
Steering wheel replacement How-To. DB9V
Discussion


Having not being as supple as I was many years ago, I have found it uncomfortable getting in and out of the car with the bottom of the steering wheel restricting my legs, both whilst driving, and entering the car, so I decided to try and do something about it other than taking up Yoga.
Before we start

Whether this is the "official" technique for doing this procedure or not, this is how I have just safely, and successfully done it.
To start with, the electrical system needs to be disconnected and discharged, so to do this.....
On a Volante, fully open the roof to drop the rear windows and tip the drivers seat forward. This improves access to the rear seat area. Once this is done.....
Remove the seat base by pulling the small trim panel, detaching the Velcro...

Followed by the base by lifting at the front edge.....
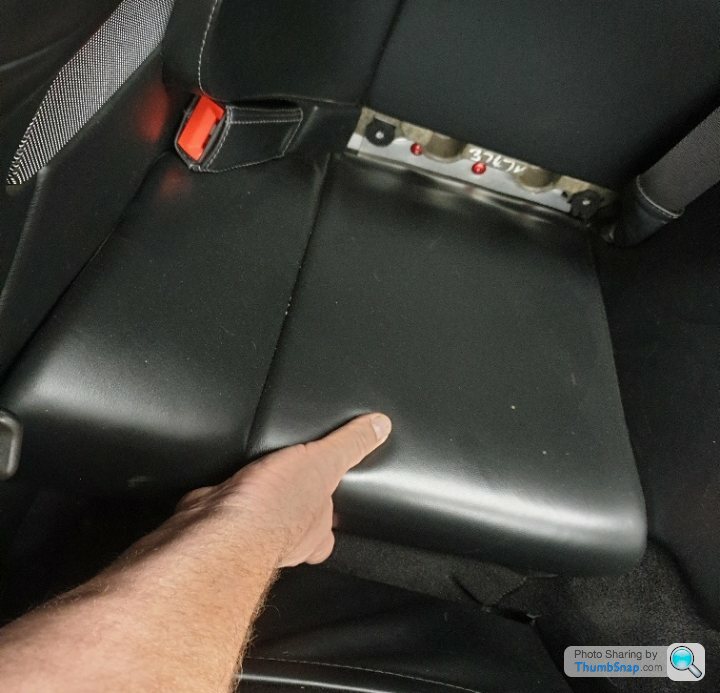
This will expose the battery aluminium cover retained by 10x M6 screws. Seen circled here.....

I have replaced mine with anodised alloy screws because the original ones had damaged torx sockets.

This will reveal the battery compartment....

With the cover off, you need to isolate the power, so disconnect the earth terminal and swing the cable clear. 13mm socket for this.

Now, wait a few minutes for all the vehicle systems to discharge, and then it's time to remove the airbag. To access the retaining screws, turn the steering to 90 degrees from straight ahead, and the T30 Torx screws are accessed through a small hole in the rear of the steering wheel.

If tight, although they should only be at 10Nm, it is possible to get a 1/4" drive wrench in there.
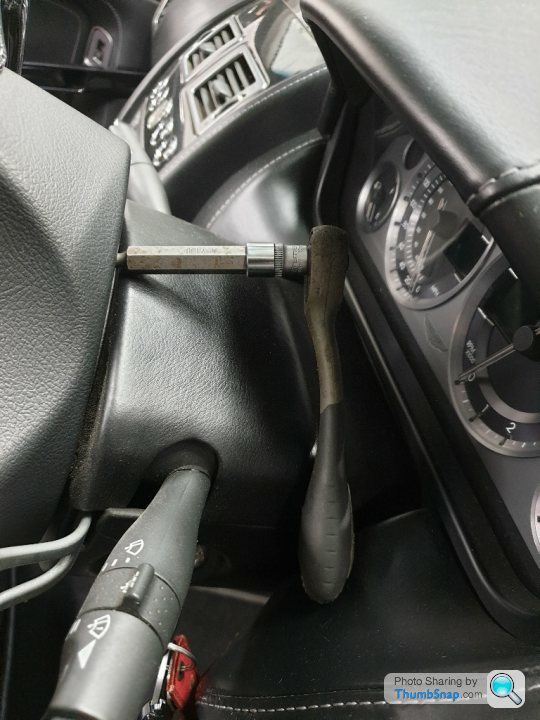
The 2 fixings are shouldered T30 screws....

That retain the airbag in these 2 receptacles in the airbag...

Holding the airbag at each "spoke" in turn, gently pull the airbag straight back to detach it from the plastic clips. Once out, you will see it is connected in 2 places for the dual-stage deployment.....DO NOT LET IT HANG ON THESE SMALL PLUGS.
Slide the yellow clips along the connectors....grey here shown unlocked, black still locked....
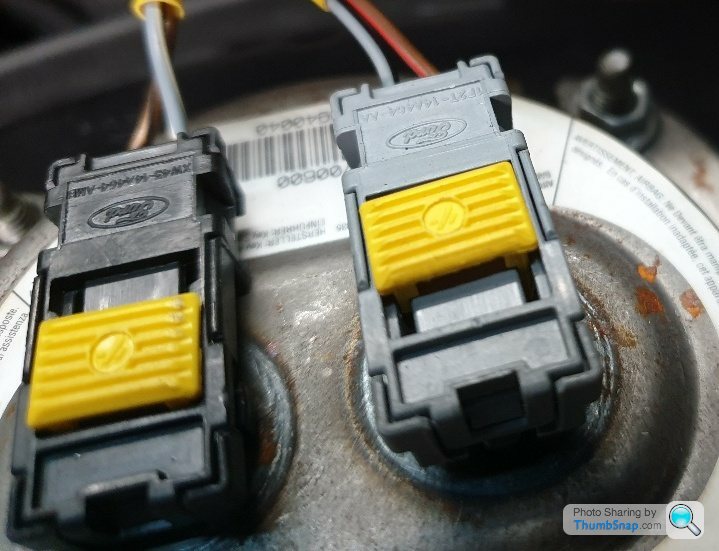
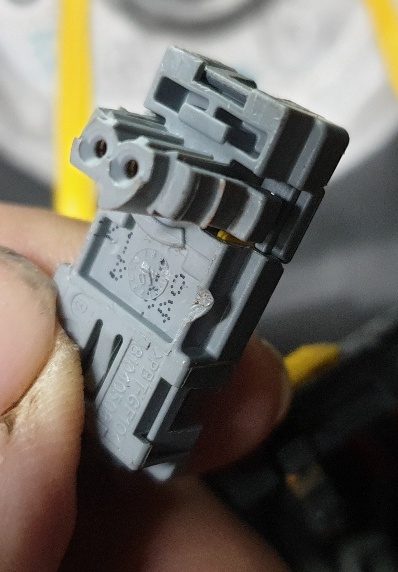
Once unlocked use a small screwdriver to release the side tabs to release the connection....

This clearly shows the side clips you are trying to release....
You now need to release the horn switches and loom. I used a small pick behind each connector in turn....
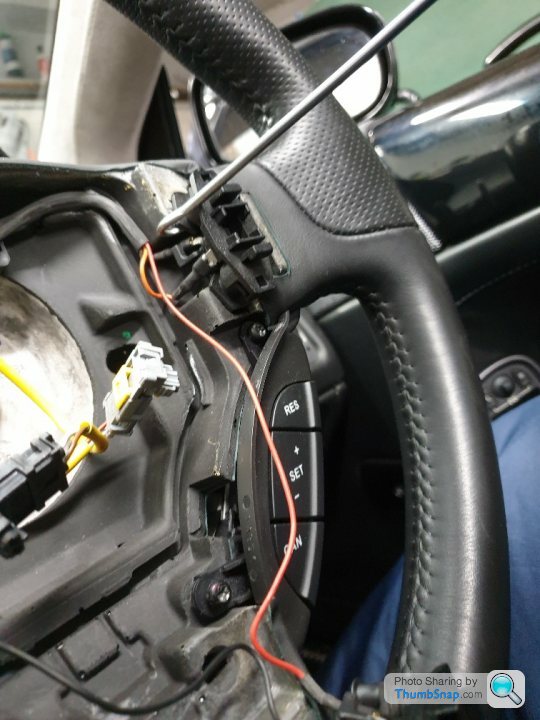
so that I did not stress the 4 piece horn buttons. They simply "pop" into rubber receptacles.

"popping in" is easier than removal, so to be safe, use the pick!. Each switch has 2, pop-in fixings, and the switch has 2 parts, clipped together with 2 springs between them....

Do this to separate all 3 switches.
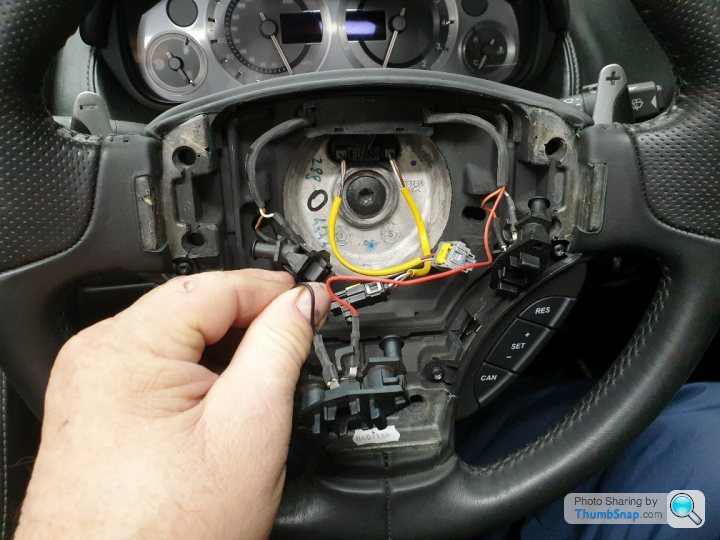
followed by the top electrical connector, which also needs disconnection by depressing the tabs either side...

The loom can then be removed completely.

Now using a T50 Torx bit, undo the central steering wheel nut.

and gently pull the steering wheel towards you, feeding the airbag wires through the hole as you go. This will reveal the clockspring assembly and it is an excellent way of making the car theft resistant.

You can now feed the wires through the steering wheel to refit, and secure in position with the T50 Torx bolt, torque setting for this is 40Nm. You can now start to refit the horn loom and refitting in the poppers is far easier than removal.

and re-attach all 3 horn contact switches.

The 2 airbag connectors are simply plugged back into their respective sockets and locked into position by sliding the yellow locks over the side clips.
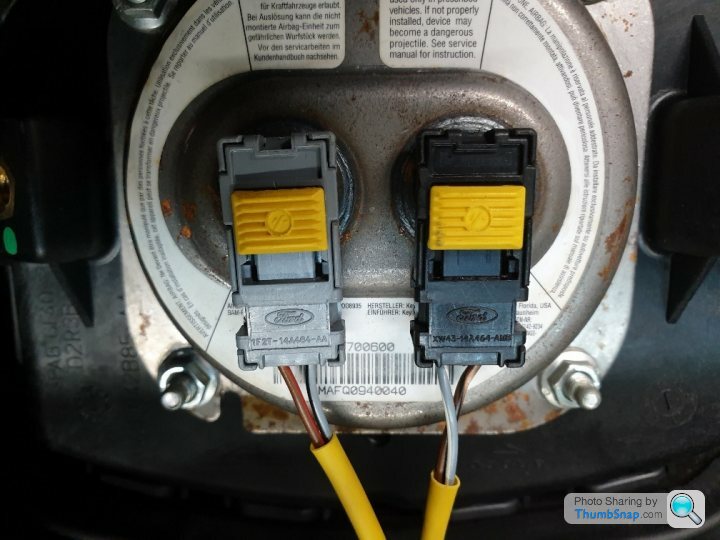
You can now carefully align the airbag to the steering wheel plastic receptacles, and gently push over the clip positions to snap them back into position....

We now refit the 2x T30 retaining screws, tightening to 10Nm.
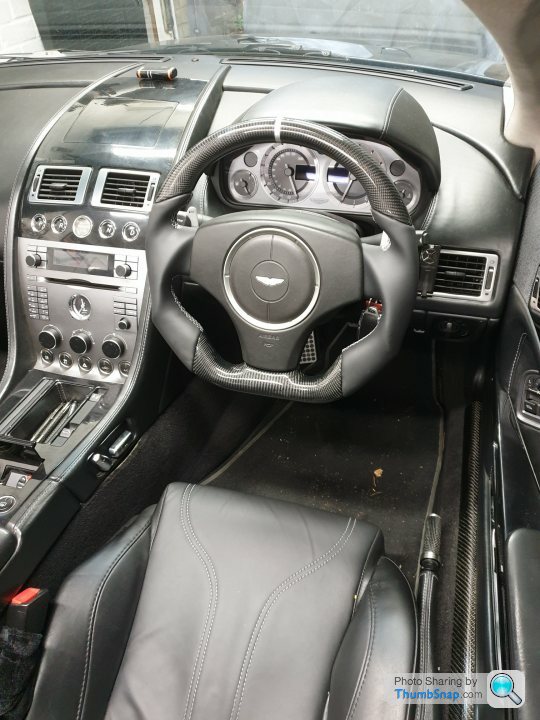
The new steering wheel has a full couple of inches clearance now above my legs....
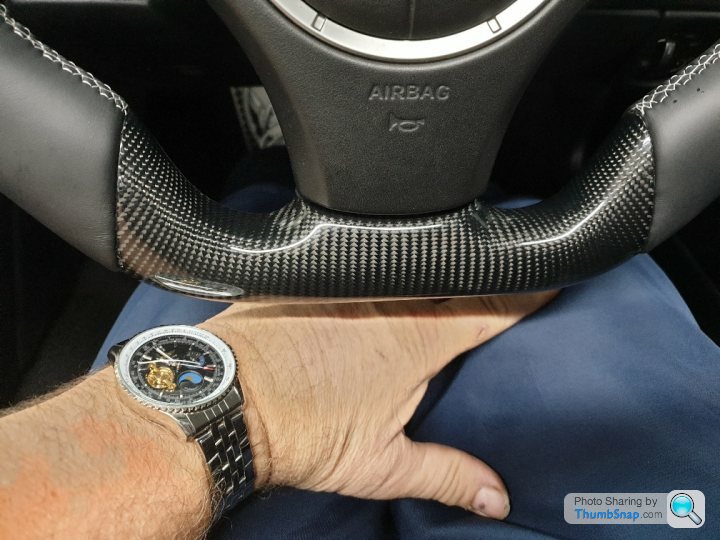
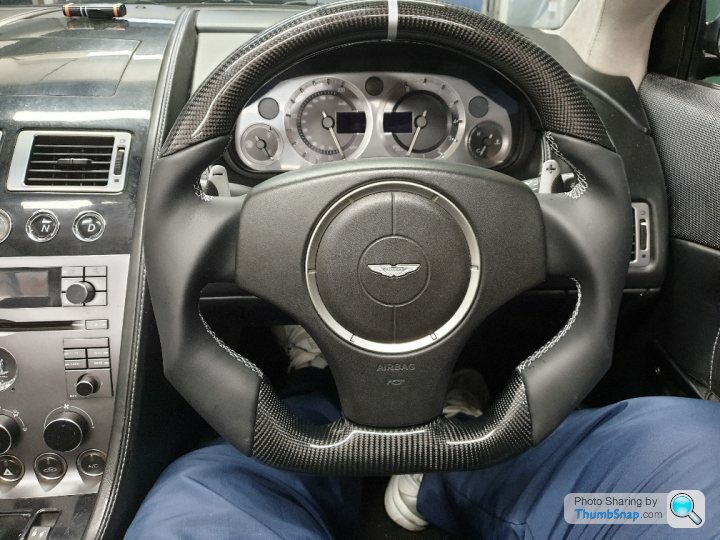
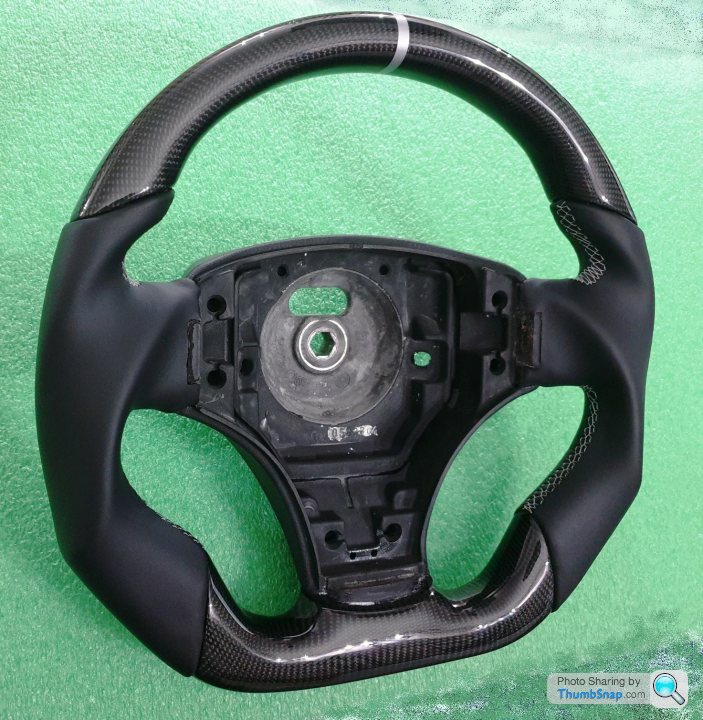
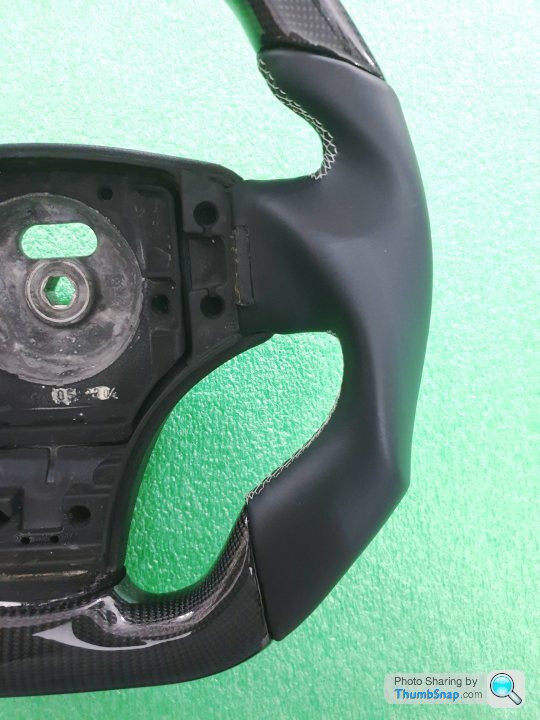
And I really like the overall look of the sculpted sides in Nappa leather and the reshaped real carbon fibre upper and lower sections. This now matches the carbon accents I have elsewhere on the car.


It is now safe to reconnect your battery, refit the removed battery compartment and rear seat.
Before we start
Whether this is the "official" technique for doing this procedure or not, this is how I have just safely, and successfully done it.
To start with, the electrical system needs to be disconnected and discharged, so to do this.....
On a Volante, fully open the roof to drop the rear windows and tip the drivers seat forward. This improves access to the rear seat area. Once this is done.....
Remove the seat base by pulling the small trim panel, detaching the Velcro...
Followed by the base by lifting at the front edge.....
This will expose the battery aluminium cover retained by 10x M6 screws. Seen circled here.....
I have replaced mine with anodised alloy screws because the original ones had damaged torx sockets.
This will reveal the battery compartment....
With the cover off, you need to isolate the power, so disconnect the earth terminal and swing the cable clear. 13mm socket for this.
Now, wait a few minutes for all the vehicle systems to discharge, and then it's time to remove the airbag. To access the retaining screws, turn the steering to 90 degrees from straight ahead, and the T30 Torx screws are accessed through a small hole in the rear of the steering wheel.
If tight, although they should only be at 10Nm, it is possible to get a 1/4" drive wrench in there.
The 2 fixings are shouldered T30 screws....
That retain the airbag in these 2 receptacles in the airbag...
Holding the airbag at each "spoke" in turn, gently pull the airbag straight back to detach it from the plastic clips. Once out, you will see it is connected in 2 places for the dual-stage deployment.....DO NOT LET IT HANG ON THESE SMALL PLUGS.
Slide the yellow clips along the connectors....grey here shown unlocked, black still locked....
Once unlocked use a small screwdriver to release the side tabs to release the connection....
This clearly shows the side clips you are trying to release....
You now need to release the horn switches and loom. I used a small pick behind each connector in turn....
so that I did not stress the 4 piece horn buttons. They simply "pop" into rubber receptacles.
"popping in" is easier than removal, so to be safe, use the pick!. Each switch has 2, pop-in fixings, and the switch has 2 parts, clipped together with 2 springs between them....
Do this to separate all 3 switches.
followed by the top electrical connector, which also needs disconnection by depressing the tabs either side...
The loom can then be removed completely.
Now using a T50 Torx bit, undo the central steering wheel nut.
and gently pull the steering wheel towards you, feeding the airbag wires through the hole as you go. This will reveal the clockspring assembly and it is an excellent way of making the car theft resistant.
You can now feed the wires through the steering wheel to refit, and secure in position with the T50 Torx bolt, torque setting for this is 40Nm. You can now start to refit the horn loom and refitting in the poppers is far easier than removal.
and re-attach all 3 horn contact switches.
The 2 airbag connectors are simply plugged back into their respective sockets and locked into position by sliding the yellow locks over the side clips.
You can now carefully align the airbag to the steering wheel plastic receptacles, and gently push over the clip positions to snap them back into position....
We now refit the 2x T30 retaining screws, tightening to 10Nm.
The new steering wheel has a full couple of inches clearance now above my legs....
And I really like the overall look of the sculpted sides in Nappa leather and the reshaped real carbon fibre upper and lower sections. This now matches the carbon accents I have elsewhere on the car.
It is now safe to reconnect your battery, refit the removed battery compartment and rear seat.

Gassing Station | Aston Martin | Top of Page | What's New | My Stuff