5 year TL1000s project - in one afternoon?
Discussion


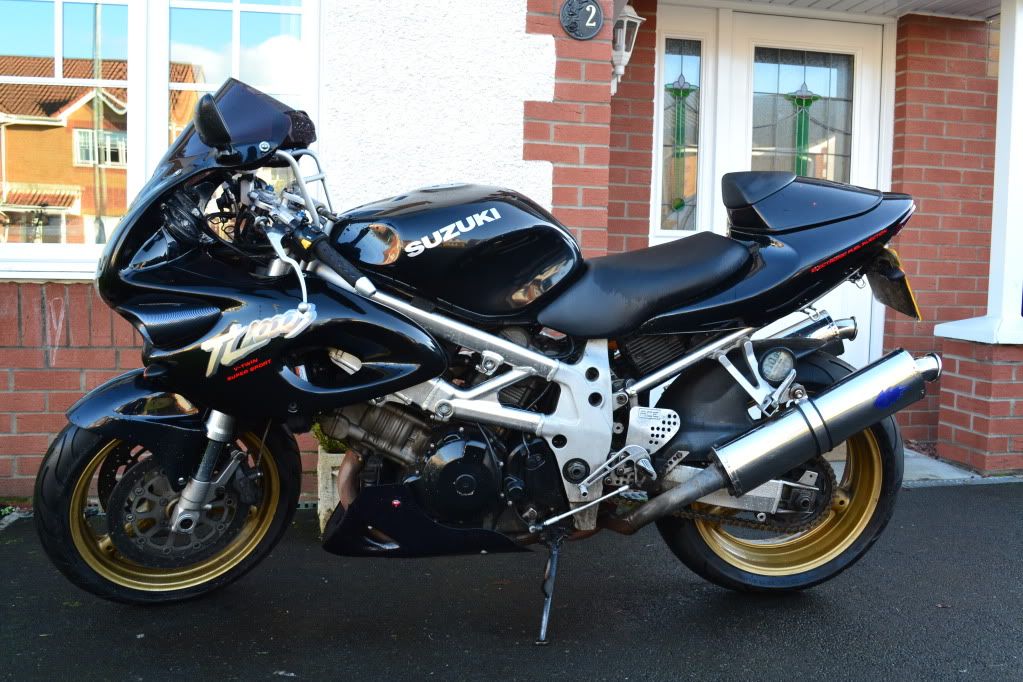
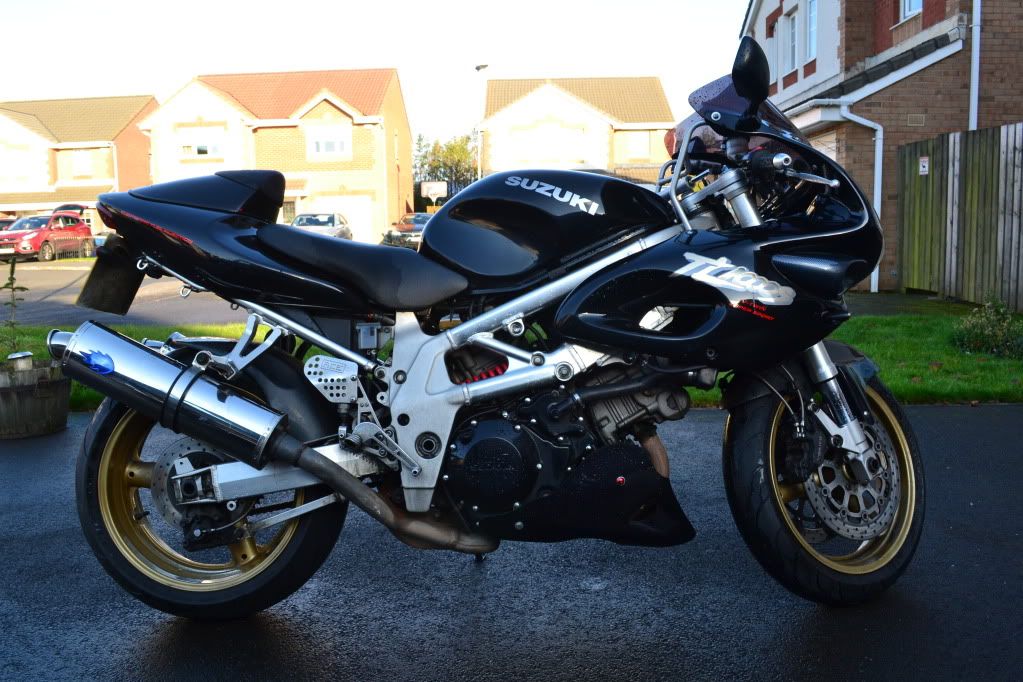
After 6 years and 30k miles I've decided to give my 97 tl a long awaited overhall over the christmas period.
The theme is to refurb the bike replacing a number of key parts and attempt to modernise the look, but keep it looking like a TL.
So far I have the following ideas that will be expanded on over the next few weeks. I may be looking for some advice too from the forum.
[LIST]
[*]refurb engine (need to get a hold of sam)
[*]powercoat frame/swing arm/subframe matt black
[*]uprate suspension to Ohlins rear, replace front forks with busa/gsxr (not decided on front yet tbh)
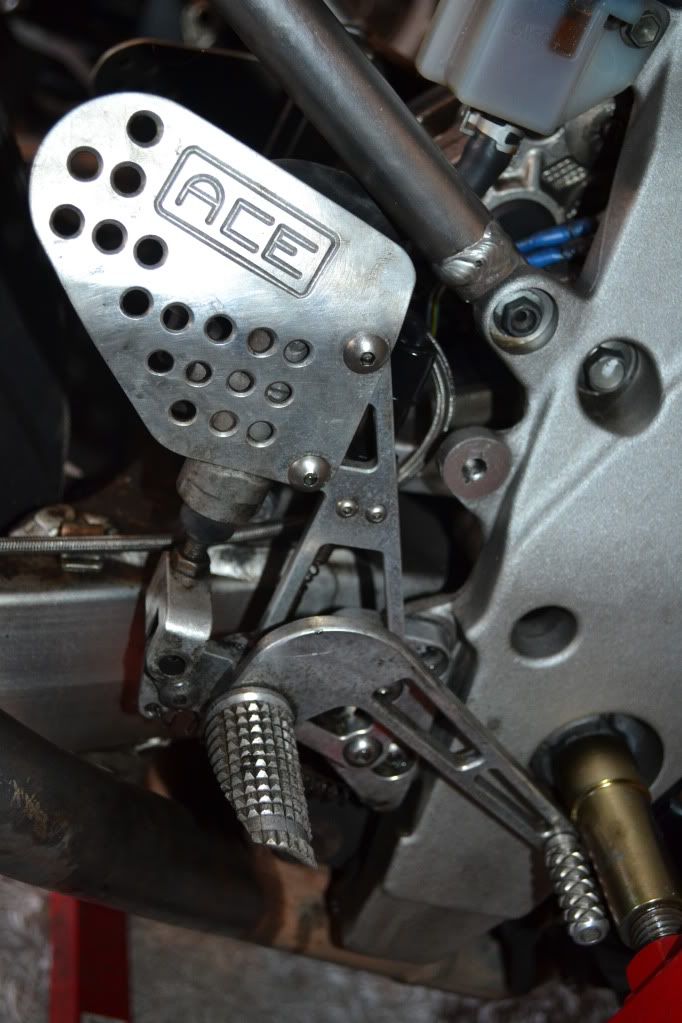
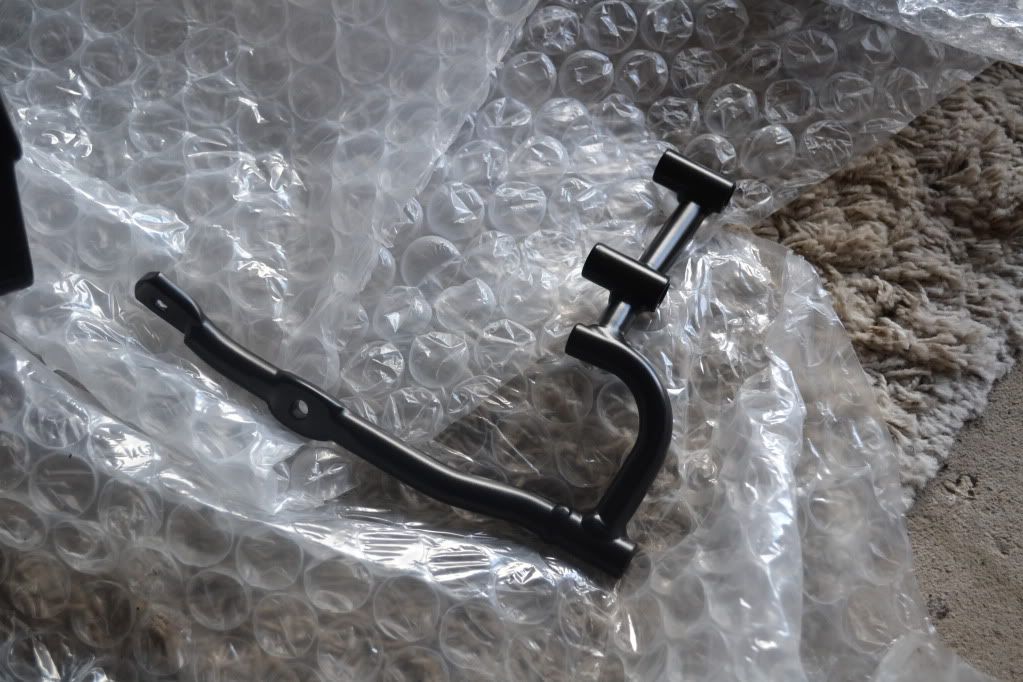
[*]gilles rear sets
[*]replace all worn parts with new equipment. So most of the running gear supporting engine will purchased
[*]new exhaust system. full yoshi if I can find one ...
[*]new tank and fairings, love the standard 97 black so sticking with that
[/LIST]
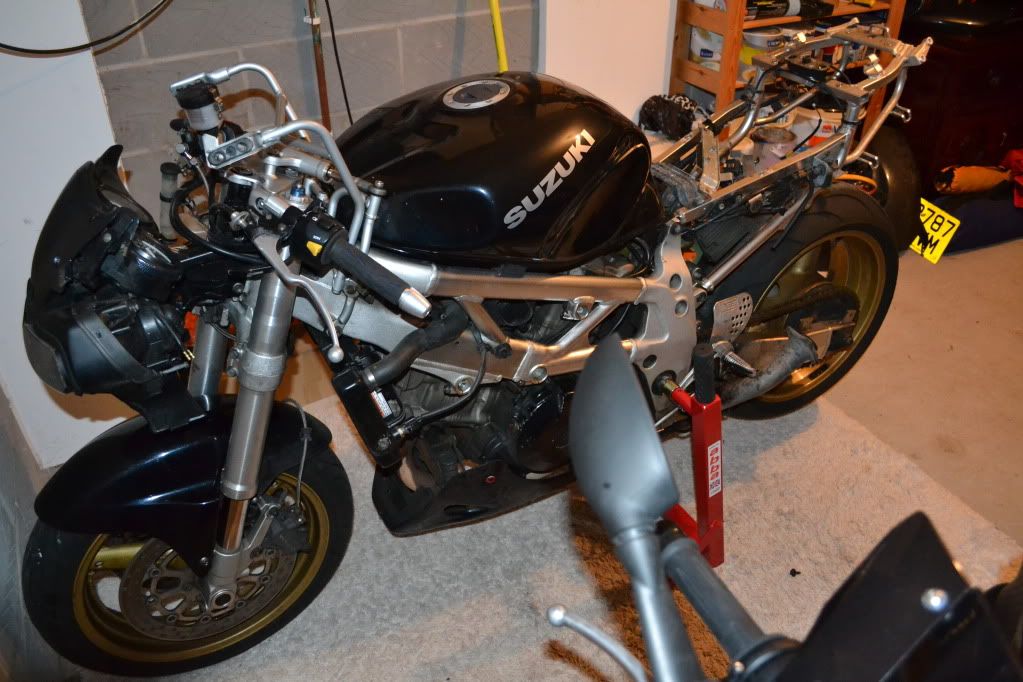
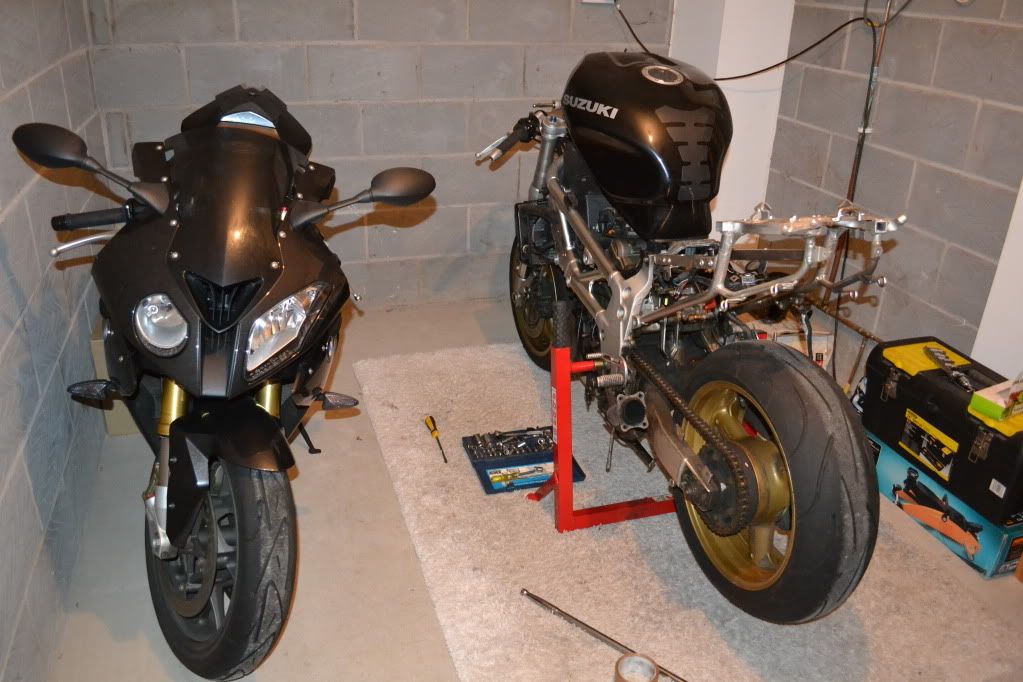
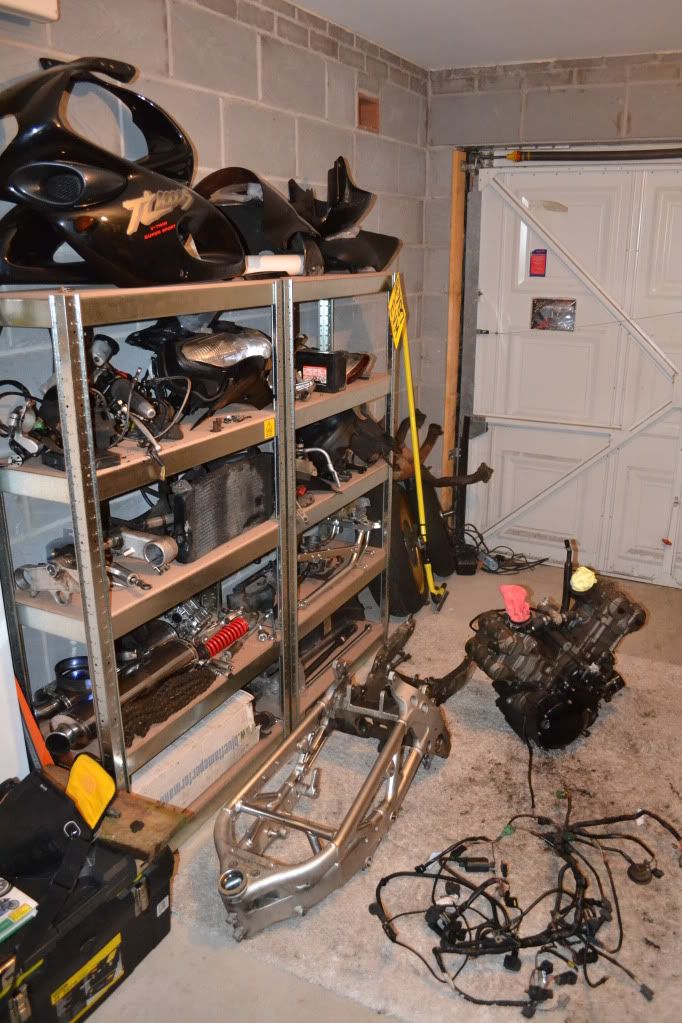
So got the bike into Garage today and started disassembling. Bike ramp on it's way by christmas so the idea is to remove all parts and get bits ordered/sent off to be fixed, and then re-assemble in the new year. Obviously I've rather enjoyed all the refurb projects ive seen on here over the years so I'll be posting as much pics as I can.
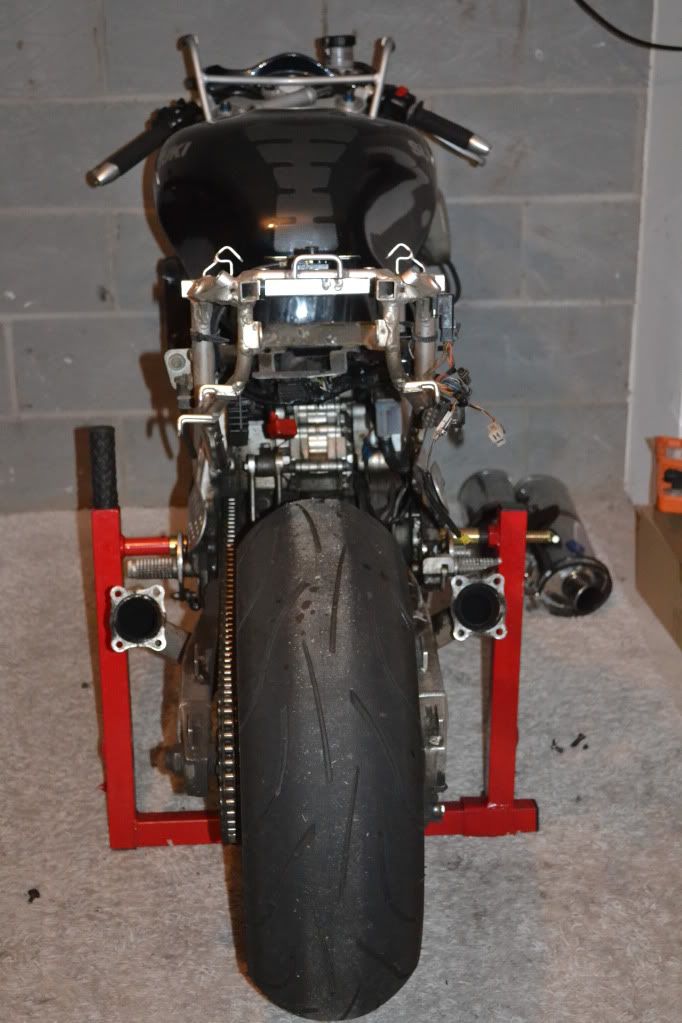
Today washed it, removed all fairings, battery, ecu undertray, pillion pegs, rear wheel fender, cans, and gave up when I rounded off bolts on the rear sets. Tomorrows job is to get the rearsets off without losing a finger.
Next step is a headstock stand, breakdown to frame and list all the new bits I need ... this could take a while !
The theme is to refurb the bike replacing a number of key parts and attempt to modernise the look, but keep it looking like a TL.
So far I have the following ideas that will be expanded on over the next few weeks. I may be looking for some advice too from the forum.
[LIST]
[*]refurb engine (need to get a hold of sam)
[*]powercoat frame/swing arm/subframe matt black
[*]uprate suspension to Ohlins rear, replace front forks with busa/gsxr (not decided on front yet tbh)
[*]gilles rear sets
[*]replace all worn parts with new equipment. So most of the running gear supporting engine will purchased
[*]new exhaust system. full yoshi if I can find one ...
[*]new tank and fairings, love the standard 97 black so sticking with that
[/LIST]
So got the bike into Garage today and started disassembling. Bike ramp on it's way by christmas so the idea is to remove all parts and get bits ordered/sent off to be fixed, and then re-assemble in the new year. Obviously I've rather enjoyed all the refurb projects ive seen on here over the years so I'll be posting as much pics as I can.
Today washed it, removed all fairings, battery, ecu undertray, pillion pegs, rear wheel fender, cans, and gave up when I rounded off bolts on the rear sets. Tomorrows job is to get the rearsets off without losing a finger.
Next step is a headstock stand, breakdown to frame and list all the new bits I need ... this could take a while !
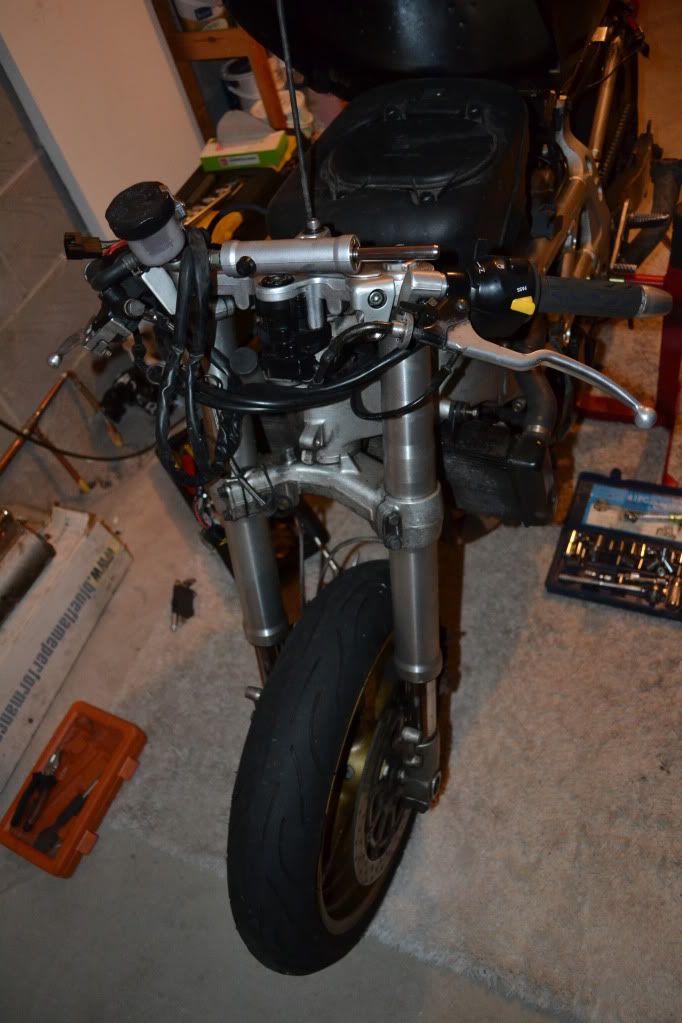
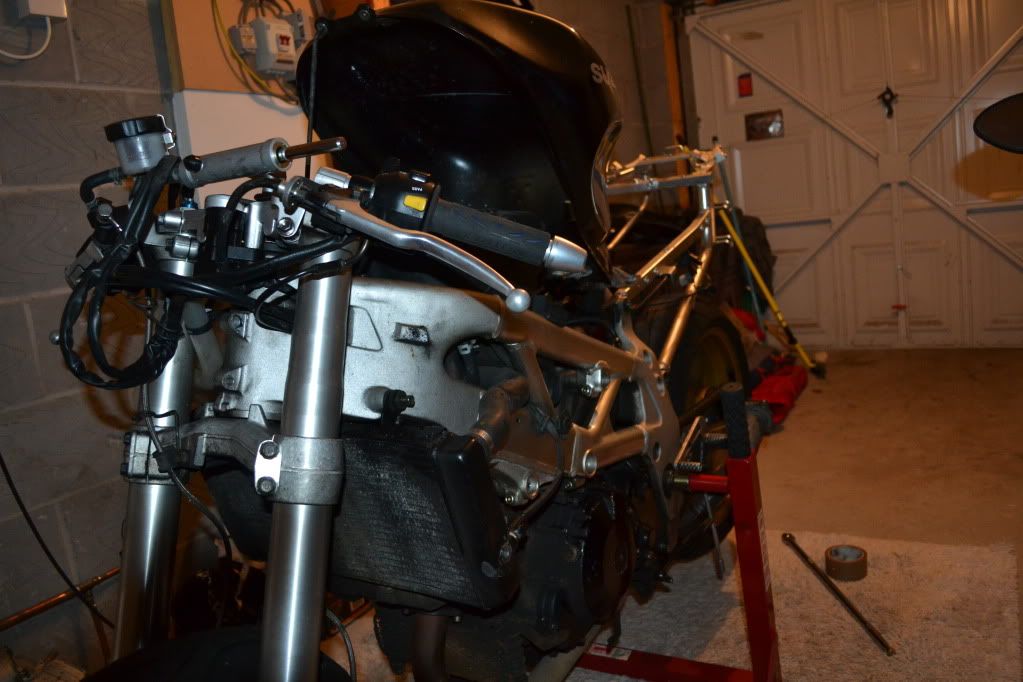

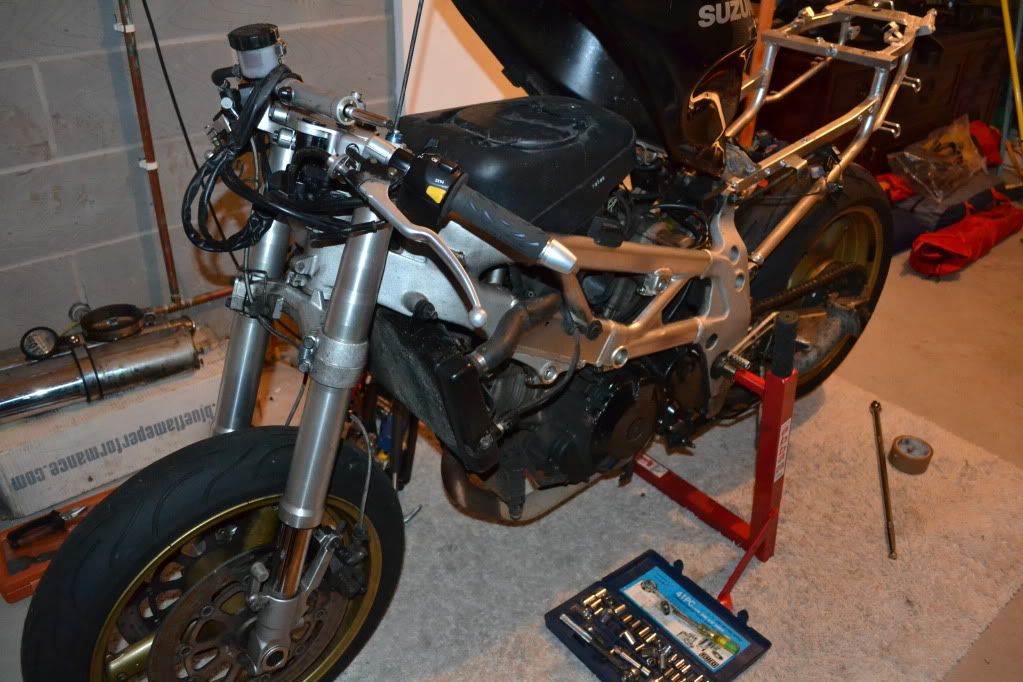
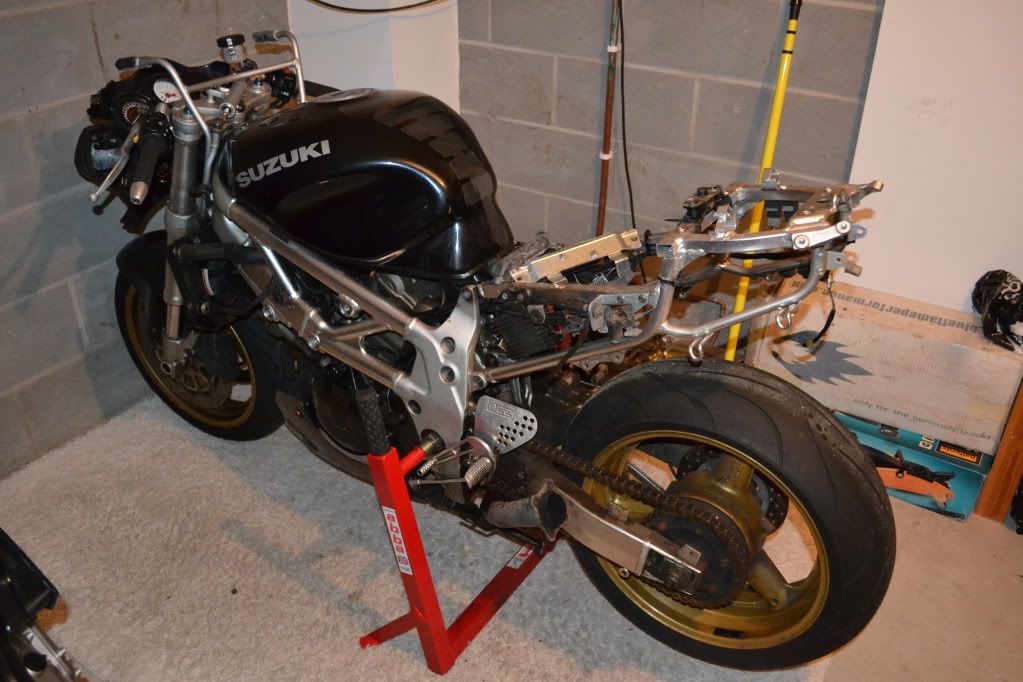
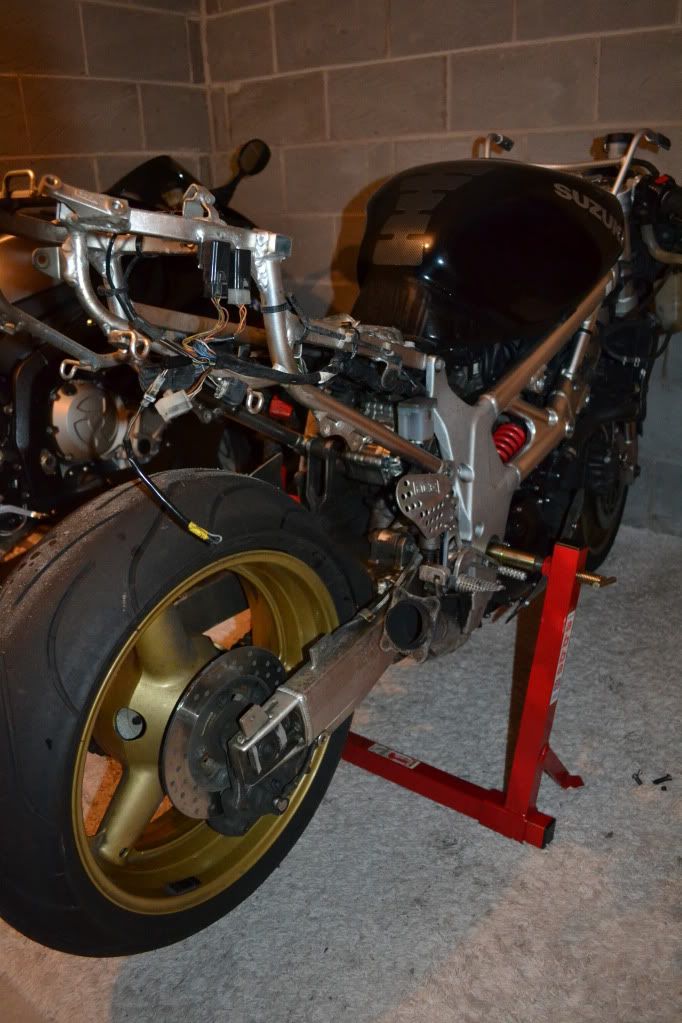
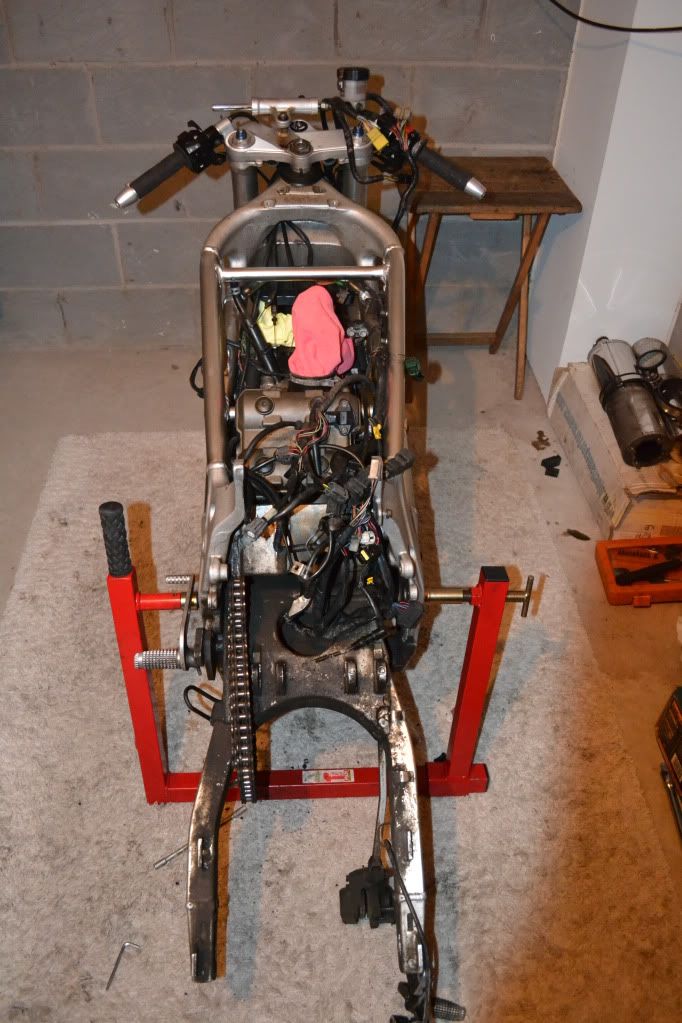
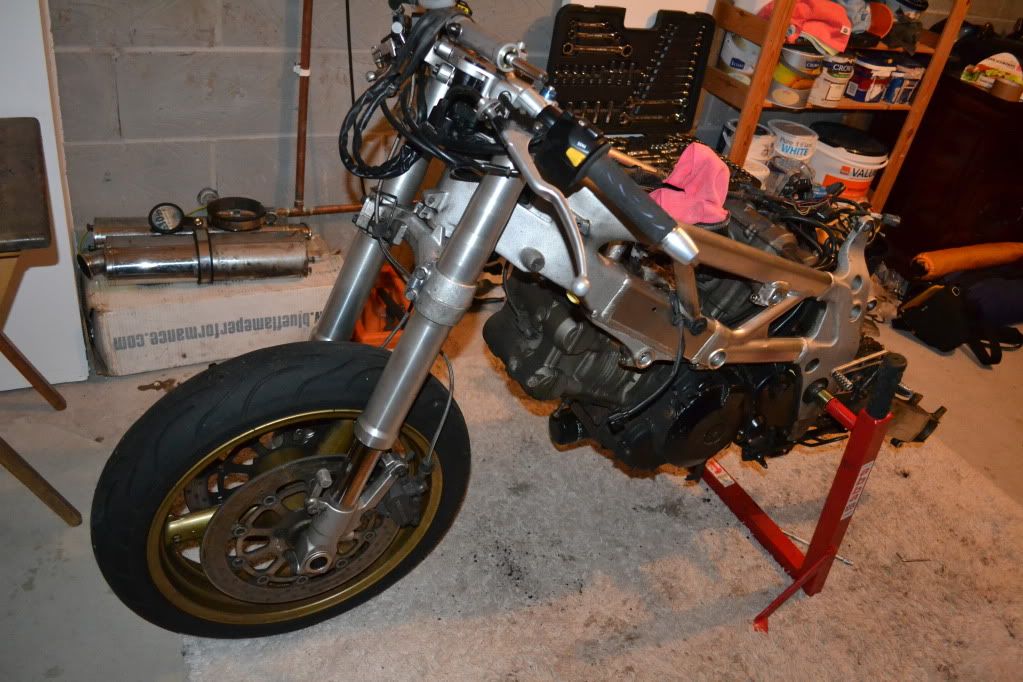
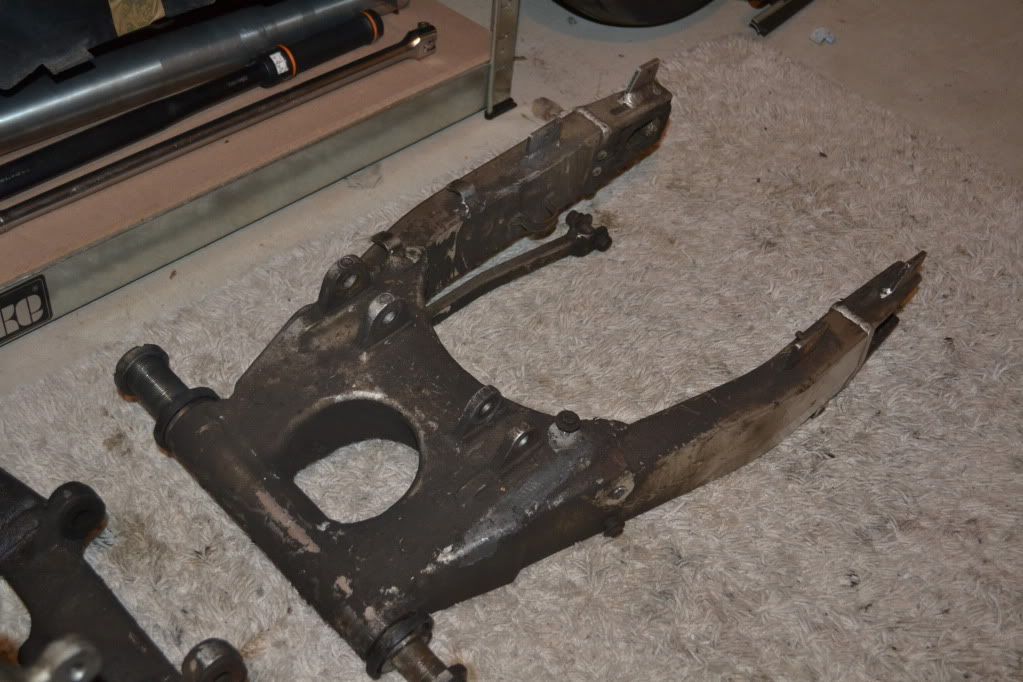
- Removed throttle bodies
- Removed rear sub frame
- Removed rear wheel
- Removed rear shock & spring
- Removed exhaust system
- Drained oil/coolant
- Removed radiator & oil cooler
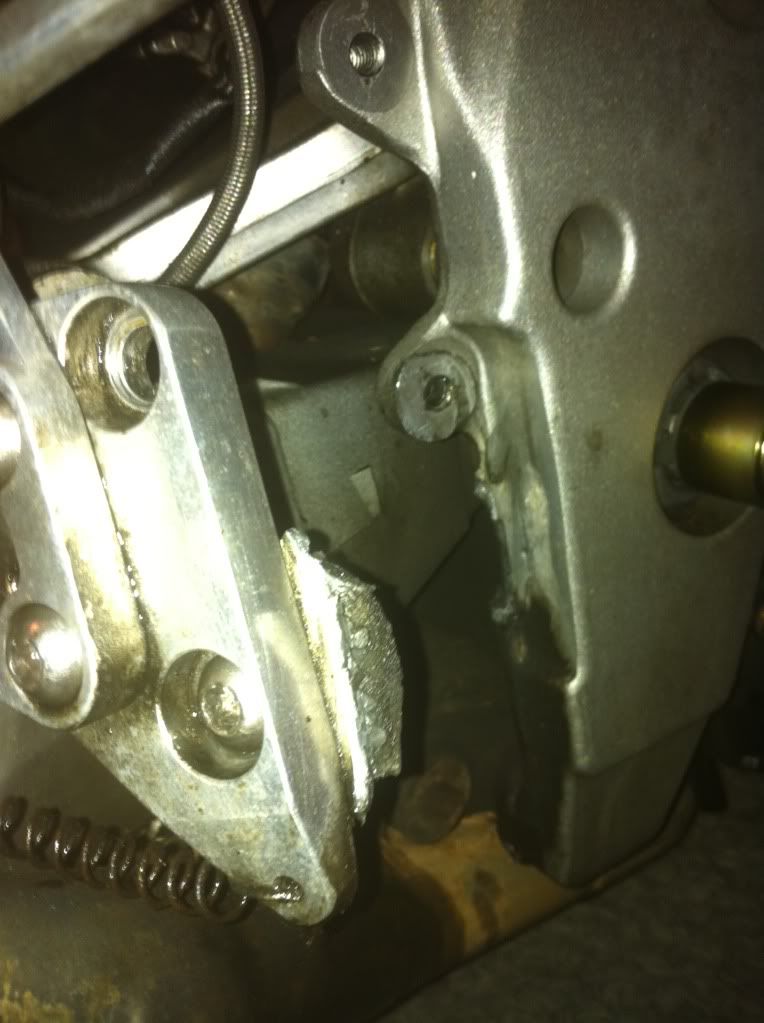
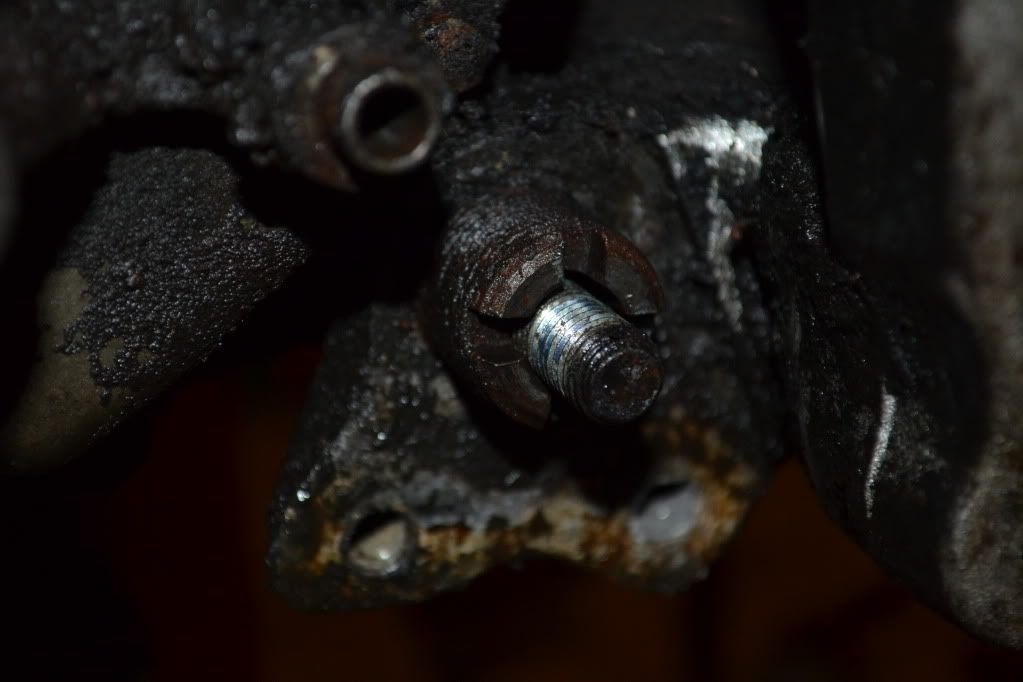
Noticed one of the two mounting bolts for the rear damper was missing.... then found it sat ontop of of the swingarm right at the back just behind where the rear downpipe exits the rear cylinder ...
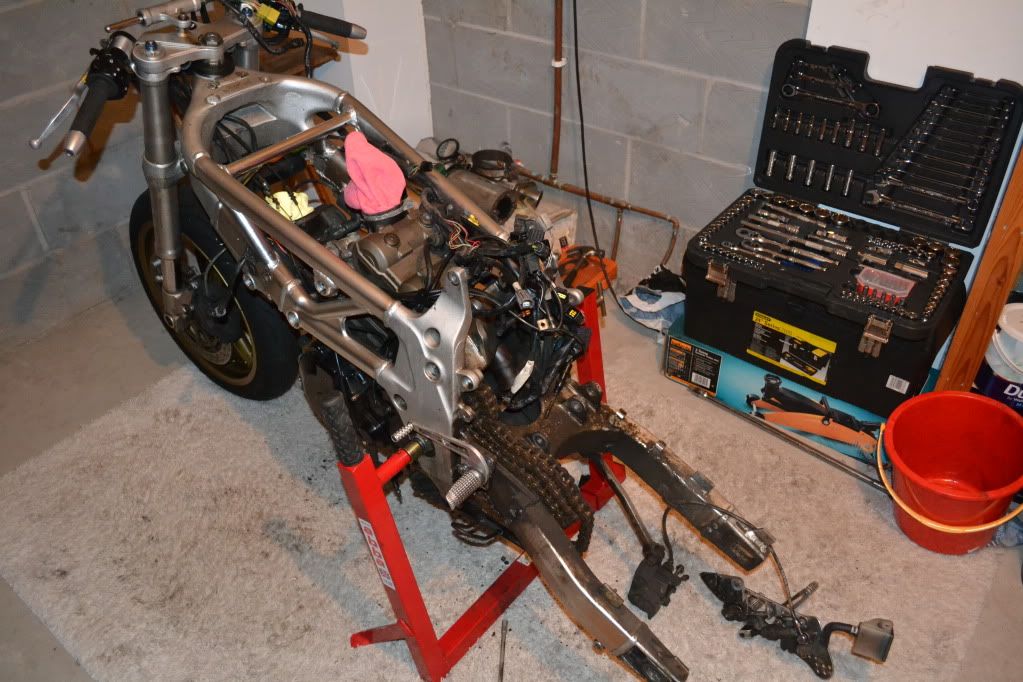
Next steps:
- drill out the other rear set mounting bolts as they are also knackered ... whoever I bought it from must have f king superglued them on.
- Re-position the abba stand into the rear set mounts on the frame
- lift the front up onto either headstock stand
- remove swing arm
- remove entire front end in one go
- remove engine
Then start making a list of items I need to replace and items I am getting refurbed over the next few months.
Aforementioned missing damper bolt and where I found it. oops.

 - Removed throttle bodies
- Removed rear sub frame
- Removed rear wheel
- Removed rear shock & spring
- Removed exhaust system
- Drained oil/coolant
- Removed radiator & oil cooler
Noticed one of the two mounting bolts for the rear damper was missing.... then found it sat ontop of of the swingarm right at the back just behind where the rear downpipe exits the rear cylinder ...
Next steps:
- drill out the other rear set mounting bolts as they are also knackered ... whoever I bought it from must have fking superglued them on.
- Re-position the abba stand into the rear set mounts on the frame
- lift the front up onto either headstock stand
- remove swing arm
- remove entire front end in one go
- remove engine
Then start making a list of items I need to replace and items I am getting refurbed over the next few months.
Aforementioned missing damper bolt and where I found it. oops.
- Removed rear sub frame
- Removed rear wheel
- Removed rear shock & spring
- Removed exhaust system
- Drained oil/coolant
- Removed radiator & oil cooler
Noticed one of the two mounting bolts for the rear damper was missing.... then found it sat ontop of of the swingarm right at the back just behind where the rear downpipe exits the rear cylinder ...
Next steps:
- drill out the other rear set mounting bolts as they are also knackered ... whoever I bought it from must have f
king superglued them on.- Re-position the abba stand into the rear set mounts on the frame
- lift the front up onto either headstock stand
- remove swing arm
- remove entire front end in one go
- remove engine
Then start making a list of items I need to replace and items I am getting refurbed over the next few months.
Aforementioned missing damper bolt and where I found it. oops.
- Removed throttle bodies- Removed rear sub frame
- Removed rear wheel
- Removed rear shock & spring
- Removed exhaust system
- Drained oil/coolant
- Removed radiator & oil cooler
Noticed one of the two mounting bolts for the rear damper was missing.... then found it sat ontop of of the swingarm right at the back just behind where the rear downpipe exits the rear cylinder ...
Next steps:
- drill out the other rear set mounting bolts as they are also knackered ... whoever I bought it from must have f
king superglued them on.- Re-position the abba stand into the rear set mounts on the frame
- lift the front up onto either headstock stand
- remove swing arm
- remove entire front end in one go
- remove engine
Then start making a list of items I need to replace and items I am getting refurbed over the next few months.
Aforementioned missing damper bolt and where I found it. oops.
- Removed throttle bodies
- Removed rear sub frame
- Removed rear wheel
- Removed rear shock & spring
- Removed exhaust system
- Drained oil/coolant
- Removed radiator & oil cooler
Noticed one of the two mounting bolts for the rear damper was missing.... then found it sat ontop of of the swingarm right at the back just behind where the rear downpipe exits the rear cylinder ...
Next steps:
- drill out the other rear set mounting bolts as they are also knackered ... whoever I bought it from must have fking superglued them on.
- Re-position the abba stand into the rear set mounts on the frame
- lift the front up onto either headstock stand
- remove swing arm
- remove entire front end in one go
- remove engine
Then start making a list of items I need to replace and items I am getting refurbed over the next few months.
Aforementioned missing damper bolt and where I found it. oops.
- Removed rear sub frame
- Removed rear wheel
- Removed rear shock & spring
- Removed exhaust system
- Drained oil/coolant
- Removed radiator & oil cooler
Noticed one of the two mounting bolts for the rear damper was missing.... then found it sat ontop of of the swingarm right at the back just behind where the rear downpipe exits the rear cylinder ...
Next steps:
- drill out the other rear set mounting bolts as they are also knackered ... whoever I bought it from must have f
king superglued them on.- Re-position the abba stand into the rear set mounts on the frame
- lift the front up onto either headstock stand
- remove swing arm
- remove entire front end in one go
- remove engine
Then start making a list of items I need to replace and items I am getting refurbed over the next few months.
Aforementioned missing damper bolt and where I found it. oops.
Right.
Used heat on the sprocket bolt and ... it worked. Off it came Then removed:
[LIST]
[*]Coils
[*]Earth wire from engine
[*]Oil temp censor
[*]Starter wire thing
[/LIST]
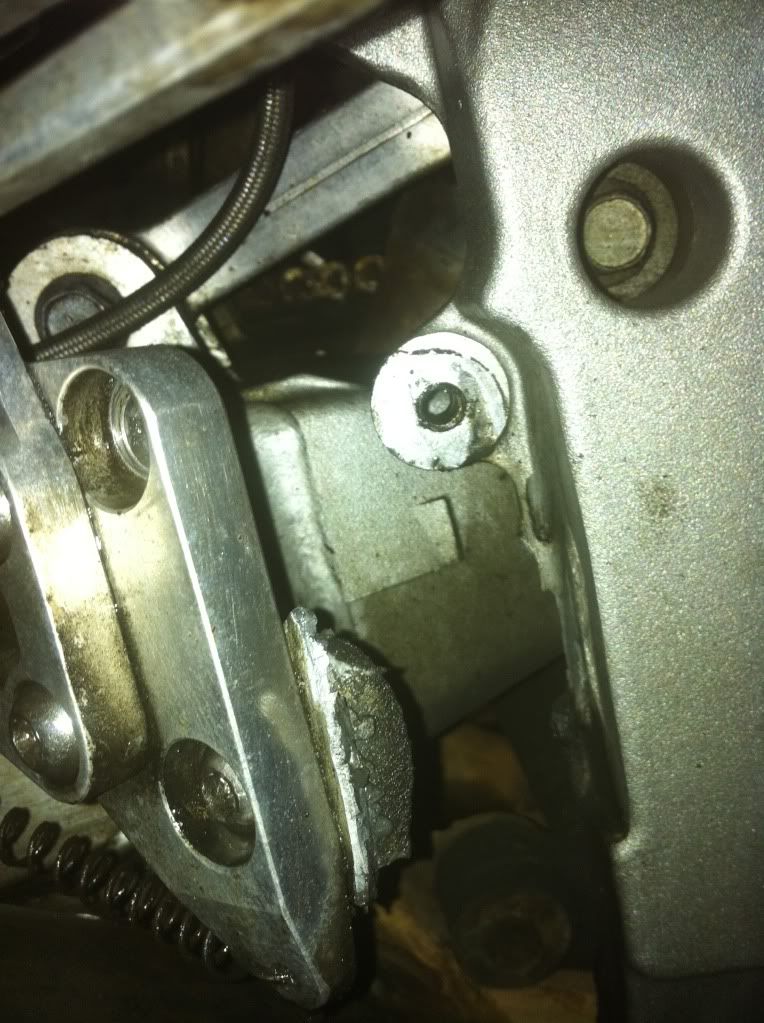
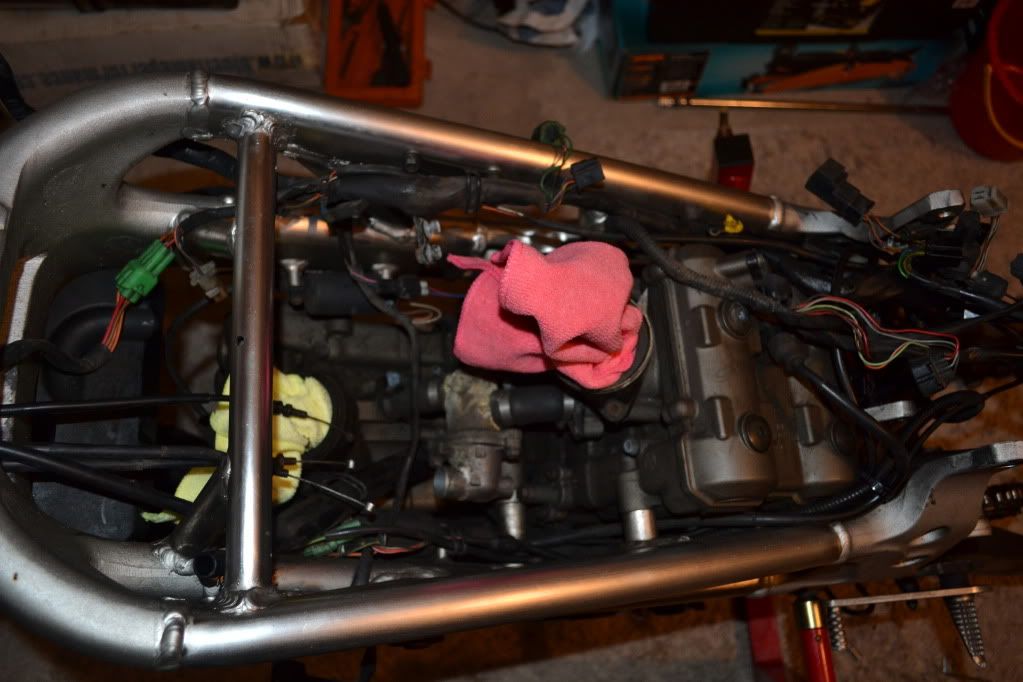
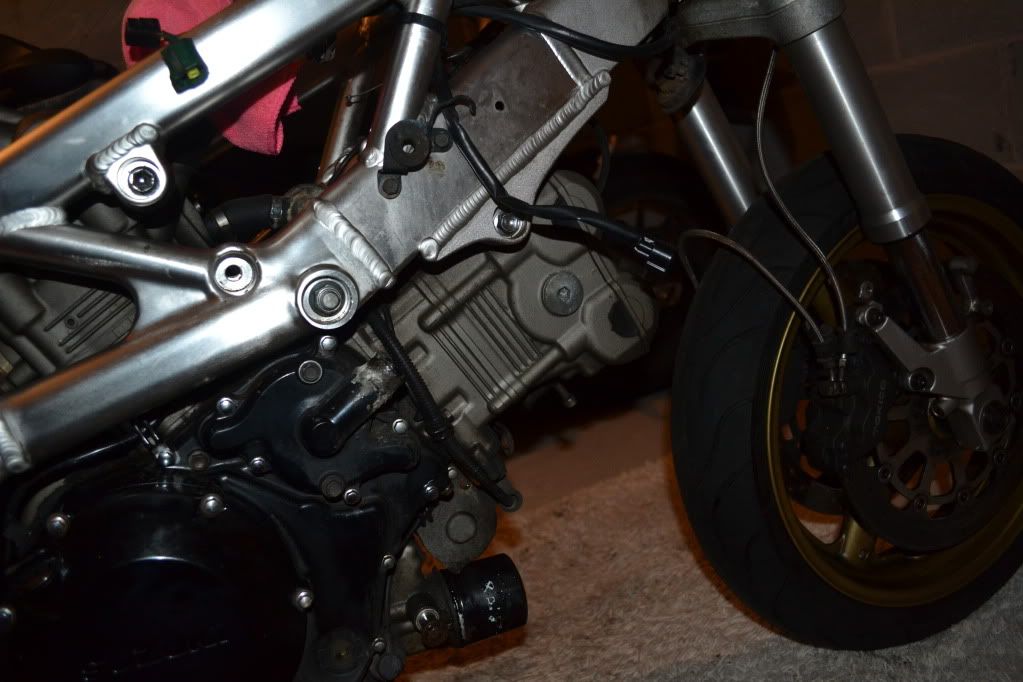
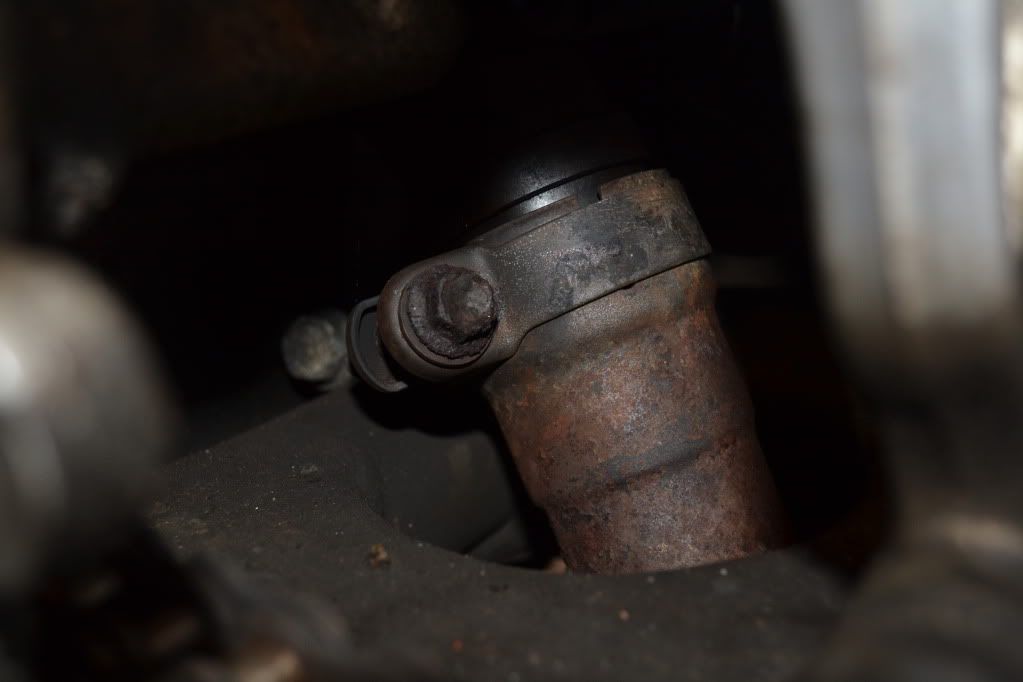
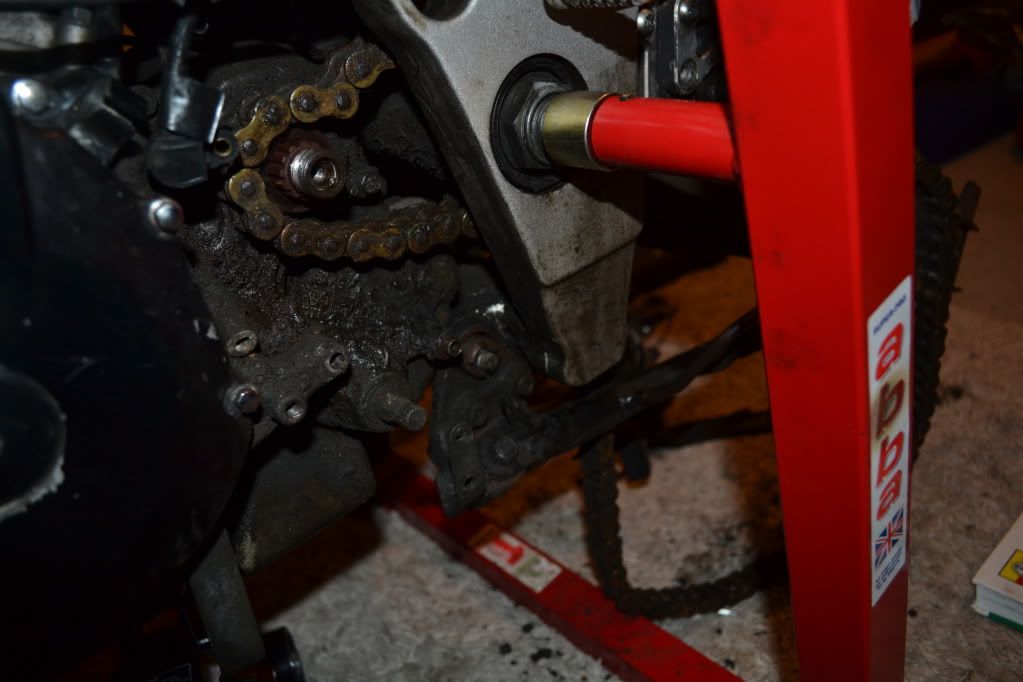
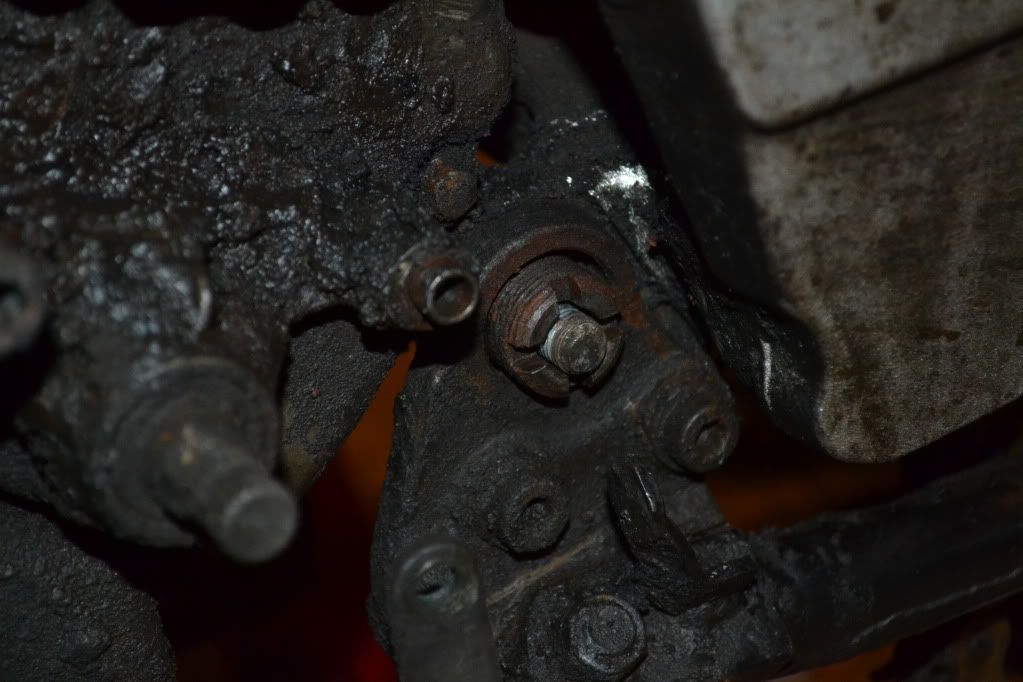
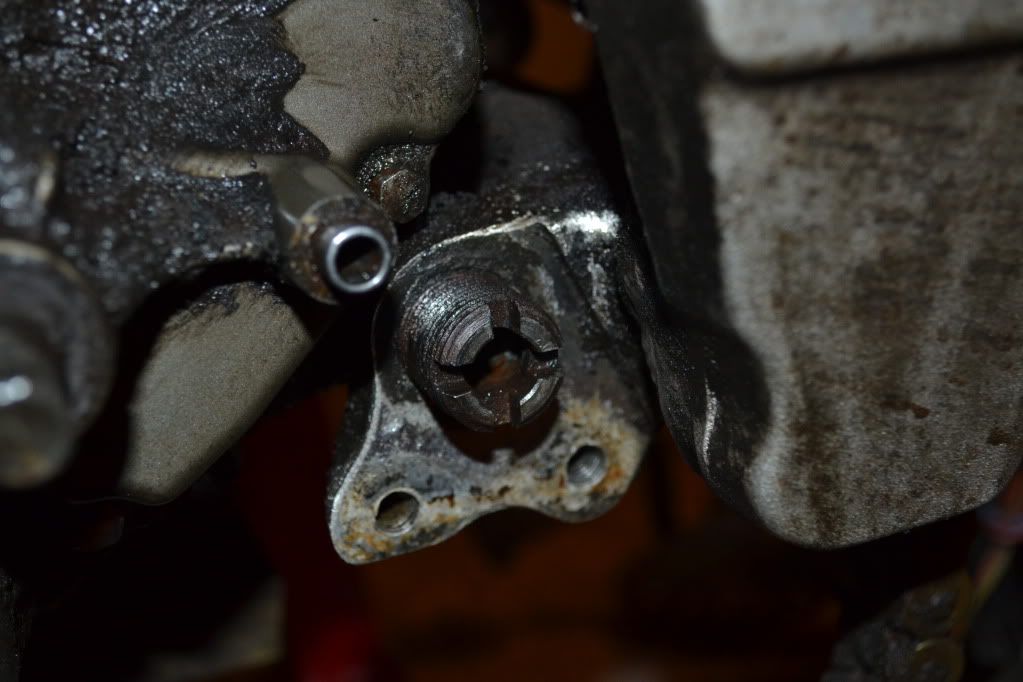
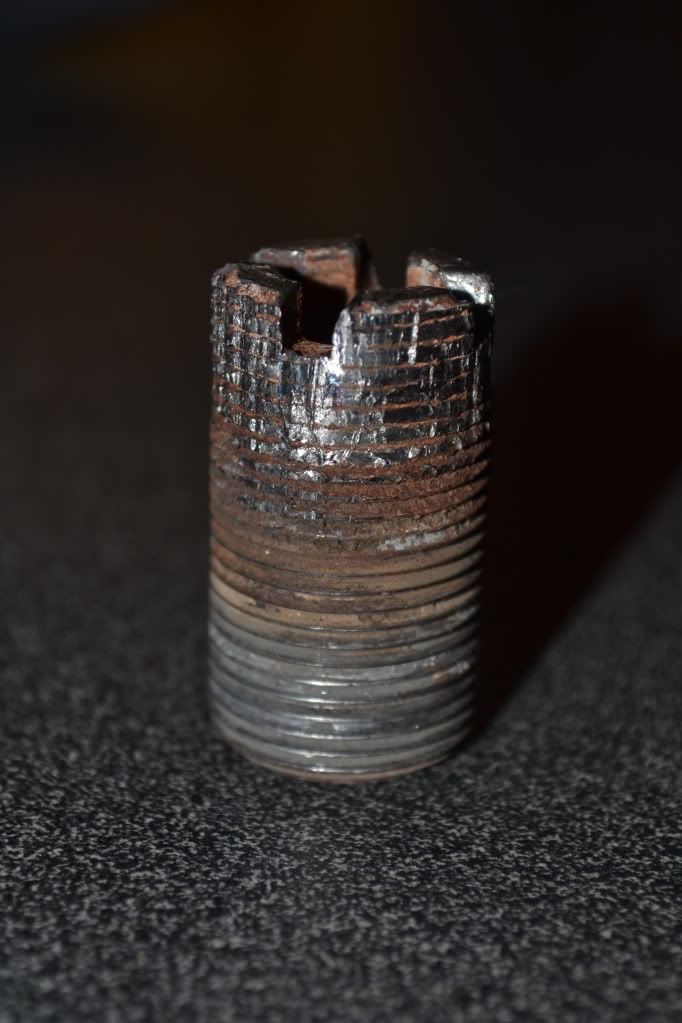
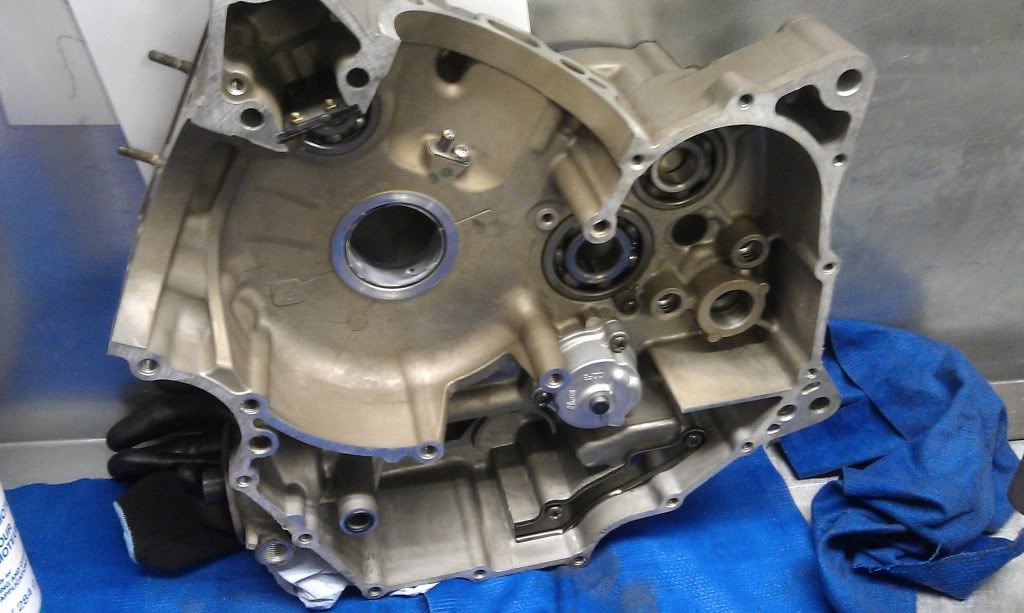
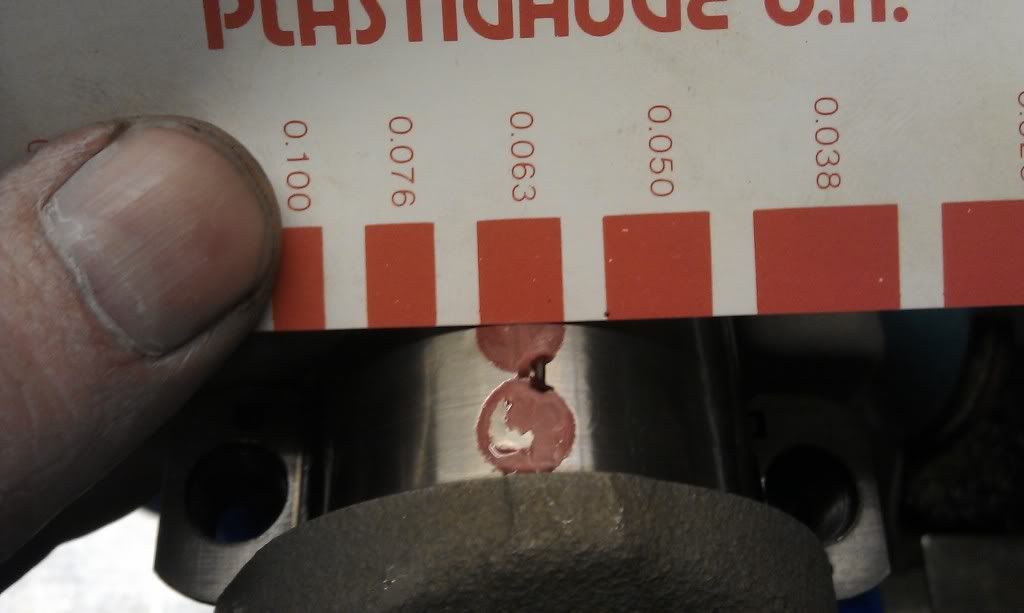
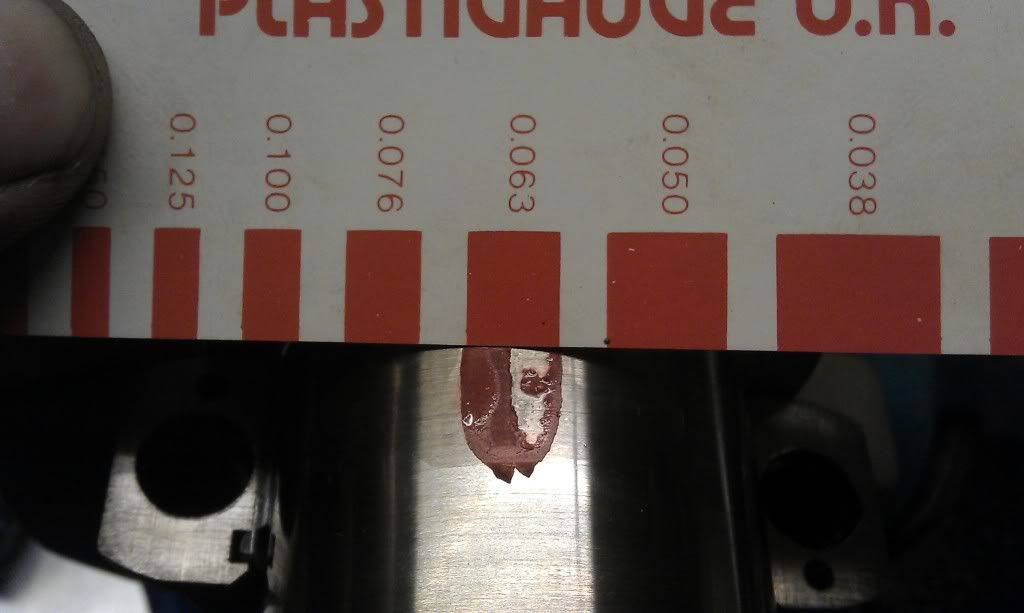
Then placed lift under engine and went to loosen the engine mounting bolt. There should be three layers according to Mr Haynes, firstly a nut tightened around the actual mounting bolt that runs from the other side, which secures two castellated bolts, the first one being a lock nut securing the the the smaller castellated nut underneath. ie 13/14 below
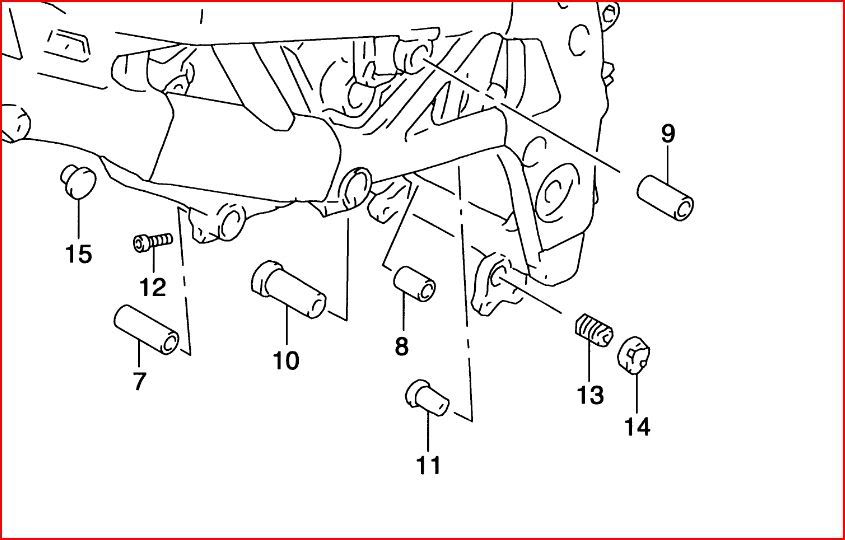
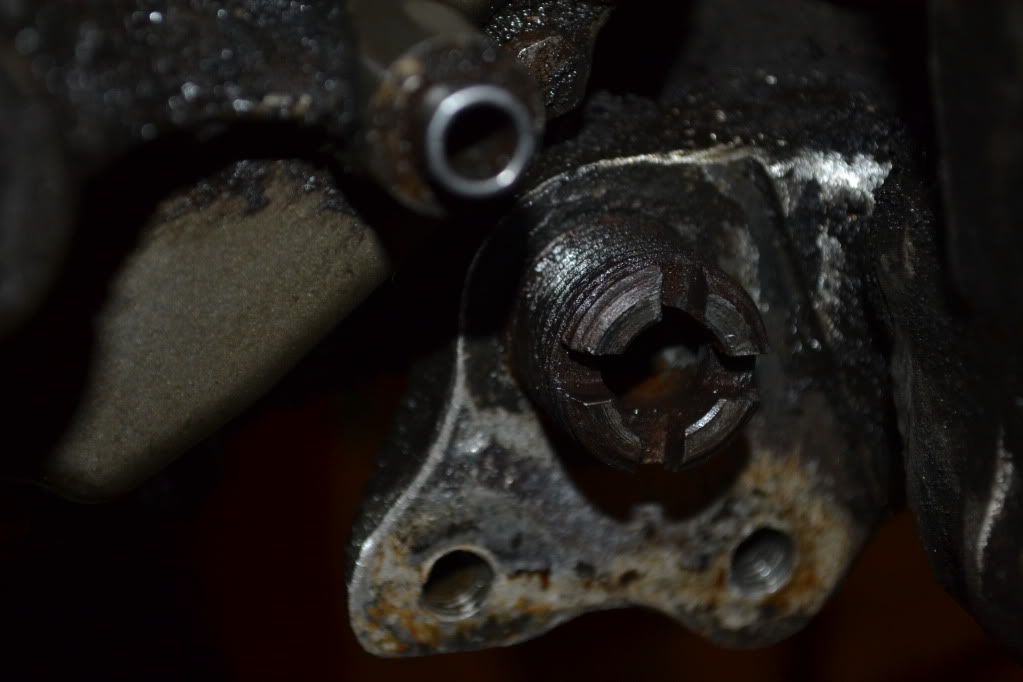
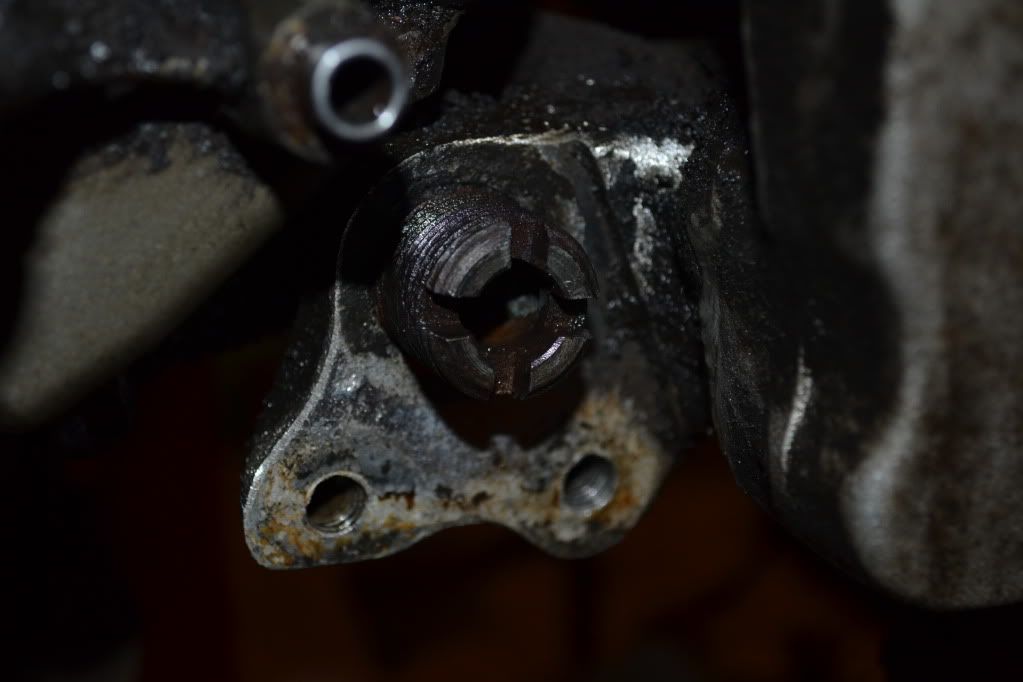
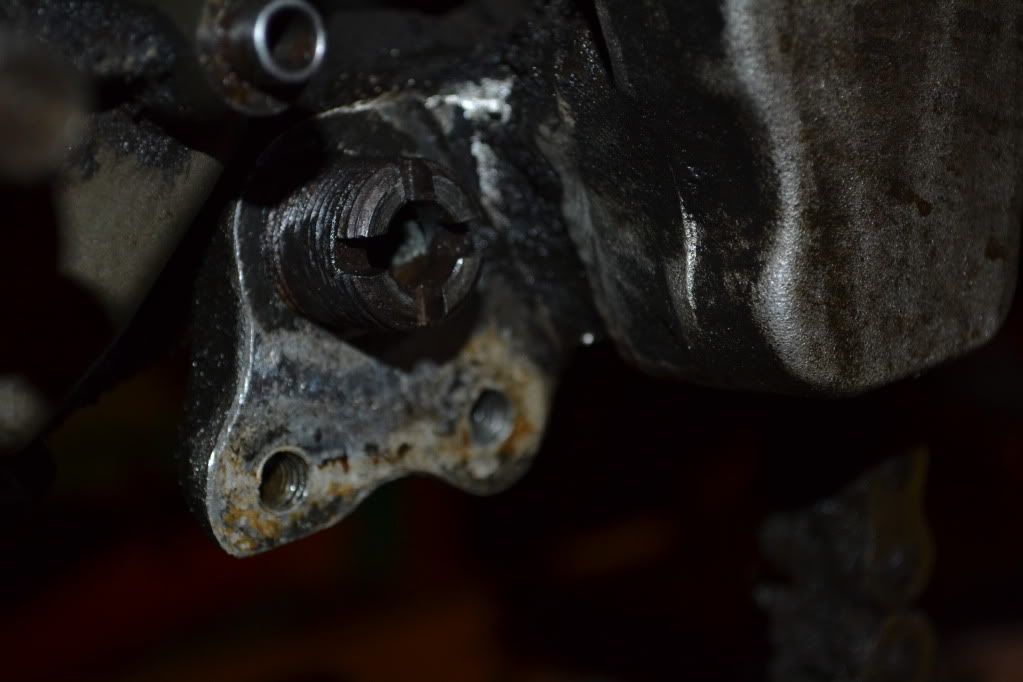
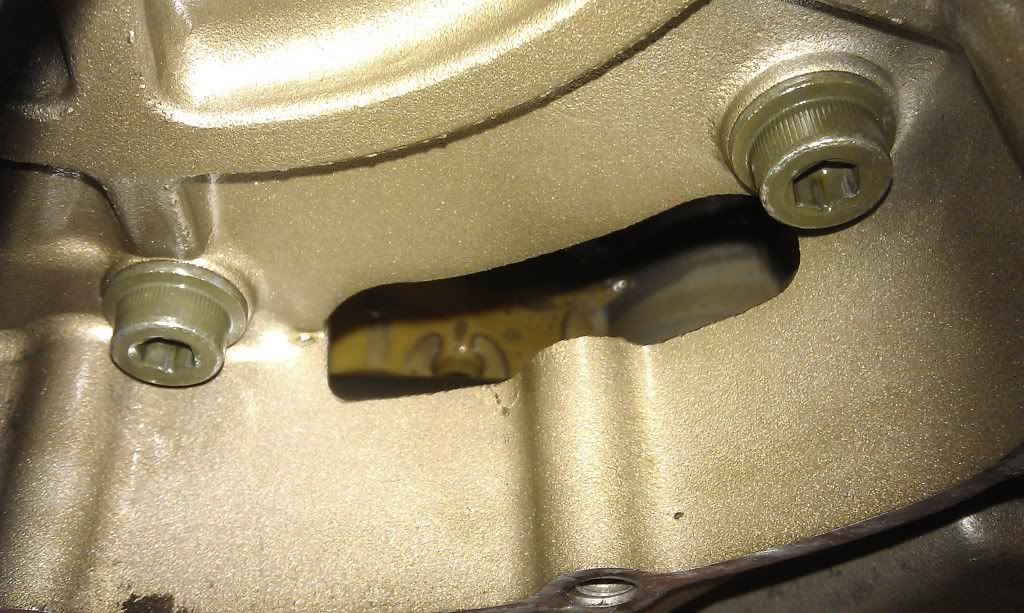
So off came the nut on the mounting bolt. Underneath I found the first castellated nut missing, with just the inner castellated bolt remaining. The actual mounting bolt is now loose and will pull out.
I'm now have issues moving the remaining castellated nut. I have heated 2-3 times (not until it's glowing mind you, which I may try again with) and it's starting to ruin the socket I have. Meh one nut till I get full disassembly and the dam thing is still giving me the finger. Makes me think someone's had the engine out of it before. What a fanny I was when I bought this thing.
Next order is to heat it up nice and proper and try again carefully with the damaged socket.
Not entirely sure what this sits on, is it screwed into the engine case itself?

Used heat on the sprocket bolt and ... it worked. Off it came
Then removed:[LIST]
[*]Coils
[*]Earth wire from engine
[*]Oil temp censor
[*]Starter wire thing
[/LIST]
Then placed lift under engine and went to loosen the engine mounting bolt. There should be three layers according to Mr Haynes, firstly a nut tightened around the actual mounting bolt that runs from the other side, which secures two castellated bolts, the first one being a lock nut securing the the the smaller castellated nut underneath. ie 13/14 below
So off came the nut on the mounting bolt. Underneath I found the first castellated nut missing, with just the inner castellated bolt remaining. The actual mounting bolt is now loose and will pull out.
I'm now have issues moving the remaining castellated nut. I have heated 2-3 times (not until it's glowing mind you, which I may try again with) and it's starting to ruin the socket I have. Meh one nut till I get full disassembly and the dam thing is still giving me the finger. Makes me think someone's had the engine out of it before. What a fanny I was when I bought this thing.
Next order is to heat it up nice and proper and try again carefully with the damaged socket.
Not entirely sure what this sits on, is it screwed into the engine case itself?
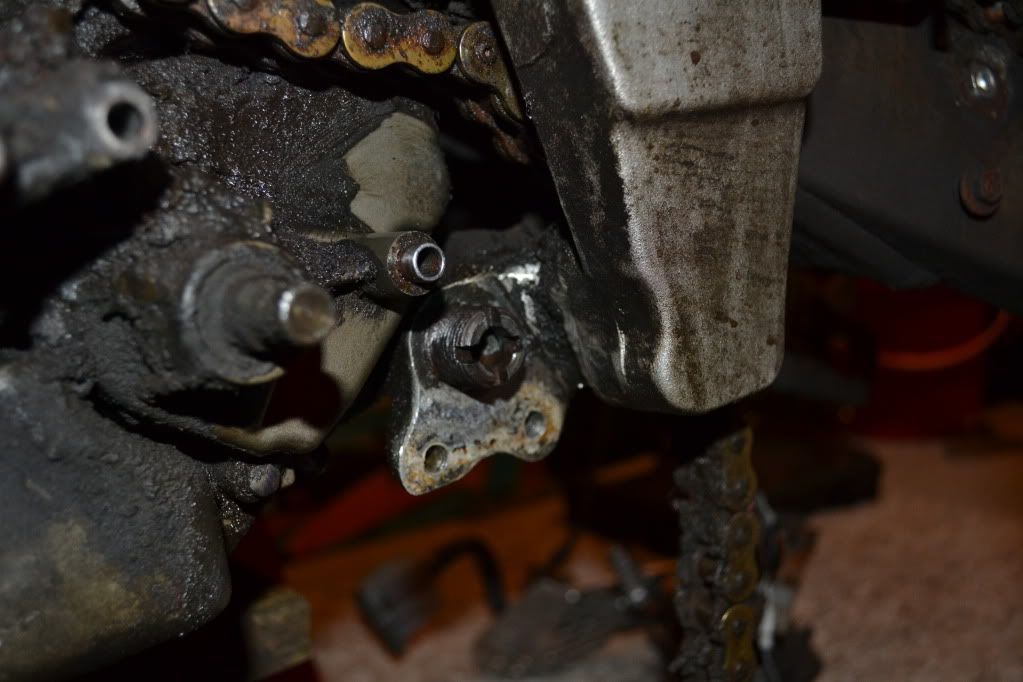
So ... Got the fker out.... with the help from a local mechanic. Best £25 I ever spent ;D
Mobile Motorcycle Services | Mobile Motorcycle Services
Can't rate the guy any higher. Ended up heating up with two torches and using mole grips to wind it off.

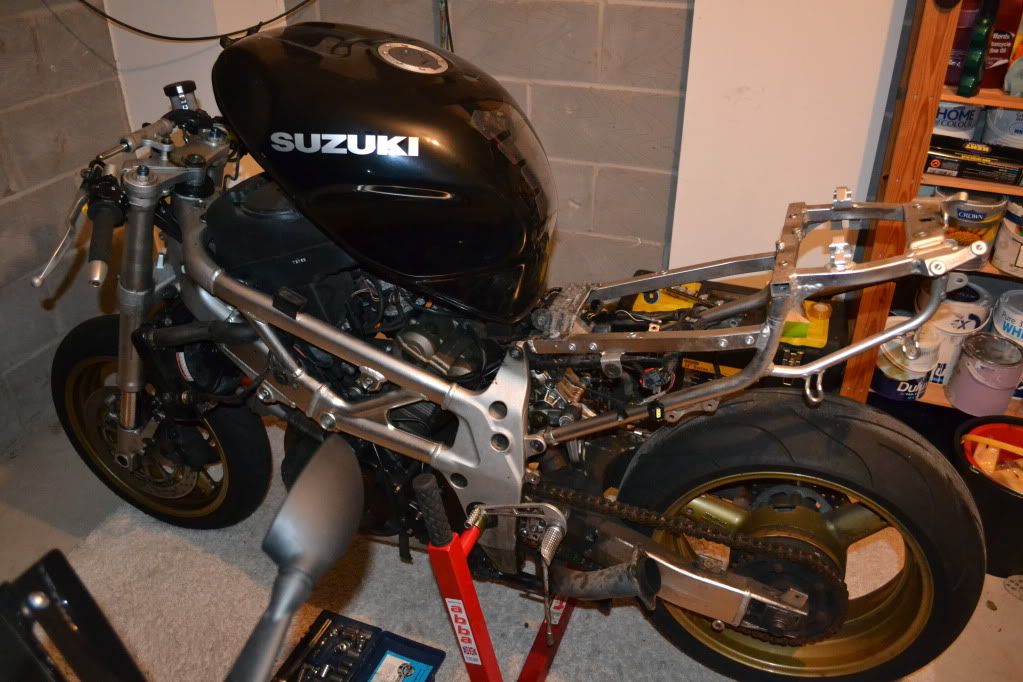
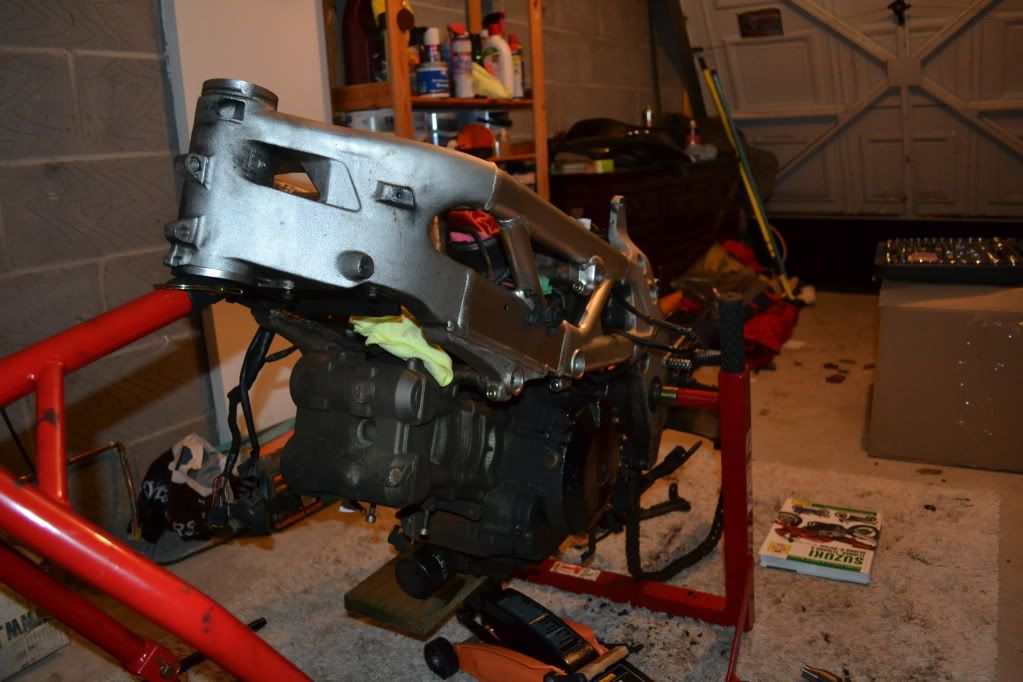
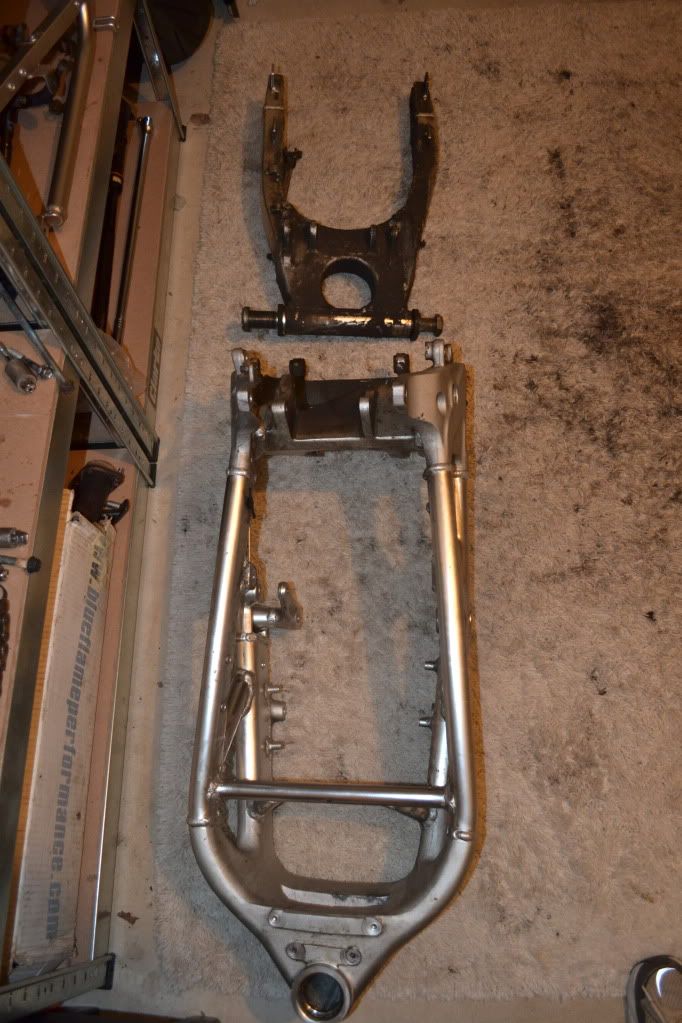
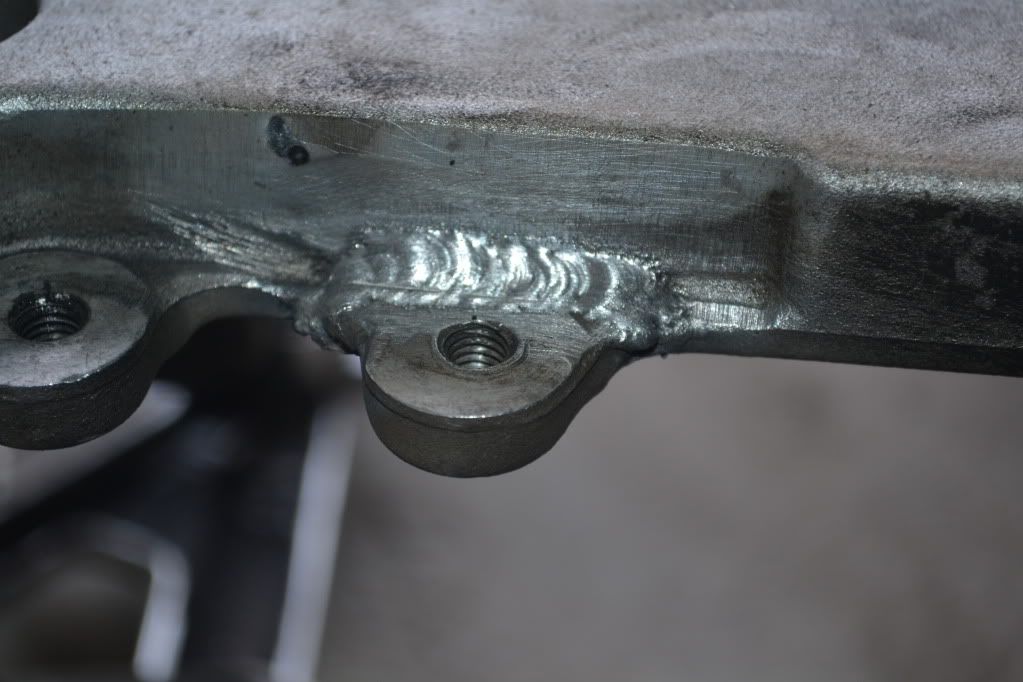
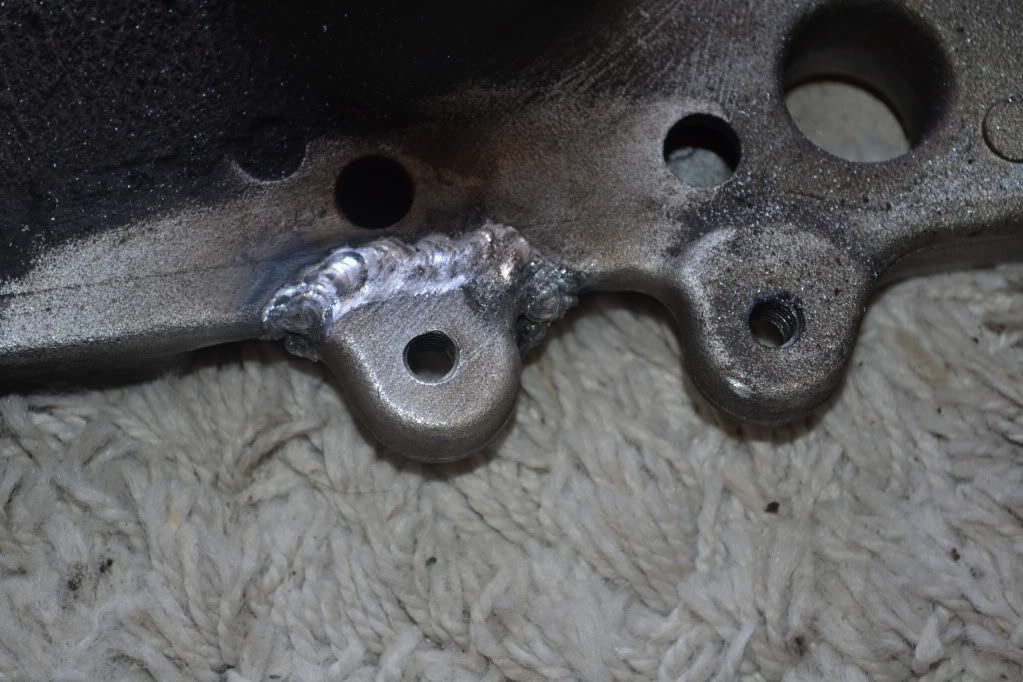
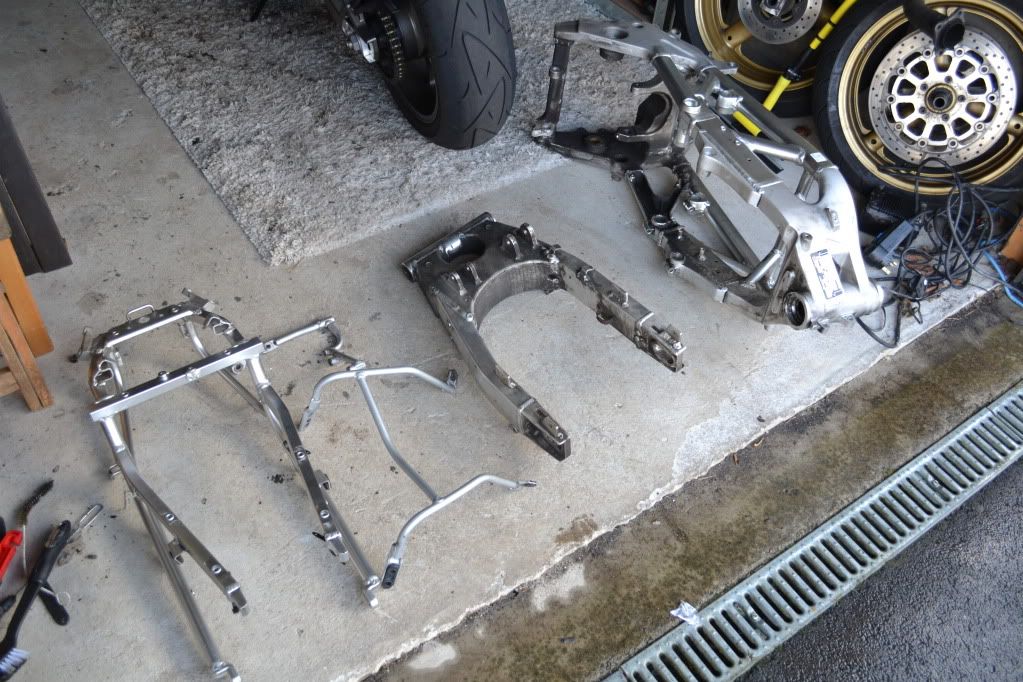
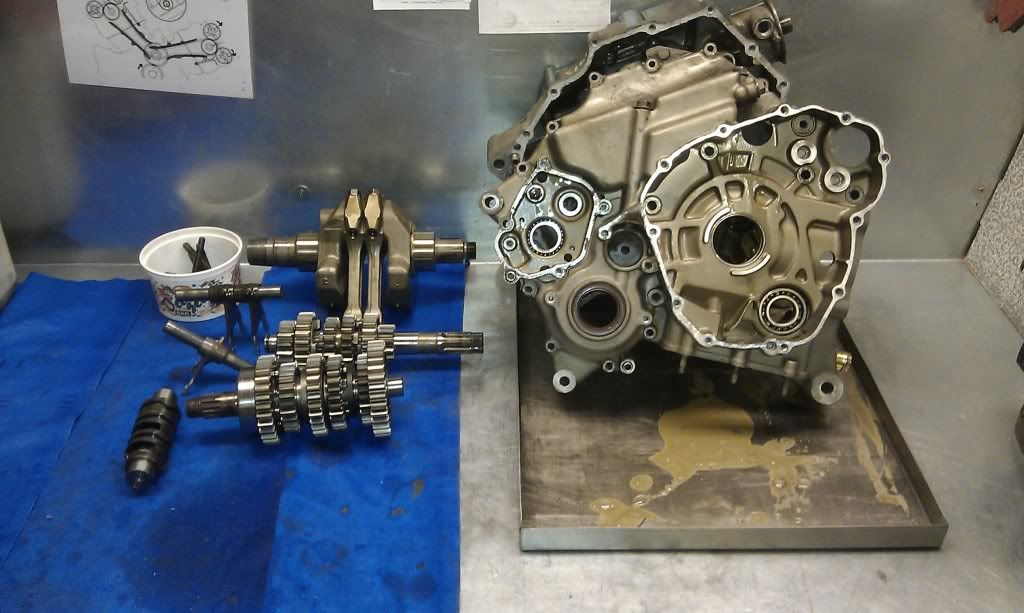
Engine now out and frame apart, heading to a place in Glasgow this weekend to get the frame welded. Hoping the same place can powder coat frame, swing arm, sub frame, fairing subframe. Then it's engine refurb.
Once that's done it's put it all back together with some replacement parts. Not looking forward to putting the wiring loom back on ..

ker out.... with the help from a local mechanic. Best £25 I ever spent ;DMobile Motorcycle Services | Mobile Motorcycle Services
Can't rate the guy any higher. Ended up heating up with two torches and using mole grips to wind it off.
Engine now out and frame apart, heading to a place in Glasgow this weekend to get the frame welded. Hoping the same place can powder coat frame, swing arm, sub frame, fairing subframe. Then it's engine refurb.
Once that's done it's put it all back together with some replacement parts. Not looking forward to putting the wiring loom back on ..
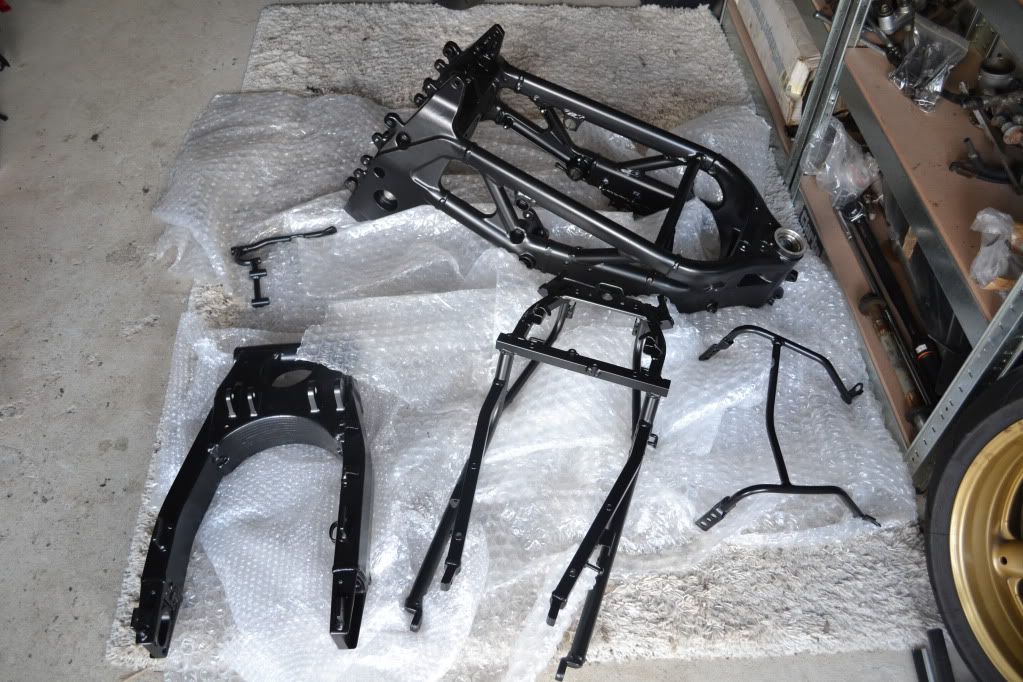
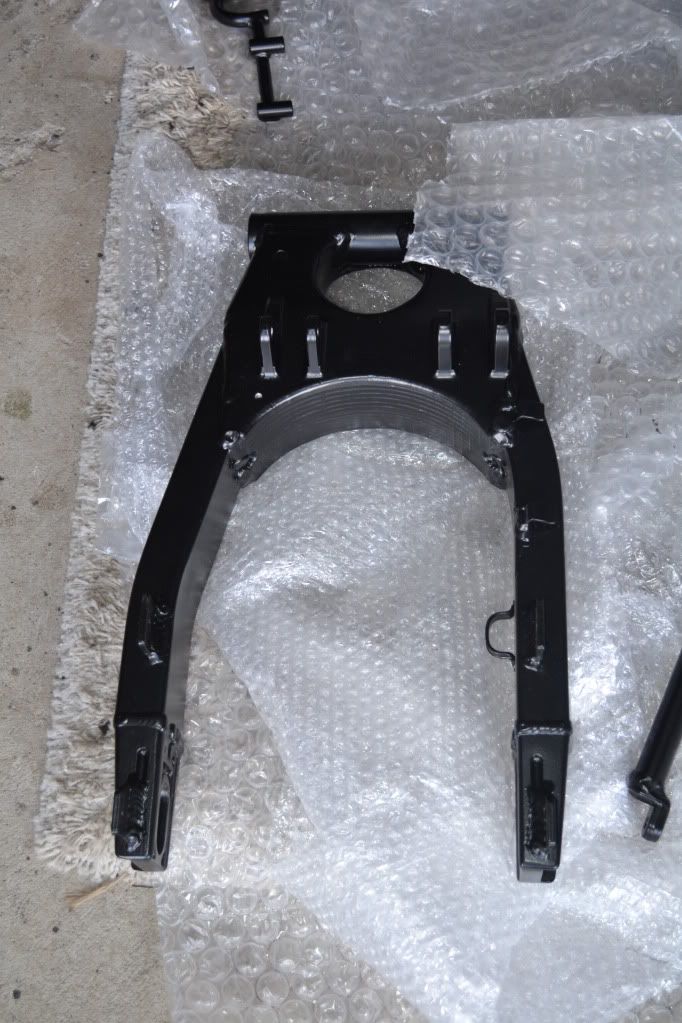
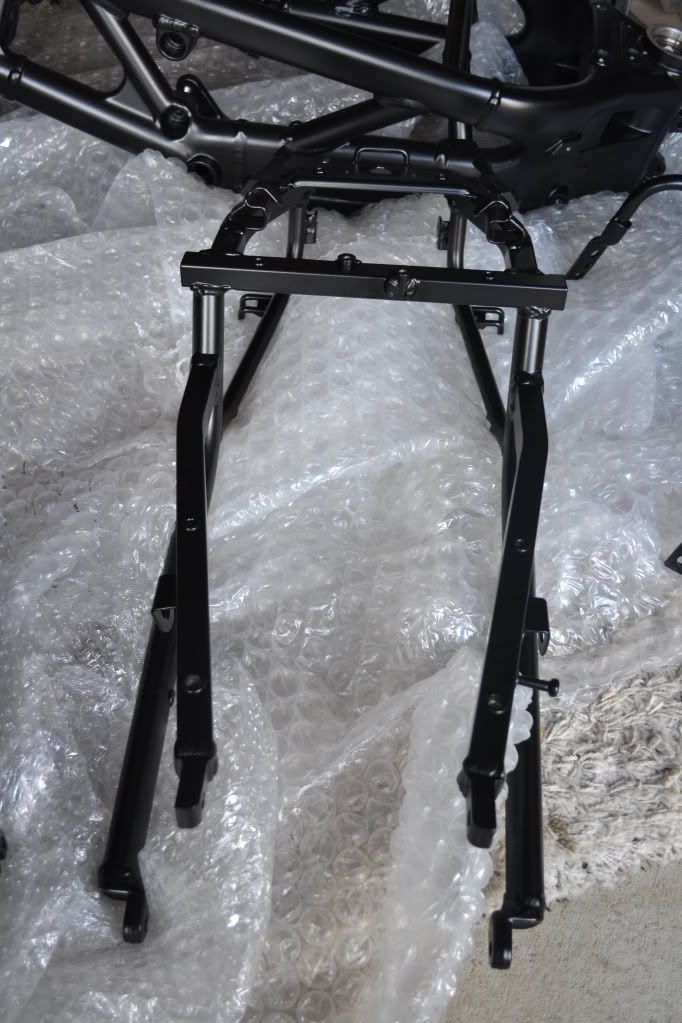
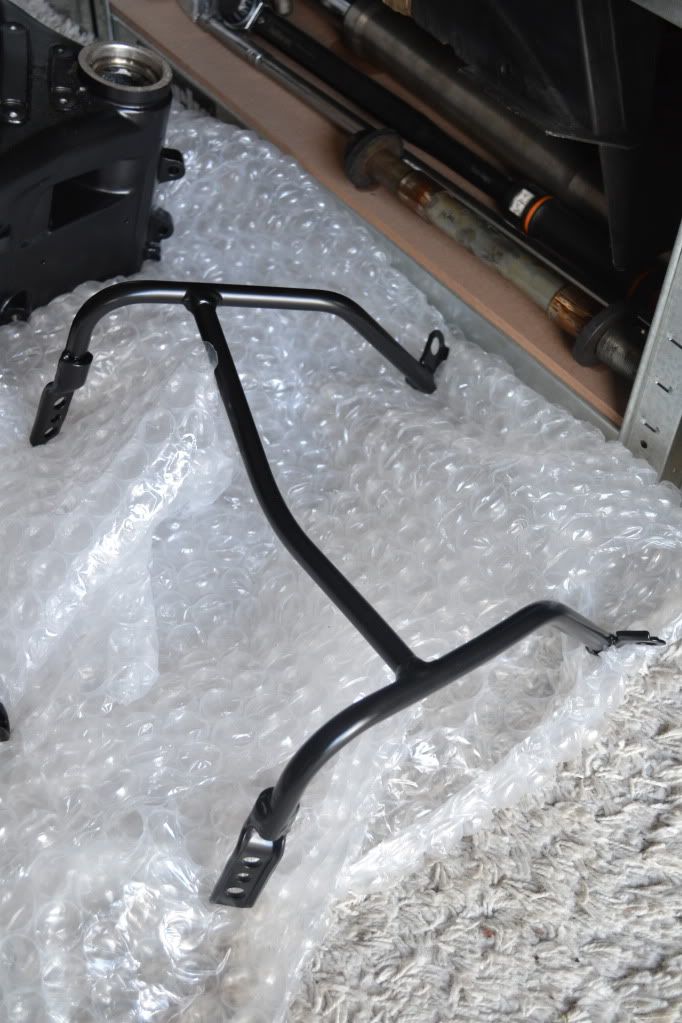
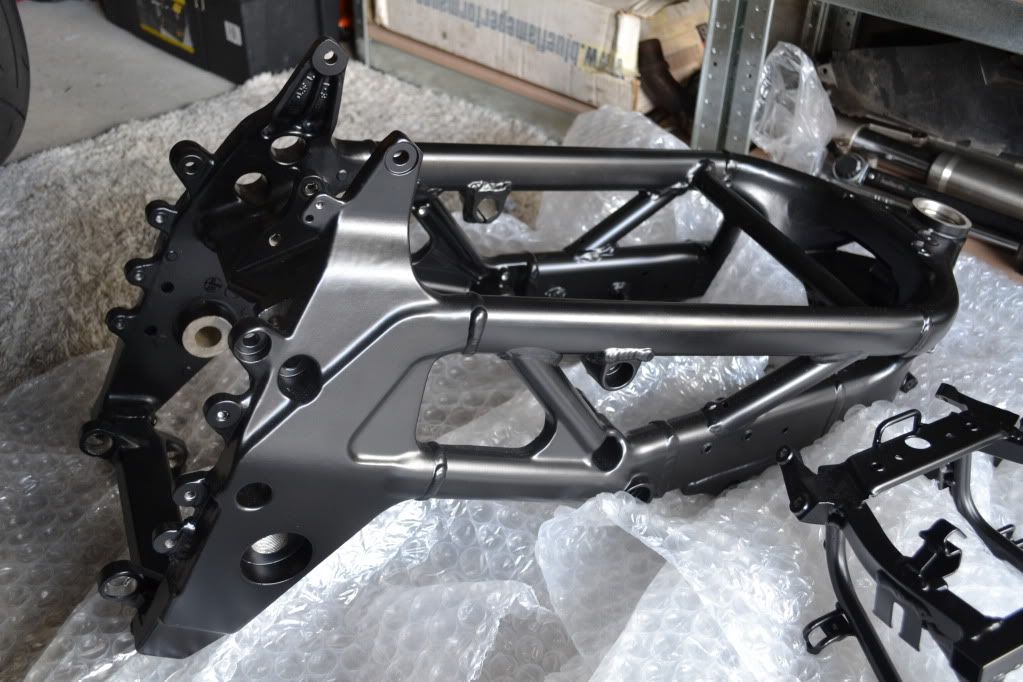
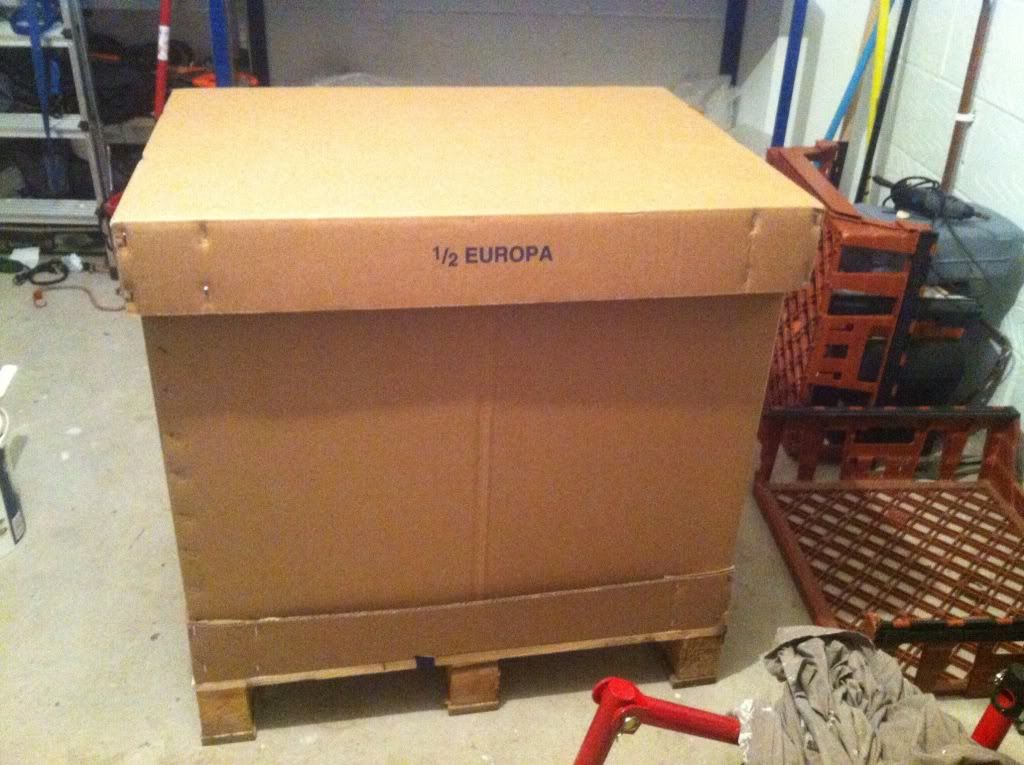
Frame away getting welded, next week I'll drop off the frame, swing arm, sub frame and fairing bracket to get blasted and powder coated in satin black.
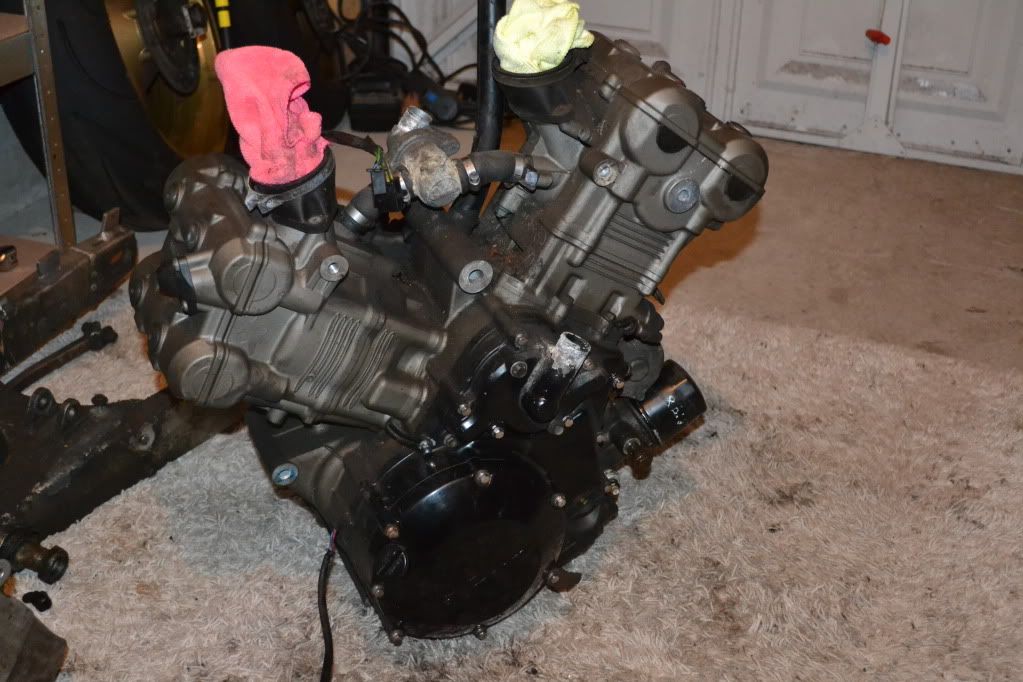
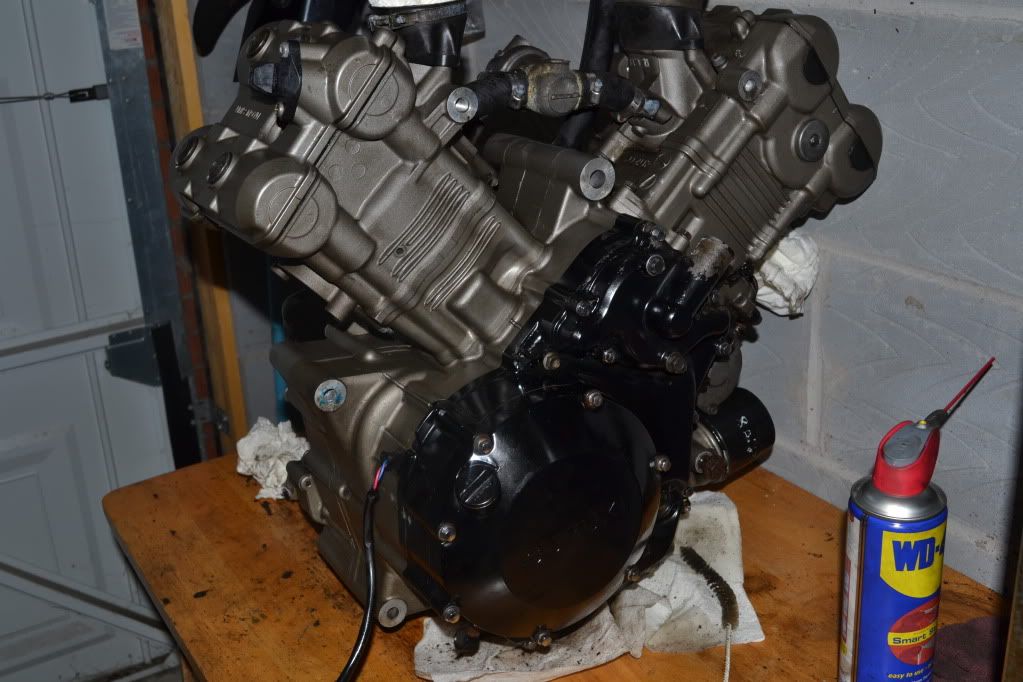
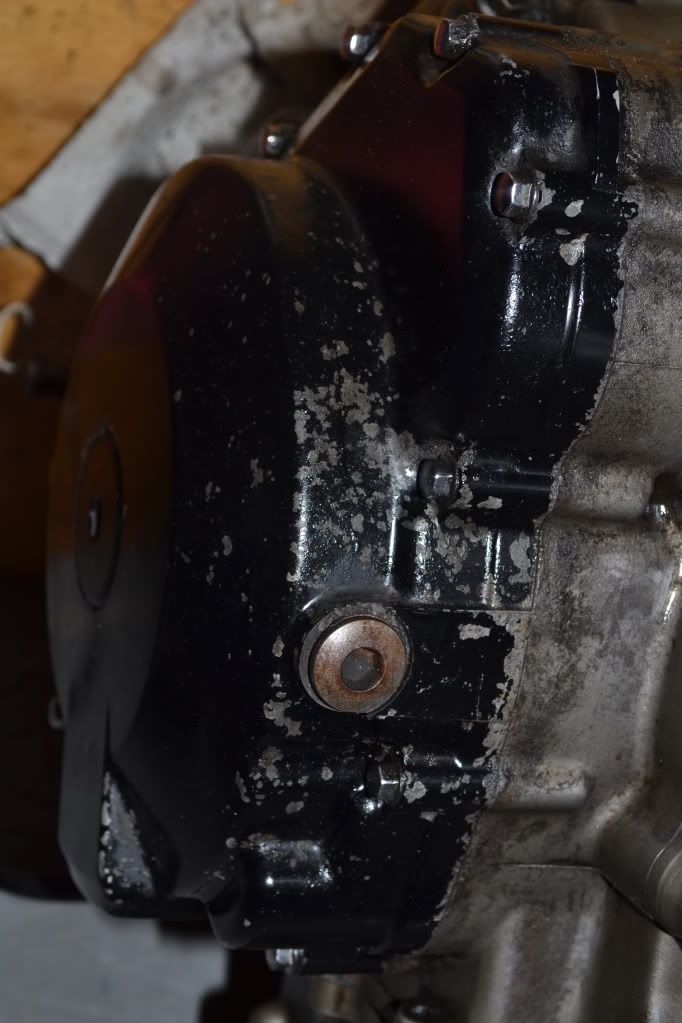
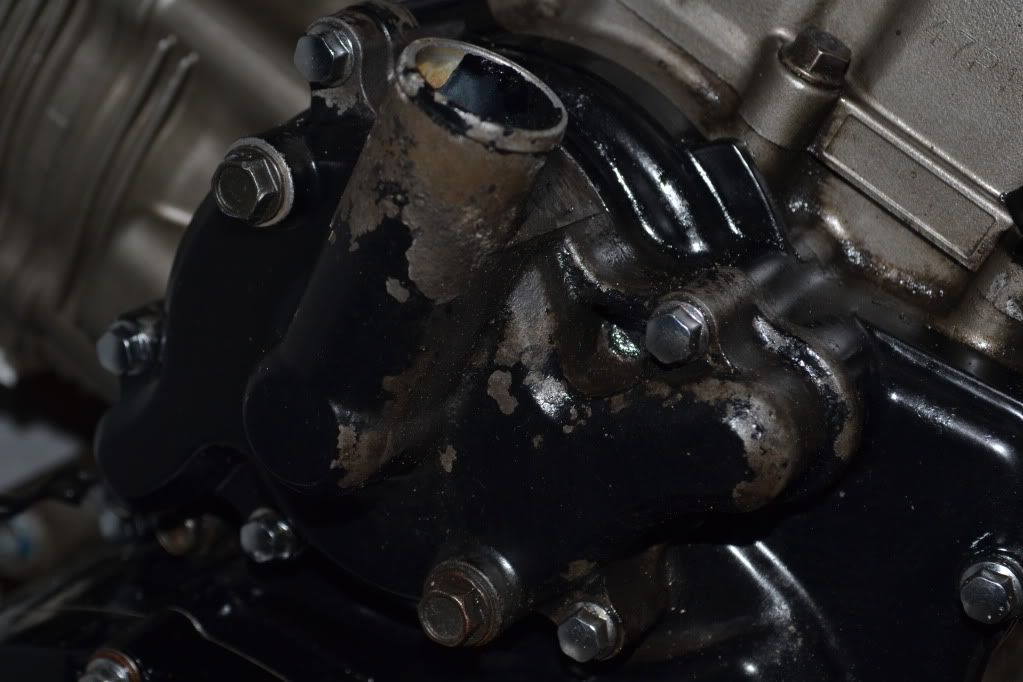
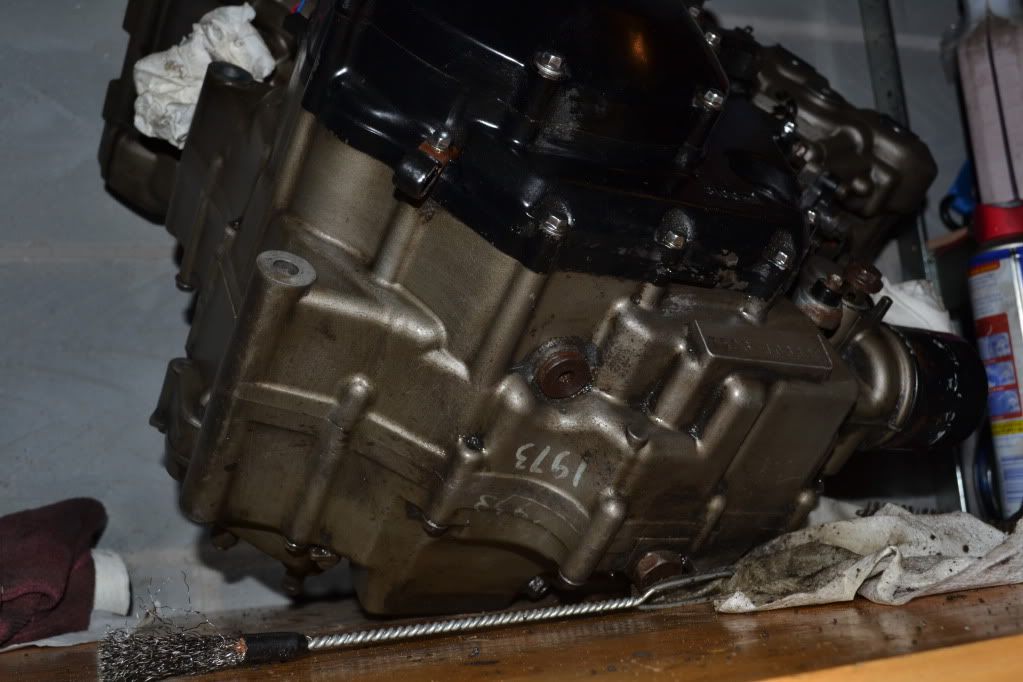
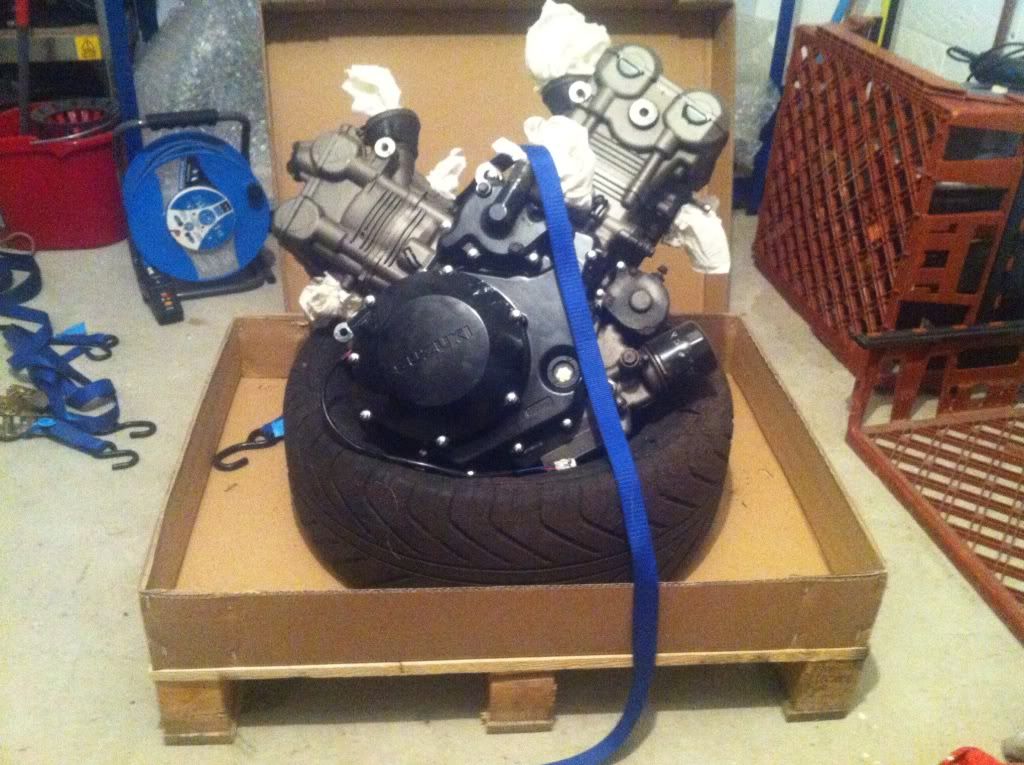
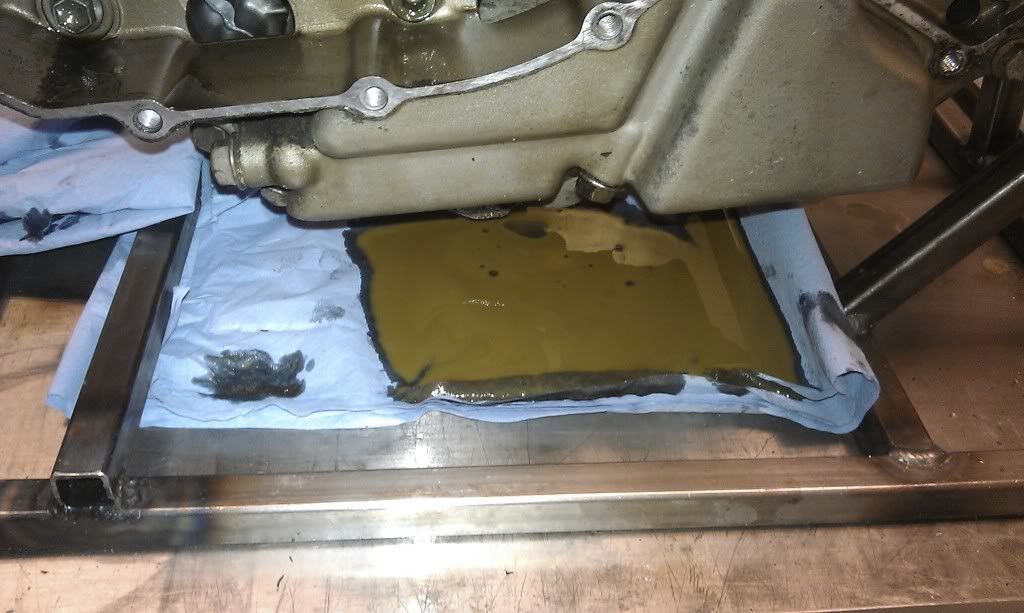
In the meantime I've spent all night doing a weeksy with the engine. Started with this ...
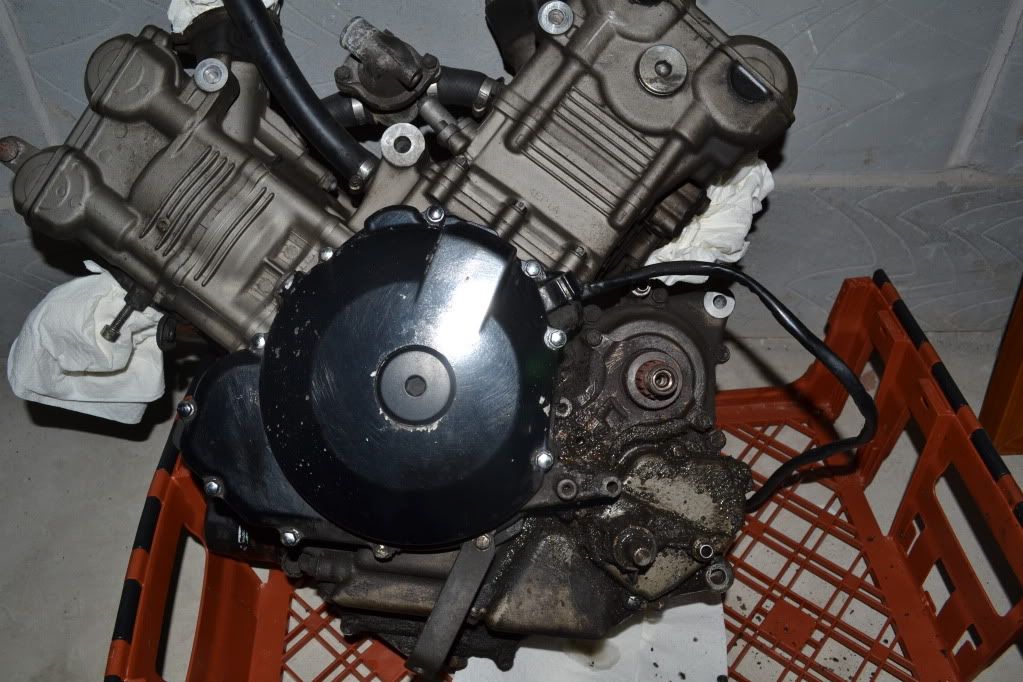
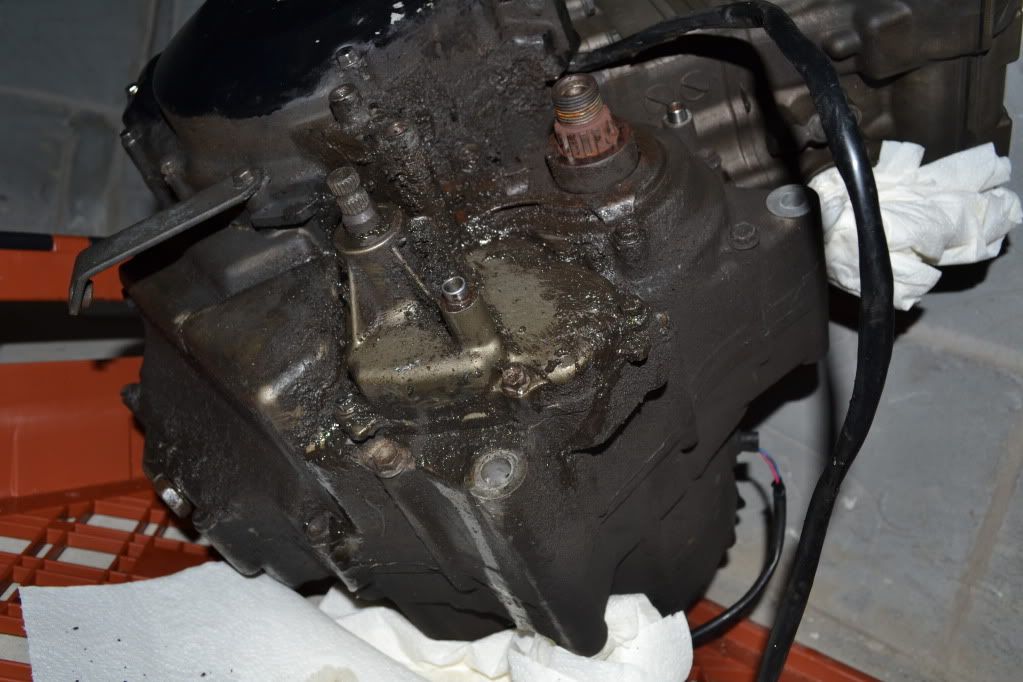
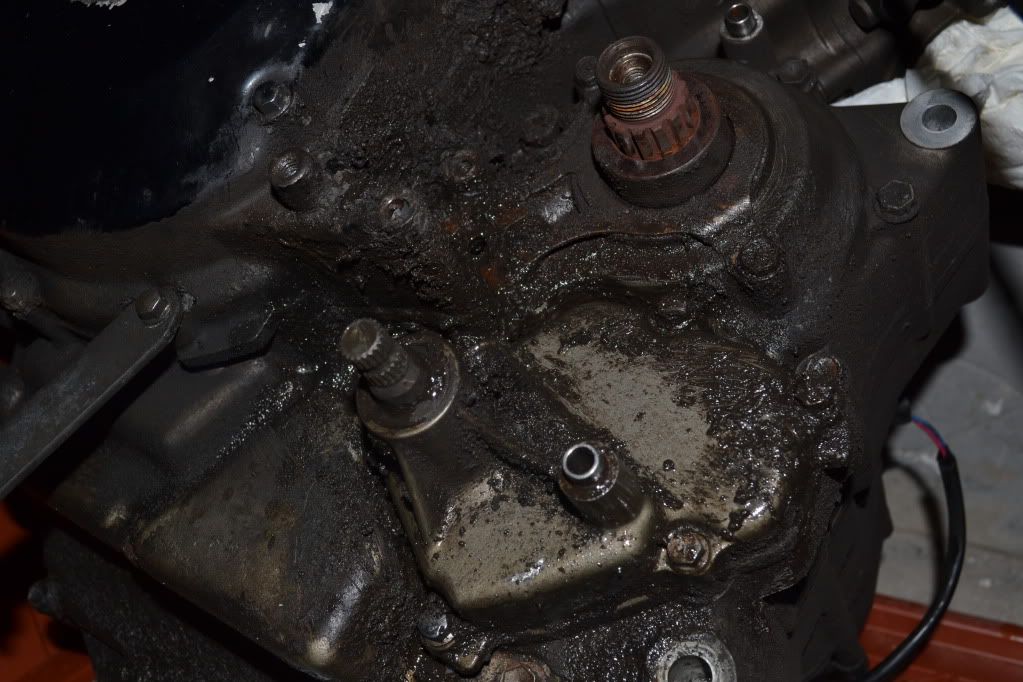
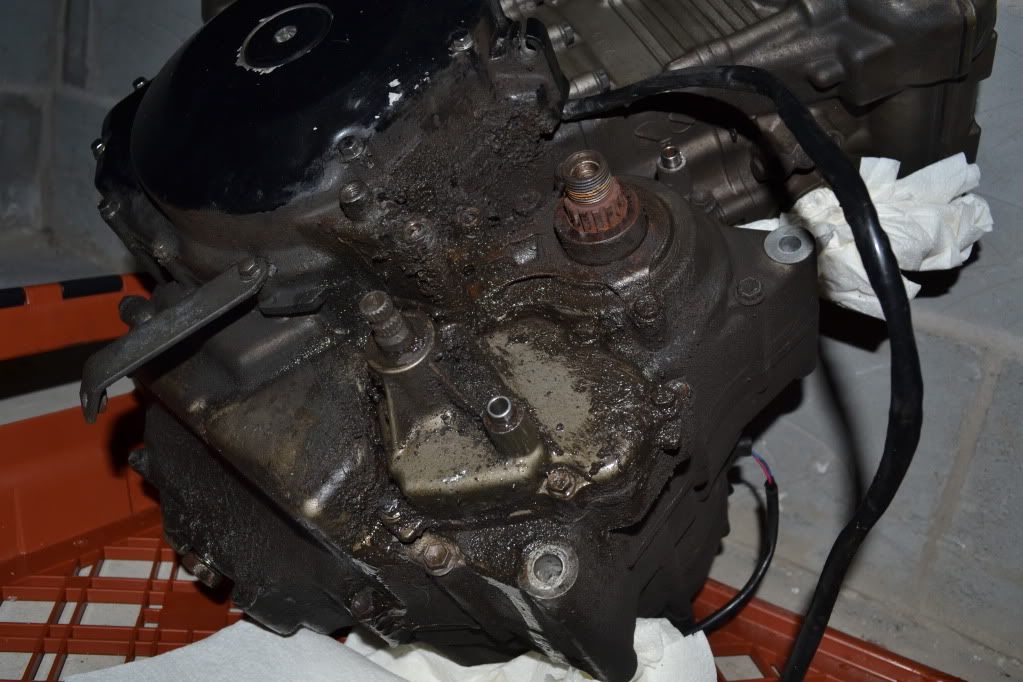
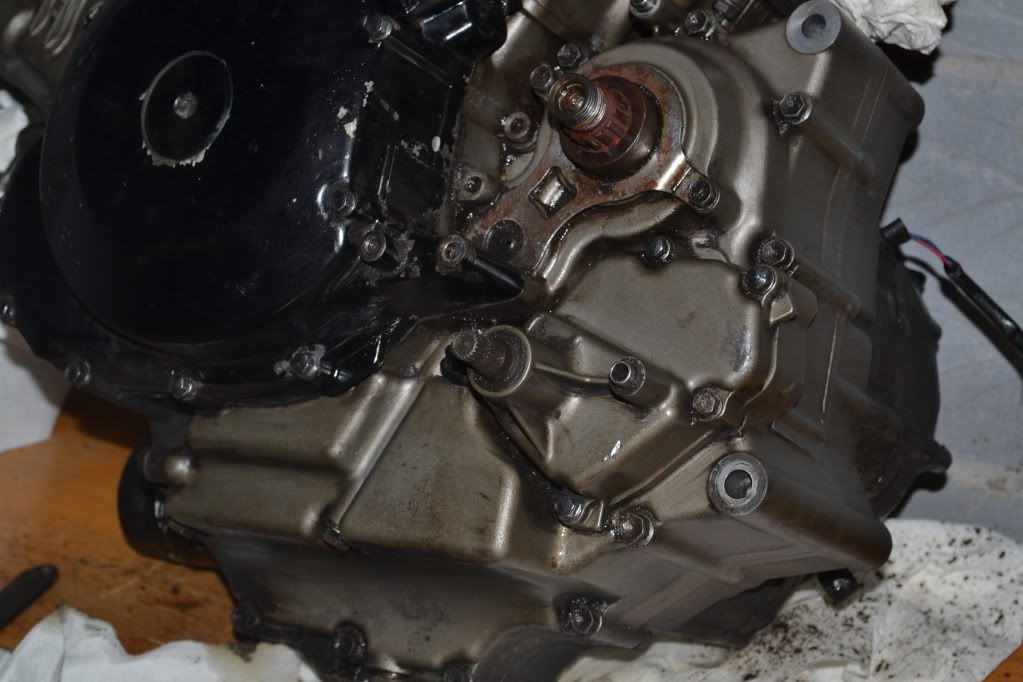
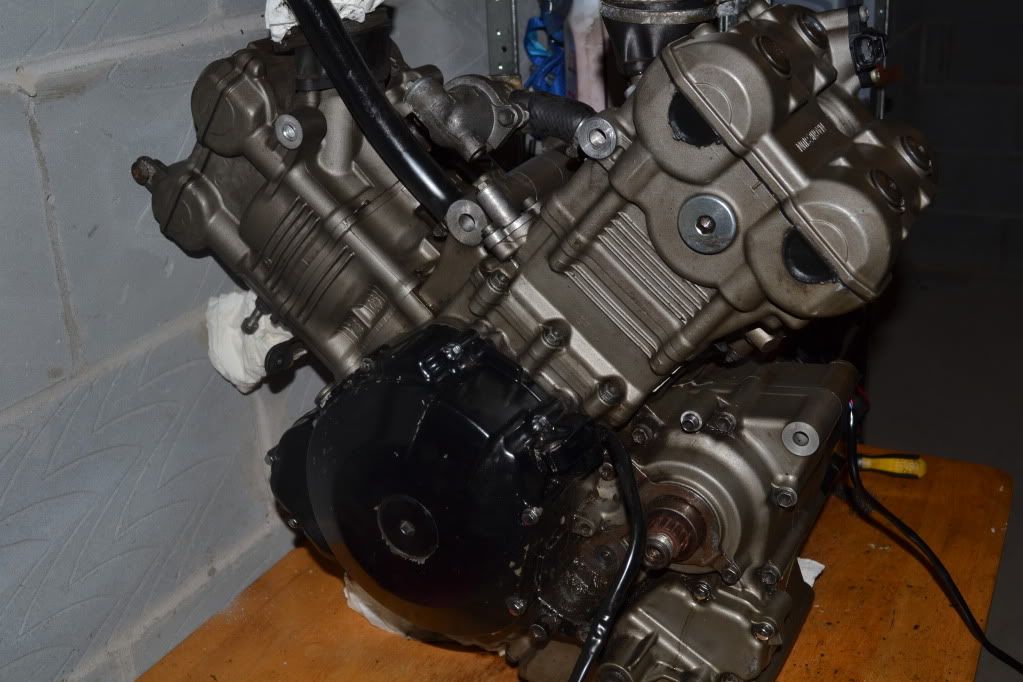
3 hours later using some wheel cleaner, loads of WD40 and a lot of painful scrubbing it's come halfway clean. Happy with this, next weekend I'll paint some gunt onto the whole thing and jet wash, once it's dry I'll get some small brushes out and get the small areas done. Hopefully should then be in a position to send to engine dude.

In the meantime I've spent all night doing a weeksy with the engine. Started with this ...
3 hours later using some wheel cleaner, loads of WD40 and a lot of painful scrubbing it's come halfway clean. Happy with this, next weekend I'll paint some gunt onto the whole thing and jet wash, once it's dry I'll get some small brushes out and get the small areas done. Hopefully should then be in a position to send to engine dude.
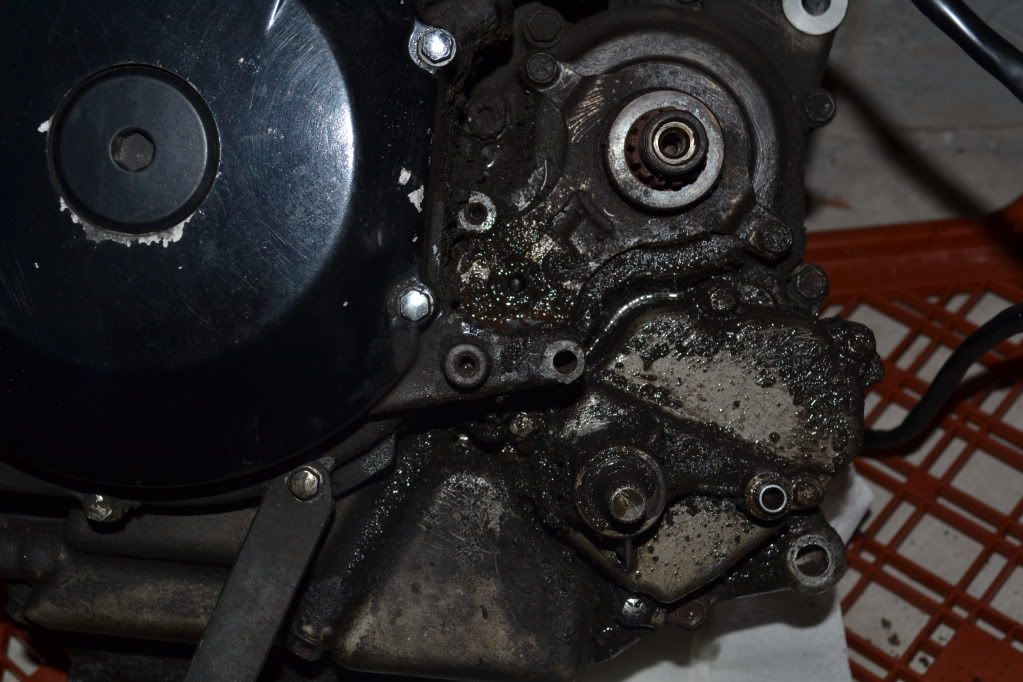
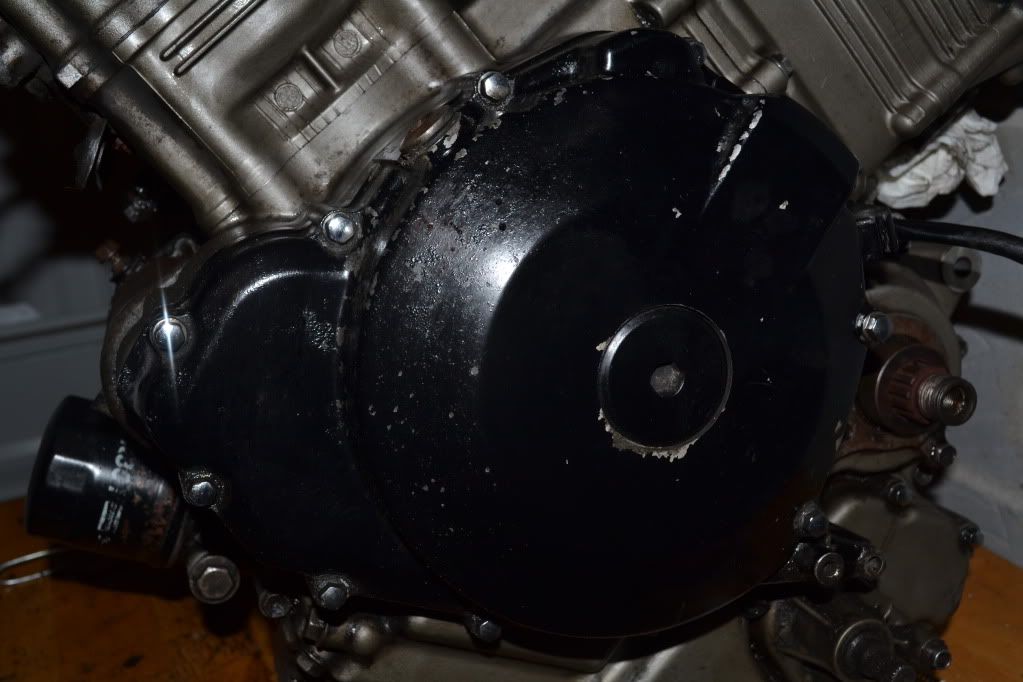
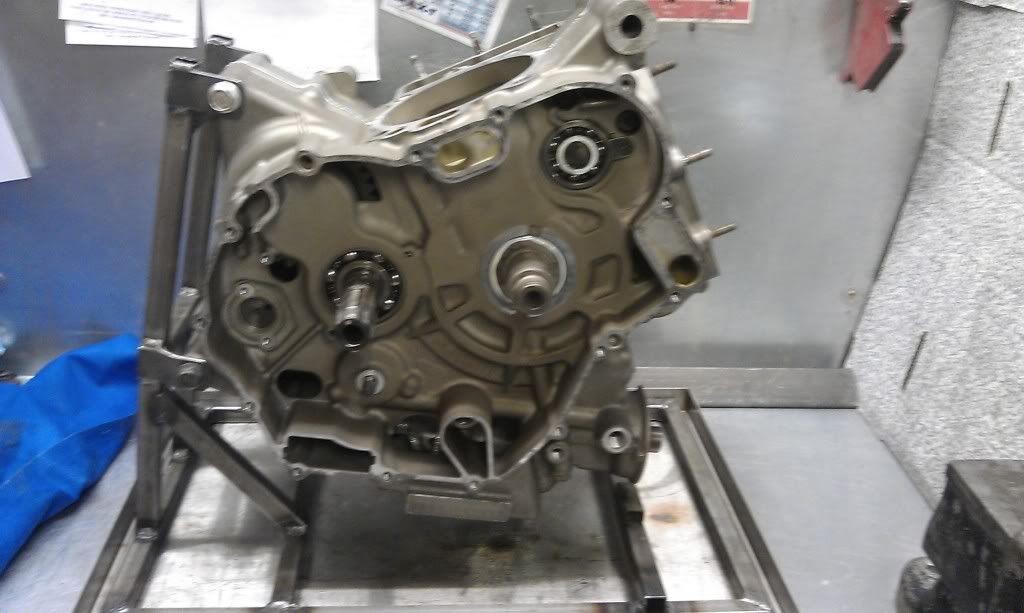
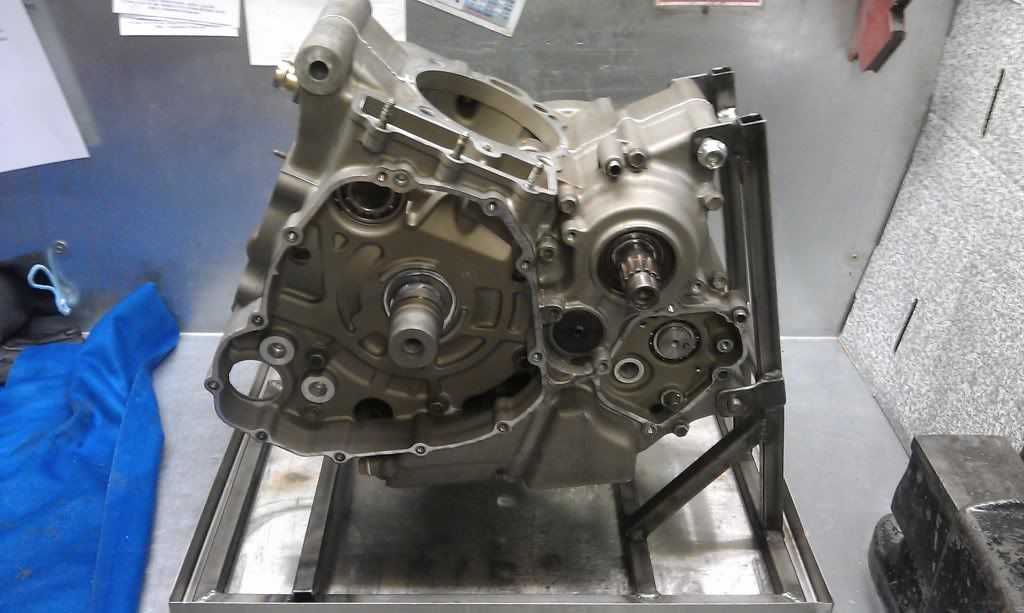
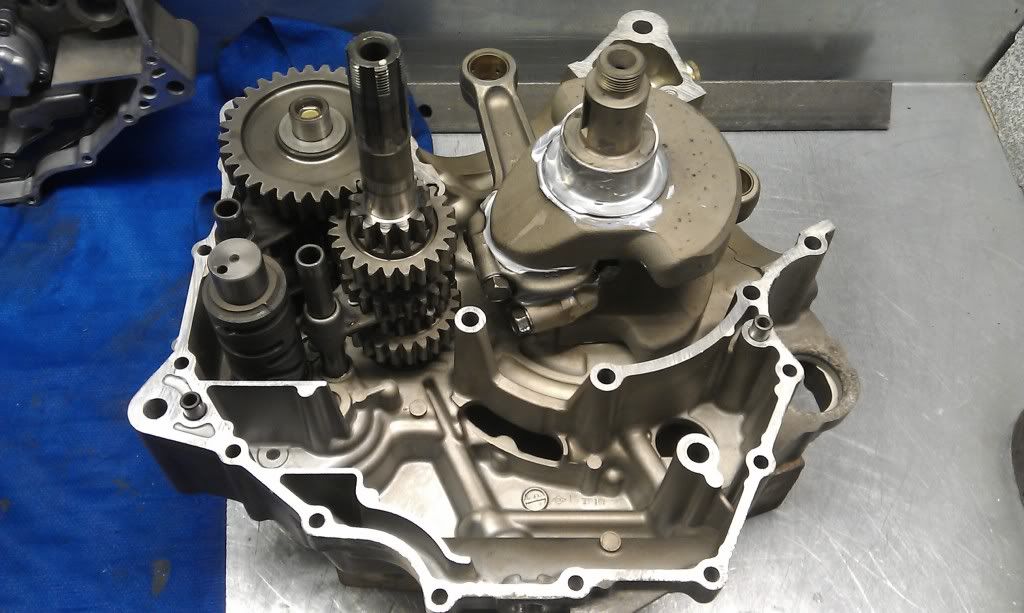
Cleaning up the casing did reveal a lot of corrosion on the cases. I think I'll replace them all, and somehow figure out a way of getting the rest of the block treated and painted gold again.
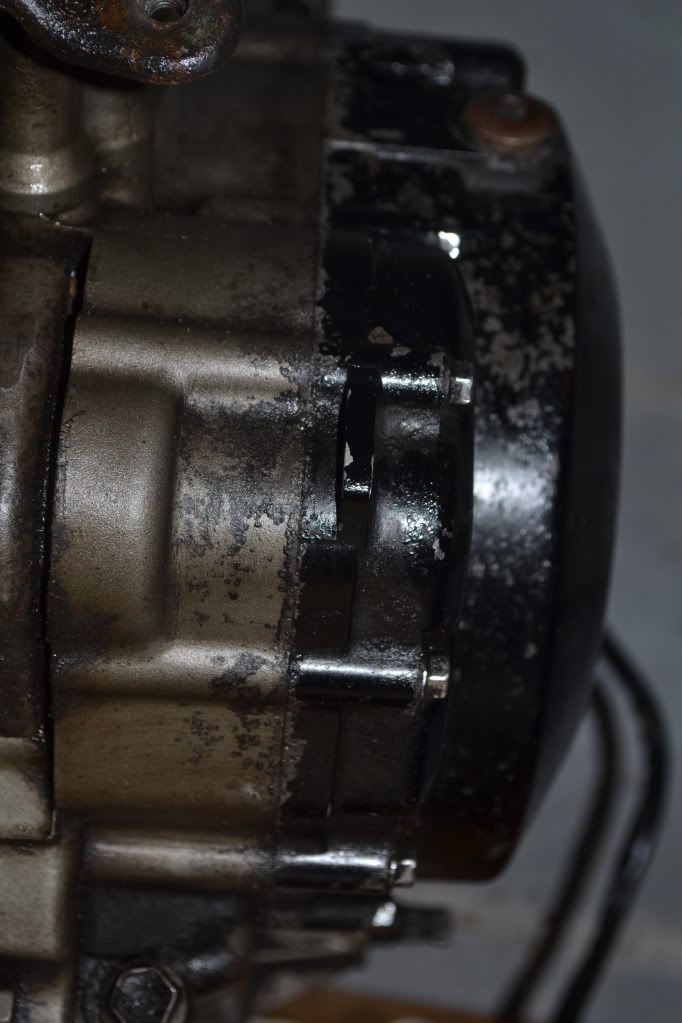
Also the front cylinder head is a bit pitted. Not entirely sure I can do anything about that other than replace.
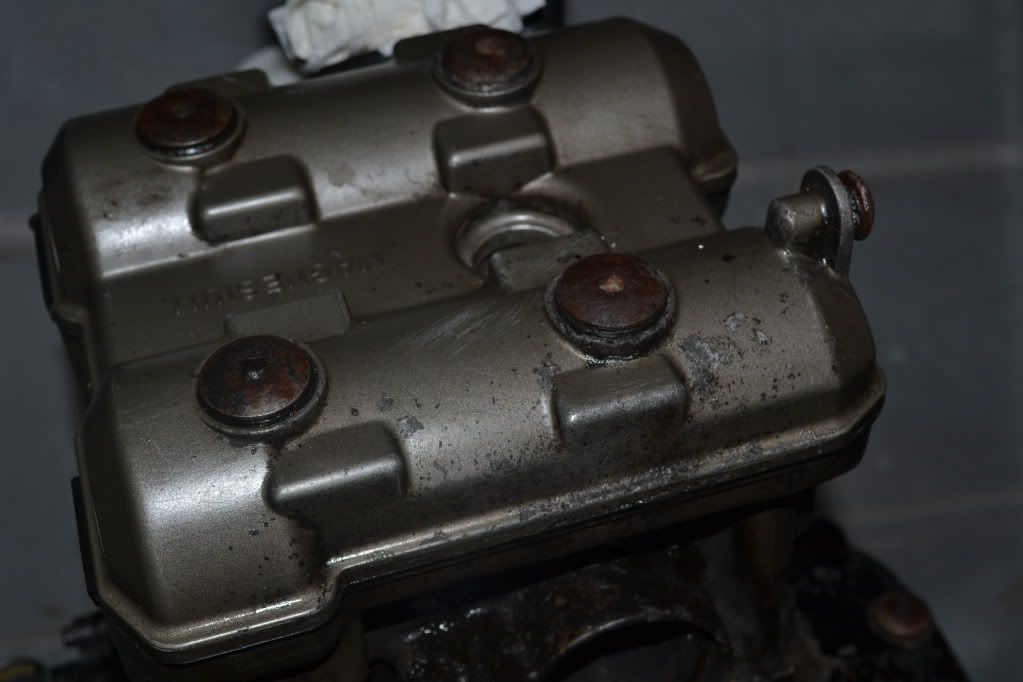
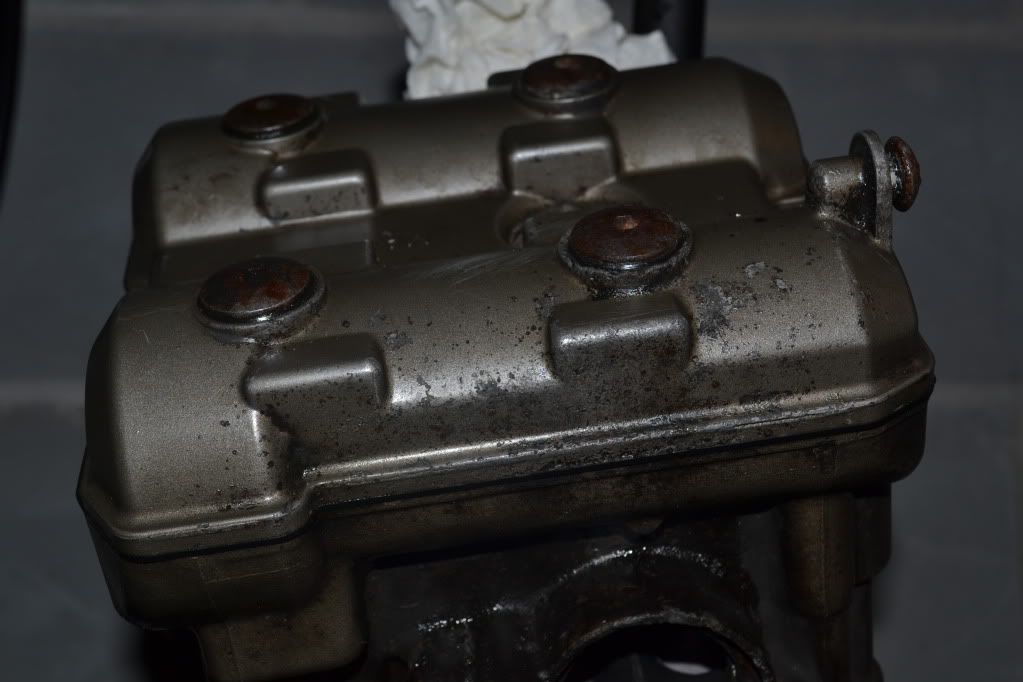
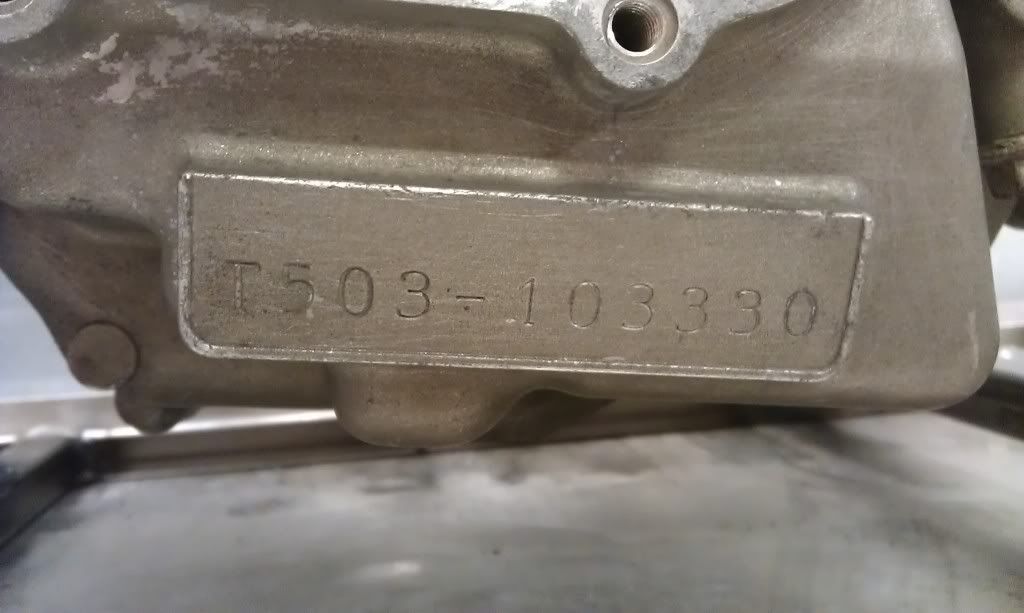
Also discovered a chalk set of numbers under the sump that I've never noticed before, suggests to me, with the missing rear lower engine mounting adjuster nut missing one of the previous owners swapped the engine. There was 8 previous owners before I bought it in 2005 so who knows!
Also the front cylinder head is a bit pitted. Not entirely sure I can do anything about that other than replace.
Also discovered a chalk set of numbers under the sump that I've never noticed before, suggests to me, with the missing rear lower engine mounting adjuster nut missing one of the previous owners swapped the engine. There was 8 previous owners before I bought it in 2005 so who knows!
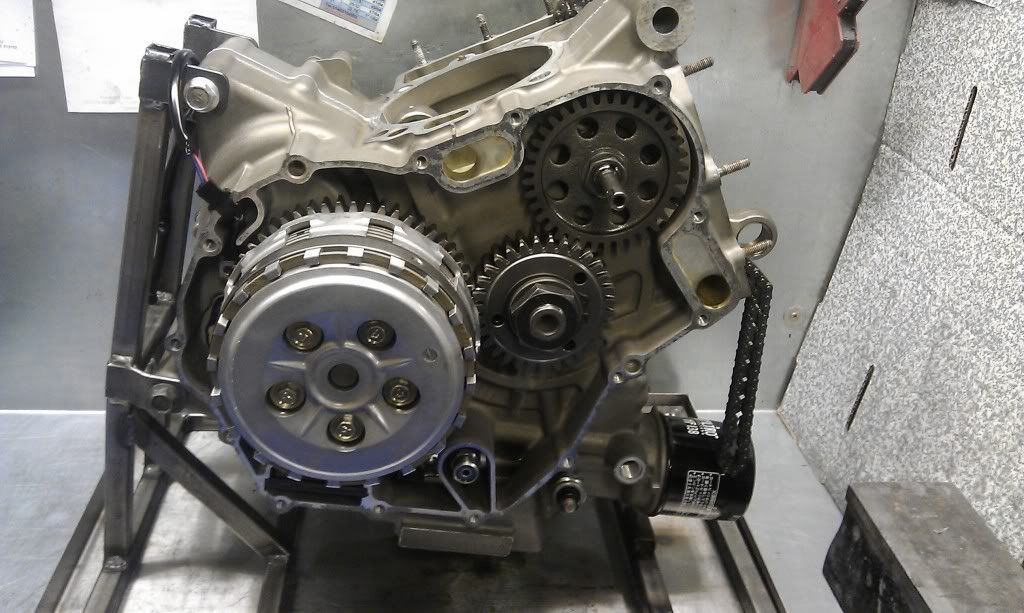
So ... got the frame repaired and powdercoated. Very happy with result.
Next thing on the list is to get engine refurbed and then decide what to do with the suspension. Current thoughts are for the rear an Ohlins damper and a replacement spring, likely a Hagon. Then for the front I'm thinking replacing the entire front end with a K9 Hayabusa front end. It's a moving feast so I'l likely change my mind. Any ideas welcome.
Next thing on the list is to get engine refurbed and then decide what to do with the suspension. Current thoughts are for the rear an Ohlins damper and a replacement spring, likely a Hagon. Then for the front I'm thinking replacing the entire front end with a K9 Hayabusa front end. It's a moving feast so I'l likely change my mind. Any ideas welcome.
Now then. Engine went to engine builder last week.
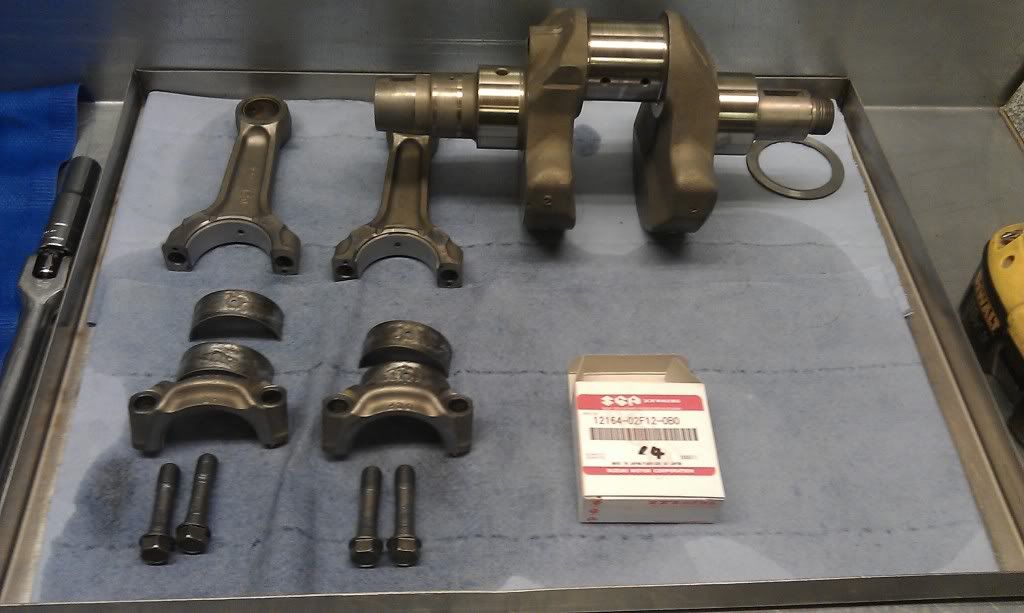
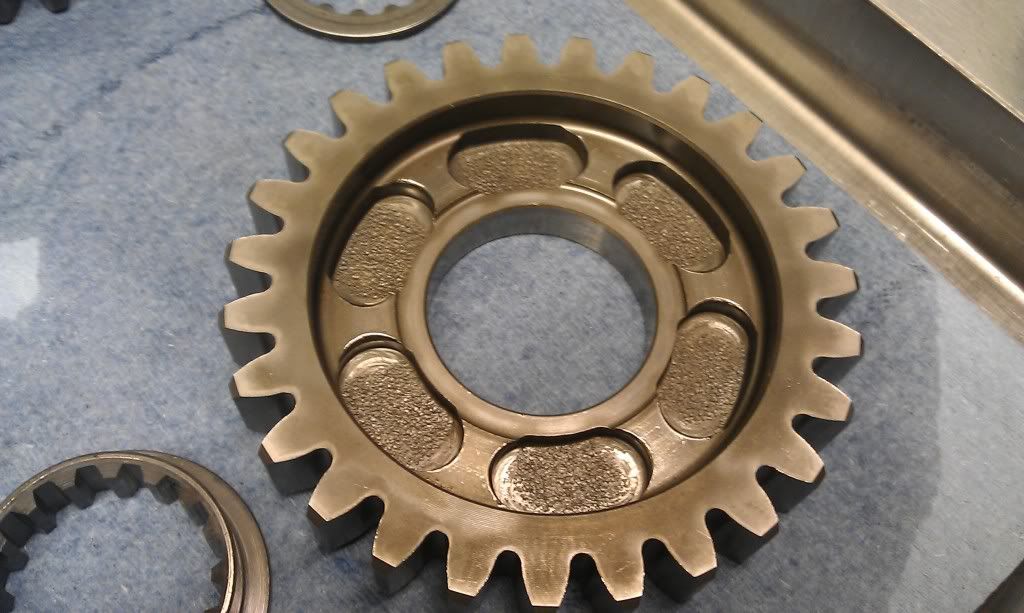
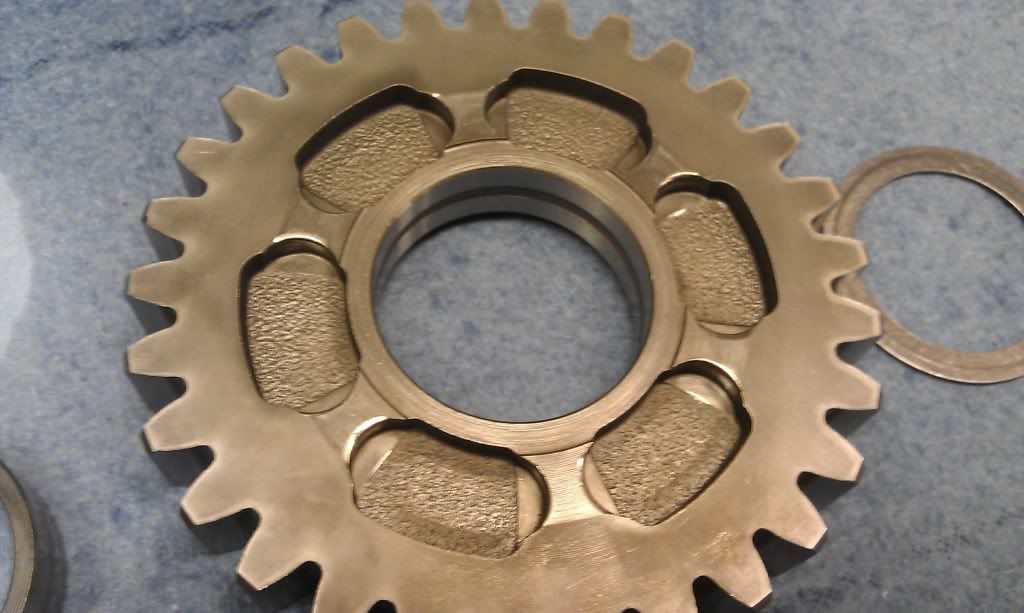
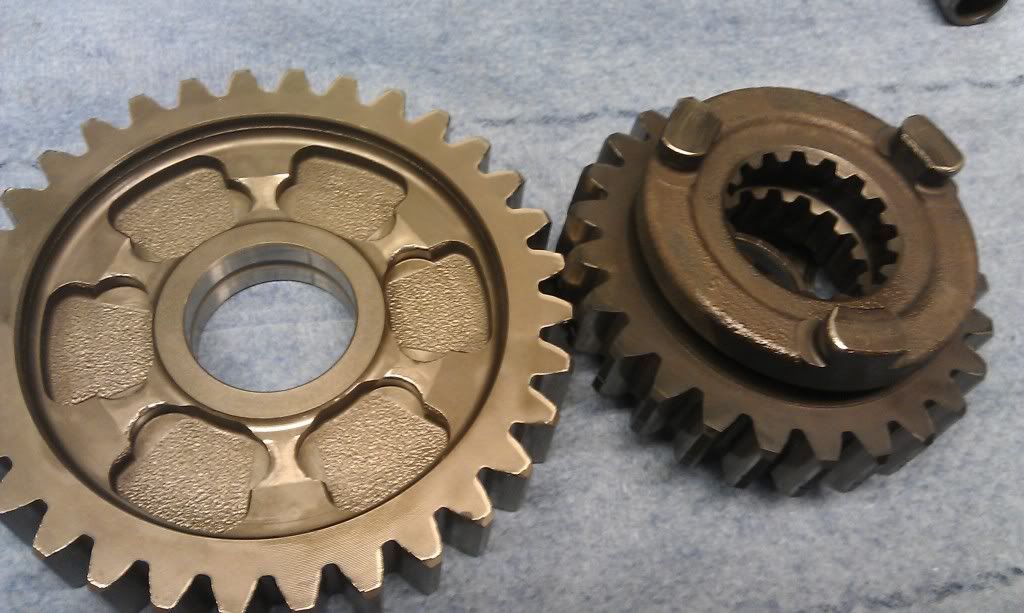
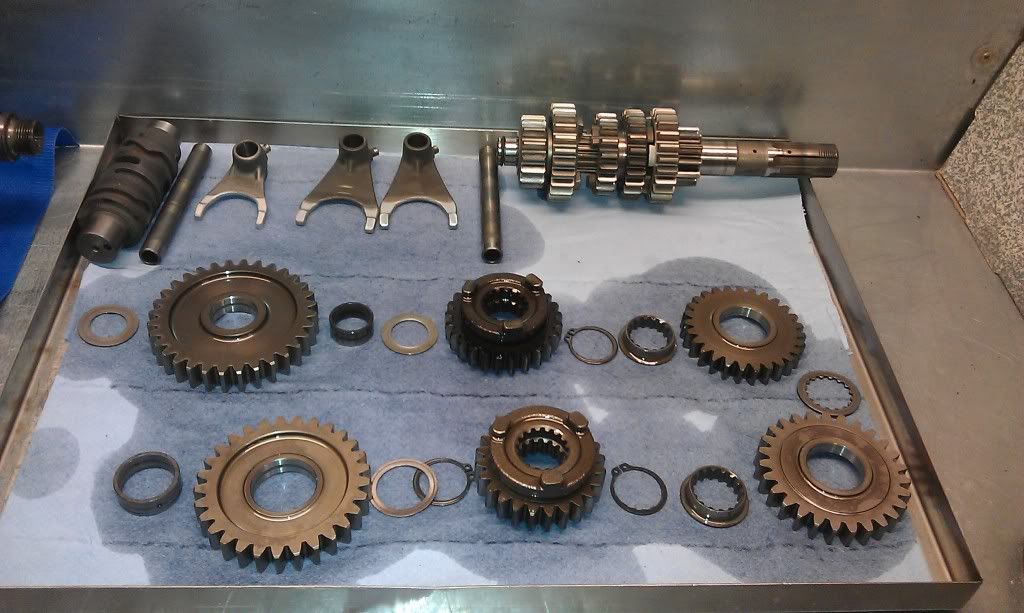
All good news other than front bore having some rust marks on the bore and rings Crank/rods/gearbox all fine. Gearbox is in really good condition for a 97 TL. The engine is being rebuilt with the following replaced with OEM gaskets/seals
[LIST]
[*]Oil Pump
[*]Head Gasket
[*]Base Gasket (Front)
[*]Base Gasket (Rear)
[*]Clutch Cover gasket
[*]Generator Cover Gasket
[*]Big End Shells
[*]Water Pump Mechanical Seal
[*]Impeller Washer
[*]Impeller Bolt Sealing Washer
[*]Water Pump Shaft Oil Seal
[*]Oil Filter
[*]Gear Shift Cover Gasket
[*]Front Cyl Cam Chain Tensioner Gasket
[*]Rear Cyl Cam Chain Tensioner Gasket
[*]97 Gearbox Output Shaft Bearing (28x68x18)
[/LIST]
Considering some other work being done other than the rebuild:
[LIST=1]
[*]Fitting a set of JE High Comp pistons
[*]Cams degreeing
[*]Clutch centre welding
[/LIST]
2/3 I'm likely to go for but still considering the new pistons.
Still watching for a full Yoshi system for sale as they don't make them anymore. This came up the other day but I'm not sure I want to pay for a scuffed system/cans Suzuki TL1000S TLS Yoshimura RS-3 Full Exhaust System | eBay
Also watching for suspension options. There's a few Ohlins dampers online of varying newness. Not sure why there's so many for sale right now as they only tend to come along every so often?! Weighing up options, decent condition used are about 500 quid, new 700 so hmmmm
Suzuki tl1000s rear shock ohlins | eBay
Ohlins Mono Shock S46PR1C1W to fit Suzuki TL1000 S V-Y (AG3215) 1997 to 1998 | eBay
Suzuki TL1000S TLS Ohlins Rear Damper | eBay
SUZUKI TL1000S TL 1000 S OHLINS REAR SHOCK ABSORBER | eBay
Suzuki tl1000s rear shock ohlins | eBay
Still on the hunt for a 9-12 set of Hayabusa forks/spindle/calipers however the only sets I've been seeing recently are in the USA.

Oh yes. Also looking for a bike lift, as once re-assembly starts it's going to take f
king ages. ;DDecided to go for the mods, so the JE comp pistons, cam degreeing and clutch welding will be done.
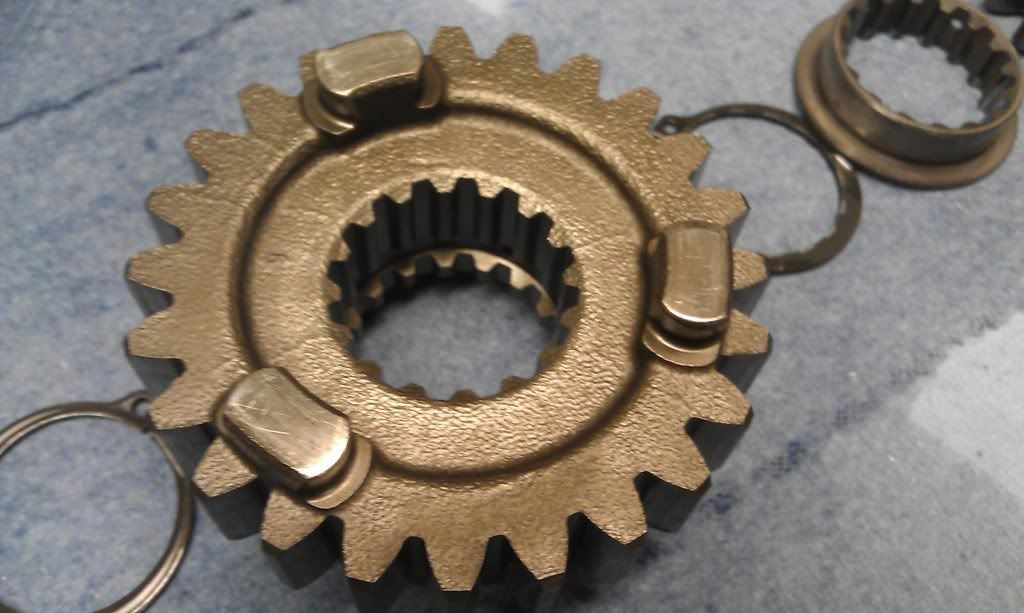
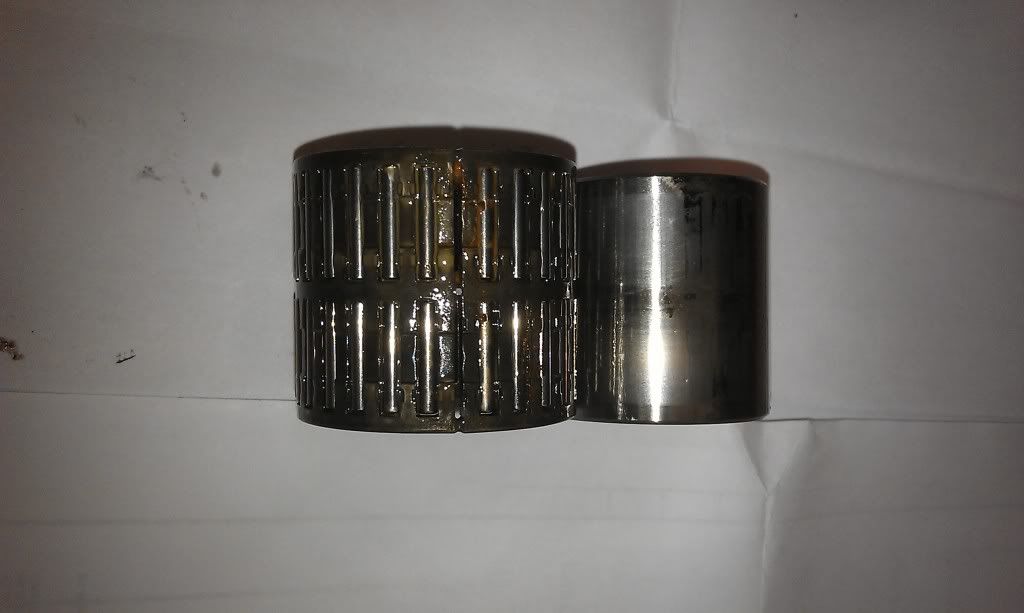
He's fitted a new clutch pushrod seal and 4 new circlips in the gearbox for piece of mind. He's also replaced the rusted clutch sleeve and needle roller and also the 2 clutch thrust washers as they were worn with spares he had. There was some slight pit marking to the inside of the clutch basket where the needle roller runs, he's cleaned it up with some 1500 wet&dry/oil it it's almost gone.
Very impressed with his work so far. I believe he's been in MCN talking about TL engines to the journos recently. Find out more info here on the dude: www.tl1000s.com :: Profile
There's some really impressive work here too around his self built TL1200: http://www.tlzone.net/forums/bike-pictures/131229-...
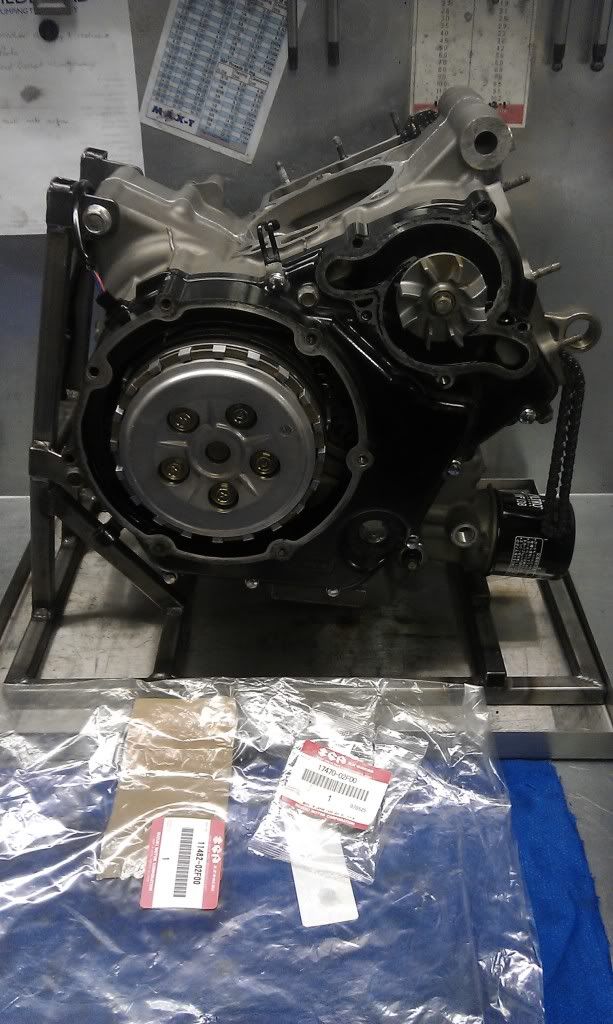
Gassing Station | Biker Banter | Top of Page | What's New | My Stuff