Honda NC30 Restoration Project
Discussion


When I was in my late teens I had a picture of this Commonwealth Racing Team RC30 on my bedroom wall.
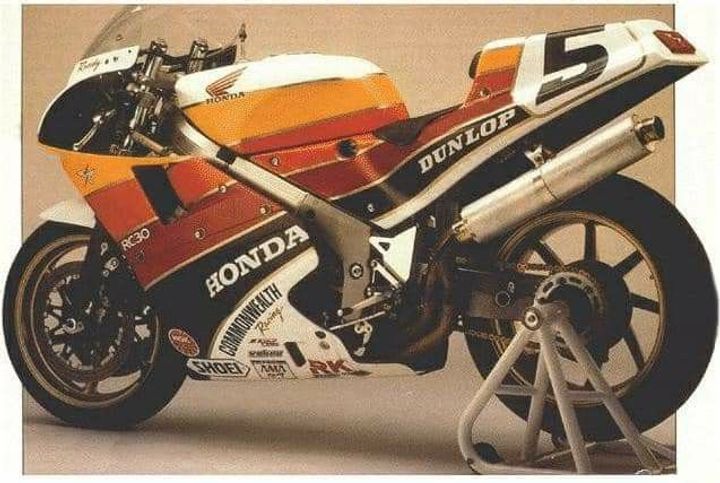
Fast forward 30 or so years and I recently bought an unfinished NC30 project as the basis for a rebuild and attempt to recreate the same livery onto a road bike. I know it's only a NC30 and not a RC30, but those are way beyond my price range. The basis for my project is a 1989 grey import. Being a 1989 model year, I'm sure the Honda purists would prefer I retain the Type 1 colours, but there are already so many of these around that I don't feel the need to restore yet another one the same way. I can always return it back to Type 1 colours at a later date, as I'm keeping hold of the original fairings and will use replica panels for the new paint job.
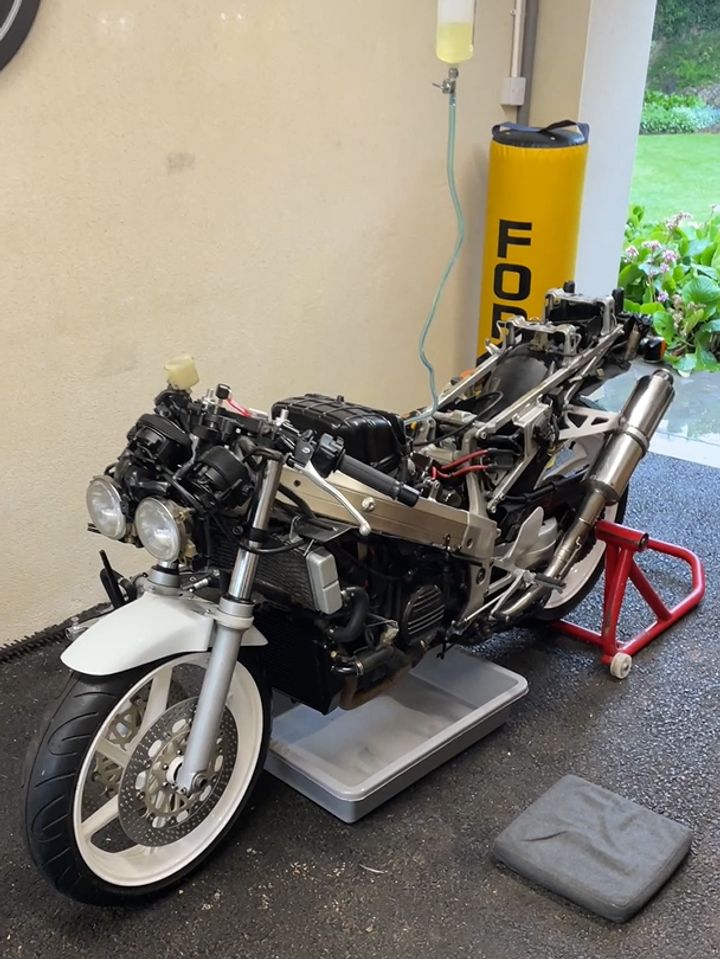
Here's how the bike came to me - mostly complete, but a lot of various parts in boxes and a few bits and pieces missing completely.

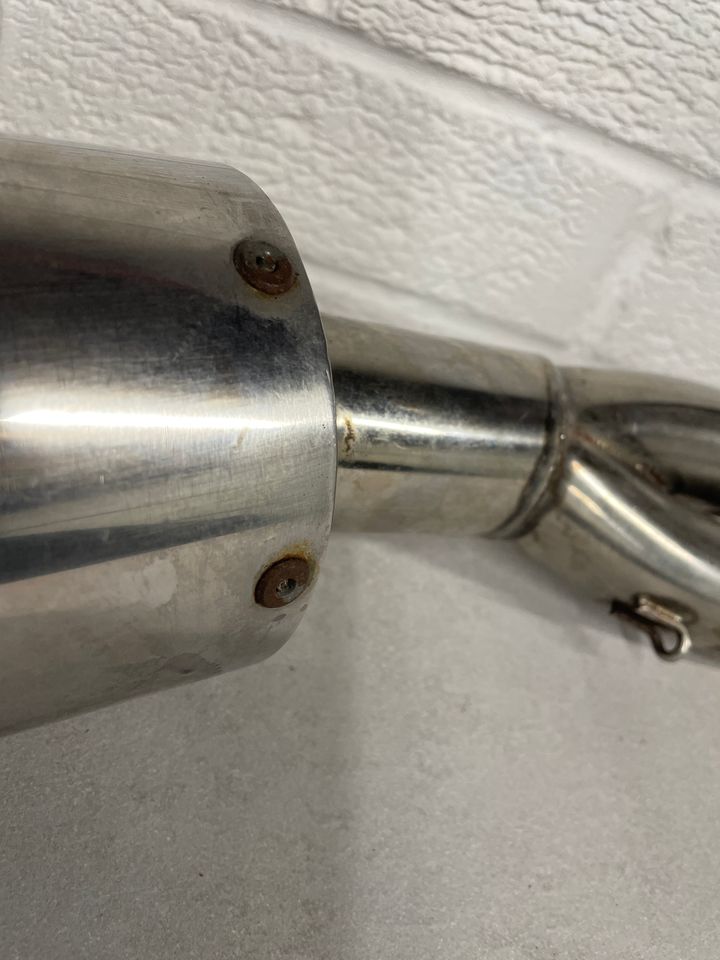
Good parts of the bike were that the carbs and front forks have both been re-built and it has freshly powder coated wheels and new tyres. The original anodised finish on the main sections of the frame is also still intact and in great condition, which is unusual. Bad parts were, it was absolutely flithy, didn't go into neutral, the OEM front brake disc centres had been badly re-painted at some point and I had no idea if it ran or not as it was laid up with the previous owner for around 4 years. The bike came with a period, stainless steel Ethos exhaust system fitted, which is apparently a replica of the HRC system. Initially, I was thinking of going back to an OEM exhaust, but on closer inspection it's in really good condition and sort of matches the system on the orginal Commonwealth bike I'm trying to replicate, so now think I'll be keeping it. The muffler on the Ethos exhaust is also a better match for the single seat unit I am intending to fit, as the OEM muffler has a second mounting bracket that attaches to the pillion footrest - which I will be removing entirely.
Having not taken the bike apart myself, it was a bit of a jigsaw puzzle trying to work out what parts from the boxes went where and what was missing, so I left the bike sitting in the garage while I did a lot of on-line research to try and figure it all out. A few weeks later and happy that I knew how to approach things, I was ready to attempt to start it up - just to check there were no major mechanical issues before I started the strip down.
Sprayed some fogging oil down the bores and left overnight before attempting the start. Cooling system filled, new plugs and battery fitted and a temporary fuel supply via a bottle hung from the garage ceiling. Somewhat surpsingly, and much to my relief, it fired up first time of asking and ran smoothly and smoke free after burning off the fogging oil. I also figured out the issue with it not going into neutral, as the gear change arm was fitted upside down.
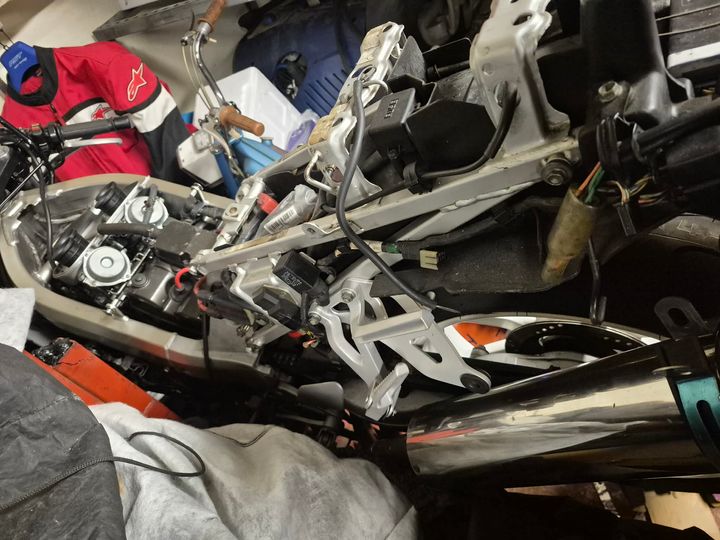
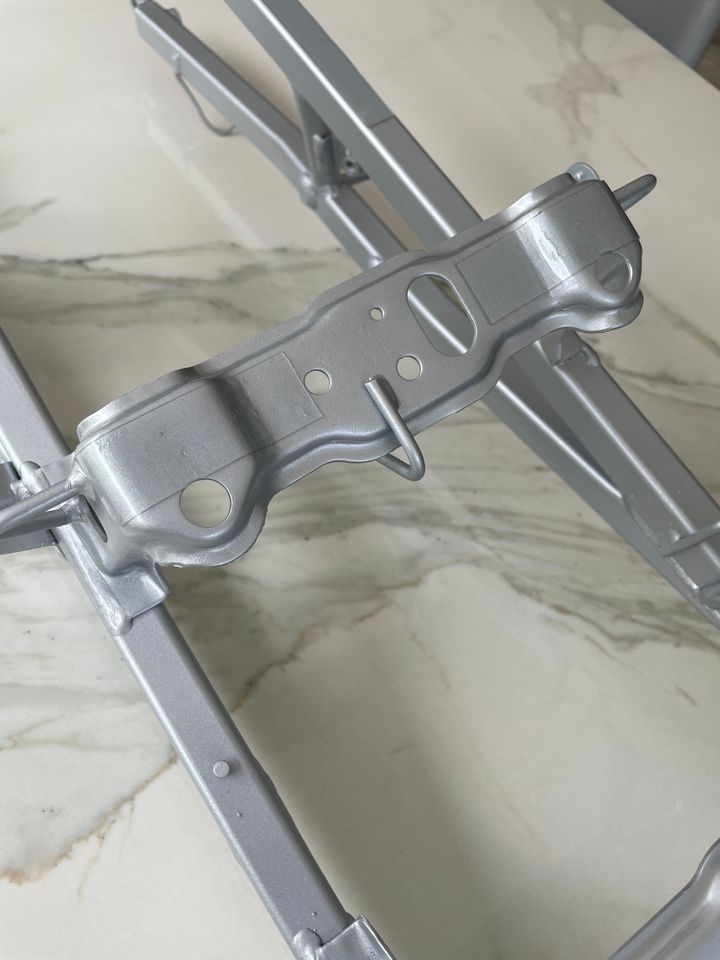
That out of the way and my mind at rest from a mechanical perspective, I started the stip down over the easter weekend and now plan a nut and bolt restoration before getting new fairings painted to match the Commonwealth Racing Team livery. I sent away the front discs for re-finishing, which came back just in time to test fit prior to the strip down. First job was to remove the wiring loom and sub-frame, then moved onto the cooling system, lights and instruments, exhaust, air box, rear brake and foot rests. Lots of reference photos taken during the strip down to help me when it all goes back together. Getting the loom off was definitely the worst part. Amazingly, I've had no seized bolts or fittings so far, apart from the head rounding off on one of the ignition switch mounting screws - which was one of the few new parts fitted to the bike.
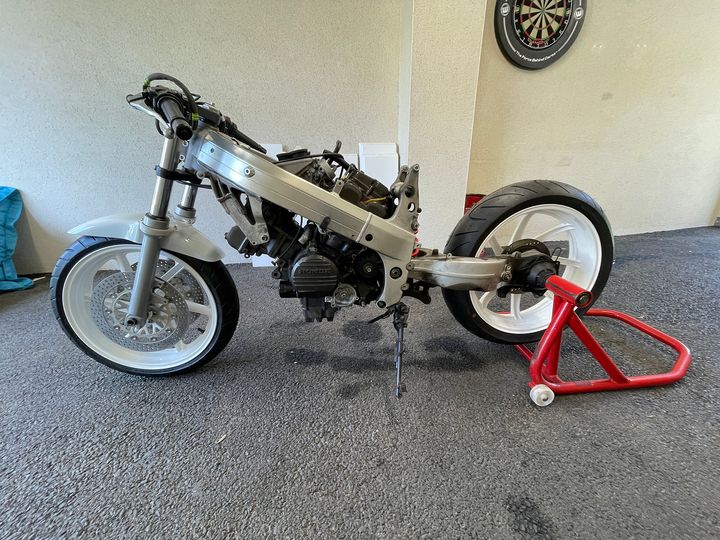
This is how it looks as of today. Just the carbs and swing arm assembly to remove and then the engine to drop. I'm keeping the forks attached, as these were rebuilt by the previous owner and just need a bit of clean up, which I can easily do in-situ.
Will post up more progress pictures as and when I get the time.
Fast forward 30 or so years and I recently bought an unfinished NC30 project as the basis for a rebuild and attempt to recreate the same livery onto a road bike. I know it's only a NC30 and not a RC30, but those are way beyond my price range. The basis for my project is a 1989 grey import. Being a 1989 model year, I'm sure the Honda purists would prefer I retain the Type 1 colours, but there are already so many of these around that I don't feel the need to restore yet another one the same way. I can always return it back to Type 1 colours at a later date, as I'm keeping hold of the original fairings and will use replica panels for the new paint job.
Here's how the bike came to me - mostly complete, but a lot of various parts in boxes and a few bits and pieces missing completely.
Good parts of the bike were that the carbs and front forks have both been re-built and it has freshly powder coated wheels and new tyres. The original anodised finish on the main sections of the frame is also still intact and in great condition, which is unusual. Bad parts were, it was absolutely flithy, didn't go into neutral, the OEM front brake disc centres had been badly re-painted at some point and I had no idea if it ran or not as it was laid up with the previous owner for around 4 years. The bike came with a period, stainless steel Ethos exhaust system fitted, which is apparently a replica of the HRC system. Initially, I was thinking of going back to an OEM exhaust, but on closer inspection it's in really good condition and sort of matches the system on the orginal Commonwealth bike I'm trying to replicate, so now think I'll be keeping it. The muffler on the Ethos exhaust is also a better match for the single seat unit I am intending to fit, as the OEM muffler has a second mounting bracket that attaches to the pillion footrest - which I will be removing entirely.
Having not taken the bike apart myself, it was a bit of a jigsaw puzzle trying to work out what parts from the boxes went where and what was missing, so I left the bike sitting in the garage while I did a lot of on-line research to try and figure it all out. A few weeks later and happy that I knew how to approach things, I was ready to attempt to start it up - just to check there were no major mechanical issues before I started the strip down.
Sprayed some fogging oil down the bores and left overnight before attempting the start. Cooling system filled, new plugs and battery fitted and a temporary fuel supply via a bottle hung from the garage ceiling. Somewhat surpsingly, and much to my relief, it fired up first time of asking and ran smoothly and smoke free after burning off the fogging oil. I also figured out the issue with it not going into neutral, as the gear change arm was fitted upside down.
That out of the way and my mind at rest from a mechanical perspective, I started the stip down over the easter weekend and now plan a nut and bolt restoration before getting new fairings painted to match the Commonwealth Racing Team livery. I sent away the front discs for re-finishing, which came back just in time to test fit prior to the strip down. First job was to remove the wiring loom and sub-frame, then moved onto the cooling system, lights and instruments, exhaust, air box, rear brake and foot rests. Lots of reference photos taken during the strip down to help me when it all goes back together. Getting the loom off was definitely the worst part. Amazingly, I've had no seized bolts or fittings so far, apart from the head rounding off on one of the ignition switch mounting screws - which was one of the few new parts fitted to the bike.
This is how it looks as of today. Just the carbs and swing arm assembly to remove and then the engine to drop. I'm keeping the forks attached, as these were rebuilt by the previous owner and just need a bit of clean up, which I can easily do in-situ.
Will post up more progress pictures as and when I get the time.
Edited by blade runner on Tuesday 7th April 15:44
Not had the time to drop the engine or remove the swing arm yet, so been working on restoring some parts that came off in the first part of the strip down.
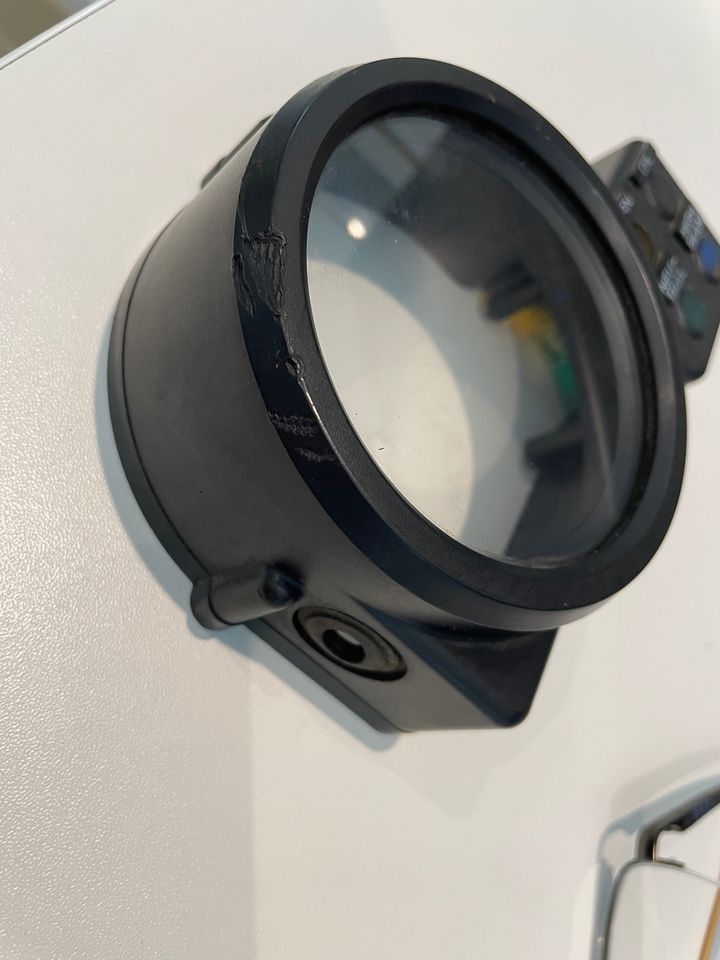
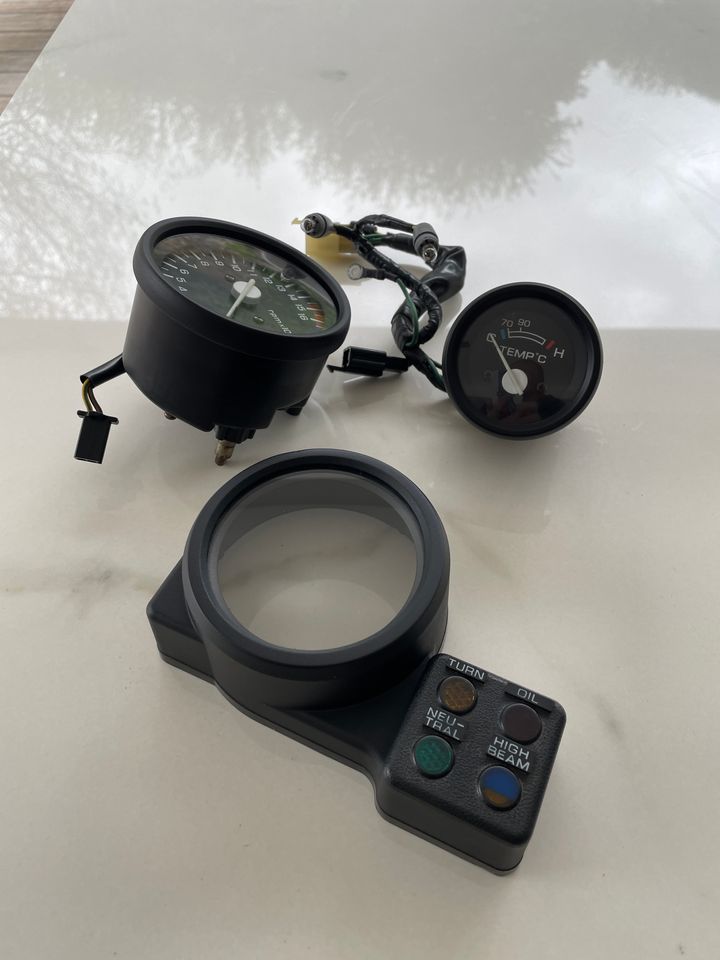
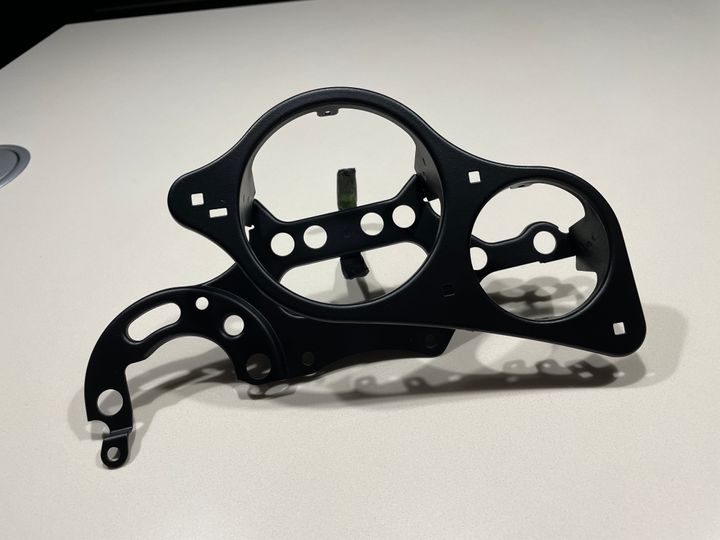
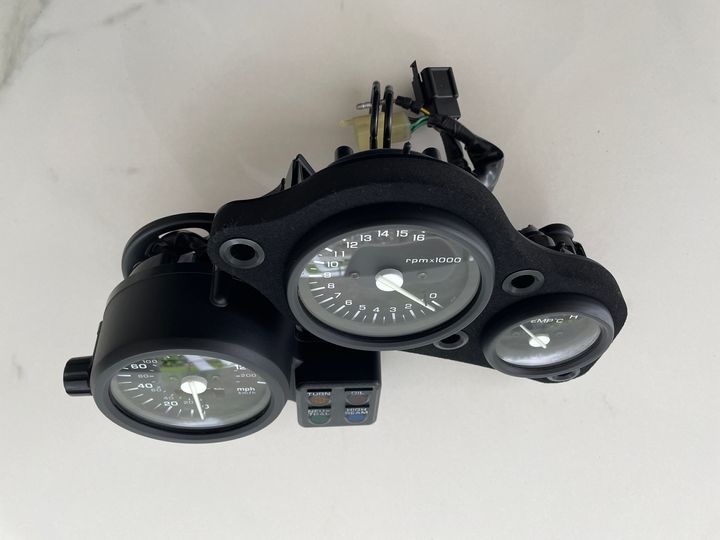
It seems quite common for these bikes to pick up gouges on the speedo housing, presumably when a bike gets dropped on the left side and the clocks hit the road. Mine certainly had some of these battle scars, and as I had the instrument cluster off and it needed a good clean, I figured I would take the time to recitfy this and also update the kmph speedo face to a new mph version from Lockwood.
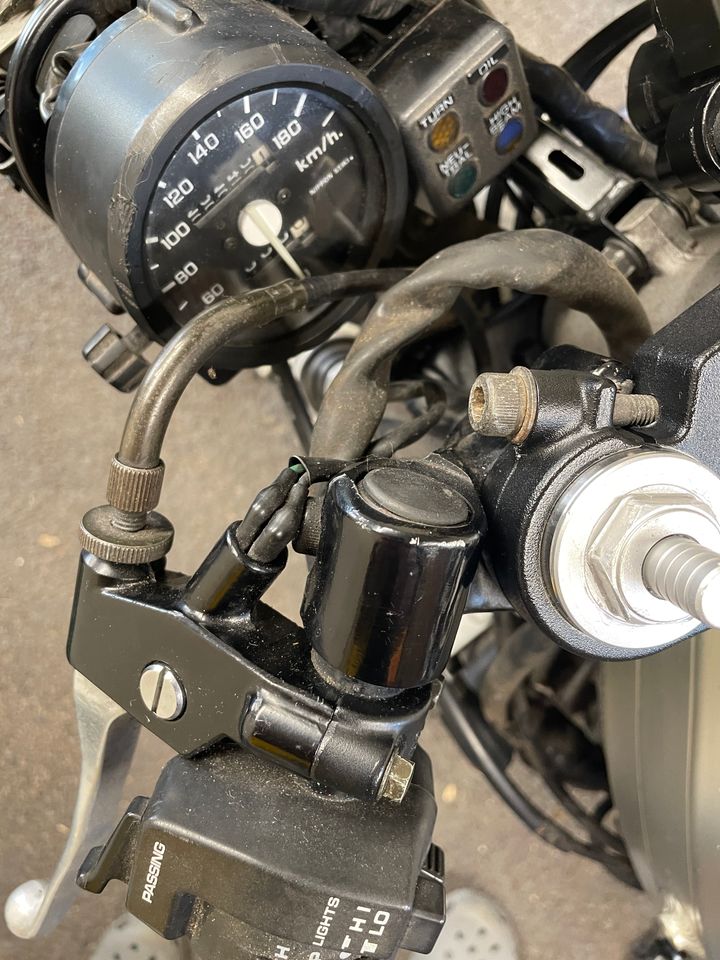
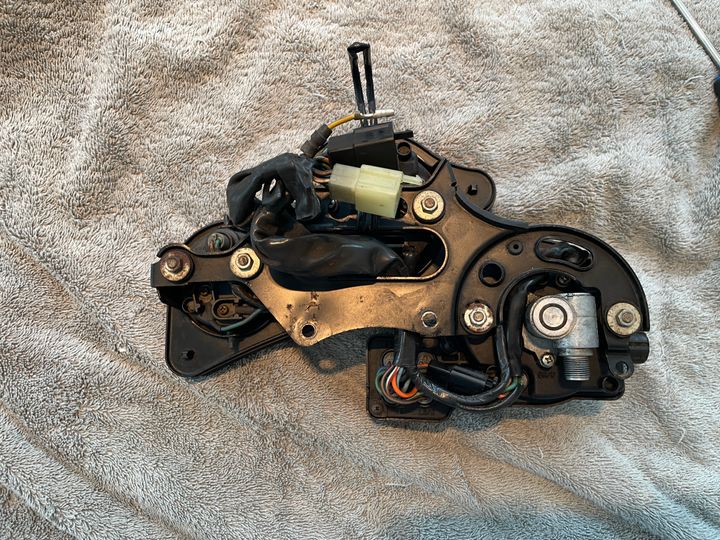
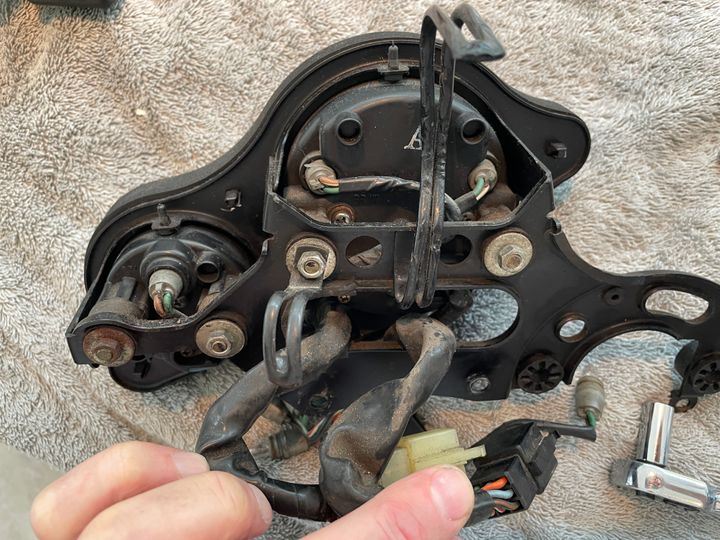
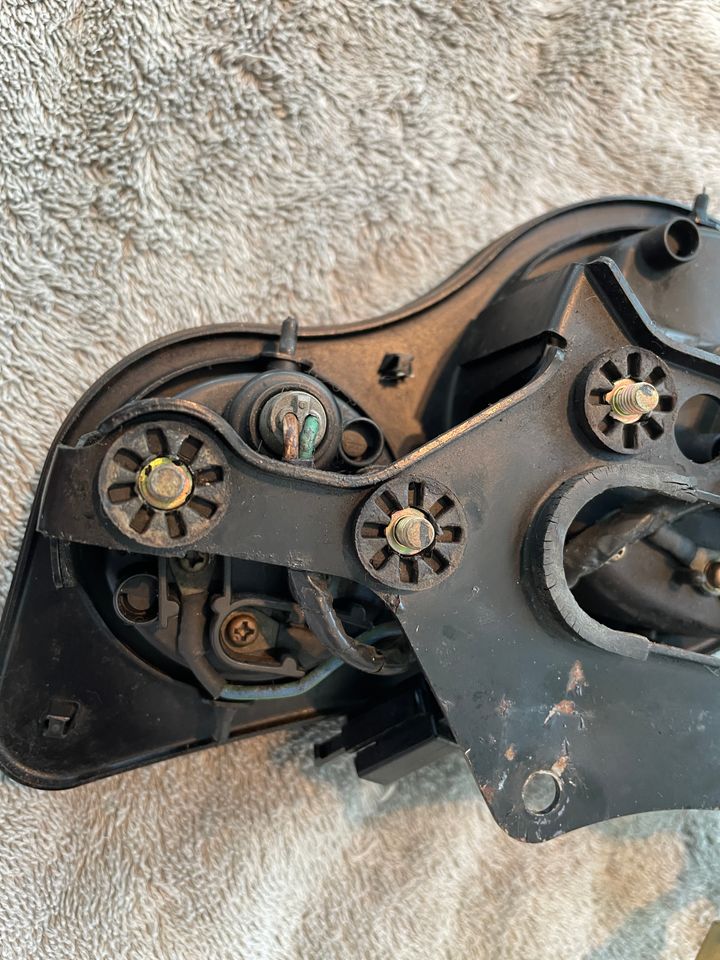
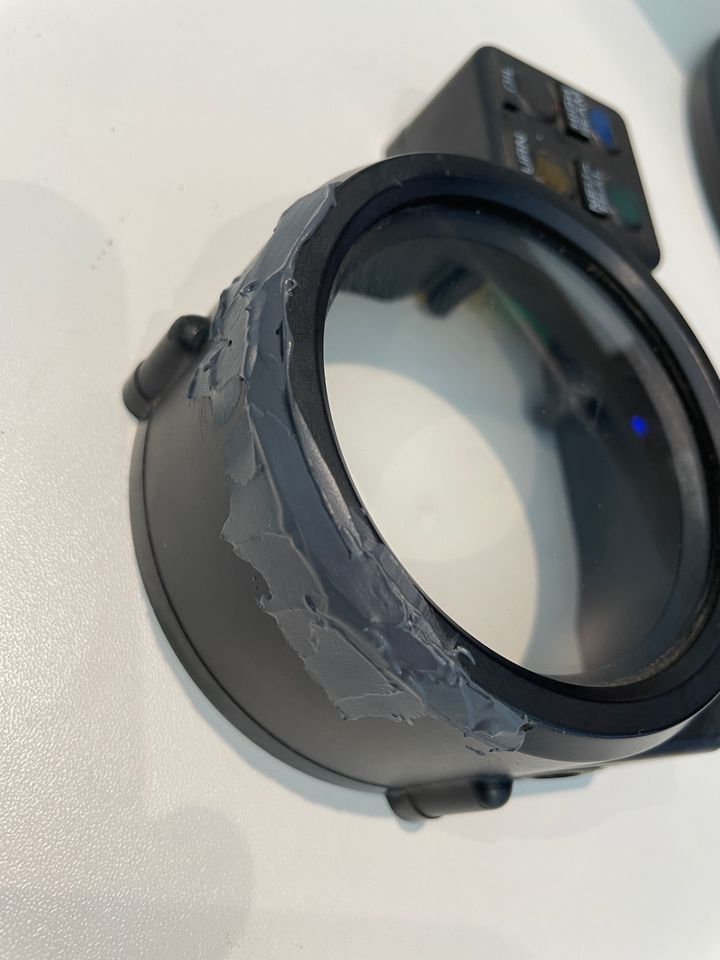
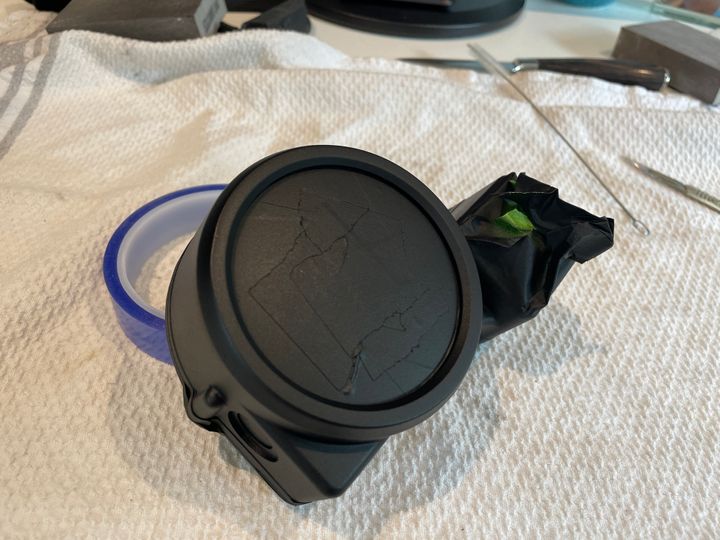
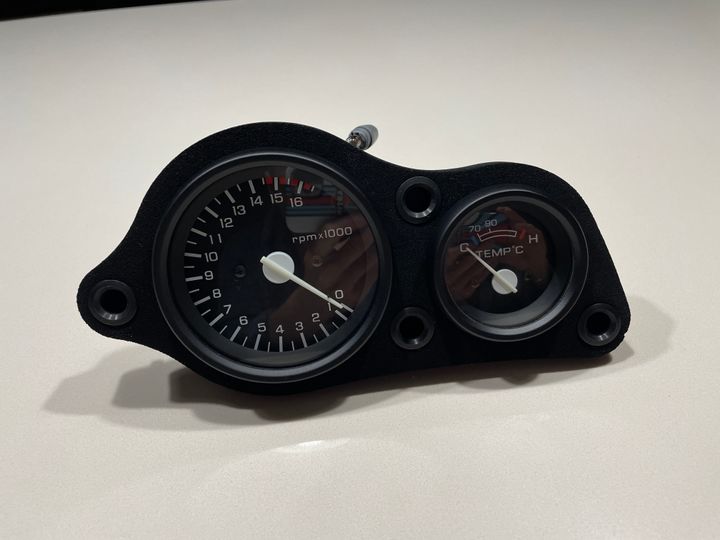
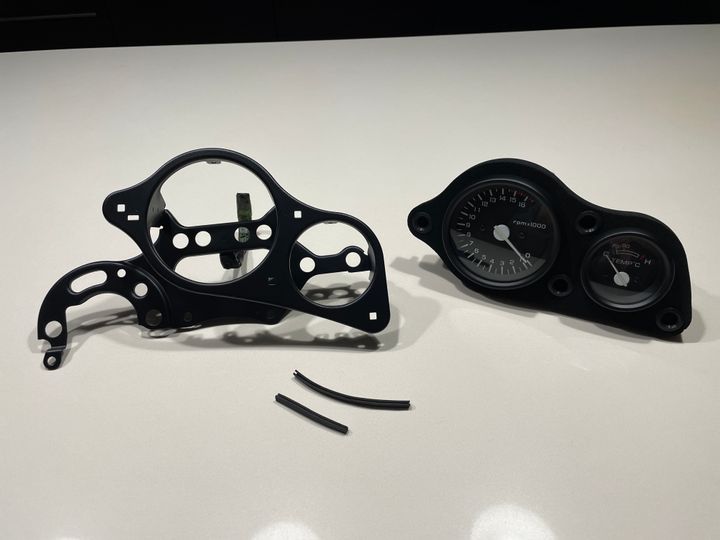
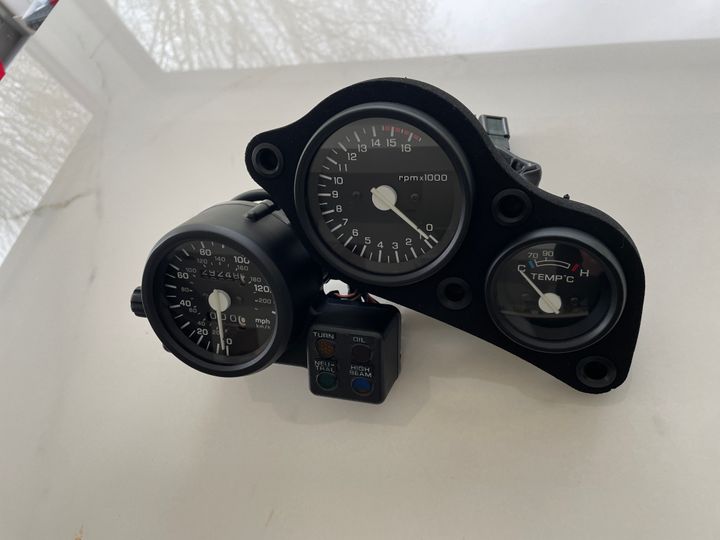
So, clocks removed from the backing plate, disassembled from the wiring loom and everything cleaned up. Speedo housing removed, filled with plastic filler, sanded back, then carefully masked up and painted with several coats of matt black paint. Wasn't really necessary, but I also painted the bezels on the rev counter and temperature guage at the same time, so they all have exactly the same finish. The original backing plate was fairly badly bent out of shape in places, so I bought a better one off eBay, cleaned it up and re-painted. I also fitted new rubber U sections in a couple of places where the loom sits against the backing plate, as the old ones were hard and cracked. The new speedo face took some time and attention to fit - getting the pointer and the stop pin off the old speedo were especially fiddy. Then all assembled back together with some new washers and nuts and it's ready to go back on the bike when it's time.
It seems quite common for these bikes to pick up gouges on the speedo housing, presumably when a bike gets dropped on the left side and the clocks hit the road. Mine certainly had some of these battle scars, and as I had the instrument cluster off and it needed a good clean, I figured I would take the time to recitfy this and also update the kmph speedo face to a new mph version from Lockwood.
So, clocks removed from the backing plate, disassembled from the wiring loom and everything cleaned up. Speedo housing removed, filled with plastic filler, sanded back, then carefully masked up and painted with several coats of matt black paint. Wasn't really necessary, but I also painted the bezels on the rev counter and temperature guage at the same time, so they all have exactly the same finish. The original backing plate was fairly badly bent out of shape in places, so I bought a better one off eBay, cleaned it up and re-painted. I also fitted new rubber U sections in a couple of places where the loom sits against the backing plate, as the old ones were hard and cracked. The new speedo face took some time and attention to fit - getting the pointer and the stop pin off the old speedo were especially fiddy. Then all assembled back together with some new washers and nuts and it's ready to go back on the bike when it's time.

Some ive noticed have a little bracket on the bars to hold the clutch cable off the speedo housing.
What are you doing with the fairings?
I spent 8months restoring mechanicals then sent the fairings off and waited a year for them to be repaired and painted.
In hindsight would have sent the fairings off first whilst I refurbished the mechanical parts.
What are you doing with the fairings?
I spent 8months restoring mechanicals then sent the fairings off and waited a year for them to be repaired and painted.
In hindsight would have sent the fairings off first whilst I refurbished the mechanical parts.
twibs said:
Some ive noticed have a little bracket on the bars to hold the clutch cable off the speedo housing.
What are you doing with the fairings?
I spent 8months restoring mechanicals then sent the fairings off and waited a year for them to be repaired and painted.
In hindsight would have sent the fairings off first whilst I refurbished the mechanical parts.
You mean like this?What are you doing with the fairings?
I spent 8months restoring mechanicals then sent the fairings off and waited a year for them to be repaired and painted.
In hindsight would have sent the fairings off first whilst I refurbished the mechanical parts.
Nothing like that on my bike, but seems like a good idea if I can track one down.
I've bought some Tyga fairings for the new paint job as I want to keep the original fairings in their Type 1 colours, in case I want to put it back to OEM at any point in the future to sell. The Tyga fairings have not arrived yet, but when they do I intend to fit to the bike, make any adjustments required to get a decent fit, strike the paint lines and then send off for paint. Might take a while, so hopefully while they are getting painted, I can get the frame and mechanicals all restored and re-fitted and fit the new fairings as the last job.
Slow but steady progress gradually restoring the various parts that have been removed to date.
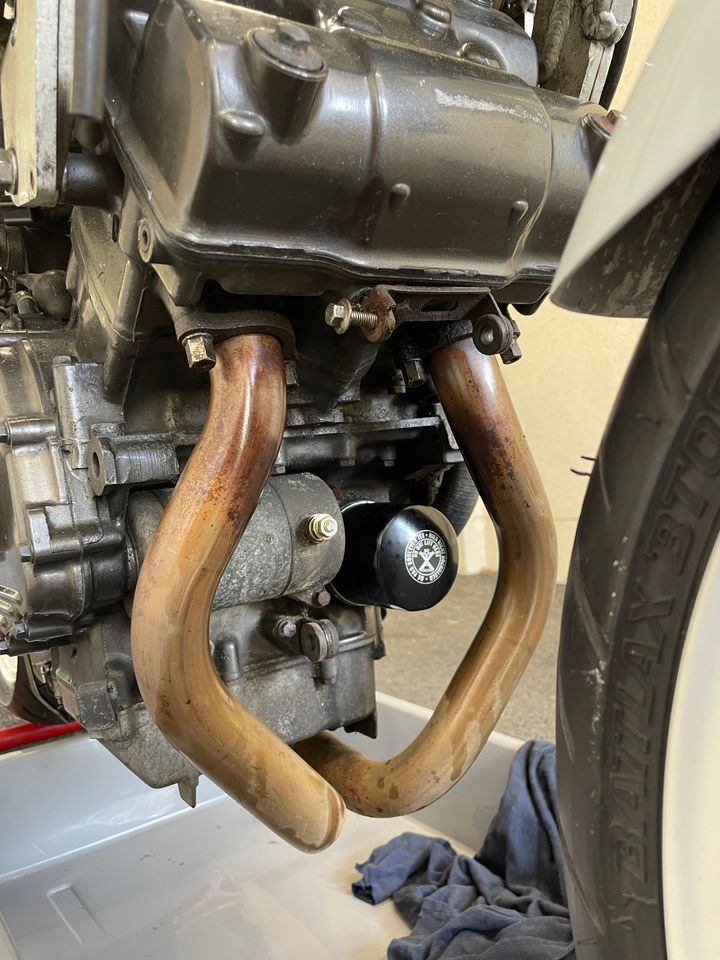
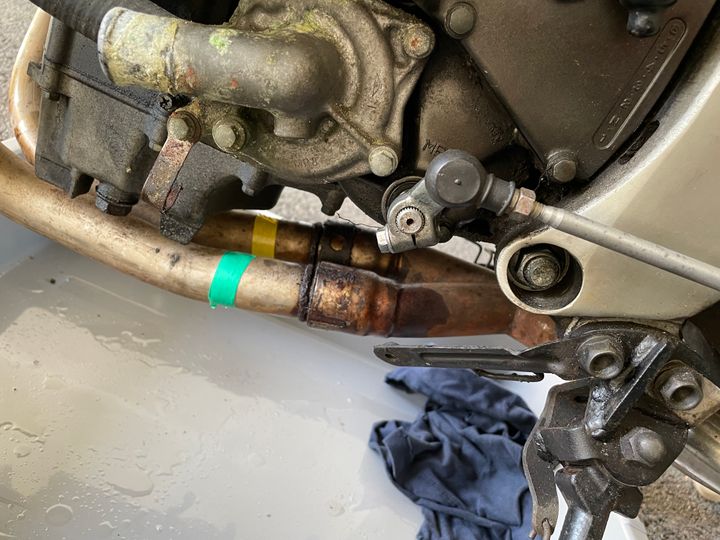
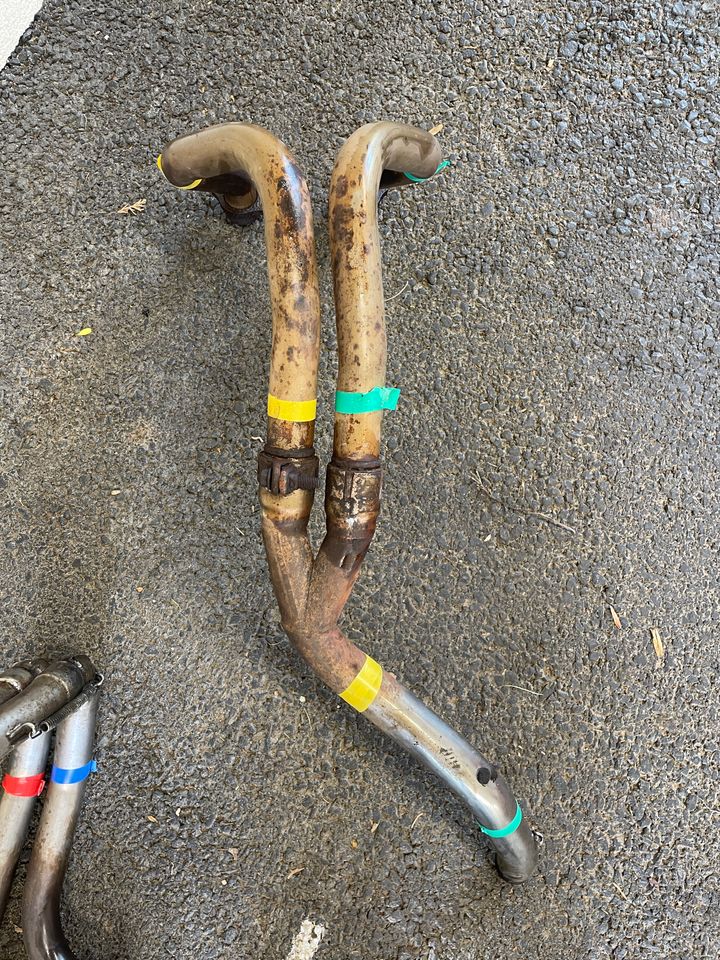
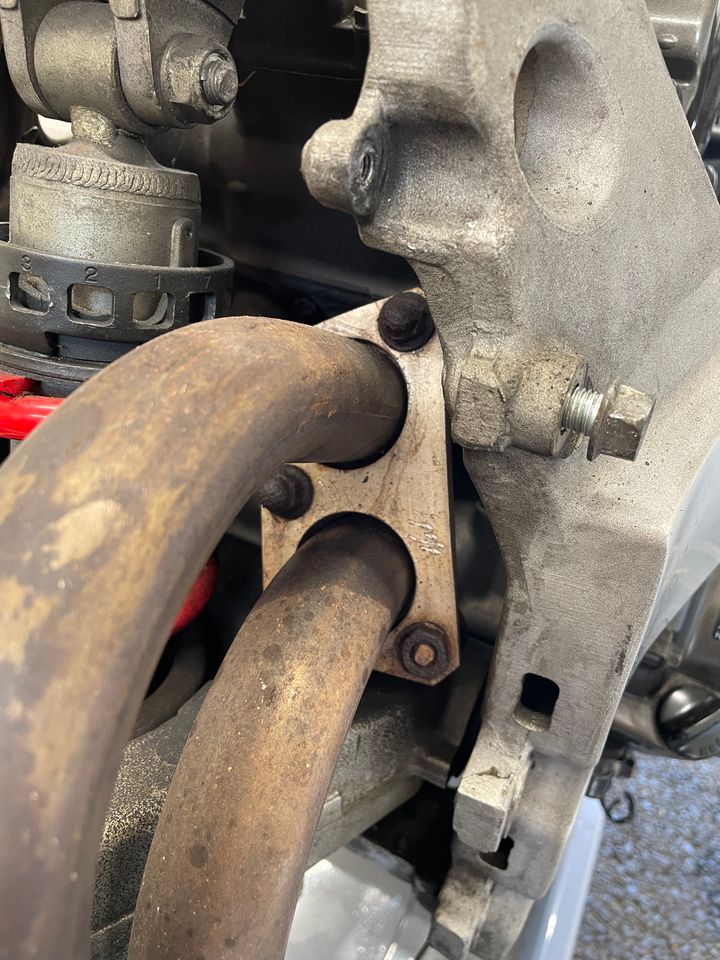
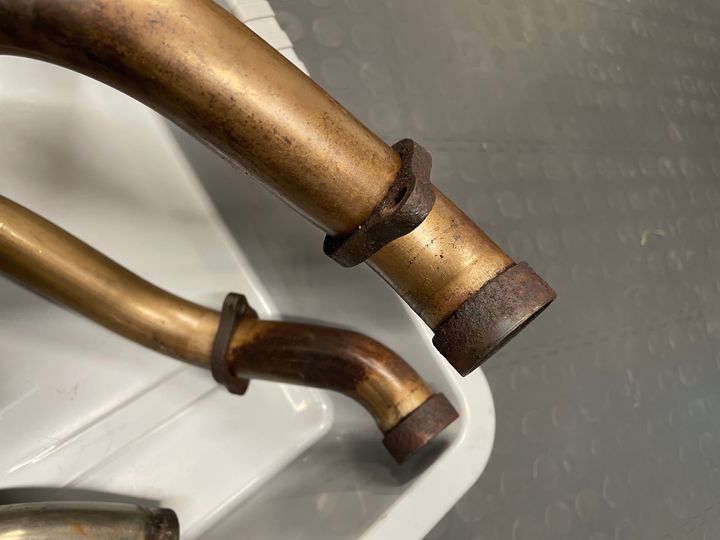
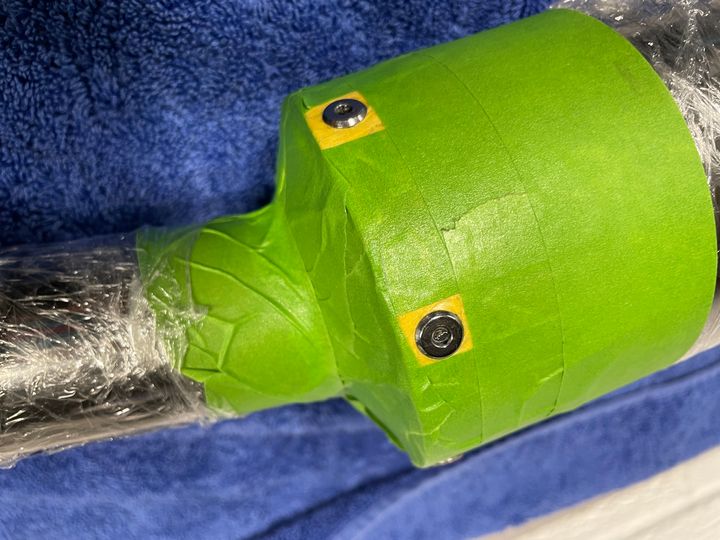
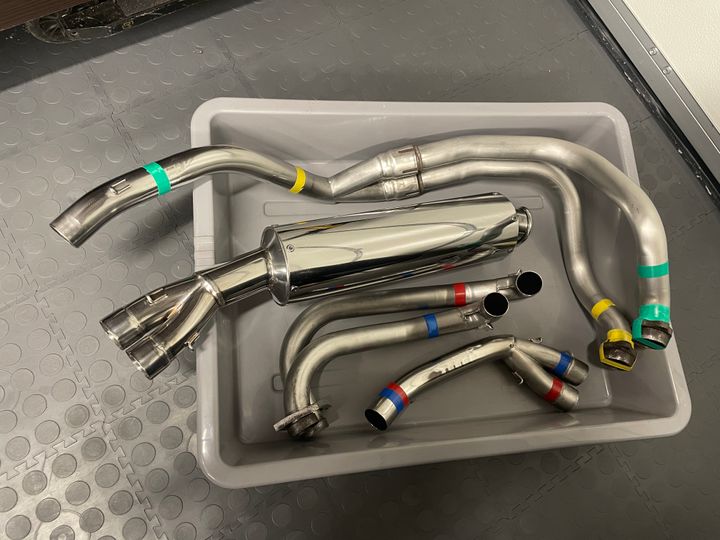
Next up was the period Ethos exhaust system, which looked to be in fairly decent condition when I stripped the bike down. Plenty of WD40 left overnight on all the studs and clamps, and luckily no problems getting everything off. There was some corrosion around the joints where the packing pieces were located and the steel clamps were toast. Also, the rivets on the can were fairly rusty, so these were obviously not stainless steel like the rest of the system. I marked everything up with coloured electrical tape prior to removal, as I find that however obvious it all looks when taking apart, it never seems to be quite so logical when assembling again.
Pipes were all cleaned with Harpic toilet cleaner to begin with to ger the worst of the dirt off, then a lot of time spent with a Dremmel to get the surface back to a decent finish. Finally, a manual rub down with various grades of Scotch Brite pads to get a brushed finish on the non-visible parts of the system, and a DA polisher and Autosol to get a mirror finish back on all the visible parts.
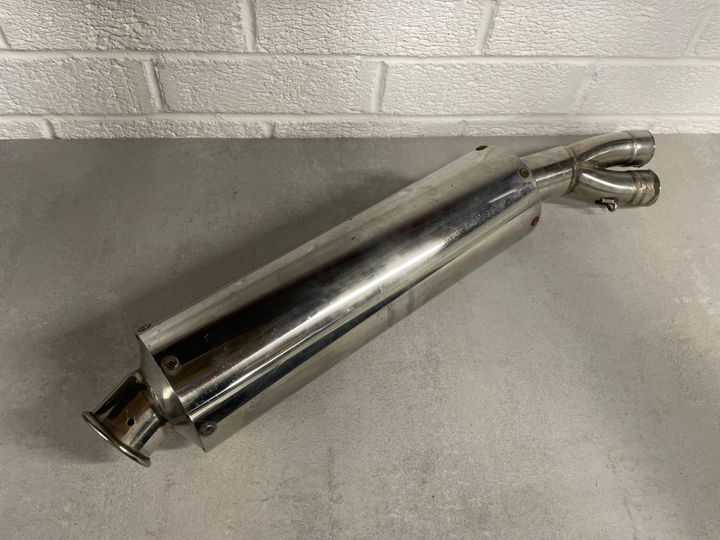
The can I just polished back to a mirror finish with the DA and for the rivet heads, I removed the rust, masked up each rivet head carefully and then applied some clear coat to seal them. Hopefully, that should stop them corroding again. So, apart from some new stainless steel clamps that are on order, it's all finished and ready to go back on the bike.
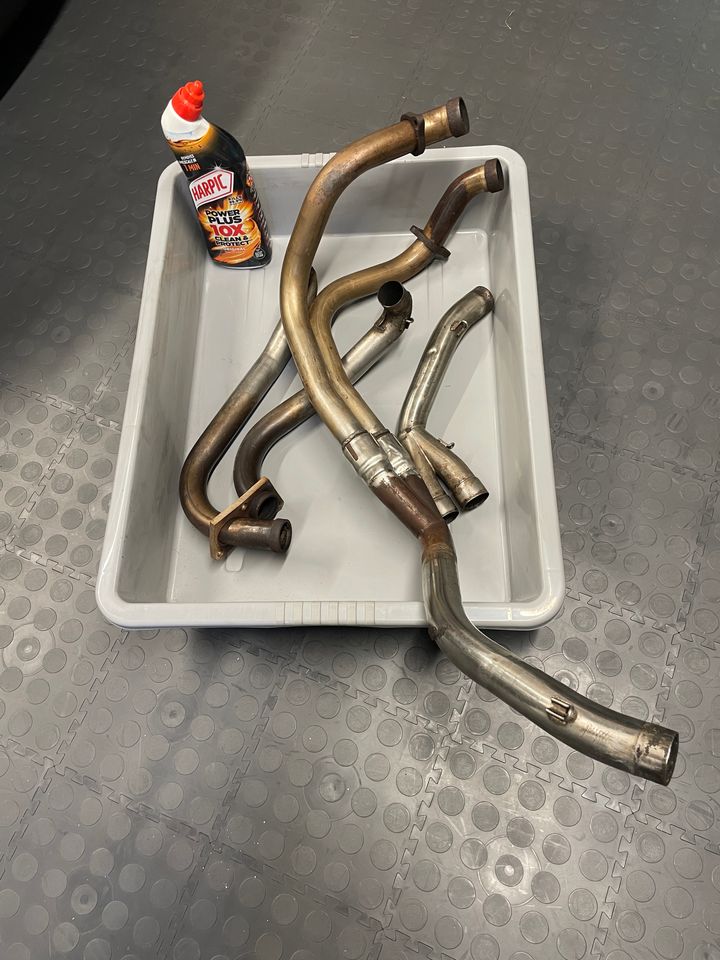
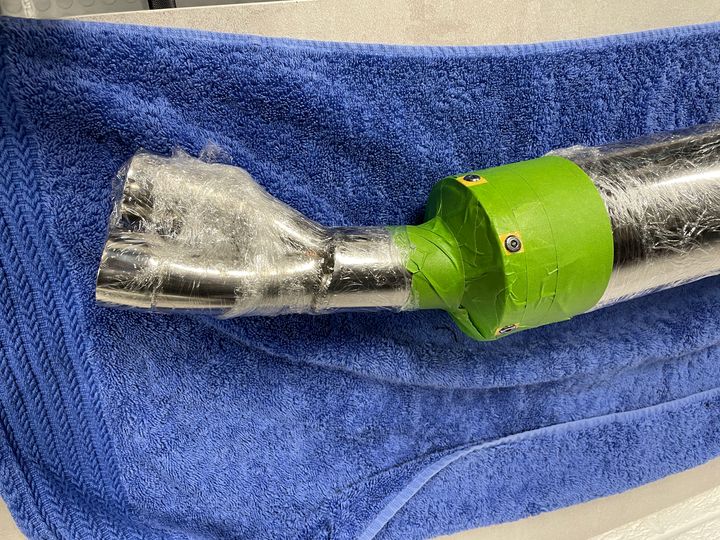
Next up was the period Ethos exhaust system, which looked to be in fairly decent condition when I stripped the bike down. Plenty of WD40 left overnight on all the studs and clamps, and luckily no problems getting everything off. There was some corrosion around the joints where the packing pieces were located and the steel clamps were toast. Also, the rivets on the can were fairly rusty, so these were obviously not stainless steel like the rest of the system. I marked everything up with coloured electrical tape prior to removal, as I find that however obvious it all looks when taking apart, it never seems to be quite so logical when assembling again.
Pipes were all cleaned with Harpic toilet cleaner to begin with to ger the worst of the dirt off, then a lot of time spent with a Dremmel to get the surface back to a decent finish. Finally, a manual rub down with various grades of Scotch Brite pads to get a brushed finish on the non-visible parts of the system, and a DA polisher and Autosol to get a mirror finish back on all the visible parts.
The can I just polished back to a mirror finish with the DA and for the rivet heads, I removed the rust, masked up each rivet head carefully and then applied some clear coat to seal them. Hopefully, that should stop them corroding again. So, apart from some new stainless steel clamps that are on order, it's all finished and ready to go back on the bike.
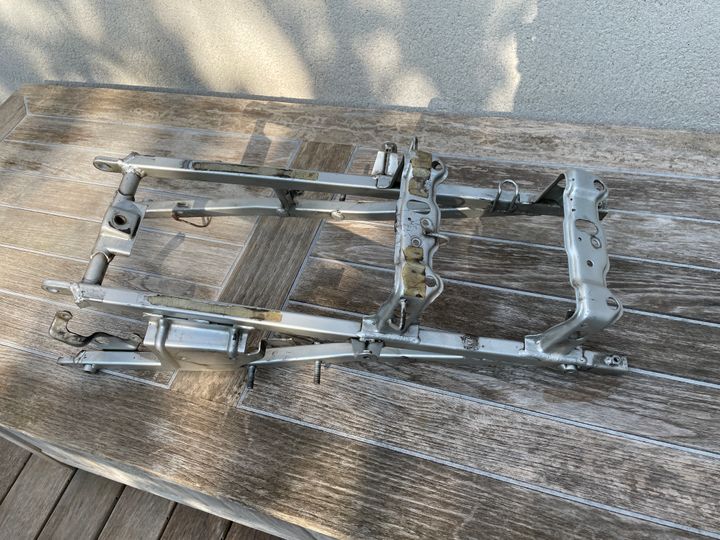
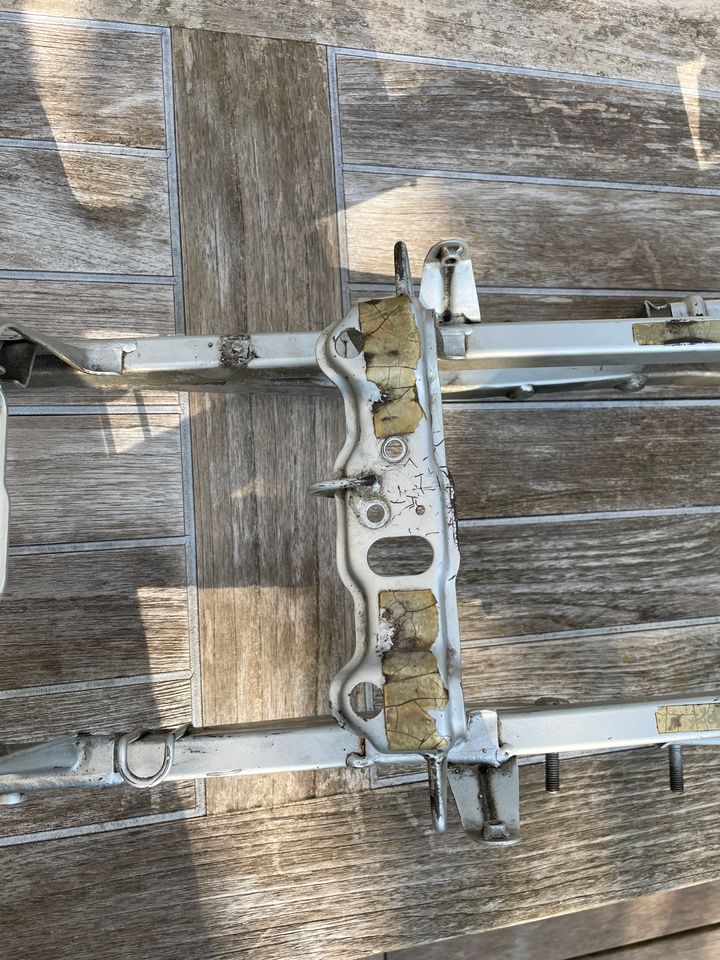
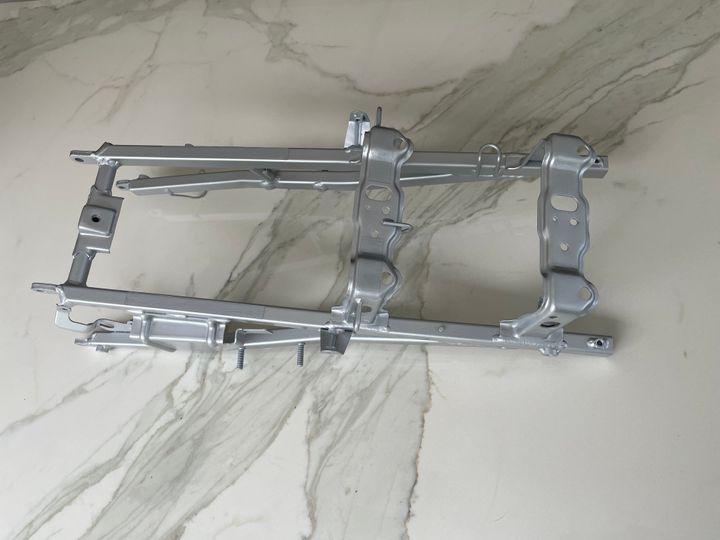
Subframe was next on the list this weekend. I don't have access to a sand blaster, so it was de-greased and washed to get the worst of the dirt off, then any rust patches sanded back and then rubbed down all over up prior to painting. A coat of etch primer to start, then a couple of coats of silver and clear coat to finish. Not sure if they are really necessay, but I anyway re-instated the very cracked and yellowed plastic bumper strips using some 1mm clear PVC sheet off Amazon and double sided tape.
Before
After
Before
After
Bob_Defly said:
Nice job!
Silly question. On metal like this that has already shown corrosion once, does removing the rust and brushing the finish leave it open to corroding again? Is there anything you can put on it to stop it rusting up again in the future?
There shouldn't be a problem if you can get it back to pristine steel.Silly question. On metal like this that has already shown corrosion once, does removing the rust and brushing the finish leave it open to corroding again? Is there anything you can put on it to stop it rusting up again in the future?
If you can't, there are numerous rust converters. They often use phosphoric acid, which converts rust into an inert black coating.
Hoping the new fairings will arrive within the next couple of weeks, so looking at some options for the paint job.
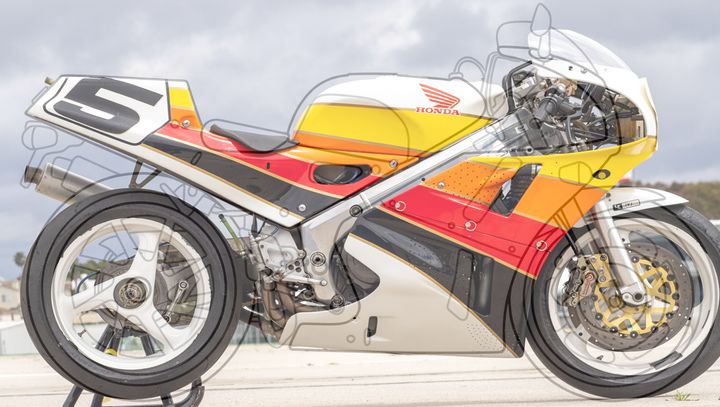
Obviously, I can't replicate the RC30 livery exactly the same on an NC30 due to the proportions being slightly different. So, I began by finding a very old and pixelated line drawing of the NC30 on-line, upscaled it and then overlaid it on top of a picture of an RC30 in Commonwealth colours to get an idea of where to start. The treatment around the tail unit where the various coloured bands converge felt like the most crucial bit to get right, so I aligned things here as the starting point.
That done, I printed out a few copies of the line drawing and then a bit of old-fashioned colouring in with some sharpies until I was generally happy with how things looked.

Finally, I used an AI app to convert my coloured drawing into something that resembled a real motorcycle. The results aren't an exact match to how an NC30 looks (for some reason, I can't get the AI to replcate the single sided swing arm or the correct style of front forks and fender), but the proportions are correct and once I added in the HONDA and Force V4 graphics on the side panels in Photoshop, it's close enough to get an idea of how it might look when finished.
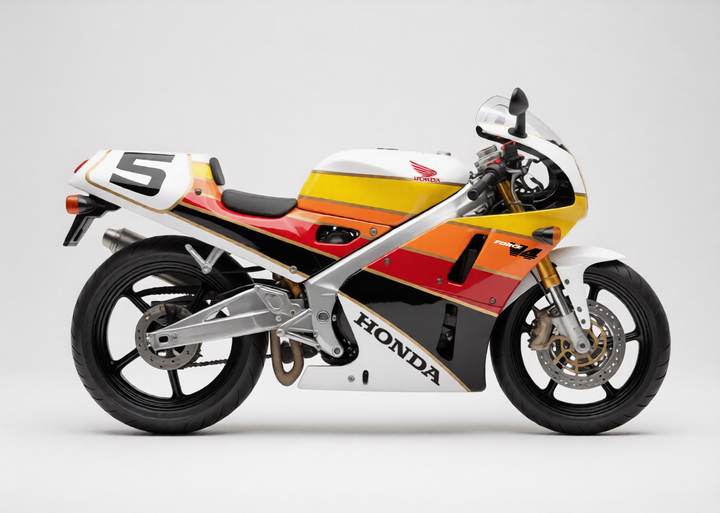
Now, a decision to be made... If I want to replicate the original RC30 Commonwealth livery as closely as possible, then it would be a black race number 5 on a white background on the tail unit. But, I've heard that race numbers on road bikes are a bit cringe-worthy, so I could instead go with an OEM style tail unit design with just the VFR400R text instead of a race number. I was also slightly worried that an all-white tail unit could look a little odd, so made a couple of images with white text on black instead to see if that looked better.
Now left with four options to consider - with or without race number and either black text on white or white text on black.
Option 1 : With Race Number - Black Text on White
Option 2 : With Race Number - White Text on Black
Option 3 : Without Race Number - Black Text on White

Option 4 : Without Race Number - White Text on Black
I'm leaning towards the replicating the original Commonwealth livery as close as possible as per Option 1, seeing as this was the where the idea first started. But then I also can see some logic in creating a bike that would look like something Honda might have done themselves if they had created a limited edition, road-going NC30 in the Commonwealth livery. In this case, I prefer Option 4 - as I think this looks more balanced visually with a predominantly black tail unit.
If anyone wants to express an opinion on what looks best, I'd be happy to take some advice!
Obviously, I can't replicate the RC30 livery exactly the same on an NC30 due to the proportions being slightly different. So, I began by finding a very old and pixelated line drawing of the NC30 on-line, upscaled it and then overlaid it on top of a picture of an RC30 in Commonwealth colours to get an idea of where to start. The treatment around the tail unit where the various coloured bands converge felt like the most crucial bit to get right, so I aligned things here as the starting point.
That done, I printed out a few copies of the line drawing and then a bit of old-fashioned colouring in with some sharpies until I was generally happy with how things looked.
Finally, I used an AI app to convert my coloured drawing into something that resembled a real motorcycle. The results aren't an exact match to how an NC30 looks (for some reason, I can't get the AI to replcate the single sided swing arm or the correct style of front forks and fender), but the proportions are correct and once I added in the HONDA and Force V4 graphics on the side panels in Photoshop, it's close enough to get an idea of how it might look when finished.
Now, a decision to be made... If I want to replicate the original RC30 Commonwealth livery as closely as possible, then it would be a black race number 5 on a white background on the tail unit. But, I've heard that race numbers on road bikes are a bit cringe-worthy, so I could instead go with an OEM style tail unit design with just the VFR400R text instead of a race number. I was also slightly worried that an all-white tail unit could look a little odd, so made a couple of images with white text on black instead to see if that looked better.
Now left with four options to consider - with or without race number and either black text on white or white text on black.
Option 1 : With Race Number - Black Text on White
Option 2 : With Race Number - White Text on Black
Option 3 : Without Race Number - Black Text on White
Option 4 : Without Race Number - White Text on Black
I'm leaning towards the replicating the original Commonwealth livery as close as possible as per Option 1, seeing as this was the where the idea first started. But then I also can see some logic in creating a bike that would look like something Honda might have done themselves if they had created a limited edition, road-going NC30 in the Commonwealth livery. In this case, I prefer Option 4 - as I think this looks more balanced visually with a predominantly black tail unit.
If anyone wants to express an opinion on what looks best, I'd be happy to take some advice!
I'm with option two as well. However, it depends on how close you want to stick to the original concept and your idea. Depending on the skills of the person doing the spraying/design there may be a way to include some shading to make the white number board more appealing.
Also, you can tweak the design to include a few period correct, well positioned 'HRC' logos as well. I've done this with my RVF, VFR and NSR on the top of the fuel tank and also on the top of the tail unit.
Have a few beers - I find that usually helps with creativity.
Also, you can tweak the design to include a few period correct, well positioned 'HRC' logos as well. I've done this with my RVF, VFR and NSR on the top of the fuel tank and also on the top of the tail unit.
Have a few beers - I find that usually helps with creativity.
Gassing Station | Biker Banter | Top of Page | What's New | My Stuff