
Fitting a new engine loom for MegaSquirt.
Discussion


I am sure there are several of you who want to go down the MS route.
If so, the best way forward is to chuck all the old wiring in the bin and fit a complete loom.
This reduces the amount of wiring in the bay, tidies up the installation no end and decreases the amount of future problems all in one hit!
First, disconnect the battery.
Then, disconnect all the engine electrics.
Disconnect the brown and the white multipin connectors that can be accessed from the passenger footwell.
Carefully pull the wiring loom into the passenger footwell and remove!
You now have no electrics to the engine, that's a good thing, for now!
Replacing the new loom is the same as disconnecting just neater with less wiring!
It really is easy and enjoyable, no really .
.
New loom.


loom and grommet removed through bulkhead, (just below radio).

Snap on all the new connectors.

Bolt the earths to the back of the head, (trickiest bit on a facelift!).

New loom through the bulkhead with one of the 2 multipin connectors just visable. These are snapped together and pushed out the way behind the radio.

New loom pulled through bulkhead, (hole is behind nearside head).

Remove inner wing panel, (on facelift models only I believe) to gain access to inner footwell to pull through wires to wideband and rad fans.

Footwell showing MS ECU before tidying.

New relay block and rev counter drive in their new home under the dash flap.

New P38 coil pack in position.

Carpets in place. Wideband in "temporary" position and will find its way to the dash one day!

Business end.
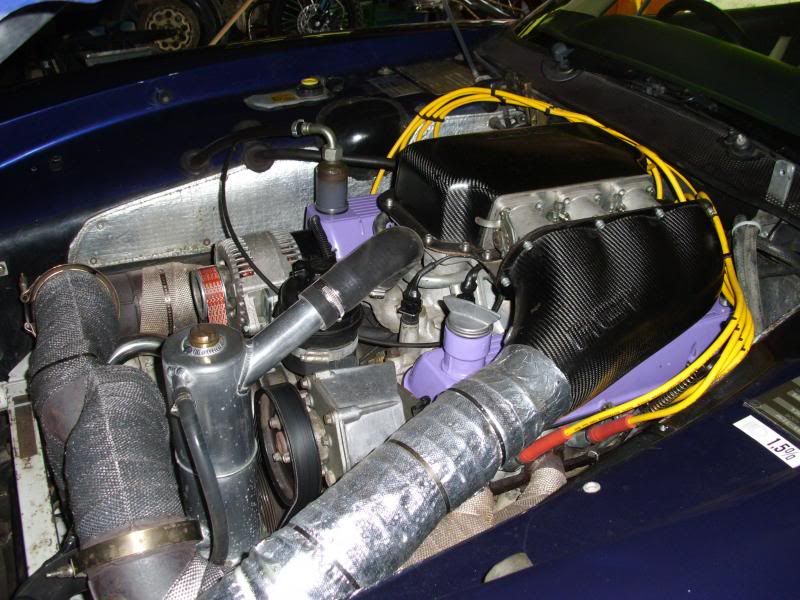
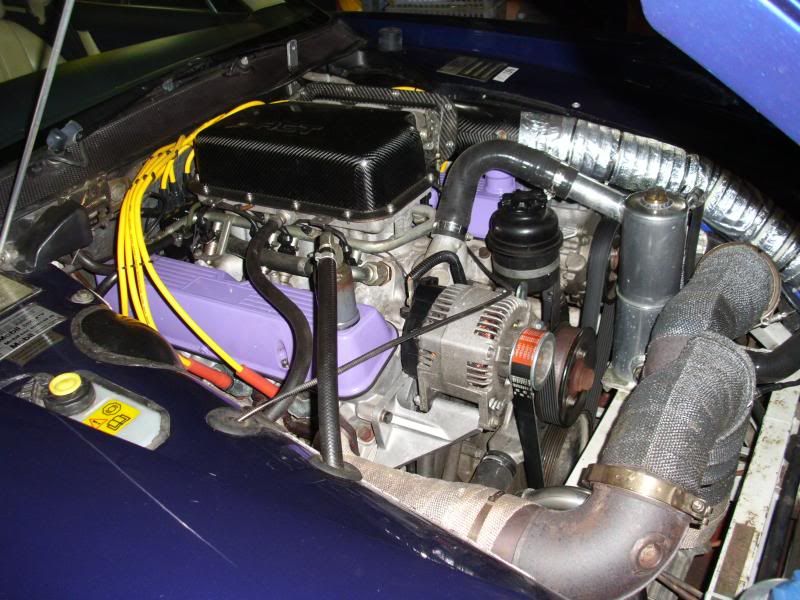
I removed the wiring to the otter switch as it is no longer needed.
I ran the wiring to the crank sensor, (out of sight). This runs down the nearside of the block.
The feed to the starter motor was dropped down behind the offside head at the bulkhead covered in a plastic shroud and connected to the solinoid.
All wiring was kept neat and out of sight as possible.
The feed to the rads was taken into the nose cone where the existing feed was disconnected to the fans and the new conected.
I'm sure I missed out a few things but you get the general idea!
If so, the best way forward is to chuck all the old wiring in the bin and fit a complete loom.
This reduces the amount of wiring in the bay, tidies up the installation no end and decreases the amount of future problems all in one hit!
First, disconnect the battery.
Then, disconnect all the engine electrics.
Disconnect the brown and the white multipin connectors that can be accessed from the passenger footwell.
Carefully pull the wiring loom into the passenger footwell and remove!
You now have no electrics to the engine, that's a good thing, for now!
Replacing the new loom is the same as disconnecting just neater with less wiring!
It really is easy and enjoyable, no really
.New loom.


loom and grommet removed through bulkhead, (just below radio).

Snap on all the new connectors.

Bolt the earths to the back of the head, (trickiest bit on a facelift!).

New loom through the bulkhead with one of the 2 multipin connectors just visable. These are snapped together and pushed out the way behind the radio.

New loom pulled through bulkhead, (hole is behind nearside head).

Remove inner wing panel, (on facelift models only I believe) to gain access to inner footwell to pull through wires to wideband and rad fans.

Footwell showing MS ECU before tidying.

New relay block and rev counter drive in their new home under the dash flap.

New P38 coil pack in position.

Carpets in place. Wideband in "temporary" position and will find its way to the dash one day!

Business end.


I removed the wiring to the otter switch as it is no longer needed.
I ran the wiring to the crank sensor, (out of sight). This runs down the nearside of the block.
The feed to the starter motor was dropped down behind the offside head at the bulkhead covered in a plastic shroud and connected to the solinoid.
All wiring was kept neat and out of sight as possible.
The feed to the rads was taken into the nose cone where the existing feed was disconnected to the fans and the new conected.
I'm sure I missed out a few things but you get the general idea!
That does look very neat!.. just taking the Dizzy out from the front of the engine makes it 100% better!
but guess you'd not get the coil packs there with the std plenum as the linkage etc would get in the way?....
Why everything runs over the top of the engine as std anyway is strange.. as you've gone, it's a lot better to go down the bulkhead and run out at a lower level ...
great job
but guess you'd not get the coil packs there with the std plenum as the linkage etc would get in the way?....
Why everything runs over the top of the engine as std anyway is strange.. as you've gone, it's a lot better to go down the bulkhead and run out at a lower level ...
great job
Can you get the grommet back in....YES
and where did you get the pod thing for the afr gauge.......DEMON TWEAKS
What are all those relays for ?...FUEL INJECTION, ECU etc, all as before on the flylead in your footwell but nice and neat.
Why don`t you need the cable to the stepper motor ?.... NOT RUNNING A STEPPER, although if you were Shaun would put one in.
and where did you get the pod thing for the afr gauge.......DEMON TWEAKS
What are all those relays for ?...FUEL INJECTION, ECU etc, all as before on the flylead in your footwell but nice and neat.
Why don`t you need the cable to the stepper motor ?.... NOT RUNNING A STEPPER, although if you were Shaun would put one in.
Hi Peter,
Have you had the loom made for you by a local sparky or is someone now selling the full loom, with plugs, relays a connectors already done for the car? If so how much?
I'm about to do the same thing while the body is off and trying to make my mind up as to make myself or farm out the job to a local chap.
The car's looking good by the way Peter.
Regards,
Paul.
Have you had the loom made for you by a local sparky or is someone now selling the full loom, with plugs, relays a connectors already done for the car? If so how much?
I'm about to do the same thing while the body is off and trying to make my mind up as to make myself or farm out the job to a local chap.
The car's looking good by the way Peter.
Regards,
Paul.

Gassing Station | Chimaera | Top of Page | What's New | My Stuff