
Removing Powder Coating.
Discussion


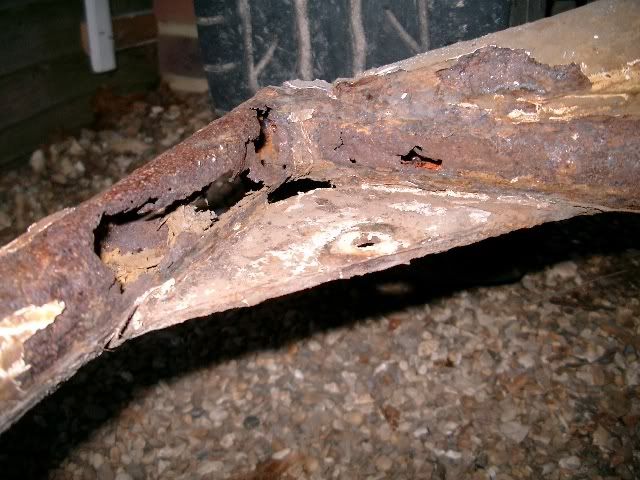
Got the body off and stripped the chassis, found that the front out riggers are rusted to nothing, 1998 car. Removing the powder coating where it is flaky is easy but where it is attached its really stuck on. Need to expose the good metal to weld to. I will be getting the chassis shot blasted before recoating, but before welding what is the best way to remove the powder coating.

Pink_Floyd said:
Can someone email me how you post pics as I have some of the out riggers that will probably horrify some people.
Hooray - body off!!!Congrats on getting the easy part done!!!
As for removing the powder coating...i used a large file...and then i brought some oxy-acetylene cutting gear and that just burnt the powder coating straight off.
before you cut out the outriggers make sure ou measure all the hole centers for the floor fixing bolts...take as many measurements as possible, straight lines, diagonals, it will help you later.
When you cut the middle support away from the outrigger it moves, lots...!
Posting pics...do a google search for photobucket and you can upload pics. then below the pics it will give you a link to copy and paste onto these pages...something like the following.


If you have a hobby compressor or bigger then an air sander using fibre Roloc discs remove this stuff without attacking the metal in anyway(time consuming though)theres also different grades of abbrasive for cleaning up welds etc without scarring the metal like a angle grinder does.Hows it going with that build up Andy and hows mumma & bubber doing?
and hows mumma & bubber doing?Edited by That Daddy on Saturday 16th June 15:33
That Daddy said:
Hows it going with that build up Andyand hows mumma & bubber doing?
The rebuild is going really well. Just a few more bits to add to the chassis but that is rolling now, the body is on supports and i have spent about 5 hrs today rubbing it down ready for spraying....just got to get a compressor now!!!and hows mumma & bubber doing?and both are doing fine...after much discussion i have decided NOT to get rid of the chim when it is done. Clare has suggested i keep the chim and then look for a cheap Cerbera!!!


Pink_Floyd said:
Andy, when you measured yours did you find that the measurements were different on each side, mine are.
I think there is a quote somewhere in the bible about the jigs used to keep the chassis in exact tolerance...?? 
The hole centers (not critical measuerments) were totally different...i think they must have dropped the body on and then drilled through the floor and the mounting plates.
The distance from the main chassis rails to the inside of the outriggers were different and the seatbelt mounting plates are in different positions.
These measurements are not crucial +/- a couple of mm but it is worth getting as many measurements down as possible so you can get the parts in the right place...would be a bit embarrasing if you did all the work, dropped the body on and it didnt fit!
Crucial one is to make sure you get the seatbelt anchor bracket that sits on top of the outrigger....it sits verticle with the inside face of the outrigger and about 170mm along the tube to the hole center.
Also it is probably a good idea to cut one tube out at a time.
The outriggers are not hugley structural like the main rails and the top tubes but doing one at a time is probably a good idea.
One more thing...it looks like your rear tubes have gone as well...i was lucky here on mine and they were both solid. The angled tubes are a bit awkward to cut out...cutting out the whole of the tubes is a no-go unless you have got good workshop facilities....cut the tubes about 4" from the end and see how much material is left...if it loooks solid then sleeve it and weld the new tube there.
Not very good descriptions i know...if you need anything else or some pictures give me a shout...i have some with the outriggers cut out and the joins prepared so it will give a rough idea.
Gassing Station | Chimaera | Top of Page | What's New | My Stuff