
Anyone else finished one of the models yet?
Discussion


Just finished mine and thought I'd post a few pictures to show that it is possible to get a decent end result with a bit of patience.
It took some time but I have to say it was thoroughly enjoyable. I haven't made a model of any sort for about twenty five years let alone a 'white metal' one so am pleased with it.
Its fairly straight forward to build if you take your time and as with anything (especially the paint finish) the better the preparation the better the end result.
Most difficult bit has to be fitting the windscreen, you need to take it slow and just trim off minute sections at a time to get a reasonable fit and getting a decent orange colour for the indicators (not totally satisfied with them but wanted to get it finished.
The pictures don't do it justice really as the flash seems to make the paint look more like treacle than it is.
It's a nice kit and I encourage all of you that bought kits to have a go (and post the result of course )
)
This picture gives a good interpretation of the size of a 1/43rd scale car!


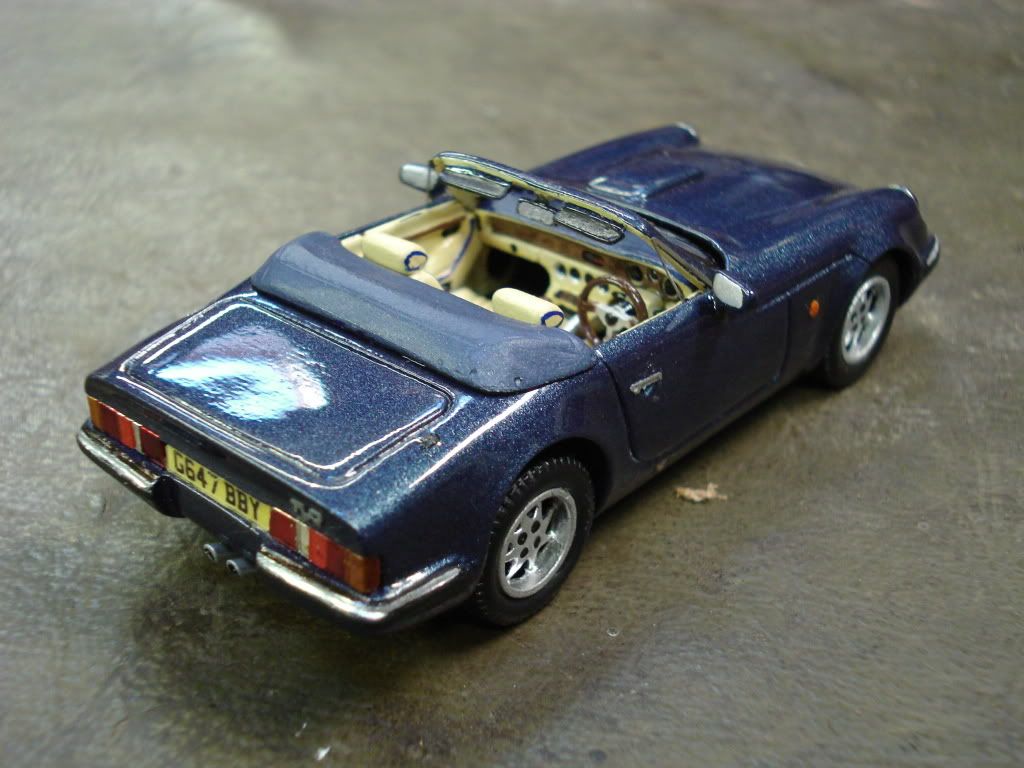

At least that's cleared the winter for some fettling to the real thing now!!!
It took some time but I have to say it was thoroughly enjoyable. I haven't made a model of any sort for about twenty five years let alone a 'white metal' one so am pleased with it.
Its fairly straight forward to build if you take your time and as with anything (especially the paint finish) the better the preparation the better the end result.
Most difficult bit has to be fitting the windscreen, you need to take it slow and just trim off minute sections at a time to get a reasonable fit and getting a decent orange colour for the indicators (not totally satisfied with them but wanted to get it finished.
The pictures don't do it justice really as the flash seems to make the paint look more like treacle than it is.
It's a nice kit and I encourage all of you that bought kits to have a go (and post the result of course
) This picture gives a good interpretation of the size of a 1/43rd scale car!
At least that's cleared the winter for some fettling to the real thing now!!!
Jon Brown said:
Thats quailty, where did you get it from?
Thanks Jon, the V6 kit came from a company called SMTS Models (google is your friend) as part of a group buy. They also do a V8. They usually need a quantity order to make them up but if your interested get in touch with them as they may have a few kits left 'on the shelf'. From memory they cost around £36 +vat+p+p as a kit or £86 +vat+p&p for a completed model but where's the fun in that?  .
.gifdy said:
Great job ! The detail is fantastic - even down to the piping on the seats
 ...and the red/blue on the heater controls. Great work, certainly sets the standard for the rest of us to follow
I will eventually turn my attention to coming up with a way of replicating my roll bar - some thick wire and delicate soldering will be required I think...
Andy Lynch said:
That looks great, mine bought at S Club, was a winter project, but you could make a few quid buliding everyone's kits. As I gave you the idea, do I get mine built for free?
Andy
Nice try Andy but no. I think I might go blind if I did any more for a while (or is that something else that's making me go blind Andy
)Gerald-TVR said:
How did you do the number plates please
Norman if you go to one of those number plate building websites and input your reg you can save the image to your hard drive. The I used Microsoft Publisher (but I would think any editing type software would do it) to resize the image to the size of the model plate and printed with a basic injet printer. I also put some clear sticky back plastic over them to make them a bit thicker and a bit like the acrylic they use for proper plates. Hope this helps.Stu
TVR-Stu said:
Gerald-TVR said:
How did you do the number plates please
Norman if you go to one of those number plate building websites and input your reg you can save the image to your hard drive. The I used Microsoft Publisher (but I would think any editing type software would do it) to resize the image to the size of the model plate and printed with a basic injet printer. I also put some clear sticky back plastic over them to make them a bit thicker and a bit like the acrylic they use for proper plates. Hope this helps.Stu

tinks v8S said:
can i ask what glue you used
Hi Tinks, used a two part epoxy (like araldite) in the main.I used it on the windscreen edges too but you do have to be careful with it. Apparently you can get a hi-tack superglue (presumably with a slower set time?) which is the one modellers use for clear plastic items.
Gassing Station | S Series | Top of Page | What's New | My Stuff