
Discussion


I recently had to remove the rear roof section on my Griff to have the plastic window replaced.
Getting it off was bad enough as two of the bolts had siezed solid. The thought of re-installing it did NOT fill me with joy as you need two sets of hands, one inside the car with the bolts and one in the boot to handle the nuts. There had to be an easier way. There is. I installed one of these in each of the bolt holes.
http://www.memfast.co.uk/shop/Vprod2.asp?cat=22570...
As a result, I can now remove the rear section in 5 minutes and replace it in a similar time. It cost me about £30.00 for the inserts and the tool. Best money I've spent in a long time.
Al.
Edited by 737 FLF on Wednesday 21st March 08:42
You can buy the mohair and window film from www.martrim.co.uk
and use evo stick timebond and evostick glue remover from B and Q
or just buy the ready made hood, you will have to do a search as i made my own using the old roof as a pattern.
get all the old glue off the grp sections using a sander (by far the quickest method) then use the glue remover on the paint work and vynal bits,
repair any chips in the grp with car filler and sand smooth.
draw a pencil line front to back on the targa roof and on the fabric, then clamp fabric to roof and draw the out line of the roof on the fabric, then decide wether you want the stitching that goes along the top of the windows or not, (i chose not to as i prefured the clean lines without it).draw a line 1/2 inch further out from the line that you drew round the roof,( these lines will meet when you sew them together, take a 1/4" seam.
the leave the excess for glueing under the lip you will trim this last of all.
once you have done both sides your ready to start glueing the fabric to the targa
centre your fabric using the lines drawn earlier, clamp one side so it all lines up along the edge and double check the other side also lines up, once you happy start spreading the timebond very thinly to both sides and smooth out as you go glueing about 4" front to back at a time, constantly checking to see if your still lined up at the stitched edge.
repeat this untill the targa is glued, finish glueing at the corners working from the centre out, and put any folds along the window edge cutting away as much bulk as possible.
make sure you glue the little cutout at the front so both bits of fabric meet as when its dry you can stanley knife a slot in it and it will stay glued.
if fixing the new rubbers to the targa make sure you follow the curve of the roof as the window curve too.
i will add the rear section how to later
HTH


slideways said:
Just completed my new roof, bought the fabic a while back and the tinted rear window film and thought i would have a crack at it,


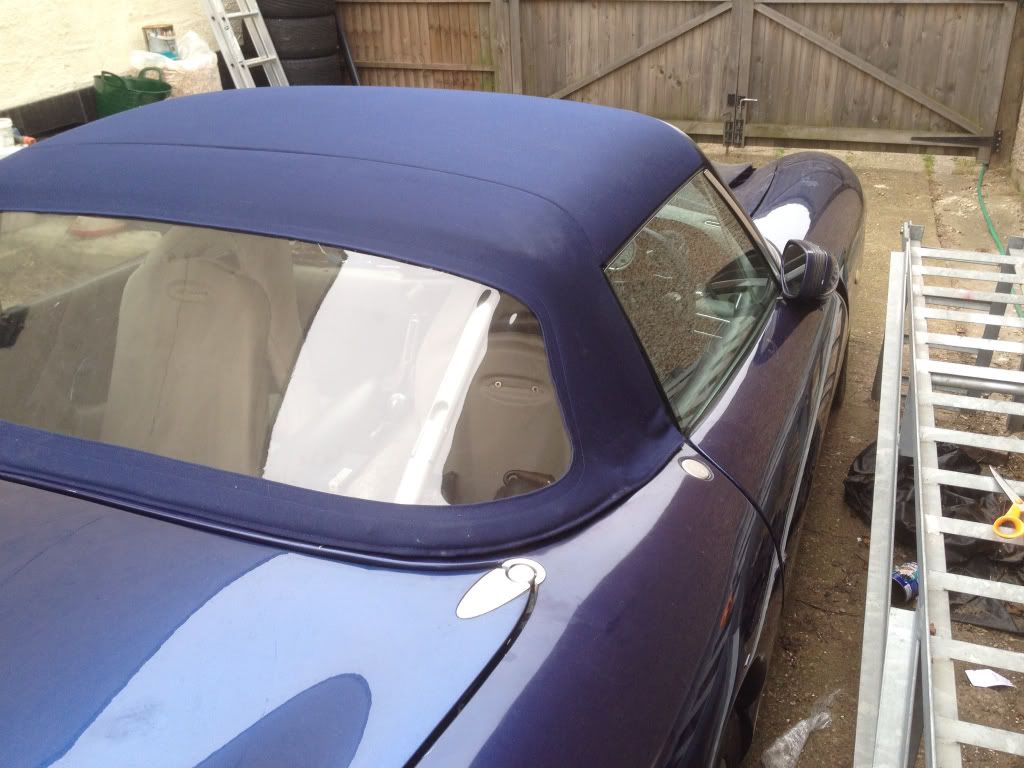
I need to hire a small child to do up the nuts around the boot lid as its almost impossible to get your hand in with said nutand washer and do them up
Tidy I need to hire a small child to do up the nuts around the boot lid as its almost impossible to get your hand in with said nutand washer and do them up
 blue on blue looks nice Be honest its not a nice job, I found the preparing and glue removal tedious and combined carpet renewal at the same time
 Doh.
slideways said:
....
draw a pencil line front to back on the targa roof and on the fabric, then clamp fabric to roof and draw the out line of the roof on the fabric, then decide wether you want the stitching that goes along the top of the windows or not, (i chose not to as i prefured the clean lines without it)...
Nice work. I thought the stitching beadline you described was to act a bit like a "gutter" and stop water wicking in under the metal strip that the seal slots into?draw a pencil line front to back on the targa roof and on the fabric, then clamp fabric to roof and draw the out line of the roof on the fabric, then decide wether you want the stitching that goes along the top of the windows or not, (i chose not to as i prefured the clean lines without it)...
Cheers,
Matt.
it is a drip bead, the Tamora doesnt have it and the roof of the chimaera is angled downwards to create its own drip bead,

I also did away with the binding on the lower edge of the folding section, it just has a line of stitching with no raw edges of fabric
I will also need to adjust the doors as they have dropped over time to creat a good seal between top of window and the rubber
I also did away with the binding on the lower edge of the folding section, it just has a line of stitching with no raw edges of fabric
I will also need to adjust the doors as they have dropped over time to creat a good seal between top of window and the rubber
Edited by slideways on Wednesday 21st March 17:36
slideways said:
it is a drip bead, the Tamora doesnt have it and the roof of the chimaera is angled downwards to create its own drip bead,
I also did away with the binding on the lower edge of the folding section, it just has a line of stitching with no raw edges of fabric
I will also need to adjust the doors as they have dropped over time to creat a good seal between top of window and the rubber
Nice work, I plan to do mine eventually.I also did away with the binding on the lower edge of the folding section, it just has a line of stitching with no raw edges of fabric
I will also need to adjust the doors as they have dropped over time to creat a good seal between top of window and the rubber
Edited by slideways on Wednesday 21st March 17:36
There is AFAIK a method to adjust the height of the window glass without messing around with the door itself. It's in the Bible somewhere I think.
peaktorque said:
slideways said:
it is a drip bead, the Tamora doesnt have it and the roof of the chimaera is angled downwards to create its own drip bead,
I also did away with the binding on the lower edge of the folding section, it just has a line of stitching with no raw edges of fabric
I will also need to adjust the doors as they have dropped over time to creat a good seal between top of window and the rubber
Nice work, I plan to do mine eventually.I also did away with the binding on the lower edge of the folding section, it just has a line of stitching with no raw edges of fabric
I will also need to adjust the doors as they have dropped over time to creat a good seal between top of window and the rubber
Edited by slideways on Wednesday 21st March 17:36
There is AFAIK a method to adjust the height of the window glass without messing around with the door itself. It's in the Bible somewhere I think.
 . The time I spent on my passenger door to get the bottom edge to sit right.................

Gassing Station | Chimaera | Top of Page | What's New | My Stuff