Discussion


Just bought a tin of this based on the quite amazing pics I've seen where it can fill swirl marks to the point they're virtually invisible. My black Corvette Z06 has some pretty bad swirls and I was expecting big things from the Auto Balm... applied it precisely as per the instructions and noticed ZERO difference in the swirls.
Any ideas?
Any ideas?
That seems odd since it normally is very very good at swirl filling.
Did you do two layers?
Did you use a paint cleanser beforehand - perhaps a previous product was causing it problems if it hadn't been fully removed? Whilst Autobalm has cleansers, they're not as effective as a dedicated cleanser.
Did you do two layers?
Did you use a paint cleanser beforehand - perhaps a previous product was causing it problems if it hadn't been fully removed? Whilst Autobalm has cleansers, they're not as effective as a dedicated cleanser.
RedSpiseeBalls said:
Thats were you went wrong, its only meant for minor paint defects and has fillers; these would never remove the swirl marks.. and even filling only works to a certain extent on "pretty bad swirls"
Not according to these pics...http://www.solodetail.com/blog/bilt-hamber-auto-ba...
Kelly from KDS also posted some pretty amazing before/after in the orange peel thread. Take a look.
jagnet said:
That seems odd since it normally is very very good at swirl filling.
Did you do two layers?
Did you use a paint cleanser beforehand - perhaps a previous product was causing it problems if it hadn't been fully removed? Whilst Autobalm has cleansers, they're not as effective as a dedicated cleanser.
Only 1 layer, so far. Tried a couple of different application methods on 2 different panels... tried applying in straight lines and in small circles. Also tried using slightly more product on the foam pad and quite a bit of pressure, but still no visible difference Did you do two layers?
Did you use a paint cleanser beforehand - perhaps a previous product was causing it problems if it hadn't been fully removed? Whilst Autobalm has cleansers, they're not as effective as a dedicated cleanser.

Clayed the car beforehand.
ian_uk1975 said:
Not according to these pics...
http://www.solodetail.com/blog/bilt-hamber-auto-ba...
Kelly from KDS also posted some pretty amazing before/after in the orange peel thread. Take a look.
Wow... I see what you mean... I was going by what BH themselves say.http://www.solodetail.com/blog/bilt-hamber-auto-ba...
Kelly from KDS also posted some pretty amazing before/after in the orange peel thread. Take a look.
Maybe update us after a second layer is applied?
See how it goes after a second layer, applied gently. If it's still struggling then you may need to use some BH cleanser-polish first to help it along. The first time I used it on the OH's car it needed 3 layers initially before it had filled all the micro pores in the paint and could leave an even finish. Subsequent application was much easier, but to start with I was wondering what I'd done buying it 
The way I apply it is to lightly mist the panel with water as well as using a damp app pad. Use firm(ish) pressure on the first layer, applying in circles initially before swapping to straight lines. Repeat for the second layer but with light pressure.
If you can pause a moment longer before buffing without it becoming difficult to remove then it might give the fillers a little longer to settle.
jagnet said:
See how it goes after a second layer, applied gently. If it's still struggling then you may need to use some BH cleanser-polish first to help it along. The first time I used it on the OH's car it needed 3 layers initially before it had filled all the micro pores in the paint and could leave an even finish. Subsequent application was much easier, but to start with I was wondering what I'd done buying it
The way I apply it is to lightly mist the panel with water as well as using a damp app pad. Use firm(ish) pressure on the first layer, applying in circles initially before swapping to straight lines. Repeat for the second layer but with light pressure.
If you can pause a moment longer before buffing without it becoming difficult to remove then it might give the fillers a little longer to settle.
Thanks for that... I'll give that a whirl and report back The way I apply it is to lightly mist the panel with water as well as using a damp app pad. Use firm(ish) pressure on the first layer, applying in circles initially before swapping to straight lines. Repeat for the second layer but with light pressure.
If you can pause a moment longer before buffing without it becoming difficult to remove then it might give the fillers a little longer to settle.

There is a big difference between , wash marring (as my picture) and deep swirls.
marring is normally near on unmeasurable with paint depth gauge, where as swirls may need 2-4 microns of paint level'ed / removed to remove them.
There is only so much a product can "fill" its knowing what / when / how thats more important.
most cars are very soft compared to paint 10-15 years ago , many many reason for this (wont go into this now)
Here is some pic's of a car that was brand new (2 days old when i received it) and after one dealer wash and also very soft.
Marring not swirls
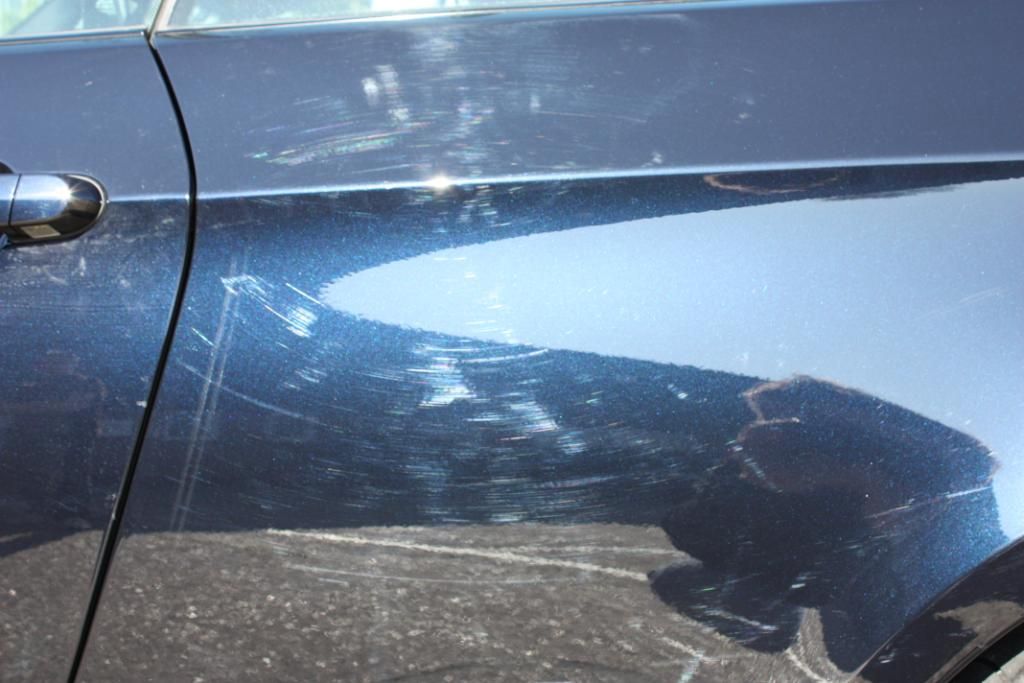
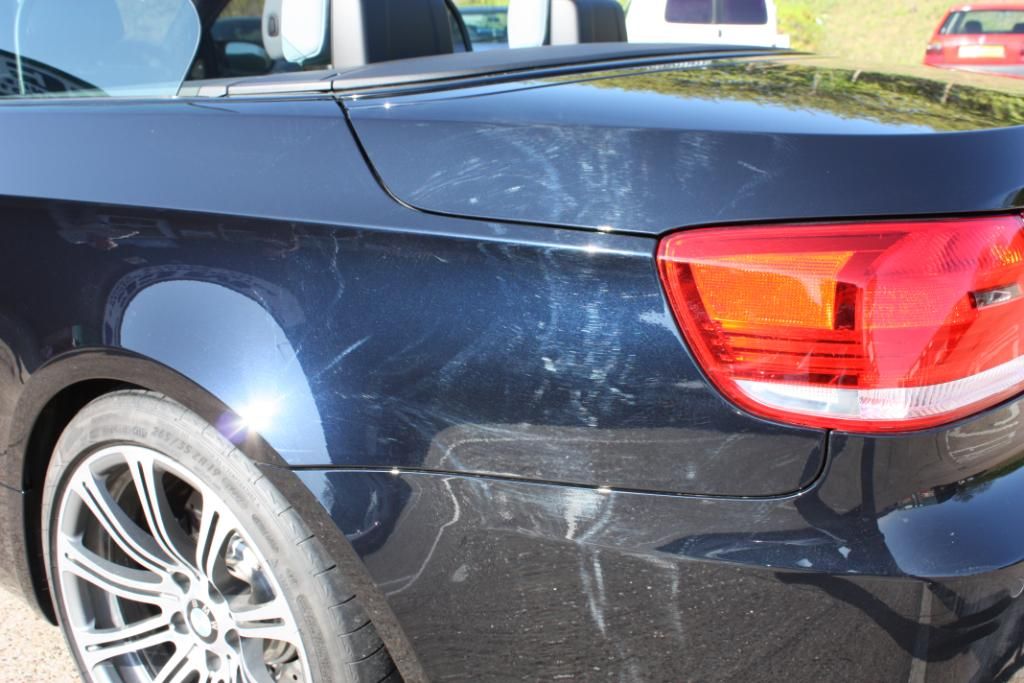

It looks very bad but in fact is hardly in the surface depth at all , and a filling product like I linked would work great.
but it wont work great on defects like this (deep spread apart swirls)

Swirls HAVE to be machine corrected to be removed , or like a lot of guys enhancement detail which partly removes the defects and partly hides the defects with "filling products" bilt hamber being great for such a job
HTH kelly
marring is normally near on unmeasurable with paint depth gauge, where as swirls may need 2-4 microns of paint level'ed / removed to remove them.
There is only so much a product can "fill" its knowing what / when / how thats more important.
most cars are very soft compared to paint 10-15 years ago , many many reason for this (wont go into this now)
Here is some pic's of a car that was brand new (2 days old when i received it) and after one dealer wash and also very soft.
Marring not swirls
It looks very bad but in fact is hardly in the surface depth at all , and a filling product like I linked would work great.
but it wont work great on defects like this (deep spread apart swirls)
Swirls HAVE to be machine corrected to be removed , or like a lot of guys enhancement detail which partly removes the defects and partly hides the defects with "filling products" bilt hamber being great for such a job
HTH kelly
Edited by kds keltec on Friday 10th August 10:20
There really is no supa dupa miracle product (A very big reason why you dont see my threads on DW listing all the products used and how great they are) , its just a lot of time effort and skill needed.
when it comes to LSP (last step protection) then there are some clever products on the market to help slow down / reduce the come back of swirls and marring thou.
kelly
when it comes to LSP (last step protection) then there are some clever products on the market to help slow down / reduce the come back of swirls and marring thou.
kelly

Gassing Station | Bodywork & Detailing | Top of Page | What's New | My Stuff