
2005 VW Golf GTi - Project Clean up, Repair and Protect
Discussion


I was asked by my Wife's MD if I could help him sell on his Mk5 Golf GTi so I thought why not, but over a period of months so I can do a proper job of it!
Initially I was going to do it and sell it for him but things have changed so I've bought it and have been gradually working on it in my spare time to get things up together before I can eventually sell it on myself.
There's still a few jobs left to do so will update this later but here's what has been done so far:
The car is a 2005 VW Golf GTi, with 91k miles
On driving home I made a mental note of all the issues I discovered:
[LIST]
[*]Alignment is out, wheel pointing left for the car to go straight.
[*]Air-con is warm, not even slightly cool
[*]Front bumper corner is badly scuffed
[*]Wheels all badly kerbed and bubbling all over
[*]Wheel nut caps all white due to strong wheel cleaners / TFR's being used
[*]Rear parking sensors not working
[*]Sticking rear brake caliper
[*]Car seriously under-boosting (feels like no turbo)
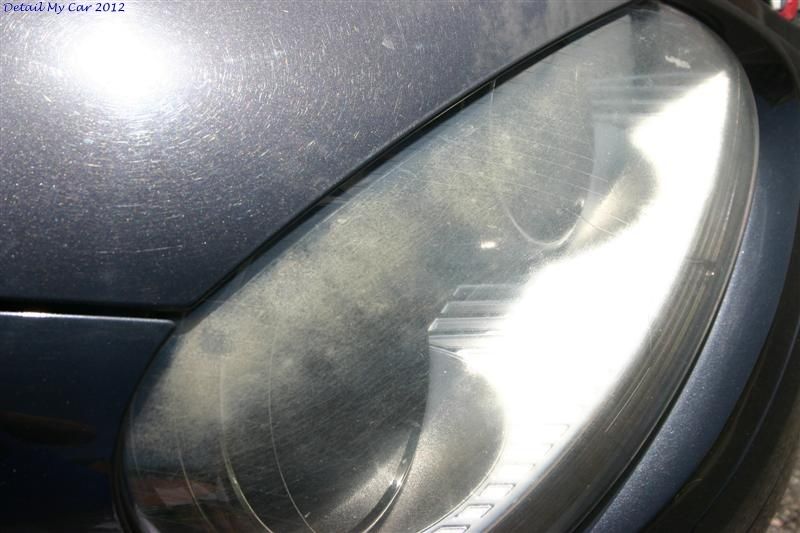
[*]Headlights badly yellowed
[*]Paintwork is generally just very dull, almost looks grey and has bad swirls all over.
[/LIST]
So by the time I'd got home, I'd already added up a fairly large bill so the car was taken into my local Bodyshop (Headley Bodyshop) to carry out a few of the repairs:
1) Wheels - Done by www.myalloys.co.uk
Process is: Chemically stripped, put through a cleaning machine to remove all chemical deposits and dirt. Shot blasted with apporpriate media to remove final stubborn particles. Put into oven to remove any trapped air, and into a spray booth for applying powder coating primer. Back into the overn to be baked for necessary time to ensure curing has been completed. Wheel then left to cool to a temperature suitable for painting. Alloy wheel front and inside is painted, flashed in the oven before being inspected and further coats added if necessary. Powder lacquer is then applied to the face and inside (Highly durable), oven baked then removed and inspected for one final time. New rubber valve inserted and the tyres are then refitted, balanced and sent back to Headley bodyshop.
Unfortunately I don't have any before shots but here's the afters (Before calipers painted and new Wheel nut caps)


While there the following jobs were completed by the bodyshop/service centre
Front bumper re-sprayed
Parking sensor control module & one sensor replaced (and painted)
4-Wheel alignment carried out
Air-Con Re-gassed and checked for leaks
New rear pads fitted
Once I picked the car up, there was still the big issue of the car having a lack of power. I started calling around and found that it was due recall by VW for the coil packs to be replaced so I got that booked in hoping they may help the problem, or at least discover what the issue might be. These were all replaced but the car was still down on power so using the power of the internet I got some great help from the guys on mk5golfgti forum and they all advised it sounded much like a typical Diverter valve (dump valve) problem as the original item was a poor design with a rubber diaphragm that was prone to split as the car got older.
I ordered the upgraded version fitted on later models and got the car down to Piper Auto's so we could replace it.
Up on the ramp it was clear to see the grease/oil around the old diverter valve:


When removed the whole thing fell apart showing a clearly broken rubber diaphram which was hopefully the cause of a boost leak.


Nice new part:


New one fitted

The car was instantly a different car, and far far better - MPG was back up in line with my Skoda VRS (same engine) and it was pulling perfectly now all through the rev range.
This was great, a simple £30 part fixed what seemed like it could be a big problem! (Hate to think what it would have cost and how many parts the Dealer would have replaced before finding this to be the issue) - Massive thanks to the Mk5golfgti forum for this diagnoses - Who says you can't diagnose faults over the net
Anyway, on to the Detailing work!
Here's how the paintwork was looking:


Headlights looking terrible!


The car was cleaned up with the usual process of Snow foam, Hand wash, Tardis & IronX before claying to remove final contamination


I carried out a test to see what combination would work out of the following polishes
S17+
S3 Gold
CarPro Fixer
Gliptone Step2
Meg's 105
Menz 85RD 3.02

As the test showed, the right combination of Megs 101 and a Hex Logic White pad was giving good correction, although quite a strong combination the paintwork was bad enough to need it! The whole thing would then be refined using Scholl S40 on a Black Scholl Waffle pad.
Here's some shots from that test:
Before


After M101


After refining with S40
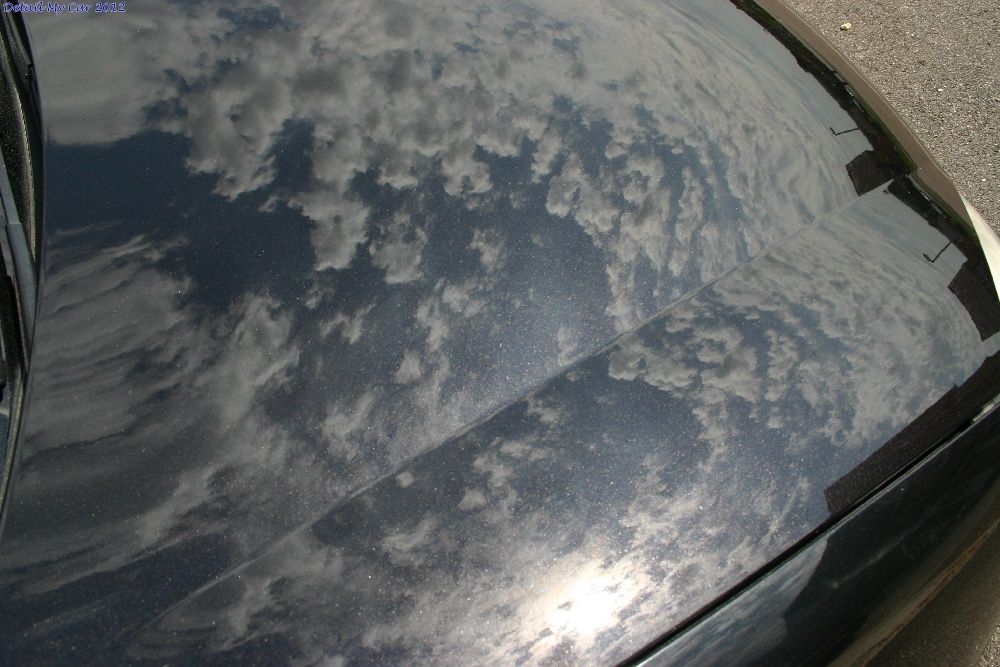


Looking far better and after spending a lot of time out in the boiling Sun, I sealed the bonnet up with FK1000p, and applied SCG Barrier Reef wax over the top just to add a bit of protection while it was left until the next weekend.
On to the next week!
Headlights were all taped up, and ready to be wet sanded to remove the damage - Starting with 1500, 2000 & 3000 Meg's Unigrit paper
During


After polishing with S3 Gold, and refined with 3M Extrafine
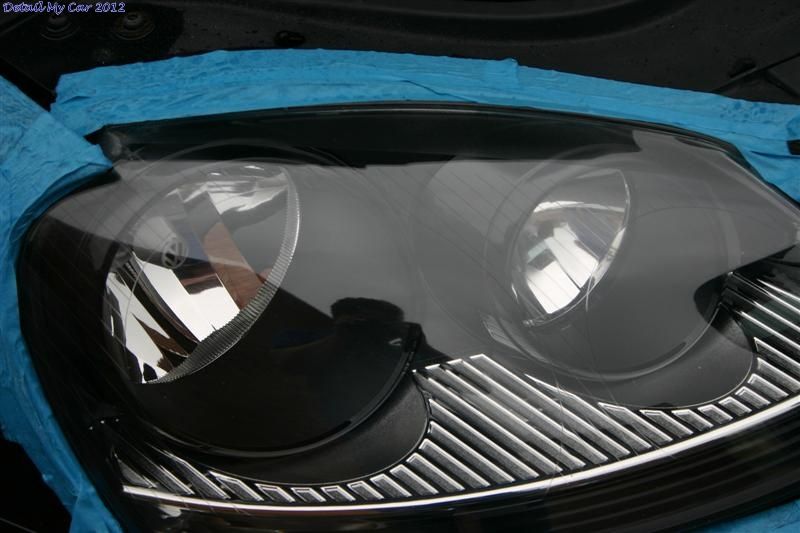

Passenger side during


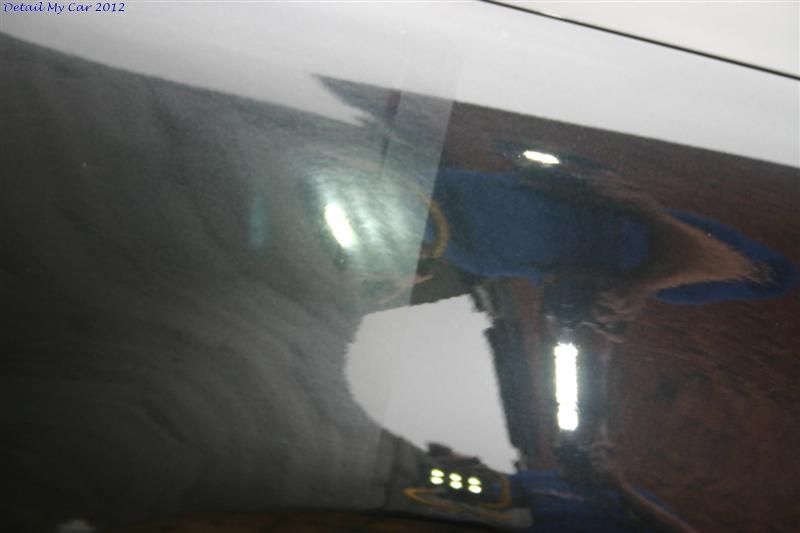
The next step was to carry on polishing, the drivers side wing was as follows - 50/50 with no light source still shows even on a cloudy day so you can see how different it was looking, it transformed from grey to black!


Under LEDs

Other before shots


Before

After

After

The whole car was polished with M101 and finished for the day. Next day I drove it to the unit and gave it a full wipe down with Eraser and set about refining using S40.
After refining the car was given one further wipe down with Eraser and prepared ready for waxing, using AS WAX on this as it's nice and easy to use and leaves a really good finish for the money plus lasts a good 4-6 months!

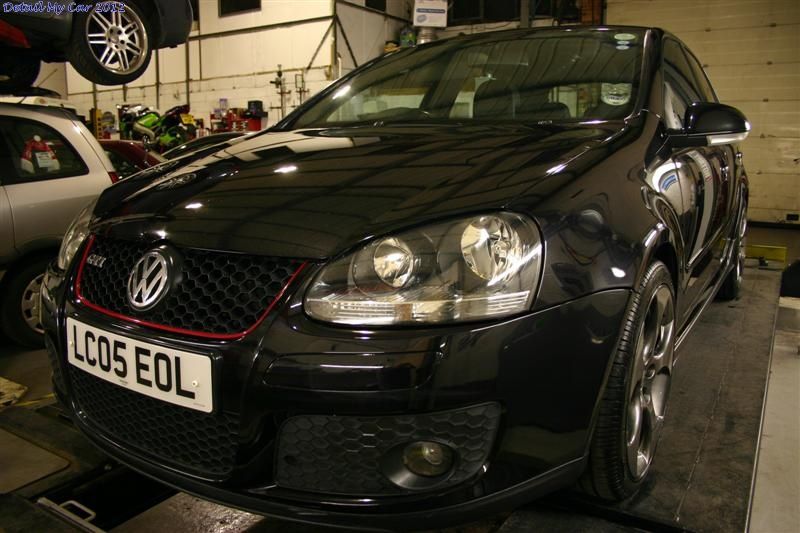
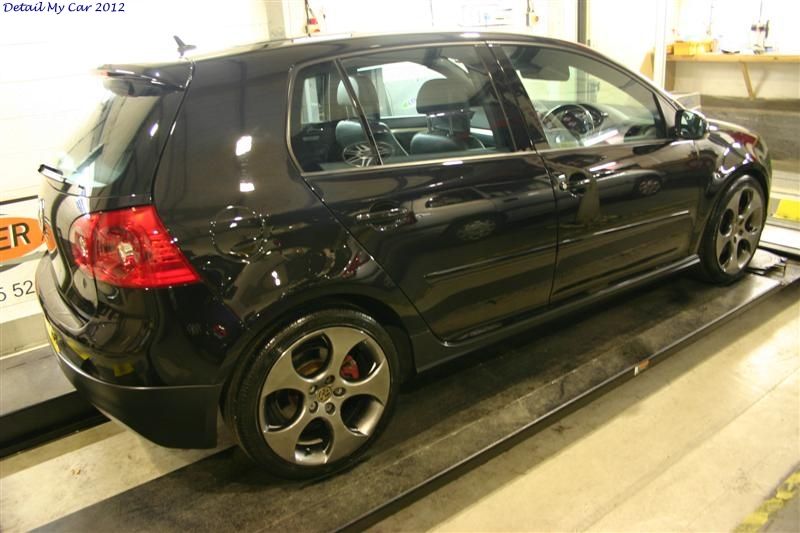
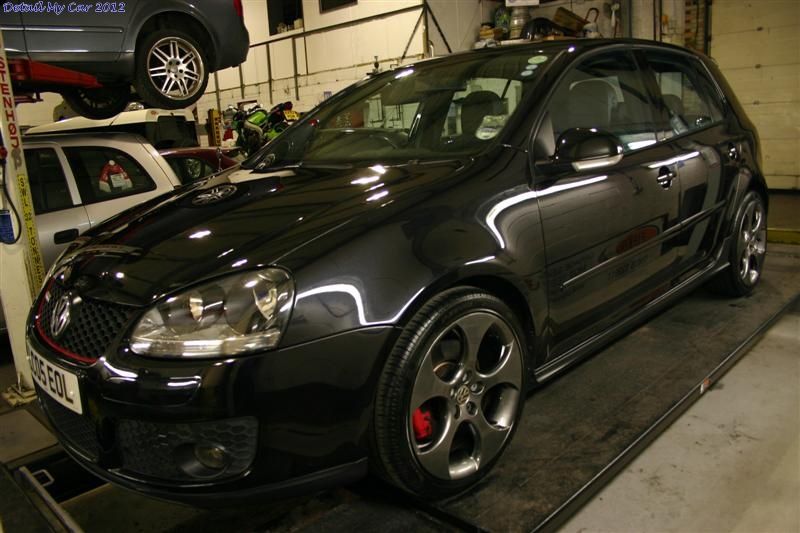
Finally the Wax was all buffed off to leave the paintwork now looking FAR better, still quite a few little jobs to do (Caliper paint, new wheel nut caps to be fitted etc)




That's all for now!
Next I'm stripping the calipers and painting them along with hubs, then a few other bits like Engine bay clean up.
Great fun though so far, and the first time I've ever had to do quite this much on one car
Initially I was going to do it and sell it for him but things have changed so I've bought it and have been gradually working on it in my spare time to get things up together before I can eventually sell it on myself.
There's still a few jobs left to do so will update this later but here's what has been done so far:
The car is a 2005 VW Golf GTi, with 91k miles
On driving home I made a mental note of all the issues I discovered:
[LIST]
[*]Alignment is out, wheel pointing left for the car to go straight.
[*]Air-con is warm, not even slightly cool
[*]Front bumper corner is badly scuffed
[*]Wheels all badly kerbed and bubbling all over
[*]Wheel nut caps all white due to strong wheel cleaners / TFR's being used
[*]Rear parking sensors not working
[*]Sticking rear brake caliper
[*]Car seriously under-boosting (feels like no turbo)
[*]Headlights badly yellowed
[*]Paintwork is generally just very dull, almost looks grey and has bad swirls all over.
[/LIST]
So by the time I'd got home, I'd already added up a fairly large bill so the car was taken into my local Bodyshop (Headley Bodyshop) to carry out a few of the repairs:
1) Wheels - Done by www.myalloys.co.uk
Process is: Chemically stripped, put through a cleaning machine to remove all chemical deposits and dirt. Shot blasted with apporpriate media to remove final stubborn particles. Put into oven to remove any trapped air, and into a spray booth for applying powder coating primer. Back into the overn to be baked for necessary time to ensure curing has been completed. Wheel then left to cool to a temperature suitable for painting. Alloy wheel front and inside is painted, flashed in the oven before being inspected and further coats added if necessary. Powder lacquer is then applied to the face and inside (Highly durable), oven baked then removed and inspected for one final time. New rubber valve inserted and the tyres are then refitted, balanced and sent back to Headley bodyshop.
Unfortunately I don't have any before shots but here's the afters (Before calipers painted and new Wheel nut caps)
While there the following jobs were completed by the bodyshop/service centre
Front bumper re-sprayed
Parking sensor control module & one sensor replaced (and painted)
4-Wheel alignment carried out
Air-Con Re-gassed and checked for leaks
New rear pads fitted
Once I picked the car up, there was still the big issue of the car having a lack of power. I started calling around and found that it was due recall by VW for the coil packs to be replaced so I got that booked in hoping they may help the problem, or at least discover what the issue might be. These were all replaced but the car was still down on power so using the power of the internet I got some great help from the guys on mk5golfgti forum and they all advised it sounded much like a typical Diverter valve (dump valve) problem as the original item was a poor design with a rubber diaphragm that was prone to split as the car got older.
I ordered the upgraded version fitted on later models and got the car down to Piper Auto's so we could replace it.
Up on the ramp it was clear to see the grease/oil around the old diverter valve:
When removed the whole thing fell apart showing a clearly broken rubber diaphram which was hopefully the cause of a boost leak.
Nice new part:
New one fitted
The car was instantly a different car, and far far better - MPG was back up in line with my Skoda VRS (same engine) and it was pulling perfectly now all through the rev range.
This was great, a simple £30 part fixed what seemed like it could be a big problem! (Hate to think what it would have cost and how many parts the Dealer would have replaced before finding this to be the issue) - Massive thanks to the Mk5golfgti forum for this diagnoses - Who says you can't diagnose faults over the net
Anyway, on to the Detailing work!
Here's how the paintwork was looking:
Headlights looking terrible!
The car was cleaned up with the usual process of Snow foam, Hand wash, Tardis & IronX before claying to remove final contamination
I carried out a test to see what combination would work out of the following polishes
S17+
S3 Gold
CarPro Fixer
Gliptone Step2
Meg's 105
Menz 85RD 3.02
As the test showed, the right combination of Megs 101 and a Hex Logic White pad was giving good correction, although quite a strong combination the paintwork was bad enough to need it! The whole thing would then be refined using Scholl S40 on a Black Scholl Waffle pad.
Here's some shots from that test:
Before
After M101
After refining with S40
Looking far better and after spending a lot of time out in the boiling Sun, I sealed the bonnet up with FK1000p, and applied SCG Barrier Reef wax over the top just to add a bit of protection while it was left until the next weekend.
On to the next week!
Headlights were all taped up, and ready to be wet sanded to remove the damage - Starting with 1500, 2000 & 3000 Meg's Unigrit paper
During
After polishing with S3 Gold, and refined with 3M Extrafine
Passenger side during
The next step was to carry on polishing, the drivers side wing was as follows - 50/50 with no light source still shows even on a cloudy day so you can see how different it was looking, it transformed from grey to black!
Under LEDs
Other before shots
Before
After
After
The whole car was polished with M101 and finished for the day. Next day I drove it to the unit and gave it a full wipe down with Eraser and set about refining using S40.
After refining the car was given one further wipe down with Eraser and prepared ready for waxing, using AS WAX on this as it's nice and easy to use and leaves a really good finish for the money plus lasts a good 4-6 months!
Finally the Wax was all buffed off to leave the paintwork now looking FAR better, still quite a few little jobs to do (Caliper paint, new wheel nut caps to be fitted etc)
That's all for now!
Next I'm stripping the calipers and painting them along with hubs, then a few other bits like Engine bay clean up.
Great fun though so far, and the first time I've ever had to do quite this much on one car

zabba said:
wow very impressive! reminds me I need to get the PCV checked on my 05 Gti. I see you went for a revision G, is it a DIY job or would you recommend a using a specialist?
It's a tad fiddly but I'm sure if I can do it then anyone can :-) A ramp certainly helps if you're able to borrow one? Then it's just a case of blindly undoing 1 of the 3 allen bolts, the other two you can see.I'd definitely recommend replacing it though, they are very prone to failure so I believe - Even a small tear could be having an effect on MPG, performance etc.
Price wise PM me if you want, I'm not sure when it will be put up for sale but I'm enjoying it so far - Amazing how different it is to my Octavia considering they're supposed to be the same just about....
nickg123 said:
It's a tad fiddly but I'm sure if I can do it then anyone can :-) A ramp certainly helps if you're able to borrow one? Then it's just a case of blindly undoing 1 of the 3 allen bolts, the other two you can see.
I'd definitely recommend replacing it though, they are very prone to failure so I believe - Even a small tear could be having an effect on MPG, performance etc.
Price wise PM me if you want, I'm not sure when it will be put up for sale but I'm enjoying it so far - Amazing how different it is to my Octavia considering they're supposed to be the same just about....
Thanks, did you get the part from VW or elsewhere?I'd definitely recommend replacing it though, they are very prone to failure so I believe - Even a small tear could be having an effect on MPG, performance etc.
Price wise PM me if you want, I'm not sure when it will be put up for sale but I'm enjoying it so far - Amazing how different it is to my Octavia considering they're supposed to be the same just about....
zabba said:
Thanks, did you get the part from VW or elsewhere?
It was from http://www.germanautopartsdirect.co.uk/ - Cheapest I could find too! About £28 i think
yonex said:
I love all the before and after shots on detailing work, I wish I had the patience for it!
Very nice work.
Lovely work. I definitely have the patience and the OCD for this. Though I have no drive or no where to actually do this. Hopefully when I move house ill have a garage and a drive way!! Then it's game on.Very nice work.
OP where do you learn about detailing? Would really love to get into it a little (for the time being) and start with some simple but effective detailing on my car to bring some of its showroom lustre back!

Gassing Station | Readers' Cars | Top of Page | What's New | My Stuff