
Discussion


Whilst I was tackling various jobs under the 390, I happened to notice a bit of crumbliness on the offside sill tube.
Needless to say there was no way I was going to ignore it so I whipped the sill cover off and...

Which I thought was a bit odd, since the rear plate was replaced at the same time in 2001 and looks like this today:

So I reached for the grinder and half an hour later...

Then I turned the plate over and the penny dropped:

What remains of the paint looks a lot like what's on the rest of the chassis, not the Smoothrite I used... which points to it being the original plate rather than one I fitted. That explains why the rear one is still in good shape after 12 years. I do seem to vaguely recall leaving one plate untouched apart from a coat of paint on the outside; I guess nothing lasts forever...
Needless to say there was no way I was going to ignore it so I whipped the sill cover off and...
Which I thought was a bit odd, since the rear plate was replaced at the same time in 2001 and looks like this today:
So I reached for the grinder and half an hour later...
Then I turned the plate over and the penny dropped:
What remains of the paint looks a lot like what's on the rest of the chassis, not the Smoothrite I used... which points to it being the original plate rather than one I fitted. That explains why the rear one is still in good shape after 12 years. I do seem to vaguely recall leaving one plate untouched apart from a coat of paint on the outside; I guess nothing lasts forever...
 ..Would like to firm up a date for the outriggers repair of the FHC..Will have to speak to my partner in crime first...keep up the good work..
A quick rummage in the scrap bin turned up a slab of 2mm galvanised plate, so given that I can't access the rear of the plate to paint it I thought it'd be a spiffing wheeze to use this 

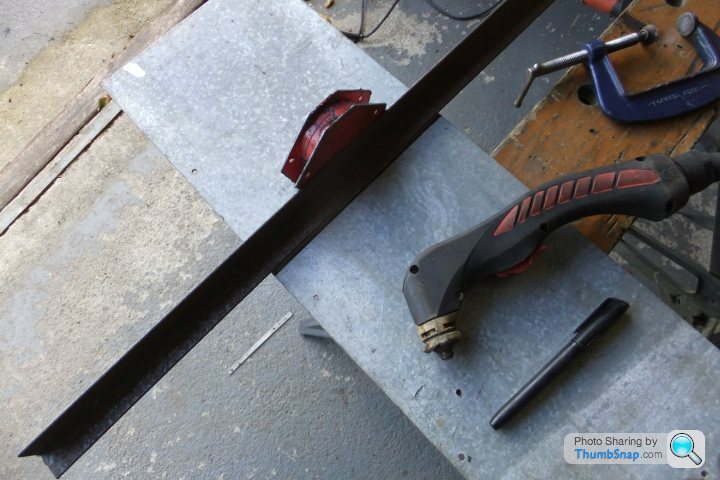
Quick bit of marking up and out with the plasma cutter:
With the folds done (vice, sledgehammer) the holes were drilled and the piece marked to show where the galvanising needed removing (gives you flu-like symptoms when you weld it, as well as making the welds a bit messsy):

then the galv. was taken off with an abrasive disc...

Instead of large washers as had originally been used (and had rusted away) I cut another piece of plate to serve as a load-spreader inside the car:

then the sill plate was assembled with the spreader, packing rubbers and new bolts...

... before being held to the sill tube at the right angle with G-clamps, the bolts and rubbers removed and Mr. Blobby brought in to do the welding

I had to slightly elongate the upper bolt hole as the dangle angle wasn't quite right (you can see on the old plate that TVR - or somebody - had drilled the holes twice).
Next, some paint and underseal... and now that I have the sill cover off of course, I may as well renew the copper fuel line...
Quick bit of marking up and out with the plasma cutter:
With the folds done (vice, sledgehammer
) the holes were drilled and the piece marked to show where the galvanising needed removing (gives you flu-like symptoms when you weld it, as well as making the welds a bit messsy):then the galv. was taken off with an abrasive disc...
Instead of large washers as had originally been used (and had rusted away) I cut another piece of plate to serve as a load-spreader inside the car:
then the sill plate was assembled with the spreader, packing rubbers and new bolts...
... before being held to the sill tube at the right angle with G-clamps, the bolts and rubbers removed and Mr. Blobby brought in to do the welding
I had to slightly elongate the upper bolt hole as the dangle angle wasn't quite right (you can see on the old plate that TVR - or somebody - had drilled the holes twice).
Next, some paint and underseal... and now that I have the sill cover off of course, I may as well renew the copper fuel line...
Edited by Wedg1e on Monday 12th August 02:07
Wedg1e said:
With the folds done (vice, sledgehammer ) the holes were drilled and the piece marked to show where the galvanising needed removing (gives you flu-like symptoms when you weld it, as well as making the welds a bit messsy):
[/footnote]
Thatll be the cyanide gas given off by the burning galvanising then!! ) the holes were drilled and the piece marked to show where the galvanising needed removing (gives you flu-like symptoms when you weld it, as well as making the welds a bit messsy):[/footnote]

Stu
Finally got round to posting some pics I've been taking whilst overhauling my car's nether regions...
Assorted drivetrain components after blasting and priming:


This is the nearside A-frame that was painted with Smoothrite a decade ago, the sandblaster was hardly touching it so I had to resort to a stripping disc to shift it...

...and afterwards:

On the basis that the tracking may need adjusting once the new bushes are fitted, I thought it'd be a good idea to remove the toe adjusters from the A-frames and make sure they were free to move. Well one came apart no bother:

but the other wound out so far and got stuck. Liberal application of Plus-Gas and a big spanner only succeeded in making matters worse so I resorted to monkeying it out. Once removed, the cause was clear: the last couple of threads (at right) had corroded up. Enough brute force sheared the thread off the adjuster, leaving it in the A-frame boss.

I ran a tap through the boss which cleared out the rust and picked-up the broken thread shards:

and now all I need to do is make a new adjuster
Meanwhile, I'd made some press tools to help get the old A-frame bushes out:

The larger one supports the boss without damaging it (unlike sockets which tend to mark the steel around the boss edge) whilst the smaller centres over the bush and pokes it through the boss and into the support tool.
Of course now I've got the old bushes out I need to get the new ones in so it was back to the lathe to make an insertion tool:

Here it is, fitted to an old bush to check for fit. It supports the bush over most of its length to keep it square and stop it deforming as it's pushed into the boss... or at least, that's how I hope it'll work

Assorted drivetrain components after blasting and priming:
This is the nearside A-frame that was painted with Smoothrite a decade ago, the sandblaster was hardly touching it so I had to resort to a stripping disc to shift it...
...and afterwards:
On the basis that the tracking may need adjusting once the new bushes are fitted, I thought it'd be a good idea to remove the toe adjusters from the A-frames and make sure they were free to move. Well one came apart no bother:
but the other wound out so far and got stuck. Liberal application of Plus-Gas and a big spanner only succeeded in making matters worse so I resorted to monkeying it out. Once removed, the cause was clear: the last couple of threads (at right) had corroded up. Enough brute force sheared the thread off the adjuster, leaving it in the A-frame boss.
I ran a tap through the boss which cleared out the rust and picked-up the broken thread shards:
and now all I need to do is make a new adjuster
Meanwhile, I'd made some press tools to help get the old A-frame bushes out:
The larger one supports the boss without damaging it (unlike sockets which tend to mark the steel around the boss edge) whilst the smaller centres over the bush and pokes it through the boss and into the support tool.
Of course now I've got the old bushes out I need to get the new ones in so it was back to the lathe to make an insertion tool:
Here it is, fitted to an old bush to check for fit. It supports the bush over most of its length to keep it square and stop it deforming as it's pushed into the boss... or at least, that's how I hope it'll work
mrzigazaga said:
Custom made parts...Tool making....Fabricating...Welding...Turning...Wiring....Refurbing...Blasting...Modifying...Custom made top notch bling....Is there no end to this man's talent's...Bloody genius!..
 Just an enthusiastic amateur, mate! I can't afford to pay others so I have to do it all myself.
Transmitter Man said:
Top work that man.
I don't like rust.
Everything made of steel going back on my car is blast cleans then zinc plated at the very least.
Suspension parts then, and only then powder coated.
Phil
420 SEAC
It's a good philosophy Phil, I'm just working on there being enough thickness of steel to outlast me I don't like rust.
Everything made of steel going back on my car is blast cleans then zinc plated at the very least.
Suspension parts then, and only then powder coated.
Phil
420 SEAC
 It's taken quarter of a century for things to get this bad, another 25 years and I doubt I'll be around to care...
Adrian@ said:
Wedg1e said:
Bah, where's the fun in that?
But for the mere mortals out there ...and at 4.00 ish...as I used to make them myself, it is not worth the effort!! even picking up a bolt to use as a start point might cost you that.Adrian@
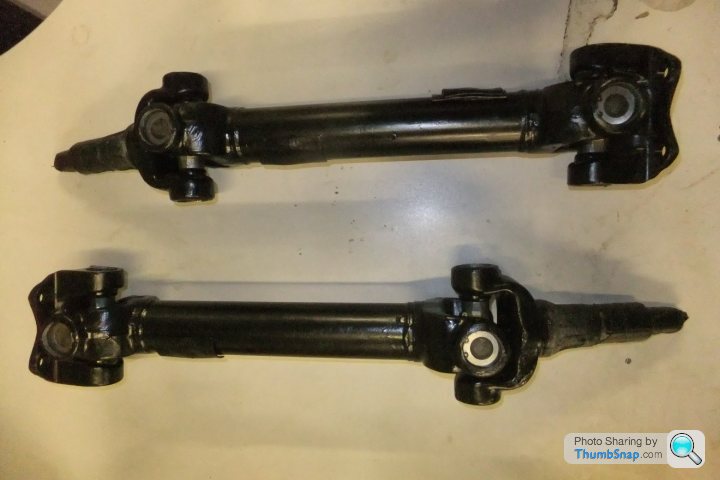
but I have to have some reason for owning a lathe!So, what have I accomplished this weekend (in between dodging rain, visiting Tesco and going to the pub )... well, the driveshafts finally got together with some new universal joints:


I had to refer to the pics I took of the shafts pre-dismantling to make sure I got the balance weights at the right ends.
Now I hadn't really intended to start refitting the A-frame and diff cradle bushes just yet, but I was itching to try out my press tools so I took a break from the tedium of cleaning the diff cradle back to shiny steel and lined up a bush...

...wound up the vice and - bloody hell, it works!

I know it looks like it's skew-whiff but it went in straight, honest! I reversed the driver tool and carried on winding...

(that rusty cutaway bit is a relic of whatever the driver tool was used for previously, I found it in the scrap bin!).
Nearly there...

and before you could say Supercalifragilisticdrobwllantysiliogogogoch the diff cradle had new bushes!
 [url]
[url]
I was on a roll now; the A-frame toe adjusters were next in the firing line...

Small extra driver I made that doubles up as a buffer to save the vice jaws marking the work (as seen in pics above)...

...and the finished article, shown with the press tools:

That was as far as I got: it was time to put toys away, wash hands and face and go to the pictures. Captain Philips, not a bad film, spoiled by having Tom Hanks playing, well, Tom Hanks, as he always does.
)... well, the driveshafts finally got together with some new universal joints:I had to refer to the pics I took of the shafts pre-dismantling to make sure I got the balance weights at the right ends.
Now I hadn't really intended to start refitting the A-frame and diff cradle bushes just yet, but I was itching to try out my press tools so I took a break from the tedium of cleaning the diff cradle back to shiny steel and lined up a bush...
...wound up the vice and - bloody hell, it works!
I know it looks like it's skew-whiff but it went in straight, honest! I reversed the driver tool and carried on winding...
(that rusty cutaway bit is a relic of whatever the driver tool was used for previously, I found it in the scrap bin!).
Nearly there...
and before you could say Supercalifragilisticdrobwllantysiliogogogoch the diff cradle had new bushes!
[url]I was on a roll now; the A-frame toe adjusters were next in the firing line...
Small extra driver I made that doubles up as a buffer to save the vice jaws marking the work (as seen in pics above)...
...and the finished article, shown with the press tools:
That was as far as I got: it was time to put toys away, wash hands and face and go to the pictures. Captain Philips, not a bad film, spoiled by having Tom Hanks playing, well, Tom Hanks, as he always does.
Gassing Station | Wedges | Top of Page | What's New | My Stuff