Clutch master cylinder help
Discussion


Next time I do it, I'll be changing the solid line that bolts to the bulkhead for a braided flexible hose. Mainly because, with the solid line it's damn hard to get the fixing to line up with the port on the master cylinder and thus very easy to cross-thread the master cylinder.
Oh, and when putting the master cylinder back in, have a nut welded on to the side of the bolt head. Stops the bolt turning when doing them up.
Oh, and when putting the master cylinder back in, have a nut welded on to the side of the bolt head. Stops the bolt turning when doing them up.
I agree with both of those suggestions. It's extremely straightforward to do in principle, but fiddly in practise.
You'll want fairly long extensions to get to the 2 nuts in the footwell to clear the pedals. Someone needs to hold a spanner on the bolt heads under the master cylinder. The upper bolt is simple. You can't see the lower one and must feel for it under the master cylinder. It requires dexterity - this is where a nut welded on to the side of the bolt head would help - it would prevent the bolt from turning making it a simple case of screwing the nut on from the footwell as a one-person job.
You'll want fairly long extensions to get to the 2 nuts in the footwell to clear the pedals. Someone needs to hold a spanner on the bolt heads under the master cylinder. The upper bolt is simple. You can't see the lower one and must feel for it under the master cylinder. It requires dexterity - this is where a nut welded on to the side of the bolt head would help - it would prevent the bolt from turning making it a simple case of screwing the nut on from the footwell as a one-person job.


I held it in a vice then added plenty of heat until red hot and then whacked it with a club hammer, took 3 attempts for the angle.
Took me all afternoon yesterday to get the old cylinder out on my own, and the new one back in,in 20mins with the help of my old man in the engine bay. All bled with AP racing dot 4, another job off the list..
Took me all afternoon yesterday to get the old cylinder out on my own, and the new one back in,in 20mins with the help of my old man in the engine bay. All bled with AP racing dot 4, another job off the list..


Not sure if this makes sense; I used a socket extension (3/8 drive), about the length of the master cylinder, with a cable tie around the end that allowed me to feed the extension down the gap at the end of the cylinder, then pull the socket end (using the end of the cable tie) of the extension up and push the socket onto the bolt. I then wedged the wrench with rags around the master cylinder access hole and was able to undo the nuts in the footwell and remove the cylinder. Refitting was the reverse 
 Caliper Spanner....

Best advice I saw was to tap the holes in the master cylinder out to M10 and use capscrews to replace it. That way you can just undo the bolts from the pedal box in future.
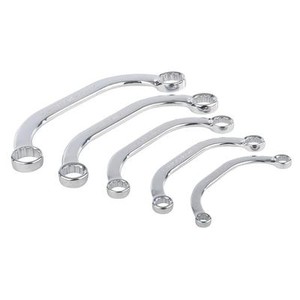
Also the union on the hard line can easily round off if using a regular spanner. And it's a half inch fitting if memory serves which makes it doubly likely if you only have metric spanners. Well worth investing in a proper 1/2" pipe spanner. Pic off ebay.

Also the union on the hard line can easily round off if using a regular spanner. And it's a half inch fitting if memory serves which makes it doubly likely if you only have metric spanners. Well worth investing in a proper 1/2" pipe spanner. Pic off ebay.

Tricky but it did just work, needed a patient assistant's help though
The gotcha was that although the pipe connection was 7/16" UNF as needed, the rod thread was not M8
I've ordered a 5/16" UNF clevis clotter pin 8mm, and hope that will fit
https://www.ebay.co.uk/itm/153902822513
The gotcha was that although the pipe connection was 7/16" UNF as needed, the rod thread was not M8
I've ordered a 5/16" UNF clevis clotter pin 8mm, and hope that will fit
https://www.ebay.co.uk/itm/153902822513
Gassing Station | Cerbera | Top of Page | What's New | My Stuff