How to remove side skirts on a VXR Monaro?
Discussion


Hi All.
Sorry for digging up an 11 year old post, but I thought I'd try and rack everyone's brains with a challenge I've got with trying to get my side skirts off this week.
My car is a '04 CV8.
All the fixings on the underside of the skirts, on both sides, won't come out and the bolts just spin, as though the threads are stripped.
Note the word, BOLTS and not screws or self-tappers....
I've been scouring Google and YouTube for more details and everything shows the fixings to be a self-tapper style screw which screws in a plastic square shaped clip that clips in to a square hole in the sill. Certainly, all GTOs in the States and Commodores in Oz use this setup.
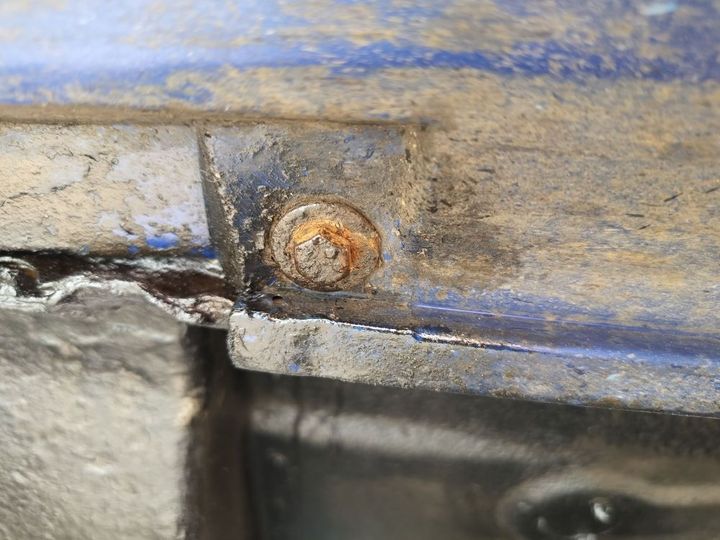
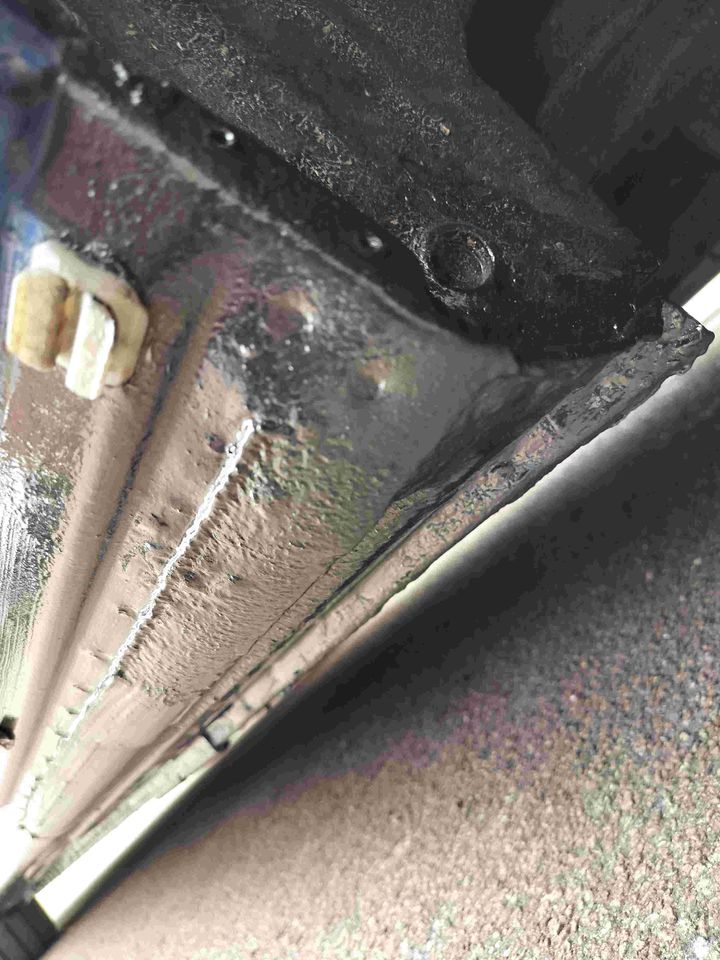
However, it seems I have 10mm hex head bolts which appear to bolt straight in to the sill. Either the sill has been tapped, or it's got the dreaded Rivnuts which are now spinning freely in the sill.
Can someone confirm either way as to which type of fixing they have in their cars please?
See the picture below as to what I have:
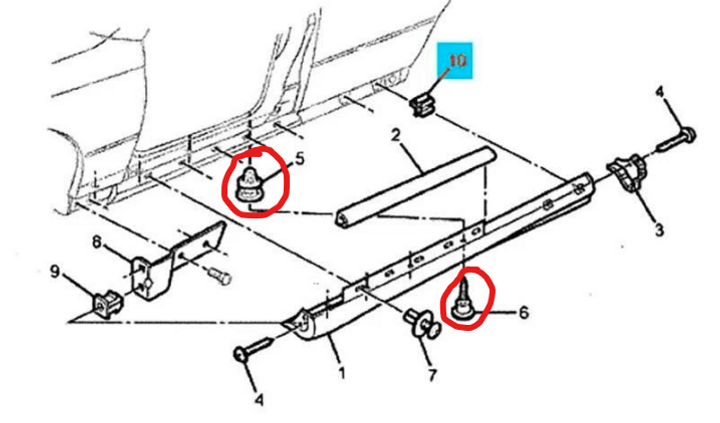
This is the GTO setup:
Sorry for digging up an 11 year old post, but I thought I'd try and rack everyone's brains with a challenge I've got with trying to get my side skirts off this week.
My car is a '04 CV8.
All the fixings on the underside of the skirts, on both sides, won't come out and the bolts just spin, as though the threads are stripped.
Note the word, BOLTS and not screws or self-tappers....
I've been scouring Google and YouTube for more details and everything shows the fixings to be a self-tapper style screw which screws in a plastic square shaped clip that clips in to a square hole in the sill. Certainly, all GTOs in the States and Commodores in Oz use this setup.
However, it seems I have 10mm hex head bolts which appear to bolt straight in to the sill. Either the sill has been tapped, or it's got the dreaded Rivnuts which are now spinning freely in the sill.
Can someone confirm either way as to which type of fixing they have in their cars please?
See the picture below as to what I have:
This is the GTO setup:
I’m not sure if this helps, but on my VZ series CV8 the side skirts were held on by screws.
On the top of the skirt I found plastic push pin scrivets which were a bit awkward to remove.
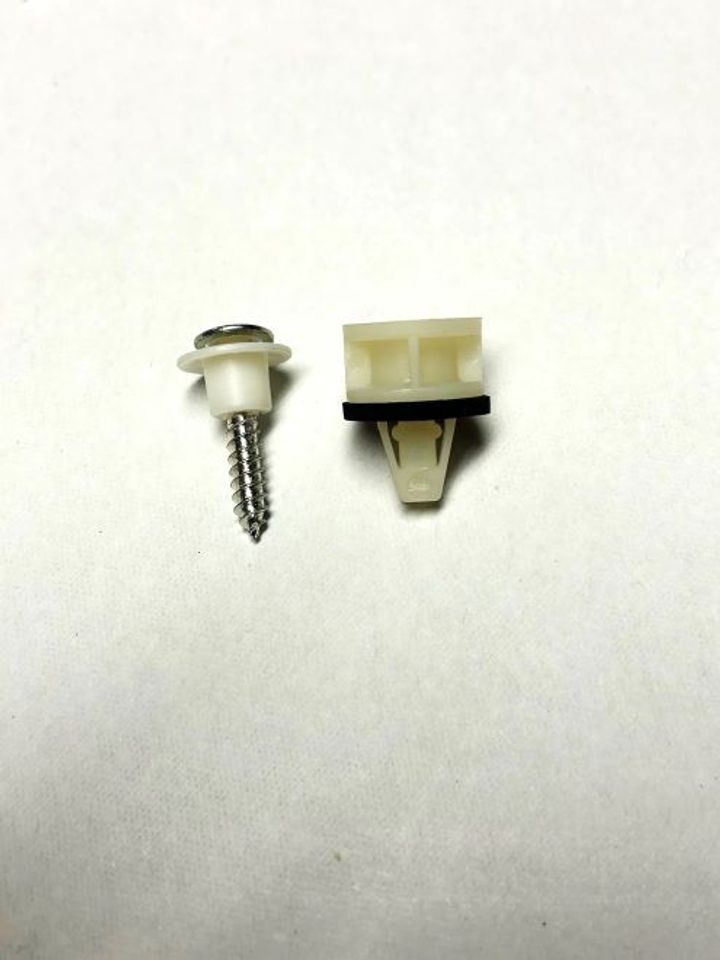
The underside was attached with steel screws which screwed into small white plastic blocks.
Once all the screws were all out the skirt had to be pushed either forward or back ( I can’t remember which ) and the skirt came off.
Looking at your set up I’m wondering if someone in the past replaced all the original fittings with bolts.
If they spin when turning maybe you could lever the bolt down with a flat bladed screw driver while turning the bolt with an open ended spanner to see if the threads bite.
You could also try cutting the bolt head off and drilling out the remaining bolt. Obviously that’s a bit of a pain to say the least!.
On the top of the skirt I found plastic push pin scrivets which were a bit awkward to remove.
The underside was attached with steel screws which screwed into small white plastic blocks.
Once all the screws were all out the skirt had to be pushed either forward or back ( I can’t remember which ) and the skirt came off.
Looking at your set up I’m wondering if someone in the past replaced all the original fittings with bolts.
If they spin when turning maybe you could lever the bolt down with a flat bladed screw driver while turning the bolt with an open ended spanner to see if the threads bite.
You could also try cutting the bolt head off and drilling out the remaining bolt. Obviously that’s a bit of a pain to say the least!.
Hi. Thanks for replying.
Hmm, I had a horrible feeling someone else has been in there before and replaced the plastic stuff with Rivnuts and bolts.
I've had the car pretty much from new, bought the car in 2006, but it's had rustproofing sessions at both Monkfish and MWP over the years, so the sills must of been off then during those periods.
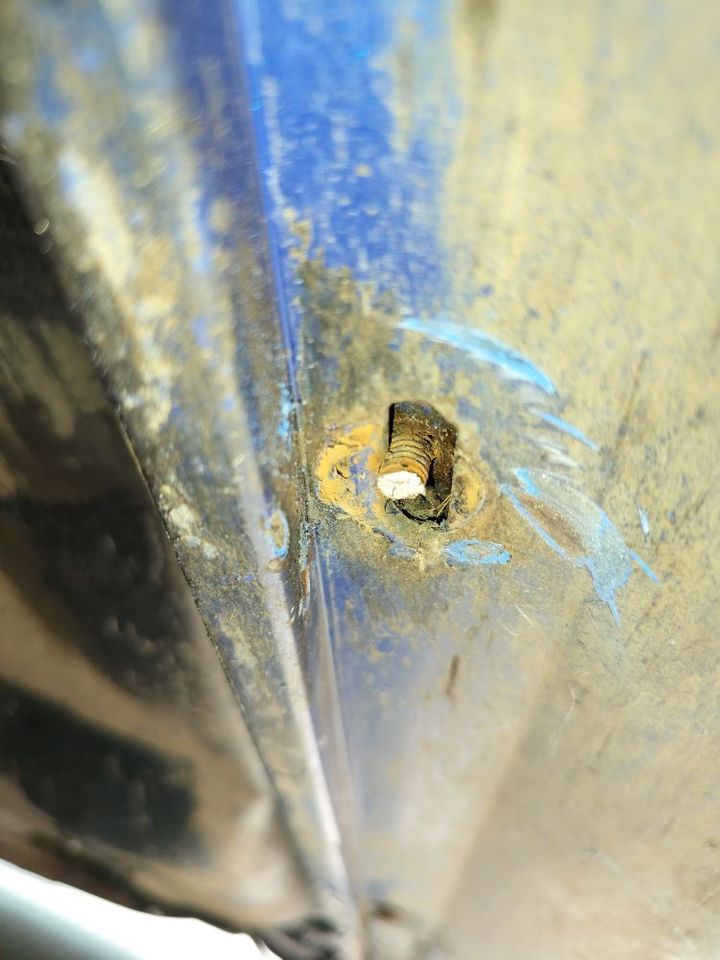
I cut off one of the bolt heads yesterday, which revealed that they are proper bolts with normal threads and not the self-tapper screws which are standard, see below. There is also no sign of the plastic blocks which clip in to the sill that the self-tappers screw in to.
I have ordered a load of the sill fixing kits from East Coast Holden Parts, so once they arrive I'll start attacking the bolts and Rivnuts with a Dremel.....
This is what should be in there:
Hmm, I had a horrible feeling someone else has been in there before and replaced the plastic stuff with Rivnuts and bolts.
I've had the car pretty much from new, bought the car in 2006, but it's had rustproofing sessions at both Monkfish and MWP over the years, so the sills must of been off then during those periods.
I cut off one of the bolt heads yesterday, which revealed that they are proper bolts with normal threads and not the self-tapper screws which are standard, see below. There is also no sign of the plastic blocks which clip in to the sill that the self-tappers screw in to.
I have ordered a load of the sill fixing kits from East Coast Holden Parts, so once they arrive I'll start attacking the bolts and Rivnuts with a Dremel.....
This is what should be in there:
Well the good news is at least the car won’t be rusty if it’s been rust proofed in the past. Keep us informed on how you get on as it’s always interesting to see how things are sorted out on these cars.
When I rust proofed my car I took the side skirts off myself and some of the metal screws were starting to go rusty at 7000 miles!
When you get the new screws if would be worth giving them a coating of grease just incase you need to remove them in the future.
When I rust proofed my car I took the side skirts off myself and some of the metal screws were starting to go rusty at 7000 miles!
When you get the new screws if would be worth giving them a coating of grease just incase you need to remove them in the future.
An update for you all....
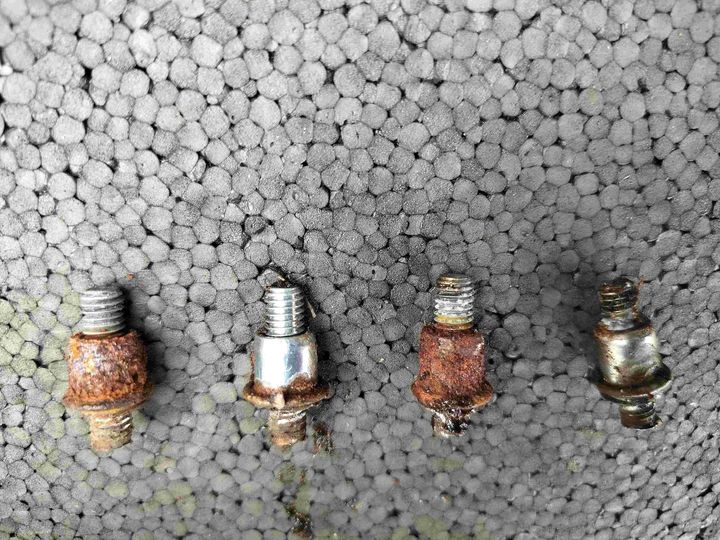
Well, I had great fun over the weekend grinding heads off 12 bolts with a cutting disc on a Dremel.
Rivnuts had indeed been fitted instead of the plastic clip/ nut and screw combo that is normally fitted as standard.
Here's a pic of 4 of the 12 that I managed to retrieve with a magnet on a stick; the rest will stay captive inside the sill in a bath of Lanoguard....
It wasn't too scary behind the skirts, it seems as though I caught in time. The worst was the passenger, side as always. I was very surprised by a huge piece of compacted mud and grime wedged between the skirt and the sill, just in front of the rear wheel arch; no wonder these cars rust in that area!
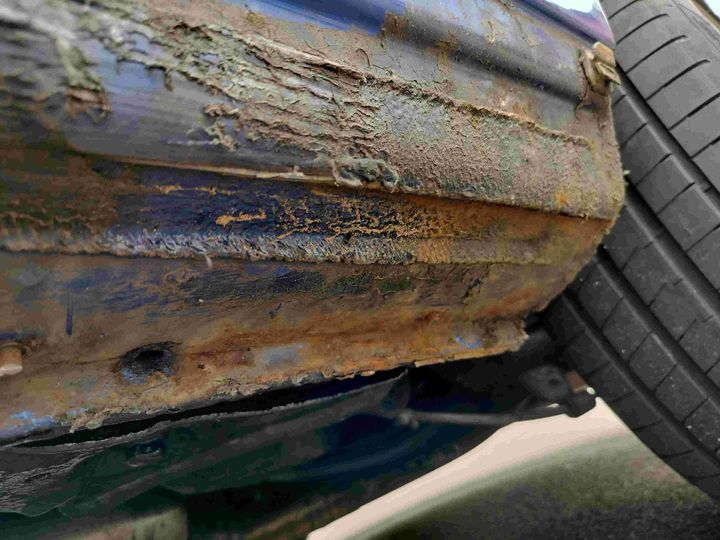
Halfway along was a bit scary too.
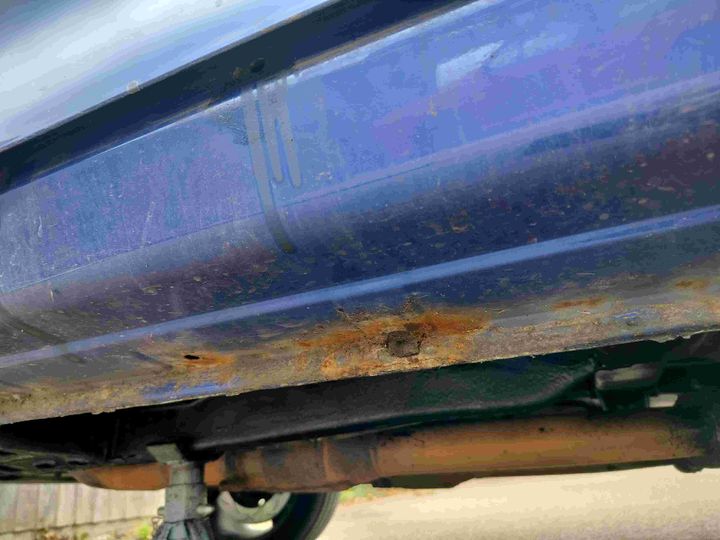
Anyway, it was pretty much surface rust, which I attacked with a wire brush and rust converter and then a good coat of black Hammerite.
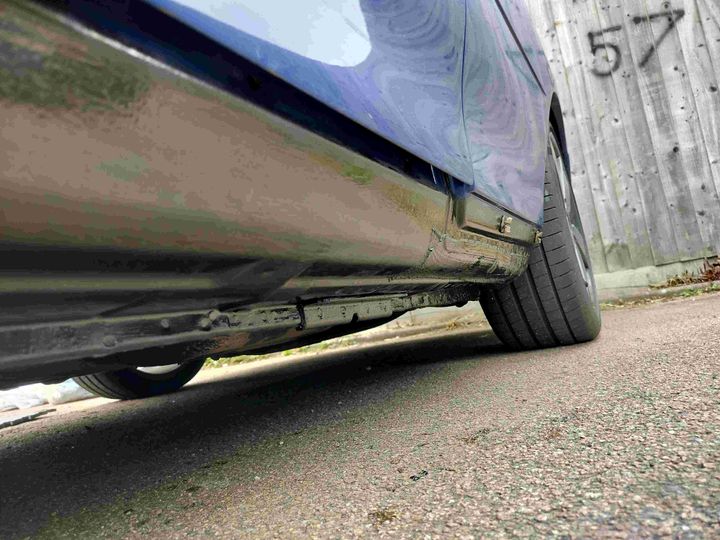
I hope that should keep it at bay for a while. As I mentioned above, both sides are now full of Lanoguard too.
I use my car all year around as a daily, so I was a bit concerned I'd never looked under the sides skirts before, but I feel happier now.
Well, I had great fun over the weekend grinding heads off 12 bolts with a cutting disc on a Dremel.
Rivnuts had indeed been fitted instead of the plastic clip/ nut and screw combo that is normally fitted as standard.
Here's a pic of 4 of the 12 that I managed to retrieve with a magnet on a stick; the rest will stay captive inside the sill in a bath of Lanoguard....
It wasn't too scary behind the skirts, it seems as though I caught in time. The worst was the passenger, side as always. I was very surprised by a huge piece of compacted mud and grime wedged between the skirt and the sill, just in front of the rear wheel arch; no wonder these cars rust in that area!
Halfway along was a bit scary too.
Anyway, it was pretty much surface rust, which I attacked with a wire brush and rust converter and then a good coat of black Hammerite.
I hope that should keep it at bay for a while. As I mentioned above, both sides are now full of Lanoguard too.
I use my car all year around as a daily, so I was a bit concerned I'd never looked under the sides skirts before, but I feel happier now.
Gassing Station | HSV & Monaro | Top of Page | What's New | My Stuff