
Steve Edwards Headlight Cowl - my DIY attempt....
Discussion


So, package arrived yesterday and I didn't pick it up until late from the drop off point - but I tried a very dry fit and had some concerns.
Texted Steve who kindly took my call, and I suggested I do a video first thing, upload it to Youtube so he can see what I meant....
The drivers side didn't seem to fit as well as pax side, so I sent a video link to Steve first thing and then spoke to him about my concerns....it also happens to be the day of his stag do (Saturday) but was willing to help out and offer advice right up until his mates turn up and take him out!
Steve has been bloody brilliant and I cannot say enough good things about my dealings with him thus far.
So, here are some pics I also sent him...


So, after the chat this morning, it was apparent I had to take more off the top and sides and remove / smooth over some of the sealant (pax side was fine).....so I sanded back and even went down to the fibreglass, so a light coat of paint was needed....

As I had watched Steve's video 'a number' of times, I pretty much knew what I needed....the kit components are very clearly marked and even I couldn't get it wrong!

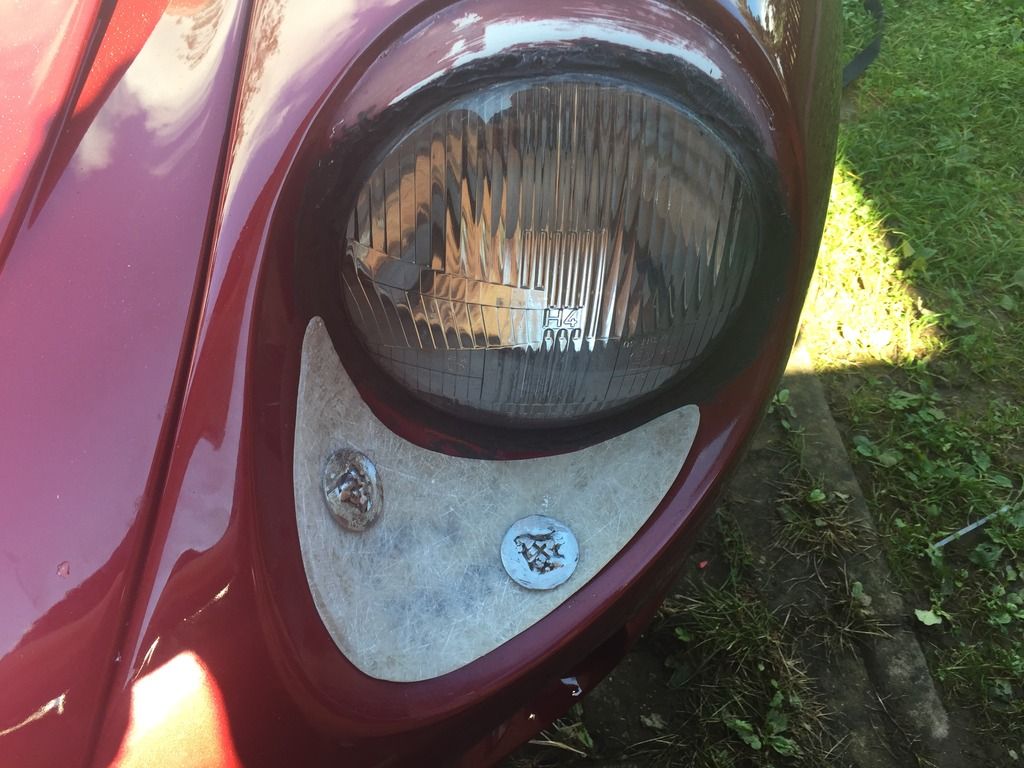
Drilled the holes in the baseplates after marking up the positions of the two holes.....

Then simply attach the bolts..

Drilled the drainage hole and then offered up the baseplates (took this pic and spoke to Steve again before I went any further) - needed to be moved slightly, but "you are doing the right things" Steve assured me
Next came the one of the parts of the process I was dreading - the application of the filler - I didn't take any pictures as I wanted to get this bit right - and as I am typing this, I am waiting for the stuff to dry / set. I plan to leave it a while, rather than rush.
This job shouldn't be rushed - and I hope to get the lenses bonded to the cowls by close of play today and let them cure overnight...
So what do I think about the look etc - well, I must say it looks absolutely stunning - I think it makes the front of the car more finished and no way overstated. It works with the colour of my car and I am very happy!
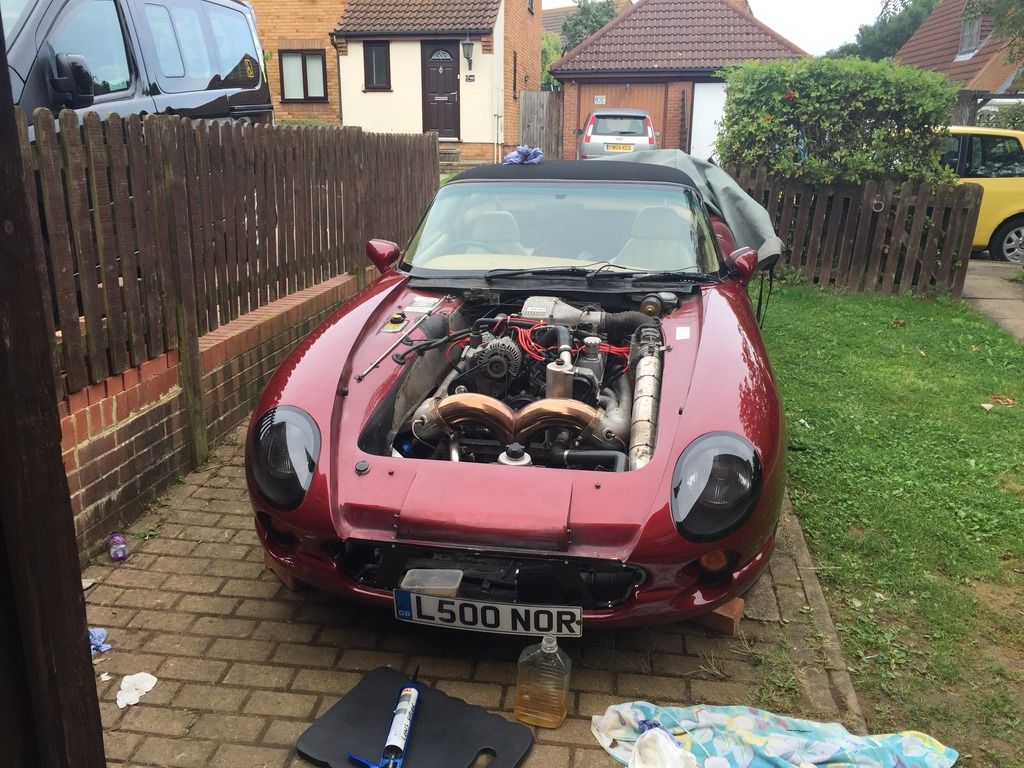
Here is how it stands at the moment...looks like it has been to the hospital though and a load of trainee Doctors have had the opportunity to have a go at bandaging for the first time

That's it for now.
Nosh
Texted Steve who kindly took my call, and I suggested I do a video first thing, upload it to Youtube so he can see what I meant....
The drivers side didn't seem to fit as well as pax side, so I sent a video link to Steve first thing and then spoke to him about my concerns....it also happens to be the day of his stag do (Saturday) but was willing to help out and offer advice right up until his mates turn up and take him out!
Steve has been bloody brilliant and I cannot say enough good things about my dealings with him thus far.
So, here are some pics I also sent him...


So, after the chat this morning, it was apparent I had to take more off the top and sides and remove / smooth over some of the sealant (pax side was fine).....so I sanded back and even went down to the fibreglass, so a light coat of paint was needed....

As I had watched Steve's video 'a number' of times, I pretty much knew what I needed....the kit components are very clearly marked and even I couldn't get it wrong!

Drilled the holes in the baseplates after marking up the positions of the two holes.....

Then simply attach the bolts..

Drilled the drainage hole and then offered up the baseplates (took this pic and spoke to Steve again before I went any further) - needed to be moved slightly, but "you are doing the right things" Steve assured me

Next came the one of the parts of the process I was dreading - the application of the filler - I didn't take any pictures as I wanted to get this bit right - and as I am typing this, I am waiting for the stuff to dry / set. I plan to leave it a while, rather than rush.
This job shouldn't be rushed - and I hope to get the lenses bonded to the cowls by close of play today and let them cure overnight...
So what do I think about the look etc - well, I must say it looks absolutely stunning - I think it makes the front of the car more finished and no way overstated. It works with the colour of my car and I am very happy!
Here is how it stands at the moment...looks like it has been to the hospital though and a load of trainee Doctors have had the opportunity to have a go at bandaging for the first time

That's it for now.
Nosh
IVANHOE said:
Well at least you now know that Steve Edwards is a top bloke to do business with.
Yup - one of the best I have come across for a while.....better than a place that sells TVR parts, who I ordered a rad off. Still nothing on email from UPS after I ordered it on Wednesday. Phoned them up on Friday, they sounded like they couldn't give a toss; told me my order had not been sorted - "but we will do it now for you..."
How kind.....
Nosh
Gc450 said:
Great write up mate keep the details coming
All the best with it
Glyn
Thanks - All the best with it
Glyn
So just done the final bonding of the lens onto the cowl....
Here are the cowls getting their additional bit of filler - and I was sceptical I would be able to pull this off.....but I managed it!!
Left done and smoothy - right, more work to do on that one!

And here she is, trussed up for the night and should be unable to move!! The bandages come off in the morning!!

Nosh
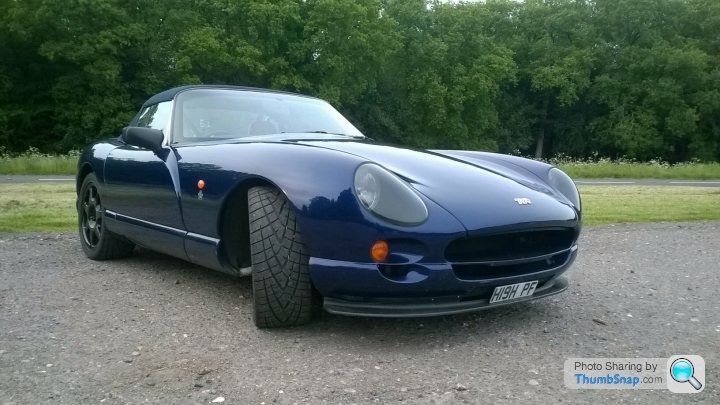
So - I got up early this morning, feeling like it was christmas morning and I really hoped Santa had brought me something nice!
I removed the bandages, removed the headlamp units, removed the tape, removed the remainder of the gunk that had crept out of the side and onto the lens. A little white spirit helped this a little.
Took them back to the car for the refit and I was over the moon with fit - not mm perfect, but as you look at them, they look spot on. And when I say not perfect, I mean not thou-mm perfect - and this is almost certainly as a result of my skill (or lack thereof), rather than the product.
Used the non-drying sealant, which has to be the worst thing invented by man - just imagine a tube of chewing gum that has been out in the sun - that gives you an idea of the consistency. It was also a whitish creme colour, so as I went for the final refit, you could still see it, even when I had got as much from the gap as possible.
So, I finished the lights with the smallest bead of silk-a-blah, and smoothed it down with a damp finger and then a small cloth with white spirit on it - finish is really nice and looks the nads with the grill in place...
So really happy and I know Steve would have done a far superior job if he had done the installation than I have managed - but I am really proud I pulled it off and how the car now looks.....
Here are a few pics of the final result.......


Nosh
I removed the bandages, removed the headlamp units, removed the tape, removed the remainder of the gunk that had crept out of the side and onto the lens. A little white spirit helped this a little.
Took them back to the car for the refit and I was over the moon with fit - not mm perfect, but as you look at them, they look spot on. And when I say not perfect, I mean not thou-mm perfect - and this is almost certainly as a result of my skill (or lack thereof), rather than the product.
Used the non-drying sealant, which has to be the worst thing invented by man - just imagine a tube of chewing gum that has been out in the sun - that gives you an idea of the consistency. It was also a whitish creme colour, so as I went for the final refit, you could still see it, even when I had got as much from the gap as possible.
So, I finished the lights with the smallest bead of silk-a-blah, and smoothed it down with a damp finger and then a small cloth with white spirit on it - finish is really nice and looks the nads with the grill in place...
So really happy
and I know Steve would have done a far superior job if he had done the installation than I have managed - but I am really proud I pulled it off and how the car now looks.....Here are a few pics of the final result.......


Nosh


SILICONEKID345HP said:
Looks great ,Are your original lights in good order ? I`m aware he does the Lupo lights with those covers .
DazThe Drivers side reflector was very rusty, so I had to change that anyway. I thought, if I had to remove the cowls, I may as well go the whole hog and update the light cowls..
Lights are good - and are pretty bright.
Nosh

Gassing Station | Chimaera | Top of Page | What's New | My Stuff