Modified Maisto 1:12 GSXR 750 K7
Discussion


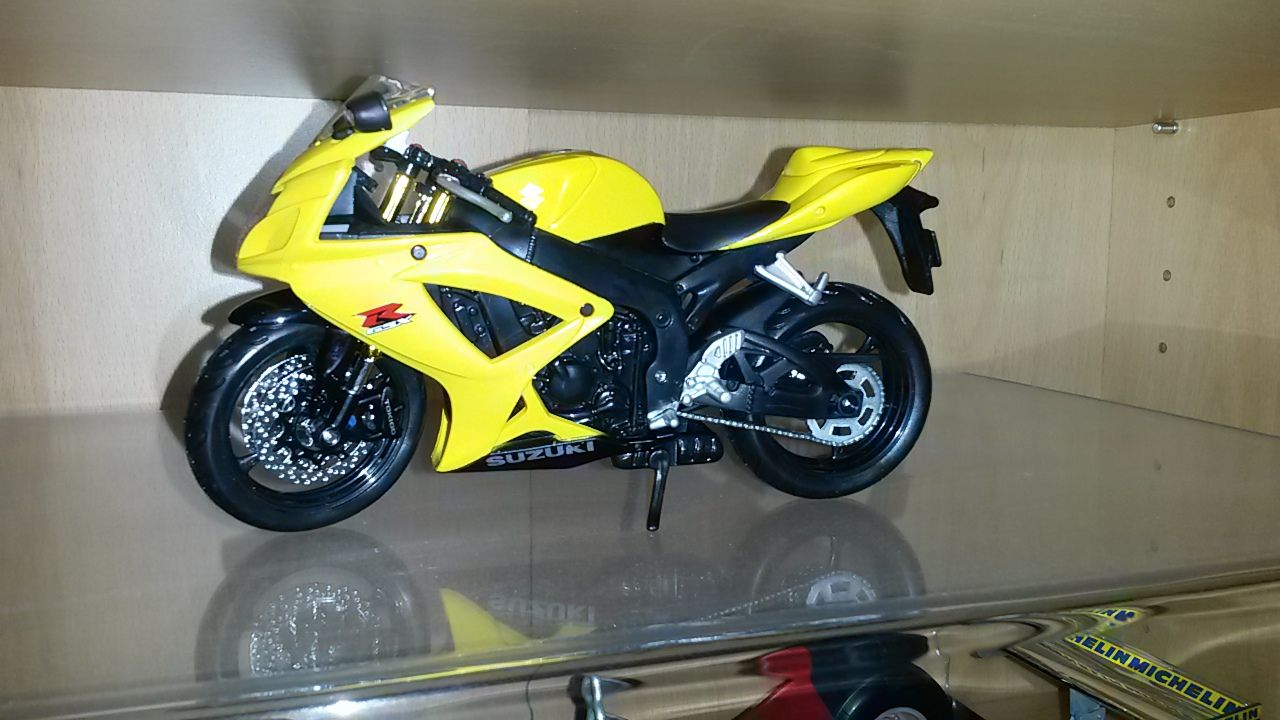
So I have made many models of F1 cars in 1:12 scale, but never of anything I own for real. I got a GSXR earlier this year as a fun bike for the road, I then found that Maisto do a 1:12 scale model of this bike, albeit in 600 form. Visually they are identical so not really a problem. Unfortunately when I ordered one from Amazon I was sent the yellow version:

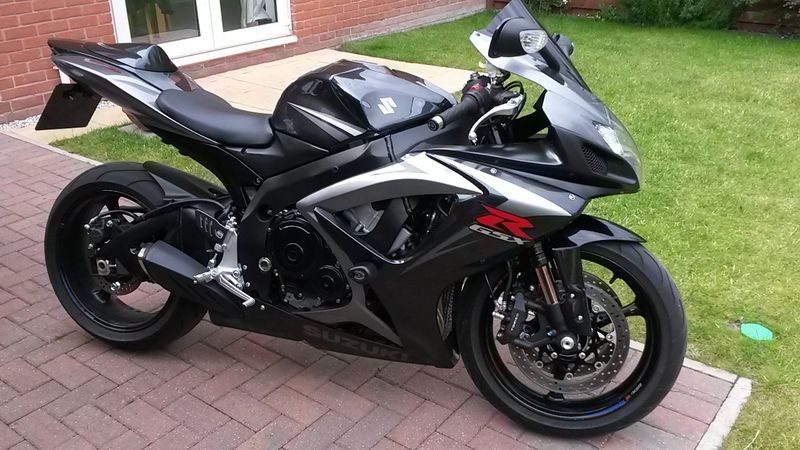
It didnt bother me though as I knew I would be painting it in the Phantom Grey scheme of my bike. What did bother me was the poorly moulded chain and rear sprocket, naff looking disc brakes and the blobby footpegs and brake/clutch levers. As Tamiya make good plastic model kits that I have made quite a few of I hit the internet again. After a bit of checking on how parts look I bought these 2 kits:


I also got hold of a photoetch set for the Hyabusa.
I would use various bits from both kits to modify the Maisto model to improve the not so great parts on it. My eventual aim was to get something resembling my real bike:
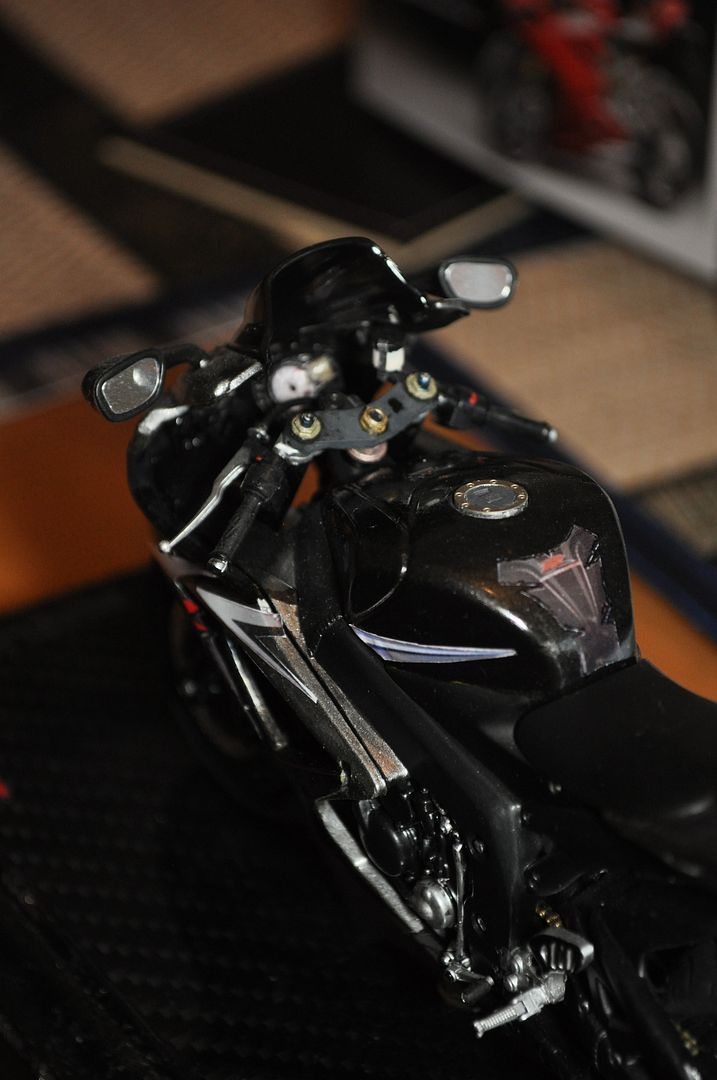
Sorry, I didnt make a diary of the build in pictures, but basically the Maisto model was completely disassembled. The rear sprocket and chain was cut off and replaced with the one from the Tamiya R1 kit. It was a crisply moulded piece and the rear sprocket matched that on the GSXR quite well. Next all the pedals and footpegs were removed. The pegs came from the R1 kit as again they matched the real ones on the bike nicely. Some drilling was required to attach them and their bracket to the model. The gear selector came from the Hyabusa, as did the brake pedal. Next up was fixing the brake discs. The fronts came from the Hyabusa, which required all the holes drilling out. The back brake came from the R1, again with all the holes drilled. The Hyabusa had the photoetched disc surface glued on which is when I realised I should have checked if the holes in it lined up with those in the kit part, doh! Oh well, next time I would have glued it on then drilled the holes. The final modified part was the front forks, including triple tree. This all came from the R1 kit, including the grips and brake/clutch levers. I still required the brake calipers and fork bottom ends, so this part was cut off the Maisto kit with the R1 forks drilled so metal pins could be inserted, over which some 3mm diameter hollow tubing could be placed to represent the polished telescoping part of the forks. Tubing from the Tamiya kits was used for the clutch cable and brake lines, with some scale ignition wire used for the throttle cables. The headlight was a poor representation so the part in the Hyabusa kit was brought into action, which had a separate lens to represent the projector high beam. Some cutting of the Maisto internals was required to get it to fit, with some reflective aluminium paper to show the sidelights. The rear fender was eliminated and modified along with some plastic from the R1 kit to represent the number plate. After painting with Tamiya paints, with silver parts using Humbrol metal colours, photo's of the bike were used to make decals which were printed on decal
paper, varnished and then attached to the bike. The tyres came from the Hyabusa kit, they didnt really need sanding as they already came with the scrubbed look. A couple of the Suzuki decals also came from the kit. The windscreen was painted with Tamiya smoke from TS rattle can. First time I have used Tamiya rattle cans and I was very impressed with the finish. A few coats were required on either side of the screen to get the required darkness.
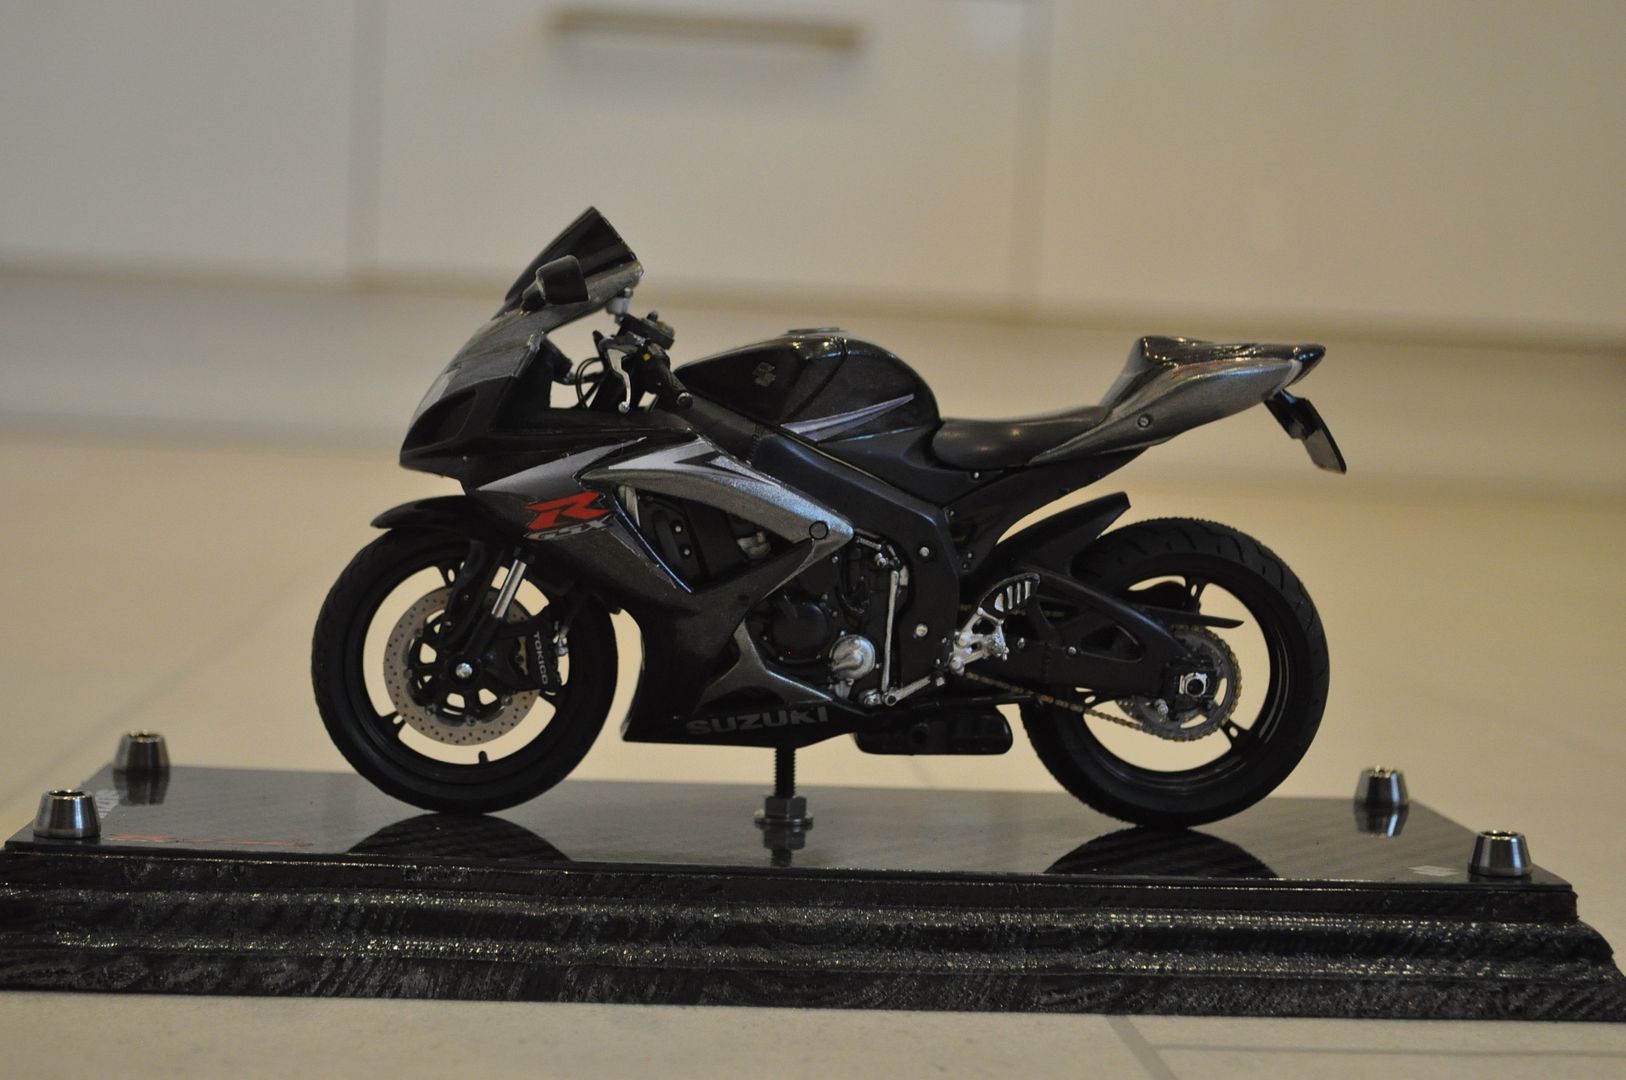
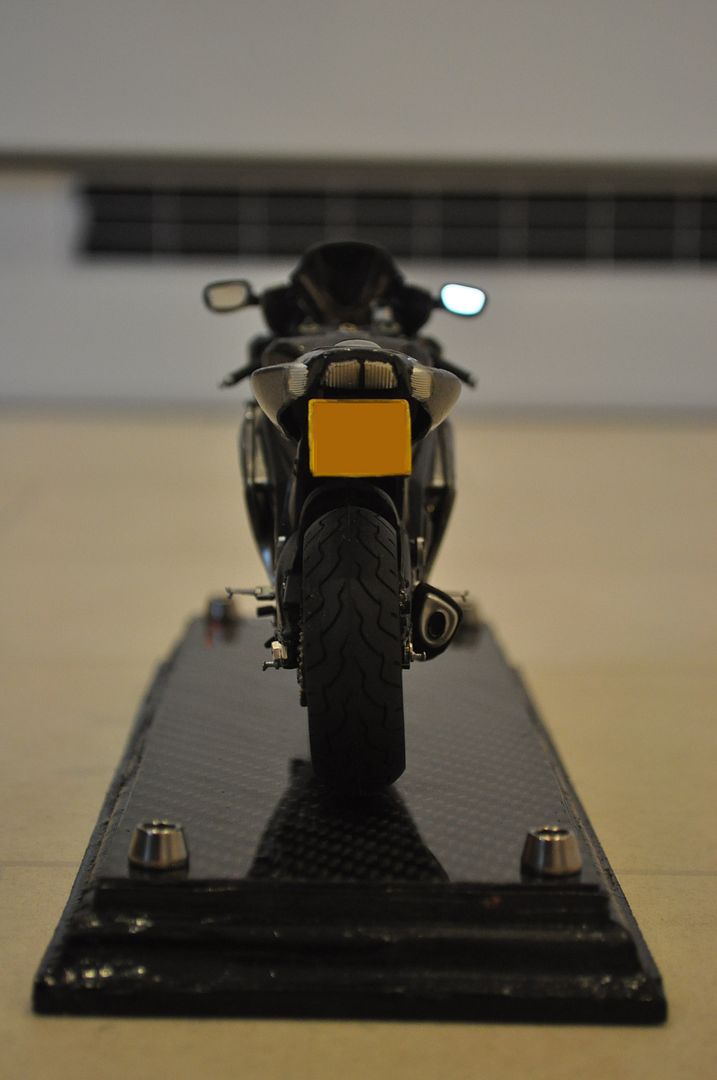
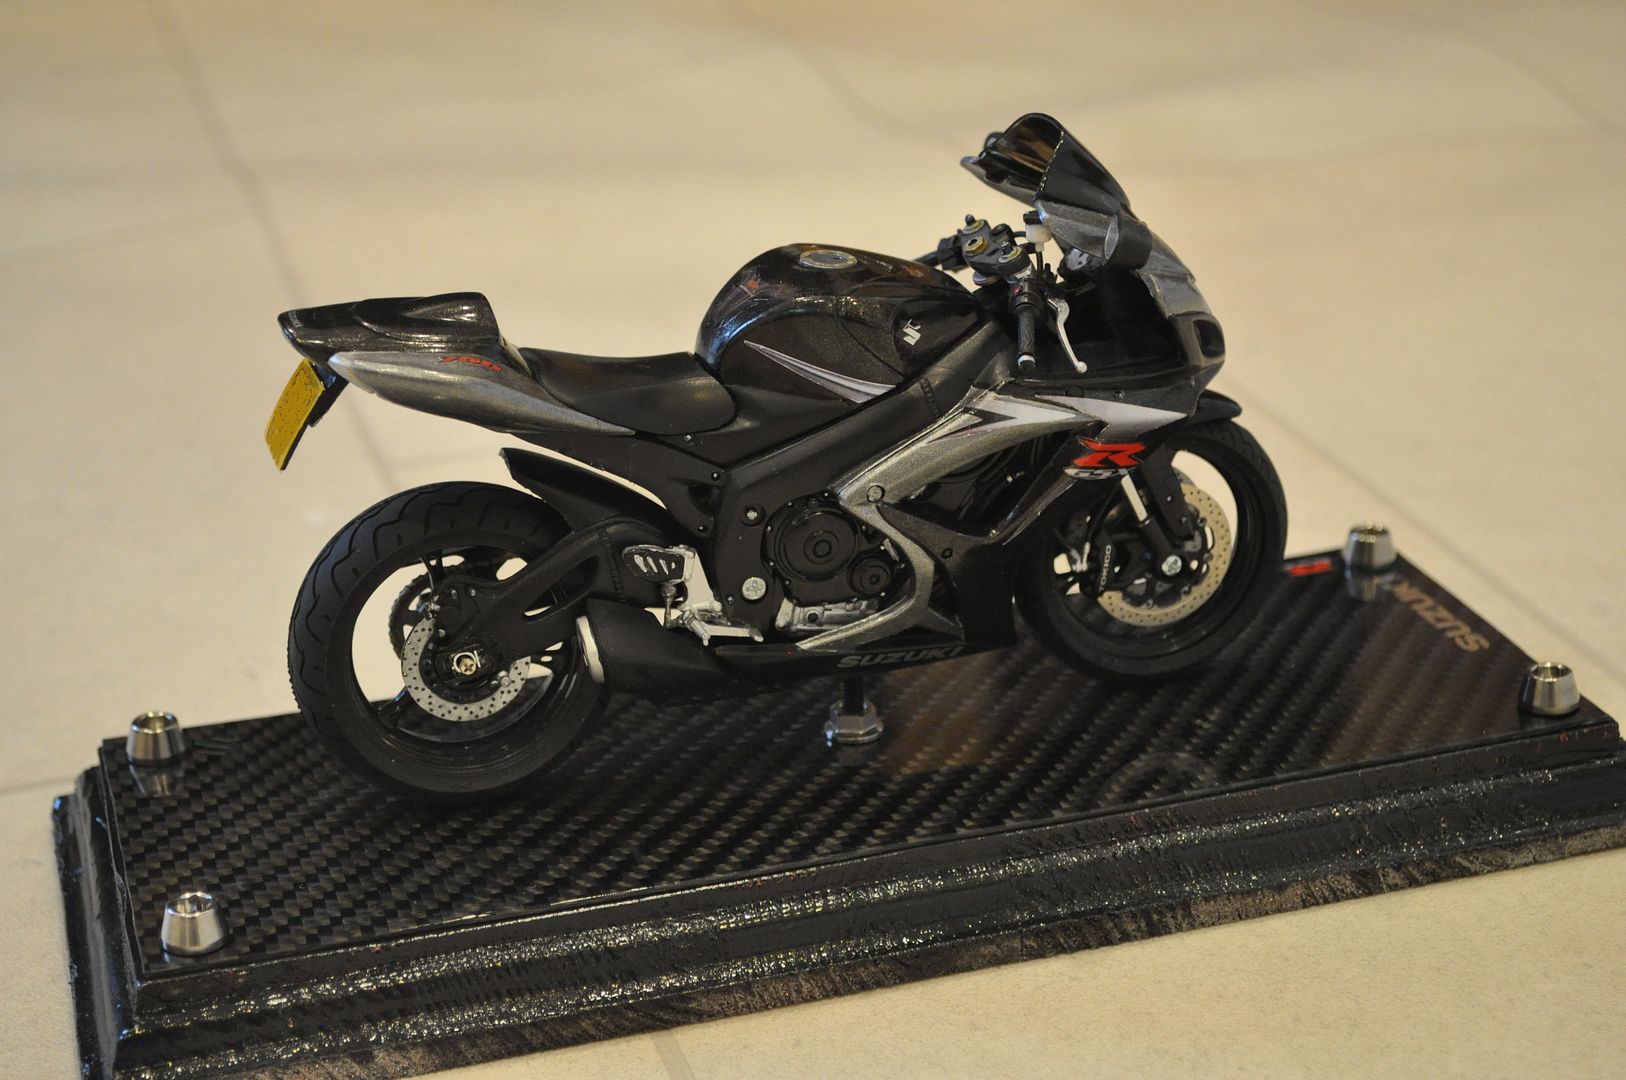
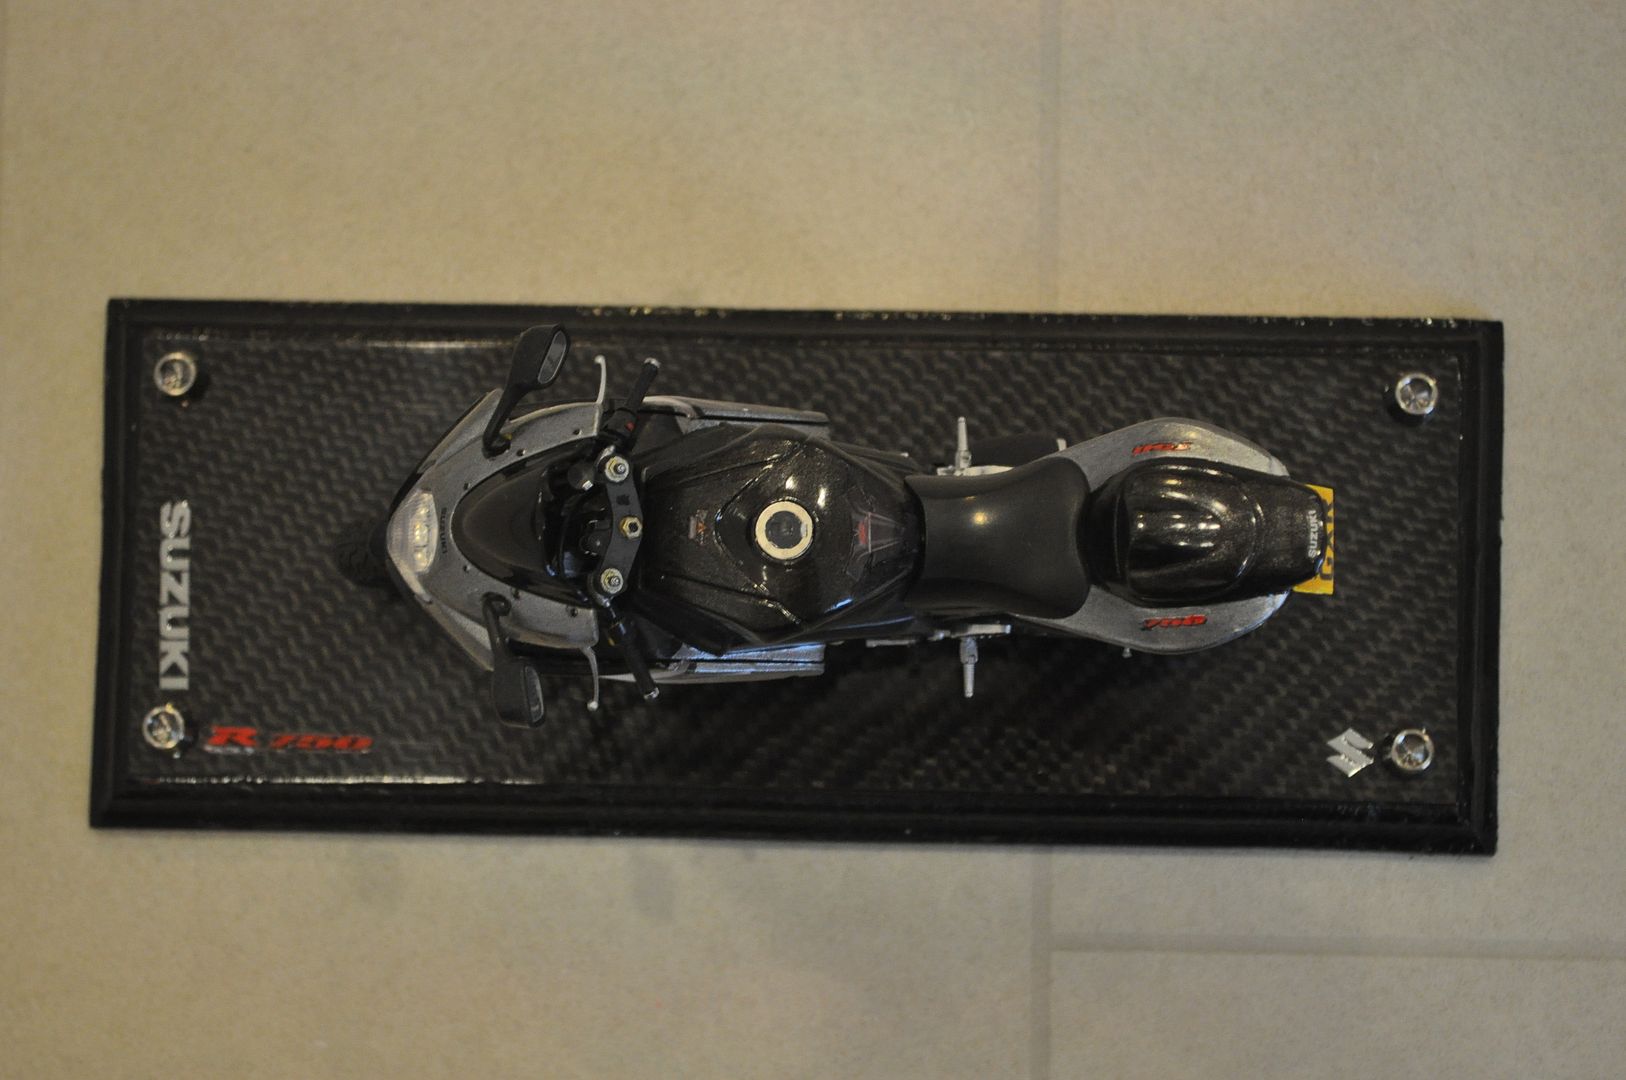
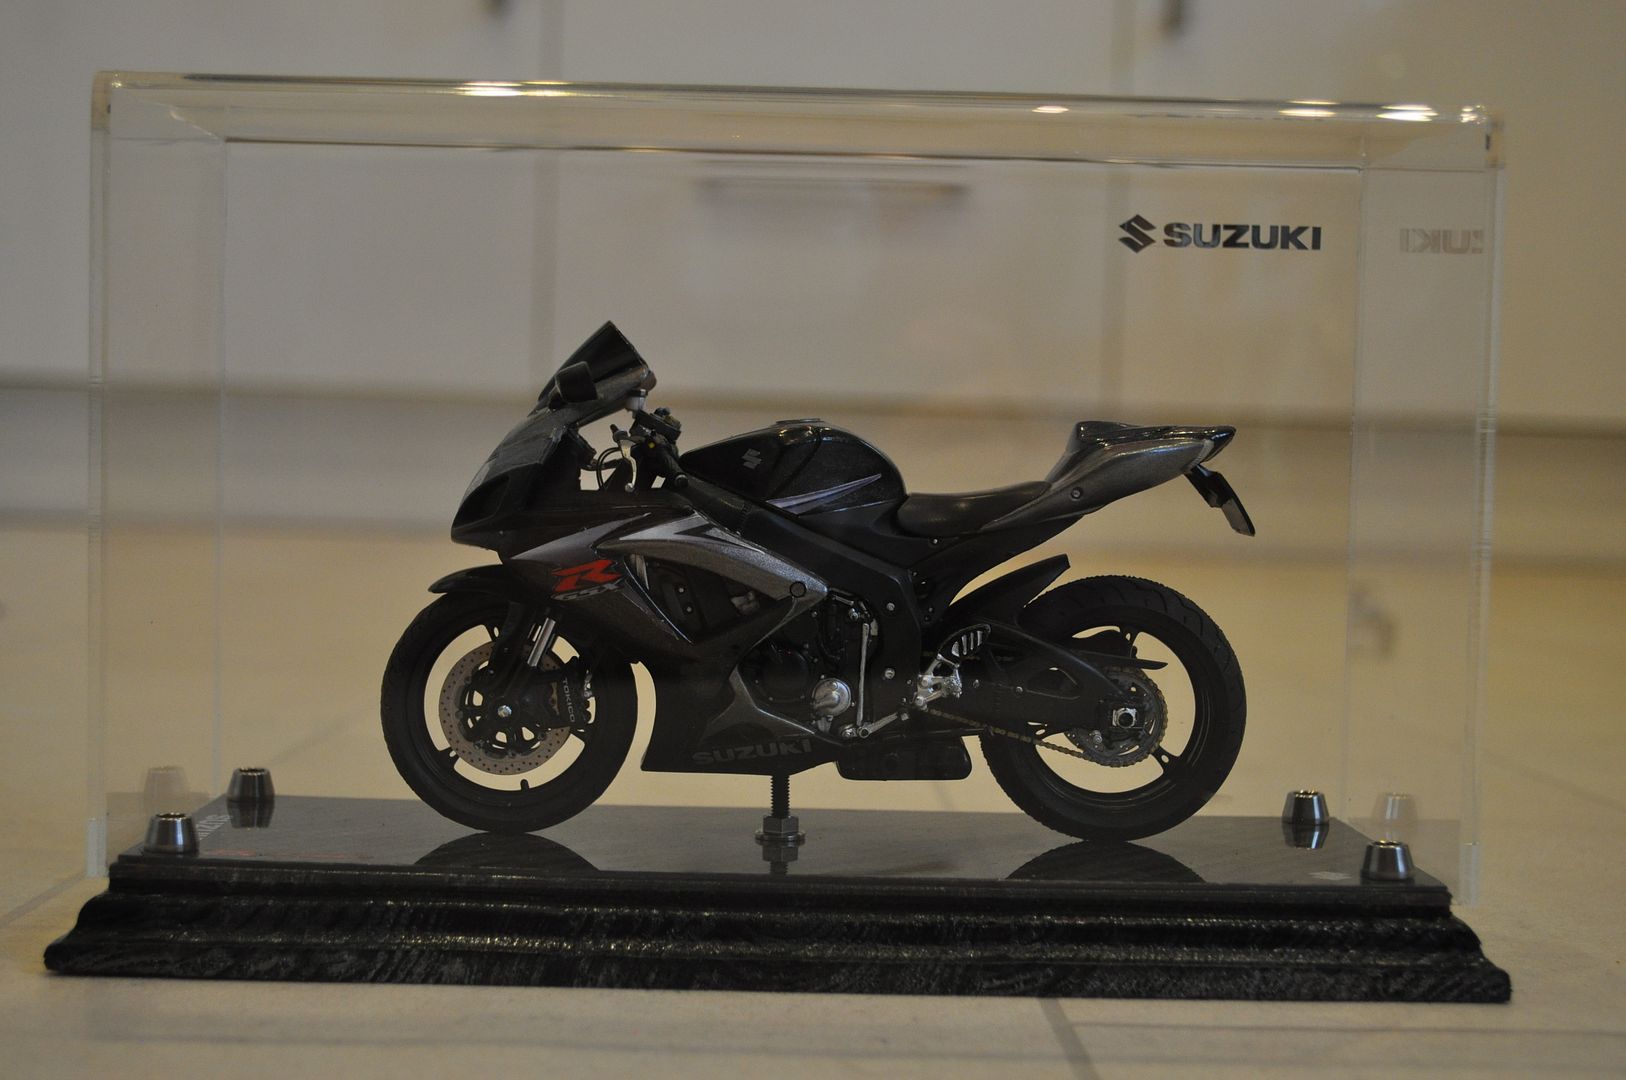
Finally the base was made from a piece of wood I had lying around which had the edges cut with a router to give a shaped profile. Holes were drilled to enable a base plate of real carbon fibre to be secured with titanium bolts. The wood was spray painted black after having been sanded and primed. I found and purchased some metal Suzuki decals from a model shop in Australia, which were placed on the carbon fibre, with the S emblem also placed on the petrol tank.
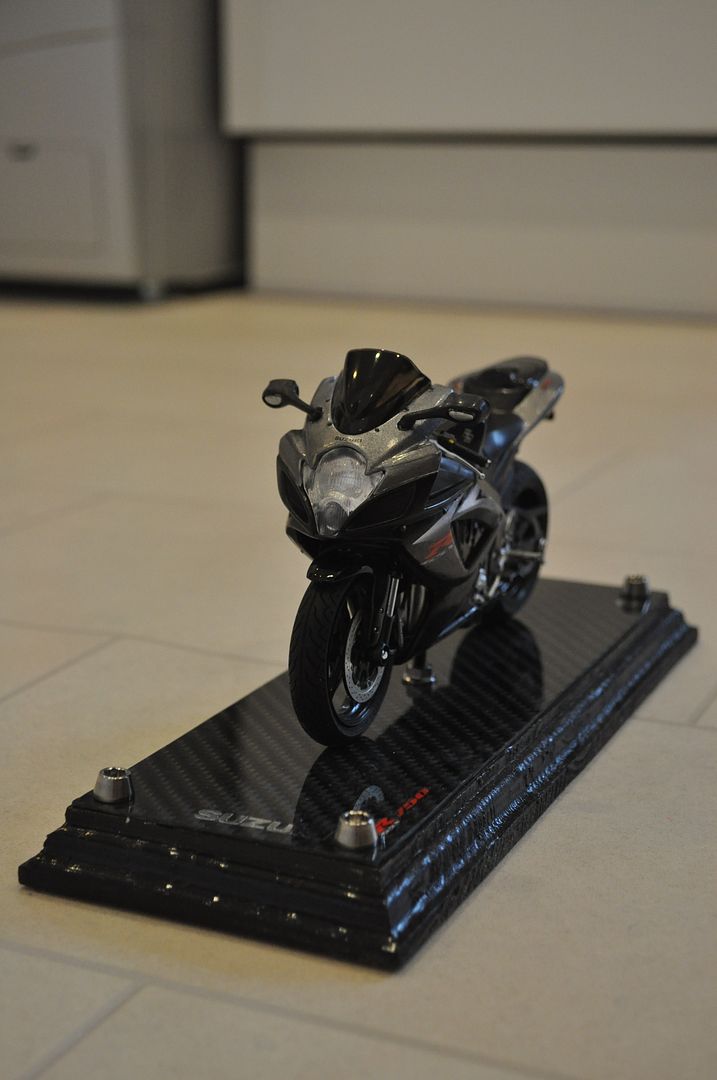
So after quite a bit of modifying and work here is the end result:
The experience has inspired me to make a second 1:12 scale bike model, a Ducati 1199 Panigale from Tamiya.
It didnt bother me though as I knew I would be painting it in the Phantom Grey scheme of my bike. What did bother me was the poorly moulded chain and rear sprocket, naff looking disc brakes and the blobby footpegs and brake/clutch levers. As Tamiya make good plastic model kits that I have made quite a few of I hit the internet again. After a bit of checking on how parts look I bought these 2 kits:
I also got hold of a photoetch set for the Hyabusa.
I would use various bits from both kits to modify the Maisto model to improve the not so great parts on it. My eventual aim was to get something resembling my real bike:
Sorry, I didnt make a diary of the build in pictures, but basically the Maisto model was completely disassembled. The rear sprocket and chain was cut off and replaced with the one from the Tamiya R1 kit. It was a crisply moulded piece and the rear sprocket matched that on the GSXR quite well. Next all the pedals and footpegs were removed. The pegs came from the R1 kit as again they matched the real ones on the bike nicely. Some drilling was required to attach them and their bracket to the model. The gear selector came from the Hyabusa, as did the brake pedal. Next up was fixing the brake discs. The fronts came from the Hyabusa, which required all the holes drilling out. The back brake came from the R1, again with all the holes drilled. The Hyabusa had the photoetched disc surface glued on which is when I realised I should have checked if the holes in it lined up with those in the kit part, doh! Oh well, next time I would have glued it on then drilled the holes. The final modified part was the front forks, including triple tree. This all came from the R1 kit, including the grips and brake/clutch levers. I still required the brake calipers and fork bottom ends, so this part was cut off the Maisto kit with the R1 forks drilled so metal pins could be inserted, over which some 3mm diameter hollow tubing could be placed to represent the polished telescoping part of the forks. Tubing from the Tamiya kits was used for the clutch cable and brake lines, with some scale ignition wire used for the throttle cables. The headlight was a poor representation so the part in the Hyabusa kit was brought into action, which had a separate lens to represent the projector high beam. Some cutting of the Maisto internals was required to get it to fit, with some reflective aluminium paper to show the sidelights. The rear fender was eliminated and modified along with some plastic from the R1 kit to represent the number plate. After painting with Tamiya paints, with silver parts using Humbrol metal colours, photo's of the bike were used to make decals which were printed on decal
paper, varnished and then attached to the bike. The tyres came from the Hyabusa kit, they didnt really need sanding as they already came with the scrubbed look. A couple of the Suzuki decals also came from the kit. The windscreen was painted with Tamiya smoke from TS rattle can. First time I have used Tamiya rattle cans and I was very impressed with the finish. A few coats were required on either side of the screen to get the required darkness.
Finally the base was made from a piece of wood I had lying around which had the edges cut with a router to give a shaped profile. Holes were drilled to enable a base plate of real carbon fibre to be secured with titanium bolts. The wood was spray painted black after having been sanded and primed. I found and purchased some metal Suzuki decals from a model shop in Australia, which were placed on the carbon fibre, with the S emblem also placed on the petrol tank.
So after quite a bit of modifying and work here is the end result:
The experience has inspired me to make a second 1:12 scale bike model, a Ducati 1199 Panigale from Tamiya.
Edited by EagleMoto4-2 on Saturday 19th December 14:00

Gassing Station | Scale Models | Top of Page | What's New | My Stuff