
15 Year Old Family Home
Discussion


Painfully aware of the standard of house renovations in this thread, I tentatively start this thread. I want to keep a record of before and afters mostly and as I enjoy looking through everyone else threads, I thought I'd give this a go. This will be done on an extremely tight budget and my wife has some eclectic colour choices  so may be a bit different to others.
Background
We have rented for a few years now. the last house was an old farm house with lots of space outside but very damp and smelly inside. No matter how we cleaned, painted or air freshened, we could not hide the smell.
A house perfect for us and good value popped up in the locality and we scraped together to take the plunge. A very stressful 5 months followed where the owner quite frankly took us for a ride. Owners stance was that the first one to sign the contract was the winner. Even the offer of more than the other parties offers was not enough for them to accept our offer. We pulled out at that stage as we didn't have the money to throw away on surveys etc when there was no commitment to us. 3mts later we were on holiday in a very noisy playpark and got a phonecall. (Why does this always happen!) Estate agent wanted to know if we were still interested as the other party had pulled out. I said yes but offered substantially less than originally. Happy days.
Its an averaged size 4 bedroom, 3 reception room 15 yr old house. My favorite bits:
- Different to the average modern square box
- Big windows, so very bright inside
- Decor is very livable in and in fairly good condition
As with any house it has a few things that need attention.
- Doors, skirting and architrave need replacing (Old pine and in fairly used condition after 15yrs.) This will have to wait
- Would benefit from a new kitchen
- Drive and paths round house need sorting (Maybe tar?)
- Staircase needs repainting. (I'm dreading this)
- House needs some character
- shower needs sorting
- Original boiler still working perfectly but would think a new one with new controls would save on heating cost
- Exterior doors need replaced as they are solid wood.
If your still reading, here's a picture.
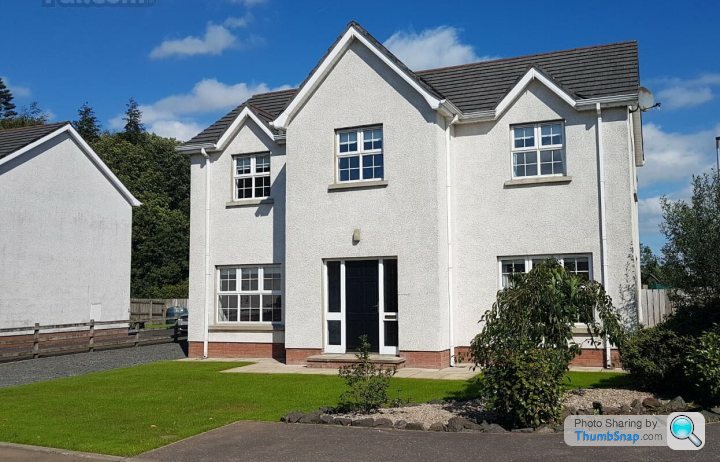
The lawn has now decided its had enough and mostly died after the recent hot dry weather!
so may be a bit different to others.Background
We have rented for a few years now. the last house was an old farm house with lots of space outside but very damp and smelly inside. No matter how we cleaned, painted or air freshened, we could not hide the smell.
A house perfect for us and good value popped up in the locality and we scraped together to take the plunge. A very stressful 5 months followed where the owner quite frankly took us for a ride. Owners stance was that the first one to sign the contract was the winner. Even the offer of more than the other parties offers was not enough for them to accept our offer. We pulled out at that stage as we didn't have the money to throw away on surveys etc when there was no commitment to us. 3mts later we were on holiday in a very noisy playpark and got a phonecall. (Why does this always happen!) Estate agent wanted to know if we were still interested as the other party had pulled out. I said yes but offered substantially less than originally. Happy days.
Its an averaged size 4 bedroom, 3 reception room 15 yr old house. My favorite bits:
- Different to the average modern square box
- Big windows, so very bright inside
- Decor is very livable in and in fairly good condition
As with any house it has a few things that need attention.
- Doors, skirting and architrave need replacing (Old pine and in fairly used condition after 15yrs.) This will have to wait
- Would benefit from a new kitchen
- Drive and paths round house need sorting (Maybe tar?)
- Staircase needs repainting. (I'm dreading this)
- House needs some character
- shower needs sorting
- Original boiler still working perfectly but would think a new one with new controls would save on heating cost
- Exterior doors need replaced as they are solid wood.
If your still reading, here's a picture.
The lawn has now decided its had enough and mostly died after the recent hot dry weather!
Well maybe I'm being a bit fussy by saying that. They are a bit grubby and would benefit from a tidy up. They have been badly fitted/refitted at some point too. I may just give them a lick of white paint to freshen them up as I'm not a fan of pine. The doors are poor quality. While the moneys tight I had thought I might give them a paint too but the last thing I want is chipped, flaking doors. Anyone any experience of painting previously varnished pine doors?
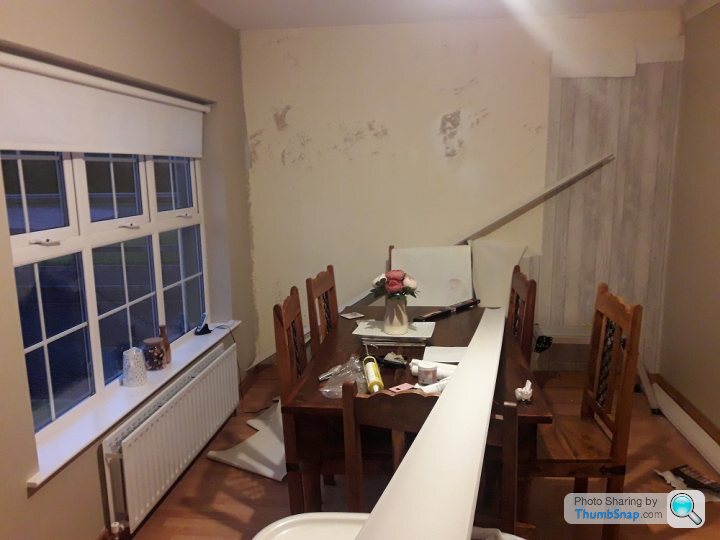
The approach we are taking to the house is one room at a time. The first is the dining room. It had that horrid fake wood textured paper at one end and the rest was painted a brown-ey grey colour.
Paper was duly ripped off (Quite good quality stuff I have to say) along with some paint and some coving put up. The miter cuts infuriate me. I had two diagonal walls with 4 different angles which I had to cut freehand. I can never get the cut right either. It will always end up concave instead of convex, leaving a gaping hole in the middle. Any help with this is much appreciated.
Pictures to come when its complete.
The approach we are taking to the house is one room at a time. The first is the dining room. It had that horrid fake wood textured paper at one end and the rest was painted a brown-ey grey colour.
Paper was duly ripped off (Quite good quality stuff I have to say) along with some paint
and some coving put up. The miter cuts infuriate me. I had two diagonal walls with 4 different angles which I had to cut freehand. I can never get the cut right either. It will always end up concave instead of convex, leaving a gaping hole in the middle. Any help with this is much appreciated. Pictures to come when its complete.
Edited by GIYess on Monday 22 July 14:45
Sounds like a similar house purchase to me, now in 3 years but was 15 years old when we bought it. It's a 4 bed 2001 house. It was very tired internally as owned but family of 5 and not particularly cared for, added to the fact that the interior decor was a bit 1990s (gold window and door trims, mahogany stained staircase etc). Therefore the whole house has needed a refurb, and we took a room by room approach. It's almost done, with just kitchen remaining but for that we want a small extension.
For painting over varnish we also used zinser BIN after a light sand, worked well. Our skirting and architrave was not to our taste but actually when cleaed up and painted a fresh white looks good.
It's been a slow and costly experience, and that's with me doing as much as I can.
My main suggestion would be dont rush into anything unless it is urgent, to give you time to understand the priorities. Think about things that will make a mess first to avoid making a mess in or near newly decorated rooms. Things like plastering, electrics and hard wiring ethernet cable, reconfiguring rooms etc do as soon as possible.
For painting over varnish we also used zinser BIN after a light sand, worked well. Our skirting and architrave was not to our taste but actually when cleaed up and painted a fresh white looks good.
It's been a slow and costly experience, and that's with me doing as much as I can.
My main suggestion would be dont rush into anything unless it is urgent, to give you time to understand the priorities. Think about things that will make a mess first to avoid making a mess in or near newly decorated rooms. Things like plastering, electrics and hard wiring ethernet cable, reconfiguring rooms etc do as soon as possible.
Running from pillar to post quite litterally these days. Have the in-laws coming to stay on Tue so am aiming to have the dining room complete for then. Had 3 days off last week so thought I'd get the gate hung across the drive. It's a 12ft gate so I bought a brute of an 8x8 8ft post to hang it. Big mistake as I found digging a 3ft hole in a compacted driveway is no mean feat!! Took me a day to dig the hole and 20 mins to set the post and fill it in again! Resultant post
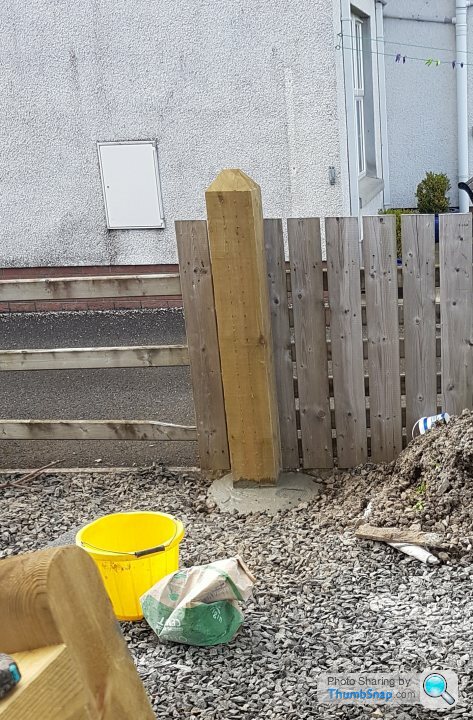
Getting my brother to hang the gate though so should be done this week some time.
Getting my brother to hang the gate though so should be done this week some time.
Bookmarked 
That's a heck of a post! Hardly surprising it took you so long to dig the hole, I admire the fact you got it done in a day. That would have probably killed me
Your house is around the same vintage as our previous one (2000). Whilst your skirting won't be anywhere near the same quality woods used in the above posters 80+ year old house (pine was very different then) a freshen up with paint and caulking (if you are using white) does a good job.
Looking forward to the photos.
That's a heck of a post! Hardly surprising it took you so long to dig the hole, I admire the fact you got it done in a day. That would have probably killed me
Your house is around the same vintage as our previous one (2000). Whilst your skirting won't be anywhere near the same quality woods used in the above posters 80+ year old house (pine was very different then) a freshen up with paint and caulking (if you are using white) does a good job.
Looking forward to the photos.
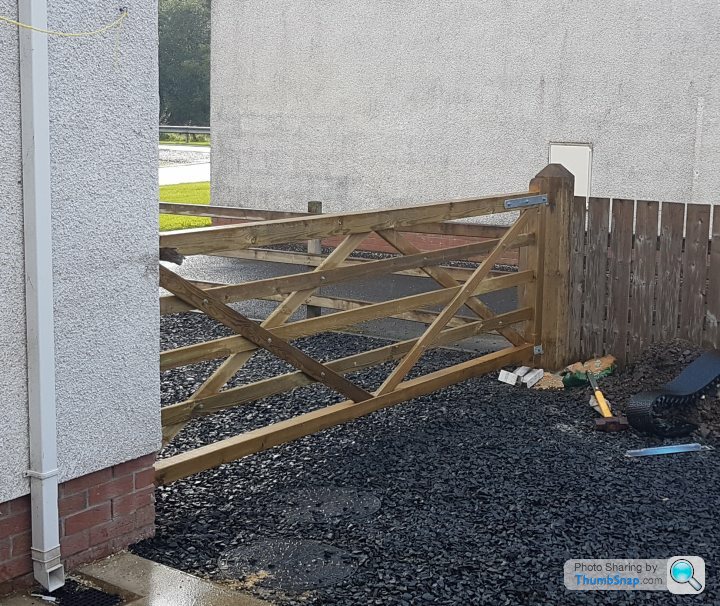
Small update from the weekend. I finally got round to hanging my gate. So armed with my trusty Titan cordless drill I started fitting the brackets. They are quite tricky to fit as the bolt must go through on arm of the bracket, through the gate and through the other side of the bracket.
I consider myself a bit of a Petter Solberg when it comes to driving a drill but unfortunately it was beyond me to drill the hole exactly straight. After the use of at least 3 incrementally increasing sized drill bits and a heavy hammer I finally got them to line up. Unfortunately the bracket is now not completely level with the gate which is annoying me greatly but not much I can do about that.
Next job was to drill the post. A quick trip to screwfix got me an impressively decent 18mm auger bit for £6something. No way my cordless was going to drive that so I borrowed a monster from a friend that chewed through in no time. This time I did not so bad with the straight line business as I clamped a set square to the post and lined the drill up to it.
I used a sledge hammer to fit the post hangers.
Horsed the gate on myself (it's really heavy!) And the result...
I consider myself a bit of a Petter Solberg when it comes to driving a drill but unfortunately it was beyond me to drill the hole exactly straight. After the use of at least 3 incrementally increasing sized drill bits and a heavy hammer I finally got them to line up. Unfortunately the bracket is now not completely level with the gate which is annoying me greatly but not much I can do about that.
Next job was to drill the post. A quick trip to screwfix got me an impressively decent 18mm auger bit for £6something. No way my cordless was going to drive that so I borrowed a monster from a friend that chewed through in no time. This time I did not so bad with the straight line business as I clamped a set square to the post and lined the drill up to it.
I used a sledge hammer to fit the post hangers.
Horsed the gate on myself (it's really heavy!) And the result...
Another short update.
At time of last posting I had begun the dining room. Plan was to cove and repaint.
Coving was a complete nightmare! I maybe mentioned before that the room has two diagonal walls which adds up to 4 odd angles. Each one different to the other. After much head scratching and countless hand cuts, I finally had something that would take less than one tube of caulking per corner to make look respectable. I filled and sanded the corners and join between the ceiling and walls and gave it a lick of paint. The coving was paper covered polystyrene. Very impressed with how it looks and its is light enough to just stick up with multi purpose adhesive. (Cheapest in B&Q). The lot cost around £27 quid.
Next job was the skirting board. As advised on here, I used Zinniser BIN primer. It was pretty impressive stuff to be honest. First coat I did wonder what I had started as it looked terrible but after a second coat it looked OK. I finished the skirtings of with white wood paint from screwfix (Velspar £15). Price is difficult to quantify really as I only used around half of the primer (£18).
Bought some Velspar paint from B&Q because we liked the colour choice. Can't remember how much that was now but one pot did 2 coats. The back wall where the wallpaper was had badly peeled paint so I had to sand the whole wall to take the edges off the paint. It has covered up pretty well but really would benefit from a re plaster to solve the bumpy wall left behind.
Curtains and pole were cheap from a local interiors chain but the table and bench sort of blew the "on the cheap" concept out the window! Oh well, we love it.
Before:
And After
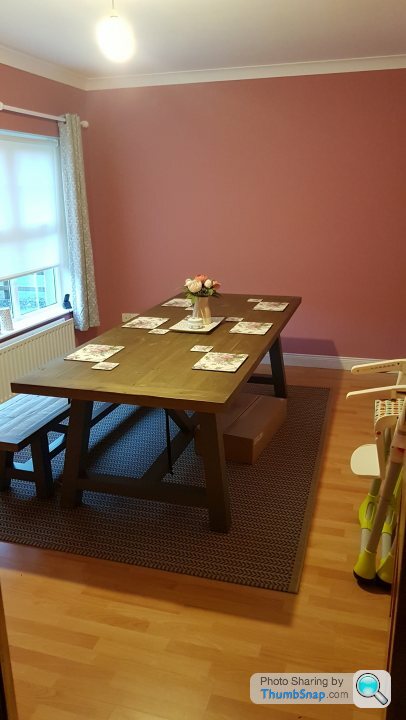
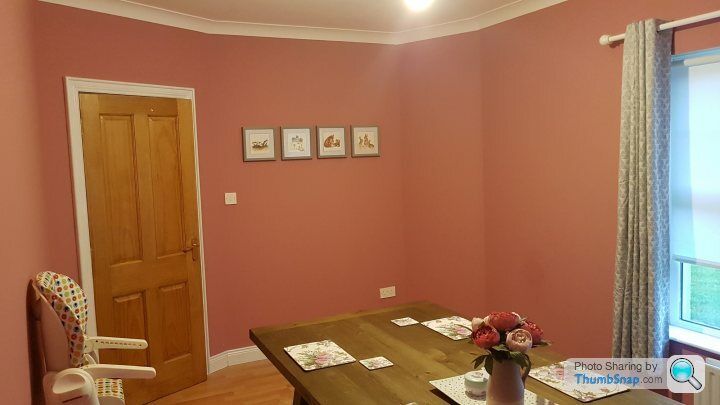
Still a light, some chairs and something else for the walls to go yet.
At time of last posting I had begun the dining room. Plan was to cove and repaint.
Coving was a complete nightmare! I maybe mentioned before that the room has two diagonal walls which adds up to 4 odd angles. Each one different to the other. After much head scratching and countless hand cuts, I finally had something that would take less than one tube of caulking per corner to make look respectable. I filled and sanded the corners and join between the ceiling and walls and gave it a lick of paint. The coving was paper covered polystyrene. Very impressed with how it looks and its is light enough to just stick up with multi purpose adhesive. (Cheapest in B&Q). The lot cost around £27 quid.
Next job was the skirting board. As advised on here, I used Zinniser BIN primer. It was pretty impressive stuff to be honest. First coat I did wonder what I had started as it looked terrible but after a second coat it looked OK. I finished the skirtings of with white wood paint from screwfix (Velspar £15). Price is difficult to quantify really as I only used around half of the primer (£18).
Bought some Velspar paint from B&Q because we liked the colour choice. Can't remember how much that was now but one pot did 2 coats. The back wall where the wallpaper was had badly peeled paint so I had to sand the whole wall to take the edges off the paint. It has covered up pretty well but really would benefit from a re plaster to solve the bumpy wall left behind.
Curtains and pole were cheap from a local interiors chain but the table and bench sort of blew the "on the cheap" concept out the window! Oh well, we love it.
Before:
And After
Still a light, some chairs and something else for the walls to go yet.
If anyone is interested in our run of the mill house improvements, I have decided to update this thread with some more work.
First dinning room again.
The outstanding job was to move the light so that it was centred on the table. It was sort of in the centre of the room but the door end of the room has two angled walls so it didn't really look right.
To move the light to the desired location required taking the wire across two joists and one cross-support (not technical name). This required holes in the roof which I was a bit nervous about as I have never plastered before.
I figured out the best way was to cut 3 holes.
1 for a new support at new light position
1 to enable me to drill a hole for the wire in the joists
1 for junction box at old light position
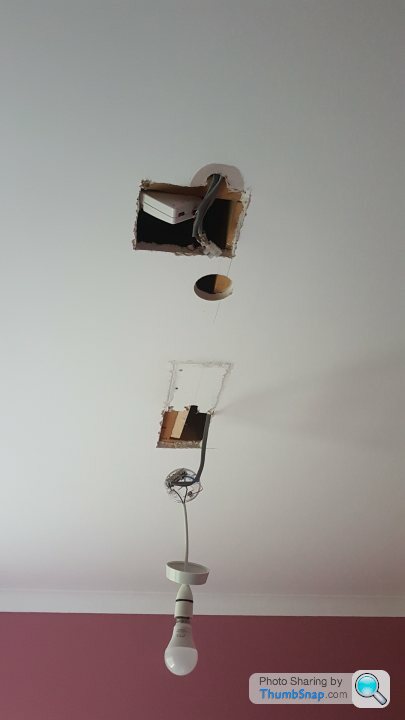
Got it wired up and insulated with heat shrink while video calling an electrician family member and was wild proud when the light turned on .
.
Next job was the patch up which I was dreading!
It went not too bad to be fair. I countersunk screws into the patches I'd cut out and with 3 slims of ready mix plaster and a lick of paint, you wouldn't know it had been butchered. This is the room finally complete now.
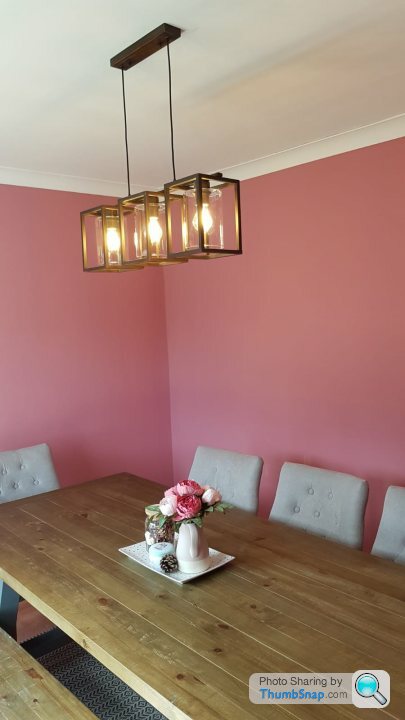
First dinning room again.
The outstanding job was to move the light so that it was centred on the table. It was sort of in the centre of the room but the door end of the room has two angled walls so it didn't really look right.
To move the light to the desired location required taking the wire across two joists and one cross-support (not technical name). This required holes in the roof which I was a bit nervous about as I have never plastered before.
I figured out the best way was to cut 3 holes.
1 for a new support at new light position
1 to enable me to drill a hole for the wire in the joists
1 for junction box at old light position
Got it wired up and insulated with heat shrink while video calling an electrician family member and was wild proud when the light turned on
.Next job was the patch up which I was dreading!
It went not too bad to be fair. I countersunk screws into the patches I'd cut out and with 3 slims of ready mix plaster and a lick of paint, you wouldn't know it had been butchered. This is the room finally complete now.
Next job our "good room."
Got a bit to do here.
Painting skirting and door - done
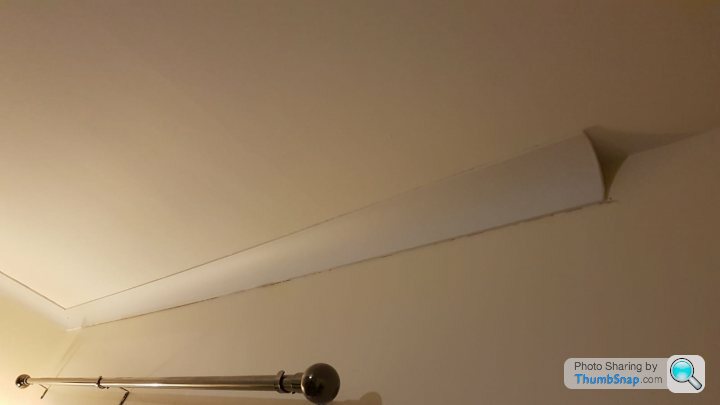
More coving. - done
Paint walls - done
Shelves for side of chimney breast
Stain fireplace to match shelves
New curtains, lights, art for above fireplace
Replace cheap wood floor with carpet.
Going by the glacial pace so far it will be done about this time next year.
During lockdown we also realised the lack of play area for the weans. We have a strange strip of grass and a sharp stone driveway which goes around the rear of the house so decided it might look better with more grass.
Started off like this

I cleared away 6 inches of stone (good excuse to mess around with this machinery again.

Added some topsoil,
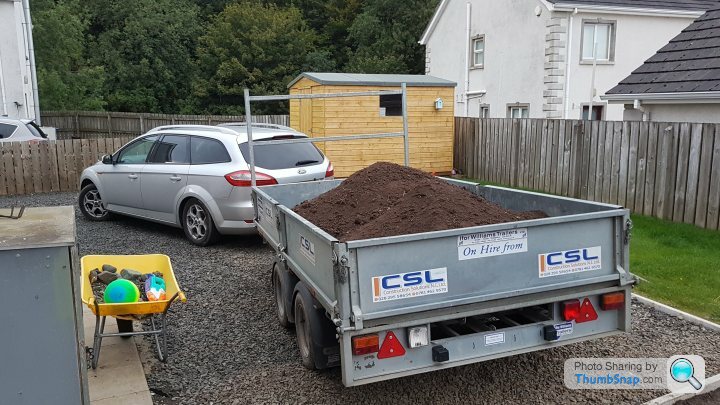

And finally laid the turf.

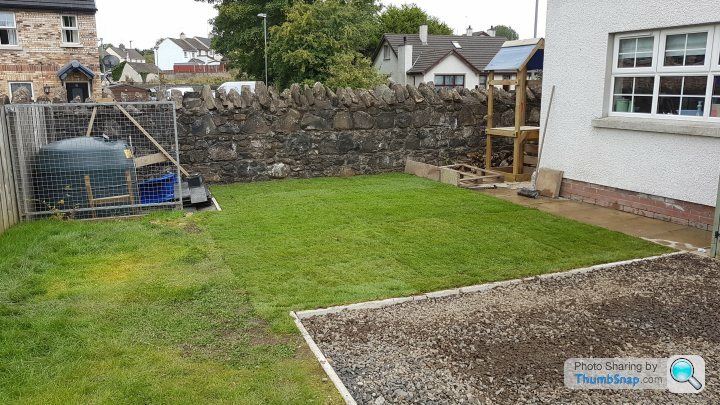
I only thought the mondeo was dead before. Now I know it!
Got a bit to do here.
Painting skirting and door - done
More coving. - done
Paint walls - done
Shelves for side of chimney breast
Stain fireplace to match shelves
New curtains, lights, art for above fireplace
Replace cheap wood floor with carpet.
Going by the glacial pace so far it will be done about this time next year.
During lockdown we also realised the lack of play area for the weans. We have a strange strip of grass and a sharp stone driveway which goes around the rear of the house so decided it might look better with more grass.
Started off like this
I cleared away 6 inches of stone (good excuse to mess around with this machinery again.
Added some topsoil,
And finally laid the turf.
I only thought the mondeo was dead before. Now I know it!
This must be the slowest thread on PH. And maybe the most boring.
Just thought I might share another fair sized project I've been working on.
At Christmas we were at relatives and got a text and picture. There had been a storm and our fence had let go. It had been retaining a bit of soil and it was only a matter of time before it gave way.
After a bout of COVID and a lot of procrastination, I got stuck in.
First step was to dig a foundation. This ended up a lot deeper than expected as I wanted to make sure the whole thing wasn't relying on the giant kerbs that my neighbour had put in when the house was built.
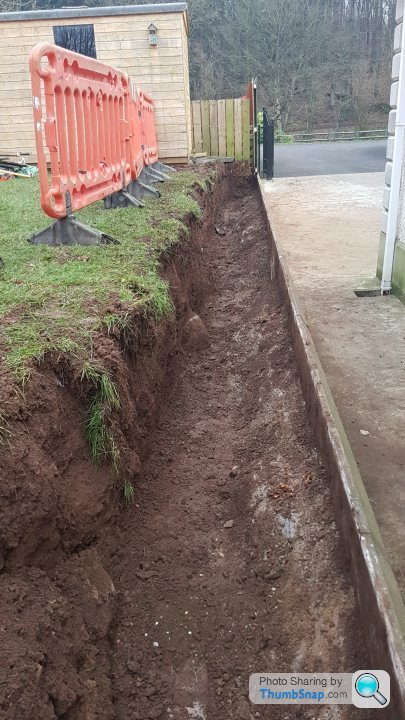
Next it was time for posts. These were 9.5ft beasts and they were brutal to get in but I wanted to make sure the fence would never blow over again!! To get them tight to the boundary I had to kango through the haunching on the giant kerbs. 10 holes through about 1.5ft of concrete! I was ready for bed that night!
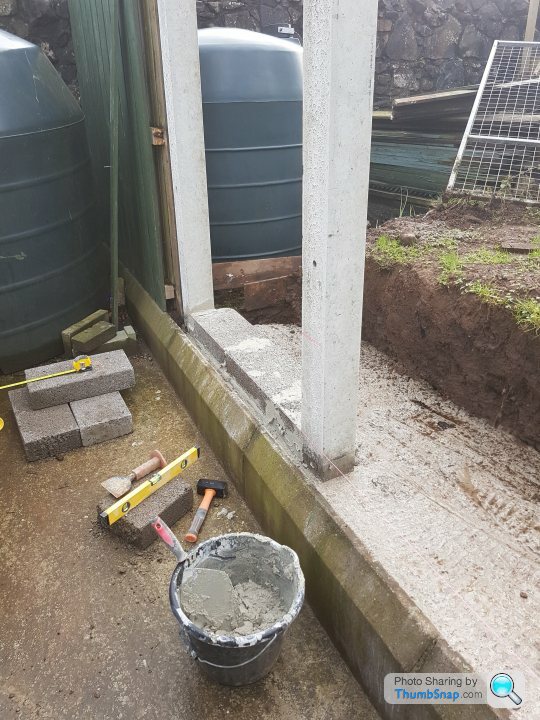
Then it was a good deep foundation and a retaining wall which took me a bit too long!
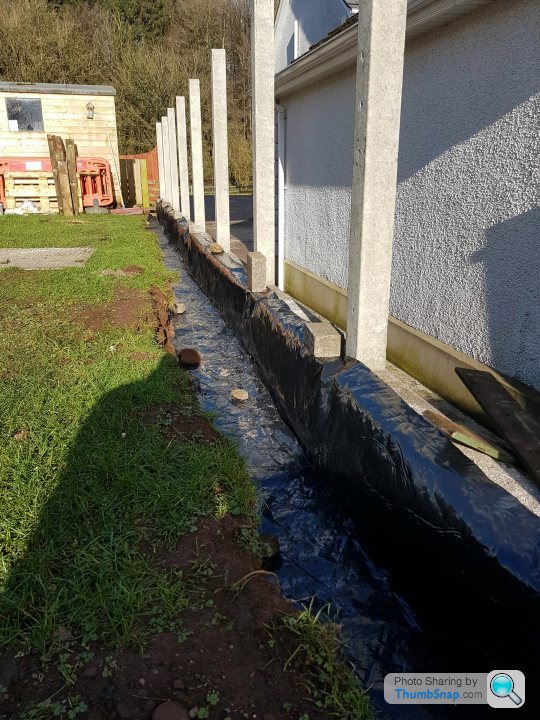
First building I've ever done and it was quite therapeutic.
After the wall was built, I put down some damp course against the wall and back filled with stone about 3 inches from the surface.
I procured some featherboard panels from a local sawmill then to finish off.
Was quite a marathon run but I'm fairly pleased with the outcome.
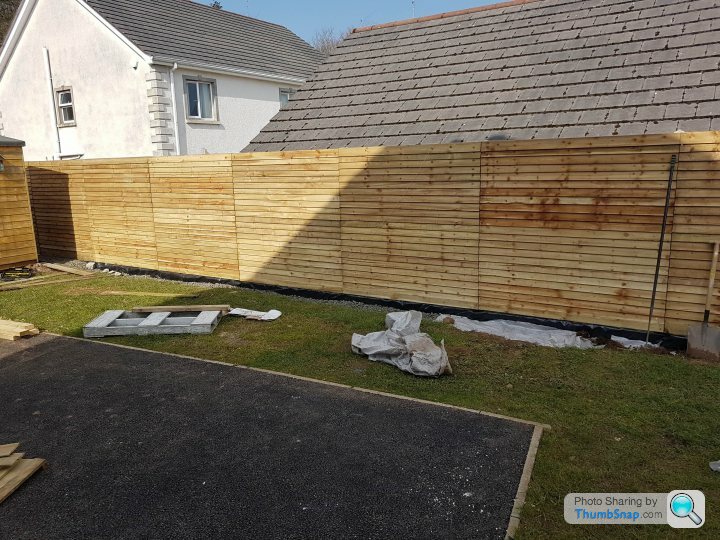
I have a few other projects I have been working on which I might put up at some stage.
Just thought I might share another fair sized project I've been working on.
At Christmas we were at relatives and got a text and picture. There had been a storm and our fence had let go. It had been retaining a bit of soil and it was only a matter of time before it gave way.
After a bout of COVID and a lot of procrastination, I got stuck in.
First step was to dig a foundation. This ended up a lot deeper than expected as I wanted to make sure the whole thing wasn't relying on the giant kerbs that my neighbour had put in when the house was built.
Next it was time for posts. These were 9.5ft beasts and they were brutal to get in but I wanted to make sure the fence would never blow over again!! To get them tight to the boundary I had to kango through the haunching on the giant kerbs. 10 holes through about 1.5ft of concrete! I was ready for bed that night!
Then it was a good deep foundation and a retaining wall which took me a bit too long!
First building I've ever done and it was quite therapeutic.
After the wall was built, I put down some damp course against the wall and back filled with stone about 3 inches from the surface.
I procured some featherboard panels from a local sawmill then to finish off.
Was quite a marathon run but I'm fairly pleased with the outcome.
I have a few other projects I have been working on which I might put up at some stage.
Thanks,
It looked huge when I was setting the posts but it's only 6ft on our side when the ground was levelled out again.
The previous was around 4-5ft and wasn't great for privacy. I have the materials for down the side of the garden now as there is no privacy between gardens at the min. It will be a fairly normal wooden post affair though with a bit of kerbing to prevent the tar from falling away at the edge.
It looked huge when I was setting the posts but it's only 6ft on our side when the ground was levelled out again.
The previous was around 4-5ft and wasn't great for privacy. I have the materials for down the side of the garden now as there is no privacy between gardens at the min. It will be a fairly normal wooden post affair though with a bit of kerbing to prevent the tar from falling away at the edge.
While I was in the mood for fencing, I decided to carry the fence on down between our garden and our other neighbour. There was a 3-4 ft fence there and there wasn't much privacy.
So I found myself digging more holes, this time it felt easy though as there was no retaining wall to build.
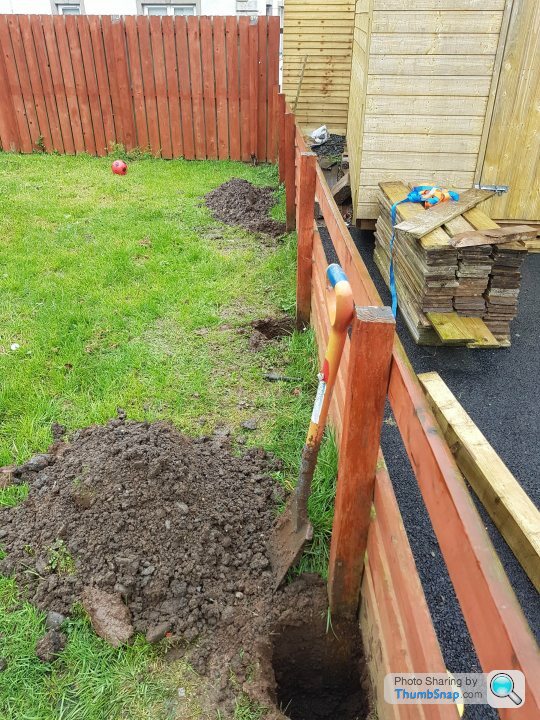
The posts were 8ft 4×4inch. Four of the holes were in the neighbours tar.
I decided I wasn't paying 60 quid to hire a kango again so I bought a £37 Rough Neck breaker bar and it was amazing at getting through the tar/concrete haunching. Bit of a workout but I need it anyway.
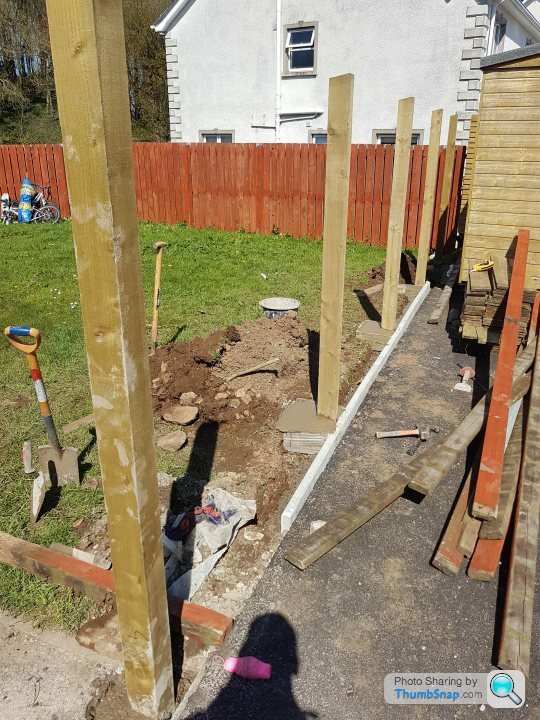
Got the posts in and concrete round the bottom to prevent strimmers eating the bottom of the post. You will also see the beginning of kerbing I had to do as our tar had been laid against the fence and there was a 2-3 inch drop to the neighbours side. I then packed the space between the kerb and the tar edge with cold tar which worked really well even though it was a bit of a faff to get it compacted in.
Finally it was time for the panels. Job done!
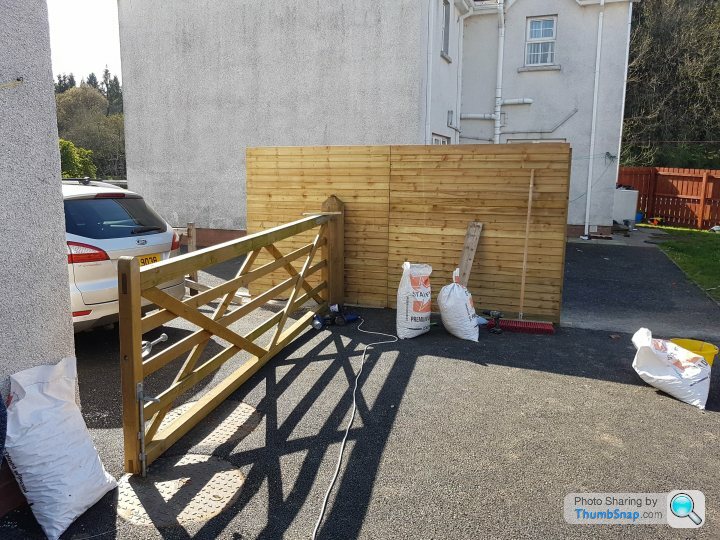
I don't actually have a picture of the finished job, will get one later.
We have quite a nice view across the neighbours garden across the river to the forest and we were slightly worried we might ruin that aspect of the garden but now it's done, it actually enhances it I think.
The neighbours aren't the tidiest and blocking the view of their garden and only seeing the trees in the background make a difference.
We also feel a bit better about sitting out in the sun now.
So I found myself digging more holes, this time it felt easy though as there was no retaining wall to build.
The posts were 8ft 4×4inch. Four of the holes were in the neighbours tar.
I decided I wasn't paying 60 quid to hire a kango again so I bought a £37 Rough Neck breaker bar and it was amazing at getting through the tar/concrete haunching. Bit of a workout but I need it anyway.
Got the posts in and concrete round the bottom to prevent strimmers eating the bottom of the post. You will also see the beginning of kerbing I had to do as our tar had been laid against the fence and there was a 2-3 inch drop to the neighbours side. I then packed the space between the kerb and the tar edge with cold tar which worked really well even though it was a bit of a faff to get it compacted in.
Finally it was time for the panels. Job done!
I don't actually have a picture of the finished job, will get one later.
We have quite a nice view across the neighbours garden across the river to the forest and we were slightly worried we might ruin that aspect of the garden but now it's done, it actually enhances it I think.
The neighbours aren't the tidiest and blocking the view of their garden and only seeing the trees in the background make a difference.
We also feel a bit better about sitting out in the sun now.
Gassing Station | Homes, Gardens and DIY | Top of Page | What's New | My Stuff