LC Racing EMB-1H build thread
Discussion


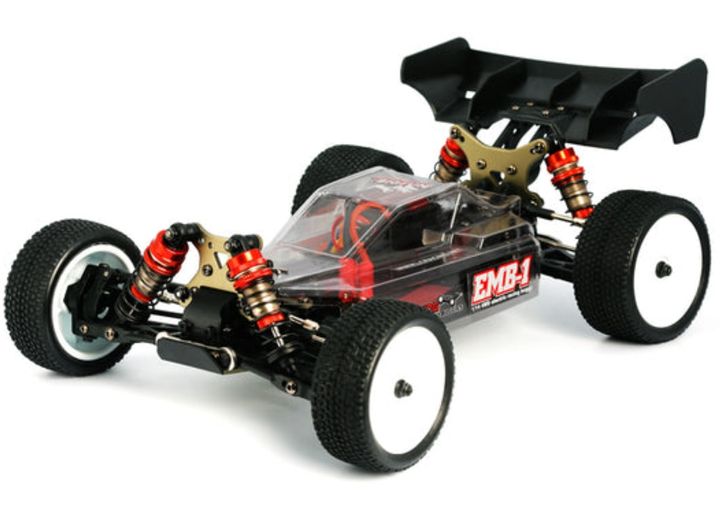
No-one's told me not to post these, so here's a build thread for my new little 1/14 AWD buggy. Finished article should look like this but with a purple body (because with red, gold, black, and white it clearly needed purple).
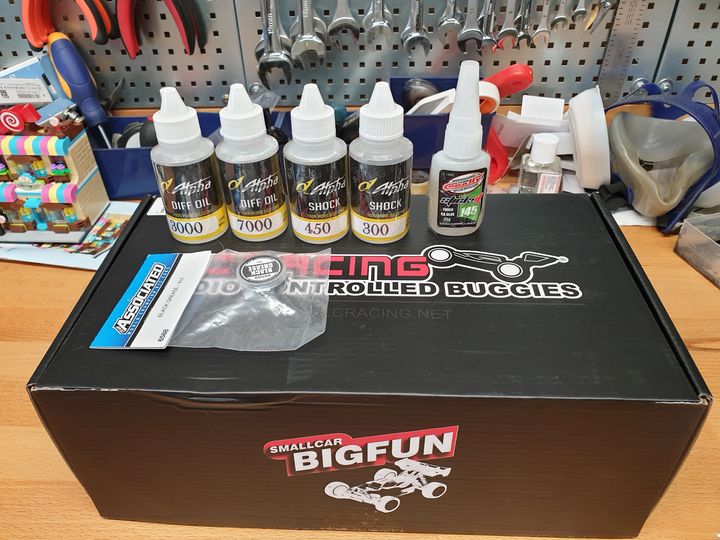
These seem to have a very good rep as racers. The kit comes with servo, ESC, and brushless motor, but you need shock and diff oil, and grease for the gearboxes. Also there are no tools included; so far I've needed tweezers (surgical no 6), a 0 Philips screwdriver, 1.5 and 2.0 Allen keys and drivers, two pairs of small pliers, one pair of big pliers, a pair of water-pump pliers, a bench top vice, digital verniers, and a lollipop stick.
The box, and the oils - I went with DMS Racing's recommendations. No affiliation, but they were very helpful, and I ordered at half three on Friday; it arrived at midday on Saturday.
What's in the box?
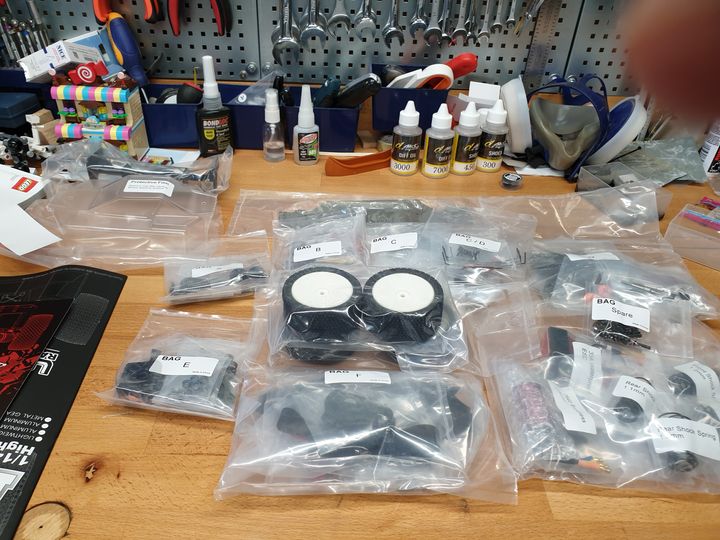
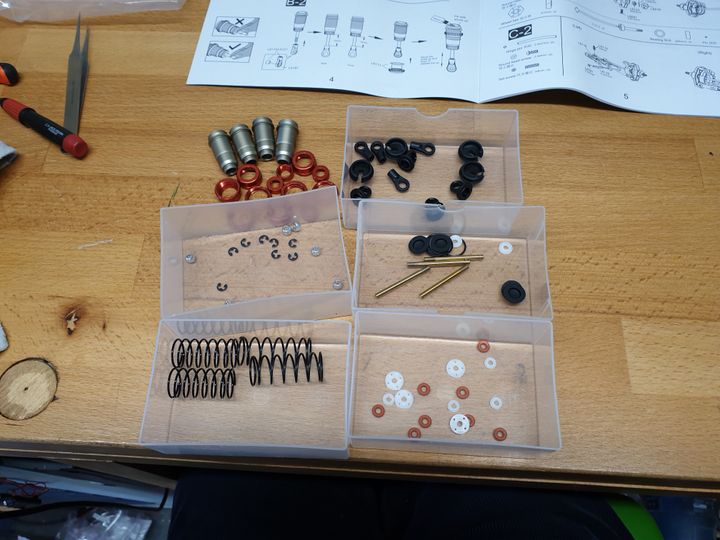
Well, it's quite a contrast from Tamiya. Each stage has its own bag with exactly the bits you need, but there's a separate spares bag. Witness bag A:

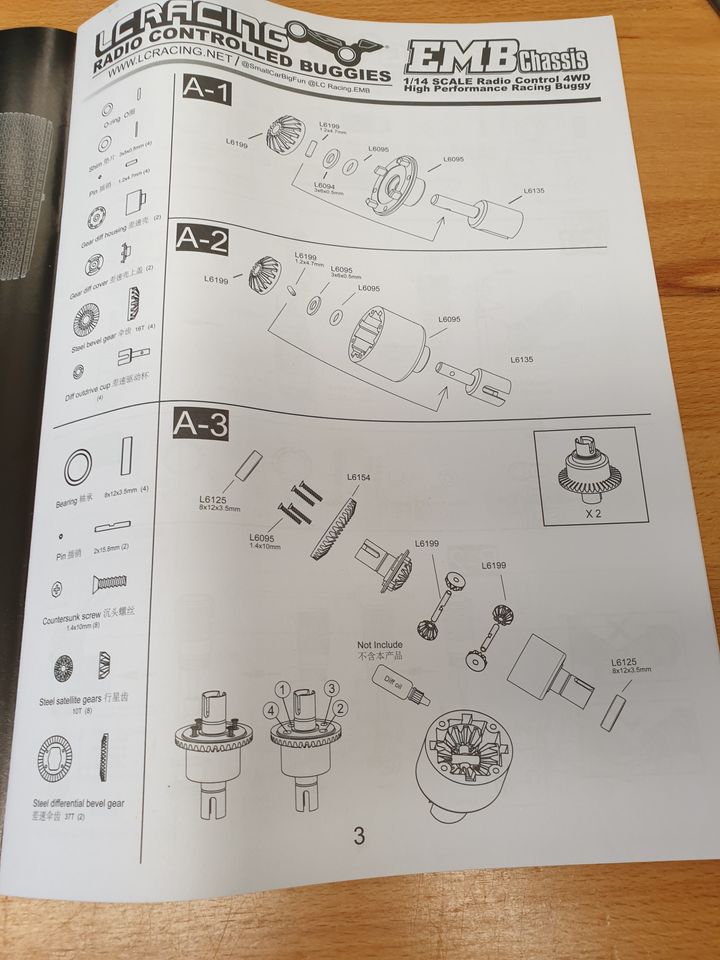
Every plastic part has been cut from the sprue, and only a couple have needed minor trimming. Body is already cut, but only comes with window masks and a load of generic LC Racing stickers. The instructions are very decent, less visually "cluttered" than Tamiya can be, but not always as clear - note here that it has part numbers for screws and things, but they're not actually referenced anywhere else:
On with the build! First stage is the diffs. First one side - this needs tweezers.
Then the other, which needs tweezers and patience.
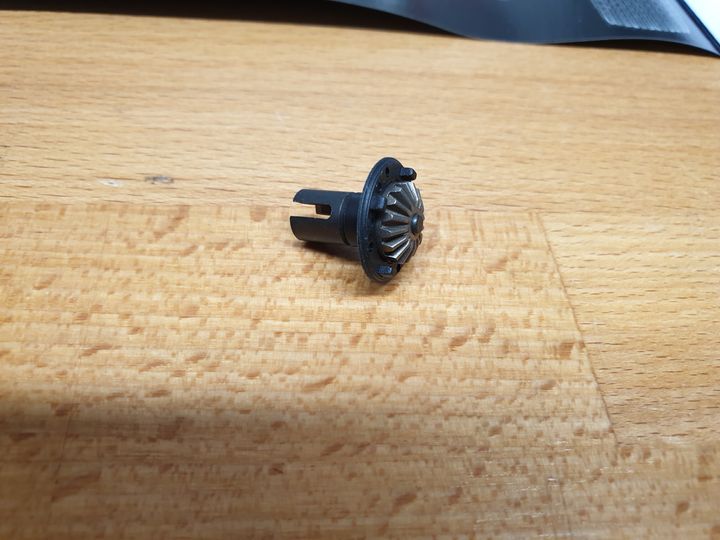
That second side then gets the planet gears (each pair on its own axle; the axles have flats which lock together if you get them lined up right), then filled with oil. Different oil weights front and back.
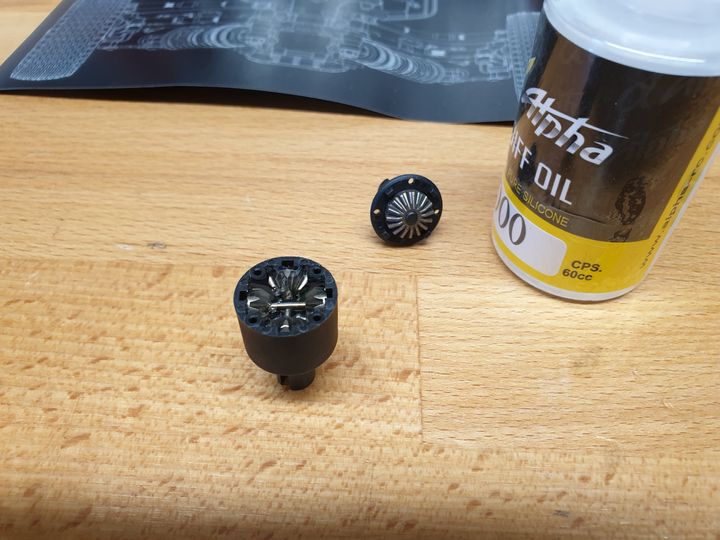
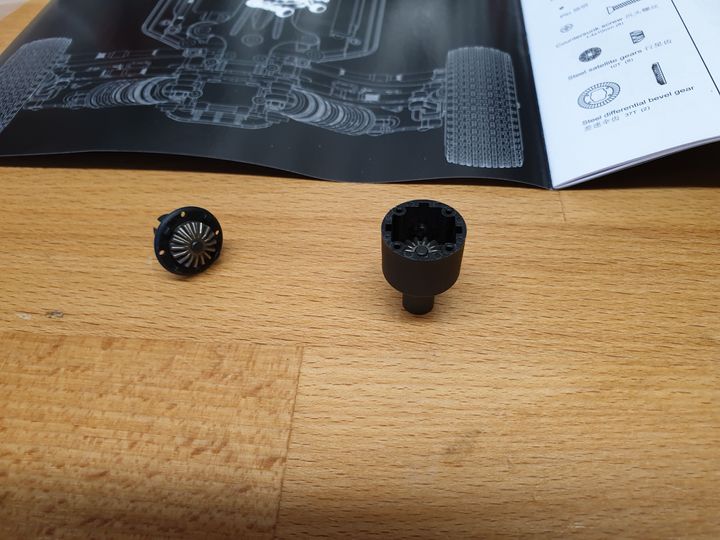
The the cap and crown gear go on, and the whole is screwed together with, thus far, the only Philips head screws in the kit. If you've put enough oil in some will leak out, so you need some tissue paper or a venerable tea towel. I marked them with Sharpie on masking tape so I didn't get them the wrong way round later.
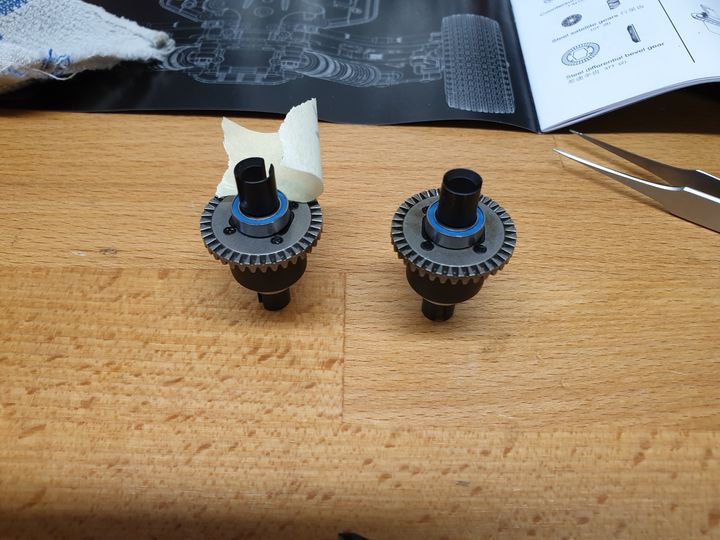
Bag A is complete. You may be unsurprised to learn that bag B comes next. But it's shocking! (sorry not-sorry)
The shock bodies come part assembled, so first you have to take them apart. I will now trial a new approach, where I show the assembly process in four stages at the same time! First the plungers, which are entirely conventional.
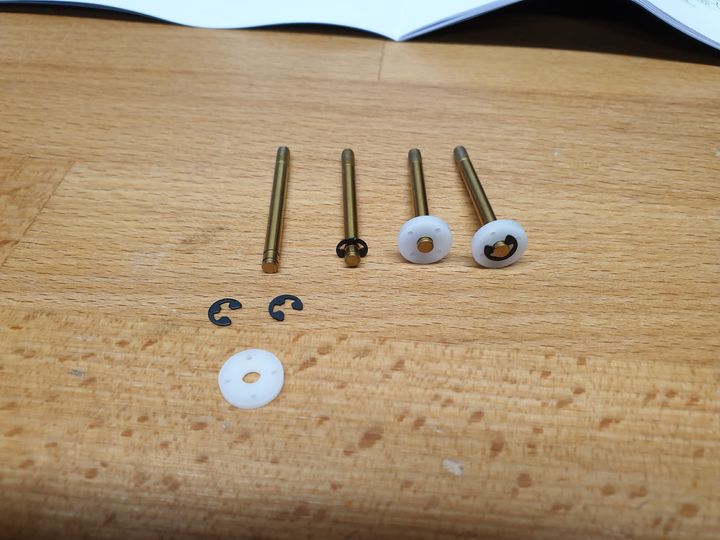
The they go into the bodies, through a plastic cap, two O-rings, and another plastic cap.
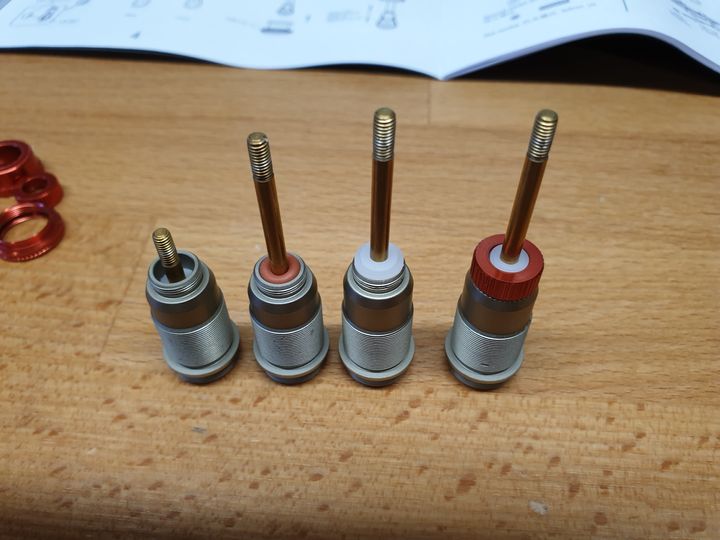
Then ball-ends and adjusters (which have an O-ring to make them really hard to adjust).

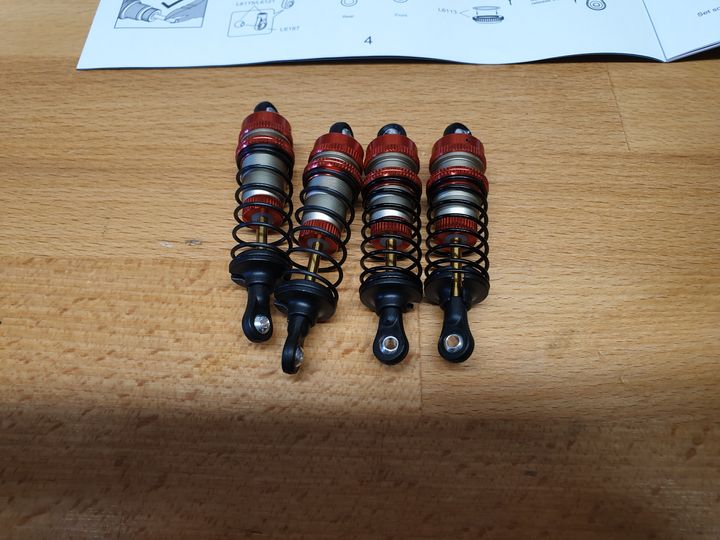
The each is filled with oil (again, different front and back), capped, and furnished with its spring. You get three front and three back, I've gone with the softest all round. The rear shocks are longer than the front ones by a few mm.
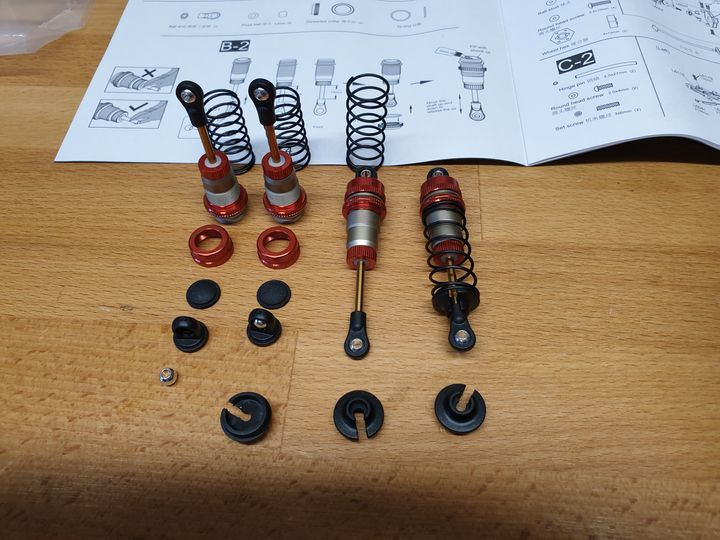
All four done. Yay me.
These seem to have a very good rep as racers. The kit comes with servo, ESC, and brushless motor, but you need shock and diff oil, and grease for the gearboxes. Also there are no tools included; so far I've needed tweezers (surgical no 6), a 0 Philips screwdriver, 1.5 and 2.0 Allen keys and drivers, two pairs of small pliers, one pair of big pliers, a pair of water-pump pliers, a bench top vice, digital verniers, and a lollipop stick.
The box, and the oils - I went with DMS Racing's recommendations. No affiliation, but they were very helpful, and I ordered at half three on Friday; it arrived at midday on Saturday.
What's in the box?
Well, it's quite a contrast from Tamiya. Each stage has its own bag with exactly the bits you need, but there's a separate spares bag. Witness bag A:
Every plastic part has been cut from the sprue, and only a couple have needed minor trimming. Body is already cut, but only comes with window masks and a load of generic LC Racing stickers. The instructions are very decent, less visually "cluttered" than Tamiya can be, but not always as clear - note here that it has part numbers for screws and things, but they're not actually referenced anywhere else:
On with the build! First stage is the diffs. First one side - this needs tweezers.
Then the other, which needs tweezers and patience.
That second side then gets the planet gears (each pair on its own axle; the axles have flats which lock together if you get them lined up right), then filled with oil. Different oil weights front and back.
The the cap and crown gear go on, and the whole is screwed together with, thus far, the only Philips head screws in the kit. If you've put enough oil in some will leak out, so you need some tissue paper or a venerable tea towel. I marked them with Sharpie on masking tape so I didn't get them the wrong way round later.
Bag A is complete. You may be unsurprised to learn that bag B comes next. But it's shocking! (sorry not-sorry)
The shock bodies come part assembled, so first you have to take them apart. I will now trial a new approach, where I show the assembly process in four stages at the same time! First the plungers, which are entirely conventional.
The they go into the bodies, through a plastic cap, two O-rings, and another plastic cap.
Then ball-ends and adjusters (which have an O-ring to make them really hard to adjust).
The each is filled with oil (again, different front and back), capped, and furnished with its spring. You get three front and three back, I've gone with the softest all round. The rear shocks are longer than the front ones by a few mm.
All four done. Yay me.
Next, bag C.
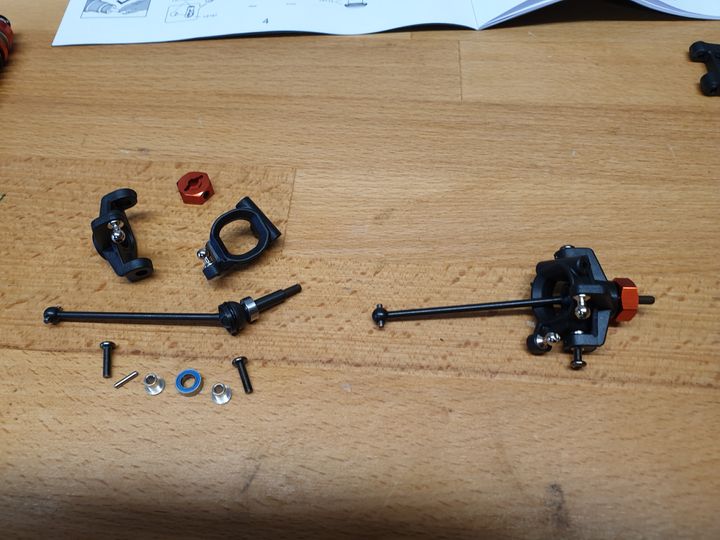
Steering knuckles. Instructions not entirely clear, and a quick twist of a no 1 Philips screwdriver (not mentioned in the tools above) required to get the ball-end screw things to bite. Left, the bits. Right, the result.
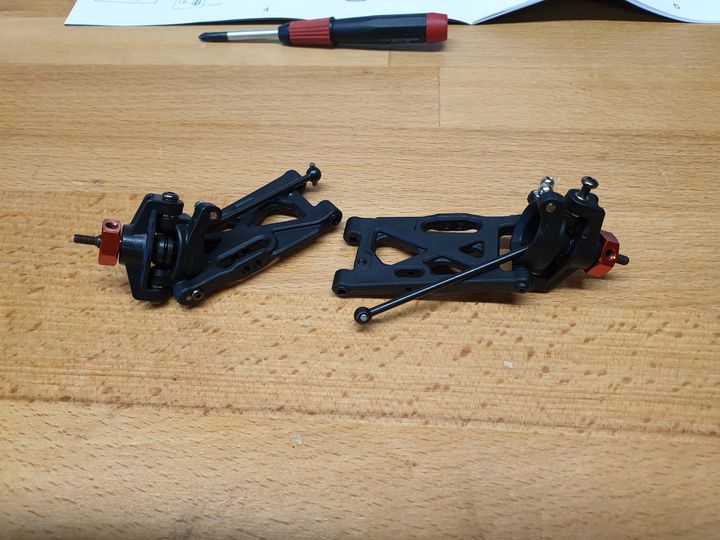
Then the lower arms. You may note that one is the wrong way around; this will be magically rectified later.
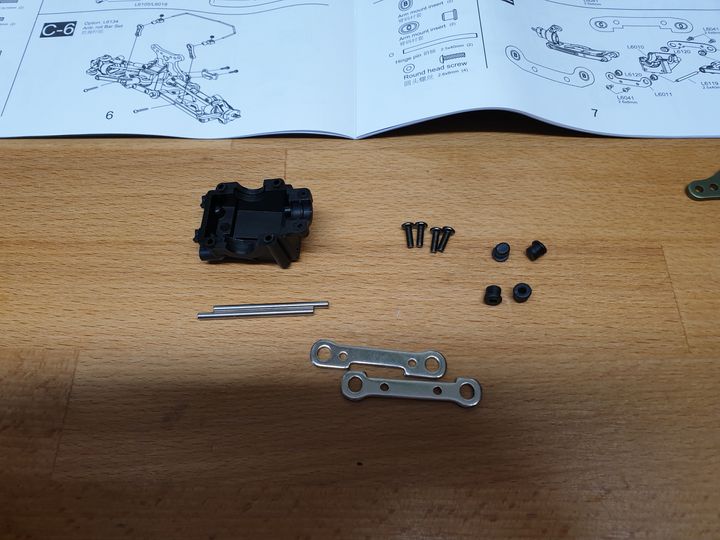
Front gearbox housing bits.
Assembled! This all feels a bit simpler and slicker than Tamiya. Maybe there's a whole new world out there...
All of these bits and a load of black grease (applied using the aforementioned lollipop stick) go on. The two gearbox halves require a fair effort to snap together.
Ta-da!
Two turnbuckles that'll form the upper links. As usual one side is reverse threaded (or I s'pose they wouldn't be turnbuckles).
And crimped on using the water pump pliers (I plan on treating myself to a nice Knipex set but never seem to get it done...).
The instructions say adding the anti-roll bars is optional, but they've got shiny anodised bits so I don't see why it's an option. I chose the softer of the two options because I'm a big softy. Also I figure soft suspension does more work. Hard suspension is lazy. Don't mind me.
Finally (for bag C) the previously-built shocks are attached.
That's it for today. Remember to tip your server and to say something kind to your family.
Steering knuckles. Instructions not entirely clear, and a quick twist of a no 1 Philips screwdriver (not mentioned in the tools above) required to get the ball-end screw things to bite. Left, the bits. Right, the result.
Then the lower arms. You may note that one is the wrong way around; this will be magically rectified later.
Front gearbox housing bits.
Assembled! This all feels a bit simpler and slicker than Tamiya. Maybe there's a whole new world out there...
All of these bits and a load of black grease (applied using the aforementioned lollipop stick) go on. The two gearbox halves require a fair effort to snap together.
Ta-da!
Two turnbuckles that'll form the upper links. As usual one side is reverse threaded (or I s'pose they wouldn't be turnbuckles).
And crimped on using the water pump pliers (I plan on treating myself to a nice Knipex set but never seem to get it done...).
The instructions say adding the anti-roll bars is optional, but they've got shiny anodised bits so I don't see why it's an option. I chose the softer of the two options because I'm a big softy. Also I figure soft suspension does more work. Hard suspension is lazy. Don't mind me.
Finally (for bag C) the previously-built shocks are attached.
That's it for today. Remember to tip your server and to say something kind to your family.
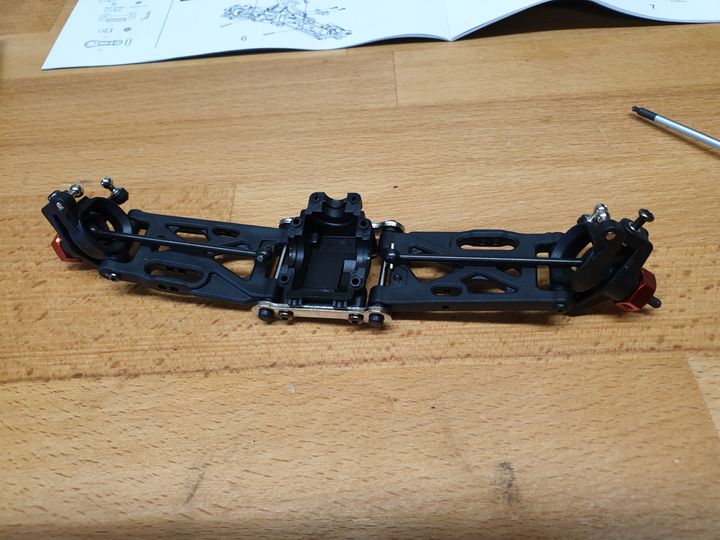
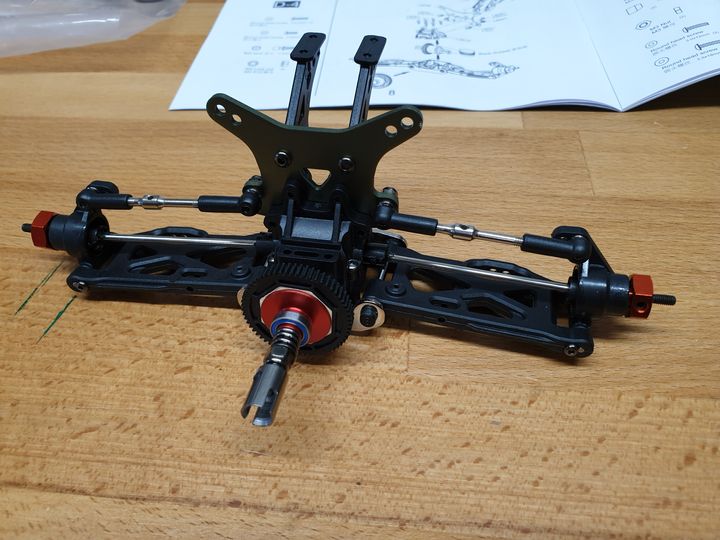
Today, bag D - the rear end.
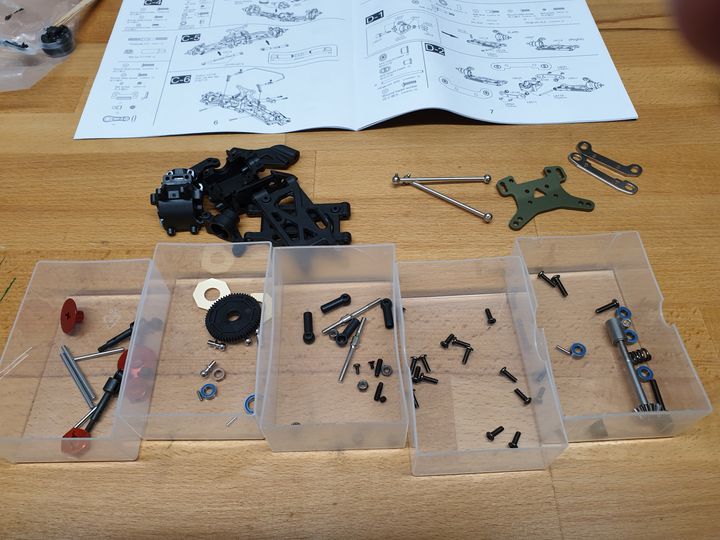
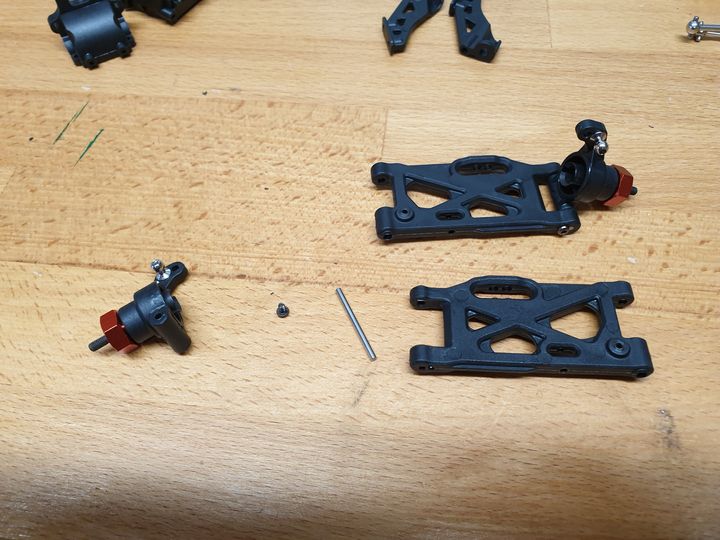
First the knuckles. Knuckles? I think they're knuckles. Or uprights. Or wheel mounts. Left: bits. Right: result. Make sure you use the slightly longer pins because you need the short ones later.

Then the lower arms. Each whatever-it-is from the previous stage pivots on a steel pin, which is held in place with a teeny screw. This time I got them both the right way around first time!
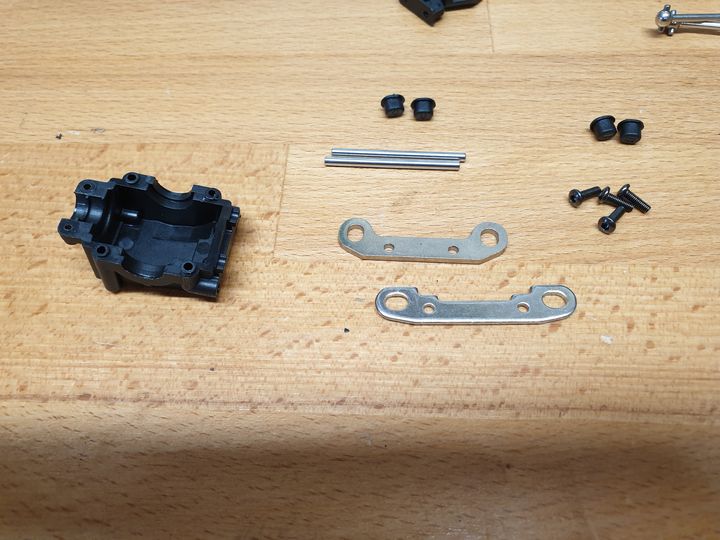
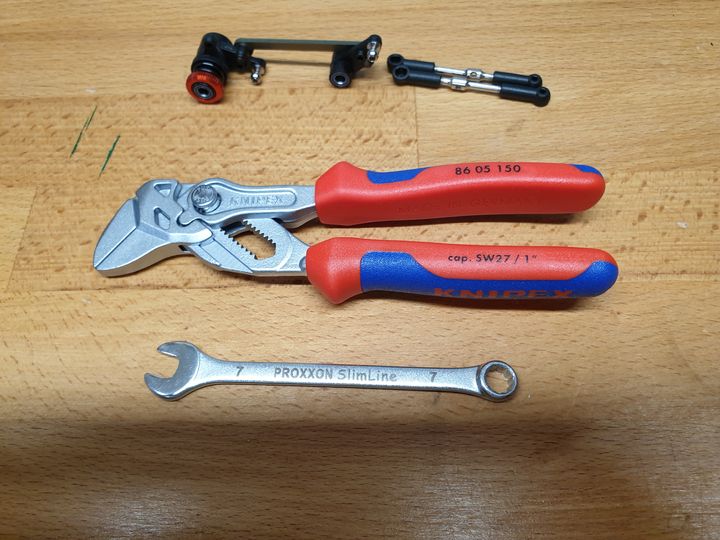
Then these bits get assembled to form the bottom of the diff housing and to attach the rear arms. Getting the pin holders in to the cross-members was quite tricky - I used a 7mm spanner, water pump pliers, and a little bit of wood. Which reminds me that in addition to the tools I mentioned in the first post you also need a 5.5mm spanner and/or nut spinner, and a 7mm spanner (not necessarily for the pin holders, but for a couple of M4 nuts).
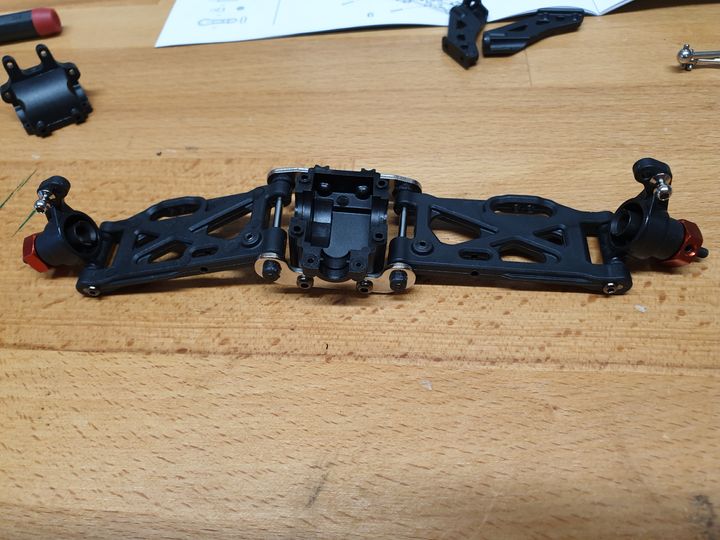
That then looks like this.
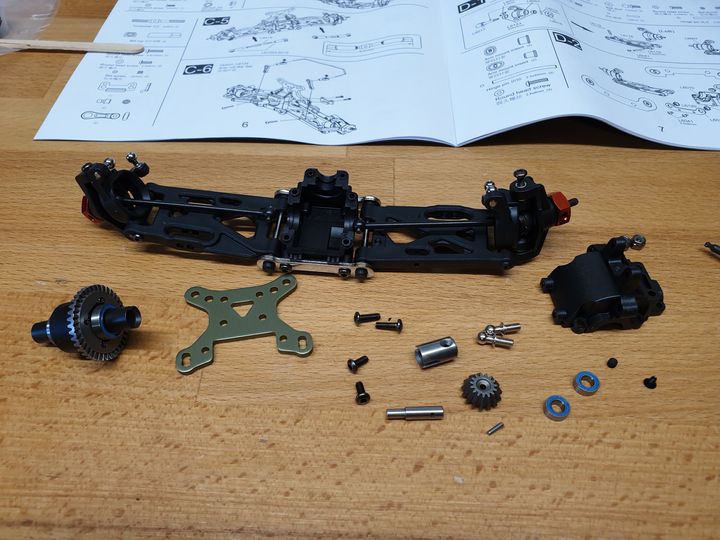
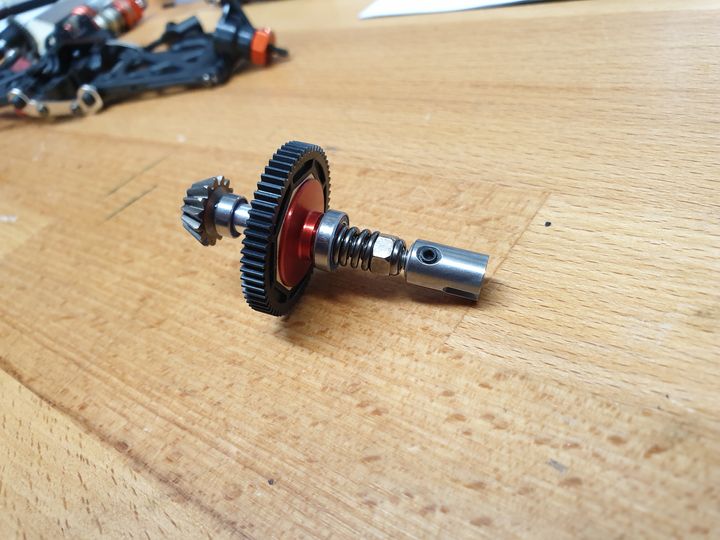
The next bit is the slipper clutch from the motor. Mildly fiddly because the pins are very small and there are some weeny screws and grub screws needing threadlock. Also the instructions list one more bearing than there is - one is actually a bushing.
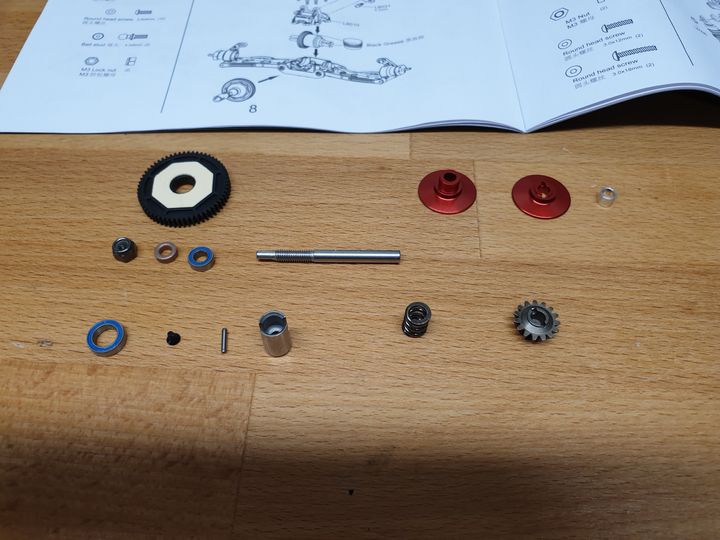
After assembly:
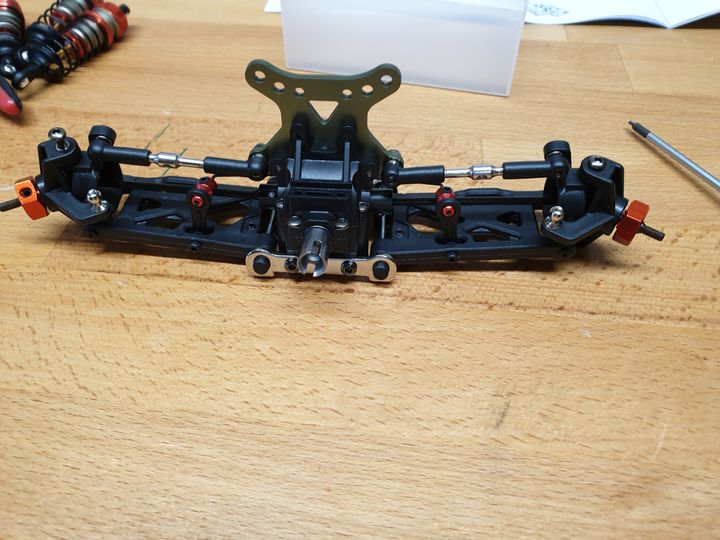
Rear shock tower and wing mounts attach to the top of the diff housing, and black grease is applied liberally to the gears. Again, not entirely clear instructions - the shock tower is bent in the middle, and it's not until you put the wing mounts against it that it's obvious which way around it goes.
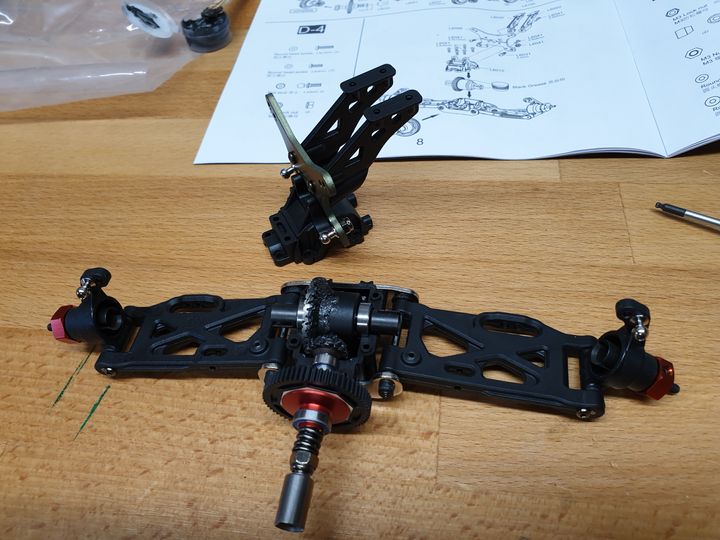
Just like on the front one, the two halves of the diff housing snap together but require a fair bit of squeezing to do that - the screws aren't enough to pull it together. Easy enough once you know you have to do it though.
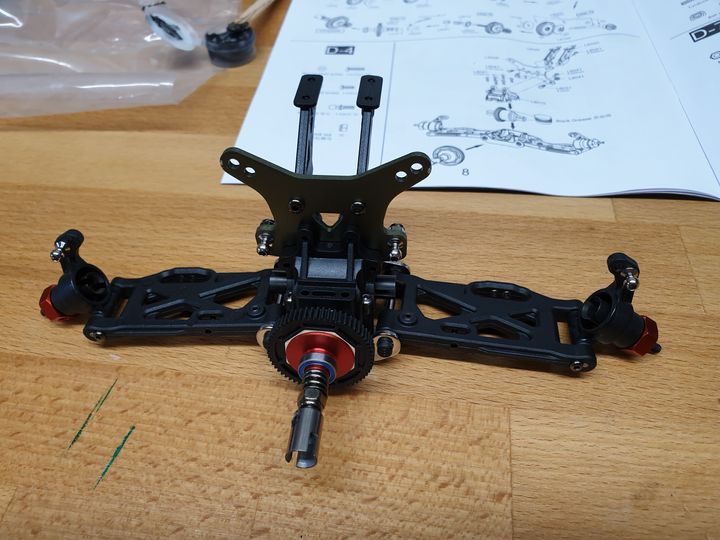
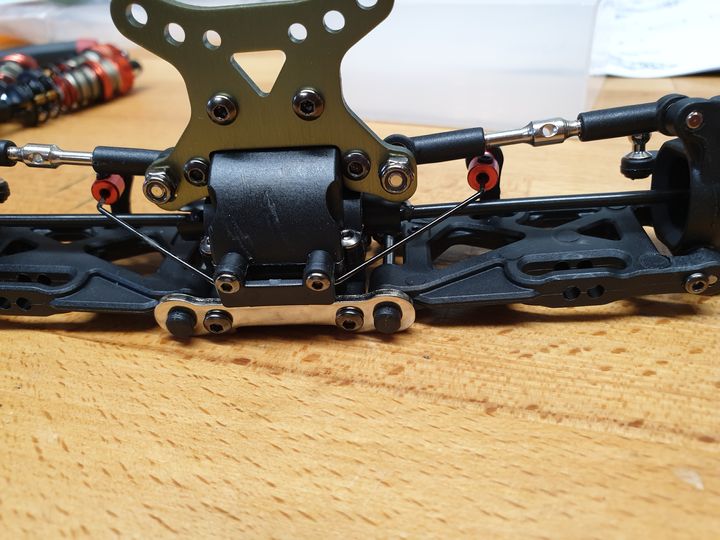
And from a different angle:
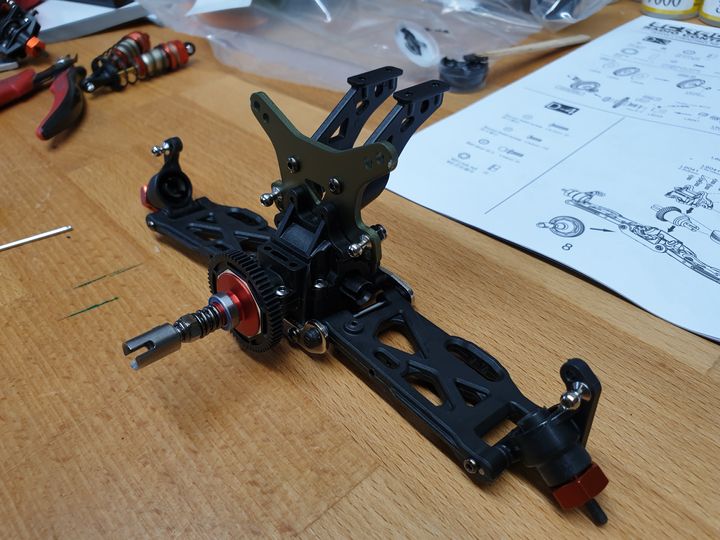
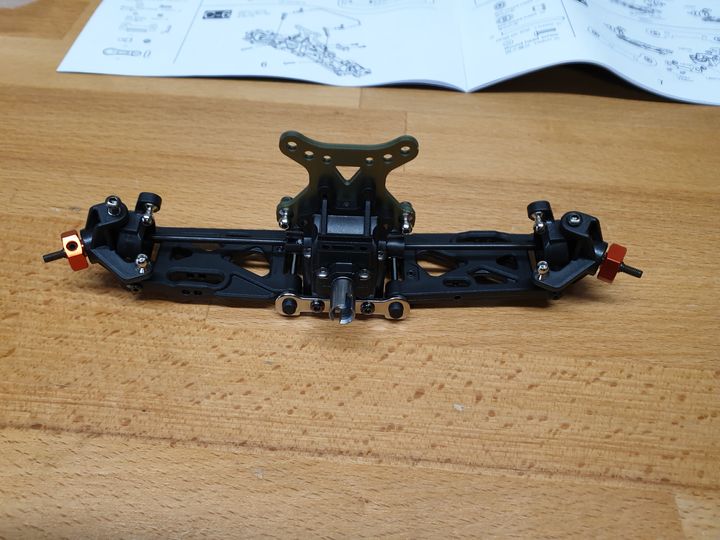
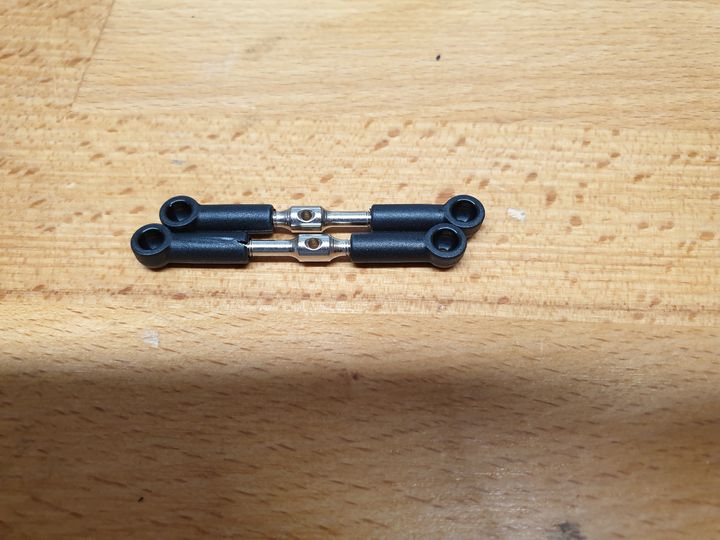
Next, two more turnbuckles that form the upper links - just like at the front.
And again, just like the front there are optional anti-roll bars for the rear. I've gone for the softer bar again, the other parts are identical to the front ARB.

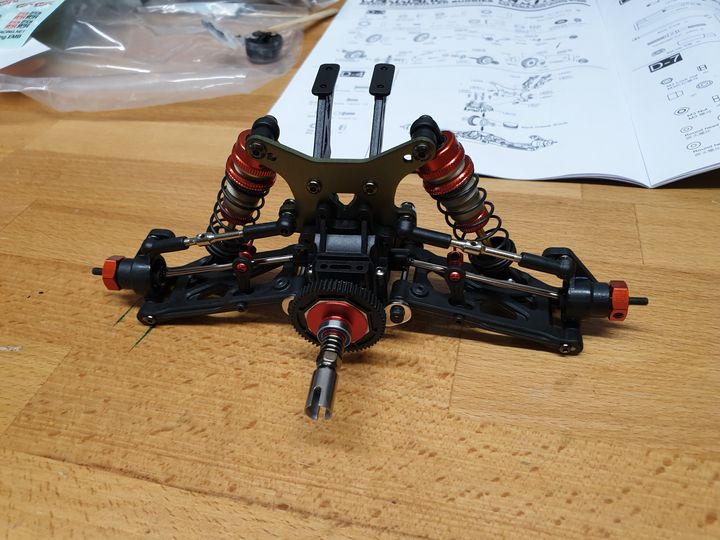
And mounted.
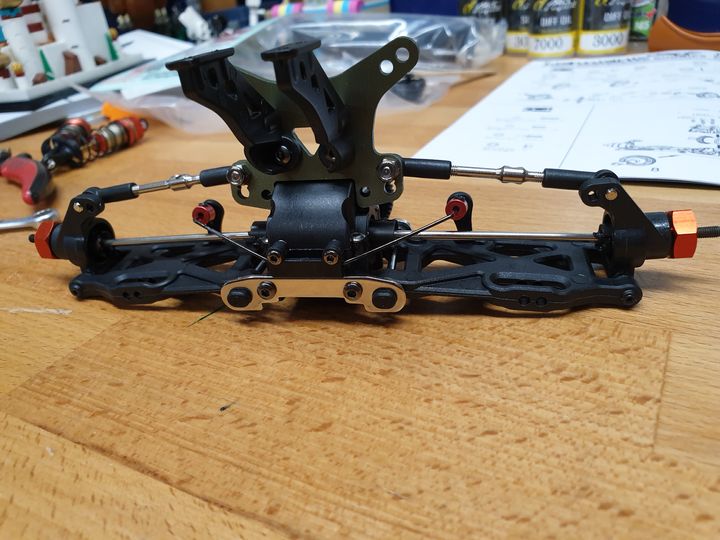
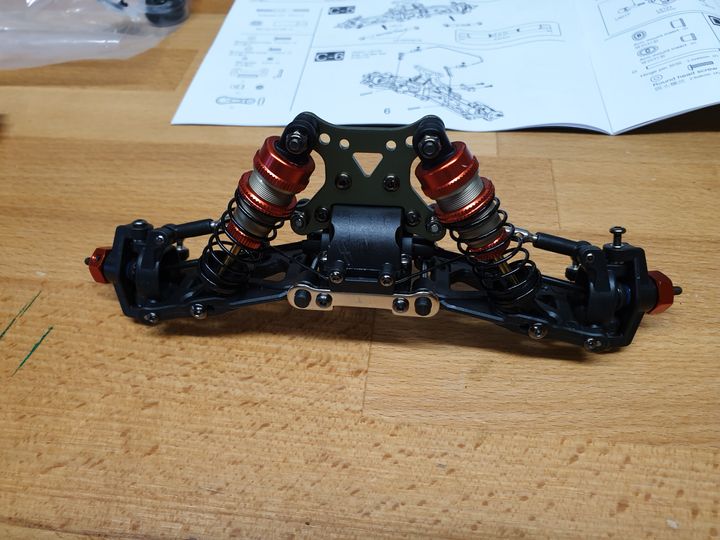
Last bit of bag D is to attach the two rear shocks. Both the red and the gold anodising are less vivid than in the photos - the gold is more of a champagne colour. Still quite jolly, mind.
I've also washed the body but not yet applied the window masks. I'm pondering doing it part purple and part white (or white with green/purple flip added), but it looks tricky to mask accurately, and there are no stickers to hide the lines. Needs some thinking.
Just arrived is a roll of self-adhesive purple vinyl for Lady BMcH's Cricut. I'm doing spirals for the wheels. If I can figure out drawing them in Inkscape. And that pair of tiny Knipex water-pump pliers I'd been eyeing up.
First the knuckles. Knuckles? I think they're knuckles. Or uprights. Or wheel mounts. Left: bits. Right: result. Make sure you use the slightly longer pins because you need the short ones later.
Then the lower arms. Each whatever-it-is from the previous stage pivots on a steel pin, which is held in place with a teeny screw. This time I got them both the right way around first time!
Then these bits get assembled to form the bottom of the diff housing and to attach the rear arms. Getting the pin holders in to the cross-members was quite tricky - I used a 7mm spanner, water pump pliers, and a little bit of wood. Which reminds me that in addition to the tools I mentioned in the first post you also need a 5.5mm spanner and/or nut spinner, and a 7mm spanner (not necessarily for the pin holders, but for a couple of M4 nuts).
That then looks like this.
The next bit is the slipper clutch from the motor. Mildly fiddly because the pins are very small and there are some weeny screws and grub screws needing threadlock. Also the instructions list one more bearing than there is - one is actually a bushing.
After assembly:
Rear shock tower and wing mounts attach to the top of the diff housing, and black grease is applied liberally to the gears. Again, not entirely clear instructions - the shock tower is bent in the middle, and it's not until you put the wing mounts against it that it's obvious which way around it goes.
Just like on the front one, the two halves of the diff housing snap together but require a fair bit of squeezing to do that - the screws aren't enough to pull it together. Easy enough once you know you have to do it though.
And from a different angle:
Next, two more turnbuckles that form the upper links - just like at the front.
And again, just like the front there are optional anti-roll bars for the rear. I've gone for the softer bar again, the other parts are identical to the front ARB.
And mounted.
Last bit of bag D is to attach the two rear shocks. Both the red and the gold anodising are less vivid than in the photos - the gold is more of a champagne colour. Still quite jolly, mind.
I've also washed the body but not yet applied the window masks. I'm pondering doing it part purple and part white (or white with green/purple flip added), but it looks tricky to mask accurately, and there are no stickers to hide the lines. Needs some thinking.
Just arrived is a roll of self-adhesive purple vinyl for Lady BMcH's Cricut. I'm doing spirals for the wheels. If I can figure out drawing them in Inkscape. And that pair of tiny Knipex water-pump pliers I'd been eyeing up.
Edited by Sporky on Monday 3rd February 19:18
Well that's good, because here's more!
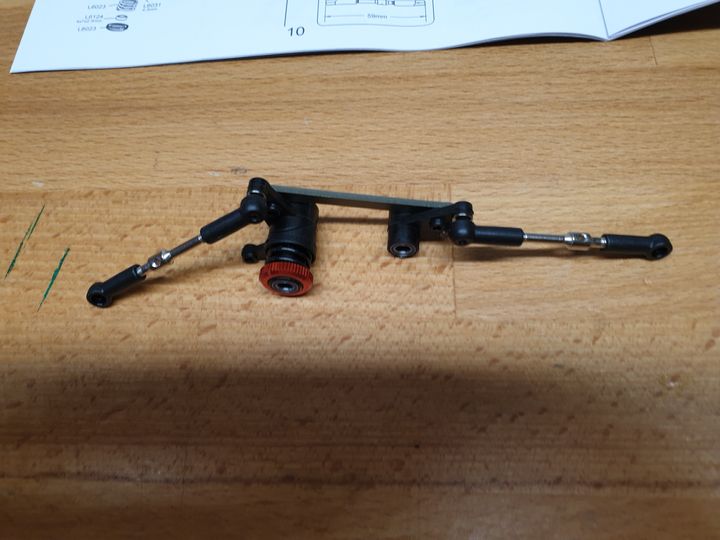
Last bit of bag E, finishing the steering linkages. Another not-quite-clear bit in the instructions - the solid link bar can go in two different holes at each end. Looking ahead reveals that it's the outer hole on both.
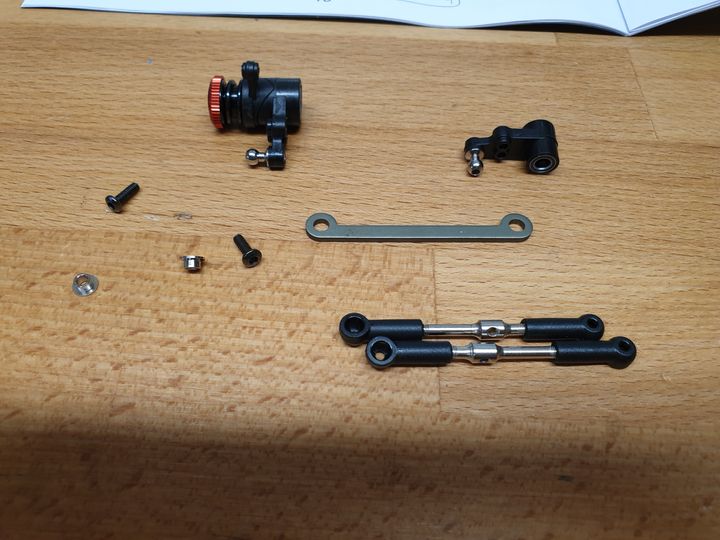
Any my new Knipexes are perfect for snapping the ball-ends together. Aren't they adorable?
So that's bag E done. The steering links are on ball bearings so this should be lovely and smooth.
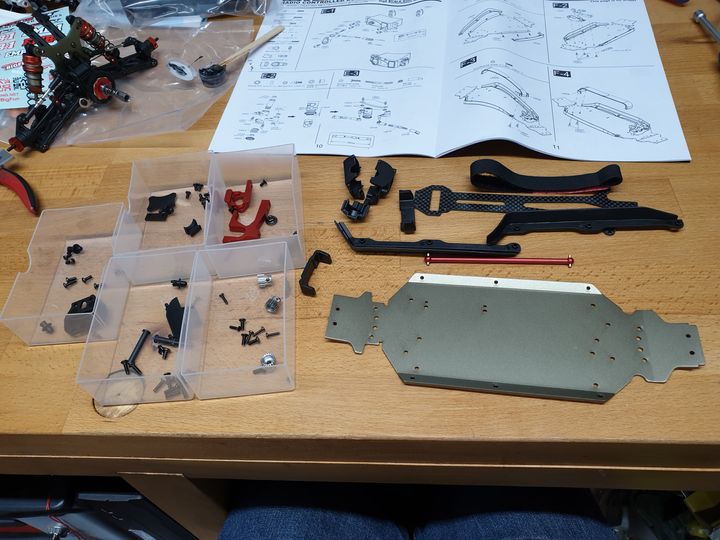
Bag F - this is where the magic happens! Check all the screws before beginning as there are a fair few lengths.
Body tub outer rails and the motor mount first. It says to threadlock all four screws, I just did the ones into the metal motor mount, cos threadlock eats plastic.
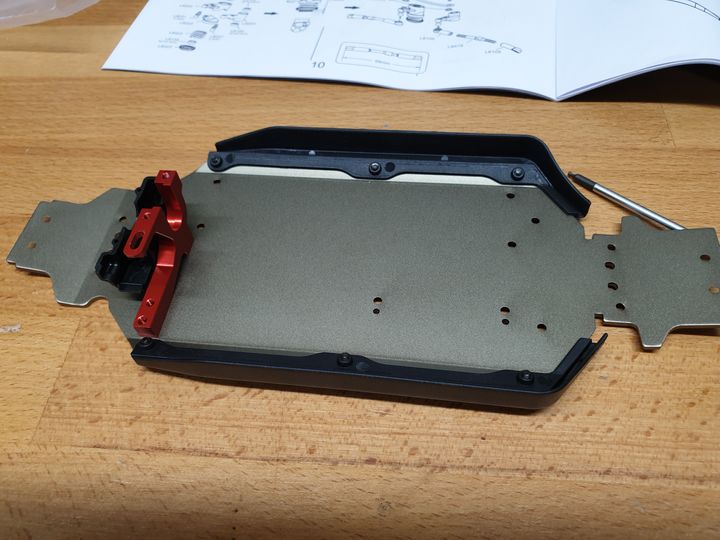
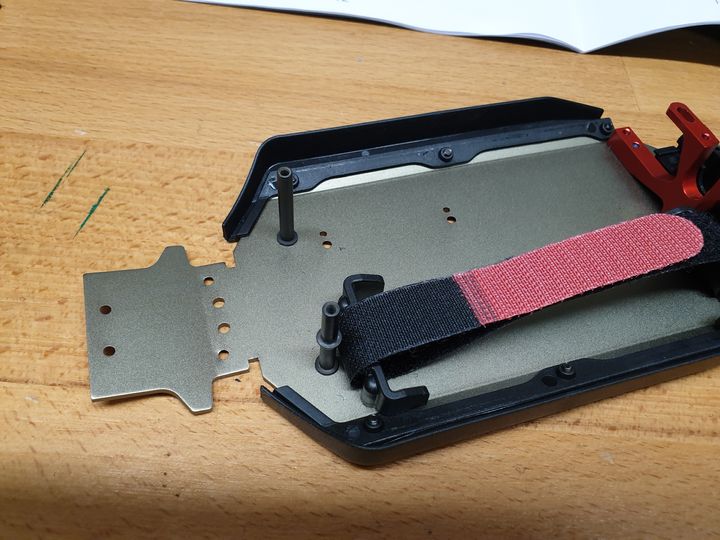
Then the battery mount and steering columns. The battery mount doesn't really suit my battery - not quite wide enough, and the strap fouls the connections. That'll need modifying later.
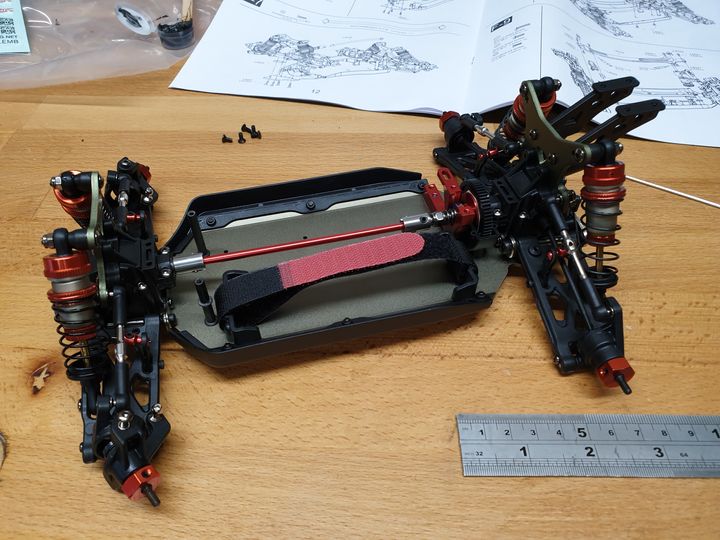
Front and rear assemblies next, plus the central driveshaft.
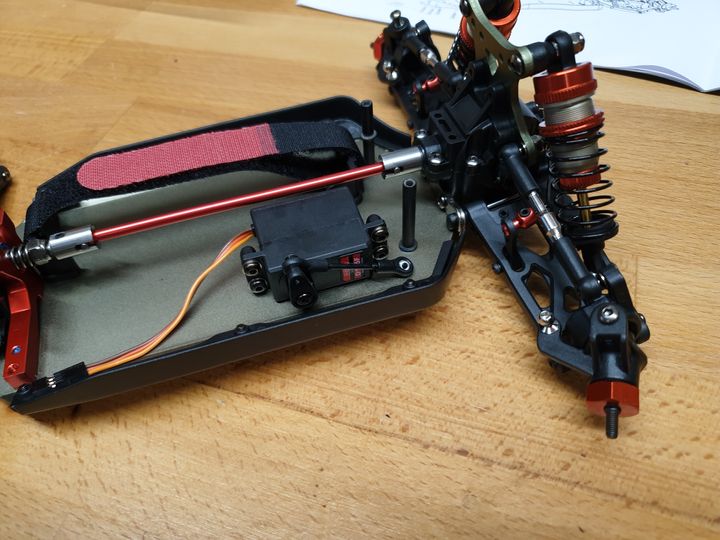
Then the included servo...
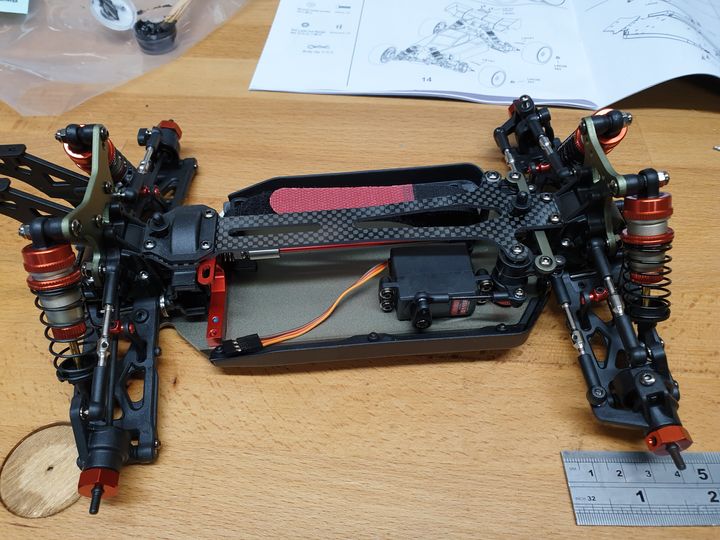
The kit comes with both plastic and CF top plates. Obvs the CF one goes in, because it's fancier. The cover for the main driveshaft gear, and the body mount, needed some trimming as they didn't quite fit together right.
Motor goes in - there are three opinions included, I've gone for the smallest as I reckon it'll still be scary-fast. I tried three different angles - there's not much space for the ESC and the motor wires are quite stiff.
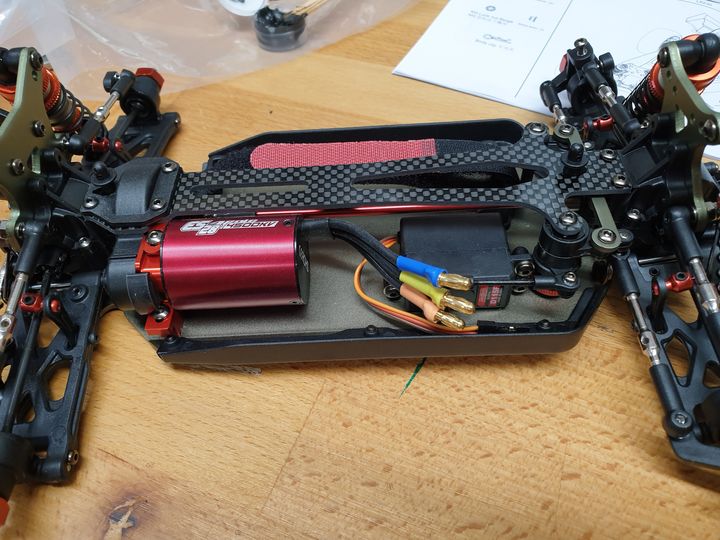
So, left to do - mount the ESC and receiver, paint the body, tidy the wiring. Getting there. Mocked up for now.
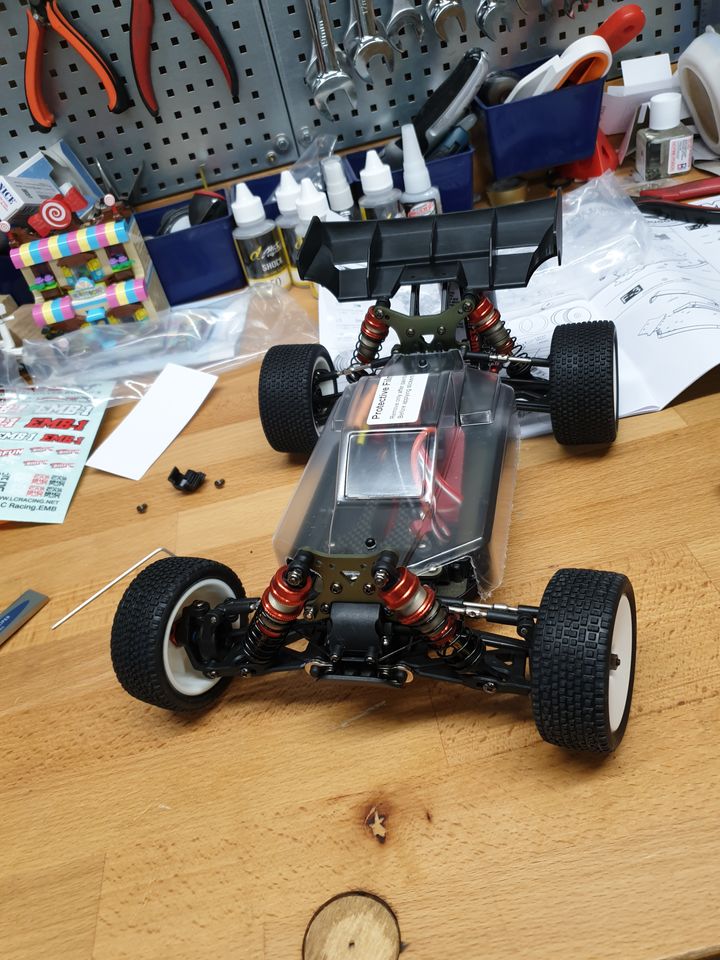
Did a quick drop-test onto the bench - no bounce at all, the damping is spot-on.
Last bit of bag E, finishing the steering linkages. Another not-quite-clear bit in the instructions - the solid link bar can go in two different holes at each end. Looking ahead reveals that it's the outer hole on both.
Any my new Knipexes are perfect for snapping the ball-ends together. Aren't they adorable?
So that's bag E done. The steering links are on ball bearings so this should be lovely and smooth.
Bag F - this is where the magic happens! Check all the screws before beginning as there are a fair few lengths.
Body tub outer rails and the motor mount first. It says to threadlock all four screws, I just did the ones into the metal motor mount, cos threadlock eats plastic.
Then the battery mount and steering columns. The battery mount doesn't really suit my battery - not quite wide enough, and the strap fouls the connections. That'll need modifying later.
Front and rear assemblies next, plus the central driveshaft.
Then the included servo...
The kit comes with both plastic and CF top plates. Obvs the CF one goes in, because it's fancier. The cover for the main driveshaft gear, and the body mount, needed some trimming as they didn't quite fit together right.
Motor goes in - there are three opinions included, I've gone for the smallest as I reckon it'll still be scary-fast. I tried three different angles - there's not much space for the ESC and the motor wires are quite stiff.
So, left to do - mount the ESC and receiver, paint the body, tidy the wiring. Getting there. Mocked up for now.
Did a quick drop-test onto the bench - no bounce at all, the damping is spot-on.
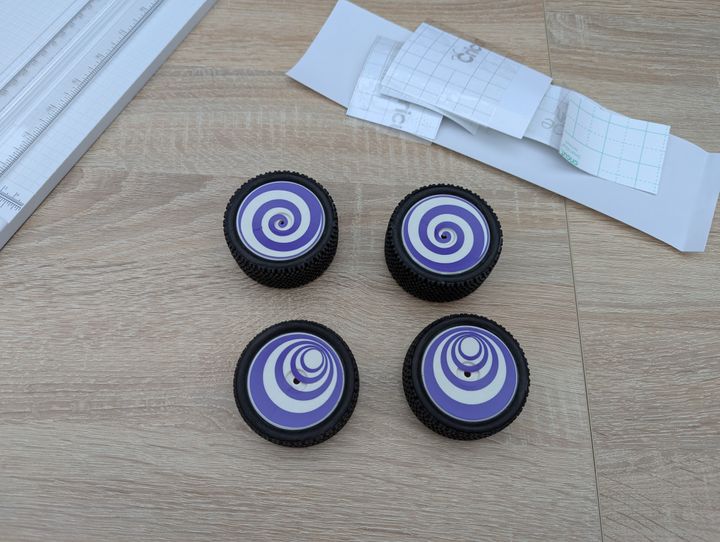
While I await a response from the shop on the battery (they do two mini scale ones, the other looks right) I spent a day swearing at Inkscape and Cricut Design Studio, and then got it working. No in-process photos because it's a slightly fraught process, but some decorated wheels. Wobblers will go at the front, spirals at the back.
Body is painted too, and I decided to besticker it, because buggies look odd without stickers. It came out a darker, blue purple than I'd expected - should have done a coat of the purple/green iridescent first, but it looks decent enough.
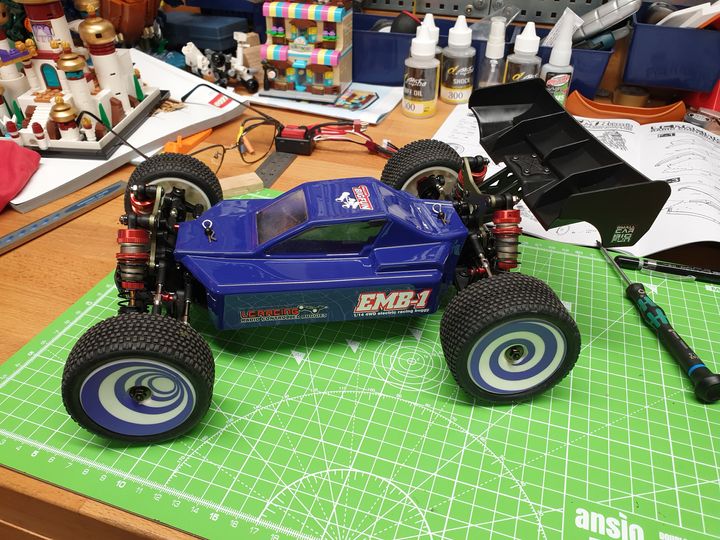
So all done. Overall a really enjoyable build, and (subject to sorting out the battery) one I'd happily recommend. Though brushless makes an even worse noise than brushed...
Body is painted too, and I decided to besticker it, because buggies look odd without stickers. It came out a darker, blue purple than I'd expected - should have done a coat of the purple/green iridescent first, but it looks decent enough.
So all done. Overall a really enjoyable build, and (subject to sorting out the battery) one I'd happily recommend. Though brushless makes an even worse noise than brushed...
Sporky said:
Hmm. The recommended battery just won't fit; it's too wide for the holder, and the connections are on top, so you can't strap it down, and you can't get the body on with the battery connected. Which seems odd.
What are the dimensions of the holder?I use Radient 2S 1600Mah lipo"s in my Team Associated Reflex 14b (L=85 W=12 H=32mm).
Ah - LC Racing used to do one, but it was made by Gens Ace, and I've found that one at Wheelspin.
The original shop gave said I should cut up the velcro strap, resolder the leads at a right angle, and find some new mounts. I am now far less impressed with them - that's a really crappy answer.
The original shop gave said I should cut up the velcro strap, resolder the leads at a right angle, and find some new mounts. I am now far less impressed with them - that's a really crappy answer.
Sporky said:
I didn't think so but then again... I guess it must have been!There probably are alternative mounts available on Aliexpress, but no problem using what you already have. Depending on the battery you use you might have to cut a notch out of the plastic holder for the leads, the velcro will still hold it fine as they're not big heavy batteries like with larger scale vehicles.
I'm irked that they specifically recommended this battery for this kit, knowing that it didn't fit, when there are batteries that fit perfectly.
The velcro fouls where the leads attach even if I rebuild them to have 90° connectors, and I'd have to remove the leads every time the pack goes in or out because the velcro is secured at one end and near-impossible to rethread through the other because the steering link column is in the way.
I can't find any way to post this one back for a refund, so it's basically a scam.
Edited by Sporky on Tuesday 11th February 08:50
Sporky said:
95 long, 30 wide as a maximum. Probably not over 20mm tall, and the wires need to come out at a corner or on the side or they'll foul the strap.
I can recommend https://www.hobbyrc.co.uk/2s-lipo for batteries, always a good selection of sizes and capacities.Really enjoyed your build by the way, I have one of these, I like a small buggy..... they're very usable. I'm planning on doing the kit version of the 14B with all the factory team parts soon.
Gassing Station | Scale Models | Top of Page | What's New | My Stuff