MX5 Newbie Motorsport
Discussion


I have decided that I want to have a go at grass routes motorsport more for fun that any dreams of winning.
After much research and attending some events I have decided on a series which is a mix of sprints and hillclimbs at various venues. Further research turned up a class that was based on Mk1 and Mk2 MX5 road cars with tight controls on what can be done to change the car to keep costs reasonable.
The main changes allowed are for safety gear, brake pads, exhaust side and so on.
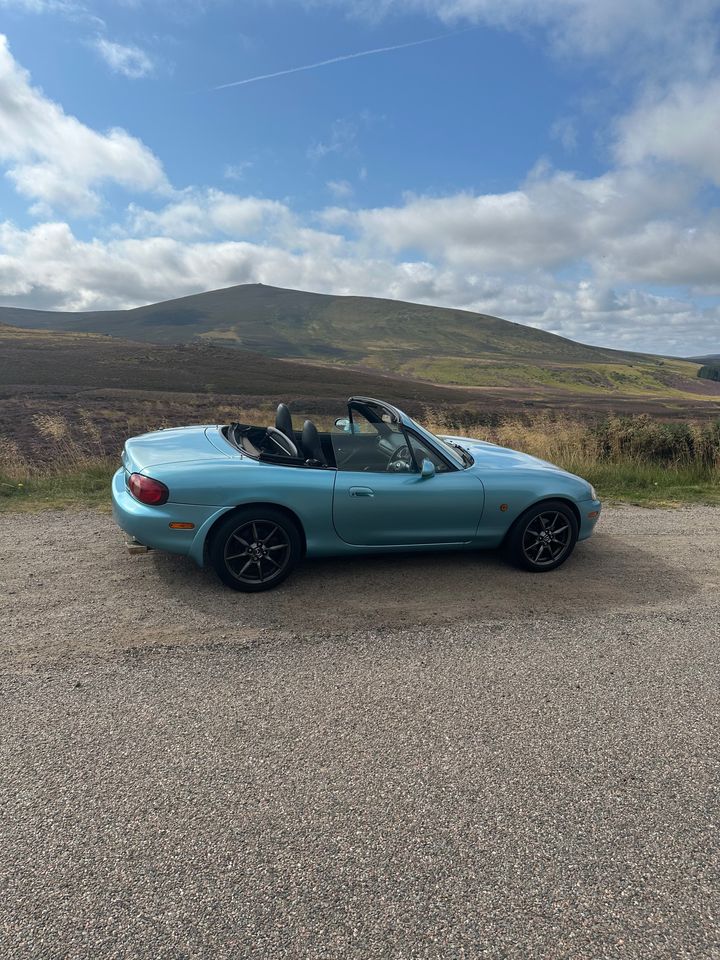
Next to find a car, it seems that the Mk2 facelift 1.8 VVT with a six speed box is the one to have and these, in a rust free condition are a bit like hens teeth. Anyway one turned up for sale close to Carlise and after a video call and so on the wife and I made the 5 hour drive to see it and hopefully buy it. The car turned out to be better than described so I was delighted, a deal struck and the car was mine.
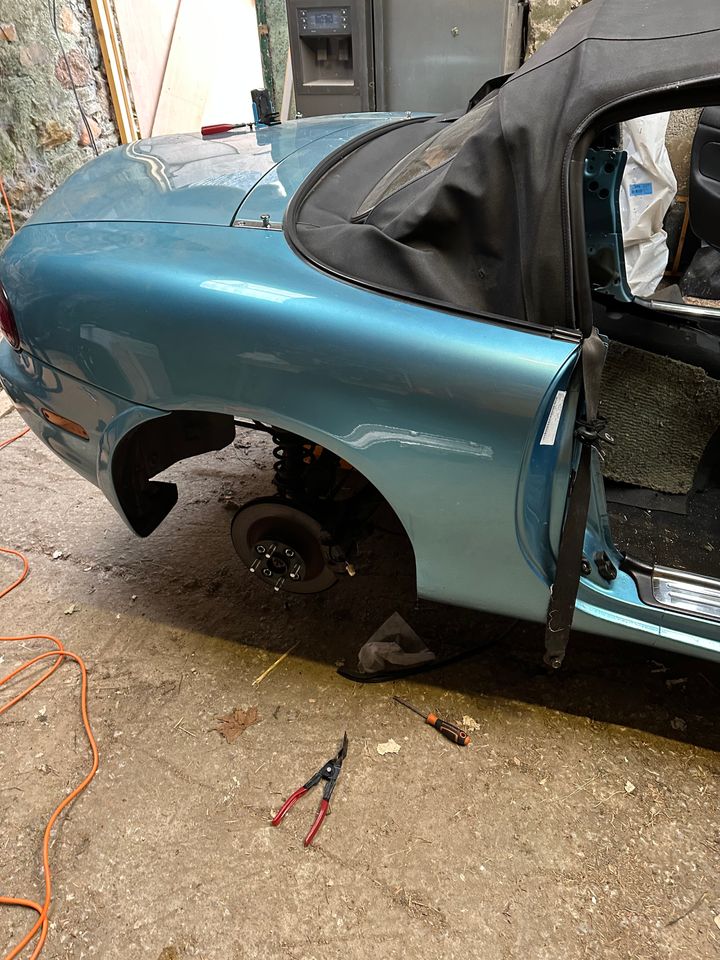
I then had a great 5 hour drive home back to the highlands and the car drove brilliantly. I then took it for a spin around the local area and again it drove brilliantly. This is how it looks now
Now I need to get it ready for the events. Job one was to put in new plugs, and change the oil and filter which took about an hour and was simple.
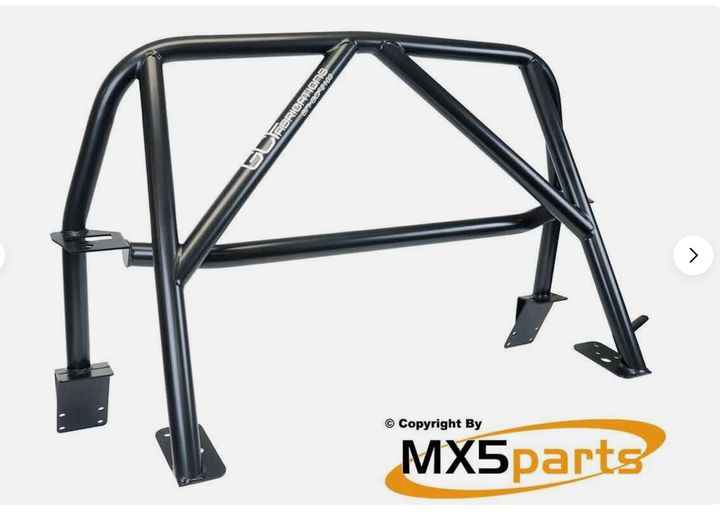
Next jobs are brake pads (Roddisons) which have been ordered and should be here at the weekend. A roll bar has been ordered too, this looks straightforward but fiddly and time consuming to fit. I have ordered one of these
After that I want to get a hardtop and a race seat, but then I should be good to go.
There are a couple of events before the season ends in mid/late September which I might try to get to but we shall see.
After much research and attending some events I have decided on a series which is a mix of sprints and hillclimbs at various venues. Further research turned up a class that was based on Mk1 and Mk2 MX5 road cars with tight controls on what can be done to change the car to keep costs reasonable.
The main changes allowed are for safety gear, brake pads, exhaust side and so on.
Next to find a car, it seems that the Mk2 facelift 1.8 VVT with a six speed box is the one to have and these, in a rust free condition are a bit like hens teeth. Anyway one turned up for sale close to Carlise and after a video call and so on the wife and I made the 5 hour drive to see it and hopefully buy it. The car turned out to be better than described so I was delighted, a deal struck and the car was mine.
I then had a great 5 hour drive home back to the highlands and the car drove brilliantly. I then took it for a spin around the local area and again it drove brilliantly. This is how it looks now
Now I need to get it ready for the events. Job one was to put in new plugs, and change the oil and filter which took about an hour and was simple.
Next jobs are brake pads (Roddisons) which have been ordered and should be here at the weekend. A roll bar has been ordered too, this looks straightforward but fiddly and time consuming to fit. I have ordered one of these
After that I want to get a hardtop and a race seat, but then I should be good to go.
There are a couple of events before the season ends in mid/late September which I might try to get to but we shall see.
i used to own an NB MX-5 as my first "own" car! it was an evolution orange Pre-FL 1.8 from 1998. wanted to modify it and make it a road worthy track car and added coilovers and other breathing mods (obviously didnt tell insurance as the dumb 19 year old i was). was an absolute RIOT through the twistys and was just insanely slick to control
sadly someone forgot how roundabouts operated and smashed into the passenger side of my car at 30mph and wrote it off. while i own an MR2 Spyder now, i do sometimes long for the simplicity of an NB.
instead i shall live vicariously through your build! good luck! just a note, the FL NBs have worse rust issues due to additional chassis rails which can trap water and builds up over time. make sure to have those inspected hopefully replaced to maintain chassis rigidity and prevent long term rust issues
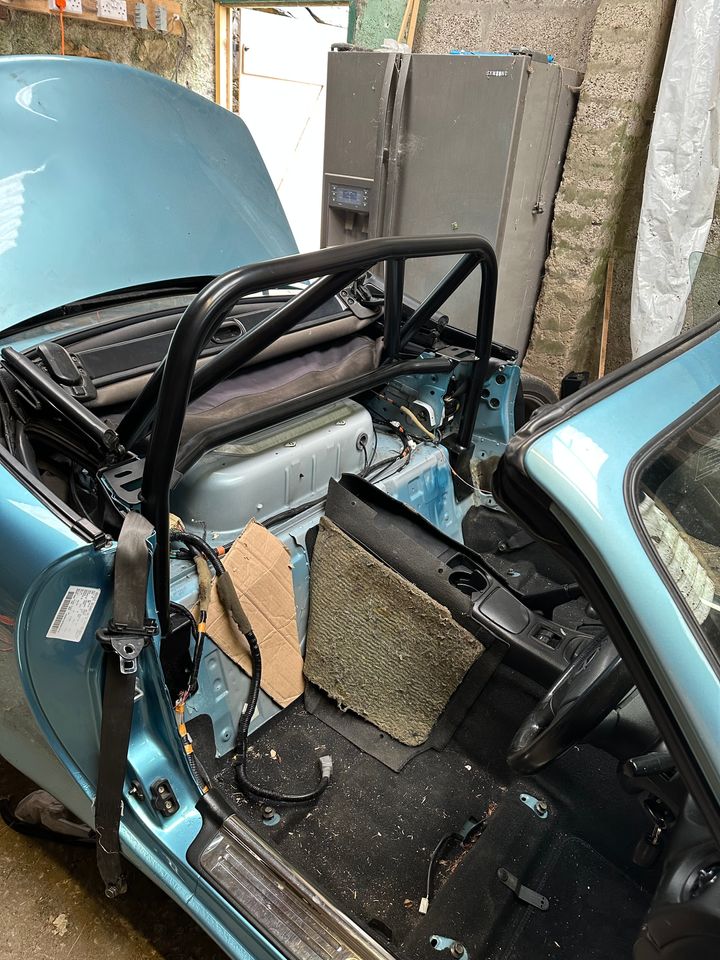
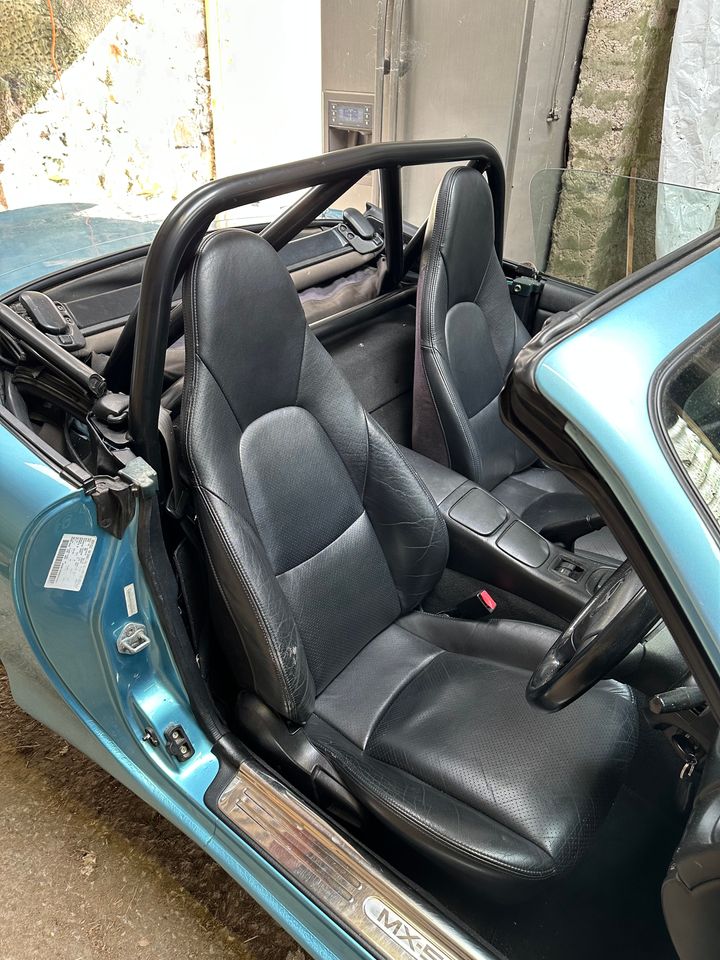
And so the transformation to sprint car starts in earnest with the fitting of the GC Fabrication Roll Bar. I watched several videos and while the job looks involved it looks straightforward.
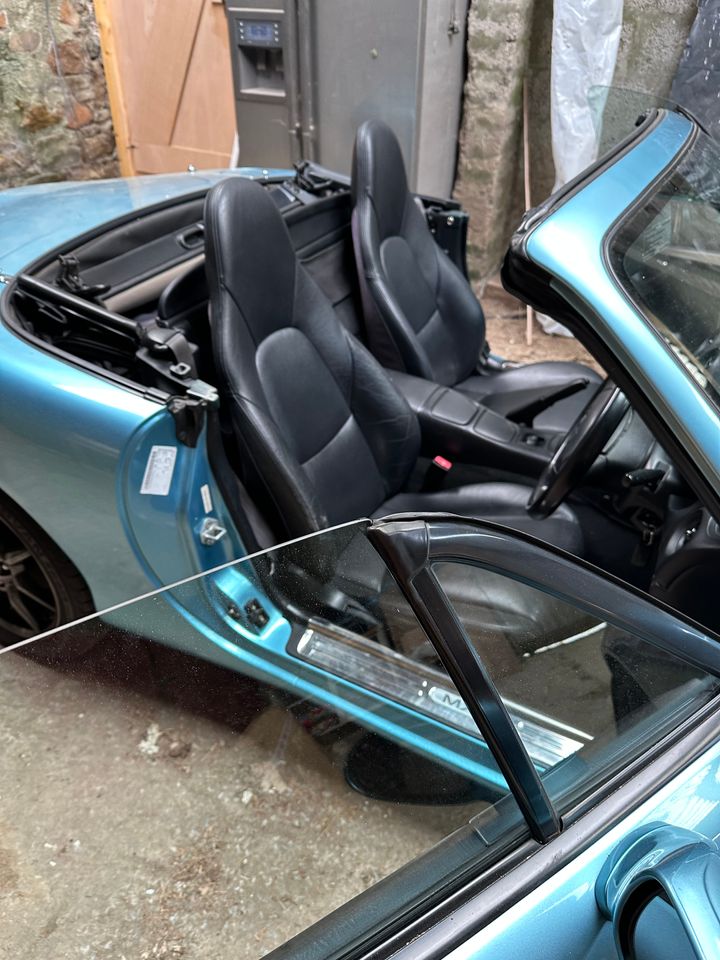
First job was to take the seats out.
A bonus was that I found £1.55 under the seats which I can net off against the overall costs.
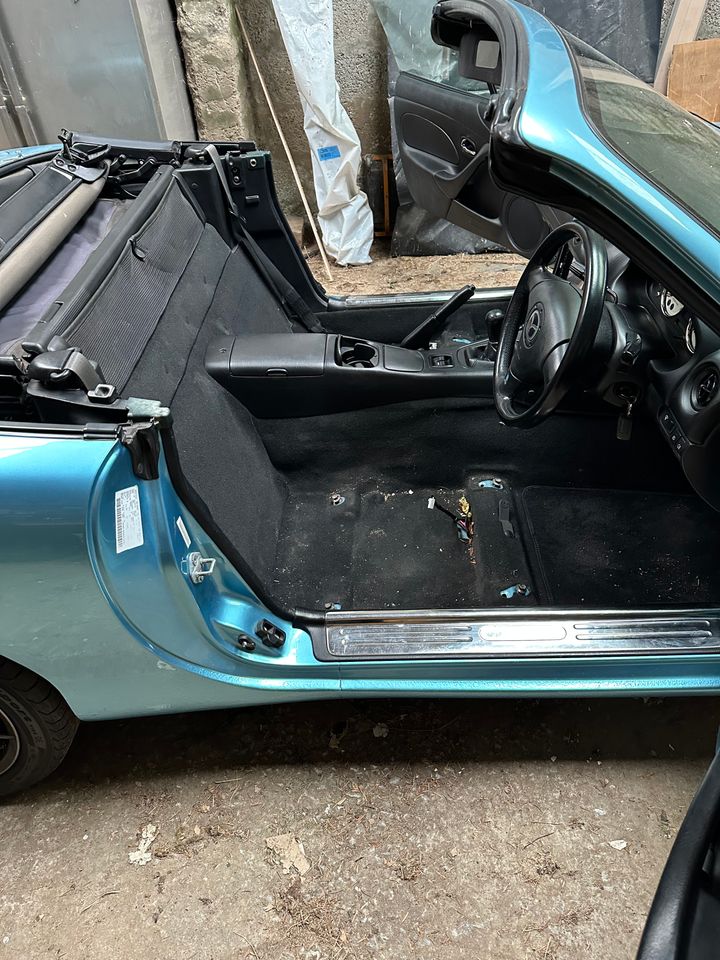
After that the wind deflector came out which was easy once I worked out there were two bolts under and plastic trim.
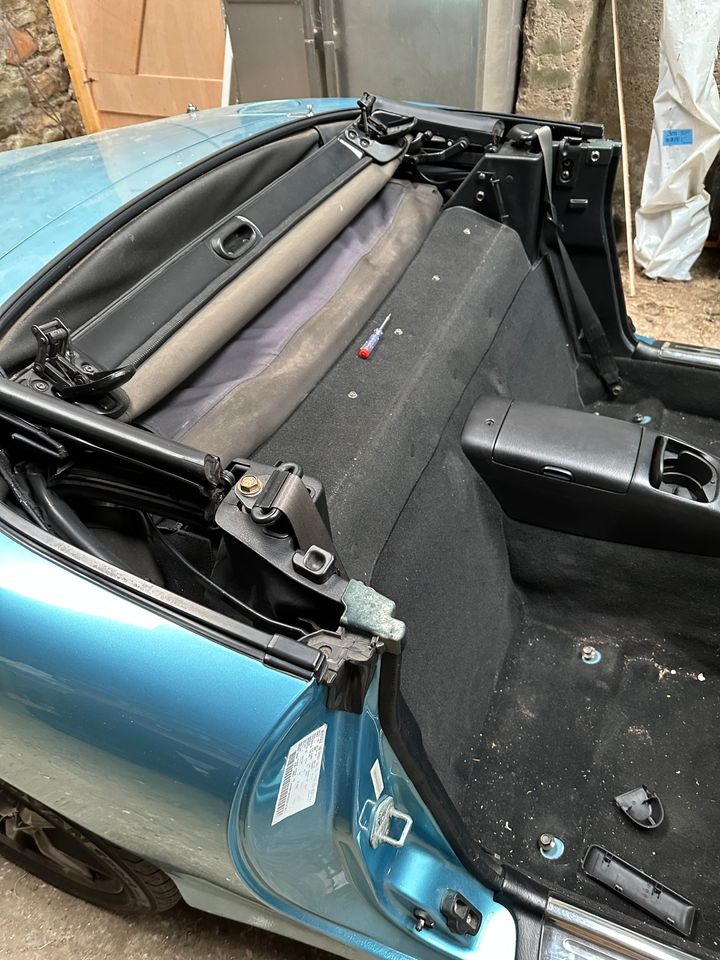
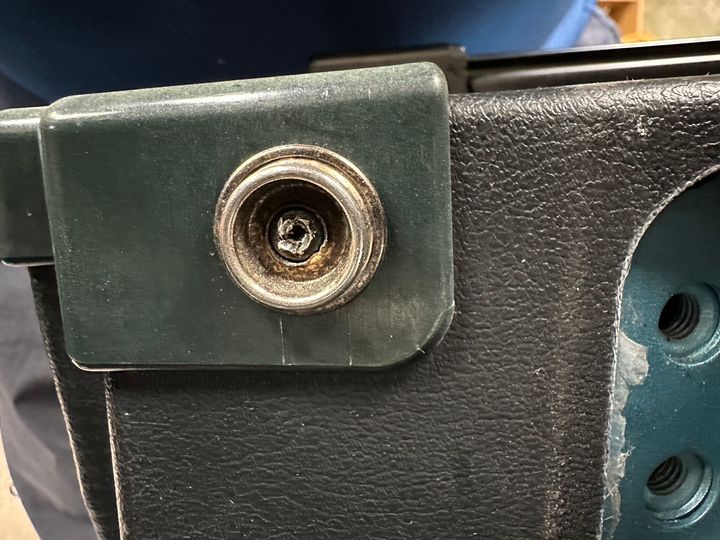
From there the plastic trim on the door pillars had to come off and this was where I encountered my first real issue. The screw that held the plastic cap on the top of the B pillar was rounded and after much effort I broke out the angle grinder and cut the screw offf. I will get a replacement screw in due course.
After that several hidden clips and the trim was off.
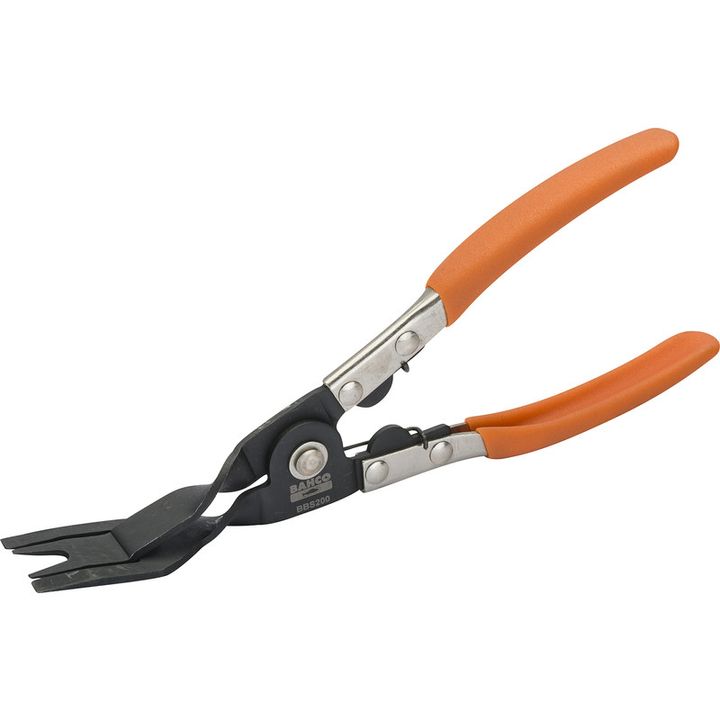
Then the carpet was removed and I was thankful I had some trim removing tools which meant I managed to remove the carpet without breaking or losing a single clip which was a result.
Finally the metal ‘parcel shelf’ could be removed which gives me access to the mounting area for the roll bar.
This all took me about 2 hours which I thought was ok.
Tomorrow I need to cut some metal out of the car to let the rear feet of the roll bar slide in and then bolt it in. (Which sounds easy saying it like that). And then modify the plastic trim and refit it all.
First job was to take the seats out.
A bonus was that I found £1.55 under the seats which I can net off against the overall costs.
After that the wind deflector came out which was easy once I worked out there were two bolts under and plastic trim.
From there the plastic trim on the door pillars had to come off and this was where I encountered my first real issue. The screw that held the plastic cap on the top of the B pillar was rounded and after much effort I broke out the angle grinder and cut the screw offf. I will get a replacement screw in due course.
After that several hidden clips and the trim was off.
Then the carpet was removed and I was thankful I had some trim removing tools which meant I managed to remove the carpet without breaking or losing a single clip which was a result.
Finally the metal ‘parcel shelf’ could be removed which gives me access to the mounting area for the roll bar.
This all took me about 2 hours which I thought was ok.
Tomorrow I need to cut some metal out of the car to let the rear feet of the roll bar slide in and then bolt it in. (Which sounds easy saying it like that). And then modify the plastic trim and refit it all.
Well today was what is technically known as a bit of.a pig.
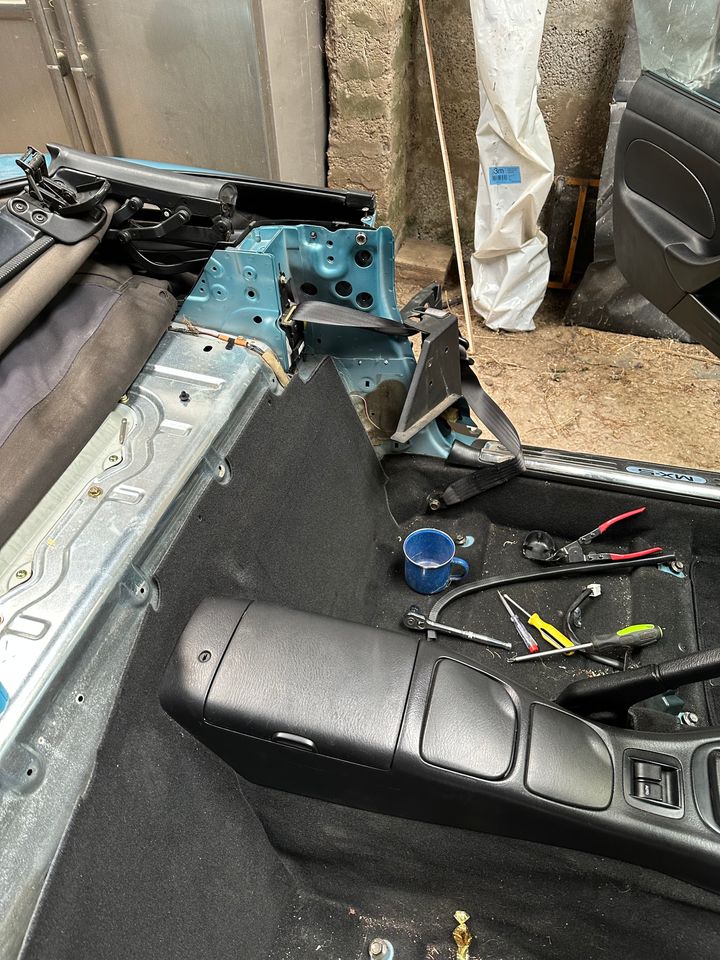
I marked up the area that needed cutting away and after a bit of procrastinating I knuckled down and actually cut the metal out. It is a bit scary taking an angle grinder to the car.
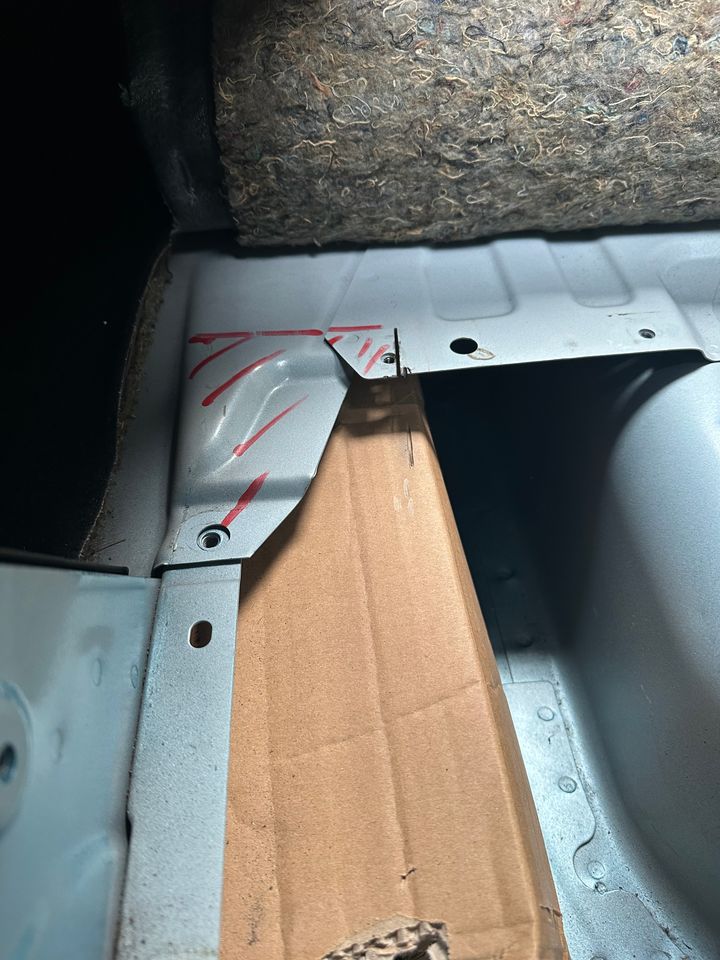
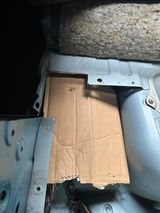
Then much fettling with the cuts to allow the bar to go in and out, I was trying to cut the least amount of metal possible.
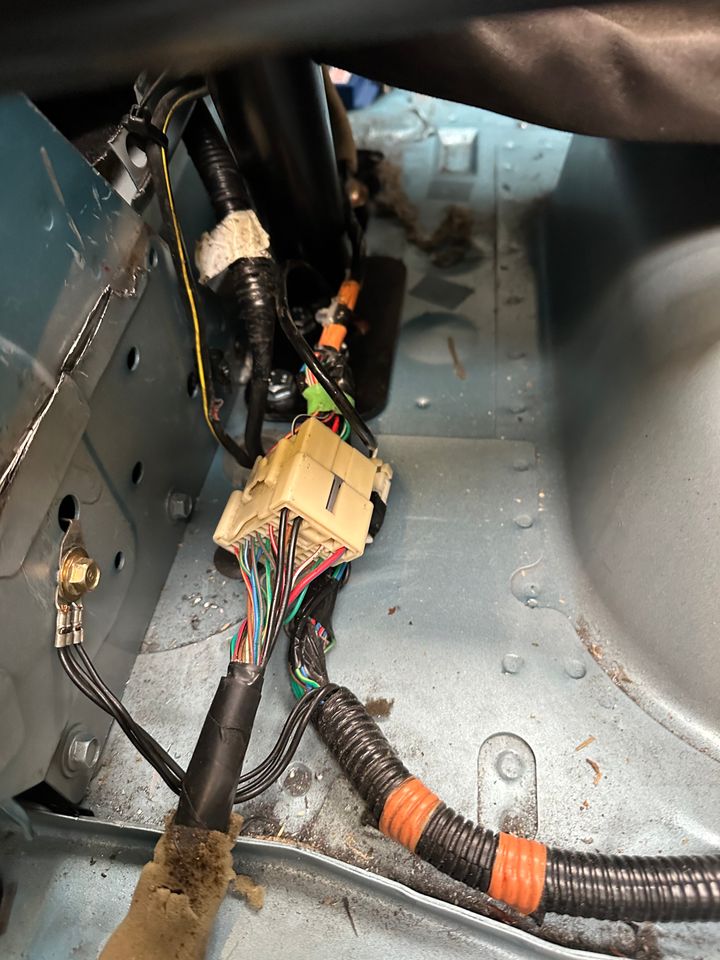
This turned out to be the easy bit. It then turns out that every wire (it seems in the world) is in the way. I managed to move most of the wires but was left with 2 ABS wires, one each side, which came through the floor where the back plate needs to sit.
By now I have been at it 3 hours and gave up, the roll bar gets surprising heavy the more you lift it in and out.
A quick message to GC Fabrications who made the bar got an almost immediate reply and told me how to deal with it. Impressive service from them.
So will be back at it tomorrow and see if I can get it done.
What have I learned so far? This is a bloody hard job and at times needs 5 hands!
Anyway, onwards and upwards for tomorrow.
I marked up the area that needed cutting away and after a bit of procrastinating I knuckled down and actually cut the metal out. It is a bit scary taking an angle grinder to the car.
Then much fettling with the cuts to allow the bar to go in and out, I was trying to cut the least amount of metal possible.
This turned out to be the easy bit. It then turns out that every wire (it seems in the world) is in the way. I managed to move most of the wires but was left with 2 ABS wires, one each side, which came through the floor where the back plate needs to sit.
By now I have been at it 3 hours and gave up, the roll bar gets surprising heavy the more you lift it in and out.
A quick message to GC Fabrications who made the bar got an almost immediate reply and told me how to deal with it. Impressive service from them.
So will be back at it tomorrow and see if I can get it done.
What have I learned so far? This is a bloody hard job and at times needs 5 hands!
Anyway, onwards and upwards for tomorrow.
Edited by skeeterm5 on Tuesday 2nd September 18:06
This morning I woke with renewed energy and cracked on.
Firstly jacking the car up, removing the wheels and part of the arch liners so that I could get the ABS wire out of the way. This was pretty straight forward.
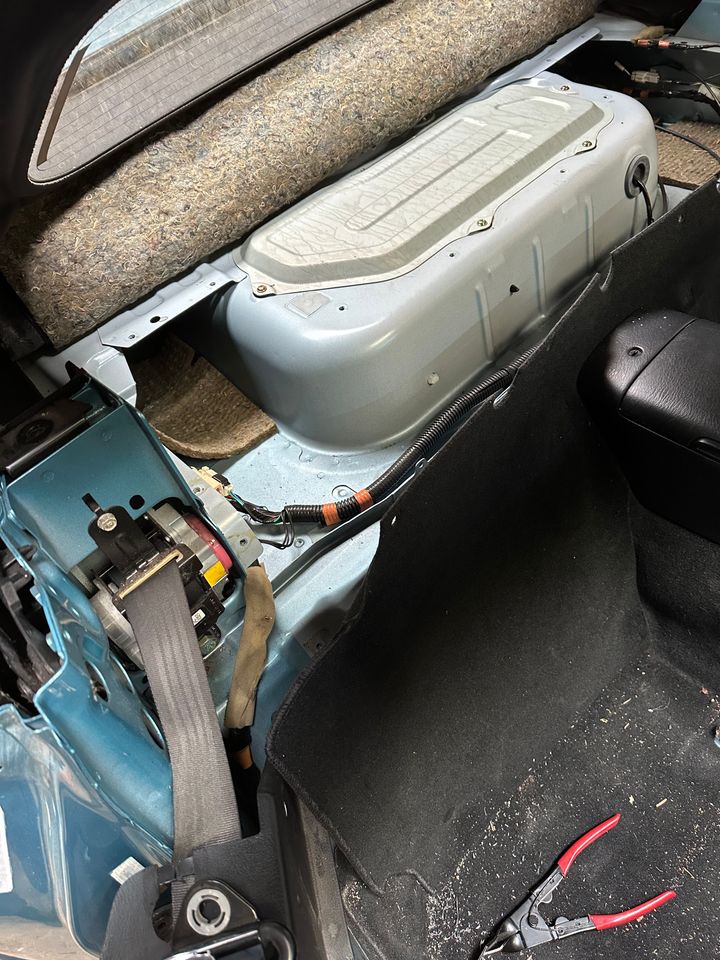
After that I decided the only way to get the rear foot on the drivers side in was to move a thick wire which was in the way, it was a feed from the battery, so this was disconnected and moved which allowed me, with some wrestling, to actually get the roll bar into the correct position and test fit it. You can see the battery wire in the footwell.
Unfortunately there was no way I could work out how to drill the rear plate bolt holes with the bar in situ so I had to mark them and then take the bar out again, which was a bit deflating to be honest.
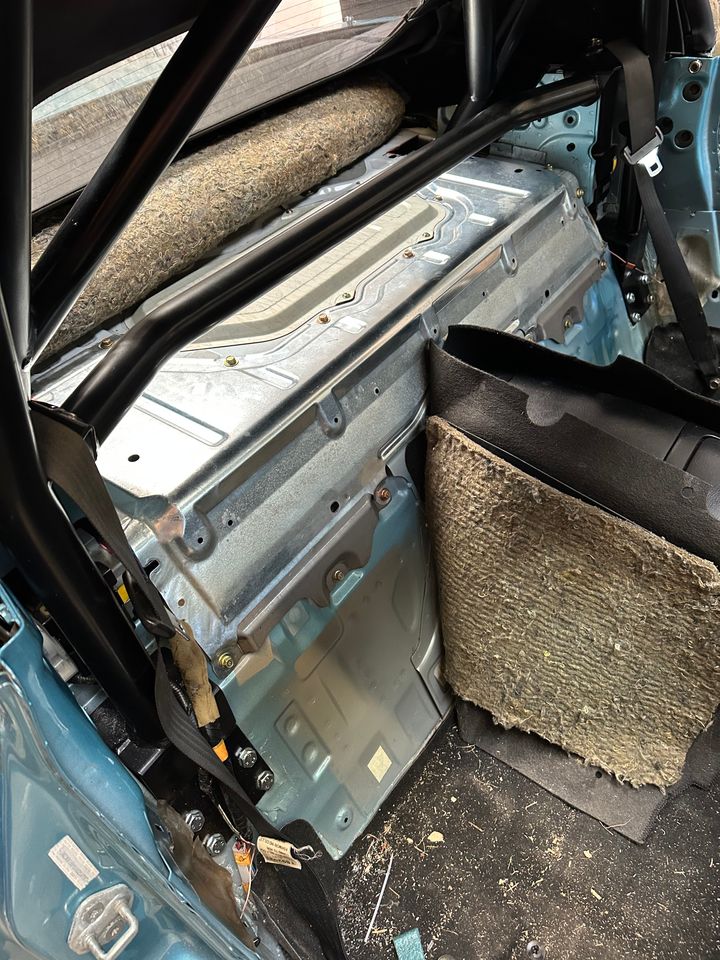
Then I drilled all the mounting holes and put the bar back in, it went in easier this time as a think I was getting more used to it.
Then I could add the bolts and spreader plates and finger tighten the bolts.
This shows the wiring I had to try and get around to get the drivers side read foot in place, but you can see the bolts now in place.
Then I could tighten the front bolts, which was easy.
So I the roll bar is now in and fixed, which is great.
Tomorrows job is to refit the interior trim which should be simple (famous last words).
Firstly jacking the car up, removing the wheels and part of the arch liners so that I could get the ABS wire out of the way. This was pretty straight forward.
After that I decided the only way to get the rear foot on the drivers side in was to move a thick wire which was in the way, it was a feed from the battery, so this was disconnected and moved which allowed me, with some wrestling, to actually get the roll bar into the correct position and test fit it. You can see the battery wire in the footwell.
Unfortunately there was no way I could work out how to drill the rear plate bolt holes with the bar in situ so I had to mark them and then take the bar out again, which was a bit deflating to be honest.
Then I drilled all the mounting holes and put the bar back in, it went in easier this time as a think I was getting more used to it.
Then I could add the bolts and spreader plates and finger tighten the bolts.
This shows the wiring I had to try and get around to get the drivers side read foot in place, but you can see the bolts now in place.
Then I could tighten the front bolts, which was easy.
So I the roll bar is now in and fixed, which is great.
Tomorrows job is to refit the interior trim which should be simple (famous last words).
Well that was an epic one man job but finally the roll bar is fully installed and the interior put back in. I have to say it looks pretty neat now that it is done.
The last bit of cutting was the metal parcel shelf thing to get it to clear the rear legs, a simple enough task and then this bolted straight back in.
Then some tidying up of the wires I had to move with cable ties, tape and foam as most of won’t clip back where it went originally.
Then onto some “modification” of the plastic side trims was needed, some a bit fiddly and meant cutting a little, trying it, cutting it more until they fit. It might have been possible to put this back in before bolting the roll bar in but it seems to work just as well afterwards.
Then the carpet can be refitted.
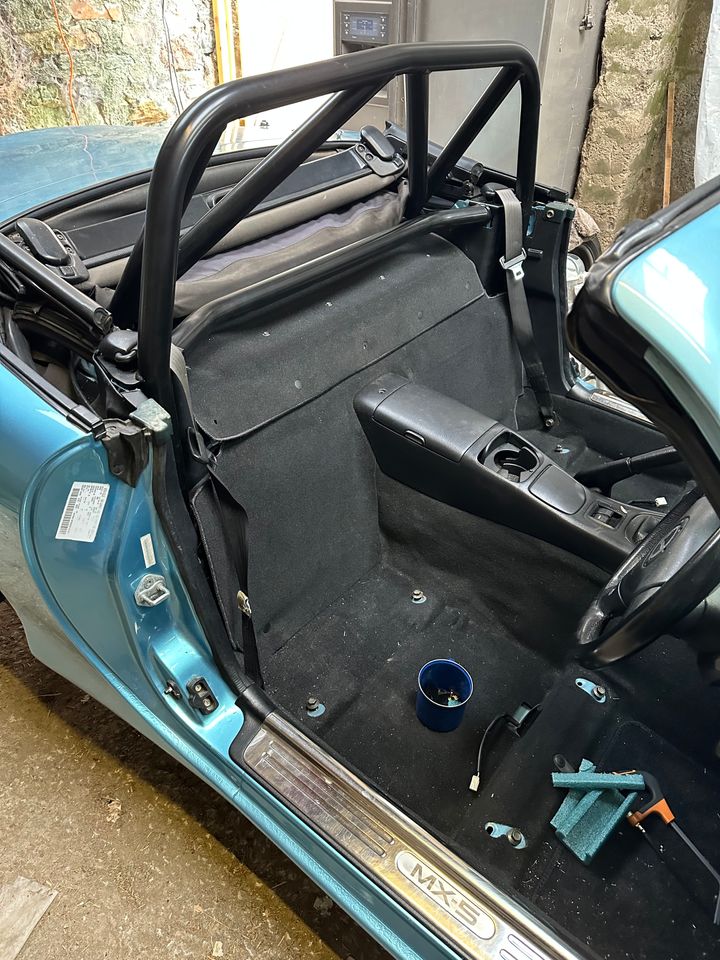
And finally the seats could go back in and the job was finished and I have to say it looks pretty good, almost OEM.
I guess this took me 2 days in all and would have been much easier with another person but is doable on your own.
But now on to the next task which sound be easier, brake pads and then new seats.
The last bit of cutting was the metal parcel shelf thing to get it to clear the rear legs, a simple enough task and then this bolted straight back in.
Then some tidying up of the wires I had to move with cable ties, tape and foam as most of won’t clip back where it went originally.
Then onto some “modification” of the plastic side trims was needed, some a bit fiddly and meant cutting a little, trying it, cutting it more until they fit. It might have been possible to put this back in before bolting the roll bar in but it seems to work just as well afterwards.
Then the carpet can be refitted.
And finally the seats could go back in and the job was finished and I have to say it looks pretty good, almost OEM.
I guess this took me 2 days in all and would have been much easier with another person but is doable on your own.
But now on to the next task which sound be easier, brake pads and then new seats.
And so it continues.
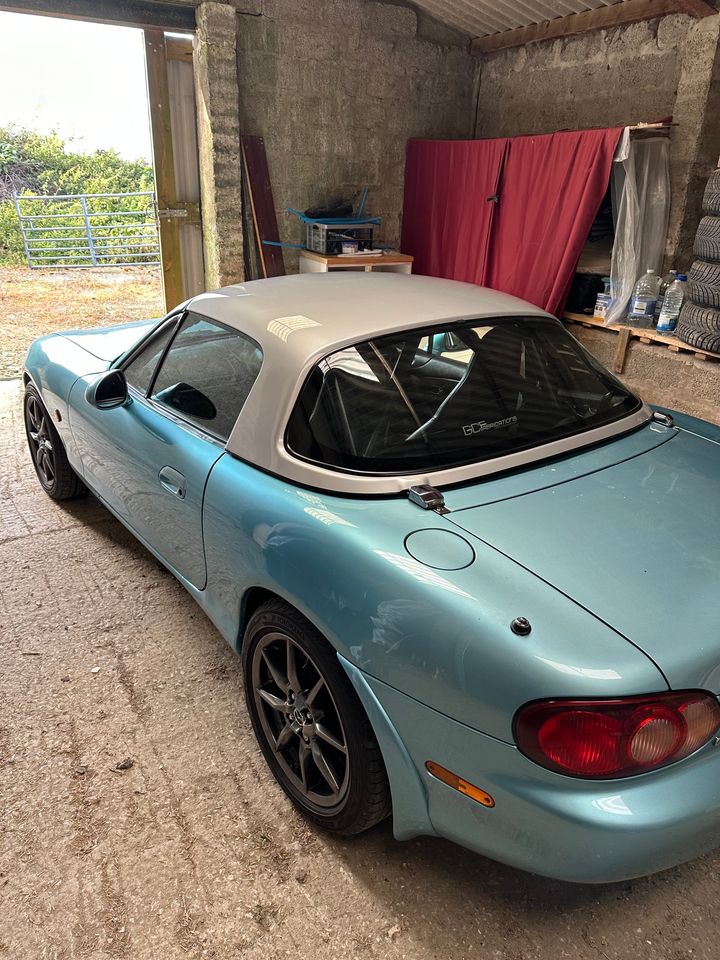
A new hardtop has been procured and fitted, the original Mazda latches have been replaced with GC Fabrication side brackets and Jass Performance front mount brackets. These bolt the hard top to the body and were a simple fit.
https://bofiracing.com/wp-content/uploads/2021/09/...
https://bofiracing.com/wp-content/uploads/2021/09/...
So now the car looks like this
Next on the list are seats and harness, I think I am going to fit Sparco Sprints, will have a chat supplier.
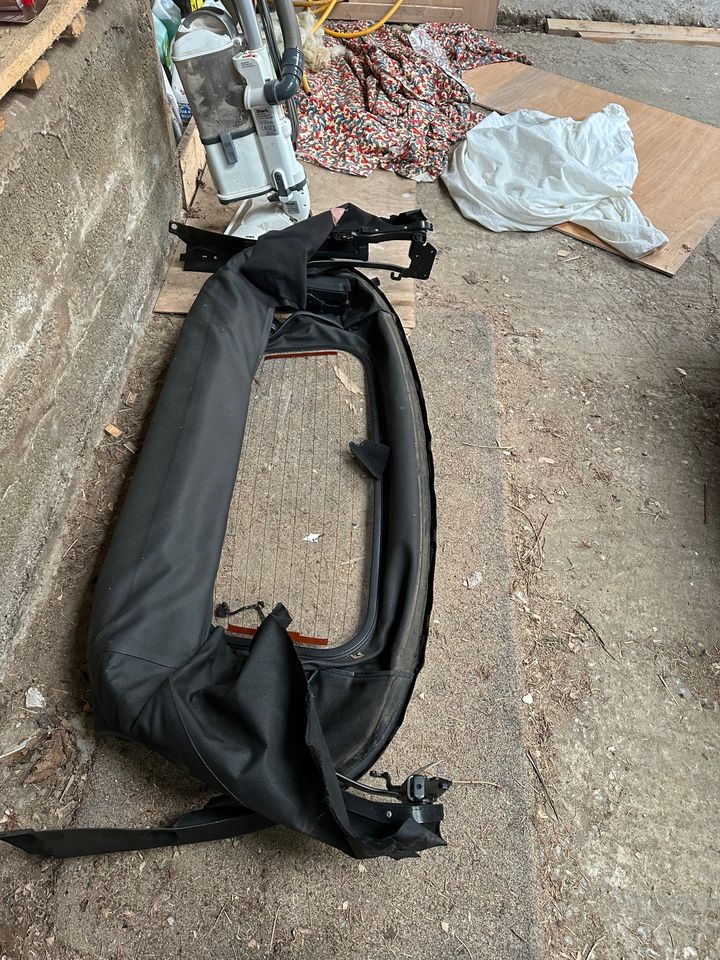
So for anybody interested the build continues, The soft top is now out which turned out to be a pig of a job, it would have been easier if I had done it before installing the roll bar.
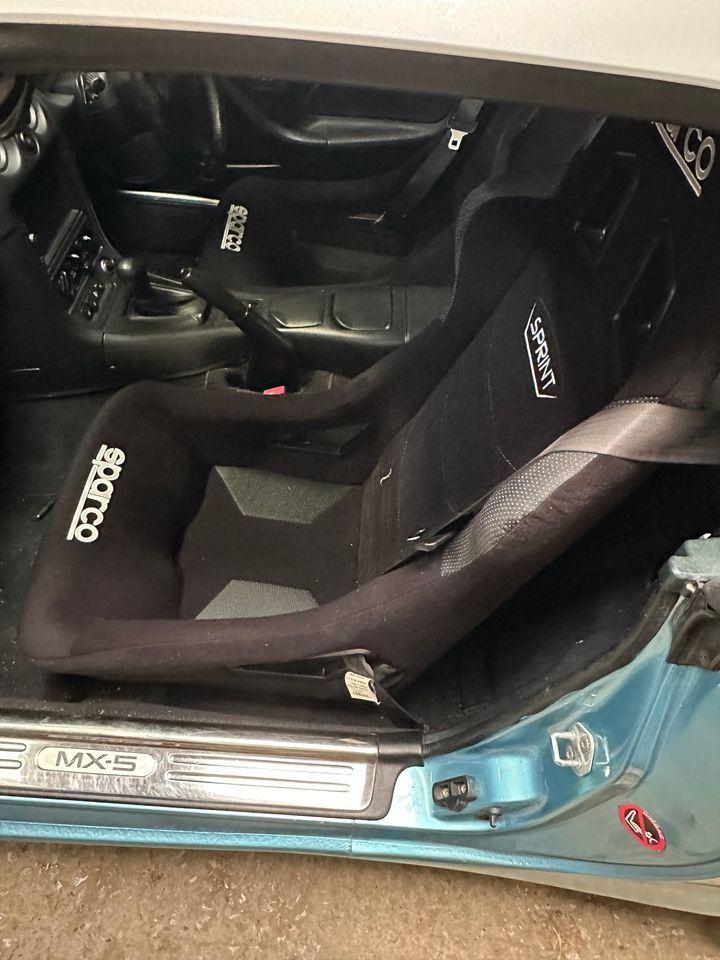
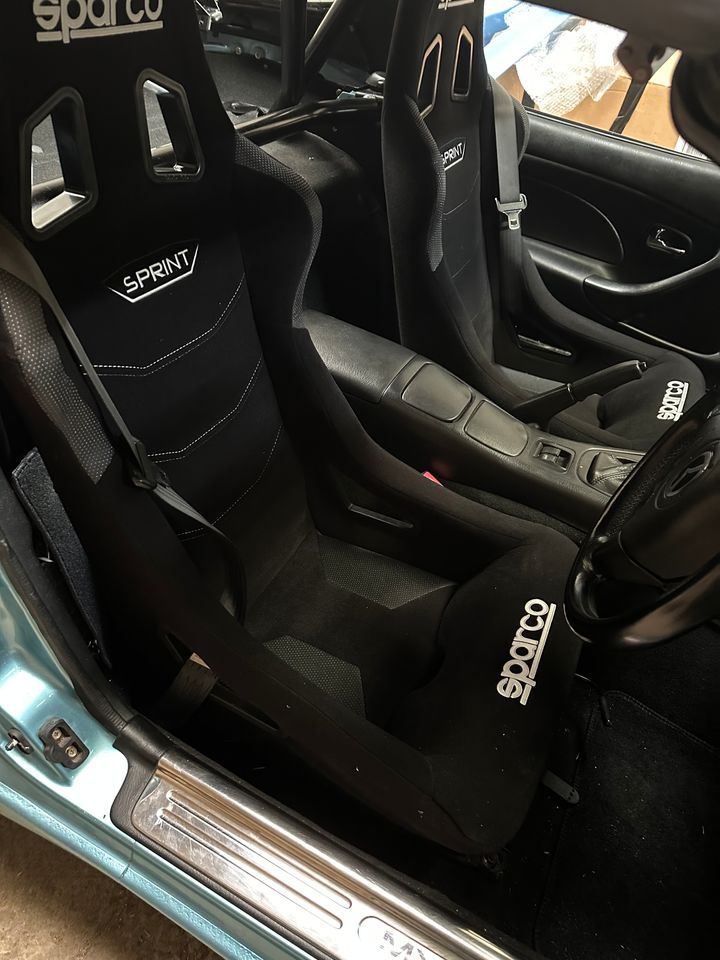
Then on to the seats, Sparco Sprint + is the choice for me. Got some Jass Performance adapters which allow me to mount the seats to the OEM rails and keep the slider. These were a simple fit, take out old seats, take off runners, attach to new seats and rebolt into the car. It creates one issue with the passenger seat in so far as the seat occupancy may is disconnected which throws up air bag lights in the dash, this is fixed by adding a couple of resistors which I had already bought, meant to be plug and play. I may swap the OEM rails for something lower but will see how I get on,
But they weren’t, the supplied plug doesn’t fit the plug in the dark it might be because mine has heated seats. Anyway some pretty simple splicing sorted that.
I have retained the OEM three point belts which should make it easier to use on the road.
I have a six point harness to fit when I get round to it.
Oh, and brake pads uprated to more track oriented ones.
So the car is now ready to go. Other mods will depend how I get on and see how the car runs, but I suspect coil overs, new clutch and fly wheel and possibly a different ratio diff will be the order of the day.
And in case you are wondering this has cost me £4290 so far including the car.
its been a while since I started this thread so to bring everybody up to date.
After the roll bar I have now added
new oil and plugs
new discs and green stuff pads all round
new racing rated brake fluid
sparco sprint seats and harness
removable omp steering wheel
15 inch wheels to run the control tyre, yoko ad02
and over the last few days I have installed a full coilover set 12kg front and 9kg back. This was not as easy as YouTube would have you believe!
I have also done my first couple of sprint events and every run got faster than the last. Next event is the first weekend of June and I am really looking forward to it.
For those interested I have spent £10k including the car, trailer and all my personal gear, a lot of which is one off spend. On balance a cost effective way of getting into a national motorsport series.
Gassing Station | Readers' Cars | Top of Page | What's New | My Stuff