Installed H&R Springs - Initial Impressions
Discussion
Hi everyone,
Yesterday I installed H&R lowering springs on my '13 DB9. It took about 7 hours for me to do in my garage with basic tools (spanners + power tools).
I followed the Aston1936 steps of removing the struts - with a few improvisations due to differences in the Mk1 vs Mk2 models (the videos are built around an early DB9):
FRONT: https://www.youtube.com/watch?v=4YDGyJmZykg
REAR: https://www.youtube.com/watch?v=PRXdF204NPQ
The only thing that's not at all covered in the above videos is disassembling the struts to change the springs. This was actually the easiest part of the job. The center shaft has a flat spot that you can put a spanner on, and a 19mm retaining nut. I used the spring compressors below to relieve the OEM springs, then put a ratcheting 19mm wrench on the retaining nut and a crescent wrench on the two flattened sides of the strut shaft. That made quick work of removing everything, and installing the H&R springs was just the same in reverse.
SPRING COMPRESSORS: https://www.amazon.com/dp/B0BK38K3ND
The main differences I noted were:
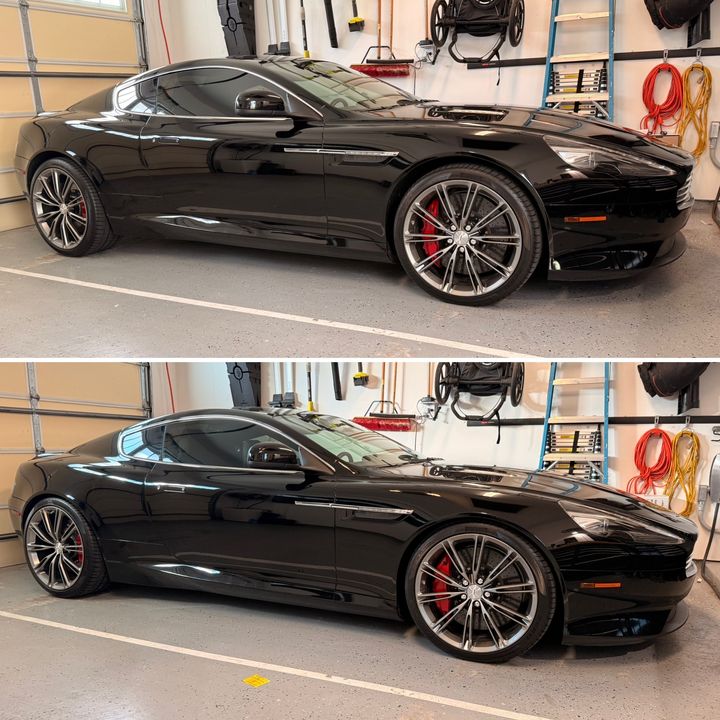
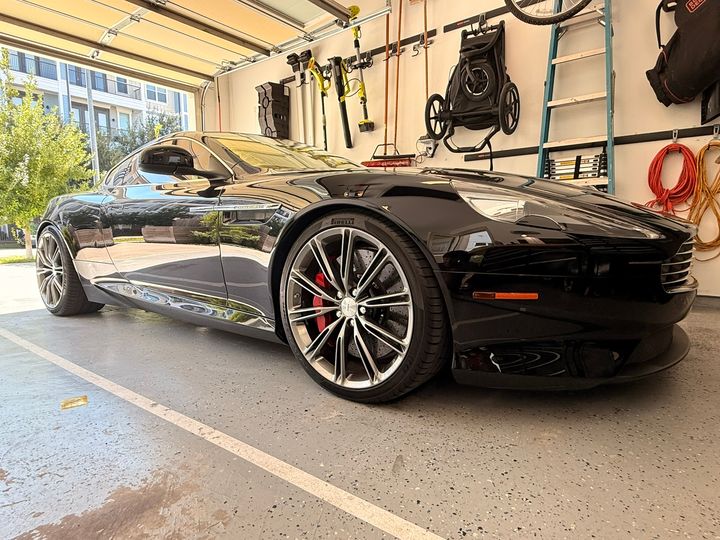
I'm quite happy with the result. In my opinion, the factory suspension leaves too much gap in the fenders - ESPECIALLY in the rear. This modification reduces the gap while keeping the car totally drivable and comfortable, and is totally reversible. The "Before" image below doesn't really do a stellar job of showing how high the car was before...but believe me, it was too high. Now, it's ideal. The car looks much sleeker, even with just 1" drop.
The ride of the updated H&Rs (blue) is really nice, a little softer than OEM in standard setting, and firm in adaptive sport setting. I found that the factory springs were a little hard, the ride of the H&Rs is exactly what I was hoping for.
I've paired this with 11mm spacers in the front and 23mm spacers in the rear so that the wheels fill the fender space, and it's looking good! I am going to 18mm in the front once my new bolt-on spacers are finished in a couple weeks so that the fitment is identical to the rear. I did a test fit at 18mm in the front, and had no rubbing at all.


Yesterday I installed H&R lowering springs on my '13 DB9. It took about 7 hours for me to do in my garage with basic tools (spanners + power tools).
I followed the Aston1936 steps of removing the struts - with a few improvisations due to differences in the Mk1 vs Mk2 models (the videos are built around an early DB9):
FRONT: https://www.youtube.com/watch?v=4YDGyJmZykg
REAR: https://www.youtube.com/watch?v=PRXdF204NPQ
The only thing that's not at all covered in the above videos is disassembling the struts to change the springs. This was actually the easiest part of the job. The center shaft has a flat spot that you can put a spanner on, and a 19mm retaining nut. I used the spring compressors below to relieve the OEM springs, then put a ratcheting 19mm wrench on the retaining nut and a crescent wrench on the two flattened sides of the strut shaft. That made quick work of removing everything, and installing the H&R springs was just the same in reverse.
SPRING COMPRESSORS: https://www.amazon.com/dp/B0BK38K3ND
The main differences I noted were:
- The strut tower brace is a single piece instead of 3 pieces on early models, so I just removed the T50 bolts from each tower and loostened the 13MM bolt in the top center to allow me to pivot the brace around....much easier than fully removing it, since there's a ground screw on it too.
- The front has less room for maneuvering due to the carbon brakes and their airflow ducting. Just makes it harder to wiggle out, but it's still doable.
- The adaptive suspension leads must be removed from all four corners, and considered when you reinstall. It's just one wire, but don't pinch it or forget about it.
- I couldn't actually fully remove the rear fender liners, they were 'stuck' on the front side. That made it a bit more difficult to maneuver, but wasn't a big deal in the scheme of things.
- You MUST have both front wheels off the ground when removing front struts. You won't be able to get enough space to clear the strut from the lower control arm if the sway bar is loaded up. As such, make sure you have two hydraulic jacks available (or jack stands). You don't need both wheels off the ground for the rear.
- There's less ancillary stuff to remove in the rear of the Mk2, however I did find it WAY easier to remove the three 13mm nuts and take off the upper mount from the strut before taking the strut out of the car....it's a bulky piece that makes maneuvering much harder.
- Cursing and yelling at the suspension components will help you in your journey of squeezing the struts through tight spaces. You're going to have to get a bit creative, but they will eventually come out.
- Spring compressors will help you to remove the OEM springs, they are not needed when installing the H&Rs. You can get enough thread visible for the top nut just by pushing down on the hat. Then a 19mm ratcheting wrench and an adjustable spanner will allow you to tighten it down.
- Allow for 8 hours of time, mainly tied in to working the struts out of and in to the car. Consider doing an axle per day, or a side per day if you want to split it up.
I'm quite happy with the result. In my opinion, the factory suspension leaves too much gap in the fenders - ESPECIALLY in the rear. This modification reduces the gap while keeping the car totally drivable and comfortable, and is totally reversible. The "Before" image below doesn't really do a stellar job of showing how high the car was before...but believe me, it was too high. Now, it's ideal. The car looks much sleeker, even with just 1" drop.
The ride of the updated H&Rs (blue) is really nice, a little softer than OEM in standard setting, and firm in adaptive sport setting. I found that the factory springs were a little hard, the ride of the H&Rs is exactly what I was hoping for.
I've paired this with 11mm spacers in the front and 23mm spacers in the rear so that the wheels fill the fender space, and it's looking good! I am going to 18mm in the front once my new bolt-on spacers are finished in a couple weeks so that the fitment is identical to the rear. I did a test fit at 18mm in the front, and had no rubbing at all.
Edited by andratch on Tuesday 14th October 21:01
Edited by andratch on Wednesday 22 October 17:39
christof said:
Looking very nice!
I've fitted Eibach springs on my 2009 Vantage and 11mm spacers on the rear.
Would not fit spacers at the front axle, as these affect the Ackermann steering angle, which usually cause problems with bump steering at high speeds (dangerous!!!)
Appreciate the perspective. I know spacers impact the scrub radius, which can introduce or worsen bump steer. That said, the "underbite" from the factory wheel offset is pretty unappealing, and lowering springs just highlight it more. I've fitted Eibach springs on my 2009 Vantage and 11mm spacers on the rear.
Would not fit spacers at the front axle, as these affect the Ackermann steering angle, which usually cause problems with bump steering at high speeds (dangerous!!!)
Phil _L said:
Personally, I think your car looks amazing. The rear wheel gap (it is the same on the Virage) is the only thing that lets these cars down. Kudos for doing the work yourself, results are amazing - well done.
Thanks, I totally agree on the wheel gap. I am a big fan of "OEM+" styling, and I think 1 inch lower with spacers is the ideal OEM+ look for the DB9. This is a very DIY-able job. I wouldn't take it on if it's your first ever time using a spanner, but if you feel comfortable doing your own spark plugs and ignition coils, you should feel comfortable doing this too. It's mainly a matter of making sure you give plenty of time, because the hardest part is squeezing the struts away from the car.
My only caution with spacers on DB9 specifically relates to the OEM Ford lug nuts. There's about 8mm of headroom before the threads actually start, meaning with a 10mm+ spacer, you only get about 2-3 threads of contact. THIS IS NOT ENOUGH, and will strip the threads in the nut before reaching proper torque. I mentioned my solution here, about halfway down:
https://www.pistonheads.com/gassing/topic.asp?h=0&...
Edited by andratch on Wednesday 22 October 17:35
Gassing Station | Aston Martin | Top of Page | What's New | My Stuff


