Porsche Bespoke Leather Trimming Service
Discussion


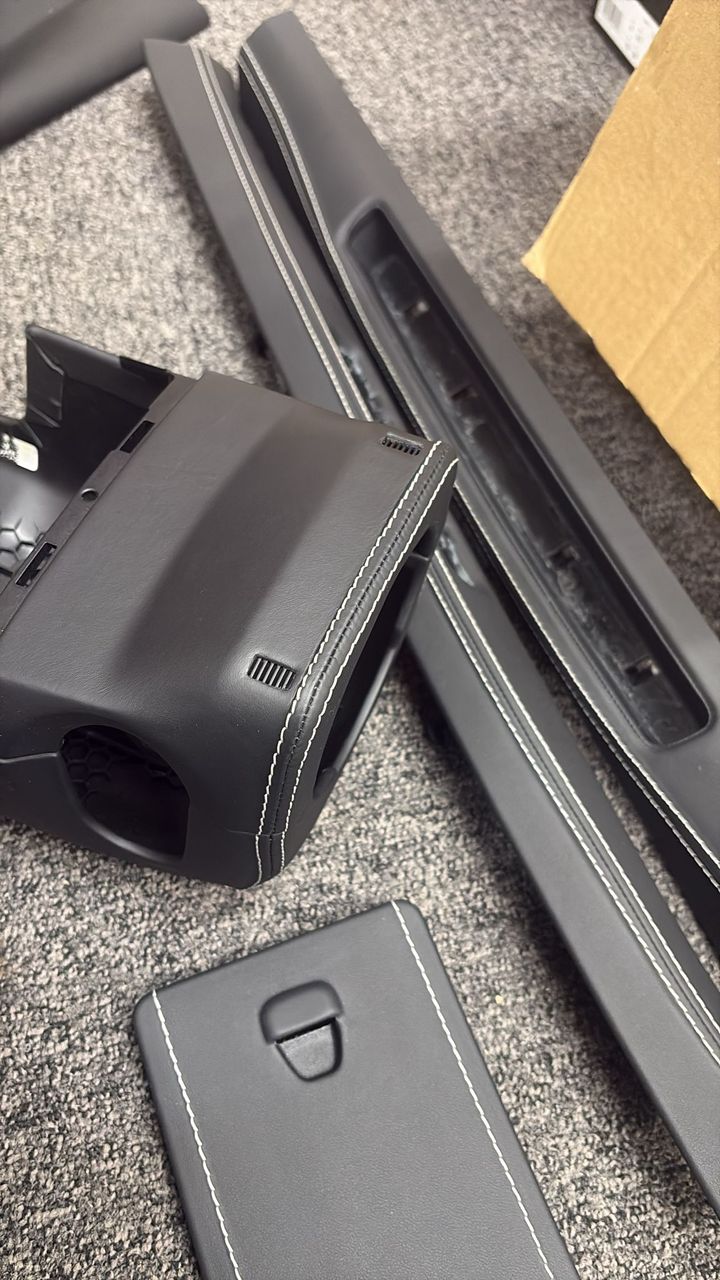
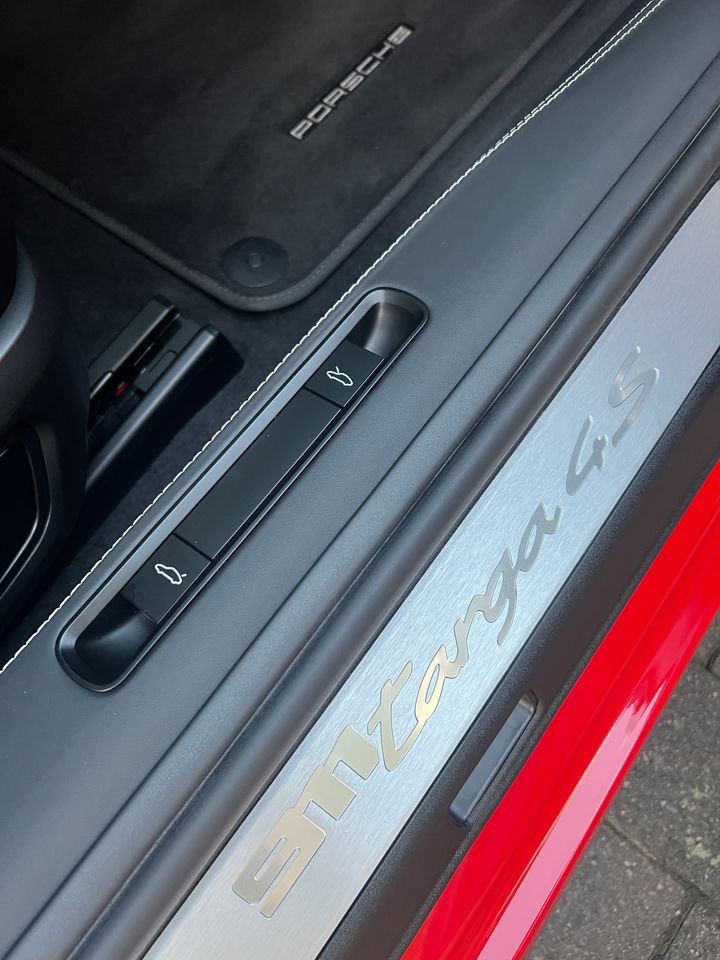
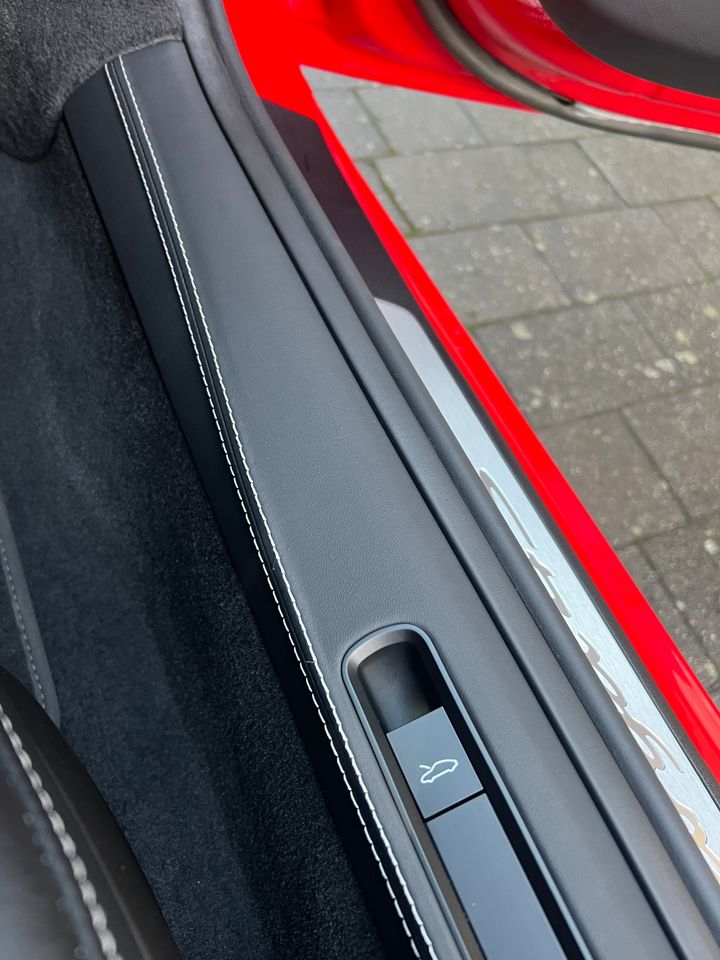
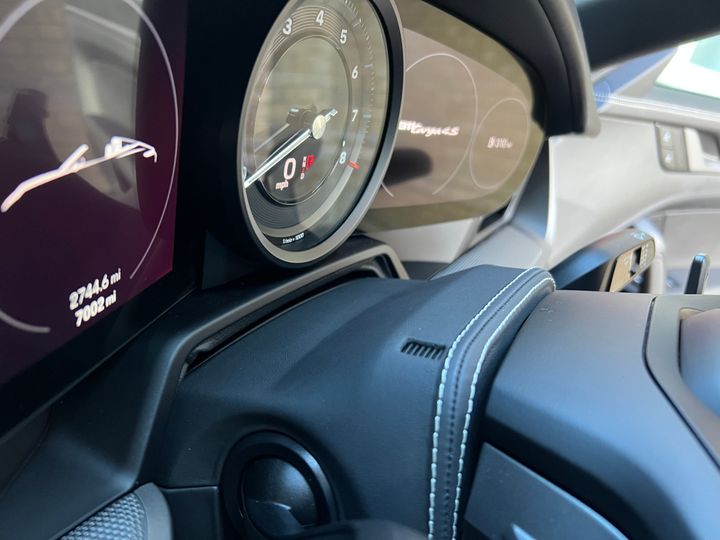
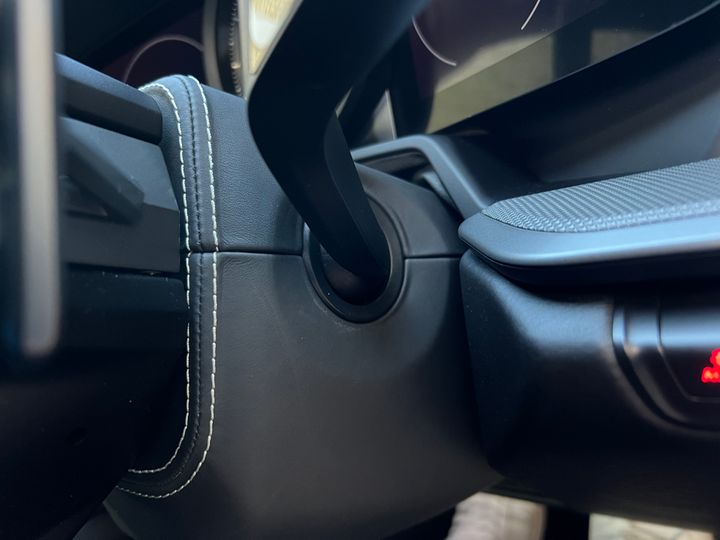
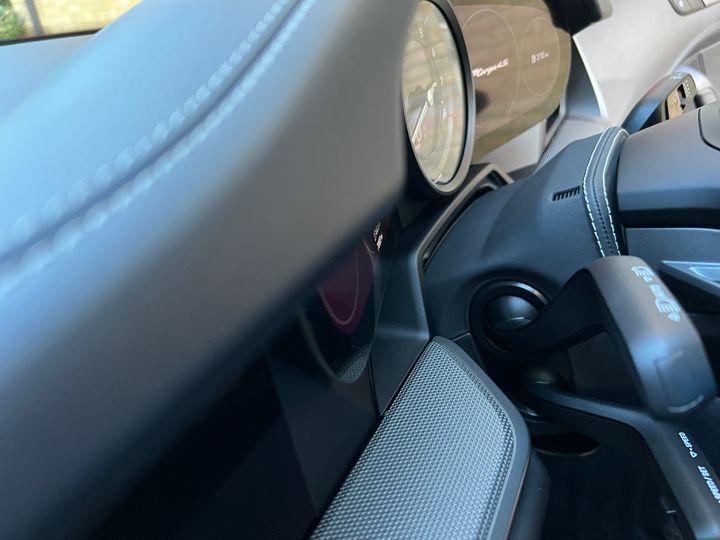
Just thought I'd put a recommendation on here for Linas ( https://www.designls.co.uk/index.php/porsche-inter... ) who has done some work on the interior of my 911. These pieces can be optioned in leather from new but this is a much more cost effective way of doing it! I sent the original pieces to him and he returned them covered with leather!
I've had both door sills trimmed in leather, the steering wheel cowling and also the fusebox covers. Absolutely incredible quality and matches the existing leather and stitching perfectly!
Sorry for so many pictures, but really pleased with the end result!

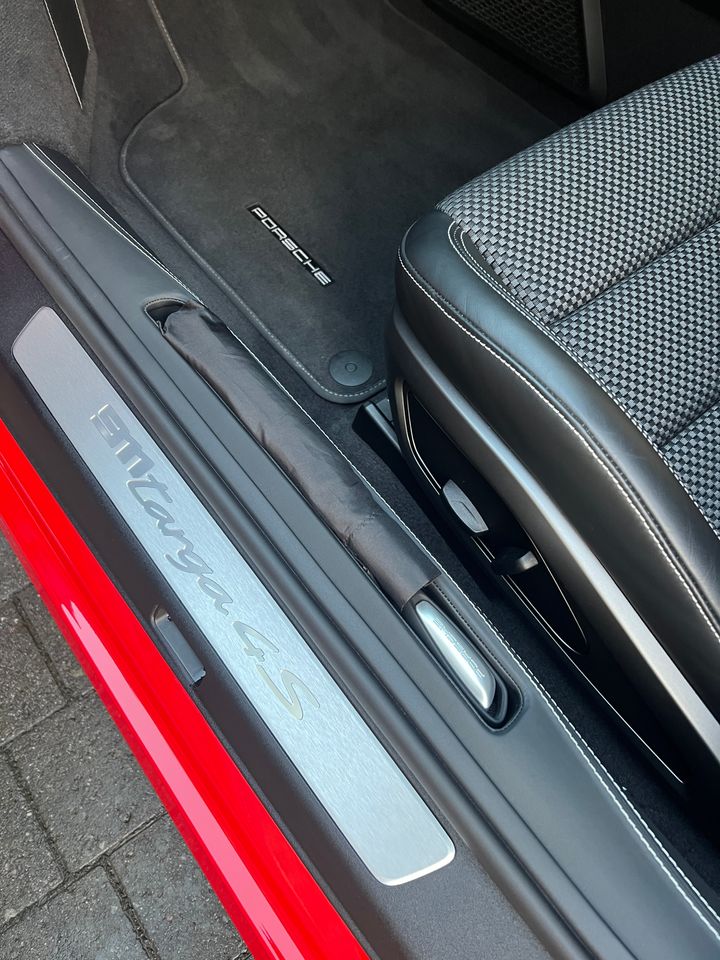
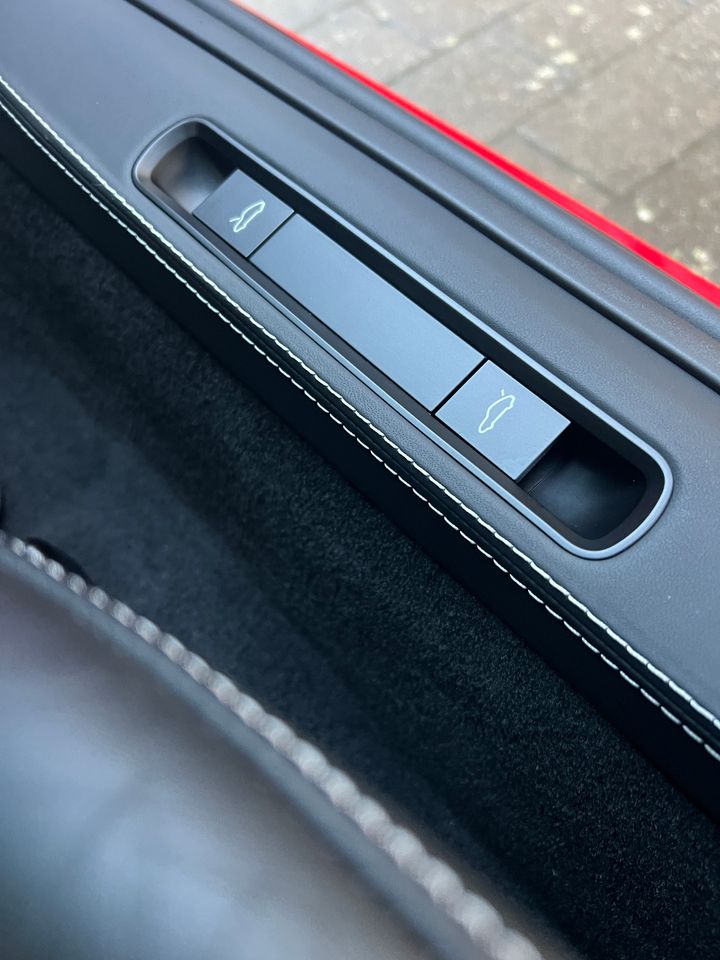
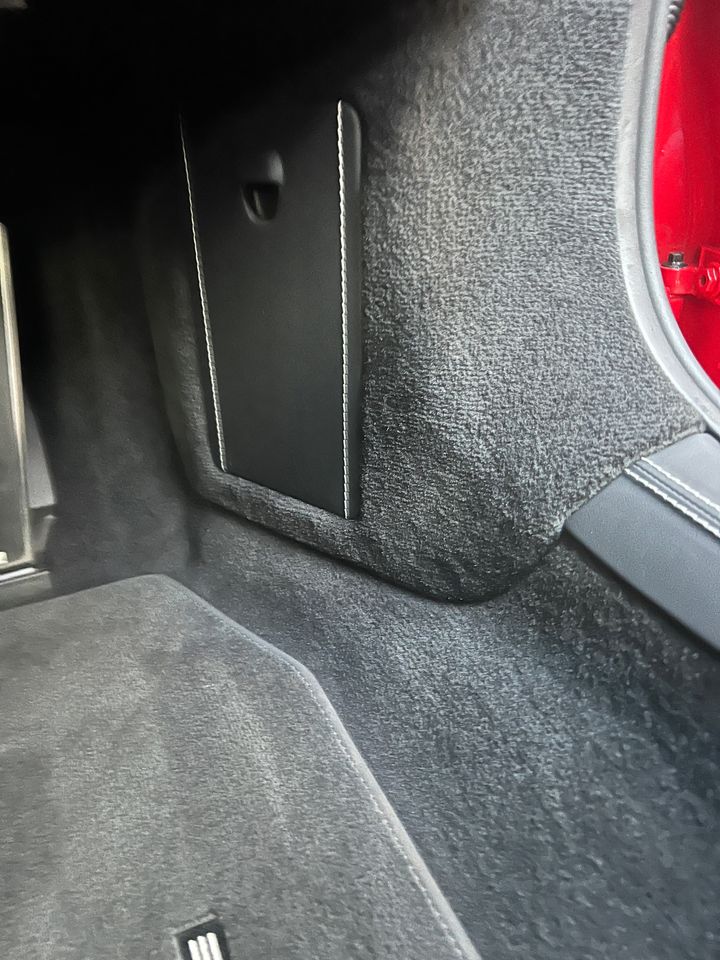
I've had both door sills trimmed in leather, the steering wheel cowling and also the fusebox covers. Absolutely incredible quality and matches the existing leather and stitching perfectly!
Sorry for so many pictures, but really pleased with the end result!
cervezaman said:
Jones the cat said:
cervezaman said:
Looks as near to as identical to me!
But compare it side by side to OEM and you will be surprised how different it can look. Edited by Jones the cat on Tuesday 20th January 21:35
the test is with what stitching do they use?
Porsche use Serafil for all its colour options... eg
https://www.dclassautoshop.co.uk/product-page/sera...
looking at your pics I don't think that is the correct OEM thread.
Edited by Jones the cat on Tuesday 20th January 21:58
jonny finance said:
Is the steering column casing difficult to remove? I did the sun visors & inner sills but wasn t too sure on the removal process on other bits ?
I found the inner sills to be more difficult than the steering column casing to be honest! Yours may or may not be more difficult than mine as I don't have electric steering column adjustment. On mine, you remove 1 torx screw in the middle of the underneath section and then you can apply a little bit of force to separate the top section of casing from the bottom section (you split them at the point nearest to the steering wheel). There are then two further torx screws hidden behind the top section where you will have split the casing which further secures the bottom casing. You need to turn the steering wheel each way in order to get to the screws. At this point the bottom section can be removed. The top section will have a couple of connectors which are clipped into it (microphone I think?) but are very easily unclipped. Finally there is a leather section right at the back of the upper casing which again can easily be unclipped. The top caaing can then be removed.
I drove my car for a few weeks without any of this place while I waited for Linas to finish it all off, no issues.
[quote=cervezaman]
I found the inner sills to be more difficult than the steering column casing to be honest!
Yours may or may not be more difficult than mine as I don't have electric steering column adjustment. On mine, you remove 1 torx screw in the middle of the underneath section and then you can apply a little bit of force to separate the top section of casing from the bottom section (you split them at the point nearest to the steering wheel). There are then two further torx screws hidden behind the top section where you will have split the casing which further secures the bottom casing. You need to turn the steering wheel each way in order to get to the screws. At this point the bottom section can be removed. The top section will have a couple of connectors which are clipped into it (microphone I think?) but are very easily unclipped. Finally there is a leather section right at the back of the upper casing which again can easily be unclipped. The top caaing can then be removed.
I drove my car for a few weeks without any of this place while I waited for Linas to finish it all off, no issues.
Thanks 🙏 very useful. Mine also has no elec adjustment so will have a look

Gassing Station | Porsche General | Top of Page | What's New | My Stuff