Bravery, Butyl and Big Holes: Saving My V8V N420 Tail Lights
Discussion


Hi fellow AM fans,
Today was my bravery day!
After four months of owning my beloved V8V N420 and noticing persistent moisture in the tail lights, I decided not to let it destroy my LEDs, time to act instead!
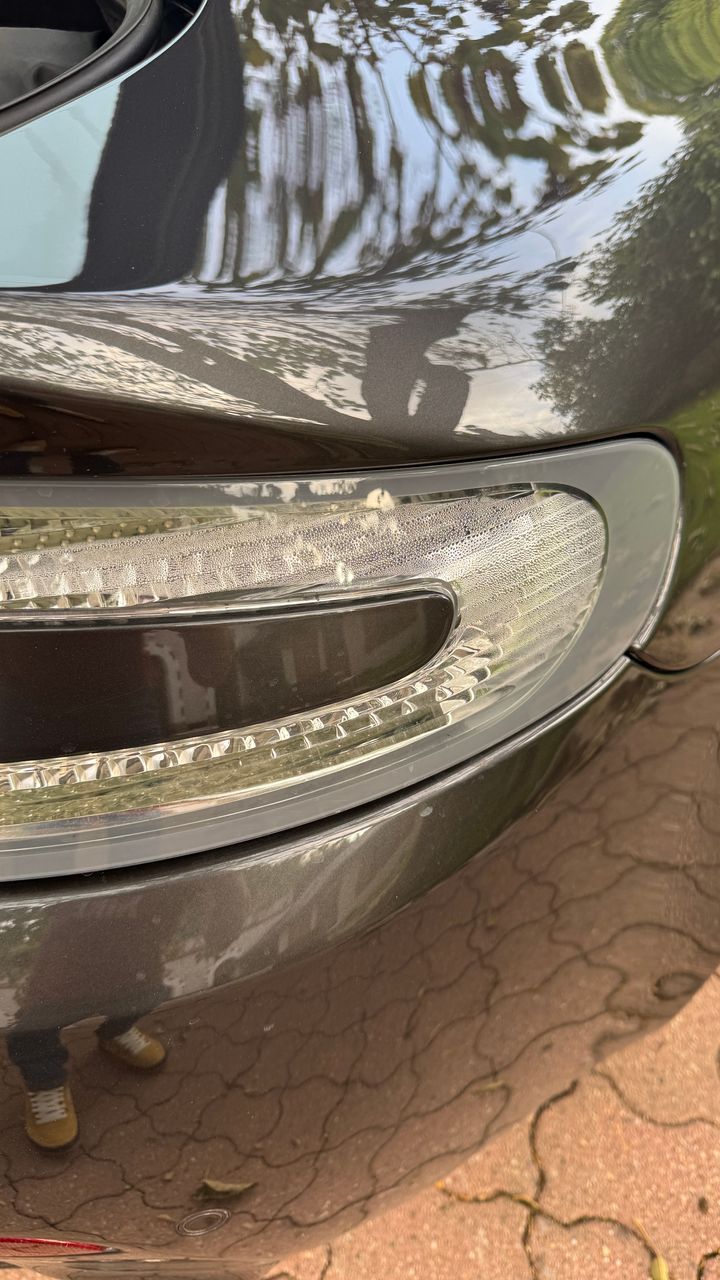
First, I removed the tail lights. Nothing complicated, super easy, actually.
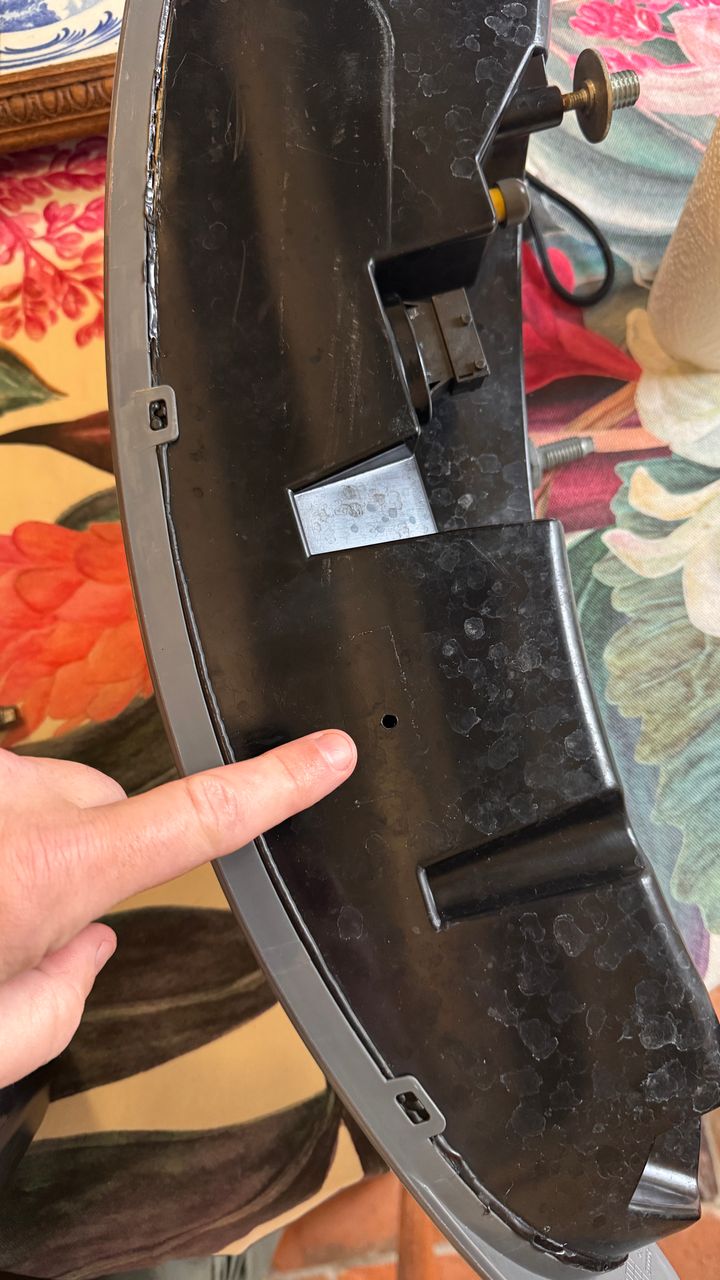
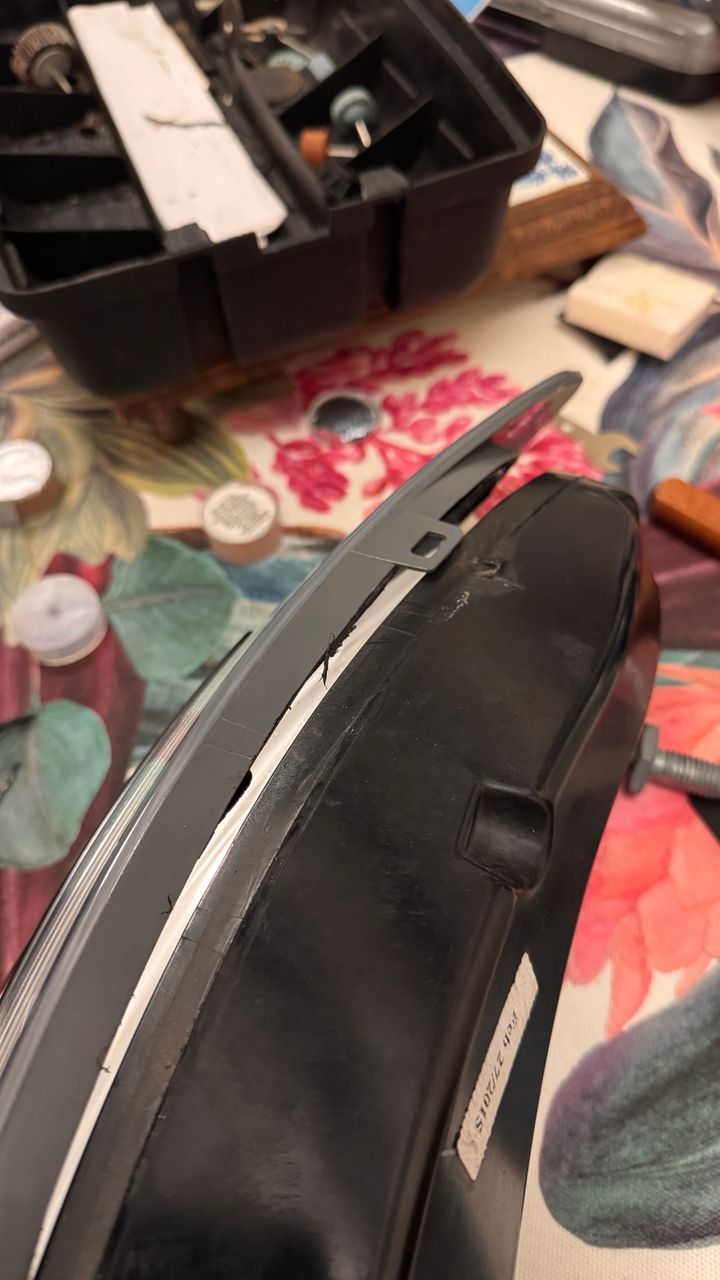
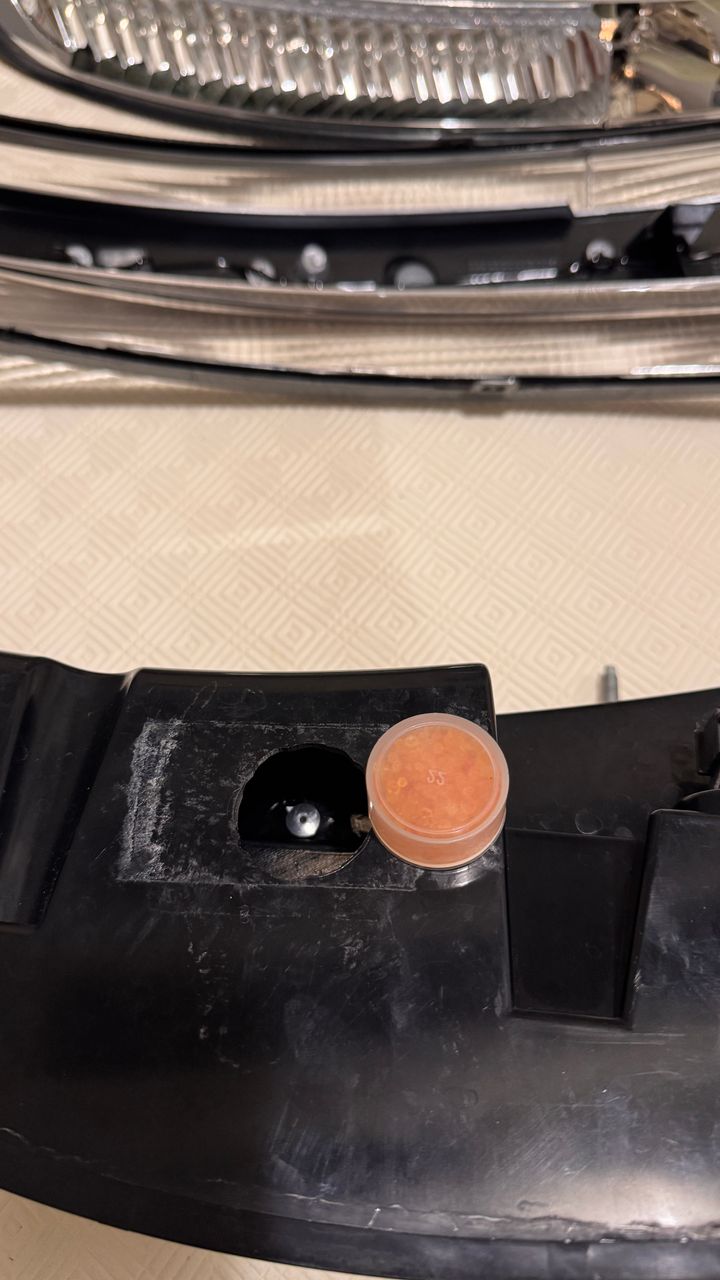
Then I inspected them, and as you can see, one had a small hole, while the other had a large one. Inside the one with the big hole, I found a small silica gel bag taped inside. Of course, it was completely saturated, as there was still a lot of humidity inside the light.
I checked a few tutorials and forum posts and decided to try the oven method: 50°C for an hour and a half. Still had big drops of water inside, a bit better, but far from dry.
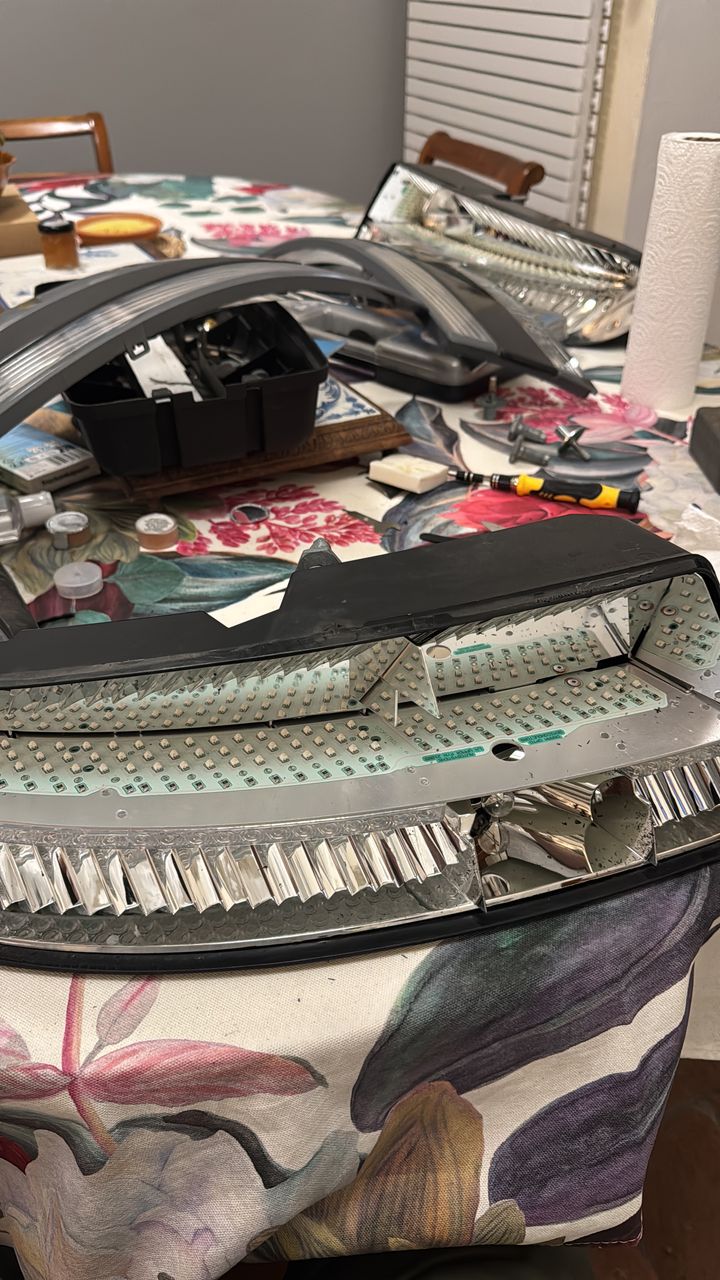
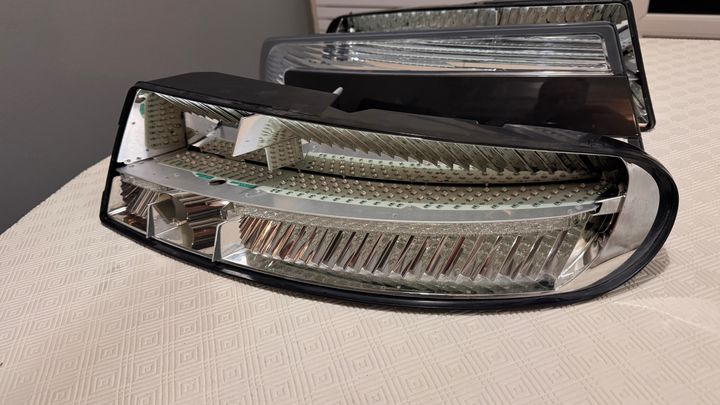
While one tail light was cooking, I examined the sealant of the second one. Someone had added some extra that was already completely dry and poorly applied, so I removed it. Then I looked at the clear lens to see if I could disassemble it to improve drying. The transparent part moved slightly when I pulled it, so I carefully went around the joint between the black housing and the lens using a very thin knife to separate what was still glued. After 5 7 minutes of very careful work, I finally disassembled the light. Hooray
I cleaned everything thoroughly and used an air blower to remove the remaining moisture, quite a few drops came out.
Next steps:
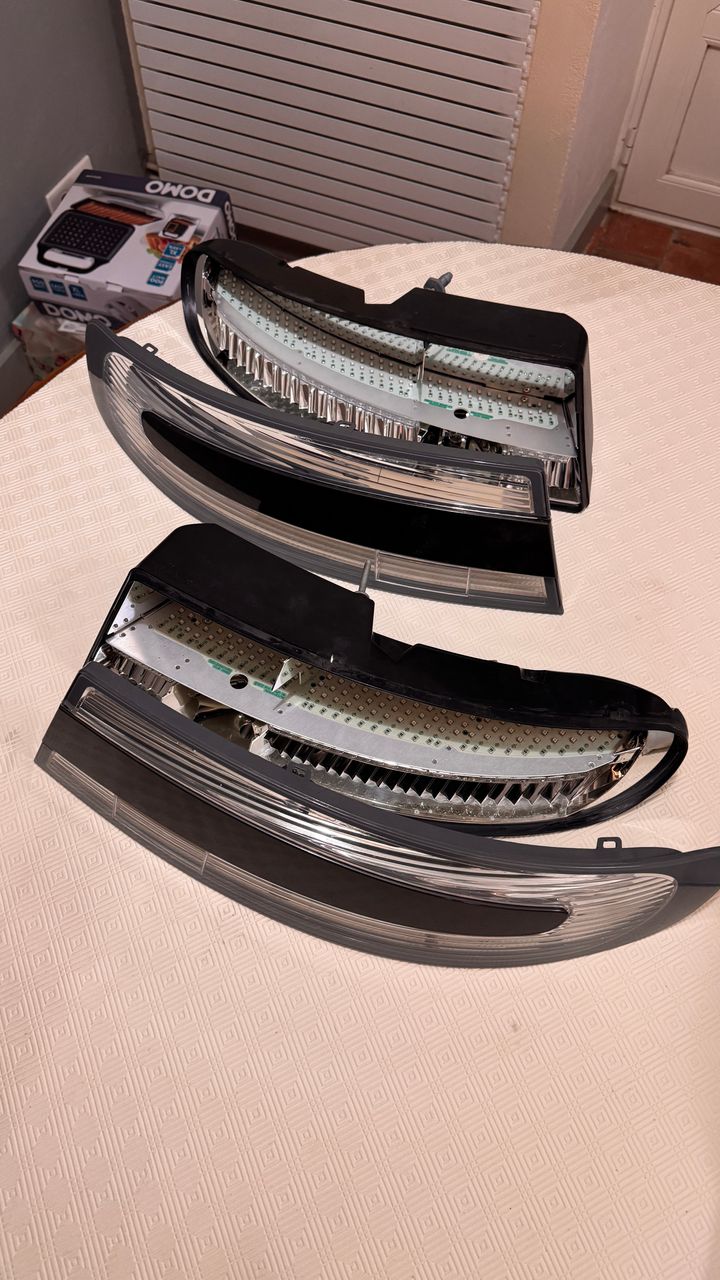
1. Leave the lights open for 48 hours in a warm, dry room.
2. Clean the old sealant and order new butyl round sealant from Amazon. I ll also add a layer of silicone around the outer joint once the parts are resealed.
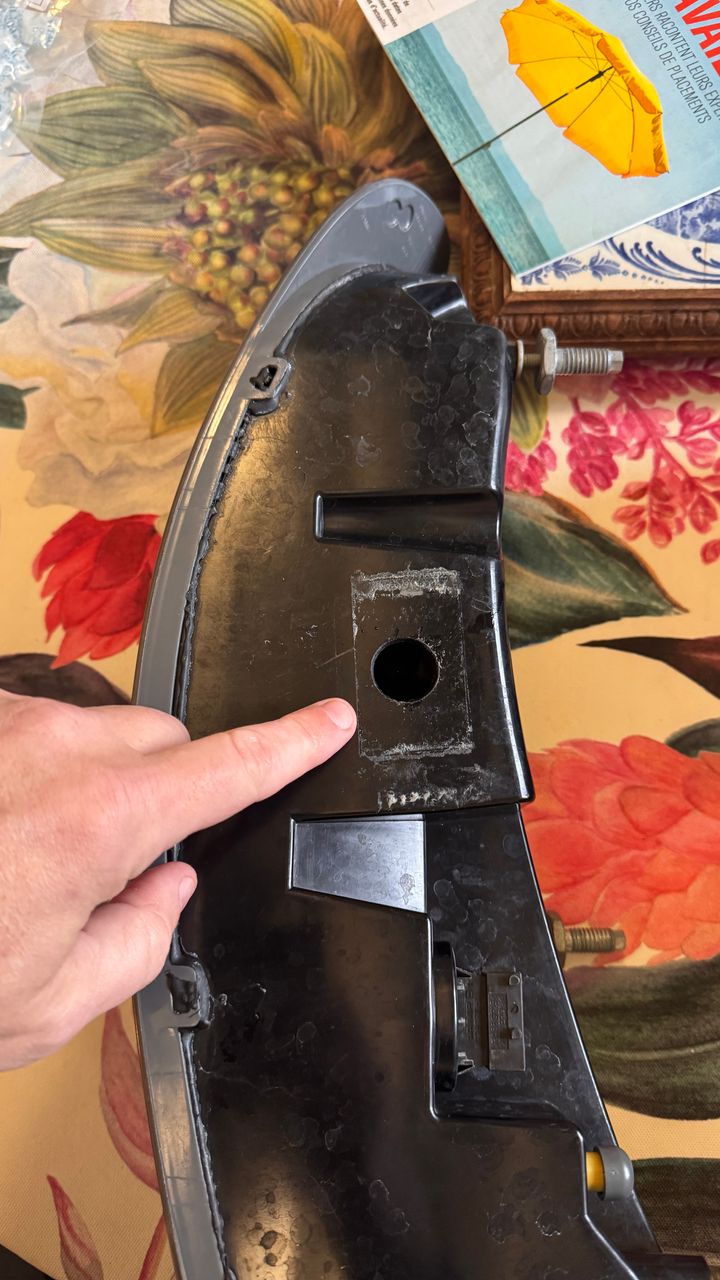
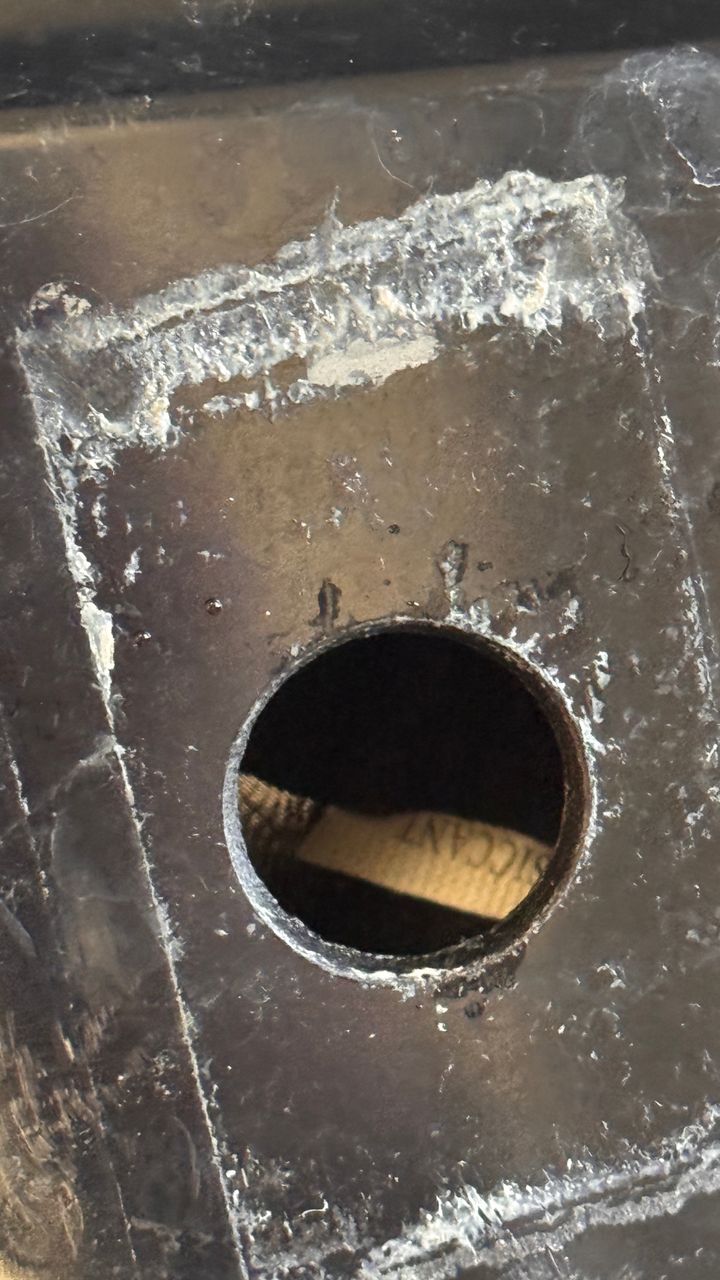
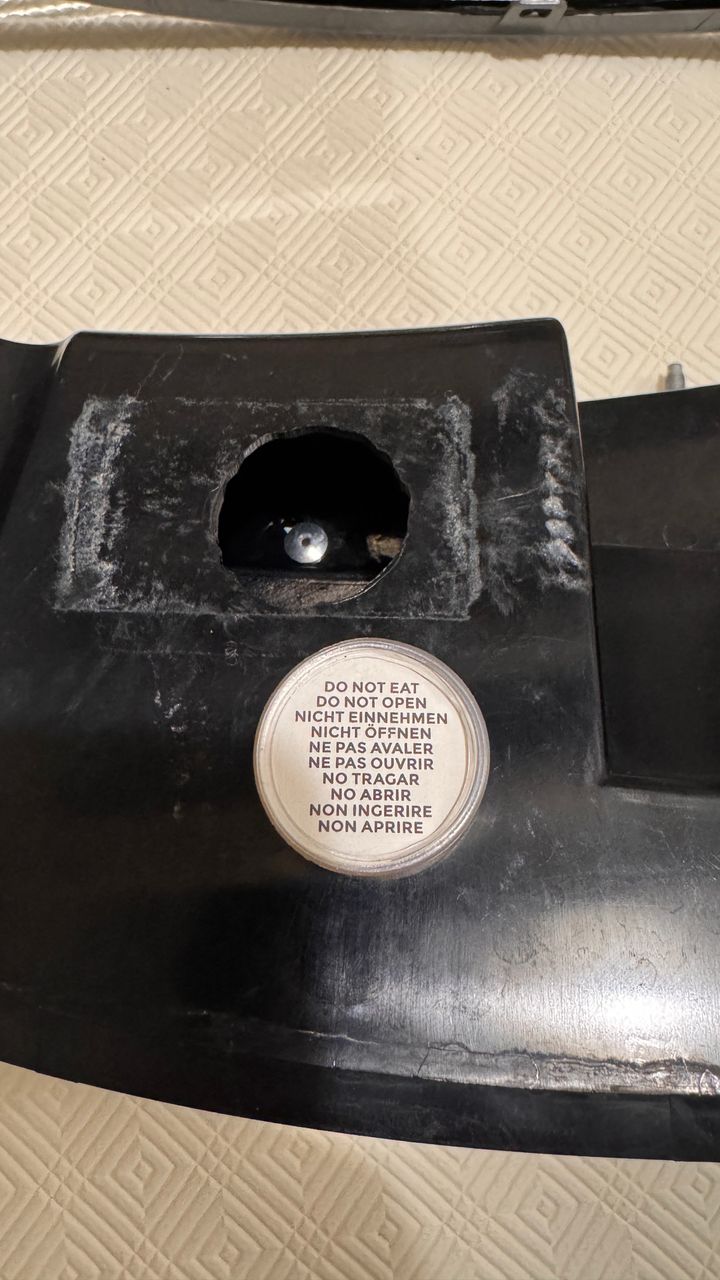
3. Since both tail lights already had holes, I enlarged them slightly so they can hold 5g silica capsules. They re already inside a small plastic box, and I ll replace them in about six months if needed.
4. Refit the tail lights carefully, making sure the spacer is properly aligned. From what I understand, part of the moisture problem may come from misaligned spacers: if the lights are pulled too tightly against the body when screwed in, the pressure can cause the seal to fail (if that makes sense!).
I m quite proud to have done this myself, I was really hesitant to open the lights, and my AM advisor told me it s very tricky to do without cracking the lens.
I wouldn't recommend doing it unless you really have to, but I did it anyway.
Today was my bravery day!
After four months of owning my beloved V8V N420 and noticing persistent moisture in the tail lights, I decided not to let it destroy my LEDs, time to act instead!
First, I removed the tail lights. Nothing complicated, super easy, actually.
Then I inspected them, and as you can see, one had a small hole, while the other had a large one. Inside the one with the big hole, I found a small silica gel bag taped inside. Of course, it was completely saturated, as there was still a lot of humidity inside the light.
I checked a few tutorials and forum posts and decided to try the oven method: 50°C for an hour and a half. Still had big drops of water inside, a bit better, but far from dry.
While one tail light was cooking, I examined the sealant of the second one. Someone had added some extra that was already completely dry and poorly applied, so I removed it. Then I looked at the clear lens to see if I could disassemble it to improve drying. The transparent part moved slightly when I pulled it, so I carefully went around the joint between the black housing and the lens using a very thin knife to separate what was still glued. After 5 7 minutes of very careful work, I finally disassembled the light. Hooray
I cleaned everything thoroughly and used an air blower to remove the remaining moisture, quite a few drops came out.
Next steps:
1. Leave the lights open for 48 hours in a warm, dry room.
2. Clean the old sealant and order new butyl round sealant from Amazon. I ll also add a layer of silicone around the outer joint once the parts are resealed.
3. Since both tail lights already had holes, I enlarged them slightly so they can hold 5g silica capsules. They re already inside a small plastic box, and I ll replace them in about six months if needed.
4. Refit the tail lights carefully, making sure the spacer is properly aligned. From what I understand, part of the moisture problem may come from misaligned spacers: if the lights are pulled too tightly against the body when screwed in, the pressure can cause the seal to fail (if that makes sense!).
I m quite proud to have done this myself, I was really hesitant to open the lights, and my AM advisor told me it s very tricky to do without cracking the lens.
I wouldn't recommend doing it unless you really have to, but I did it anyway.
Edited by TheBigHunt on Wednesday 28th January 18:40
Edited by TheBigHunt on Wednesday 28th January 18:44
Very similar to my method, except that on my light unit the two halves are very firmly stuck together so I can't open the unit.
During the oven phase my idea was to get warm air going up through the unit, taking the moisture with it, so I ended up with a big hole on top and bottom to assist this.
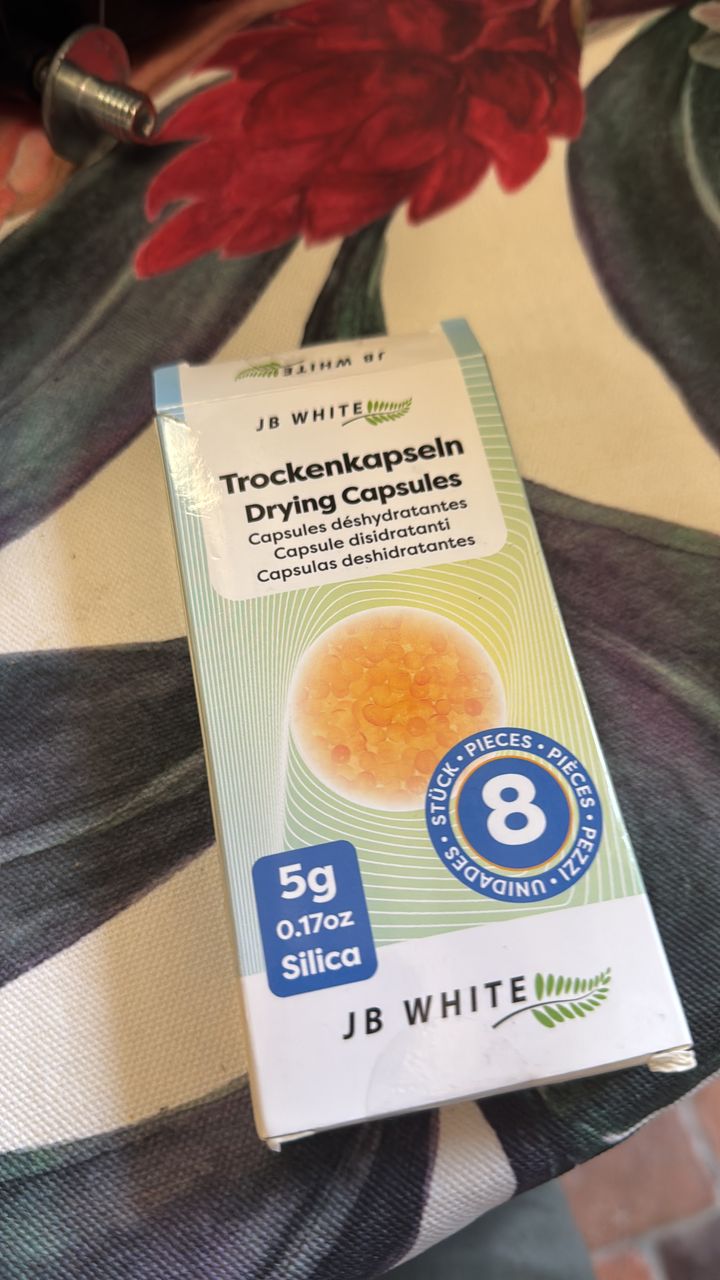
But what is that plastic tub of orange stuff in your photo? If it's silica gel it's normally white and in sachets.
During the oven phase my idea was to get warm air going up through the unit, taking the moisture with it, so I ended up with a big hole on top and bottom to assist this.
But what is that plastic tub of orange stuff in your photo? If it's silica gel it's normally white and in sachets.
Simpo Two said:
Very similar to my method, except that on my light unit the two halves are very firmly stuck together so I can't open the unit.
During the oven phase my idea was to get warm air going up through the unit, taking the moisture with it, so I ended up with a big hole on top and bottom to assist this.
But what is that plastic tub of orange stuff in your photo? If it's silica gel it's normally white and in sachets.
Hi, Yes it's a silicate capsule. It's orange and turns white when saturated. I will keep the transparent face of it visible if i remove the light.During the oven phase my idea was to get warm air going up through the unit, taking the moisture with it, so I ended up with a big hole on top and bottom to assist this.
But what is that plastic tub of orange stuff in your photo? If it's silica gel it's normally white and in sachets.
I expect to do not have so much condensation at the beginning and if i see it coming back, i will just remove the light and see if the orange turned white.
TheBigHunt said:
First, I removed the tail lights. Nothing complicated, super easy, actually.
This is actually where I stopped! 
One screw was behind the carpet and I wasn't brave enough to remove it.
Glad to see you did what I never attempted. I know one light had been treated by AM Milano at the start of my ownership, I suspect the one with the small hole (and the badly applied sealant...
 ) since the Service Bulletin describe to drill a small hole.
I have no clue why the other light had the silica gel bag though.
Your solution with the silica capsules perfectly fitting the holes is quite sleek and smart!
Simpo Two said:
My rear light has gone again. Maybe I should stick it on with velcro to save all that faffing around in the boot 
Whichever bozo designed that light unit needs a good punch in the snotter.
Yeah, I feel you. They are from Canada if memory serves me correctly.Whichever bozo designed that light unit needs a good punch in the snotter.
But at least they are not like the Vanquish 2 tail lights, a proper nightmare.
I don't think the vanq 2 is anywhere near as bad as the Vantage range.
I have seen a slight misting in my rear lenses once or twice but it never stays, always clears itself up after a few minutes.
On mine it only happens on start up when the hot exhaust gases, on a cold day cause any dampness within rhe lenses to condensate usually when its left ticking over and rhe exhaust gases rise directly up over the lights.
Similar with my front lights, it can occasionally show a minor mist internally when I wash the car but again it doesn't last.
Maybe I'm lucky or perhaps this is typical but I don't generally hear a lot if complaints from Vanq 2 owners ref water ingress in the lights.
I'm sure it happens to some though
Longy00000 said:
I don't think the vanq 2 is anywhere near as bad as the Vantage range.
I have seen a slight misting in my rear lenses once or twice but it never stays, always clears itself up after a few minutes.
On mine it only happens on start up when the hot exhaust gases, on a cold day cause any dampness within rhe lenses to condensate usually when its left ticking over and rhe exhaust gases rise directly up over the lights.
Similar with my front lights, it can occasionally show a minor mist internally when I wash the car but again it doesn't last.
Maybe I'm lucky or perhaps this is typical but I don't generally hear a lot if complaints from Vanq 2 owners ref water ingress in the lights.
I'm sure it happens to some though
My front lights do the same, but like yours it's transitory and doesn't affect function.I have seen a slight misting in my rear lenses once or twice but it never stays, always clears itself up after a few minutes.
On mine it only happens on start up when the hot exhaust gases, on a cold day cause any dampness within rhe lenses to condensate usually when its left ticking over and rhe exhaust gases rise directly up over the lights.
Similar with my front lights, it can occasionally show a minor mist internally when I wash the car but again it doesn't last.
Maybe I'm lucky or perhaps this is typical but I don't generally hear a lot if complaints from Vanq 2 owners ref water ingress in the lights.
I'm sure it happens to some though
Are you sure about hot gases causing condensation inside the rear units? Condensation happens on relatively cold surfaces; if you warm them up it evaporates.
Same job I did. I bought my chiari used and they immediately gave me problems. I did the same process as you, but I used heat gun to open it's faster and I don't put chemicals in the oven. I tried but it didn't so I sent everything to a well-known headlight expert who put me new LED strip and I mounted it
They areNow you have made me understand that if you do not adjust the headlights well you can release the bolts and let moisture in. Thanks for reporting there I had not I had thought about it
They areNow you have made me understand that if you do not adjust the headlights well you can release the bolts and let moisture in. Thanks for reporting there I had not I had thought about it
Simpo Two said:
Longy00000 said:
I don't think the vanq 2 is anywhere near as bad as the Vantage range.
I have seen a slight misting in my rear lenses once or twice but it never stays, always clears itself up after a few minutes.
On mine it only happens on start up when the hot exhaust gases, on a cold day cause any dampness within rhe lenses to condensate usually when its left ticking over and rhe exhaust gases rise directly up over the lights.
Similar with my front lights, it can occasionally show a minor mist internally when I wash the car but again it doesn't last.
Maybe I'm lucky or perhaps this is typical but I don't generally hear a lot if complaints from Vanq 2 owners ref water ingress in the lights.
I'm sure it happens to some though
My front lights do the same, but like yours it's transitory and doesn't affect function.I have seen a slight misting in my rear lenses once or twice but it never stays, always clears itself up after a few minutes.
On mine it only happens on start up when the hot exhaust gases, on a cold day cause any dampness within rhe lenses to condensate usually when its left ticking over and rhe exhaust gases rise directly up over the lights.
Similar with my front lights, it can occasionally show a minor mist internally when I wash the car but again it doesn't last.
Maybe I'm lucky or perhaps this is typical but I don't generally hear a lot if complaints from Vanq 2 owners ref water ingress in the lights.
I'm sure it happens to some though
Are you sure about hot gases causing condensation inside the rear units? Condensation happens on relatively cold surfaces; if you warm them up it evaporates.
Could be wrong but it only happens on colder days when left ticking over and gasnt been a problem so far. Hopefully it stays that way as the inside of that lamp unit above looks a nightmare !
Longy00000 said:
I hear you but my thoughts are that Led can run very hot so inside the lamp is typically warmer than the ambient temperature. The 'steam' from the exhaust rises directly up and over the light unit so I'm assuming the dampness hitting the lens cools it from the outside causing a temp condensate on the inside where it's getting much warmer.
Could be wrong but it only happens on colder days when left ticking over and gasnt been a problem so far. Hopefully it stays that way as the inside of that lamp unit above looks a nightmare !
I think you are right but genuine question: I thought LEDs, generally speaking, were running way colder than normal bulbs, no?Could be wrong but it only happens on colder days when left ticking over and gasnt been a problem so far. Hopefully it stays that way as the inside of that lamp unit above looks a nightmare !
Longy00000 said:
I hear you but my thoughts are that Led can run very hot so inside the lamp is typically warmer than the ambient temperature. The 'steam' from the exhaust rises directly up and over the light unit so I'm assuming the dampness hitting the lens cools it from the outside causing a temp condensate on the inside where it's getting much warmer.
Ah, I never considered that the LEDs might get hot... they're supposed to be efficient, ie no electricity wasted as heat...What we need is a clever bloke to offer a service that replaces 4,000 fickle LEDs with something that (a) works (b) costs 10p to replace:
Gassing Station | Aston Martin | Top of Page | What's New | My Stuff