
Levelling a wall before tiling
Discussion


A profession old school guy would use timber grounds and apply plaster prior to tiling with adhesive. A plaster ground is a wooden strip or guide attached to walls around openings (doors, windows) or along floors/ceilings before applying the plaster. They serve as a precise thickness gauge, ensuring the plaster coat is perfectly plumb and straight.
When my bathroom got tiled my tiler used little yellow wedges like this.
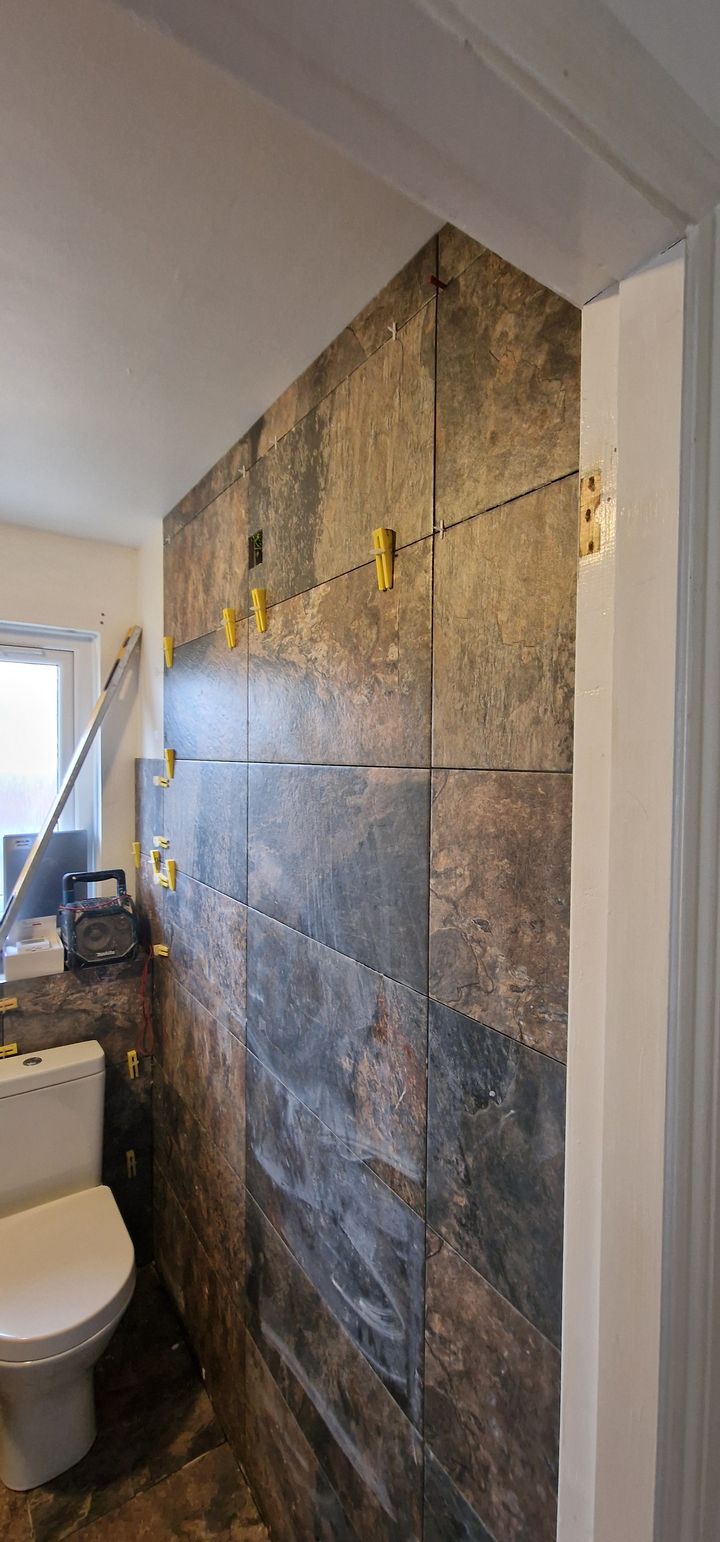
Walls and floor are nice and level now
Heres similar on amazon
https://amzn.eu/d/037LclW9
Walls and floor are nice and level now
Heres similar on amazon
https://amzn.eu/d/037LclW9
fourstardan said:
Some of my walls are about 10mm out of plumb top to bottom so plan to use tile adhesive to get it level.
Is there any sort of tool that can be used to apply just about the right level across the full wall?
I'd advise not using a premix adhesive. Get a quick setting powder mix.Is there any sort of tool that can be used to apply just about the right level across the full wall?
Premix will take forever to go off if it's put on thick.
fourstardan said:
Is there any sort of tool that can be used to apply just about the right level across the full wall?
Could use one of the larger Speedskims I guess, running it across a couple of battens/strips?Not like you need a perfect surface, just a mostly flat one.
Bag of tile adhesive would work if mixed right. I quite liked Kerakoll H40, shop around and it can be found quite cheap.
Plaster ground/depth indicator is a good option. Never knew they had a name in the trade. I can use some packers drilled down maybe.
I'll be using Mapei super flex, not sure I want it setting too quickly as I'm a DIY'er!
One's things for sure, I won't be the person removing this bathroom one day with the amount of tile adhesive going down! It's already been applied to breeze wall previously dot and dabbed.
I'll be using Mapei super flex, not sure I want it setting too quickly as I'm a DIY'er!
One's things for sure, I won't be the person removing this bathroom one day with the amount of tile adhesive going down! It's already been applied to breeze wall previously dot and dabbed.
Buy some 6mm insulation board. Work out where on the wall 7mm is. Glue the board to the wall using a 6mm notch trowel from thin to thick to deal with most of the wall. Pop a few screws under the bottom to stop it dropping. Then you can skim in the 0-6mm part with tile adhesive using a level.
Edited by Vanden Saab on Saturday 25th April 02:36
Vanden Saab said:
Buy some 6mm insulation board. Work out where on the wall 7mm is. Glue the board to the wall using a 6mm notch trowel from thin to thick to deal with most of the wall. Pop a few screws under the bottom to stop it dropping. Then you can skim in the 0-6mm part with tile adhesive using a level.
Thanks yes, just bought some 6mm tilebacker to do just this! It's like pink wafer at 6mm tilebacker, hilarious. Edited by Vanden Saab on Saturday 25th April 02:36
Would you use tile adhesive to put onto the existing tilebacker here?
Yes as tilebacker is designed for tile adhesive. After 30 years I can use a 10mm notched trowel and alter the adhesive thickness with the angle of the trowel but if you are less experienced it might be better to used a 3mm for the thin bit and then a 6mm for the thicker bit. Hold the trowel almost level with the wall to start and bring it out as you go to get the thickness right. Mix the adhesive quite thin but thick enough so it doesn't slump when you apply it. Use slow set and do a board at a time mixing only enough glue for each board.
Get the board on the wall then check with a long level and work the board up and down until it is in the right place. Then put the screws under it to hold it in place. Don't forget to check the horizontal level too.
When you fill in the thinner bit mix it a fair bit stiffer and use a notch trowel again and run the level the other way in a sawing motion to end up with a solid wall. You will need a 10mm notch trowel for the biggest gap.
Get the board on the wall then check with a long level and work the board up and down until it is in the right place. Then put the screws under it to hold it in place. Don't forget to check the horizontal level too.
When you fill in the thinner bit mix it a fair bit stiffer and use a notch trowel again and run the level the other way in a sawing motion to end up with a solid wall. You will need a 10mm notch trowel for the biggest gap.
Vanden Saab said:
Yes as tilebacker is designed for tile adhesive. After 30 years I can use a 10mm notched trowel and alter the adhesive thickness with the angle of the trowel but if you are less experienced it might be better to used a 3mm for the thin bit and then a 6mm for the thicker bit. Hold the trowel almost level with the wall to start and bring it out as you go to get the thickness right. Mix the adhesive quite thin but thick enough so it doesn't slump when you apply it. Use slow set and do a board at a time mixing only enough glue for each board.
Get the board on the wall then check with a long level and work the board up and down until it is in the right place. Then put the screws under it to hold it in place. Don't forget to check the horizontal level too.
When you fill in the thinner bit mix it a fair bit stiffer and use a notch trowel again and run the level the other way in a sawing motion to end up with a solid wall. You will need a 10mm notch trowel for the biggest gap.
Thanks for the tips. Get the board on the wall then check with a long level and work the board up and down until it is in the right place. Then put the screws under it to hold it in place. Don't forget to check the horizontal level too.
When you fill in the thinner bit mix it a fair bit stiffer and use a notch trowel again and run the level the other way in a sawing motion to end up with a solid wall. You will need a 10mm notch trowel for the biggest gap.
I think I can work the trowel ok.
I have to sort out 1/2mm sections where the tanking tapes bulked out a bit anyway so I've got a LOT of mixing and work to do with Tile adhesive. Oh joy.
Gassing Station | Homes, Gardens and DIY | Top of Page | What's New | My Stuff