Long overdue update on La Bala Mid engine scratch-built
Discussion


Hello, just wanted to give you all an update on my mid-engine sportscar project. I haven't had much info to post, but finally made some progress and thought you might enjoy an update. (These images have also been posted to the locostbuilders forum but I realize many of you don't get over there.)
If you want to see the shape of my car you really should watch a video of it! I have a number of videos on YouTube, but this is the latest one: www.youtube.com/watch?v=l4X5p5LJzHI
For those of you that don't watch videos online, here are some photos of my most recent progress.
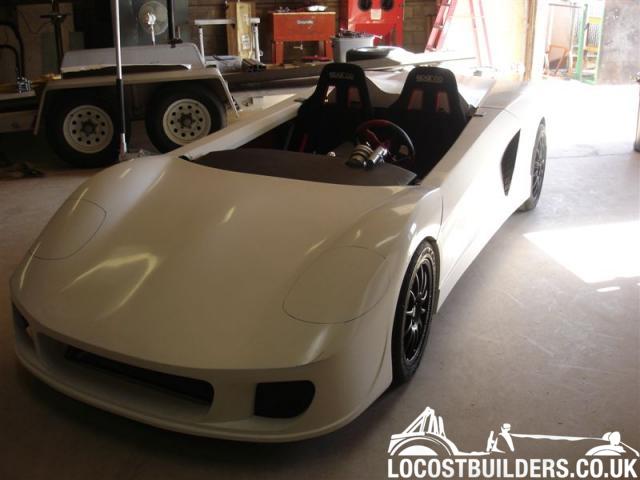
To recap. My production quality molds are finished and the body you see here is straight out of the molds. The white color is the gel-coat with no work done to it post-pull. It's very straight with no ripples. I believe that with a colored gelcoat it could be used without paint and minimal polishing to remove the parting lines. The parting lines from the mould are almost invisible. All the body panels (4 total) are attached and the hood and rear decklid are hinged and have hidden latches with cable mechanisms to the main cabin. This is my first attempt at building a car so I wanted to keep it pretty simple, so no doors and only 4 fiberglass parts. The car weighs just under 1,400Lbs as you see it here. The engine is a Toyota 1.6L 4AGE with a turbo/intercooler/megasquirt making approx 160Hp.
In this first image you can make the outline of the not yet created headlamp covers. Also you can see there are some nice specular highlights that really show off the shape well! I happen to like it quite a bit.

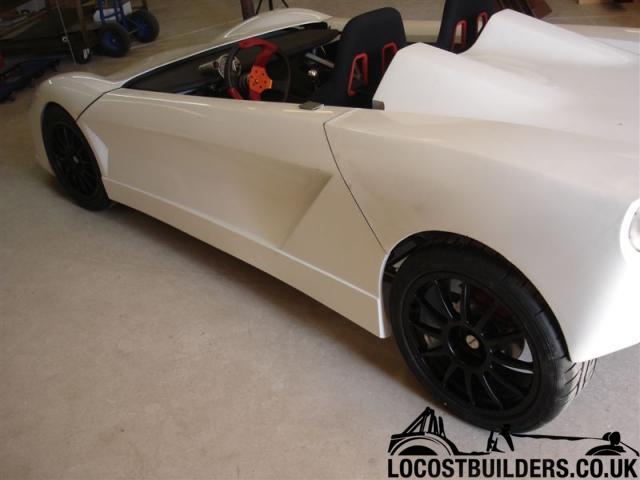
The dash and the center console are coming together nicely. Both pieces are made of 1" polyurethane board covered in 1 layer of fiberglass, then upholstered with thin foam and marine grade vinyls. The dash vinyl has a carbonfiber pattern to it while the center console is more like a cloth material but very heavy duty. I still have some work to finish the interior and you can see it's a bit dirty right now, but that's because it's still being worked on!

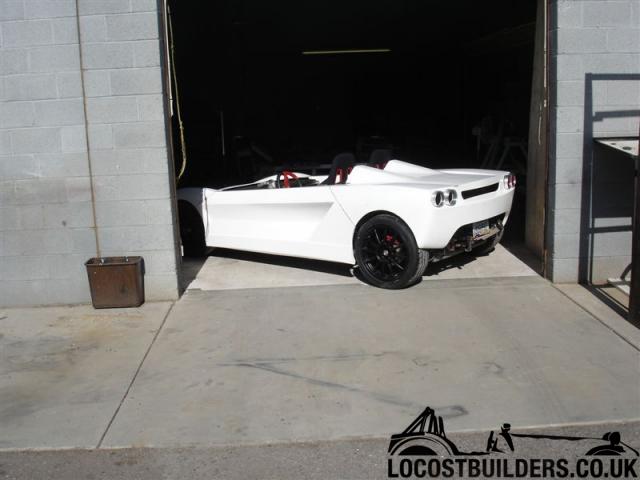
The tail light housings are almost finished and the bodywork is prepped to accept them.

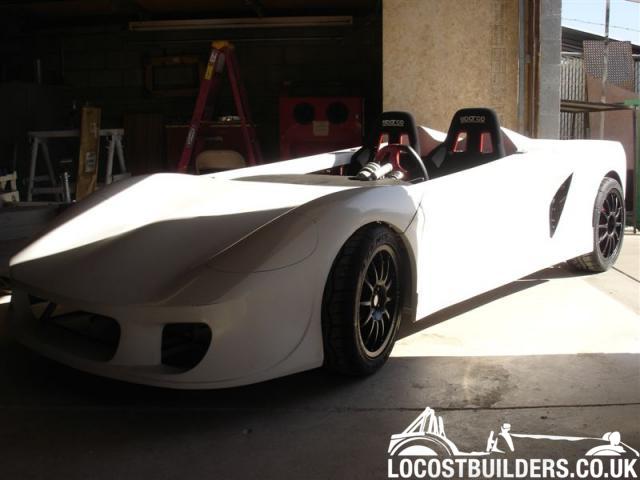
One of the issues I was coming up against was where to place the fuel filler door. Adding a fuel filler pocket to the bodywork, and then a door and hinge for the filler is extra complexity and expense I didn't want to deal with. Since the rear decklid needs to move rearwards to clear the rollhoop before tilting up, why not place the fuel filler under the rear decklid? This following photo shows the decklid in the intermediate rotation of the main hinge. It's really a natural position for the decklid and I have a strong gas strut installed that helps lift the decklid forward when closing.

And the bodywork in fully open position front and rear.

Finally, here you can see that long double jointed hinge at the rear and the gas assist strut that helps lift the decklid when closing. it works quite well.

Regards,
Steve Graber
www.grabercars.com
If you want to see the shape of my car you really should watch a video of it! I have a number of videos on YouTube, but this is the latest one: www.youtube.com/watch?v=l4X5p5LJzHI
For those of you that don't watch videos online, here are some photos of my most recent progress.
To recap. My production quality molds are finished and the body you see here is straight out of the molds. The white color is the gel-coat with no work done to it post-pull. It's very straight with no ripples. I believe that with a colored gelcoat it could be used without paint and minimal polishing to remove the parting lines. The parting lines from the mould are almost invisible. All the body panels (4 total) are attached and the hood and rear decklid are hinged and have hidden latches with cable mechanisms to the main cabin. This is my first attempt at building a car so I wanted to keep it pretty simple, so no doors and only 4 fiberglass parts. The car weighs just under 1,400Lbs as you see it here. The engine is a Toyota 1.6L 4AGE with a turbo/intercooler/megasquirt making approx 160Hp.
In this first image you can make the outline of the not yet created headlamp covers. Also you can see there are some nice specular highlights that really show off the shape well! I happen to like it quite a bit.
The dash and the center console are coming together nicely. Both pieces are made of 1" polyurethane board covered in 1 layer of fiberglass, then upholstered with thin foam and marine grade vinyls. The dash vinyl has a carbonfiber pattern to it while the center console is more like a cloth material but very heavy duty. I still have some work to finish the interior and you can see it's a bit dirty right now, but that's because it's still being worked on!
The tail light housings are almost finished and the bodywork is prepped to accept them.
One of the issues I was coming up against was where to place the fuel filler door. Adding a fuel filler pocket to the bodywork, and then a door and hinge for the filler is extra complexity and expense I didn't want to deal with. Since the rear decklid needs to move rearwards to clear the rollhoop before tilting up, why not place the fuel filler under the rear decklid? This following photo shows the decklid in the intermediate rotation of the main hinge. It's really a natural position for the decklid and I have a strong gas strut installed that helps lift the decklid forward when closing.
And the bodywork in fully open position front and rear.
Finally, here you can see that long double jointed hinge at the rear and the gas assist strut that helps lift the decklid when closing. it works quite well.
Regards,
Steve Graber
www.grabercars.com


As MTv Dave says, respect!
Looks like you're not far off finishing now, though from the photos I'd just say a word of caution about the headlights. These tend to require more depth than you think and you obviously don't want them or their wiring fouling the tyres, and of course it's not just static clearance you need to consider but bumps/turns too.
I've no doubt you'll sort them out, but from the sketched outlines of the covers on the body I think you might need to move them forward a bit. I could be wrong, but obviously worth you checking with your intended light units to make sure before you start cutting the bodywork.
Look forward to seeing the finished result.
Very nice...I know how much time and effort that goes into this kind of project, so deepest respect for getting so far.........only one problem that I can see, and its a major one I'm afraid - the steering wheel is on the wrong side. Simple mistake to make though, I still have problems deciding left from right.....
Keep up the good work - will you put it on the market in the UK?
Keep up the good work - will you put it on the market in the UK?
Steering on wrong side? HA! Now the good news is that my newest chassis design uses a center pinion steering rack... You can see where this is going? I have made some good friends over the past few years of building this car and some of them happen to be based in the UK, sooooo. It may come to pass that La Bala appears in the UK as a kit. Please email me from my website contact form if you are interested in seeing this happen. We have a saying in the US. "Money talks and bullshit walks...."  And I've been walking a loooong time. But seriously, I am interested in seeing how far this project can go. And many of you know how I have tried very hard to spend as little as possible on this project. We have had some discussion about the costs of molds previous to this post. So getting it into production in the US is my only focus. Someone else would have to help front the cost of E.U. production until I have built my fledgling company sufficiently to take that on myself.
Yes the headlamps. It's something that I have spent quite a bit of time working at. I am impressed that you picked up on the outline of the headlamp cover and the possible interference thereof. Nice! Here's the plan. The headlamp cover is larger than the required opening for the lamps. Both above and below the lamp. There is an 'eyelid' over the top of the lamps that sits undernath the perspex (we call it plexiglass) It allows the lamp housings to push forward into the space of the bucket leaving plenty of room behind for the wheel to move and turn. The eyelid will give the headlamps a more aggressive 'frown' like the furrow of an angry eyebrow! Squint your eyes and furrow your brow for a similation of the intended effect. The extra space around the bottom of the headlamp bucket is a billet piece that wraps around the front and side with a number of amber LED's behind countersunk and chamfered holes. The entire effect is very HOT! and if you think the car looks good now, just wait till you see these headlamp buckets. (I have the ability to picture my imagination photographically in my mind so I can say that it's awesome without having built it.)
One thing I have not worked out yet is the windshield wiper. There is no room under the bonnet to store it and I don't like the idea of leaving them in plain view. Has anyone ever done 'removeable wipers'? Something that slots onto the windshield header and stows inside the cabin until needed?
And I've been walking a loooong time. But seriously, I am interested in seeing how far this project can go. And many of you know how I have tried very hard to spend as little as possible on this project. We have had some discussion about the costs of molds previous to this post. So getting it into production in the US is my only focus. Someone else would have to help front the cost of E.U. production until I have built my fledgling company sufficiently to take that on myself. Yes the headlamps. It's something that I have spent quite a bit of time working at. I am impressed that you picked up on the outline of the headlamp cover and the possible interference thereof. Nice! Here's the plan. The headlamp cover is larger than the required opening for the lamps. Both above and below the lamp. There is an 'eyelid' over the top of the lamps that sits undernath the perspex (we call it plexiglass) It allows the lamp housings to push forward into the space of the bucket leaving plenty of room behind for the wheel to move and turn. The eyelid will give the headlamps a more aggressive 'frown' like the furrow of an angry eyebrow! Squint your eyes and furrow your brow for a similation of the intended effect. The extra space around the bottom of the headlamp bucket is a billet piece that wraps around the front and side with a number of amber LED's behind countersunk and chamfered holes. The entire effect is very HOT! and if you think the car looks good now, just wait till you see these headlamp buckets. (I have the ability to picture my imagination photographically in my mind so I can say that it's awesome without having built it.
) One thing I have not worked out yet is the windshield wiper. There is no room under the bonnet to store it and I don't like the idea of leaving them in plain view. Has anyone ever done 'removeable wipers'? Something that slots onto the windshield header and stows inside the cabin until needed?
Hi Steve,
Why am I not surprised that you've got the lights all planned out?
You really do seem to be well on top of things, but I know people have been caught out by not leaving enough room for lights in the past so thought it worth mentioning.
As for removable wipers, I'm pretty sure some hot rodders use removable wiper motors that clip to the top of the windcreen frame. Not sure how suitable they'd be for your car, but could be worth looking through the ads in Street Rodder.
grahambell said:
As for removable wipers, I'm pretty sure some hot rodders use removable wiper motors that clip to the top of the windcreen frame. Not sure how suitable they'd be for your car, but could be worth looking through the ads in Street Rodder.
from my experience of them and the way you worded that, I think you've already guessed the answer, not very suitable really.
How does the windscreen fit around the bodyline? is it straight from one to the other or is there a scuttle panel of any description?
The windshield traces the shape of the bonnet edge with less than 1/2" of gap. It's not the ideal situation and I'm probably stuck with drilling the glass, either that or moving the windshield and frame back 2 inches to allow room for the wiper to hide below... That may be the best option moving forward.
Edited by sgraber on Thursday 14th December 17:05
sgraber said:
The windshield traces the shape of the bonnet edge with less than 1/2" of gap. It's not the ideal situation and I'm probably stuck with drilling the glass, either that or moving the windshield and frame back 2 inches to allow room for the wiper to hide below... That may be the best option moving forward.
Edited by sgraber on Thursday 14th December 17:05
Drilling the glass.... very much advise against it. Very much.
Moving the frame and windshield back - Obviously only you know the true amoung of work involved in that to make the decision, but I was going to suggest one alternative, which would be to trim the bodywork back in a sweeping curve to create an area just large enough for a small scuttle to be fitted - could do it like a celica, with a return lip at the screen edge so it sits proud of the screen by an inch, then tucked under the back edge of the newly trimmed bonnet.
I'm not sure how the rear edge of the bonnet is finished, if it's rolled etc, but if it's just a straight edge this would IMO possibly be the simplest way forward. You could even use a carbon top layer for the scuttle and make a feature of it (there is a car that has this look, just can't think which right now!!)
you might hate the idea, but thought I'd throw it out there in case it's an easier way forward for you.
Those are great suggestions Davi. The lip of the bonnet is rolled and that's why I was hesitating to trim it. The glass extends several inches below the bonnetline and in an admission of oversite I neglected to account for the travel of the windshield wiper when I was creating the moulds. So I may have to come back and fix the molds. But OTOH I am in the process of creating a new chassis and it may be simpler to move the windshield frame back the required 2 inches... I'll take a look at that this weekend.
Thanks again for you input.
Graber
Thanks again for you input.
Graber
no worries, pleased it gave another option
let us all know how it goes. Certainly if you are doing another chassis then moving the screen back may not be that great a chore in the long run - of course if you do this and create a gap between body and glass then a carbon look scuttle would be an easy way to finish it without having to touch the current moulds.
Good luck with it
"You could even use a carbon top layer for the scuttle and make a feature of it (there is a car that has this look, just can't think which right now!!) "
Zonda makes a feature of it in this way.
Windsreen wipers are horrible looking IMO and I have been trying to figure a way of making a feature of them myself or recessing them into the scuttle.
Zonda makes a feature of it in this way.
Windsreen wipers are horrible looking IMO and I have been trying to figure a way of making a feature of them myself or recessing them into the scuttle.
The package was $1125 mounted balanced taxed included hubcentric rings and black lug nuts. I was at SEMA 2006 and spent a lot of time looking at rims. The Team Dynamics rims impressed me. The fact that they have a wide range of bolt patterns and offsets was a big plus. I needed a bit of extreme for the rears. 17x8 j33 with a 4x100 bolt pattern is difficult to find. Especially when the fronts were 16x7 j38. I feel lucky to get the rims I wanted most available in both those sizes.
 . Nevermind, certainly look the part and if they fit, even better
 Gassing Station | Kit Cars | Top of Page | What's New | My Stuff