
Mk2 Golf GTI - semi rebuild
Discussion


Hi all,
This is a summary of my project Golf GTI 16v.
I was running a 1.8 16v as a track car for a couple of years but unfortunately the cars bodywork was past its best. At the same time I have another mk2 16v which has very good bodywork, great interior which was fitted with a 2.0 16v 9a engine which i killed. So i the rebuilt 1.8 from my old track car to go in it. Sounds simple enough but this is the first time i have ever attempted a full engine swap and a project of this scale.
Anyway il let the pictures do the talking...
Old pic of when i last had it on the road.
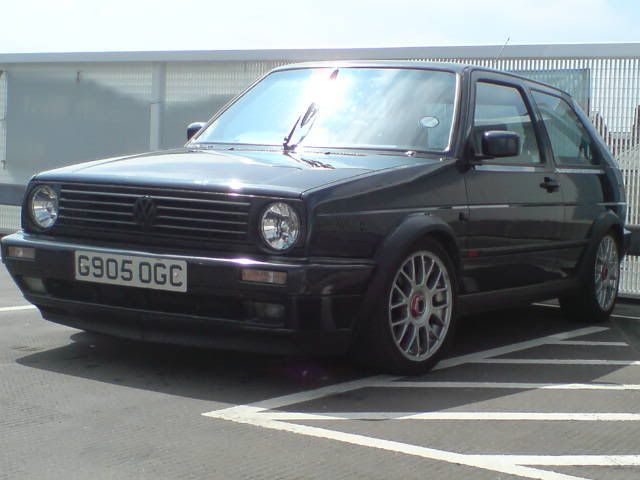
Pic of my track car
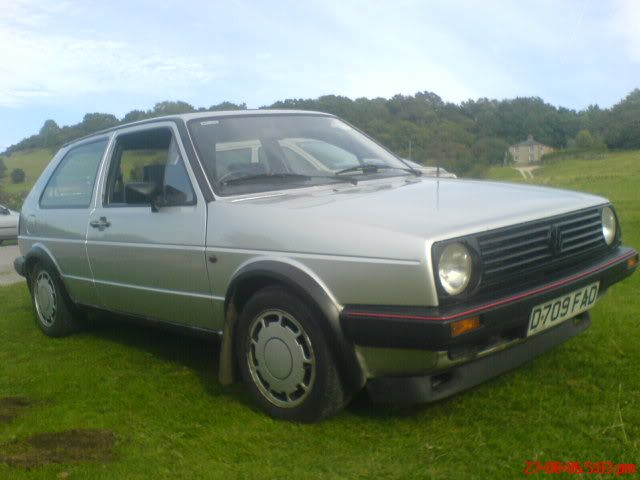
Which became this

I stripped literally everything off it
As I only have space for one car on the drive I had to wait for the silver one to be scrapped before beginning on the blue golf,
Began stripping the front off


Once the 2.0 9A engine was out I was left with this

Gave the bay a good clean and tidy rerouting a few wires and anything that could be removed was taken out degreased an painted satin black or polished silver and lacquered

whilst there i fitted new
1) Brake servo + master cylinder
2) new brake lines
3) track rod ends + control arms
4) new bushes, ball joints
Here is the 1.8 16v rebuilt nearly ready to go in. painted block black, gearbox and accessories silver and engine mounts black.
work done included
1)chemical dip - nice an clean now
2) skimmed 40tho - should raise compression to 10.7ish:1
3) new valves + guides
4) new exhaust valves
5) multi angled valve seats
6) mild port matching / polishing
7) new cam chain
8)new manifold studs and bolts
9)manifolds port matched
10) steel ABF head gasket

Easy does it…..

And its in…

Accessories/airbox intake and other bits and bobs all back on. Whilst engine was out front crossmember/subframe/front rad support were also painted satin black. Rad is a passat 16v item.

Engine in and everything hooked up, filled with fluids and ready to go.

Now most people would stop at this point but I thought since MOT had expired now why not do a few more jobs so-
Interior stripped


All carpets out and new underlay put in, carpets vacuumed, dash taken apart and cleaned, original votex consol back in but at moment only oil temp an volt meter working.
Looking better now.


looked like this for a while as i lost access to this garage so had to move the car to storage.
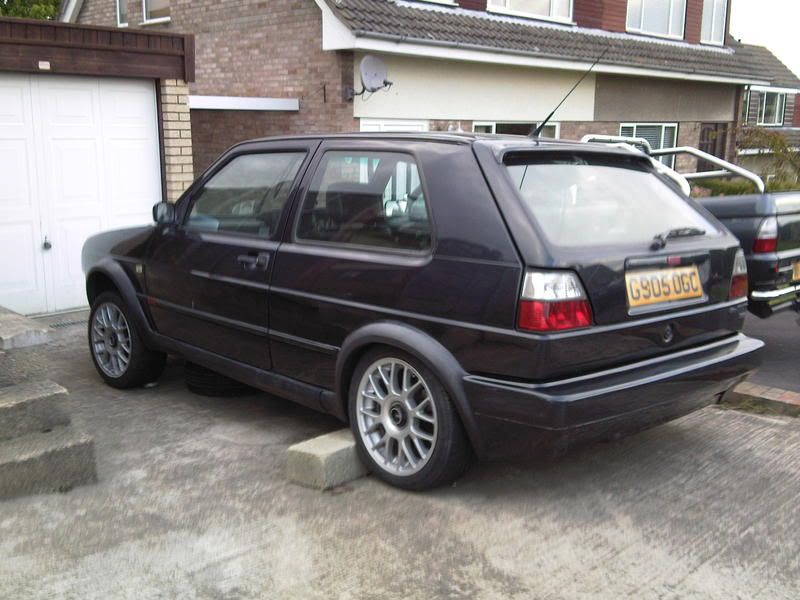
whilst in storage I stripped all the underseal off the underside, replaced all the fuel lines, the fuel pump housing+fuel filter, removed/cleaned fuel tank, stripped and repainted the back axle. Brand new mk3 callipers painted red, replaced brake flexi sections and handbrake cables - I will get some pics showing all this when the car is next up on the ramps…. It does look almost factory fresh.
At the end of the day my intention was not to make this a show car but to make it clean enough to make it easy to work on, look reasonably original but be neater and have a few subtle changes here an there.
That’s all for now. Hopefully il have the car MOT’d an taxed next month as i need to redo a captive nut on the subframe and finish a few wiring issues so all my indicators work.
Enjoy, all comments welcome!
Dave
This is a summary of my project Golf GTI 16v.
I was running a 1.8 16v as a track car for a couple of years but unfortunately the cars bodywork was past its best. At the same time I have another mk2 16v which has very good bodywork, great interior which was fitted with a 2.0 16v 9a engine which i killed. So i the rebuilt 1.8 from my old track car to go in it. Sounds simple enough but this is the first time i have ever attempted a full engine swap and a project of this scale.
Anyway il let the pictures do the talking...
Old pic of when i last had it on the road.
Pic of my track car
Which became this
I stripped literally everything off it
As I only have space for one car on the drive I had to wait for the silver one to be scrapped before beginning on the blue golf,
Began stripping the front off
Once the 2.0 9A engine was out I was left with this
Gave the bay a good clean and tidy rerouting a few wires and anything that could be removed was taken out degreased an painted satin black or polished silver and lacquered
whilst there i fitted new
1) Brake servo + master cylinder
2) new brake lines
3) track rod ends + control arms
4) new bushes, ball joints
Here is the 1.8 16v rebuilt nearly ready to go in. painted block black, gearbox and accessories silver and engine mounts black.
work done included
1)chemical dip - nice an clean now
2) skimmed 40tho - should raise compression to 10.7ish:1
3) new valves + guides
4) new exhaust valves
5) multi angled valve seats
6) mild port matching / polishing
7) new cam chain
8)new manifold studs and bolts
9)manifolds port matched
10) steel ABF head gasket
Easy does it…..
And its in…
Accessories/airbox intake and other bits and bobs all back on. Whilst engine was out front crossmember/subframe/front rad support were also painted satin black. Rad is a passat 16v item.
Engine in and everything hooked up, filled with fluids and ready to go.
Now most people would stop at this point but I thought since MOT had expired now why not do a few more jobs so-
Interior stripped
All carpets out and new underlay put in, carpets vacuumed, dash taken apart and cleaned, original votex consol back in but at moment only oil temp an volt meter working.
Looking better now.
looked like this for a while as i lost access to this garage so had to move the car to storage.
whilst in storage I stripped all the underseal off the underside, replaced all the fuel lines, the fuel pump housing+fuel filter, removed/cleaned fuel tank, stripped and repainted the back axle. Brand new mk3 callipers painted red, replaced brake flexi sections and handbrake cables - I will get some pics showing all this when the car is next up on the ramps…. It does look almost factory fresh.
At the end of the day my intention was not to make this a show car but to make it clean enough to make it easy to work on, look reasonably original but be neater and have a few subtle changes here an there.
That’s all for now. Hopefully il have the car MOT’d an taxed next month as i need to redo a captive nut on the subframe and finish a few wiring issues so all my indicators work.
Enjoy, all comments welcome!
Dave
i want to get some pictures of the underside but it is pretty hard work when i have been doing 99% of the work on a driveway with the car on axle stands which give enough height so i can crawl under the car but couldnt possibly take a picture.
Stripping the underside took hours and hours, i used petrol and degreaser to start cleaning up the underseal so i could see what condition it was in and then thought sod it scraped all the areas which looked thin with wire brush, grinding pads all sorts before wiping it all down again. A silly number of hours later i was able to begin applying underseal and treated the sills and arches with black hammerite. It is a very labour intensive job!!!!
Hopefully il get some pics whilst the car is being MOT'd...
Dave
Stripping the underside took hours and hours, i used petrol and degreaser to start cleaning up the underseal so i could see what condition it was in and then thought sod it scraped all the areas which looked thin with wire brush, grinding pads all sorts before wiping it all down again. A silly number of hours later i was able to begin applying underseal and treated the sills and arches with black hammerite. It is a very labour intensive job!!!!
Hopefully il get some pics whilst the car is being MOT'd...
Dave
Gassing Station | Readers' Cars | Top of Page | What's New | My Stuff