Tamiya Yamaha OW01 build
Discussion


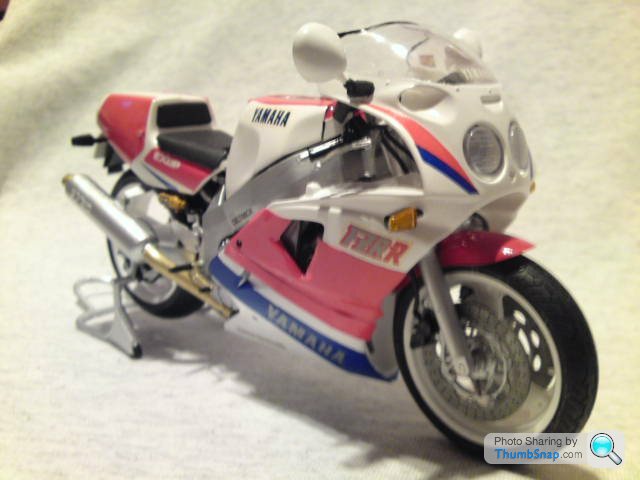
I bought a Tamiya Yamaha OW01 motorcycle kit in 1990, i started it, then lost interest after about an hour!
It sat in my cupboard for the next 20 years, until a month ago, when i finally decided i must build it!
Being older & hoping to have the patience to do it, this is my progress so far!
Probably not up to some of the efforts i've seen on here but remember, my first kit in 20 years, so don't be too harsh on me!!
The kit.

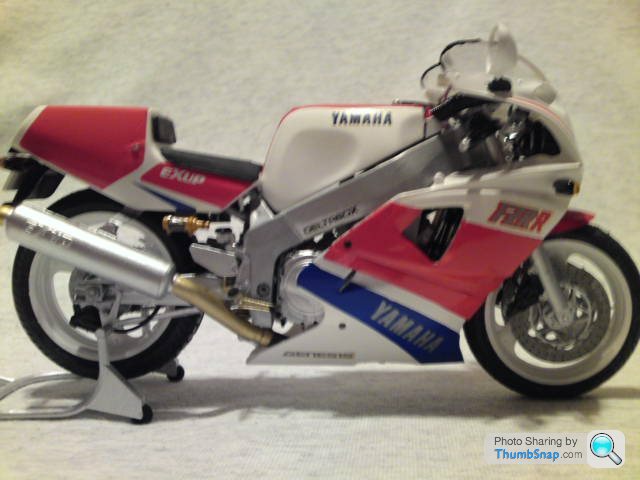
Frame painted, engine assembled, wheels, forks, exhaust on.


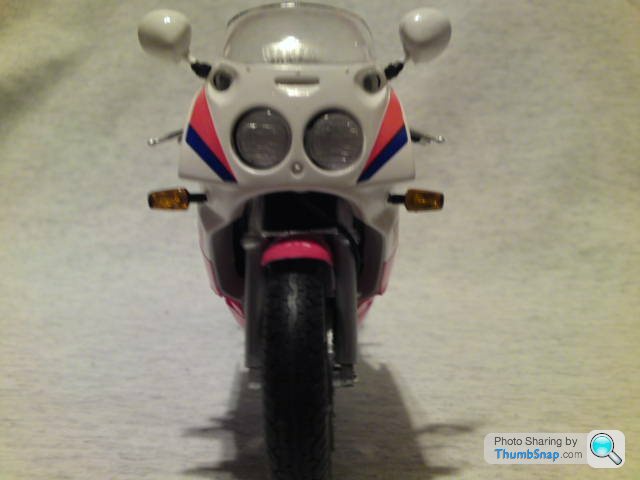
Next up was the lights, headlamps, clocks etc. Then time to spray the fairing, bellypan, seat cowl & petrol tank. Used tetrosyl, domestic gloss white in the absence of the proper Tamiya T-26 paint. Then the decals, 20 year old decals were very reluctant to attach to the curved surfaces, so the seat cowl & petrol tank ones, i made up in vinyl. Also, front mudguard should be a decal but paited it instead!


Thats it so far, this week will finish off with the fairing & belly pan & post up when finished.
Hope you like. ;D
It sat in my cupboard for the next 20 years, until a month ago, when i finally decided i must build it!
Being older & hoping to have the patience to do it, this is my progress so far!
Probably not up to some of the efforts i've seen on here but remember, my first kit in 20 years, so don't be too harsh on me!!
The kit.
Frame painted, engine assembled, wheels, forks, exhaust on.
Next up was the lights, headlamps, clocks etc. Then time to spray the fairing, bellypan, seat cowl & petrol tank. Used tetrosyl, domestic gloss white in the absence of the proper Tamiya T-26 paint. Then the decals, 20 year old decals were very reluctant to attach to the curved surfaces, so the seat cowl & petrol tank ones, i made up in vinyl. Also, front mudguard should be a decal but paited it instead!
Thats it so far, this week will finish off with the fairing & belly pan & post up when finished.
Hope you like. ;D
Gareth350 said:
I bought a Tamiya Yamaha OW01 motorcycle kit in 1990, i started it, then lost interest after about an hour!
It sat in my cupboard for the next 20 years, until a month ago, when i finally decided i must build it!
Being older & hoping to have the patience to do it, this is my progress so far!
Probably not up to some of the efforts i've seen on here but remember, my first kit in 20 years, so don't be too harsh on me!!
The kit.
Frame painted, engine assembled, wheels, forks, exhaust on.
Next up was the lights, headlamps, clocks etc. Then time to spray the fairing, bellypan, seat cowl & petrol tank. Used tetrosyl, domestic gloss white in the absence of the proper Tamiya T-26 paint. Then the decals, 20 year old decals were very reluctant to attach to the curved surfaces, so the seat cowl & petrol tank ones, i made up in vinyl. Also, front mudguard should be a decal but paited it instead!
Thats it so far, this week will finish off with the fairing & belly pan & post up when finished.
Hope you like. ;D
Yes, I do like it. Looks very "clean" in an age where everything has to be weathered to within an inch of it's life, (I exaggerate of course), but as an example of a brand new 'bike it is looking really good. I've seen much worse examples from supposedly experienced builders. Well done so far; bodes well for the future.It sat in my cupboard for the next 20 years, until a month ago, when i finally decided i must build it!
Being older & hoping to have the patience to do it, this is my progress so far!
Probably not up to some of the efforts i've seen on here but remember, my first kit in 20 years, so don't be too harsh on me!!
The kit.
Frame painted, engine assembled, wheels, forks, exhaust on.
Next up was the lights, headlamps, clocks etc. Then time to spray the fairing, bellypan, seat cowl & petrol tank. Used tetrosyl, domestic gloss white in the absence of the proper Tamiya T-26 paint. Then the decals, 20 year old decals were very reluctant to attach to the curved surfaces, so the seat cowl & petrol tank ones, i made up in vinyl. Also, front mudguard should be a decal but paited it instead!
Thats it so far, this week will finish off with the fairing & belly pan & post up when finished.
Hope you like. ;D

bob1179 said:
That looks lovely.
Can I ask how you painted and attached the clear indicator, and light lenses without ruining them with glue?
This is something I can never do, and the lights always look a mess!
Also, how did you make the new decals up with vinyl?

Well, the indicators, rear light & headlights, i painted the inside, reflective part, being very careful not to get any paint on the mating surface where the lens has to be glued, left that unpainted so gluing to plain black plastic, to avoid the glue drawing the paint up on to the lense. I used the smallest blob of glue top & bottom to affix.Can I ask how you painted and attached the clear indicator, and light lenses without ruining them with glue?
This is something I can never do, and the lights always look a mess!
Also, how did you make the new decals up with vinyl?
The decals i simply cut out exactly, placed on vinyl (i used Halfords sun strips that go on top of car screens!) drew round & carefully cut out & applied! Very fiddly & time consuming but end up with a superior colour & fit!
Edited by Gareth350 on Tuesday 20th April 14:17
Gareth350 said:
bob1179 said:
That looks lovely.
Can I ask how you painted and attached the clear indicator, and light lenses without ruining them with glue?
This is something I can never do, and the lights always look a mess!
Also, how did you make the new decals up with vinyl?
Well, the indicators, rear light & headlights, i painted the inside, reflective part, being very careful not to get any paint on the mating surface where the lens has to be glued, left that unpainted so gluing to plain black plastic, to avoid the glue drawing the paint up on to the lense. I used the smallest blob of glue top & bottom to affix.Can I ask how you painted and attached the clear indicator, and light lenses without ruining them with glue?
This is something I can never do, and the lights always look a mess!
Also, how did you make the new decals up with vinyl?
The decals i simply cut out exactly, placed on vinyl (i used Halfords sun strips that go on top of car screens!) drew round & carefully cut out & applied! Very fiddly & time consuming but end up with a superior colour & fit!
Edited by Gareth350 on Tuesday 20th April 14:17
Thanks for letting me know how you did the lights, I've always been crap at them! I think I need to get my self a kit to have a go with.
bob1179 said:
Gareth350 said:
bob1179 said:
That looks lovely.
Can I ask how you painted and attached the clear indicator, and light lenses without ruining them with glue?
This is something I can never do, and the lights always look a mess!
Also, how did you make the new decals up with vinyl?
Well, the indicators, rear light & headlights, i painted the inside, reflective part, being very careful not to get any paint on the mating surface where the lens has to be glued, left that unpainted so gluing to plain black plastic, to avoid the glue drawing the paint up on to the lense. I used the smallest blob of glue top & bottom to affix.Can I ask how you painted and attached the clear indicator, and light lenses without ruining them with glue?
This is something I can never do, and the lights always look a mess!
Also, how did you make the new decals up with vinyl?
The decals i simply cut out exactly, placed on vinyl (i used Halfords sun strips that go on top of car screens!) drew round & carefully cut out & applied! Very fiddly & time consuming but end up with a superior colour & fit!
Edited by Gareth350 on Tuesday 20th April 14:17
Thanks for letting me know how you did the lights, I've always been crap at them! I think I need to get my self a kit to have a go with.


Gassing Station | Scale Models | Top of Page | What's New | My Stuff