
MK1 Capri 1600
Discussion


Bought this car several years ago as an unfinished project, it had been sitting in a field for a few years beforehand.
I then left it languishing in the mother-in-laws garage (thanks Christine) for about 3 years until the wife and I bought a house with our own garage so I was finally able to start work on it properly.
It was modified in the eighties in the style typical of that period, and I will be be continuing the (now) retro theme.
Originally a 1600 lump was fitted by ford, it then had a swaymar 3.2 but that was removed before I purchased the car. The seller gave me a standard essex however, along with a shedload of spares.
The car as I acquired it..


I then left it languishing in the mother-in-laws garage (thanks Christine) for about 3 years until the wife and I bought a house with our own garage so I was finally able to start work on it properly.
It was modified in the eighties in the style typical of that period, and I will be be continuing the (now) retro theme.
Originally a 1600 lump was fitted by ford, it then had a swaymar 3.2 but that was removed before I purchased the car. The seller gave me a standard essex however, along with a shedload of spares.
The car as I acquired it..
My first job was to get the engine fitted - I had to cut the radiator supporting panels out to make it fit and then build up some temporary ones.
The original loom was in tatters so I tore it all out and started to start afresh, just got the engine bay hooked up to a scrap of steel inside with a starter switch for now.


Sorry about the awful photos - s t camera phone and the car was mostly on axle stands which combined with my stumpy legs made photography very poor!
Got the engine running with a view to selling it, as there is plenty of space in the bay for something more exciting.
http://www.youtube.com/watch?v=rE6MIwun1bg
The original loom was in tatters so I tore it all out and started to start afresh, just got the engine bay hooked up to a scrap of steel inside with a starter switch for now.
Sorry about the awful photos - s
t camera phone and the car was mostly on axle stands which combined with my stumpy legs made photography very poor!Got the engine running with a view to selling it, as there is plenty of space in the bay for something more exciting.
http://www.youtube.com/watch?v=rE6MIwun1bg

ndtman said:
jonesey said:
nice. shame you want it gone, would have loved to seen this finished.
I thought the OP meant sell the engine to fit a bigger engine(?). V12 from the same maker as the IRS?I did consider the v12 for a long time. It would just about fit (with a few modifications) and would be awesome. 6 twin choke webers crackling away
 . But cooling would be a nightmare, and sourcing a manual gearbox is not easy for these. Also a lot of weight would be in front of the front wheels so handling would be made even worse than it already will be.
 I did ponder for a future project however, butchering a dutton and stretching the chassis a metre or so, wedge in the jag v12 and make something like this highly skilled photoshop-esque mock-up..

Looks pretty!
Edited by captainsmelly on Thursday 30th December 14:10
Naturally, this being a ford, some of the body work was rather crap.
Front crossmember..


Sill ends/door support panels..


Passengers floor pan is perfect, drivers floor pan was not too bad.
Made up a new crossmember (this was what I learnt to weld on, so it looks rubbish, and probably is, but it will be more than strong enough)


All 'skillfully' crafted from 2mm steel. The original was 1 point something tiny.
The left side sill end was fairly crap in one area but ok mostly (had been waxoiled in the past, but they missed a bit!) so I cut the rotten section out and made a replacement piece


The drivers side was far worse though, and I had to lob out a big chunk. CCI supplied a replacement section


And then go go gadget grinder one last time..

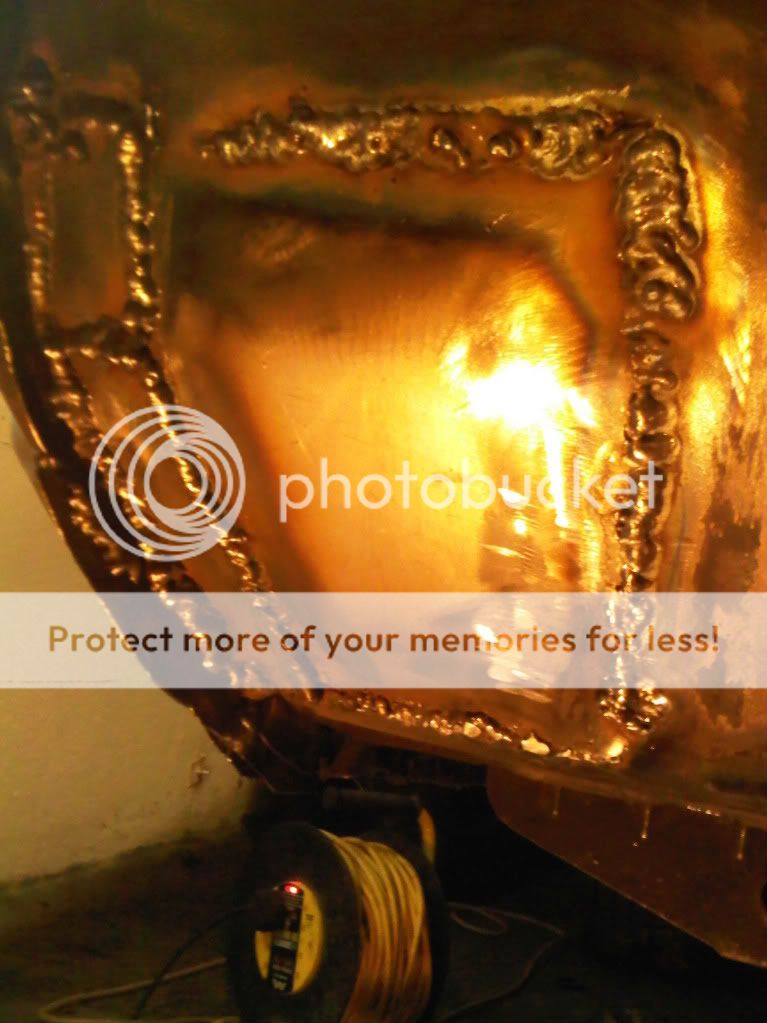
Obviously the welds have been tidied up now!
Tragically, my trusted and beloved angle grinder blew up quite spectacularly shortly after these photos were taken. RIP.
Front crossmember..
Sill ends/door support panels..
Passengers floor pan is perfect, drivers floor pan was not too bad.
Made up a new crossmember (this was what I learnt to weld on, so it looks rubbish, and probably is, but it will be more than strong enough)
All 'skillfully' crafted from 2mm steel. The original was 1 point something tiny.
The left side sill end was fairly crap in one area but ok mostly (had been waxoiled in the past, but they missed a bit!) so I cut the rotten section out and made a replacement piece
The drivers side was far worse though, and I had to lob out a big chunk. CCI supplied a replacement section
And then go go gadget grinder one last time..
Obviously the welds have been tidied up now!
Tragically, my trusted and beloved angle grinder blew up quite spectacularly shortly after these photos were taken. RIP.
Edited by captainsmelly on Thursday 30th December 14:31
stewy68 said:
Retro cool!
I would change the bodywork to standard spec and source another Swaymar spec. Or get a Cosworth 24v in it.
Is that a Jag IRS?
CheersI would change the bodywork to standard spec and source another Swaymar spec. Or get a Cosworth 24v in it.
Is that a Jag IRS?
Not really worth returning the body on this to standard, its been chopped around too much to make it viable or affordable for me to do.
Would love another swaymar but they're not the easiest engines to find, let alone buy. The cosworth is too modern really although they are brilliant.
Yes it is a jag irs, my darling wifey has told that she'll give it a polish at some point

captainsmelly said:
ndtman said:
jonesey said:
nice. shame you want it gone, would have loved to seen this finished.
I thought the OP meant sell the engine to fit a bigger engine(?). V12 from the same maker as the IRS?I did consider the v12 for a long time. It would just about fit (with a few modifications) and would be awesome. 6 twin choke webers crackling away
. But cooling would be a nightmare, and sourcing a manual gearbox is not easy for these. Also a lot of weight would be in front of the front wheels so handling would be made even worse than it already will be. http://www.youtube.com/watch?v=jZLnrOeu0KE
As to the cooling big radiator in the boot. Manual gearbox, don't bother manual valve body on the auto and drive around in 3rd.
ndtman said:
captainsmelly said:
ndtman said:
jonesey said:
nice. shame you want it gone, would have loved to seen this finished.
I thought the OP meant sell the engine to fit a bigger engine(?). V12 from the same maker as the IRS?I did consider the v12 for a long time. It would just about fit (with a few modifications) and would be awesome. 6 twin choke webers crackling away
. But cooling would be a nightmare, and sourcing a manual gearbox is not easy for these. Also a lot of weight would be in front of the front wheels so handling would be made even worse than it already will be. http://www.youtube.com/watch?v=jZLnrOeu0KE
As to the cooling big radiator in the boot. Manual gearbox, don't bother manual valve body on the auto and drive around in 3rd.
Well I had to replace the front valance, here it is halfway off..

And then the wings, these had a sort of homemade arch liner built from fibreglass that did a great job of rustproofing, but they did prevent the wings from being moved so had to be chopped off.


Note the headlamp buckets, they were a bit ugly
To de-fibreglass the inner wing was easy with paint stripper and wire brush on (replacement, not very nice) angle grinder. I could not easily clean up the wings though, so I resorted to hillbilly techniques


Worked a treat!
Once the wings were out of the way, I could continue hacking at the valance, I also started reshaping the headlamp bowls by extending the wing back to the car.

Tickover and CCI sold me a fibreglass valance, and a front splitter so I have bolted them to the wings so I can get the shapes right, the old bowls didn't look so good so I chopped them too


Then cut some new steel for the top of the valance, and the backs of the lights.

And this is pretty much where I've got to with the body work so far.
Edited by captainsmelly on Friday 31st December 12:16
vz-r_dave said:
Awesome, I asume your already on retro rides??
Thanks! No, should I be?To get my new engine to fit, which it doesn't just yet, I need to cut the engine bay some more. First to go is the bulge for the heater blower, this was just to get the engine in for measuring up and I'm going to have to chop loads more to fit the dizzy once its in.


I want to get the engine in as far back and low down as is possible, so the next step was to reshape the sump subtly as it fouled the steering rack at the front, and the crossmember too

I measured the new shape by denting it not on purpose lowing it into place a little violently whoops

Cleaned up for welding in the parts washer

Chopped

Started in the middle, also fitted a baffle to try and stop oil slosh under braking

Tacked on the sides, I think I used about 3 scraps of steel on each side and t
tted it all repeatedly with a hammer to bend it into a smoothish shape. The little knobbly bit is so I could attach the earthing lead to weld

And finally seam welded all the way round. Don't think I remembered to take a photo of it after I cleaned it up, but I did! Also fluched it through with a couple of gallons of parafin

With the sump now in the right shape, the engine can now been lowered by around 15mm more. Next step is to get it nestling at the most rearward position possible, without making work on the top end too tricky. To this end the very rear of the head should sit about a couple of mm from the bulk head, which quite coincidently means that the engine mounts all line up perfectly which was a nice surprise!
What stopped me from doing this too easily was the bellhousing which fouled the bulkhead/trans tunnel as you can see from the dents made by mocking up seen in this photo

I masked out the shape I needed to cut, which gives me a decent amount of clearance without necessitating relocation of the pedal box
And then this is whats left

This is now up to date, the work shown so far has pretty much taken me the last 18 months I reckon. I will update as it progresses
What stopped me from doing this too easily was the bellhousing which fouled the bulkhead/trans tunnel as you can see from the dents made by mocking up seen in this photo
I masked out the shape I needed to cut, which gives me a decent amount of clearance without necessitating relocation of the pedal box
And then this is whats left
This is now up to date, the work shown so far has pretty much taken me the last 18 months I reckon. I will update as it progresses
Edited by captainsmelly on Friday 31st December 12:46
captainsmelly said:
vz-r_dave said:
Awesome, I asume your already on retro rides??
Thanks! No, should I be?Anyway, you seem to be making a huge hole in the bulkhead and tunnel. What engine have you decided on?
ndtman said:
captainsmelly said:
vz-r_dave said:
Awesome, I asume your already on retro rides??
Thanks! No, should I be?Anyway, you seem to be making a huge hole in the bulkhead and tunnel. What engine have you decided on?
Forgot to mention the engine somehow, its a small block chevy. Got 4 bolt mains and ally heads, 600cfm holley (for now) and an edelbrock rpm performer inlet. Got to say thanks to Kerry Tate at Originals (07766706087) for supplying it, absolutely top bloke.
Gearbox is a Muncie m21, supplied and fully rebuilt by Marv - hotrod57 on nsra, again a hugely helpful guy who sorted me out with nearly everything I should need transmission wise.


 You are going to need a good set of brakes to stop that when it's finished. Good luck, thread bookmarked!
Gassing Station | Readers' Cars | Top of Page | What's New | My Stuff