Alloy Refurbishment
Discussion


I am looking for an alloy refurb center in Aberdeen or some advice on how to refurb my alloys.
Damage on 3 of my wheels is some light scuffing and pitting and one alloy also has some damage to the rim (dented).
I have had a couple of quotes at £65 and £100 per wheel which I consider a bit steep especially for the wheels with light scuffing.
Is there something I can do to repair them myself?
Do you know anyone who does it as a hobby and charges a reasonable price?
Many Thanks
I refurbed my wheels in January but couldn't find anyone in Aberdeen to do them; end up taking them to an outfit in Glasgow who did a total refurb for £200 for all 4 in under 6 hours. But if that's not an option I think Laws Tyres in BOD do refurbs, not sure how good/expensive they are though.
Here is a post of mine from the MX5 section, HTH (this is about the third time I've reposted this....)
DIY refurb guide (pasted from my post in another forum, so ignore bits that don't make sense!)
Heres a list of what you need:
- Three large cans of primer
- Three large cans of colour
- Three large cans of lacquer
- Wet and dry sandpaper, range of low to high grits
- Filler e.g. Davids Isopon P38
- Lots of masking tape
- Newspaper
- White spirit
Heres what you do:
1. Clean wheels
- Use your wheel cleaner, then maybe some fairy liquid and warm water
- Wash with plenty of water then dry
2. Mask up tyres
- Obviously this only applies if you are leaving tyres on
- Let some air out
- Apply plenty of masking tape behind the wheel lip
- Mask the rest of the tyre with newspaper

3. Sand down wheels
- Start with a course grit, and sand down the entire wheel
- If the wheel paint is flaking or really corroded, you will need to go down to the metal
- Use less course grit sandpaper until the finish is smooth
4. Fill imperfections, dry and then resand
- Follow filler instructions to get the right consistency - you don't want the filler to set too soon!
- Leave to dry for A LONG time - 48 hours is best
- Sand down using progressively lower course grit, until S-M-O-O-T-H
TIP! This is the most important stage - the more time you spend here, the better the finish. Paint WILL NOT cover up any imperfections!

TIP! Sanding in between coats helps prevent the orange peel effect!
5. Prime wheels
- Clean wheel using white spirit, rinse with water and dry thoroughly
- Leave primer in warm water for half an hour before using, to loosen
- Shake VERY can very well - Apply several thin coats (at least three)
- Do not spray too close
- Leave to dry, and sand in between each coat using a very fine grit

5. Paint wheels
- Leave primer to dry for 48 hours
- Sand lightly, then rinse with water and dry thoroughly
- Again, leave cans in warm water for a while and shake thoroughly
- Aim for lots of very light coats, allow each layer to dry and sand down using a very light grit sandpaper
TIP! When spraying, aim away from the wheel then sweep across. This clears any drips and gives a more misty, fine spray with fewer blobs.
6. Lacquer wheels
- Leave paint to dry for 48 hours
- Same as the other cans, leave in warm water, aim for several thin coats
7. Clean and admire
- Apply some sealant, get the wheels rebalanced and enjoy your hard work


Any questions / corrections let me know!
J
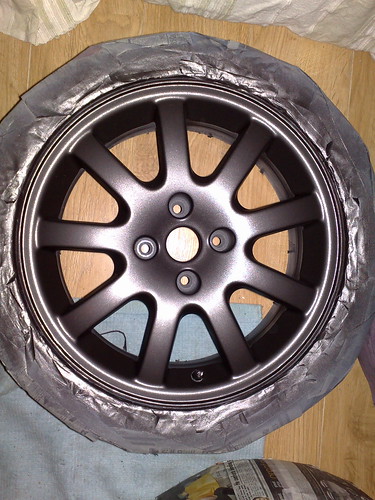
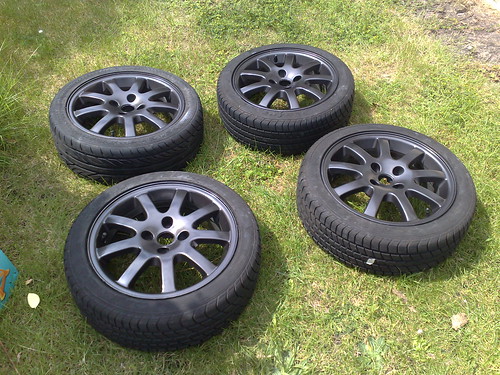
EDIT: I only did the front of the alloys, as I don't think the back of the spokes etc. are painted. However, there is nothing stopping you from doing this, and will probably make the refurb last longer. I think Brian did the whole wheel and it looked ace.
EDIT: By sealant I mean wheel sealant - Poorboys do a good one. However, I used my Nattys paste wax and it did a good job!
EDIT: I put my GTi on steelies whilst working on the refurb, but didn't really drive it!
DIY refurb guide (pasted from my post in another forum, so ignore bits that don't make sense!)
Heres a list of what you need:
- Three large cans of primer
- Three large cans of colour
- Three large cans of lacquer
- Wet and dry sandpaper, range of low to high grits
- Filler e.g. Davids Isopon P38
- Lots of masking tape
- Newspaper
- White spirit
Heres what you do:
1. Clean wheels
- Use your wheel cleaner, then maybe some fairy liquid and warm water
- Wash with plenty of water then dry
2. Mask up tyres
- Obviously this only applies if you are leaving tyres on
- Let some air out
- Apply plenty of masking tape behind the wheel lip
- Mask the rest of the tyre with newspaper
3. Sand down wheels
- Start with a course grit, and sand down the entire wheel
- If the wheel paint is flaking or really corroded, you will need to go down to the metal
- Use less course grit sandpaper until the finish is smooth
4. Fill imperfections, dry and then resand
- Follow filler instructions to get the right consistency - you don't want the filler to set too soon!
- Leave to dry for A LONG time - 48 hours is best
- Sand down using progressively lower course grit, until S-M-O-O-T-H
TIP! This is the most important stage - the more time you spend here, the better the finish. Paint WILL NOT cover up any imperfections!
TIP! Sanding in between coats helps prevent the orange peel effect!
5. Prime wheels
- Clean wheel using white spirit, rinse with water and dry thoroughly
- Leave primer in warm water for half an hour before using, to loosen
- Shake VERY can very well - Apply several thin coats (at least three)
- Do not spray too close
- Leave to dry, and sand in between each coat using a very fine grit
5. Paint wheels
- Leave primer to dry for 48 hours
- Sand lightly, then rinse with water and dry thoroughly
- Again, leave cans in warm water for a while and shake thoroughly
- Aim for lots of very light coats, allow each layer to dry and sand down using a very light grit sandpaper
TIP! When spraying, aim away from the wheel then sweep across. This clears any drips and gives a more misty, fine spray with fewer blobs.
6. Lacquer wheels
- Leave paint to dry for 48 hours
- Same as the other cans, leave in warm water, aim for several thin coats
7. Clean and admire
- Apply some sealant, get the wheels rebalanced and enjoy your hard work
Any questions / corrections let me know!
J
EDIT: I only did the front of the alloys, as I don't think the back of the spokes etc. are painted. However, there is nothing stopping you from doing this, and will probably make the refurb last longer. I think Brian did the whole wheel and it looked ace.
EDIT: By sealant I mean wheel sealant - Poorboys do a good one. However, I used my Nattys paste wax and it did a good job!
EDIT: I put my GTi on steelies whilst working on the refurb, but didn't really drive it!
Looks like you did a good job there, however (and I don't wish to cause offence), no spray job will ever be as good as a full-on strip and powder coat (which will do both sides of the wheel), you still have to factor in the cost of the rebalance, paint etc, your car is off the road for several days (initial prep, paint, dry, lacquer coat, take to balance, refit). What's your total outlay there? £100?
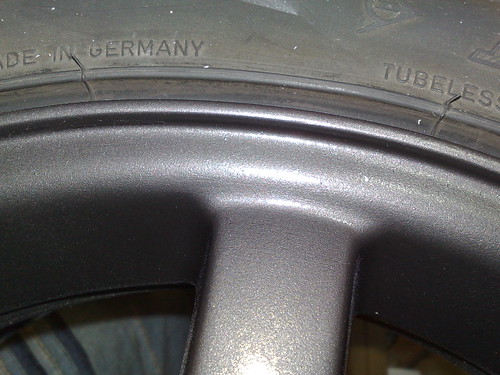
Also don't forget that if your alloys are suffering from rim leaks etc due to the bead needing a nice recoat that painting them won't solve this.
I think dropping your car off at somewhere like TWS in the morning and collecting them in the afternoon when they have had the tyres removed, stripped, blasted, coated, retyred, balanced etc for a grand total of about £300 for some 18 inchers is an utter bargain when considering the work you have done above (I know - I've done the painting thing myself in the past).
Dog Star said:
Looks like you did a good job there, however (and I don't wish to cause offence), no spray job will ever be as good as a full-on strip and powder coat (which will do both sides of the wheel), you still have to factor in the cost of the rebalance, paint etc, your car is off the road for several days (initial prep, paint, dry, lacquer coat, take to balance, refit). What's your total outlay there? £100?
No offence taken, I'm objective about the whole experience. I did the job over ten days (was a bored student at the time  ) and the materials and steelies cost me £75 in total. I agree it will never be as good as a full strip and powdercoat, but on a rough and ready car it is an option to do it yourself. Quite a satisfying experience too!
The finish lasted quite well, with imperfections appearing only when curbing spread and I spilt petrol on one of them.
BoomBoomPow: I spoke to Laws tyres and they told me they send the wheels to glasgow to be refurbed at a cost of £100 per wheel.
JFReturns: Thanks for all the info that is great, I may try that for the lighly scuffed and pitted wheels. As for the dented rim I may get that one done properly, there is a guy here in Aberdeen who will come to you and do the job in his van for £65 a wheel.
JFReturns: Thanks for all the info that is great, I may try that for the lighly scuffed and pitted wheels. As for the dented rim I may get that one done properly, there is a guy here in Aberdeen who will come to you and do the job in his van for £65 a wheel.
JFReturns said:
I agree it will never be as good as a full strip and powdercoat, but on a rough and ready car it is an option to do it yourself. Quite a satisfying experience too!
The finish lasted quite well, with imperfections appearing only when curbing spread and I spilt petrol on one of them.
If you have the time it is quite good fun. I did the alloys on the OHs onetime A4 several yeas ago pretty well as you did above (didn't leave the 48 hours between spray and lacquer though) and they did look great - still looked fine a couple of years later when we got rid of it. I couldn't afford a full refurb at that time (indeed didn't know such a thing existed!).The finish lasted quite well, with imperfections appearing only when curbing spread and I spilt petrol on one of them.
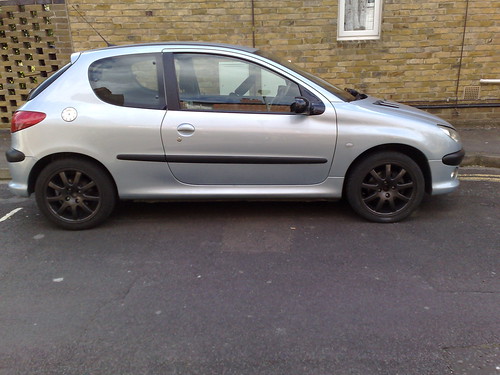
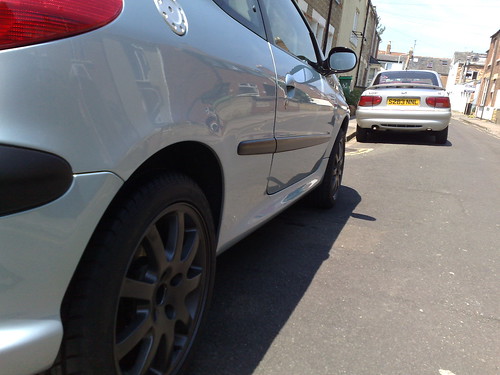
The other good thing is that you've not blown too much if you decide you don't like the colour if you've done them yourself. I was a bit worried about mine being coated in black chrome (see pic above) but as it turns out they couldn't have looked better. Those graphite ones on the Pug look great too.
Gassing Station | General Gassing | Top of Page | What's New | My Stuff