5 year TL1000s project - in one afternoon?
Discussion


Right.
Popped out the headstock, swing arm and both wheels bearings.
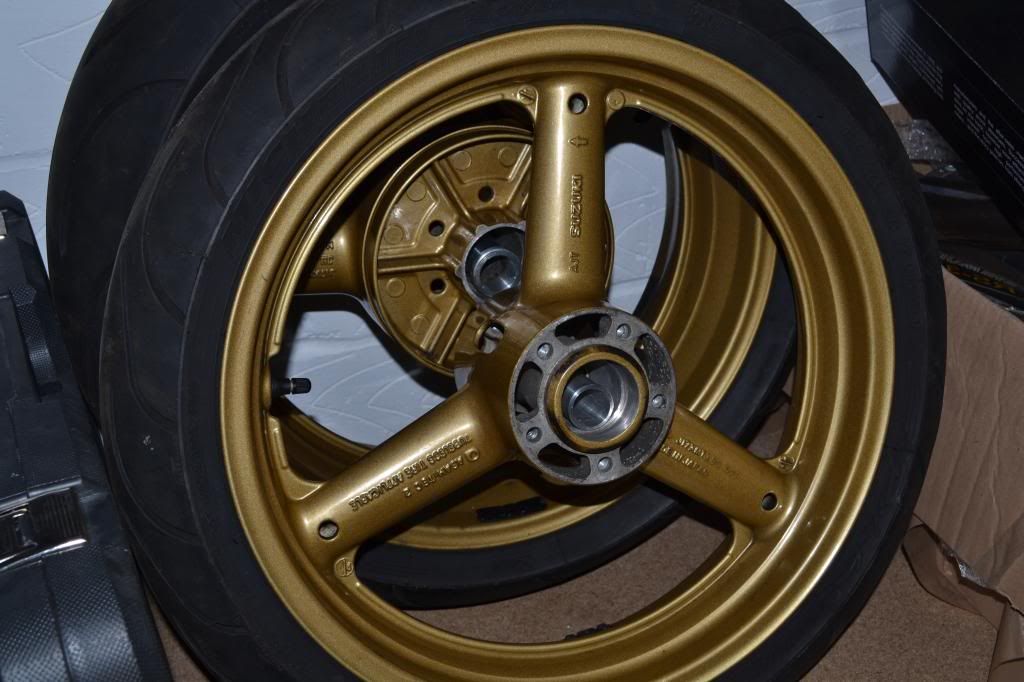
Wheels nice and cleaned up ready for new bearings
Setting in the new outer races in the headstock
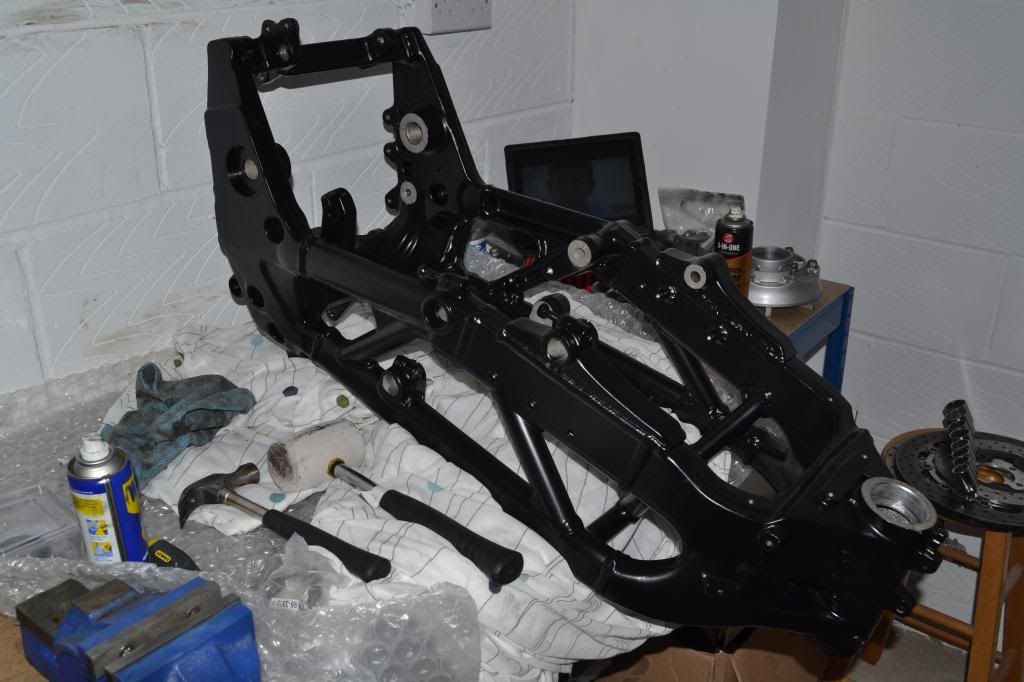
Swing arm with new bearings and plates
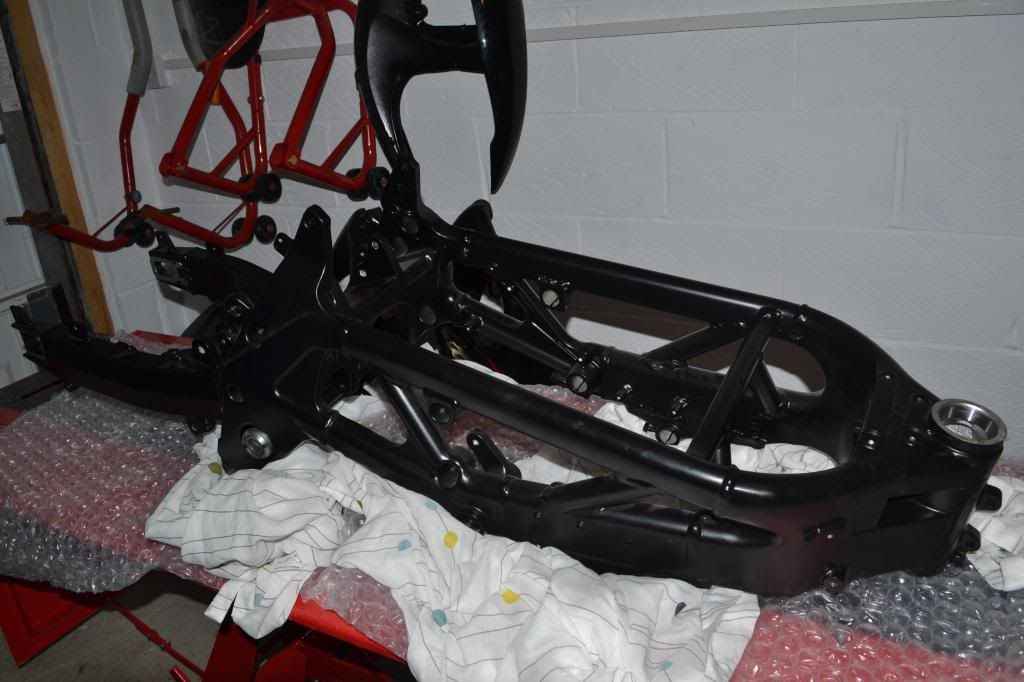
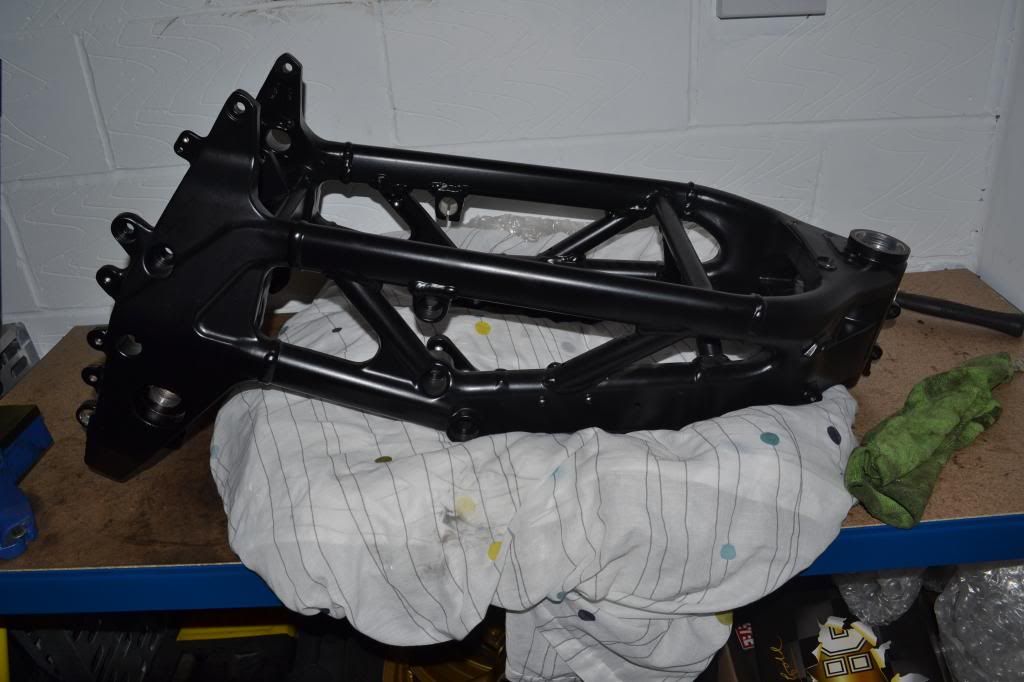
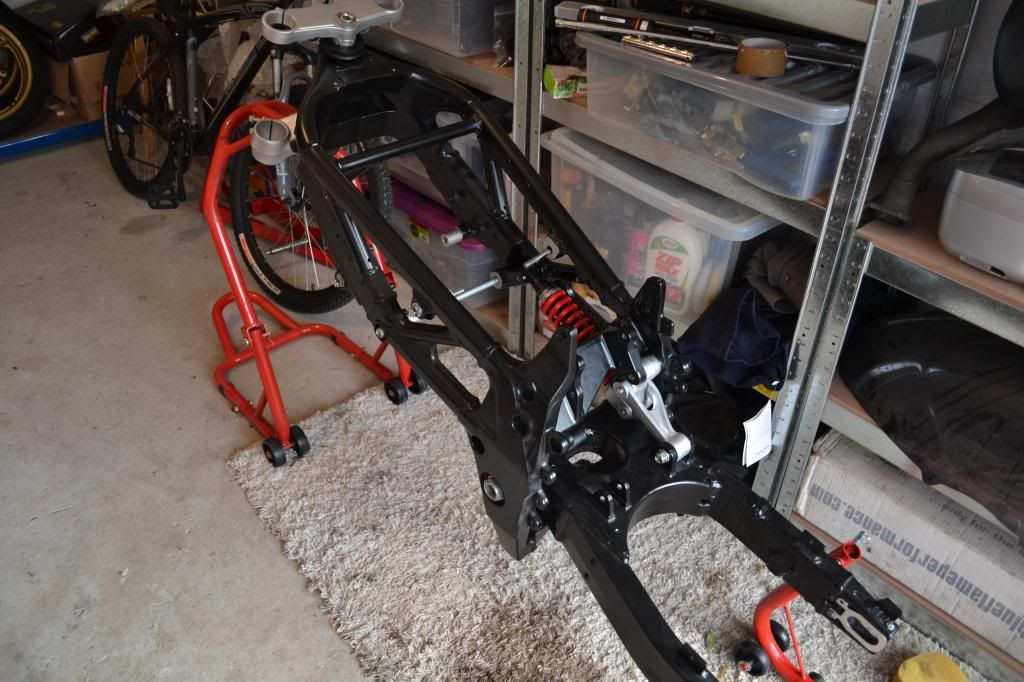
Swingarm and frame back together on the new hydraulic bike lift
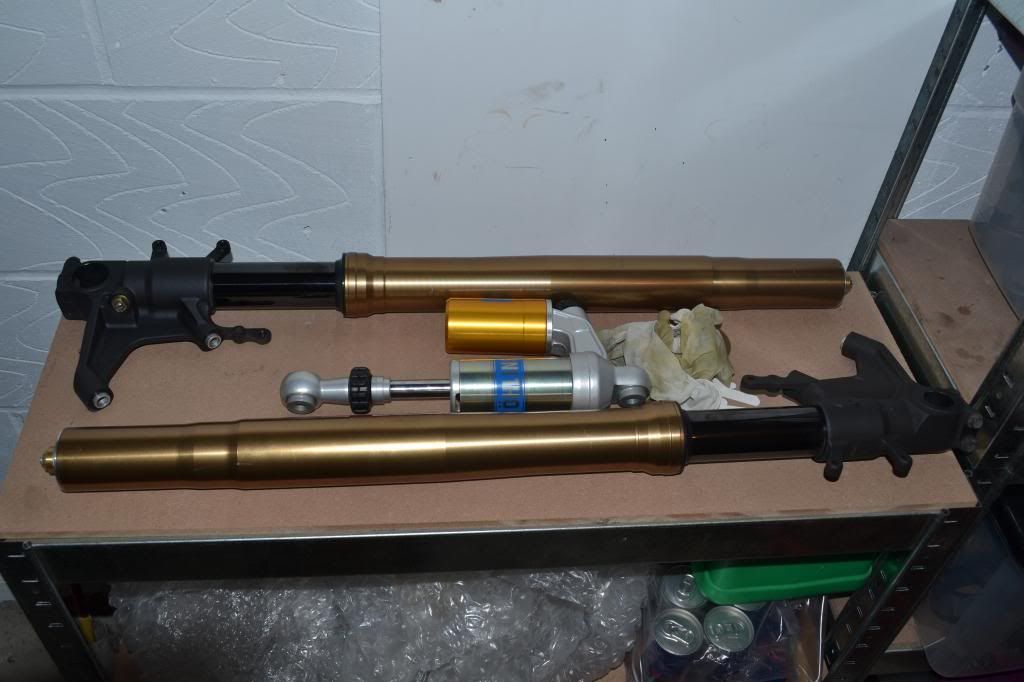
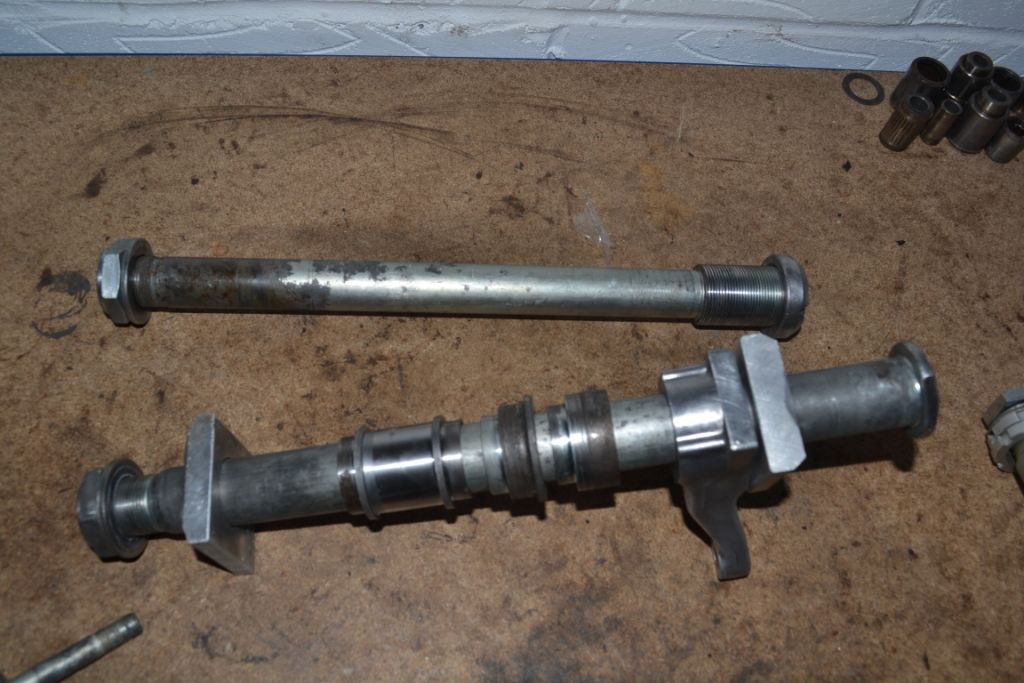
Set of 08 - 12 Hayabusa forks and a brand new Ohlins shock. Brand new OEM radiator is on shelf below ... just looking to order a new oil cooler.
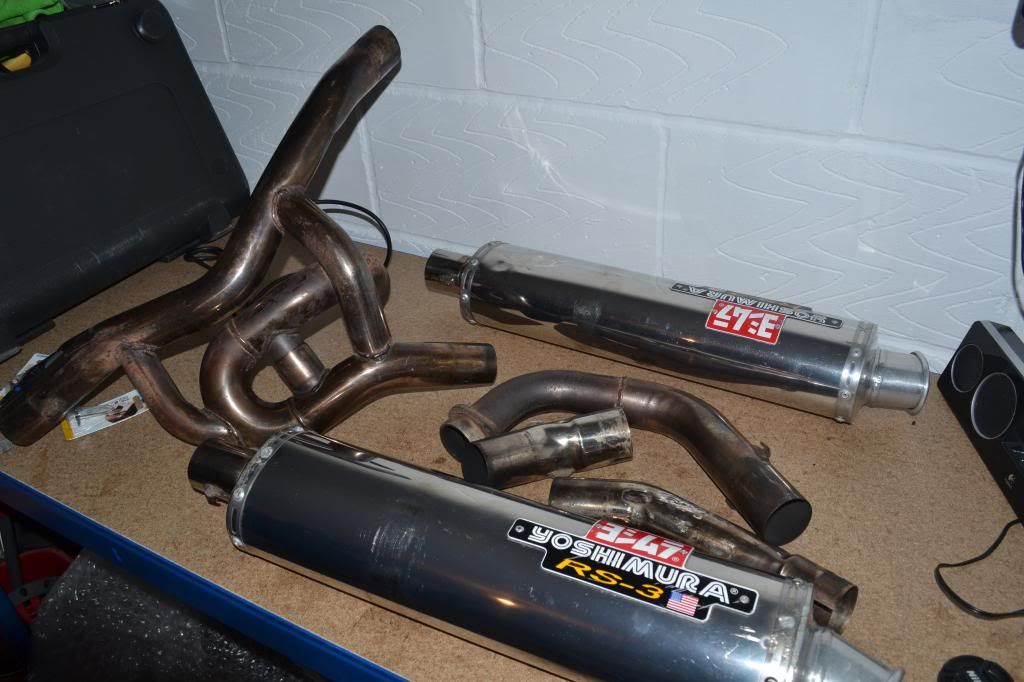
Full Yoshimura RS3 system. Cans need re-sleeved and the pipes need polished. All parts are there.
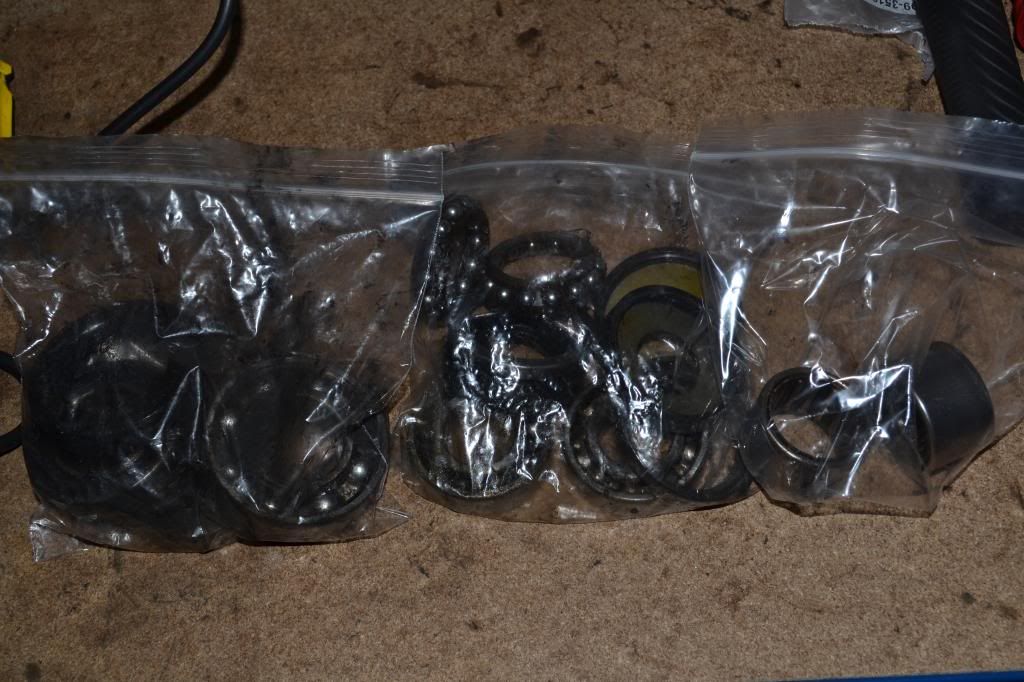
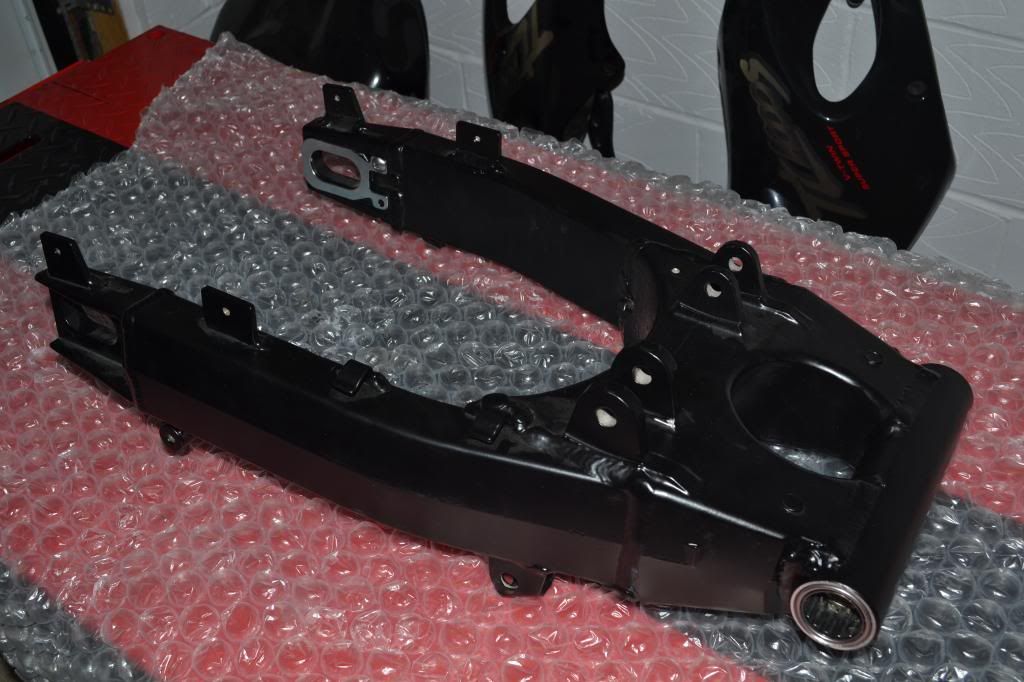
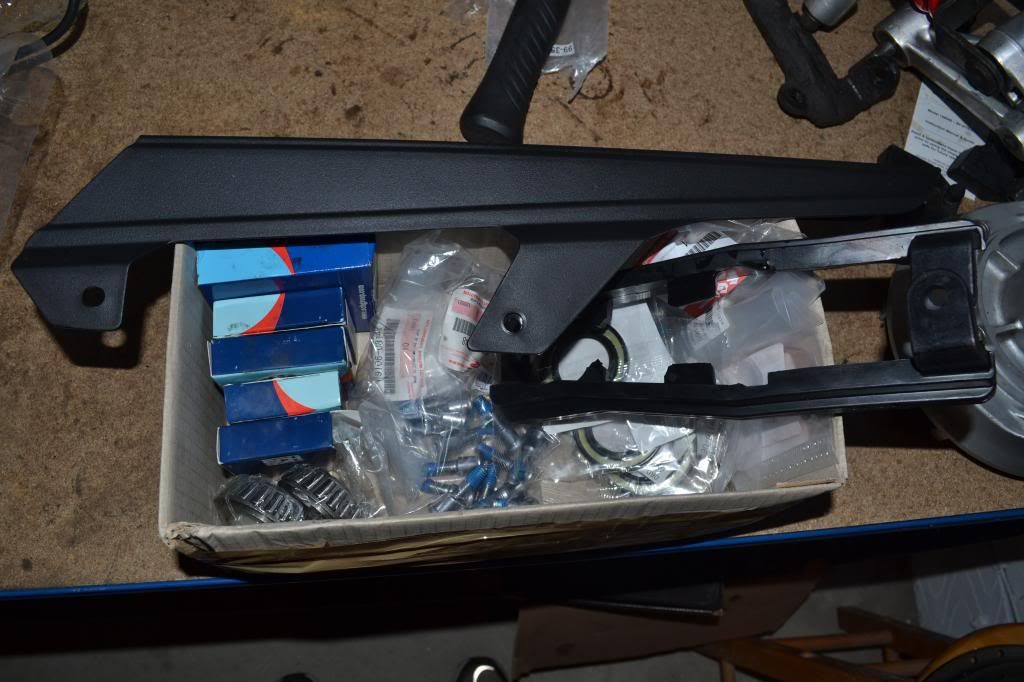
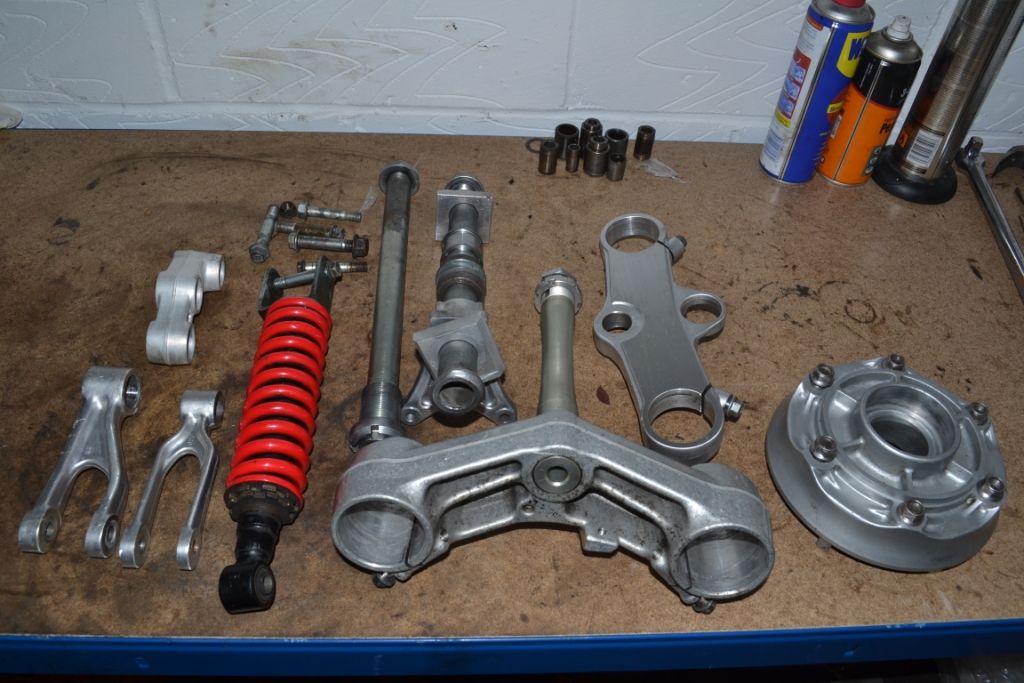
New OEM parts. New bearings for headstock, swingarm, wheel bearings. Plus chain guard/runner & front and rear disc bolts, new plates and some bolts for swinger
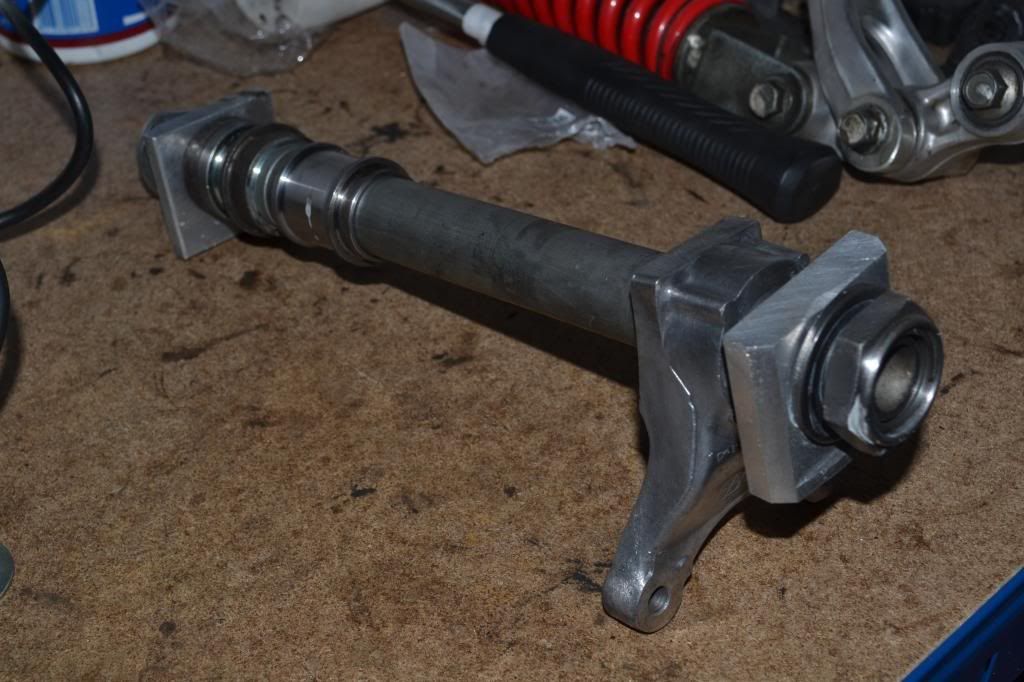
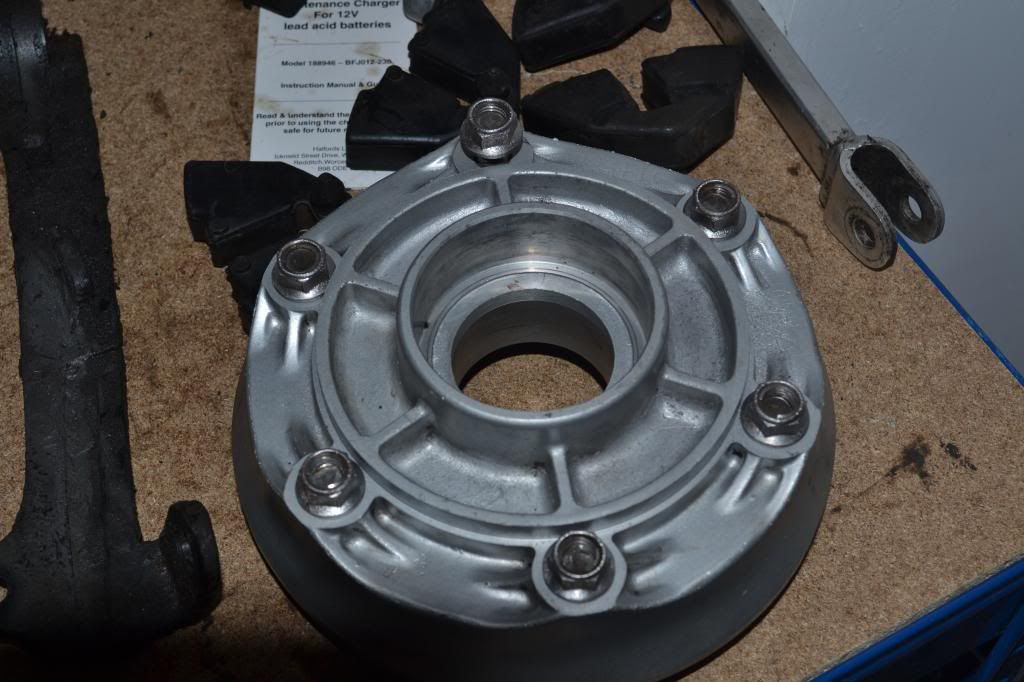
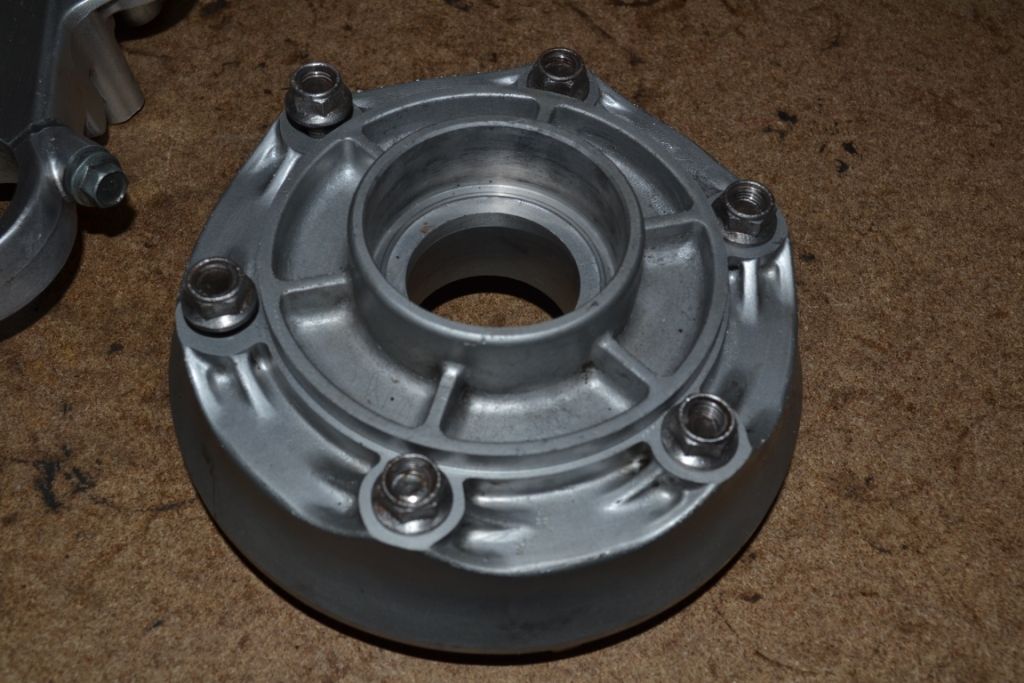
Wire brushed the rear axle components & rear hub and they seem to have come up well. Was intending to get the aqua/vapour blasted but might just leave and re-use as is
Popped out the headstock, swing arm and both wheels bearings.
Wheels nice and cleaned up ready for new bearings
Setting in the new outer races in the headstock
Swing arm with new bearings and plates
Swingarm and frame back together on the new hydraulic bike lift
Set of 08 - 12 Hayabusa forks and a brand new Ohlins shock. Brand new OEM radiator is on shelf below ... just looking to order a new oil cooler.
Full Yoshimura RS3 system. Cans need re-sleeved and the pipes need polished. All parts are there.
New OEM parts. New bearings for headstock, swingarm, wheel bearings. Plus chain guard/runner & front and rear disc bolts, new plates and some bolts for swinger
Wire brushed the rear axle components & rear hub and they seem to have come up well. Was intending to get the aqua/vapour blasted but might just leave and re-use as is
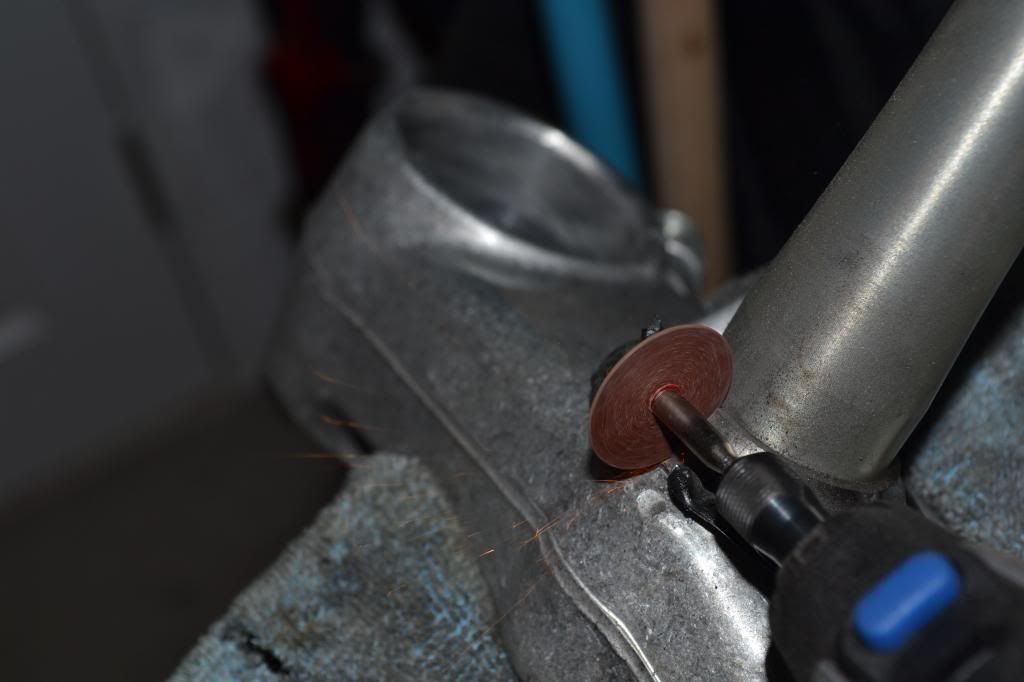
One thing causing some hassle is removing the inner race on the bottom of the headstock. After some googling I decided to try to cut it with a dremel blade however im at the point of touching the yoke/spindle and it still wont come off, even after getting whacked with a large hammer/screw driver combination. Any ideas would be appreciated. On the verge of getting a bikeshop to remove but I'd rather do it myself.
Only other concern at the moment is the new outer race in the headstock. The Lower went in in fine, the upper seems tighter, and other than driving it in as hard as I can this is as close to the bottom of the recess as I can get it. I don't want to cause any damage so I think I'll re-assemble as below and test out the movement. Where required I'll just have to remove the triple clamps again and use a threaded bolt and large washer to remove the 1mm gap. The gouges I can see where there allready ... not sure what happened there !
Next things to do once above resolved:
[LIST=1]
[*]Replace wheel bearings
[*]Remount triple clamps
[*]Clean up the spring & linkages. Some of the linkage bearings will need replaced too me thinks.
[*]Re-attach forks with shim kit to match the busa parts to TL parts
[*]Re install wheels
[/LIST]
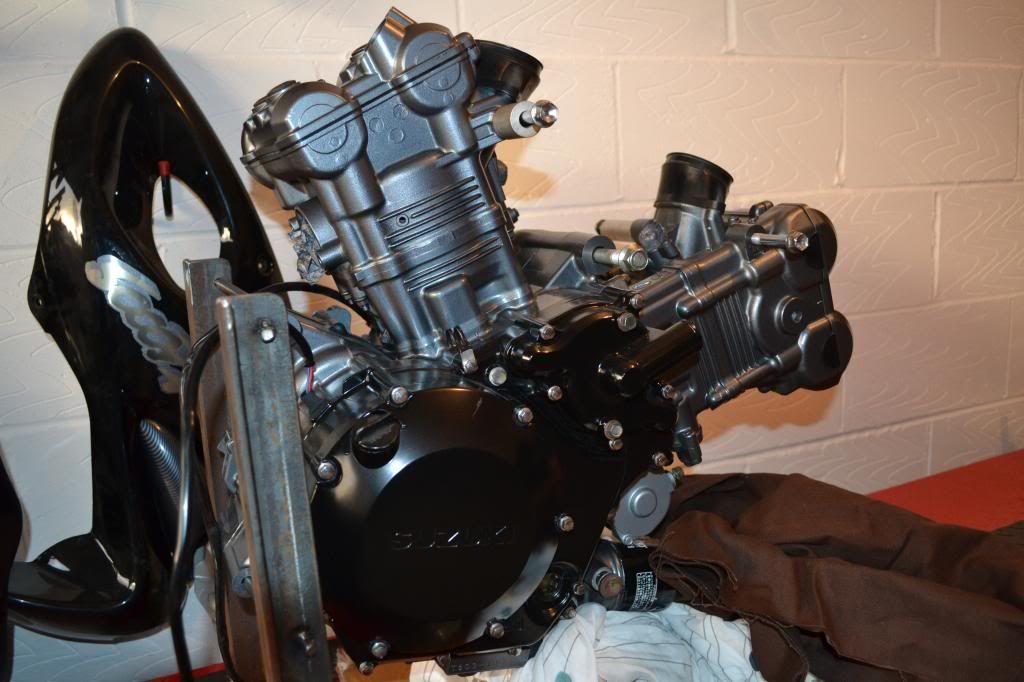
Engine should be back end of next week from the blaster/painter redone back to OEM newness which after it's back in the frame shall result in all manner of nightmares with the wiring loom. Bugger.
Only other concern at the moment is the new outer race in the headstock. The Lower went in in fine, the upper seems tighter, and other than driving it in as hard as I can this is as close to the bottom of the recess as I can get it. I don't want to cause any damage so I think I'll re-assemble as below and test out the movement. Where required I'll just have to remove the triple clamps again and use a threaded bolt and large washer to remove the 1mm gap. The gouges I can see where there allready ... not sure what happened there !
Next things to do once above resolved:
[LIST=1]
[*]Replace wheel bearings
[*]Remount triple clamps
[*]Clean up the spring & linkages. Some of the linkage bearings will need replaced too me thinks.
[*]Re-attach forks with shim kit to match the busa parts to TL parts
[*]Re install wheels
[/LIST]
Engine should be back end of next week from the blaster/painter redone back to OEM newness which after it's back in the frame shall result in all manner of nightmares with the wiring loom. Bugger.
So ...
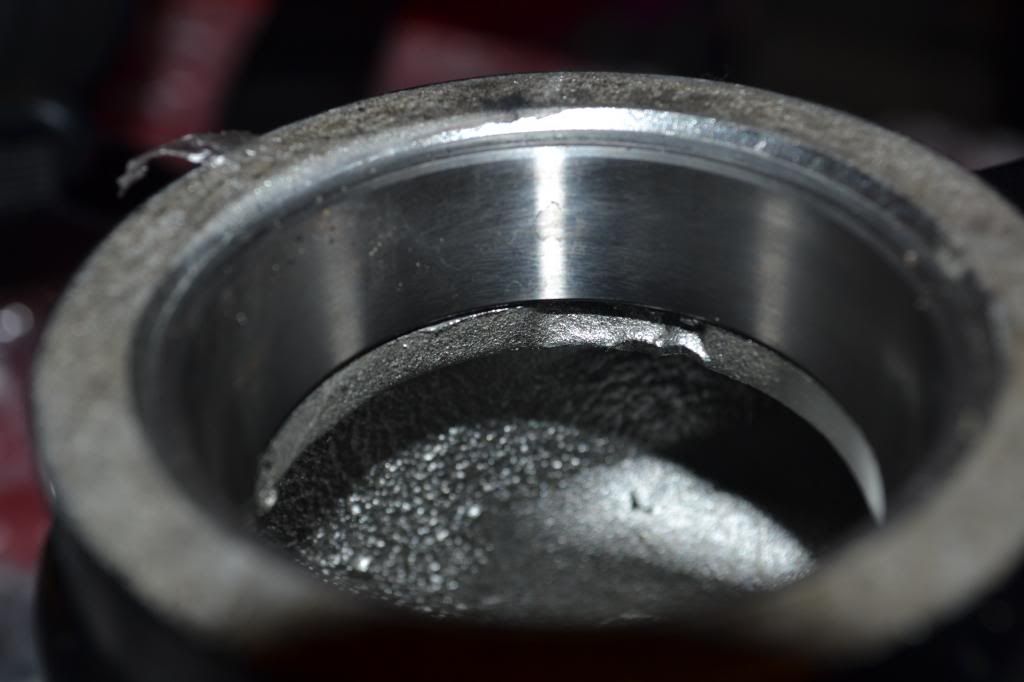
New outer race removed from headstock. Cleaned out. The race is in the freezer, and I'll try again Thurs with a threaded rod puller I put together with the headstock heated.
Frame on the bench ... was VERY f kING CAREFUL hammering out the race so as not to damage the powder coat. Bubble wrap wrapped in old curtains ;D
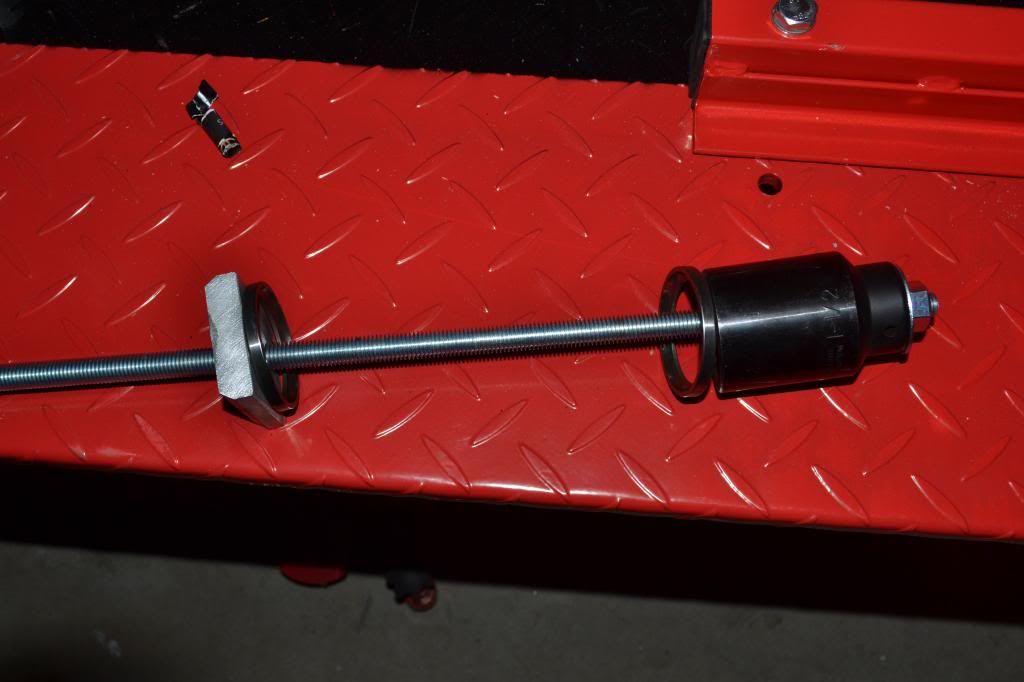
Ad-hoc drawbolt from a threaded bar I'll be using to seat the race on Thursday without having to hammer the dam thing in.
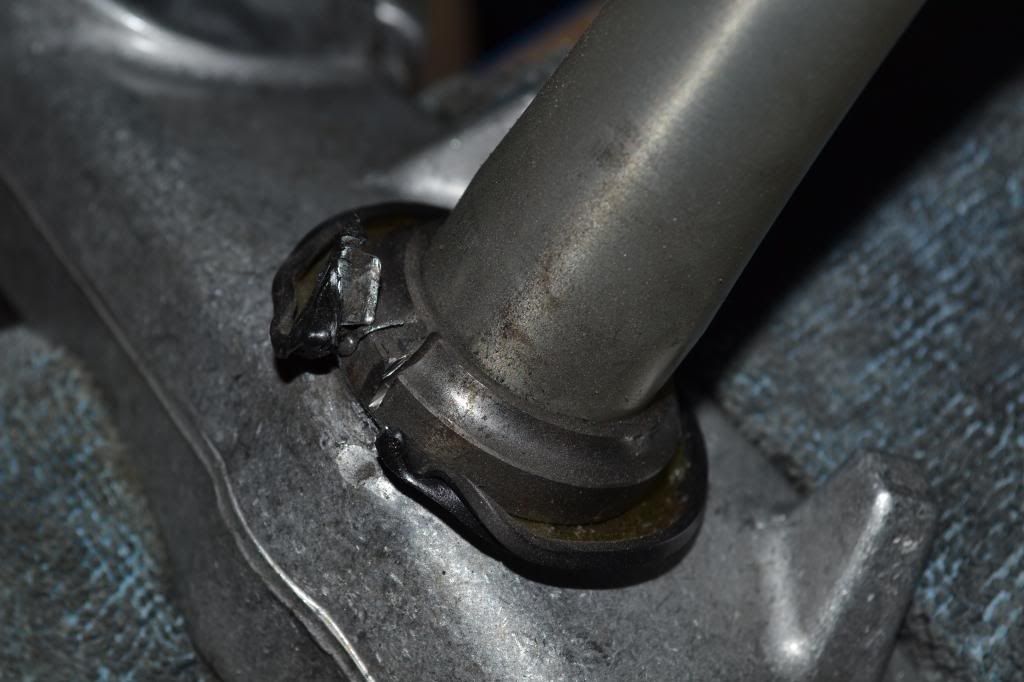
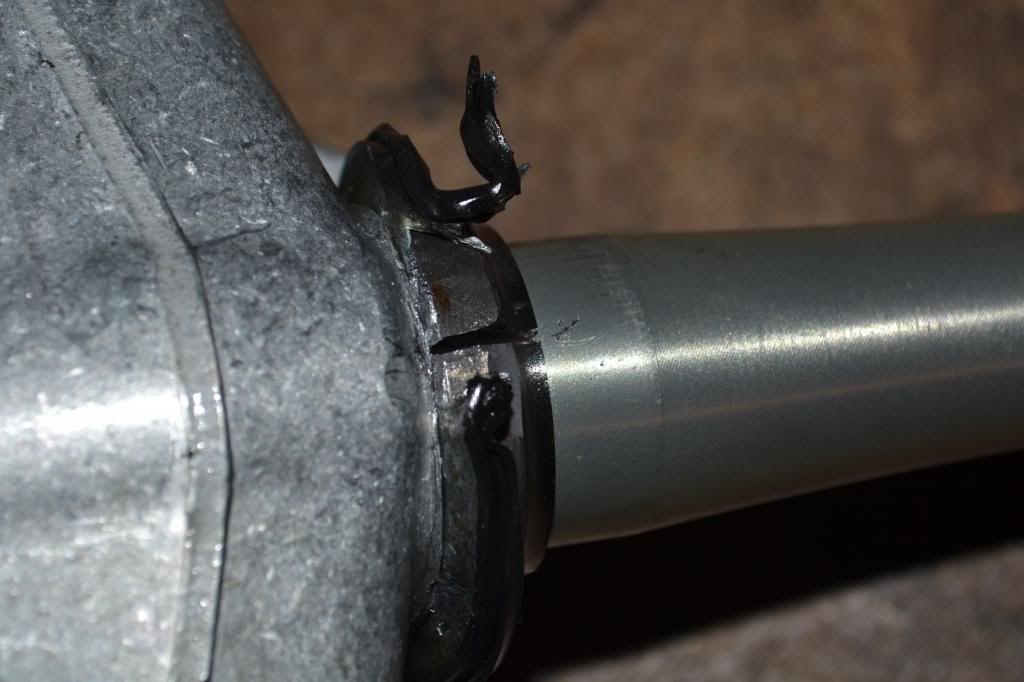
Also had great fun removing the old inner race from the headstock. Much fun was had with the Dremel
Next .......... new inner race back on frame and then rebuild the triple clamps with new bearings and mount.
New outer race removed from headstock. Cleaned out. The race is in the freezer, and I'll try again Thurs with a threaded rod puller I put together with the headstock heated.
Frame on the bench ... was VERY f
kING CAREFUL hammering out the race so as not to damage the powder coat. Bubble wrap wrapped in old curtains ;DAd-hoc drawbolt from a threaded bar I'll be using to seat the race on Thursday without having to hammer the dam thing in.
Also had great fun removing the old inner race from the headstock. Much fun was had with the Dremel
Next .......... new inner race back on frame and then rebuild the triple clamps with new bearings and mount.


Spring & linkages were sent along with rear axle, swingarm axle, rear hub and triple clamps to TSR Vapour Blasting Services - Home who did an amazing job
Before:

Before:


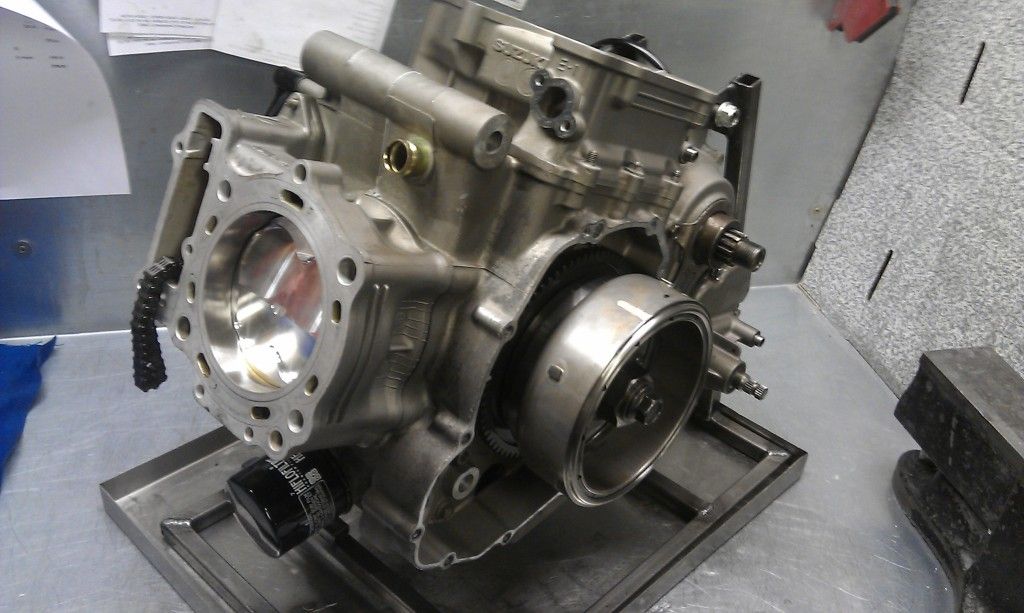
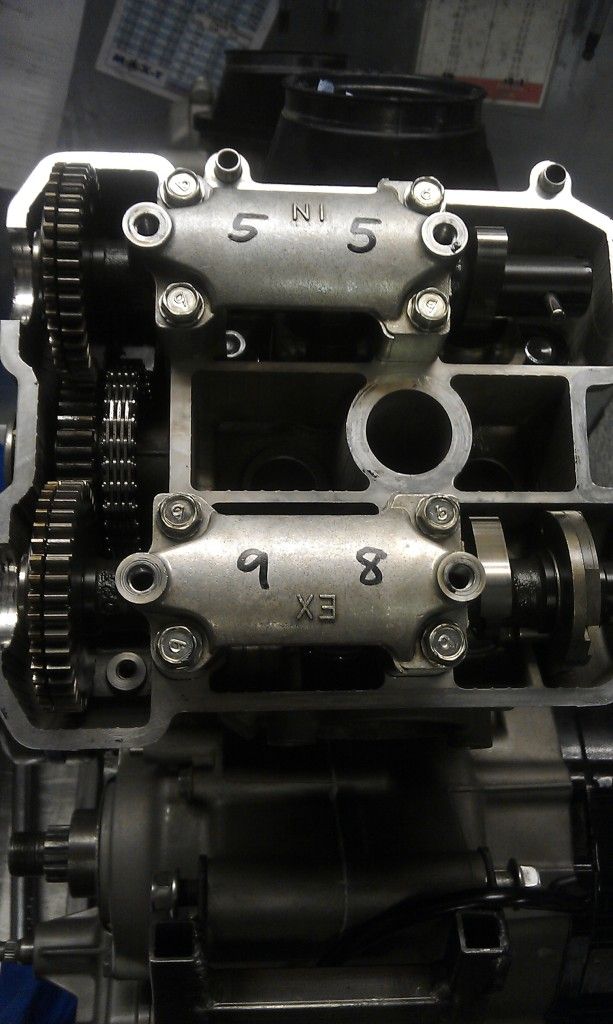
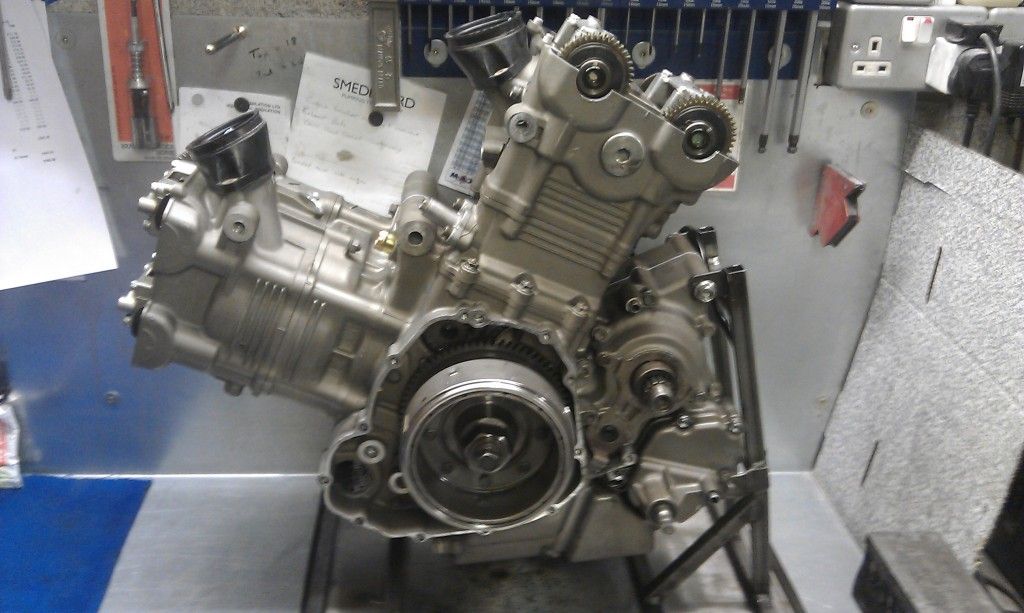
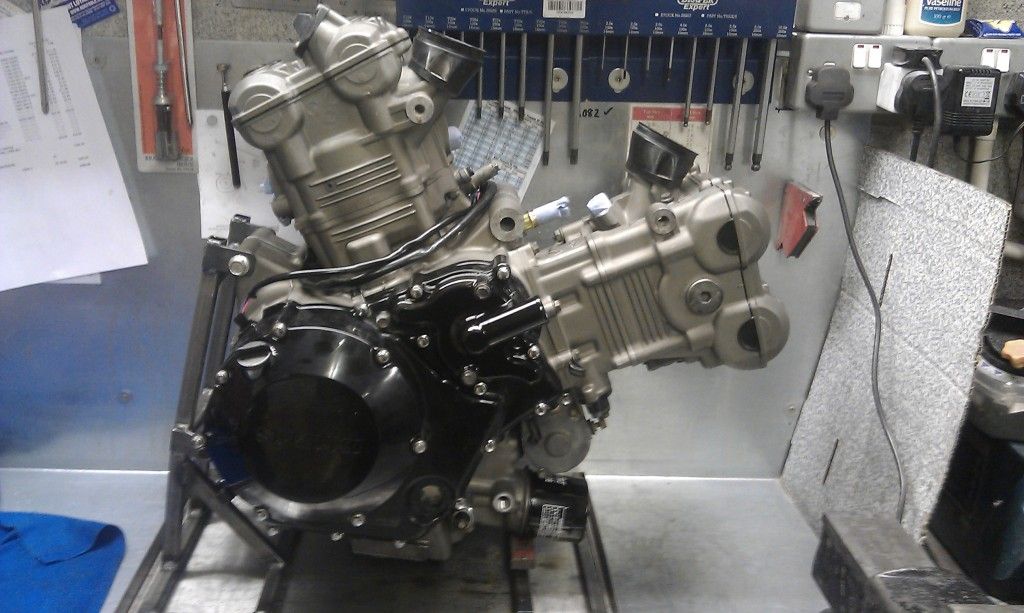
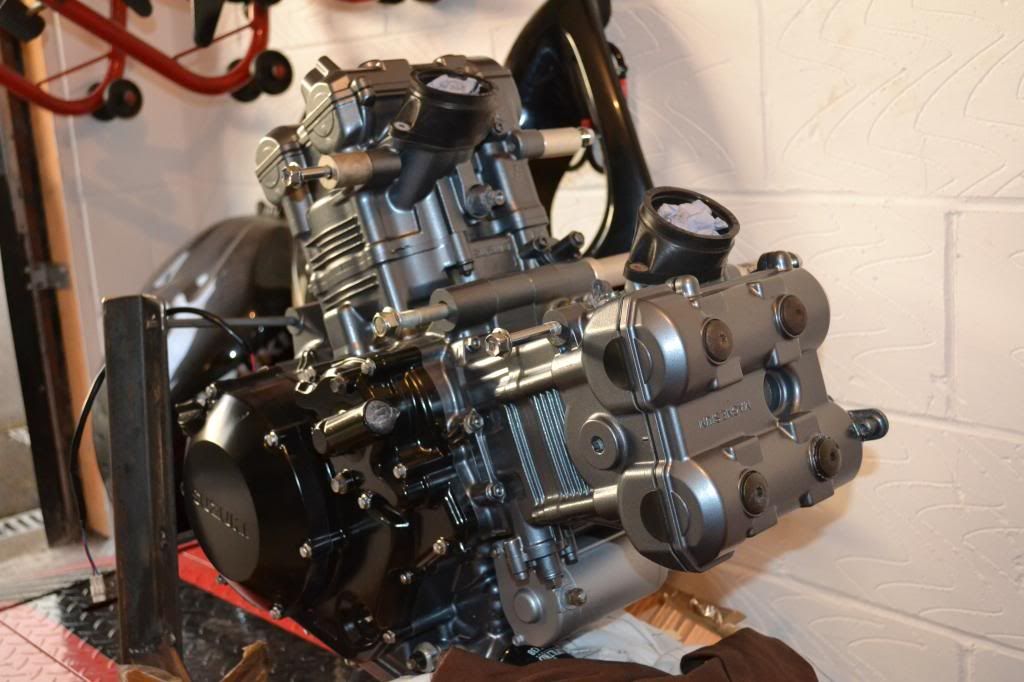
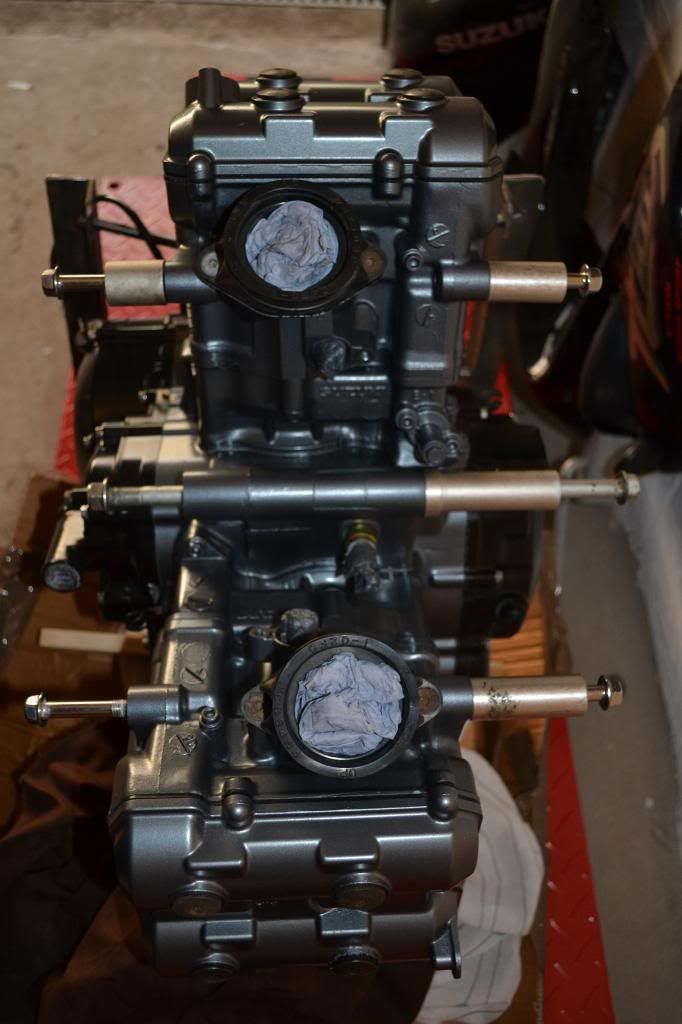
Now then. Got engine back nicely painted.

Current plan to refit is ........ use this shelf ... take top one off and ...
Lay length ways underneath the frame. Use straps to lift headstock up and place the engine on the shelf under some memory foam sheets to protect. Then I'll lower the frame down onto the engine and get the key bolts in. Best laid plans and all that. Give it a go and see what happens
For all the fking photos I took what I didn't do is take a photo of how the mounting bolts fit so I'm having to play about to see what looks the most obvious. Bugger. ;D


Current plan to refit is ........ use this shelf ... take top one off and ...

Lay length ways underneath the frame. Use straps to lift headstock up and place the engine on the shelf under some memory foam sheets to protect. Then I'll lower the frame down onto the engine and get the key bolts in. Best laid plans and all that. Give it a go and see what happens

For all the f
king photos I took what I didn't do is take a photo of how the mounting bolts fit so I'm having to play about to see what looks the most obvious. Bugger. ;D


So .....
Dug out clip ons ..
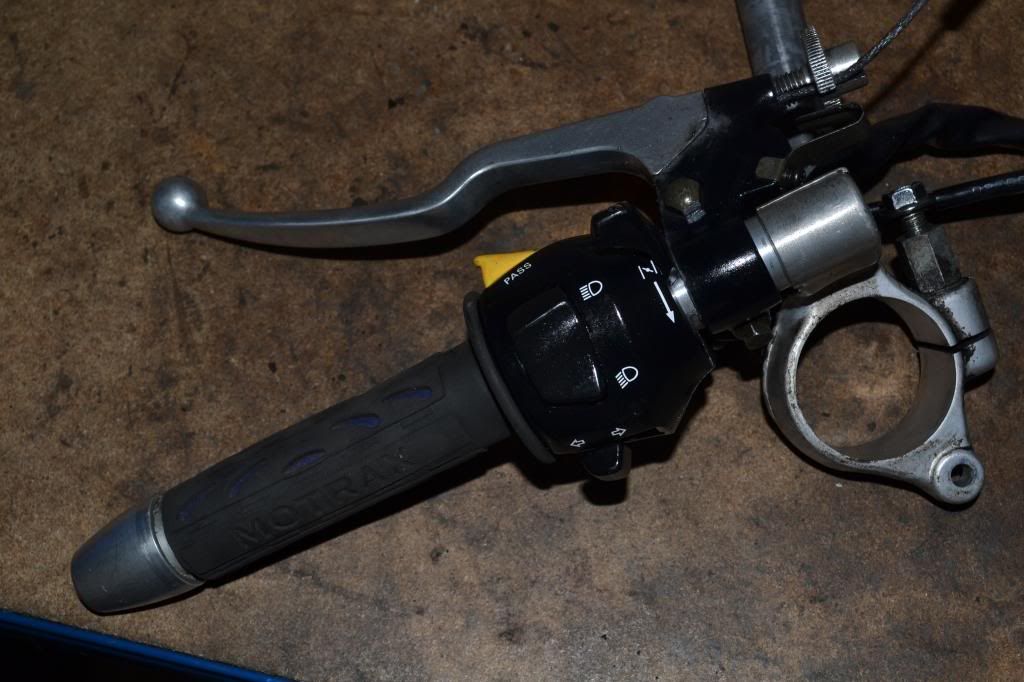
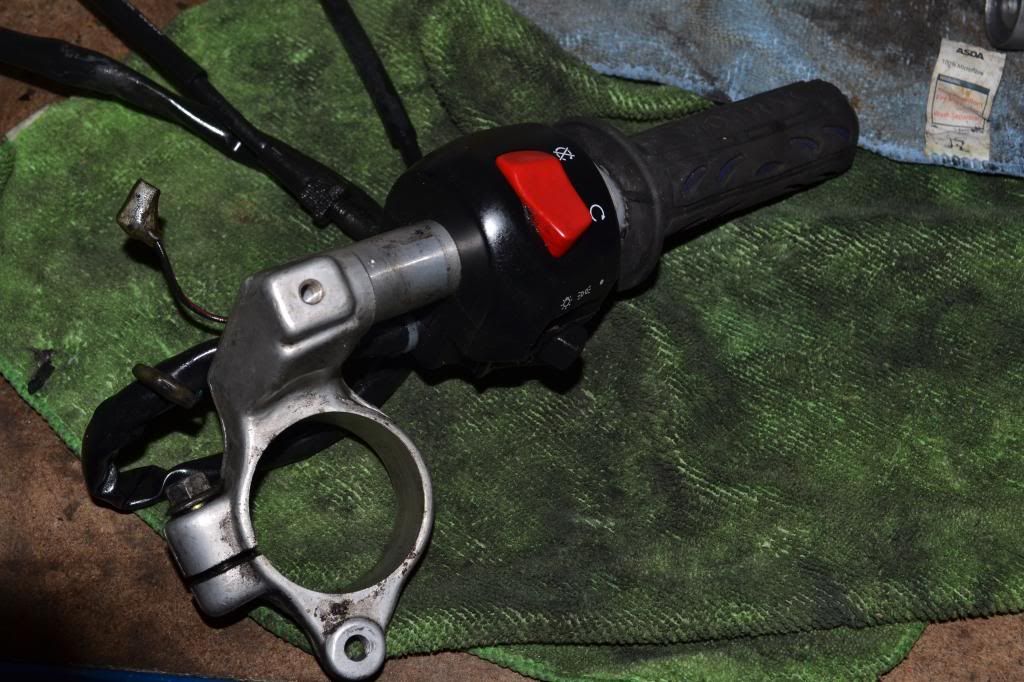
Manky. Stripped and cleaned the bars.
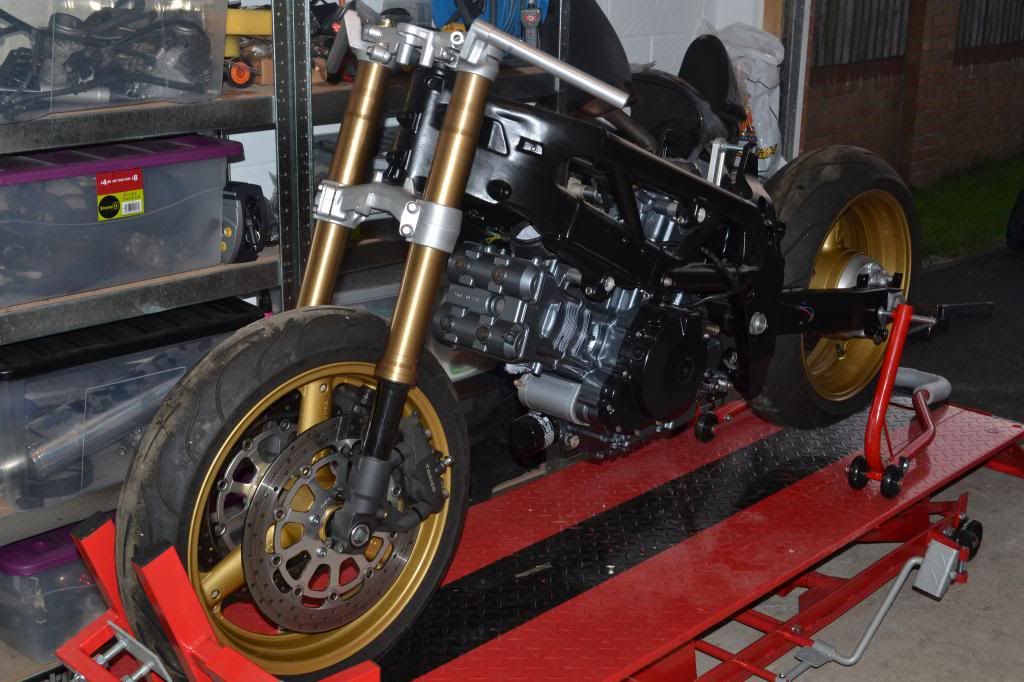
Fitted to forks.
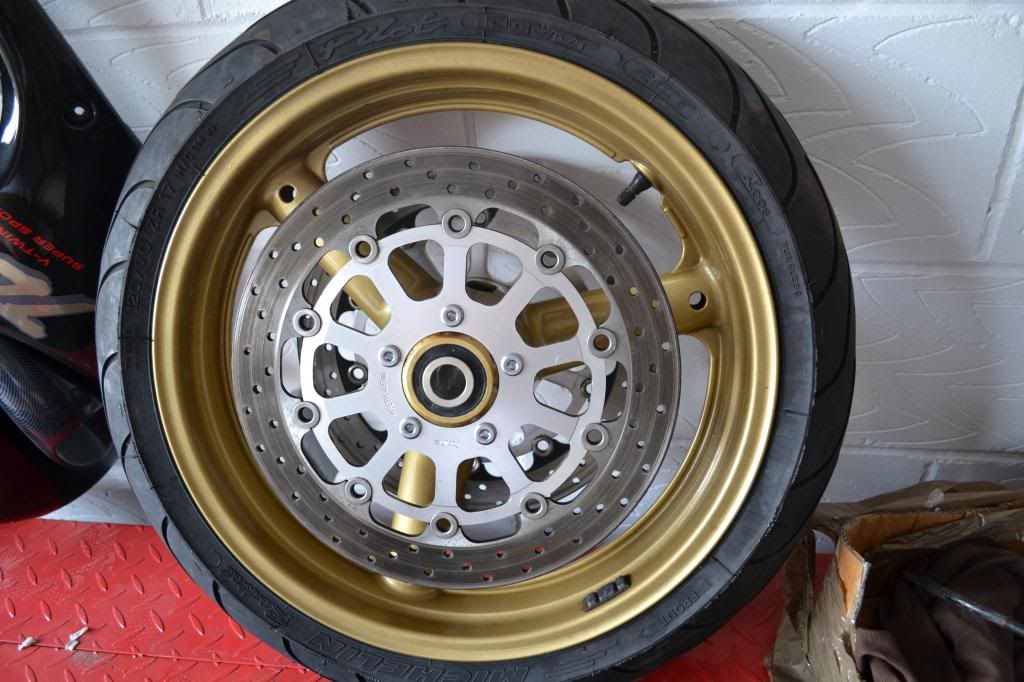
Then got front wheel. So we have TL wheel, discs and yoke. And we have 08-12 busa forks & calipers. Ordered a fitting kit which includes a washer thing between discs and wheel to push them out by 3-4mm so discs slot into busa calipers, and some extentions that seat the calipers 4 mm further out so they fit the discs from the TL.
Put together and torqued the sexy new disc bolts on.
Dug out clip ons ..


Manky. Stripped and cleaned the bars.
Fitted to forks.
Then got front wheel. So we have TL wheel, discs and yoke. And we have 08-12 busa forks & calipers. Ordered a fitting kit which includes a washer thing between discs and wheel to push them out by 3-4mm so discs slot into busa calipers, and some extentions that seat the calipers 4 mm further out so they fit the discs from the TL.
Put together and torqued the sexy new disc bolts on.

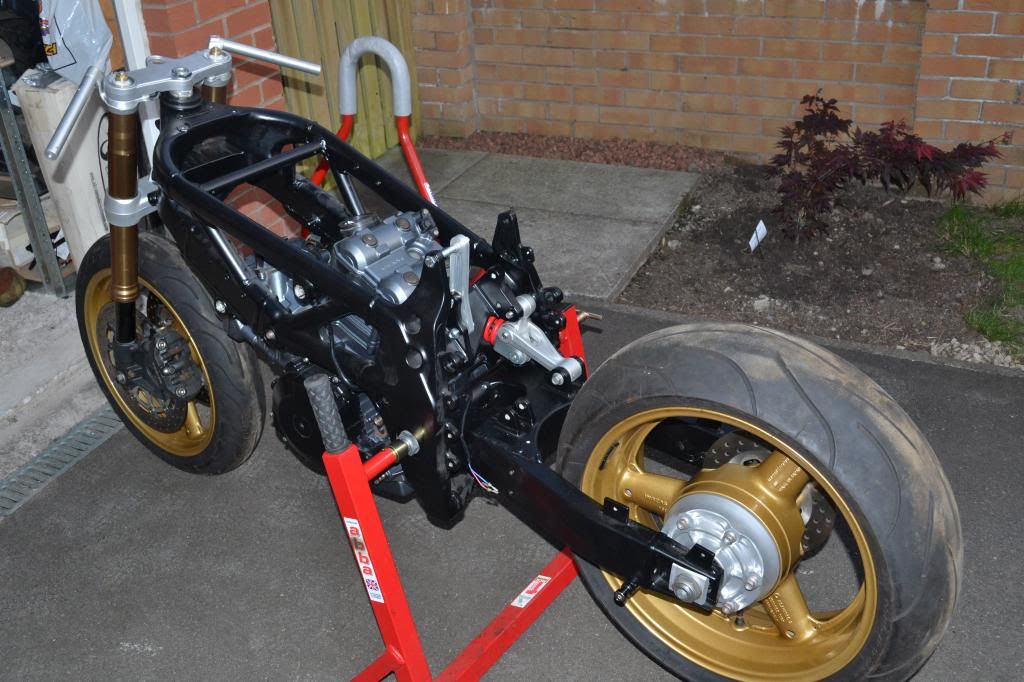
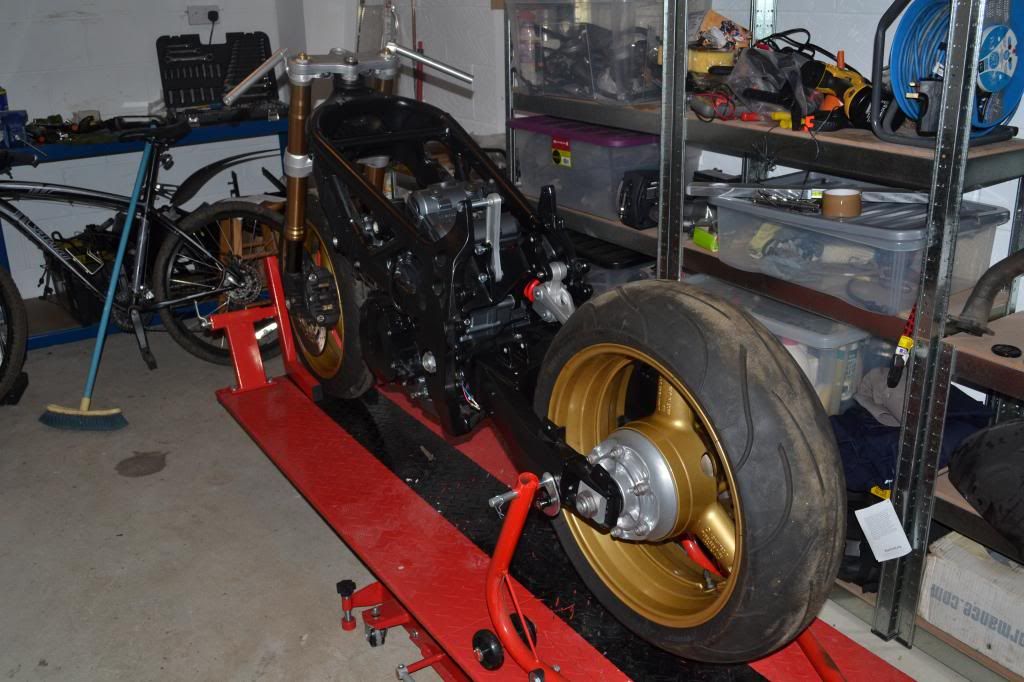
Fired the wheel in.
Calipers on and it all fits perfect.
Fired on rear wheel and it rolled out the garage for the first time in 2 years. Wahoo.

Fitted the mount for the ohlins shock. Waiting for a few bolts .... but next steps are ...
- fit rear cyclinder exhaust port thing
- fit Ohlins
- fit thermostat, coils
- fit rear sub frame
- fit wiring look
Calipers on and it all fits perfect.
Fired on rear wheel and it rolled out the garage for the first time in 2 years. Wahoo.


Fitted the mount for the ohlins shock. Waiting for a few bolts .... but next steps are ...
- fit rear cyclinder exhaust port thing
- fit Ohlins
- fit thermostat, coils
- fit rear sub frame
- fit wiring look


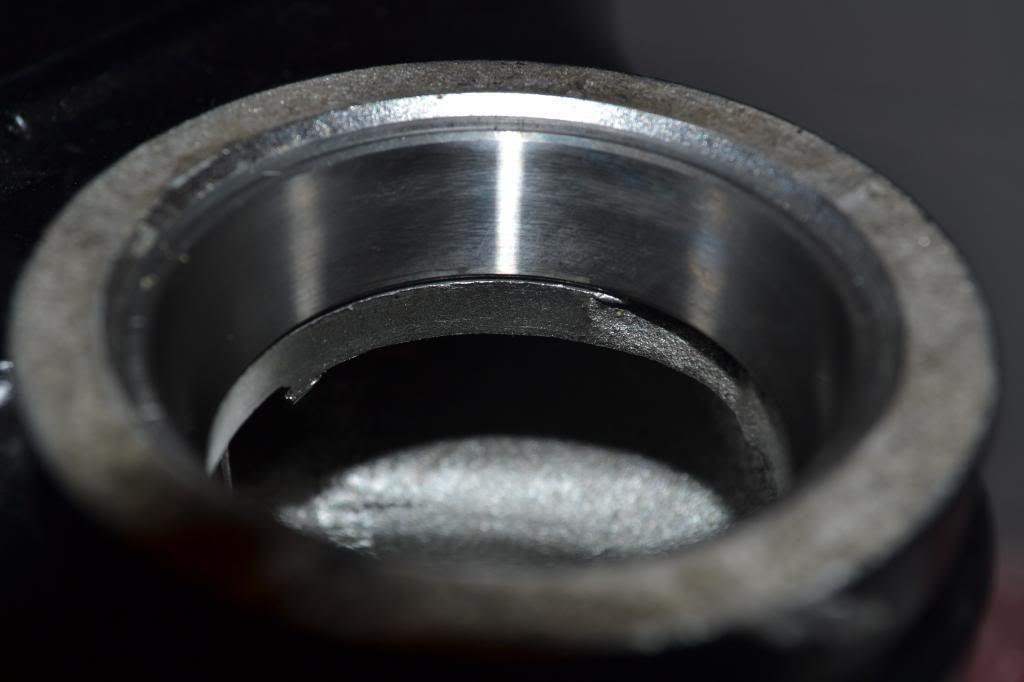
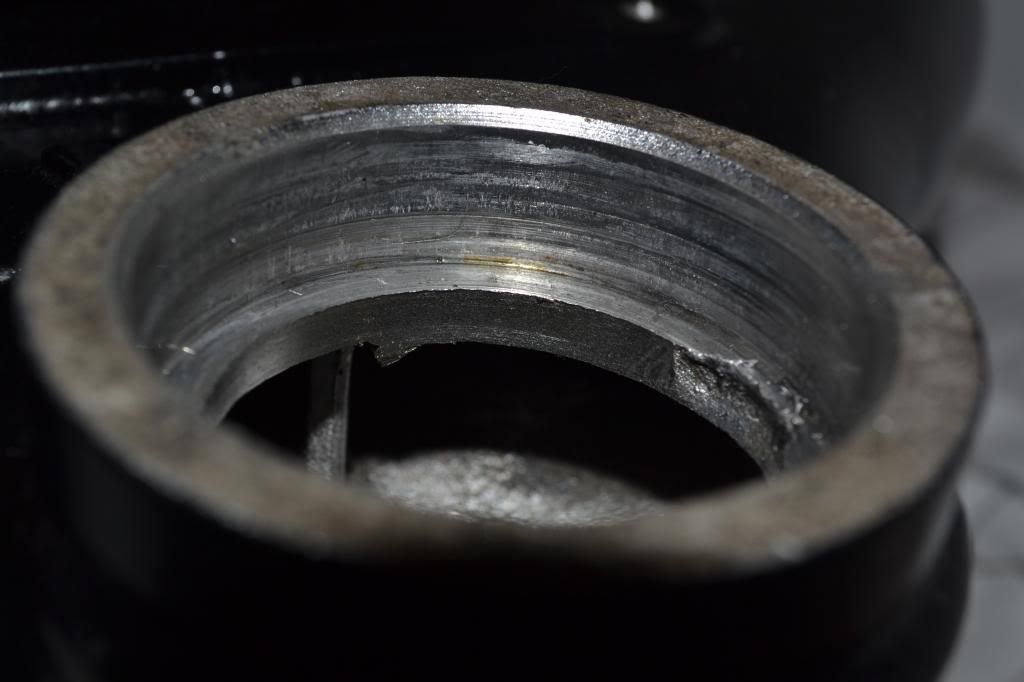
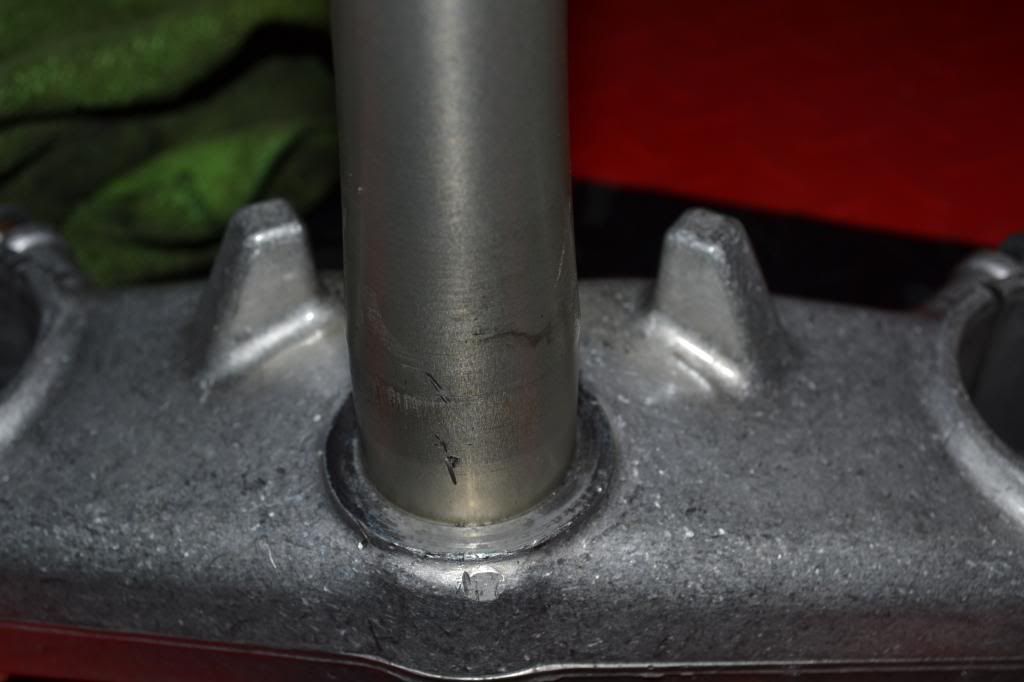
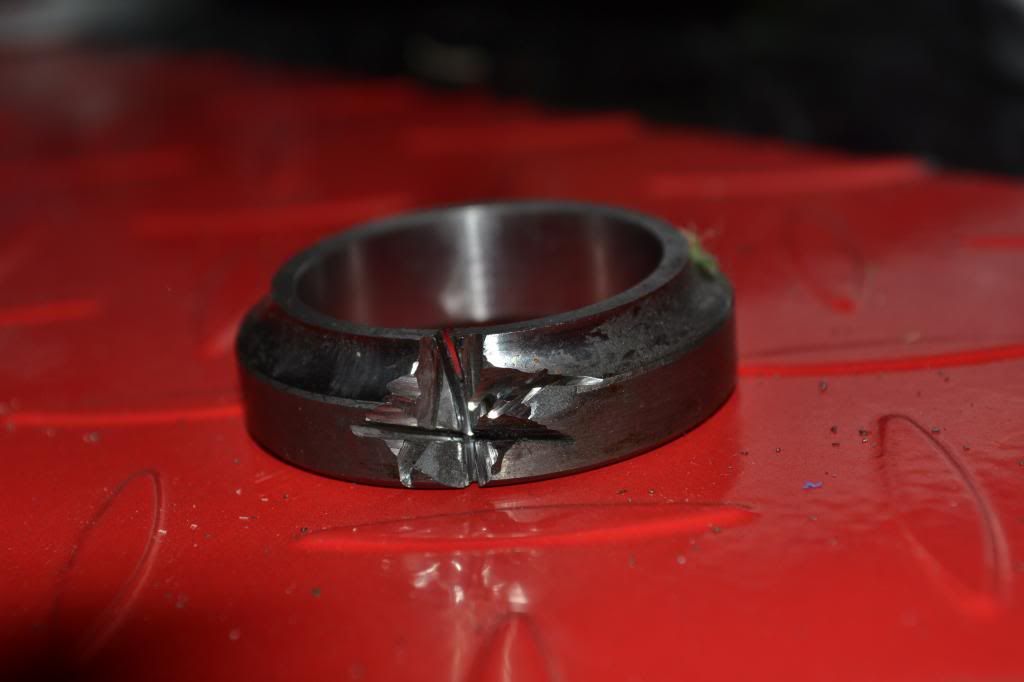
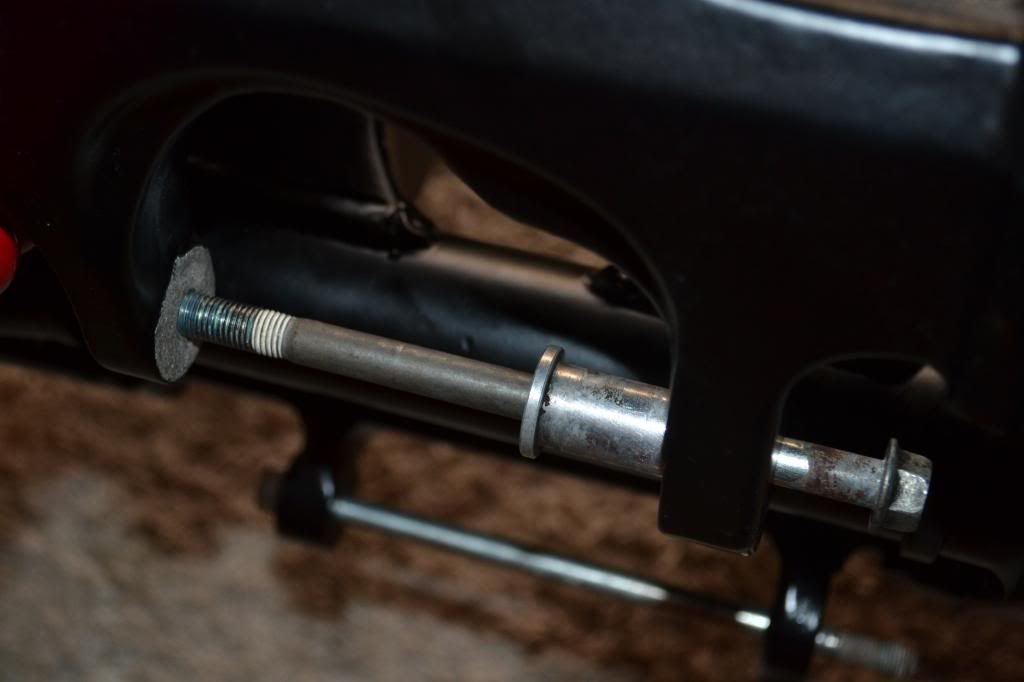
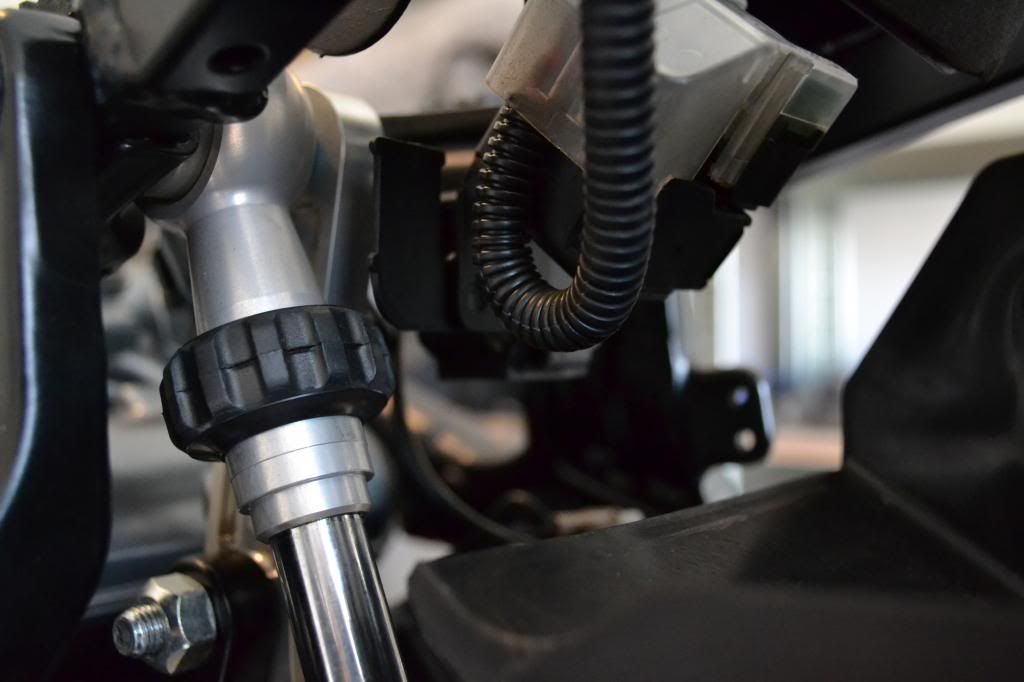
Next PITA that is confusing me is the mounting points for the rear shock on the swing arm.
Replacing the rotary damper with an Ohlins unit. Ohlins instructions state use the same OEM bolt for the swing arm mount.
So pulled out the original bolts I pulled off the bike and it didn't fit. First thought is it's the wrong bolt and I've lost it somehow. So I order a new one and a nut from part number on the microfiche...
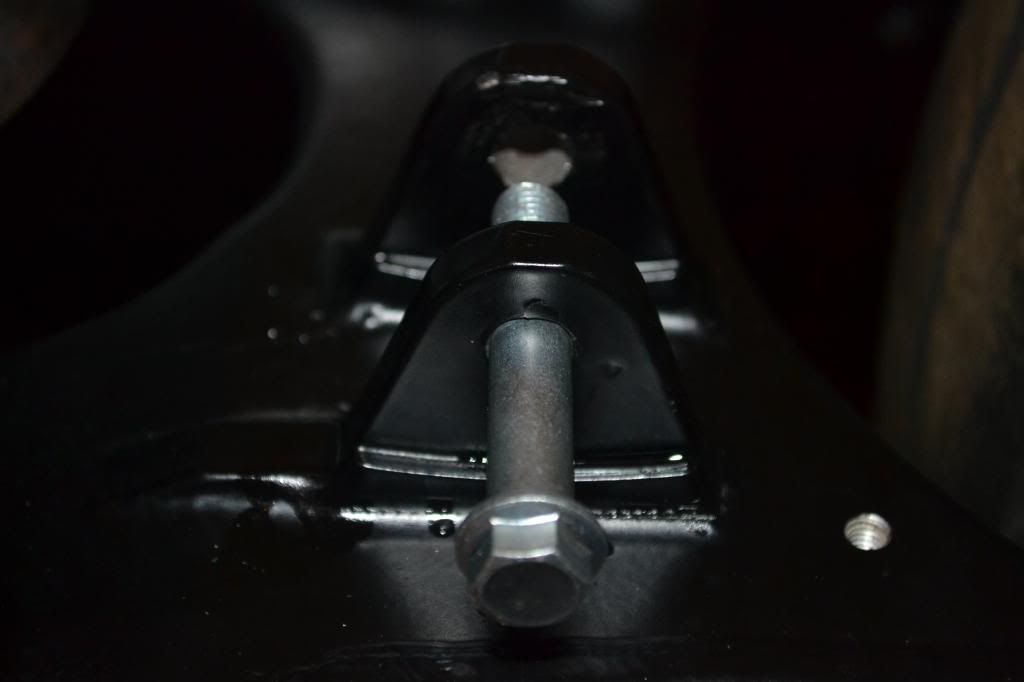
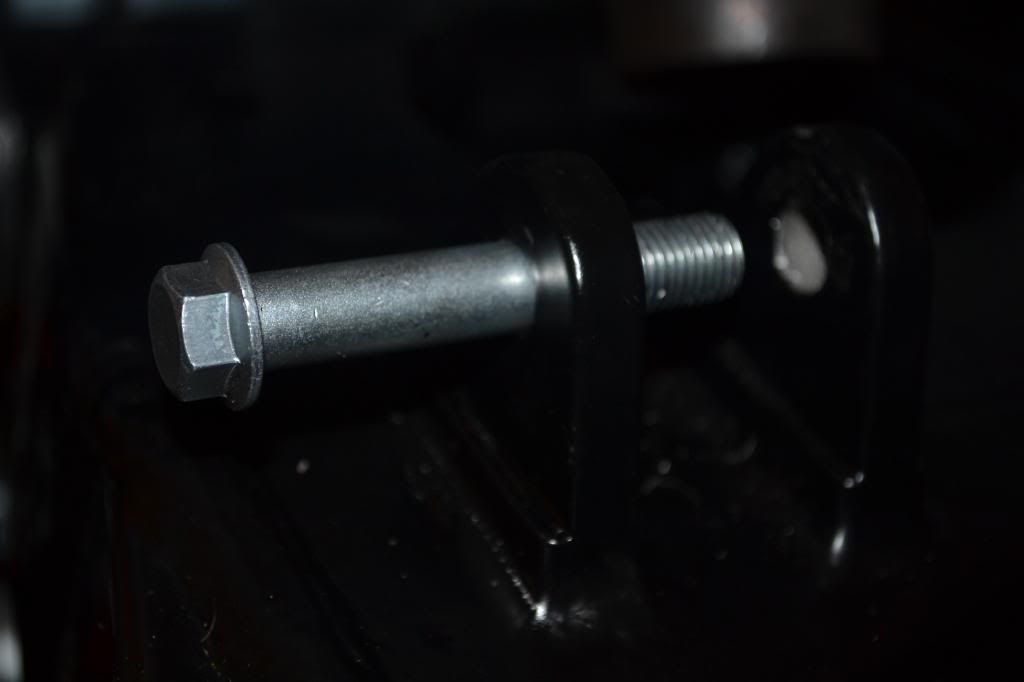
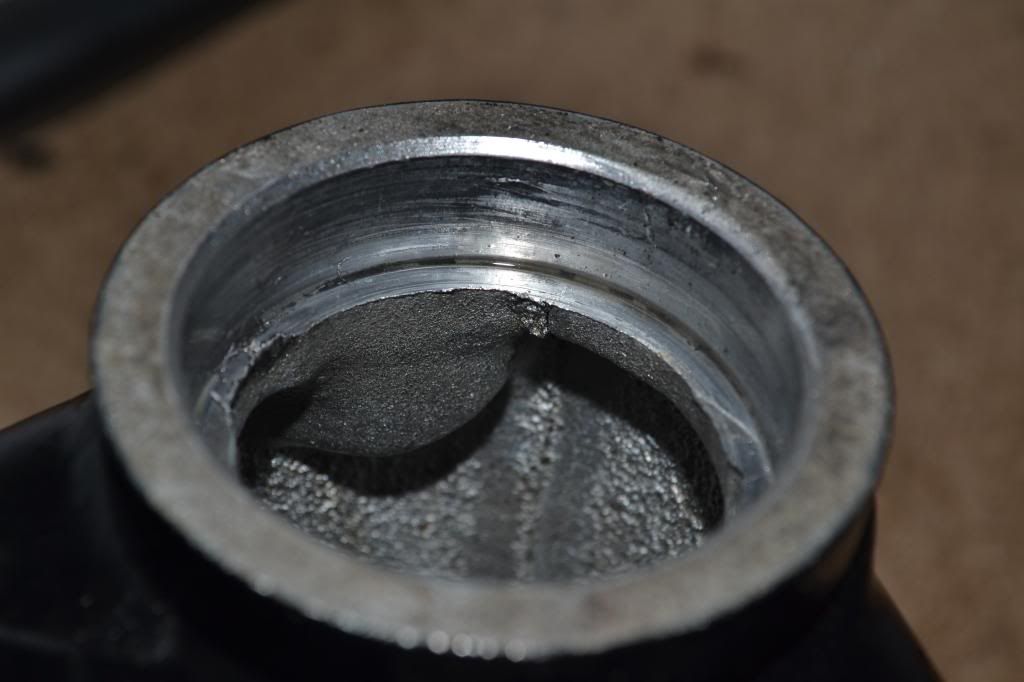
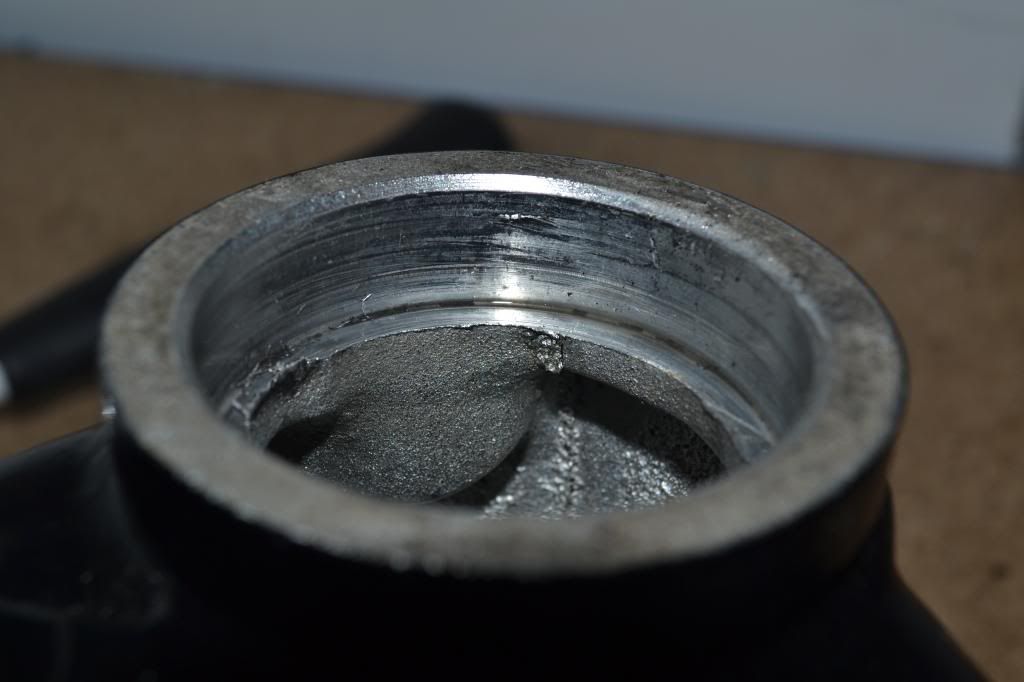
That's how far in it goes with some soft tapping from a mallet...... so I'm not scratching my head. I can see alloy in the gap so it's not powdercoated the inside, and I've scraped out the internal bits just incase.
hmmmmmmmmmmmmmmmmmmmmm Tempted to give it a proper wack with a hammer however I don't recall having to use a hammer to get it out.
Replacing the rotary damper with an Ohlins unit. Ohlins instructions state use the same OEM bolt for the swing arm mount.
So pulled out the original bolts I pulled off the bike and it didn't fit. First thought is it's the wrong bolt and I've lost it somehow. So I order a new one and a nut from part number on the microfiche...


That's how far in it goes with some soft tapping from a mallet...... so I'm not scratching my head. I can see alloy in the gap so it's not powdercoated the inside, and I've scraped out the internal bits just incase.
hmmmmmmmmmmmmmmmmmmmmm Tempted to give it a proper wack with a hammer however I don't recall having to use a hammer to get it out.


So .... had the full yoshi system. Emailed Yoshimura in California and they sent my a breakdown of the system with fitting instructions and all the part numbers / springs / etc.
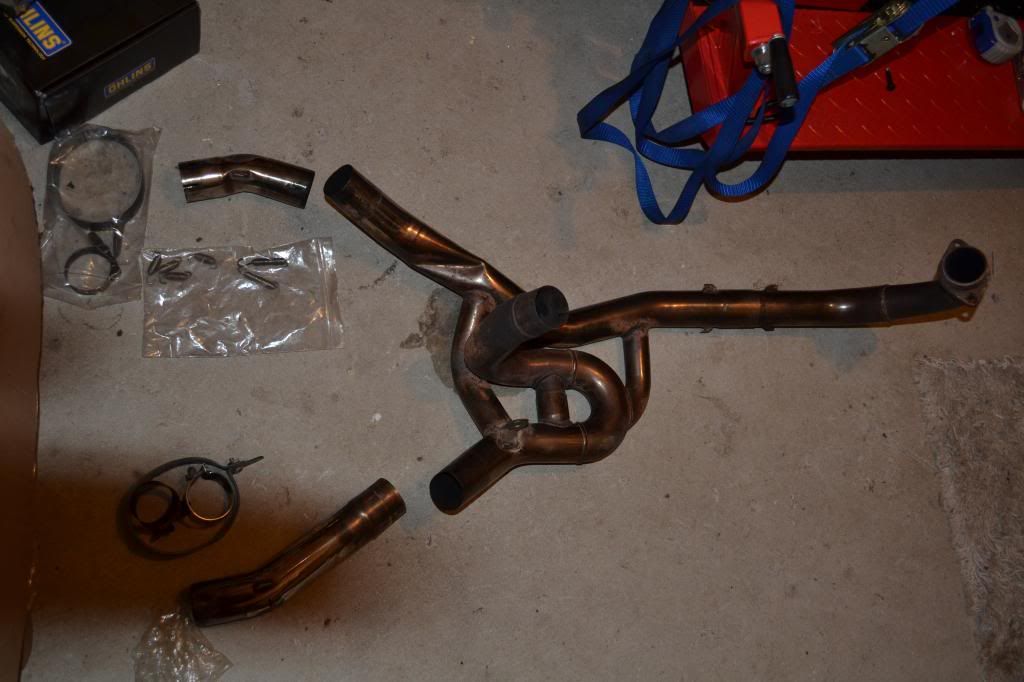
Sent them to a machine polisher in glasgow who managed to get rid of virtually all the scrapes/scratches crash damage and buffed it up. Turned out perfect. So got some new clamps online, some new OEM bolts and fired it on. Must admit it sits very tight with the rest of the bike. Just need to order some springs from Yoshi which I can do at a later date.


Sent them to a machine polisher in glasgow who managed to get rid of virtually all the scrapes/scratches crash damage and buffed it up. Turned out perfect. So got some new clamps online, some new OEM bolts and fired it on. Must admit it sits very tight with the rest of the bike. Just need to order some springs from Yoshi which I can do at a later date.

I haz a slight issue with the tank mounting fitting with the new Ohlins shock in place.
So ...... here is the top of the ohlins mount. Previous rotary damper fitted a lot lower.
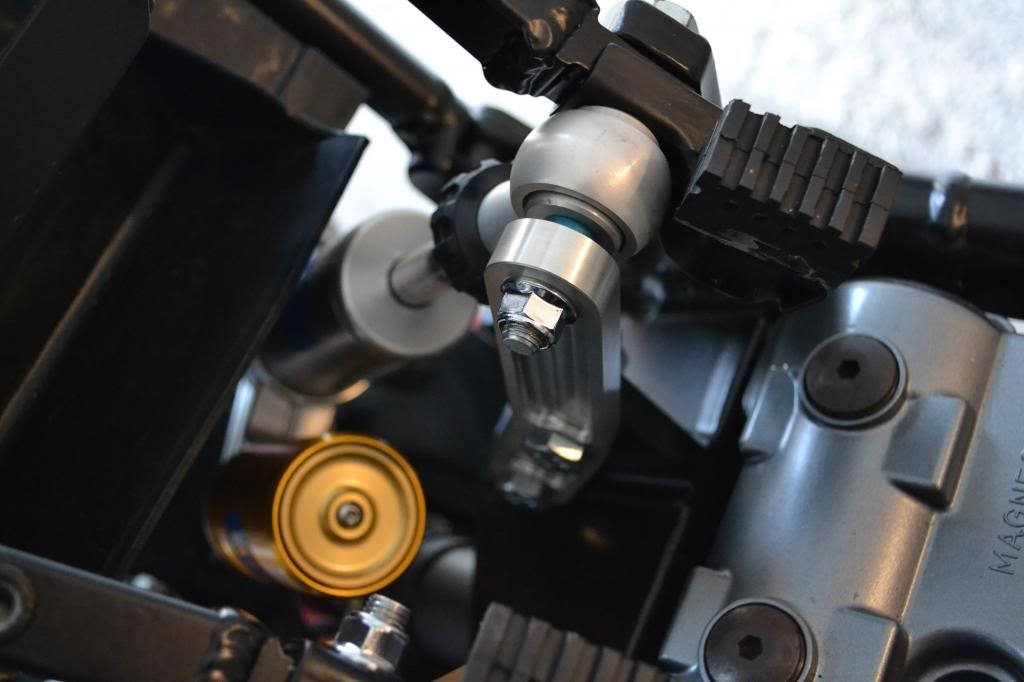
And here's the bracket I need to fit just up from it.
And here it is from the top with the mount on. As you can see the vacuum bit on the bracket is touching and is pushed slightly to the right, which can't be right. I think I still require this so really just trying to figure out how to remount. Right now seems the best option would be to cut off the end of the mount and attach it to the right of the remaining mount, so shifting it slightly off centre. Or anyone got any better ideas?
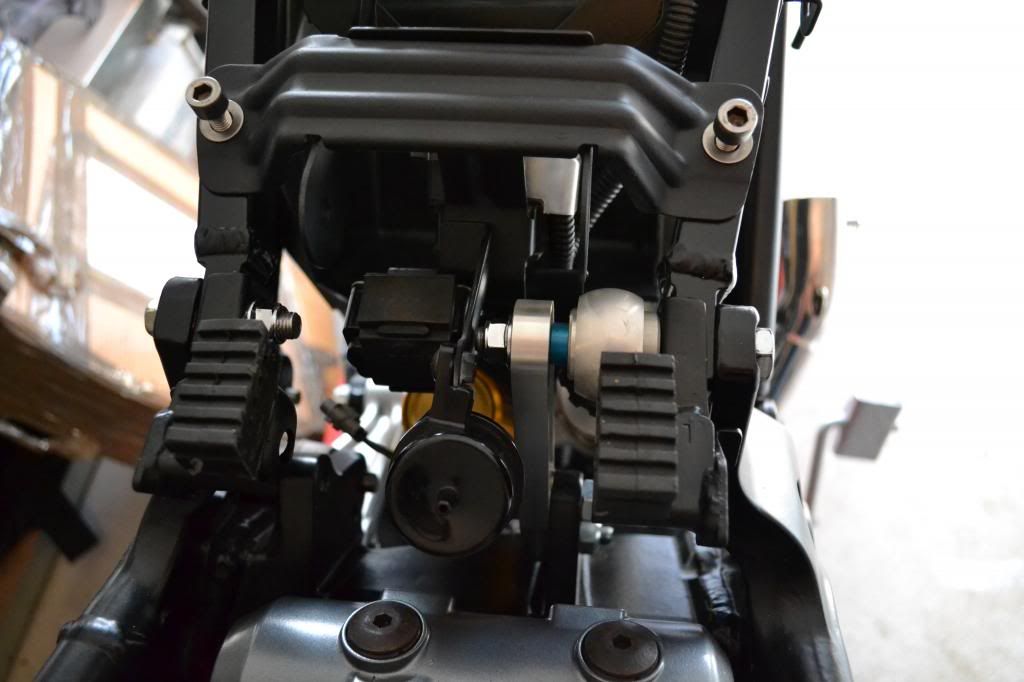

Here's the bottom view, again there seems to be an unused mount just that little but close th eht top of the shock, nothing seems to be hanging from this so I can remove easy enough.
It's a bit pish the Ohlins needs mods to the bike to fit.
So ...... here is the top of the ohlins mount. Previous rotary damper fitted a lot lower.

And here's the bracket I need to fit just up from it.

And here it is from the top with the mount on. As you can see the vacuum bit on the bracket is touching and is pushed slightly to the right, which can't be right. I think I still require this so really just trying to figure out how to remount. Right now seems the best option would be to cut off the end of the mount and attach it to the right of the remaining mount, so shifting it slightly off centre. Or anyone got any better ideas?


Here's the bottom view, again there seems to be an unused mount just that little but close th eht top of the shock, nothing seems to be hanging from this so I can remove easy enough.

It's a bit pish the Ohlins needs mods to the bike to fit.
Gassing Station | Biker Banter | Top of Page | What's New | My Stuff