
My garage build
Discussion


Wee update til I get more uploaded
Blockwork nearly finished, took two brickies 2 days to complete the garage.
Us setting the lintel


Wee lintel over the side door

Didn't get any photos of the roof going on but here it is.
Got the fascias on at this point as well


Tiles arrived


Once the brickie had finished the garage I got him to finish the copes for the wall. These were yorkstone 300x600 slabs I used.


Will get more pics fired up tomorrow
Blockwork nearly finished, took two brickies 2 days to complete the garage.
Us setting the lintel
Wee lintel over the side door
Didn't get any photos of the roof going on but here it is.
Got the fascias on at this point as well
Tiles arrived
Once the brickie had finished the garage I got him to finish the copes for the wall. These were yorkstone 300x600 slabs I used.
Will get more pics fired up tomorrow
RichB said:
OOI why did you align the pitch of the roof opposite to your neighbours?
I already had the offer of trusses which were the same size for a 5m depth which I got super cheap so purely based on that.CoolC said:
Love these types of threads. It should be a nice little man-cave when done.
What plans do you have for the interior?
Interior walls will be painted white and I'm not sure what to do with the floor yet. Any ideas? I'm looking at floor tiles from the likes of Racedeck etc Anyone have any experience of these?What plans do you have for the interior?
More pics
Tiles going up


Nice tiled roof

Bellcast bead all set for the roughcaster


Materials for roughcasting

Was working the next few days solid so didn't have any 'work in progress pics'
Here it is all finished with snow chips


Roughcasters are a messy trade

More pics on the way
Looks good. Similar to what I'm hoping to start again when the weather turns. I've leveled my garden using sleepers. Found 50 sticks of dynamite whilst digging the trench for them lol. Blocked through bit near the house and dug a ton of trees out. Hoping for a 20 foot by 16. Got to start leveling and digging. The foundations. Also want a pit for easy servicing etc.
Also looking forward to the costings. Keep the pics coming. Pitched roof for storage win!
Also looking forward to the costings. Keep the pics coming. Pitched roof for storage win!
mattdaniels said:
calum_ek said:
Yup, that'd be a bit much if the garage took up the whole back garden!
Go and sit in the PH corner and think about what you've just said there. 

ETA: Moving on at quite a pace... if only my house was being built as quickly!
Edited by 5potTurbo on Tuesday 6th November 14:08

nails1979 said:
I've leveled my garden using sleepers. Found 50 sticks of dynamite whilst digging the trench for them lol
I read that as levelled the garden using dynamite. That would've been cool!King Herald said:
I naturally though it was going to, from the early photos, but then it was explained otherwise.... 
Aye would've been an awesome garage that, shame the missus wanted some grass left Anyway, more pics
Put up a board ready for the main electric unit

Strip lights up. Got these for free, saved a couple hundred pound, woohoo!


The side door used to be the back door of a house, acquired this for free as well saving more £££

Gotta have drainage

This was the existing manhole in the drive, it was covered by a 3'x2' 3" thick reinforced slab! Dunno why someone used that as a cover but it took some lifting myself! Changed it for a normal 2x2 so I could lift it easier


Modified this slightly with a 90degree bend pointing down into the drain.

Re cemented the pipe in where it breaks through the brickwork in the manhole to stop any debris falling in there. Filled in the trench at this point

Mess!

Time to sort out the driveway and the drainage
Aco drain channels set in concrete along the front of the garage and edgings set for the driveway.


Drain set in place just under the level of the edgings


Looking like a tip here

Next up, driveway pics!
Looks like this has been planned for a while. Really lucky with your access to drainage and the proximity of the house for electric too. Probably going to have to dig a soakaway for mine as dont think theres any drains where mines going..
Didnt think this far ahead with mine. I wired in outside sockets but didn't plan forthe garage wiring. Will have to take upstairs carpets and run from my meter through the flooring to outside. Although I have an option of running 3 phase as close to the lines. Don't know how much they'd cost to do that as Id have to get people in.
What kind of door are you fitting? Roller?
Didnt think this far ahead with mine. I wired in outside sockets but didn't plan forthe garage wiring. Will have to take upstairs carpets and run from my meter through the flooring to outside. Although I have an option of running 3 phase as close to the lines. Don't know how much they'd cost to do that as Id have to get people in.
What kind of door are you fitting? Roller?
nails1979 said:
Looks like this has been planned for a while. Really lucky with your access to drainage and the proximity of the house for electric too.
What kind of door are you fitting? Roller?
Yup, as soon as I bought the house I always had in mind that I was going to dig out the garden and build the garage so been a few months in the making.What kind of door are you fitting? Roller?
Roller door is going on soon, will get pics of that uploaded in the meantime.
More pics
Painting the inside
Before

During


1st coat down

2nd coat finished a week later

Only learned one thing doing this. Painting breeze blocks is a nightmare and I hate it! Should probably have sealed it first so I didn't use so much paint but hey-ho, learning experience and all that.
So this is how it looked as of 2 weeks ago

I decided to dig up half the front garden to have a turning area in the driveway. Front doesn't get used, no sun and too close to the road so would be better as being driveway


Digger's back!


Started by scraping out the driveway in preparation for hardcore


Old tar all lifted


You can see where the original tar level was so there was only about 1" of hardcore + about 20mm of crap tar! Cowboys!
This was scraped out a further few inches


Front dug out


First layer of type 1 hardcore going in


After all this was whacked down, another layer was poured. Nearly 40 tons of hardcore went in.
Didn't get much photos of sand going in as I was working Nightshifts.


Blocks arrived

Edging set and pavement re tarred


Blocks being laid, I decided to go for brindle mono locks with a charcoal edge


Pretty chuffed how it looks when it's all laid, looks like a proper driveway now!
Will get more fired up later

Cheers for the comments
 good job it was on offer at B&Q!
Anyone have any ideas what I could do for the floor? Paint? Floor tile? etc
5potTurbo said:
Looks like a great job!
We've had enough posts about painting garage interiors recently, so you failed to check those.
Only after 30 litres of emulsion We've had enough posts about painting garage interiors recently, so you failed to check those.
good job it was on offer at B&Q!nails1979 said:
Are you not boarding the roof inside?
Dont know yet. Might plywood over the trusses so that I can store stuff up there but I probably wont board the whole lot for a ceiling.Anyone have any ideas what I could do for the floor? Paint? Floor tile? etc
calum_ek said:
Dont know yet. Might plywood over the trusses so that I can store stuff up there but I probably wont board the whole lot for a ceiling.
Anyone have any ideas what I could do for the floor? Paint? Floor tile? etc
I used Wickes grey garage floor paint. Thinned it down 50% so it would soak right into the pores of the concrete, then got one of the servants to apply it for me. Anyone have any ideas what I could do for the floor? Paint? Floor tile? etc
If you put it on neat it tends to form a layer on the surface and not grip too well. And being grey you hardly notice when you do scratch through it.
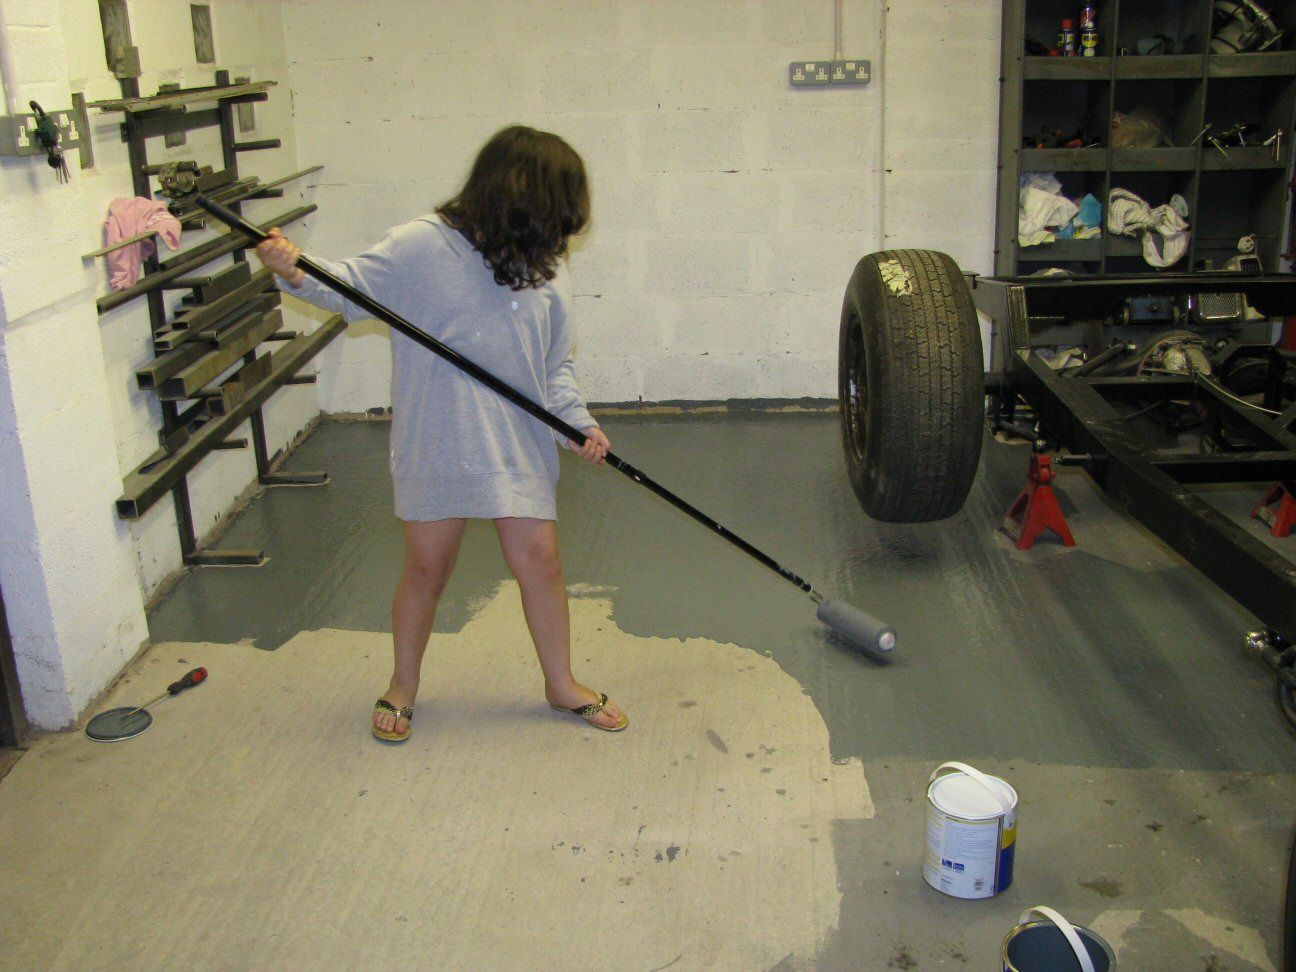
And being grey means you can't see primer over-spray on it either.

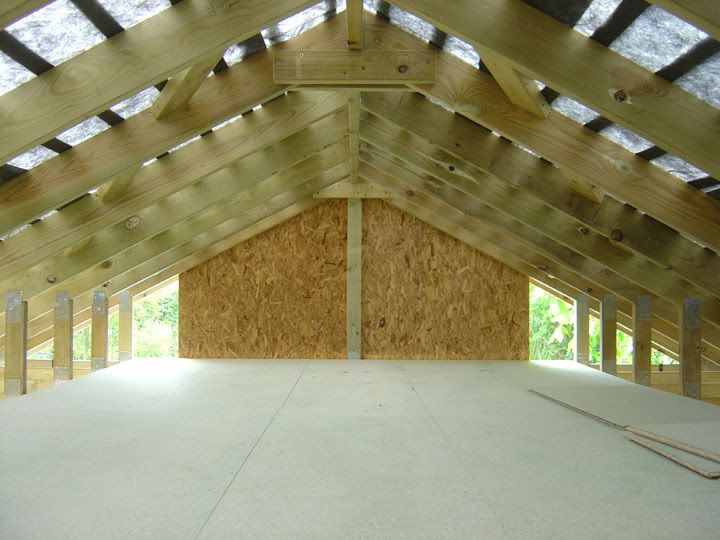
As for the loft, you have never got too much storage space. You have normal trusses, but you could still board it out and make lots of room to stash stuff. I built special 'box' trusses so I could get full access to mine.
Edited by King Herald on Saturday 10th November 14:23
Ref Garage Floor.
Paint is OK.
Tiles, rubber flooring etc is ok too, but expensive.
Personal solution would be to paint the whole floor as above.
But use a secondary floor covering, such as the click-together rubber tiles, in key areas - around your workbench and around any machine tools, areas where you will stand etc.
It will also help you differentiate between 'zones', such as a 'clean and tidy' area for your tools and storage, and a 'dirty' area where the car sits.
It sounds over the top, but it works - if you've ever been in any decently run factory, note all different markings on the floor, walkways, hatched off areas, different colours etc - it really helps to organise the place and you should be able to make best use of your space.
Finally - yes, board out the ceiling. I had this in my Parents double (about same size as yours) with a ladder up one side. A staircase would be even better! Massively increased storage space. Could use the understair area for your wash-up and tea station.
ETA - your doing a great job BTW I'm very jealous - having bought my own house this spring just gone i'd love to be able to do this next year, but the cost will likely be prohibitive. I've an awful 100ft long paving slab driveway, and a concrete pre-fab garage, with plenty of space for a lovely big double like yours.
Paint is OK.
Tiles, rubber flooring etc is ok too, but expensive.
Personal solution would be to paint the whole floor as above.
But use a secondary floor covering, such as the click-together rubber tiles, in key areas - around your workbench and around any machine tools, areas where you will stand etc.
It will also help you differentiate between 'zones', such as a 'clean and tidy' area for your tools and storage, and a 'dirty' area where the car sits.
It sounds over the top, but it works - if you've ever been in any decently run factory, note all different markings on the floor, walkways, hatched off areas, different colours etc - it really helps to organise the place and you should be able to make best use of your space.
Finally - yes, board out the ceiling. I had this in my Parents double (about same size as yours) with a ladder up one side. A staircase would be even better! Massively increased storage space. Could use the understair area for your wash-up and tea station.
ETA - your doing a great job BTW I'm very jealous - having bought my own house this spring just gone i'd love to be able to do this next year, but the cost will likely be prohibitive. I've an awful 100ft long paving slab driveway, and a concrete pre-fab garage, with plenty of space for a lovely big double like yours.
snotrag said:
Finally - yes, board out the ceiling. I had this in my Parents double (about same size as yours) with a ladder up one side. A staircase would be even better! Massively increased storage space. Could use the understair area for your wash-up and tea station.
A drop down stair is easy to make, and seemed like a good idea at the time, though there are drawbacks. If I did it again I'd try to put it against a wall, or somewhere not so central, so it is not in the way, as it is guaranteed you need to drop it down and go up it just when you have something big in the garage. Down:
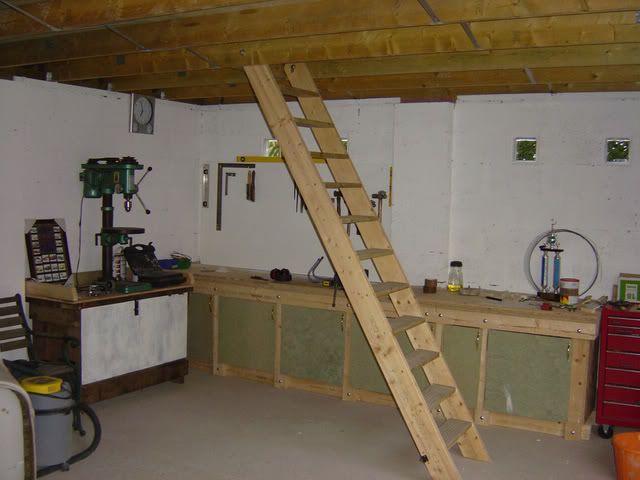
Up:

Gassing Station | Homes, Gardens and DIY | Top of Page | What's New | My Stuff