5 year TL1000s project - in one afternoon?
Discussion


Erm. Now then. Cut off that bracket and remounted.
Fitted wiring loom and had to fit the indicator relay on the other side of that mount I had to chop cause of the dam ohlins.

Then thought wtf am I going to do with these minging fuel injectors ...

Decided to send the off for some professional ultrasonic cleaning and they came back like this. I must admit I was rather amazed.

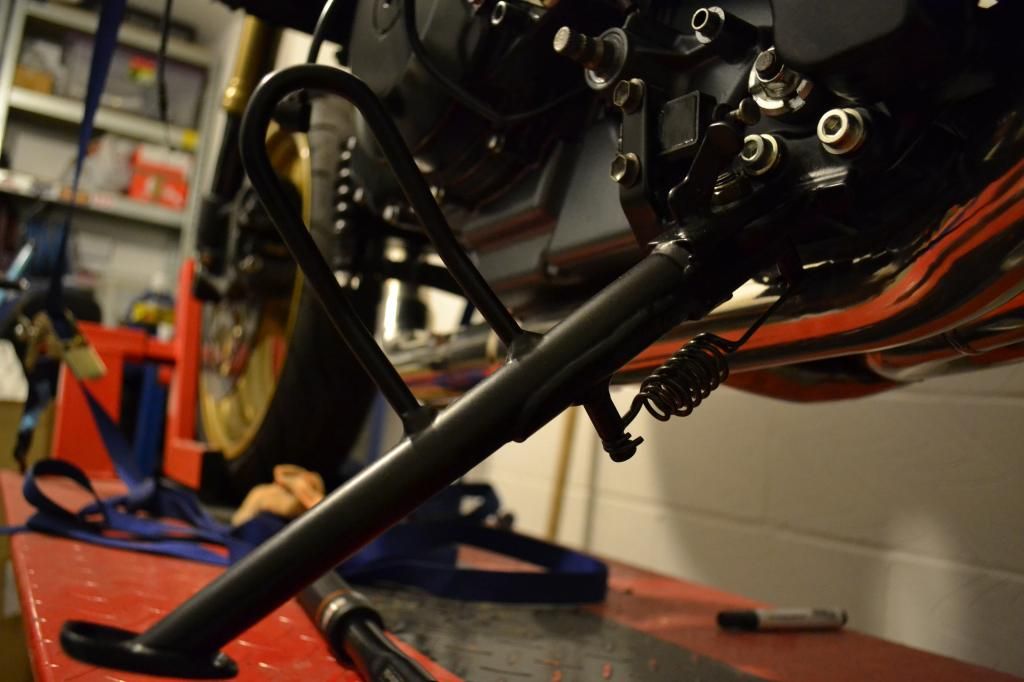
Next in my reconditioning of parts is the sidestand and mount ... these have been sent off for powercoating, the bolts/spring discarded and new ones ordered.

Fitted wiring loom and had to fit the indicator relay on the other side of that mount I had to chop cause of the dam ohlins.

Then thought wtf am I going to do with these minging fuel injectors ...

Decided to send the off for some professional ultrasonic cleaning and they came back like this. I must admit I was rather amazed.

Next in my reconditioning of parts is the sidestand and mount ... these have been sent off for powercoating, the bolts/spring discarded and new ones ordered.


.... 600 quids worth of Suzuki OEM parts ;D
I ordered every single part of the oil and water cooling system other than Radiator (managed to source a new OEM radiator from the USA for half the retail price), oil cooler (I'll be ordering an after market delkevic) and the actual water pump.

I ordered every single part of the oil and water cooling system other than Radiator (managed to source a new OEM radiator from the USA for half the retail price), oil cooler (I'll be ordering an after market delkevic) and the actual water pump.

So assembled the first of the bits. That being the entire thermostat assembly & water pump cover from a 98 bike, rather than the 97 I have.


The difference in the 97 - 98 cooling system is the ECU temp is taken from the thermostat rather than the radiator, so had to fit a new water pump cover. There's a pipe leading from cover to thermostat and the one that arrived was twice as long as it needed to be... checked part numbers and it was correct so just cut it.


The difference in the 97 - 98 cooling system is the ECU temp is taken from the thermostat rather than the radiator, so had to fit a new water pump cover. There's a pipe leading from cover to thermostat and the one that arrived was twice as long as it needed to be... checked part numbers and it was correct so just cut it.


Next was radiator. Managed to source a new OEM 98 radiator from the US at the start of the year so whipped that out. Staggering difference between that and the new one.
Suzuki charge 350 quid for a new fan so decided to reuse the one I have, but recondition the guard so that was stripped, prepped, primed and painted. Liked the wee sticker on it so that was masked !


Suzuki charge 350 quid for a new fan so decided to reuse the one I have, but recondition the guard so that was stripped, prepped, primed and painted. Liked the wee sticker on it so that was masked !


Came across a slide issue in the OEM oil cooler guard doesnt seem to fit on the delkevic cooler.


So the bottom bolt doesnt line up with the mount. Checked the original from the bike and the OEM oil cooler mount is slightly off to the side and matches the OEM guard.
Somewhat strange. hmmmmmmmmmmmm. Would have thought that would have lined up... any ideas?


So the bottom bolt doesnt line up with the mount. Checked the original from the bike and the OEM oil cooler mount is slightly off to the side and matches the OEM guard.
Somewhat strange. hmmmmmmmmmmmm. Would have thought that would have lined up... any ideas?


Now then. New child and new job have gotten in the way.
Got fed up with the bodge that would be the delkevic bodge so bought an OEM oil cooler. All the cooling gubbins are now on and completed.

Airbox on and all remaining wiring plugged in other than tank and sprocket covers.

Finally got the side assembled from all the OEM parts and fitted.
[URL=http://smg.photobucket.com/user/WallaceRL/media/TL%20project/TL230_zpsce22f125.jpg.html]
 [/URL]
Original clutch worm drive was knackered so got a new one and fitted along with clutch cable alongside getting a new DID chain fitted.

Starting to look more like a bike now.

Next things on the list:
1. Fix the chain on. DID chain and sprocket kit came with everything apart from the two rivets needed to fix it on, wasn't expecting that !
2. Swap internals / bits from the old tank onto the new one and order anything needed and fit it.
3. Find a used rear fender with all the number plate fixings and fittings to avoid having to order it all new
4. Get a battery and fit and turn on ignition and see if everything lights up, or not.
5. Find a connector to replace the stator wiring loom connector at the wiring loom end.
Got fed up with the bodge that would be the delkevic bodge so bought an OEM oil cooler. All the cooling gubbins are now on and completed.

Airbox on and all remaining wiring plugged in other than tank and sprocket covers.

Finally got the side assembled from all the OEM parts and fitted.
[URL=http://smg.photobucket.com/user/WallaceRL/media/TL%20project/TL230_zpsce22f125.jpg.html]
[/URL]Original clutch worm drive was knackered so got a new one and fitted along with clutch cable alongside getting a new DID chain fitted.

Starting to look more like a bike now.

Next things on the list:
1. Fix the chain on. DID chain and sprocket kit came with everything apart from the two rivets needed to fix it on, wasn't expecting that !
2. Swap internals / bits from the old tank onto the new one and order anything needed and fit it.
3. Find a used rear fender with all the number plate fixings and fittings to avoid having to order it all new
4. Get a battery and fit and turn on ignition and see if everything lights up, or not.
5. Find a connector to replace the stator wiring loom connector at the wiring loom end.
So.
To recap from last to do list
1. Fix the chain on. DONE
2. Swap internals / bits from the old tank onto the new one and order anything needed and fit it. DONE
3. Find a used rear fender with all the number plate fixings and fittings to avoid having to order it all new. DONE (had to get all OEM stuff)
4. Get a battery and fit and turn on ignition and see if everything lights up, or not. DONE)
5. Find a connector to replace the stator wiring loom connector at the wiring loom end. DONE
Tank is now fitted with all the internals swapped over, has the pump ultrasonic cleaned
Fitted a new rear undertray, order all the required gubbins for the number plate light / mount & fitted
Found some standard indicators in new condition on ebay, now fitted
Chain on, chain sprocket cover sprayed and fitted
Set of Gillies rear sets order & fitted
Battery, oil, coolant, plugs & filter ordered & all applied onto bike.
couple of drops oil fired into each cylinder ....
And then turned the ignition switch... all lights came on. Check oil warming light on the dash however no error codes presented.
Plan is to wheel it outside over the next day or so and see if it will fire up or not. Main concern is engine has been sat dry for 2 years and I'm not clear if that will have been an issue. One way to find out.
Remaining items on the to do list to complete the build is as follows:
Get sprocket cover bolts & fit
Get rear brake rod bolts & fit
Clean & bleed rear brake
Refurb / replace yoshi cans
Refurb / replace fairings / screen
Fit front steering damper & front sub frame
Pics as exp


First start up - dont know how to embed you tube into pistonheads.
https://www.youtube.com/watch?v=ulLvPQeAAf0
https://www.youtube.com/watch?v=ulLvPQeAAf0
Edited by IrnBruFreak on Friday 2nd June 17:13
Sooooooooooo... then I put on..
Original front fairings
OEM mirrors
New double bubble screen
Carbon front mudguard
Carbon hugger
Got the seat unit re-sprayed and fitted
Managed to procure some high level exhaust mounts and get them powder coated
Carbon look belly pan and fired on...
And then it came to the exhausts which turned into a pain in the tits. Ordered a new set of RS-3 cans via UK supplier and the inlet was too big, they were duly returned. I seemingly had an early 2 inch diameter system that was changed to 2 1/2 inch early on. Said UK supplier told me yoshi no longer made the right fitting items. After some thought I bought a second hand set of Carbon items with the intention of swapping over the inlet and baffle onto the end cap/sleezes from the original bashed set that fitted the system.
I then discovered although all RS-3 can look the same... there seems to have been countless versions and the inlet with the 2 inch diameter was round and would not mate to the end caps. Subsequently contacted yoshi directly in the states for some guidance explaining the above and they offered a) send over the existing inlets and they would build a new set of yoshis around or b) they would custom make a brand new set just for moi that fitted. Went for b) & 4 weeks later they arrived and they fitted ! Very much impressed with the bunch in the USA. They are not even the distributors in the UK and they where more than happy to help.
Bike is now complete, MOT passed last week and it's all just in time to sit in the garage for the next 5 months. Yey. Not bad for 5 years.


Gassing Station | Biker Banter | Top of Page | What's New | My Stuff