Caterham 7 Superlight No.157
Discussion


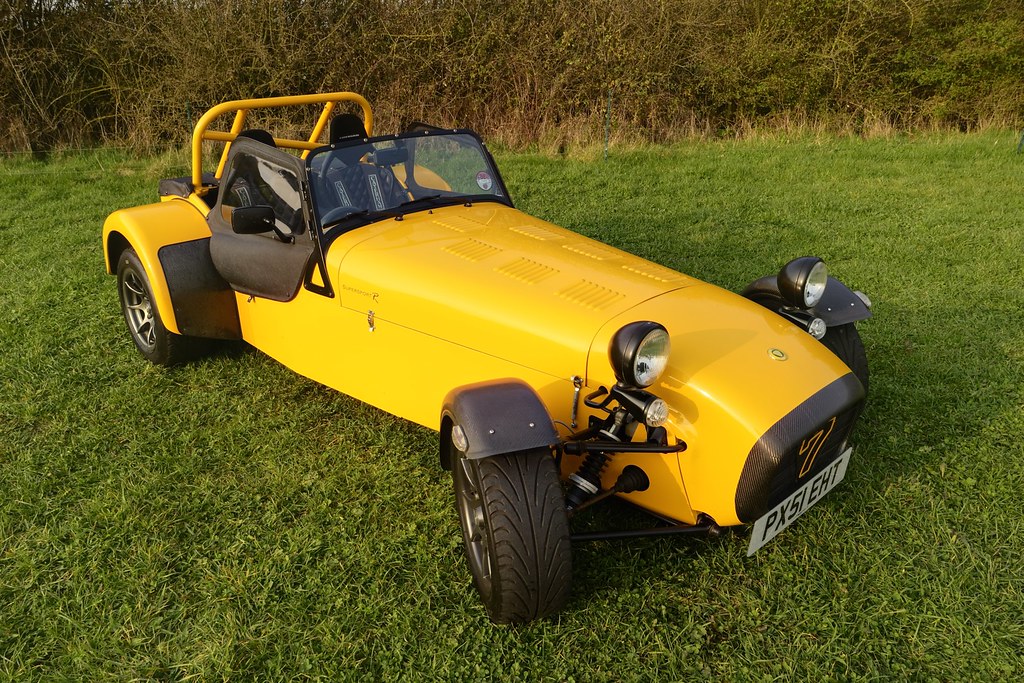
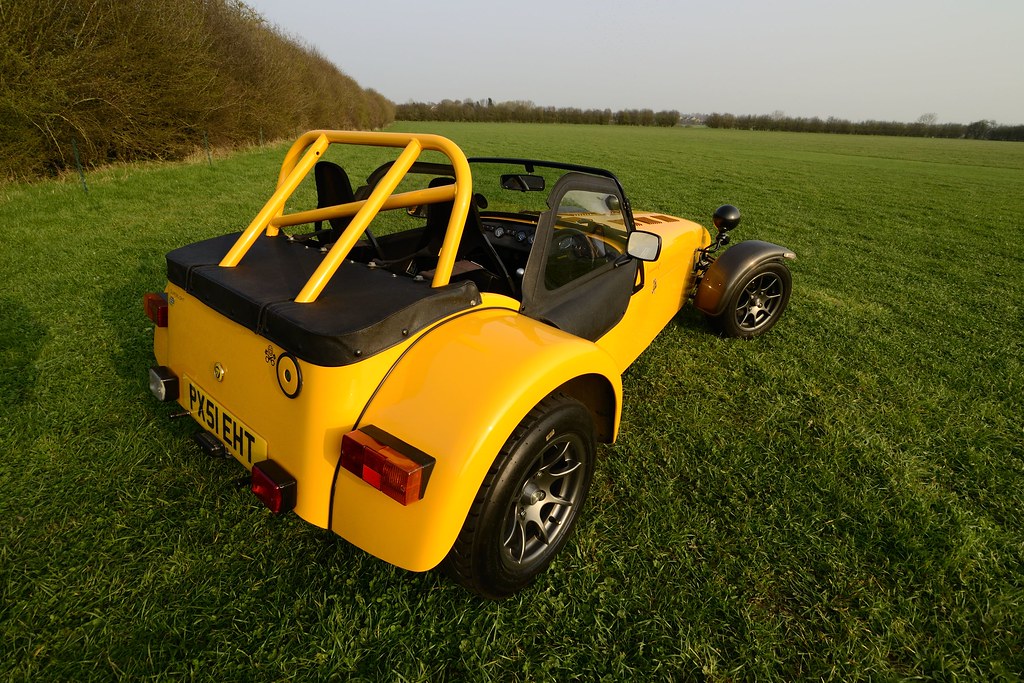
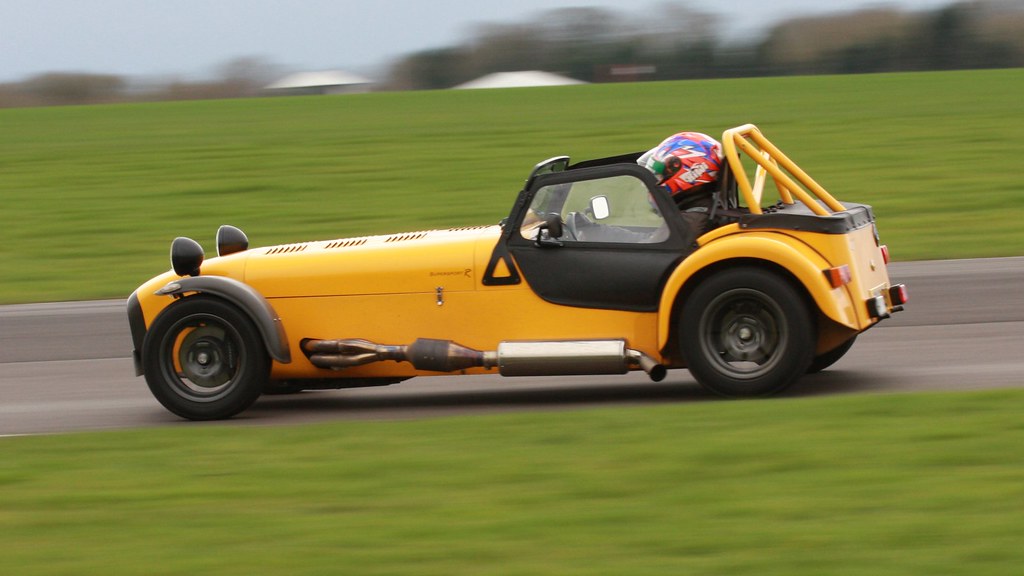
Well it's high time I contributed to Reader's Cars so I thought I'd stick a thread up about my Caterham. The car is an original Superlight from 2001, No 157 and is mango yellow (a Citroen colour) like a lot of other superlights were painted. The car started life as a kit build with 1.6 K Series and 138bhp. Spec wise it came with carbon front and rear wings, carbon dash and nosecone, ZF LSD, widetrack superlight suspension, tillet seats and the superb Caterham 6 speed box.
The car was owned for 2 years or so before passing to it's next owner who lavished money on it. I'm very lucky to have every single piece of paper and invoice relating to it's history (now in a very thick box-file as I'm no different!) and in the second owner's tenure it was treated to lots of upgrades. The highlights of these were the newer Superlight anthracite alloys (6" on the front and 8" on the back) and a Supersport R conversion. The SSR conversion was a engine upgrade done by Caterham to bring the Superlights up to R300 spec, which is a 1.8K Series on Roller Barrel Throttle Bodies running just over 160bhp. An Apollo Oil/Air Separator, ligtweight R500 flywheel and R500 4-1 exhaust were fitted. The spec didn't change much after that and this brings us to where I purchased the car from Caterham almost 3 years ago.
I picked the car mainly due to it's condition and spec. I made sure that whilst I was at Caterham I test drove as many cars as possible. The car is weekend and track day toy and although I had a good idea what I wanted, it pays to make sure! 160bhp with the 6 speed box, rather than the 5 speed and tillet seats turned out to be perfect and the deal was done.
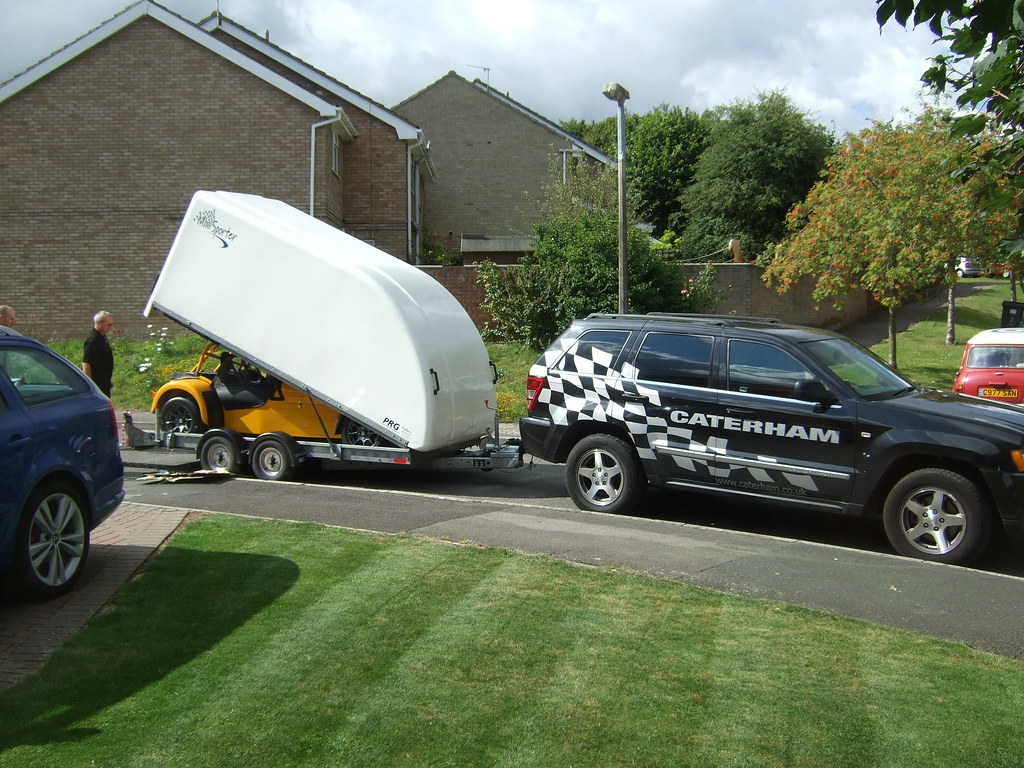
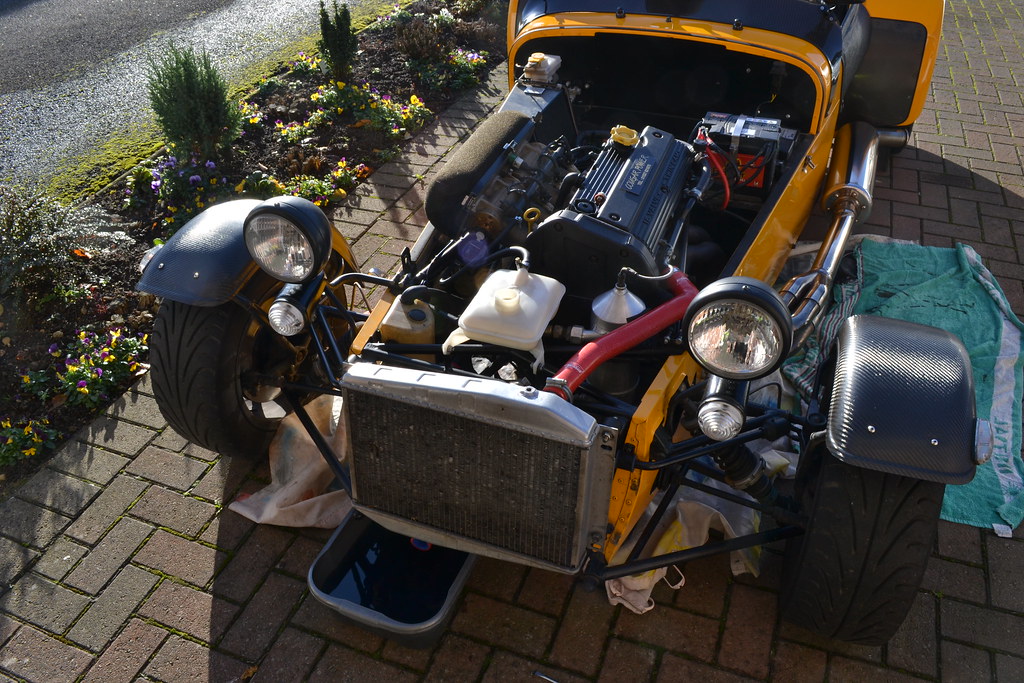
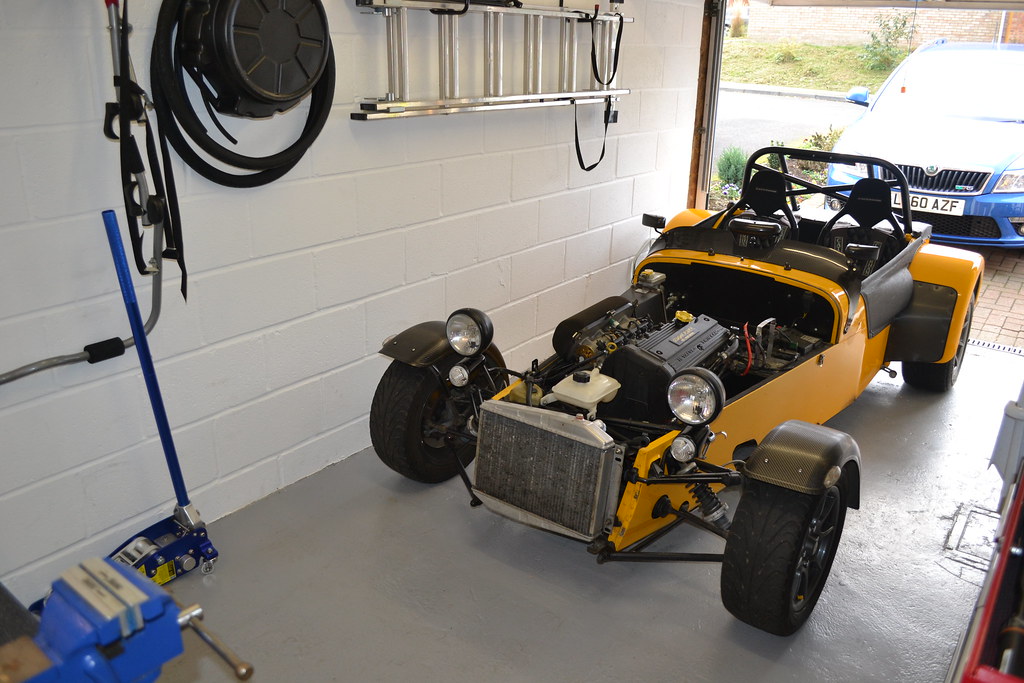
Whilst CC's prices are more than equivalent private sales, it was quite the trip in to the unknown and having the warranty helped. I used the car quite a bit in those 3 months (lots of commuting to work and out to get forgotten food items from the weekly shop ) and after 3 months the car went back to have a few little niggles squared away. Although it was only gone 2 weeks, having really gelled with the car, it was hard giving it up! Here it is coming back home (in the corner you can see my neighbours totally refurbed C-reg mini, awesome little car!)
Since then, I've driven the car all over the place. Having young kids, I tend to favour getting up very early on Sundays and driving the deserted rural roads I'm lucky to have access too where I live. Basically I can go north in to the Cotswolds, South on to Salisbury Plain or East on to the Berkshire Downs
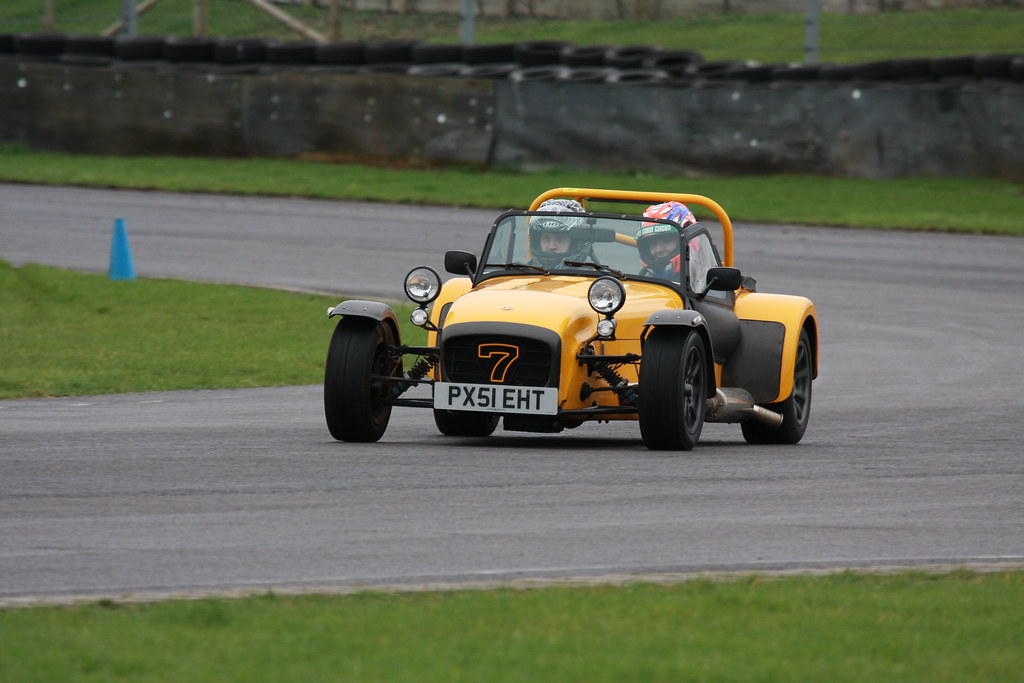
I've also done a couple of track days (more on that in a sec) at Castle Combe:
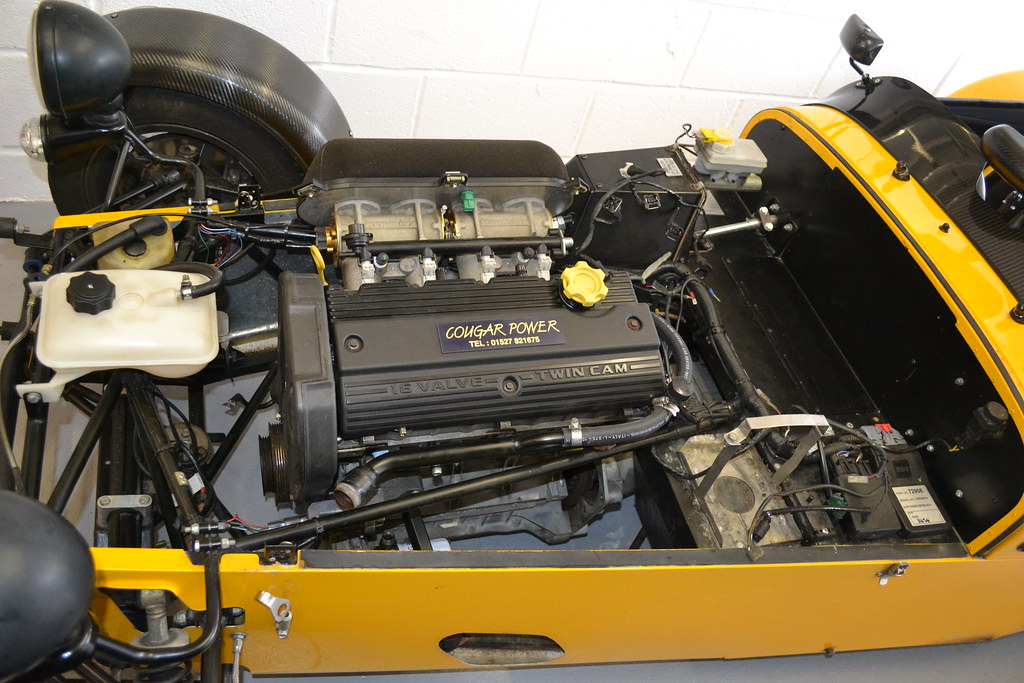
After the last day at Combe it was MOT time and service time, and during the service it was noted that the engine wasn't running right. Although it pulled like a train, the engine was running very rich giving low range and stinking of fuel at idle. I gave it to Neil Garner Motorsport (who are an excellent outfit) to try to figure out what was going on (the HG was actaully fine in this case . Although the throttle bodies were balanced (the first port of call) the exhaust primaries showed something was very wrong as they were all at very different temperatures. A compression test then showed more cause for concern with 3 and 4 being way down. So, I got them to start stripping the engine....then things got even worse
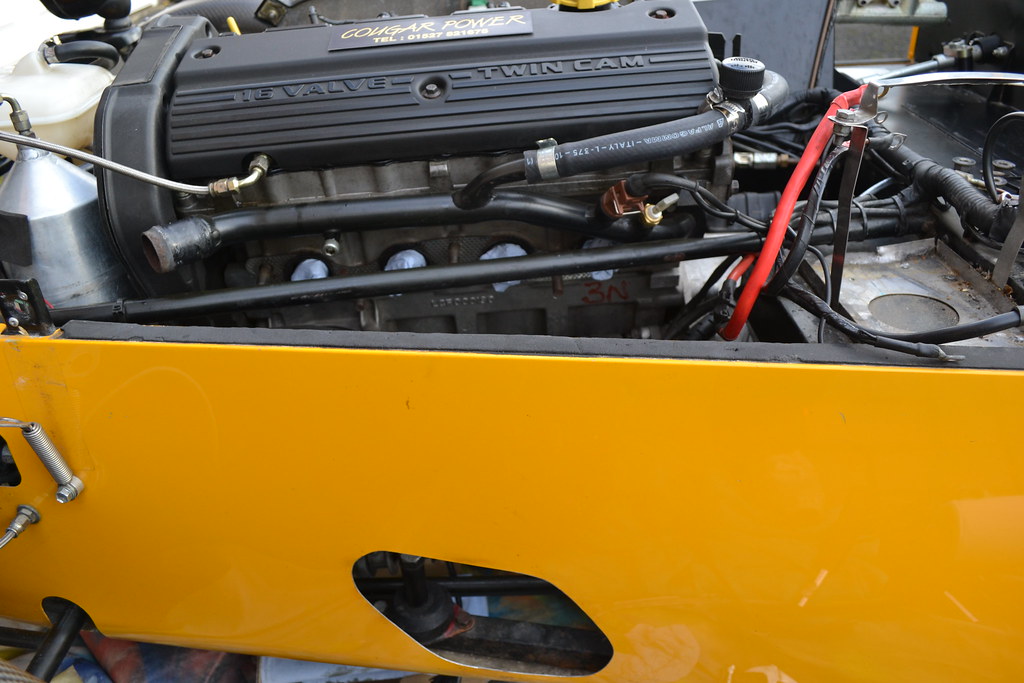
Basically, there was a catalogue of problems with it. From memory, the 3 and 4 rings weren't in great condition, several valves were pitted and didn't seat properly, one conrod was 19g lighter than the other three. There were a lot of other minor issues but those were the major ones. Neil Garner said at this point they recommended a K Series specialist rebuild the engine so it was given to Nigel Keats at Cougar Engineering to sort out. Nigel has built many K Series cars and came well recommended on the Lotus7Club website and on the net in general. In short, the engine was rebuilt properly from the ground up with forged Omega pistons, new rods which were modified to be fully floating and with improved oil channels, higher spec liners, new valves, new springs, new followers, new water and oil pumps and with vernier pulleys. The engine was then dynamically balanced and re-installed in the car.
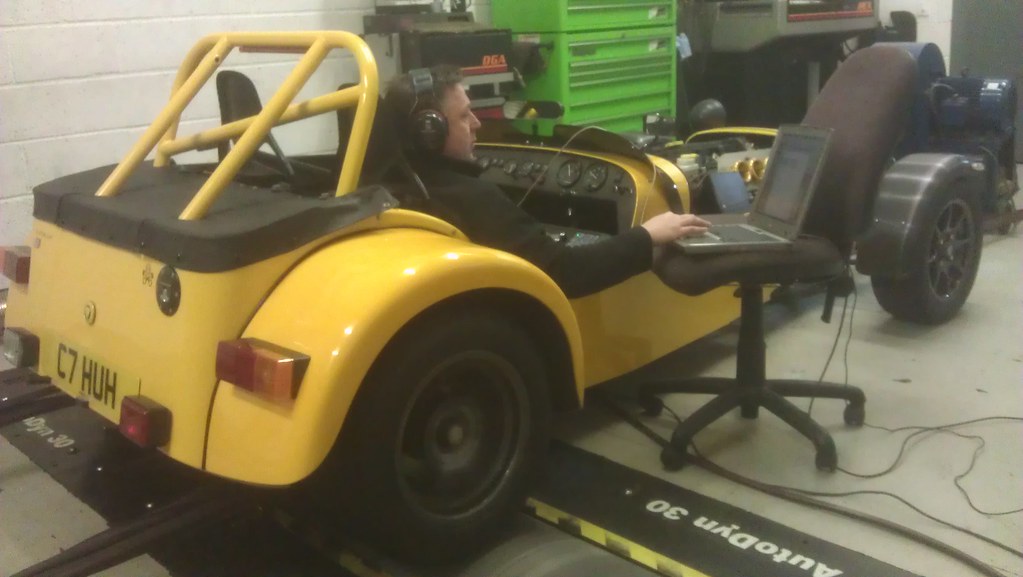
Although I've skipped a lot of the detail (I realise this is an essay by now!) after running it in, it was a different car. The engine has a hard edge to it's exhaust note now, it pulls really well right to the redline and (less importantly) I can now get almost 200 miles out of a tank even when 'pressing on' All that was needed then was a tweak of the map from Troy at Northampton Motorsport and it was back to normal (even if my bank balance wasn't!). Sorry for the crap mobile pic...
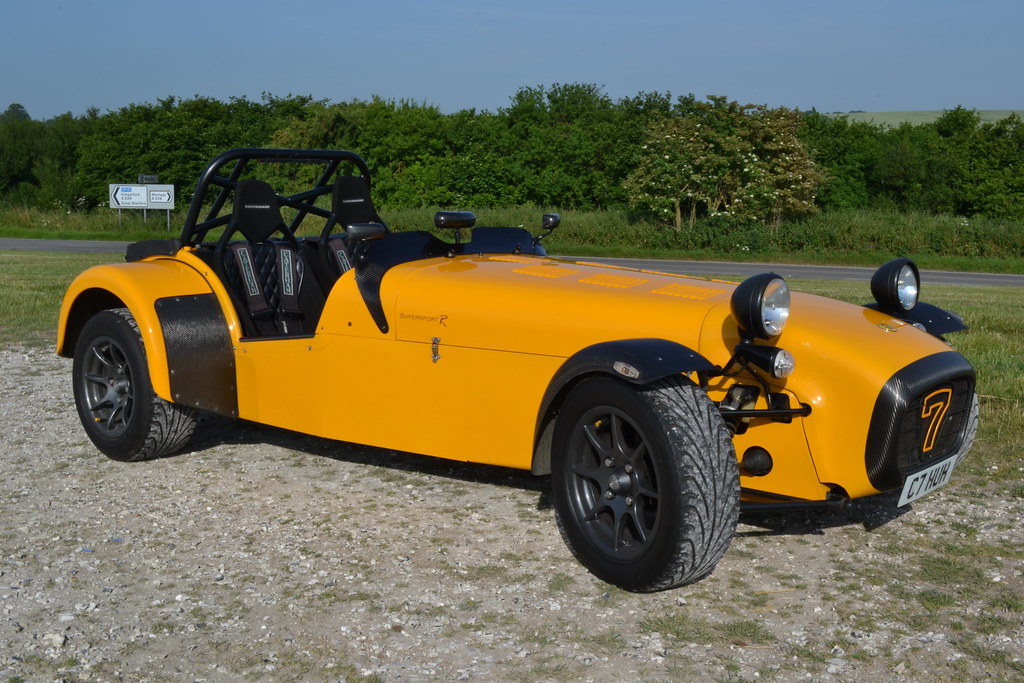
Which kind of takes us up to a few months ago, although I changed the yellow old style rollbar for a new one and the windscreen and doors have gone for a permanent carbon aeroscreen setup!
So, where now? Well yesterday the car was SORN'd and the winter upgrades have started! I'll update on those in due course.....
The car was owned for 2 years or so before passing to it's next owner who lavished money on it. I'm very lucky to have every single piece of paper and invoice relating to it's history (now in a very thick box-file as I'm no different!) and in the second owner's tenure it was treated to lots of upgrades. The highlights of these were the newer Superlight anthracite alloys (6" on the front and 8" on the back) and a Supersport R conversion. The SSR conversion was a engine upgrade done by Caterham to bring the Superlights up to R300 spec, which is a 1.8K Series on Roller Barrel Throttle Bodies running just over 160bhp. An Apollo Oil/Air Separator, ligtweight R500 flywheel and R500 4-1 exhaust were fitted. The spec didn't change much after that and this brings us to where I purchased the car from Caterham almost 3 years ago.
I picked the car mainly due to it's condition and spec. I made sure that whilst I was at Caterham I test drove as many cars as possible. The car is weekend and track day toy and although I had a good idea what I wanted, it pays to make sure! 160bhp with the 6 speed box, rather than the 5 speed and tillet seats turned out to be perfect and the deal was done.
Whilst CC's prices are more than equivalent private sales, it was quite the trip in to the unknown and having the warranty helped. I used the car quite a bit in those 3 months (lots of commuting to work and out to get forgotten food items from the weekly shop
) and after 3 months the car went back to have a few little niggles squared away. Although it was only gone 2 weeks, having really gelled with the car, it was hard giving it up! Here it is coming back home (in the corner you can see my neighbours totally refurbed C-reg mini, awesome little car!)Since then, I've driven the car all over the place. Having young kids, I tend to favour getting up very early on Sundays and driving the deserted rural roads I'm lucky to have access too where I live. Basically I can go north in to the Cotswolds, South on to Salisbury Plain or East on to the Berkshire Downs
I've also done a couple of track days (more on that in a sec) at Castle Combe:
After the last day at Combe it was MOT time and service time, and during the service it was noted that the engine wasn't running right. Although it pulled like a train, the engine was running very rich giving low range and stinking of fuel at idle. I gave it to Neil Garner Motorsport (who are an excellent outfit) to try to figure out what was going on (the HG was actaully fine in this case
. Although the throttle bodies were balanced (the first port of call) the exhaust primaries showed something was very wrong as they were all at very different temperatures. A compression test then showed more cause for concern with 3 and 4 being way down. So, I got them to start stripping the engine....then things got even worse Basically, there was a catalogue of problems with it. From memory, the 3 and 4 rings weren't in great condition, several valves were pitted and didn't seat properly, one conrod was 19g lighter than the other three. There were a lot of other minor issues but those were the major ones. Neil Garner said at this point they recommended a K Series specialist rebuild the engine so it was given to Nigel Keats at Cougar Engineering to sort out. Nigel has built many K Series cars and came well recommended on the Lotus7Club website and on the net in general. In short, the engine was rebuilt properly from the ground up with forged Omega pistons, new rods which were modified to be fully floating and with improved oil channels, higher spec liners, new valves, new springs, new followers, new water and oil pumps and with vernier pulleys. The engine was then dynamically balanced and re-installed in the car.
Although I've skipped a lot of the detail (I realise this is an essay by now!) after running it in, it was a different car. The engine has a hard edge to it's exhaust note now, it pulls really well right to the redline and (less importantly) I can now get almost 200 miles out of a tank even when 'pressing on'
All that was needed then was a tweak of the map from Troy at Northampton Motorsport and it was back to normal (even if my bank balance wasn't!). Sorry for the crap mobile pic...Which kind of takes us up to a few months ago, although I changed the yellow old style rollbar for a new one and the windscreen and doors have gone for a permanent carbon aeroscreen setup!
So, where now? Well yesterday the car was SORN'd and the winter upgrades have started! I'll update on those in due course.....

Huw, long time no speak! Will let you know about the 'box service but Road & Race do come well recommended.
Right then, UPDATE time.
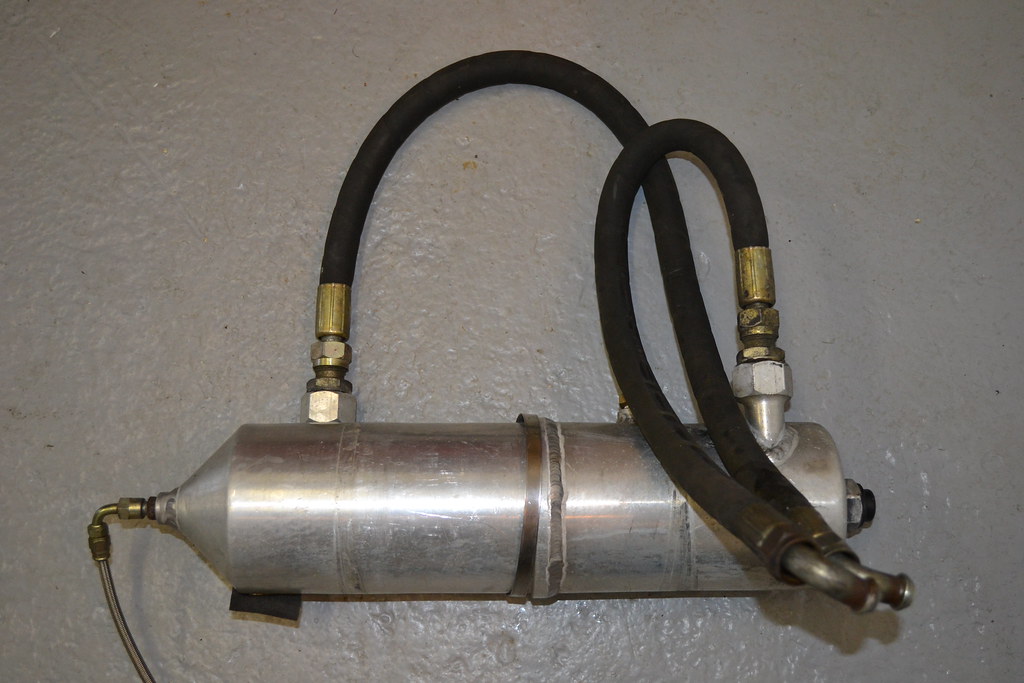
As mentioned earlier, I SORN'd the car a few days ago. I would like to do a few more trackdays per year but before that happens I wanted to completely refresh the suspension (especially the front which is looking a bit grubby) and upgrade the oil system. The car currently has an Apollo Tank which is an oil/air separator system that is kind of a halfway house between a standard wet sump and a dry sump.
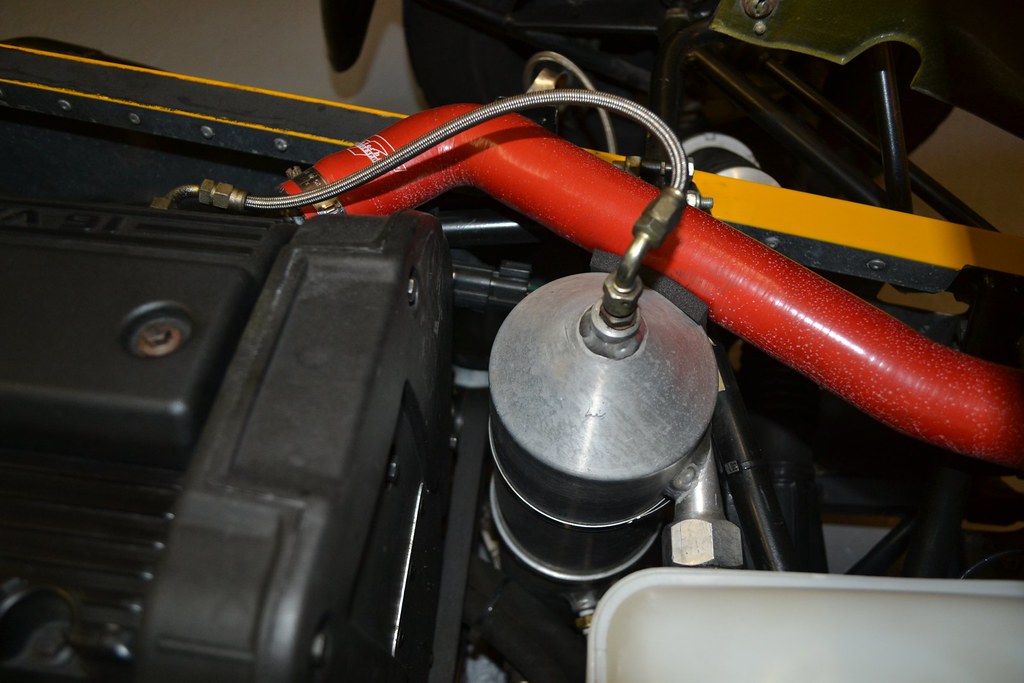
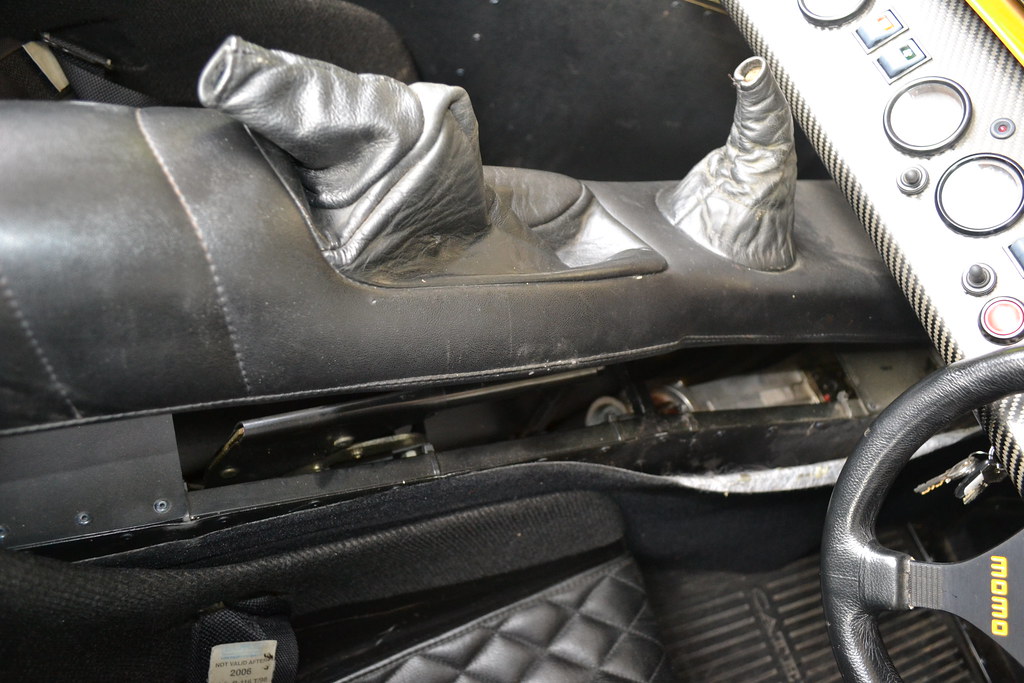
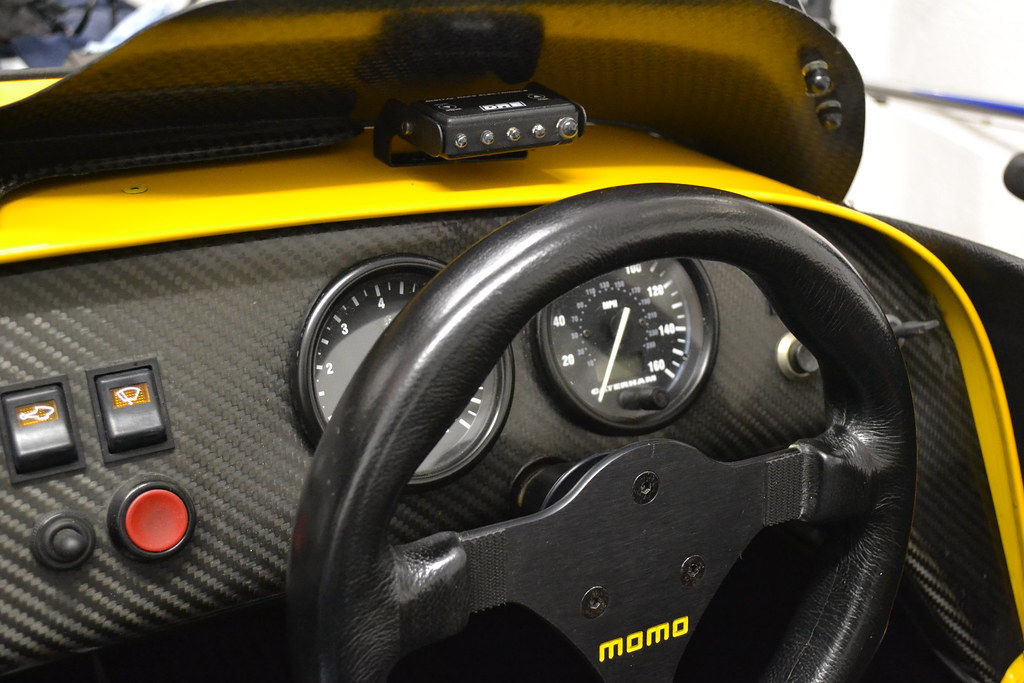
The standard electrical Caterham oil pressure gauge and pressure sensor are well known for being unreliable. So earlier in the year I fitted a Mech Oil Pressure Gauge from Think Automotive which has been superb. It has a greater scale and really shows what's happening. (Please forgive the switches, they're on the list to be changed for new ones!)
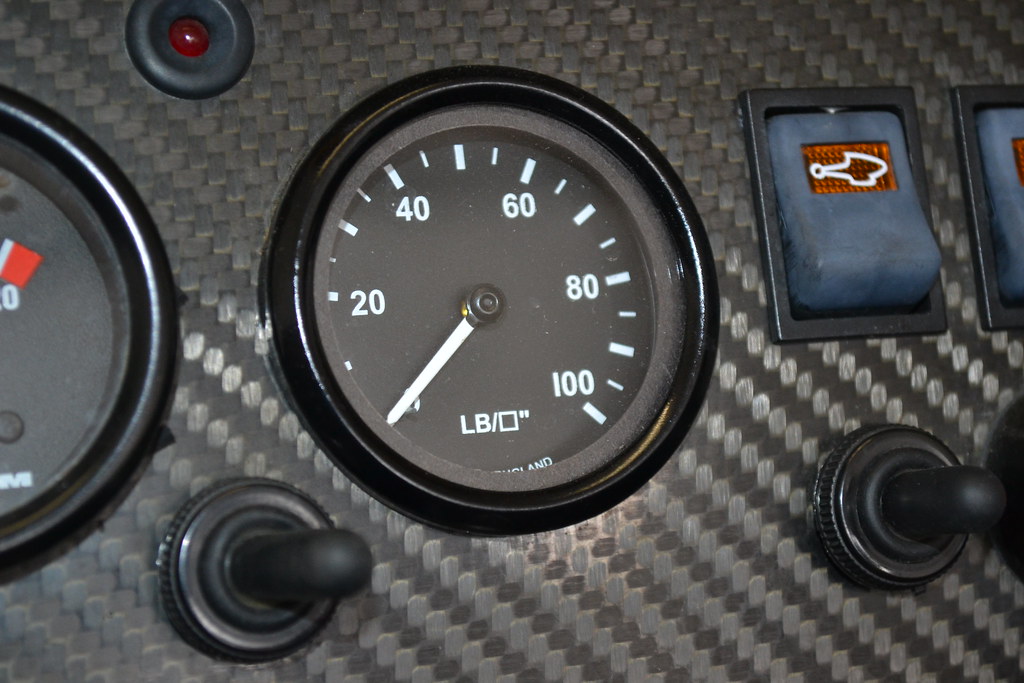
Unfortunately what is happening (and the K Series/Apollo is well known for it as the pickup is on one side of the sump) is a slight pressure drop on long right hand corners. Despite religiously checking the oil level is correct to minimise the effect, it still occurs and whilst it is only 10-15psi or so (down from 65psi), I'd like to fit stickier tyres for trackdays and if I leave the Apollo in, the pressure drop will only get worse. Clearly having spent £lots on the engine rebuild last year, an upgrade to a full dry sump system is needed. So, the K Series Caterham Dry Sump Kit is on order and should arrive in the next few weeks.
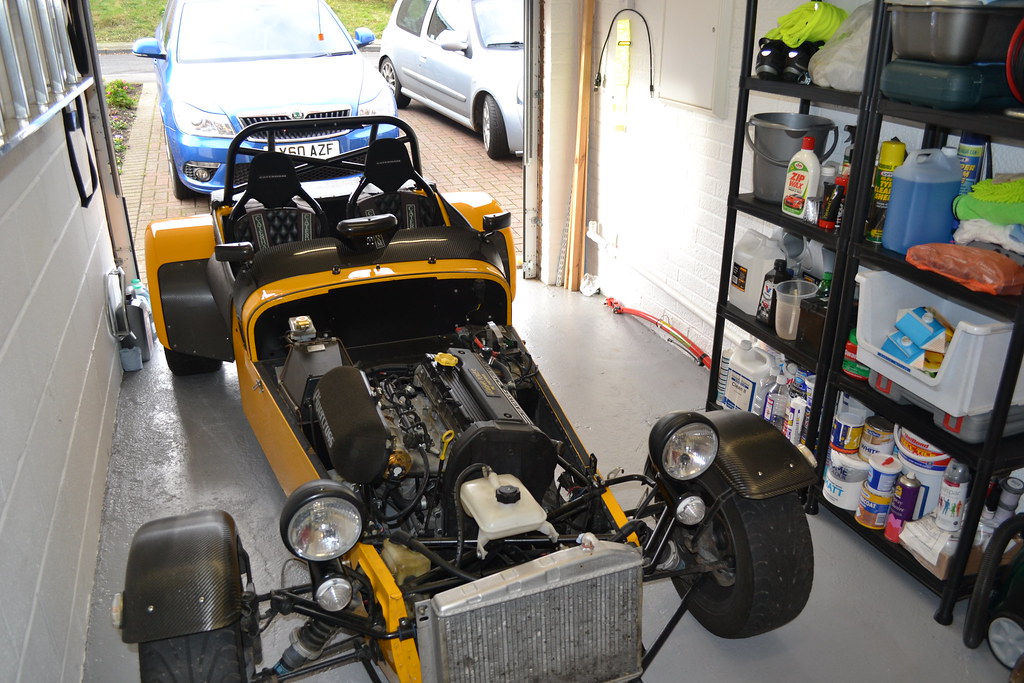
Whilst I'm doing all this work, I also want the gearbox serviced at Road & Race Transmissions. The 6 Speed box in the Seven is a cracker, but it's close ratio'd and due to the nature of the way a seven is driven it gets worked quite hard. Despite the fact I always heal and toeing the downshifts (definitely one of the joys of driving the car) the synchros do wear, so a strip/service is a good idea given the car is 12 years old. So, out have to come the engine and box. First up the oil and coolant were drained using my sloping drive to assist!
Here's the Apollo Tank out (photos are slightly out of sync below)
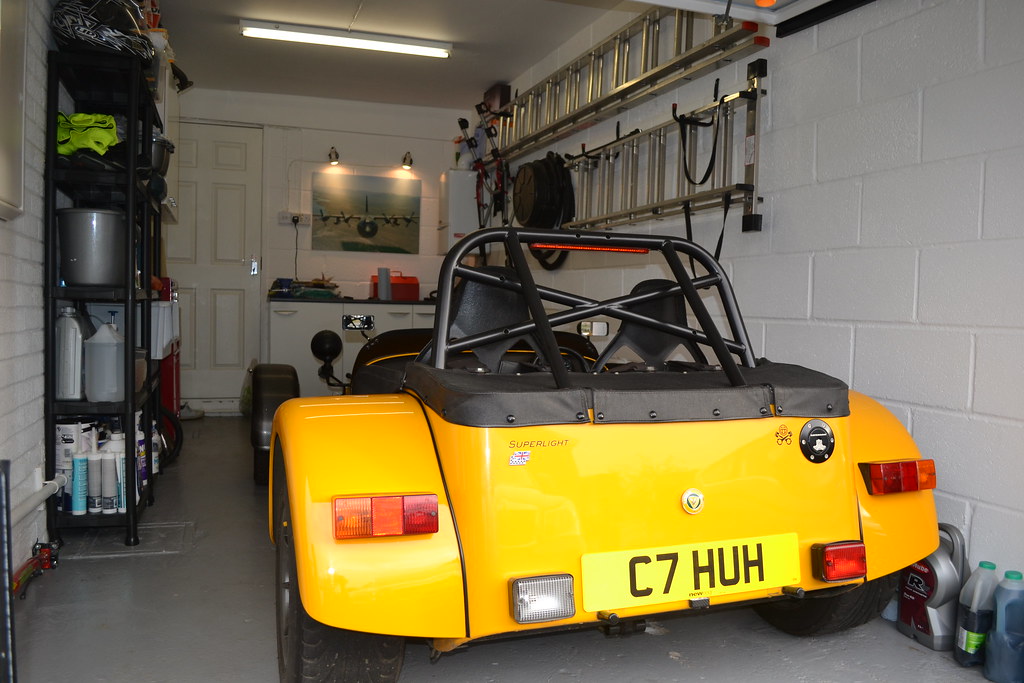
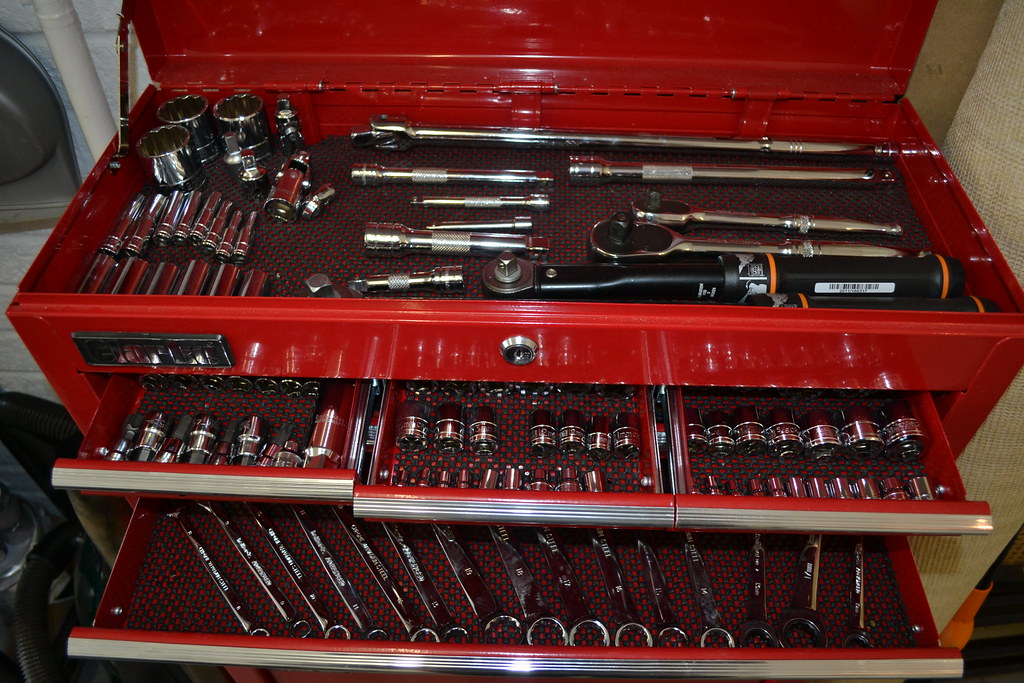
Then she's put back in the garage, which incidentally I like to keep very tidy. I hate nothing more than not being able to find the right tools so it's got to be in order (probably verging on OCD here!)
Then it was quite a straight forward job with some assistance from my 7 year old son (who I'm teaching to do all this stuff as I think it's important) to remove the exhaust and manifold, alternator, starter motor, battery, rad and other connections ready for the engine and 'box to come out on Tuesday.
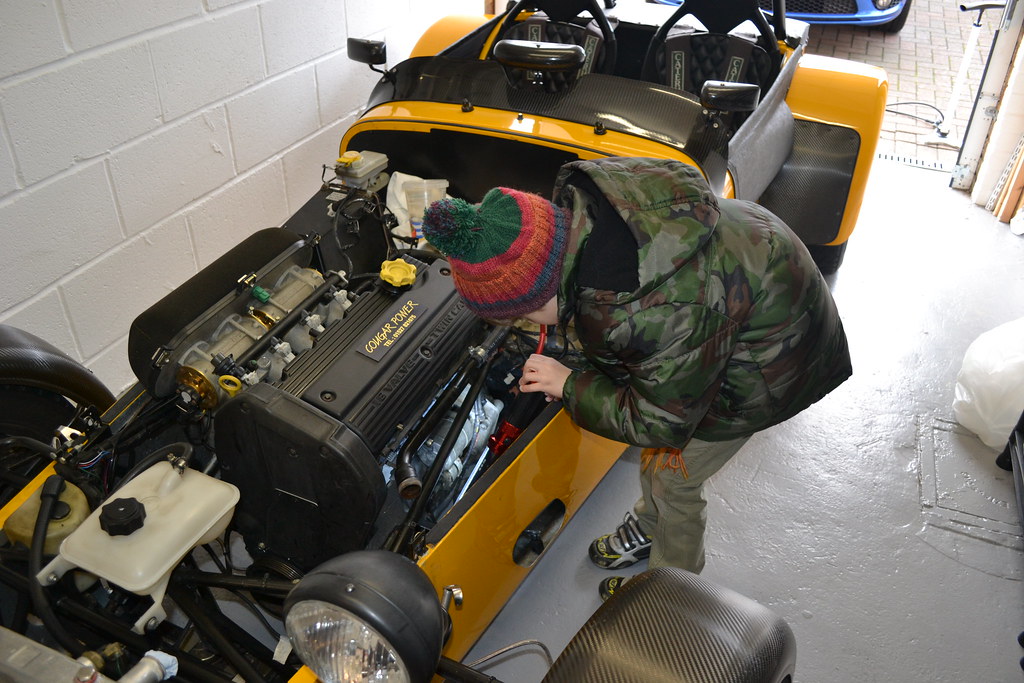
The starter motor is pretty dirty and the wiring is pretty brittle too, so that will all be replaced.

Well that's it for now, I'll update more once the engine's out and I've done some more prep for the dry sump to be installed.
Right then, UPDATE time.
As mentioned earlier, I SORN'd the car a few days ago. I would like to do a few more trackdays per year but before that happens I wanted to completely refresh the suspension (especially the front which is looking a bit grubby) and upgrade the oil system. The car currently has an Apollo Tank which is an oil/air separator system that is kind of a halfway house between a standard wet sump and a dry sump.
The standard electrical Caterham oil pressure gauge and pressure sensor are well known for being unreliable. So earlier in the year I fitted a Mech Oil Pressure Gauge from Think Automotive which has been superb. It has a greater scale and really shows what's happening. (Please forgive the switches, they're on the list to be changed for new ones!)
Unfortunately what is happening (and the K Series/Apollo is well known for it as the pickup is on one side of the sump) is a slight pressure drop on long right hand corners. Despite religiously checking the oil level is correct to minimise the effect, it still occurs and whilst it is only 10-15psi or so (down from 65psi), I'd like to fit stickier tyres for trackdays and if I leave the Apollo in, the pressure drop will only get worse. Clearly having spent £lots on the engine rebuild last year, an upgrade to a full dry sump system is needed. So, the K Series Caterham Dry Sump Kit is on order and should arrive in the next few weeks.
Whilst I'm doing all this work, I also want the gearbox serviced at Road & Race Transmissions. The 6 Speed box in the Seven is a cracker, but it's close ratio'd and due to the nature of the way a seven is driven
it gets worked quite hard. Despite the fact I always heal and toeing the downshifts (definitely one of the joys of driving the car) the synchros do wear, so a strip/service is a good idea given the car is 12 years old. So, out have to come the engine and box. First up the oil and coolant were drained using my sloping drive to assist!Here's the Apollo Tank out (photos are slightly out of sync below)
Then she's put back in the garage, which incidentally I like to keep very tidy. I hate nothing more than not being able to find the right tools so it's got to be in order (probably verging on OCD here!)
Then it was quite a straight forward job with some assistance from my 7 year old son (who I'm teaching to do all this stuff as I think it's important) to remove the exhaust and manifold, alternator, starter motor, battery, rad and other connections ready for the engine and 'box to come out on Tuesday.
The starter motor is pretty dirty and the wiring is pretty brittle too, so that will all be replaced.
Well that's it for now, I'll update more once the engine's out and I've done some more prep for the dry sump to be installed.
Edited by grenpayne on Sunday 24th November 13:44
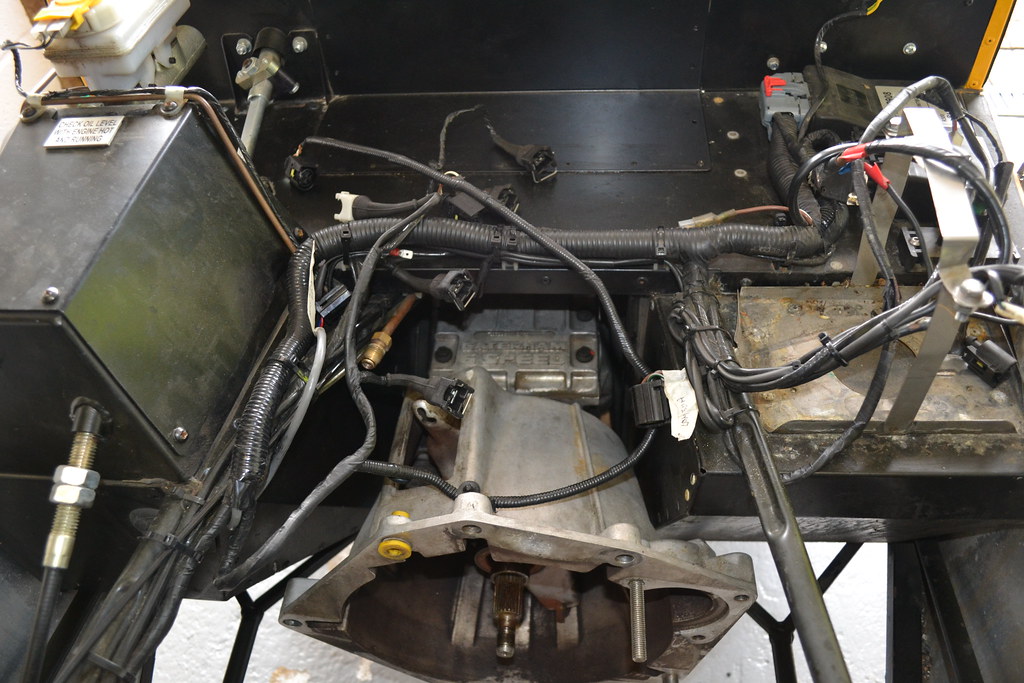
So then, quick update. After the prep work, it was relatively simple to extract the engine and 'box from the car. In fact with the help of a friend, not rushing and drinking lots of tea, it only took 2 hours. There's two ways to do it with Caterhams, either extract the engine and box as one, or split them and extract them separately. We chose the later due to height restrictions in the garage.


Then it was quite a simple case to unbolt the 'box and bellhousing and hook them out (after some disconnecting under the tunnel trim).
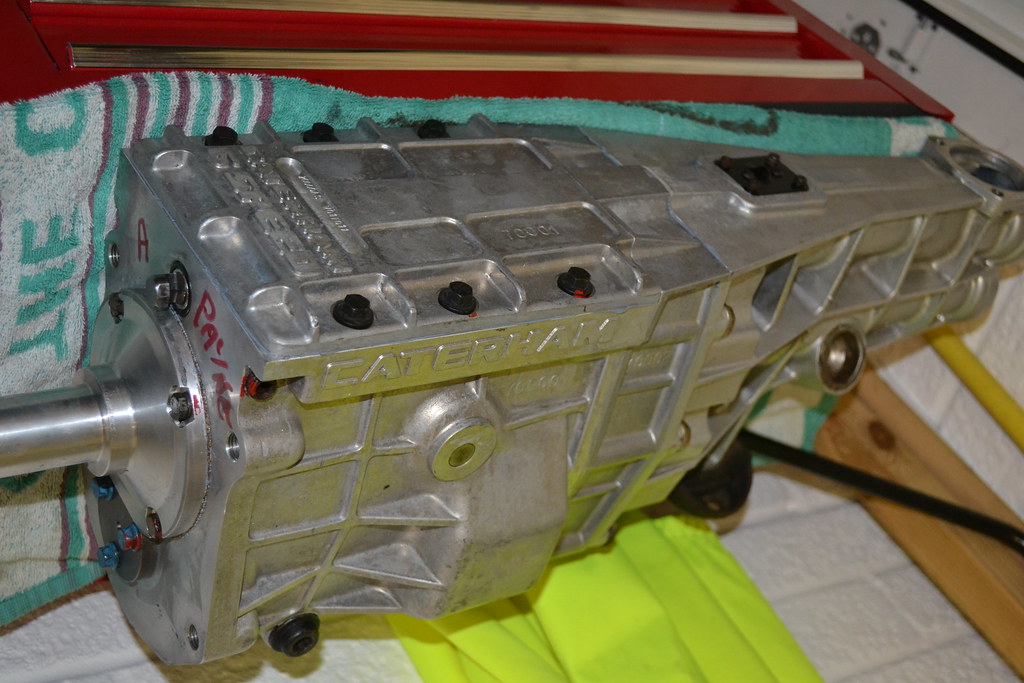
The box has been serviced at Road and race Transmissions in Kent who are well known in Seven circles. It's been stripped and had the seals, collets, shims, 3rd gear synchro and a few other bits replaced and also had a bush on the tailshaft put in that should have been present from manufacture! Well worth doing for the piece of mind.
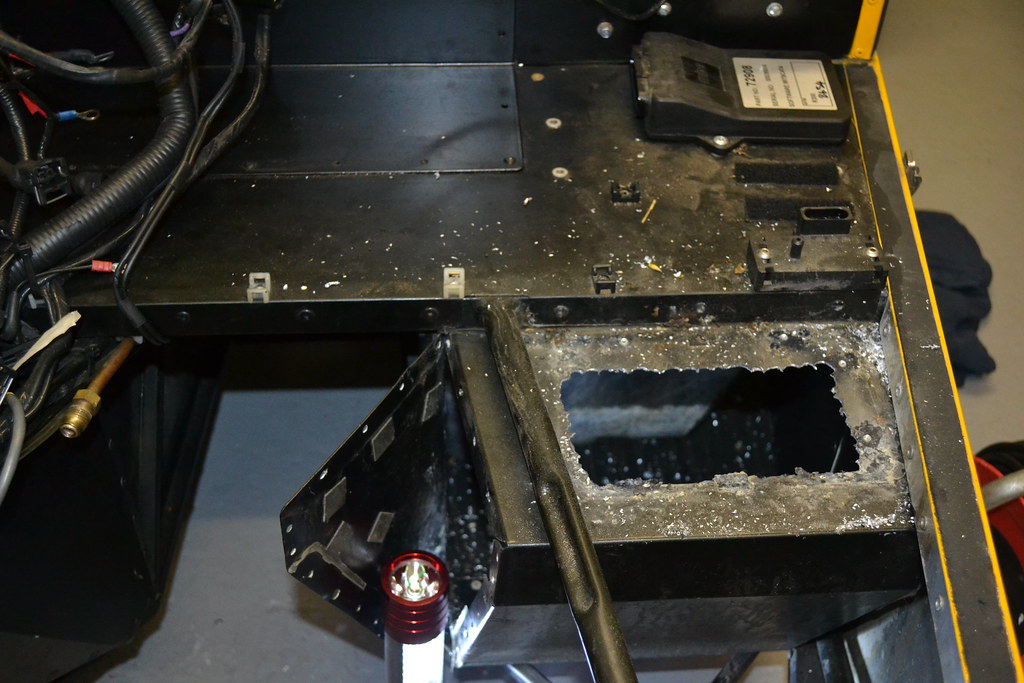
Next up was shortening the passenger footwell for the dry sump install. I don't tend to take passengers very often (if at all) and it's where the external oil tank goes, so off it came. For those that know, it's a complete b h of a job and took around 3 hours start to finish, as getting to all the internal rivets is tough. In the end the (nicely corroded) battery tray came out (the new gel battery will go on the bulkhead) to make way for access through the top.

The Dry Sump Kit should be delivered this week and contains the blanking plate needed to cap off the end. I've also decided where the gel battery will go and have ordered a bespoke oil catch tank as well as some shift lights, a battery master switch and a new 12v socket for my battery conditioner.

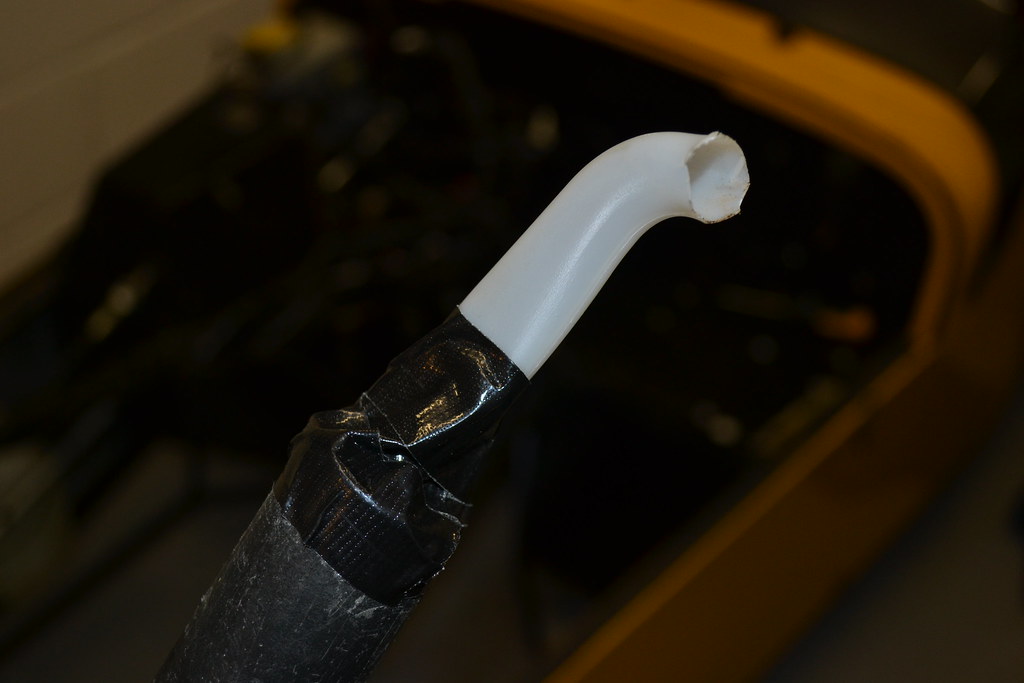
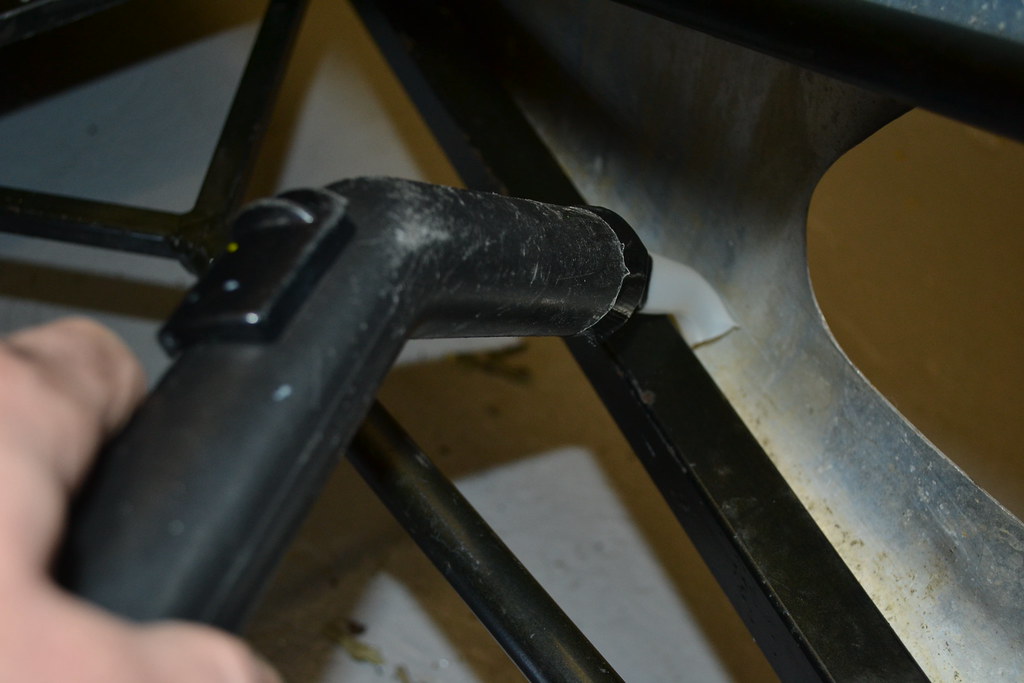
I took the opportunity to clean out all the 'grot traps' as they're known, the spaces between the skin and chassis tubes where are the muck, stones and road debris get in. Using my patented 'milk bottle container handle' I managed to get a huge amount of ste out and then cleaned up the rest of the engine bay with a damp cloth, finishing off with WD40 to protect the gap between the ali and the steel chassis.
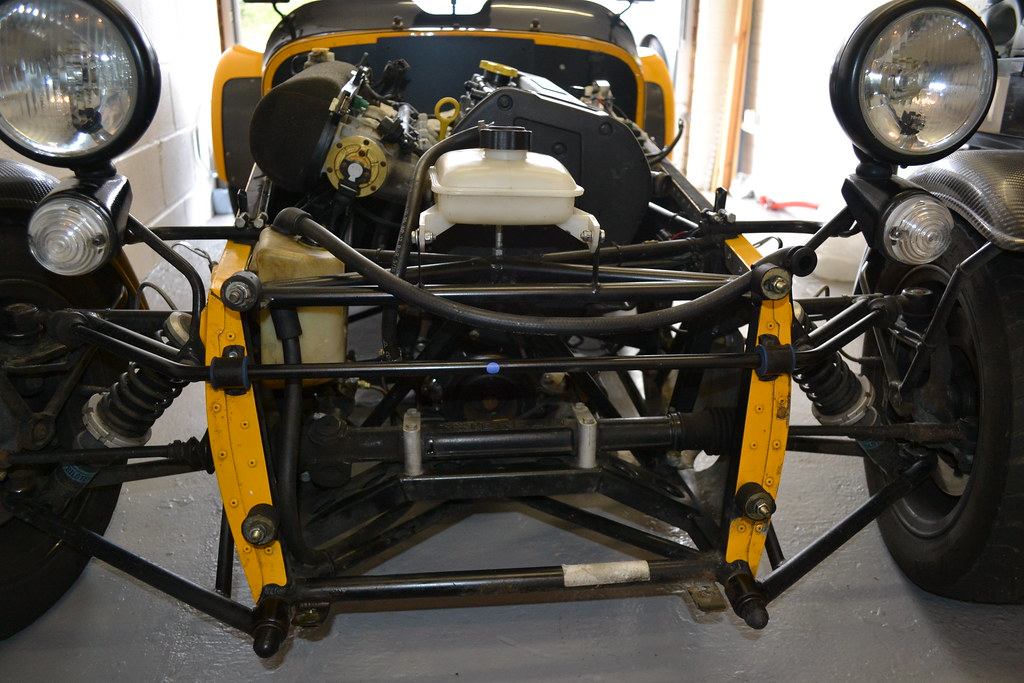
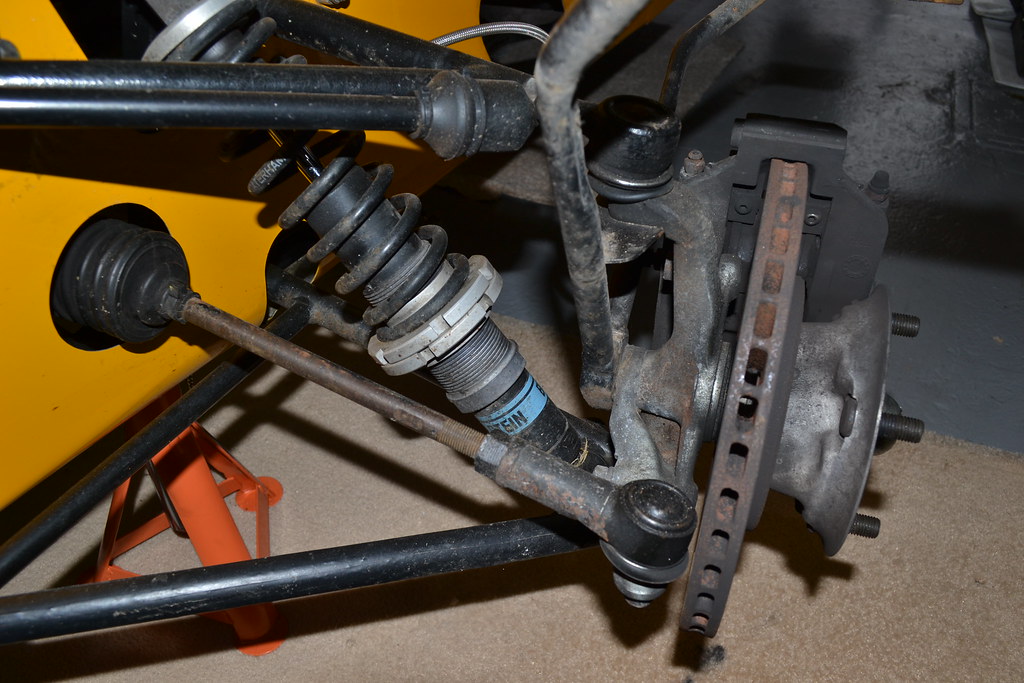
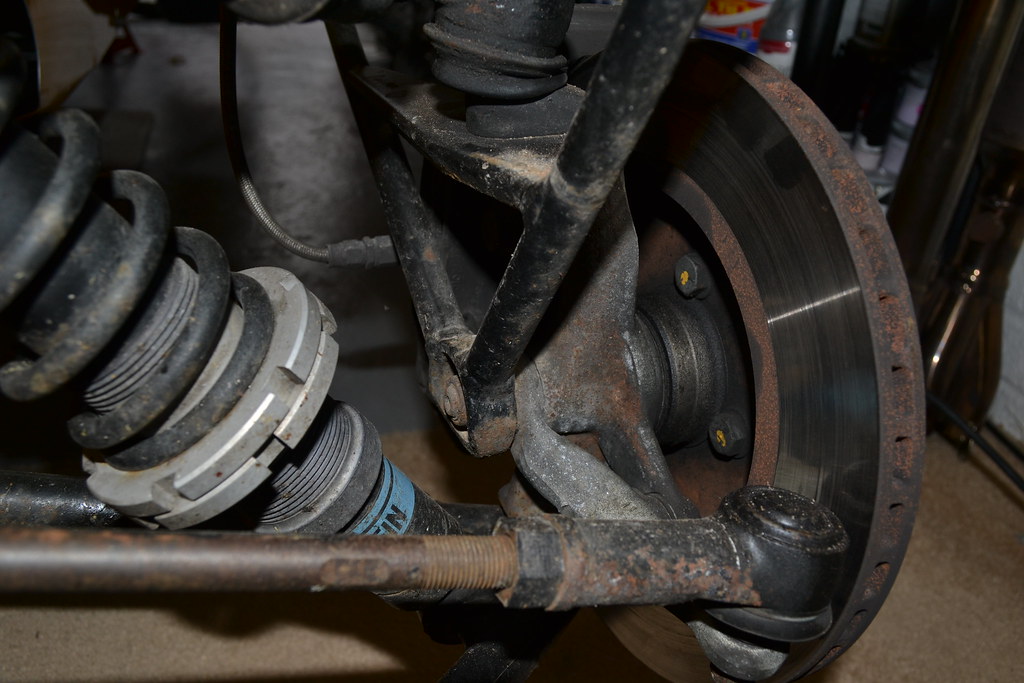
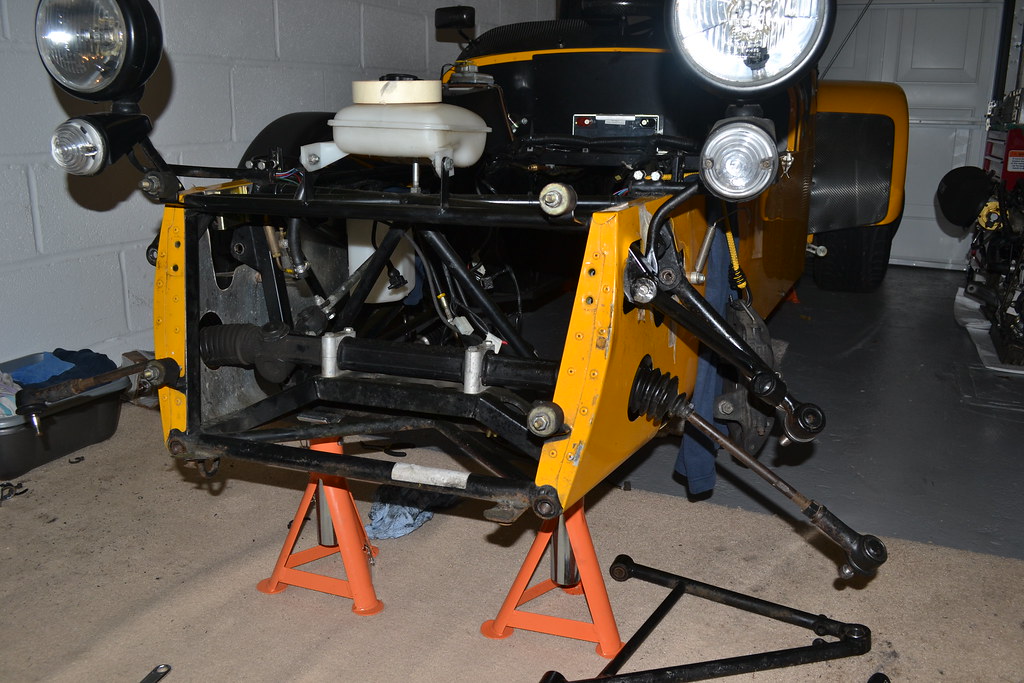
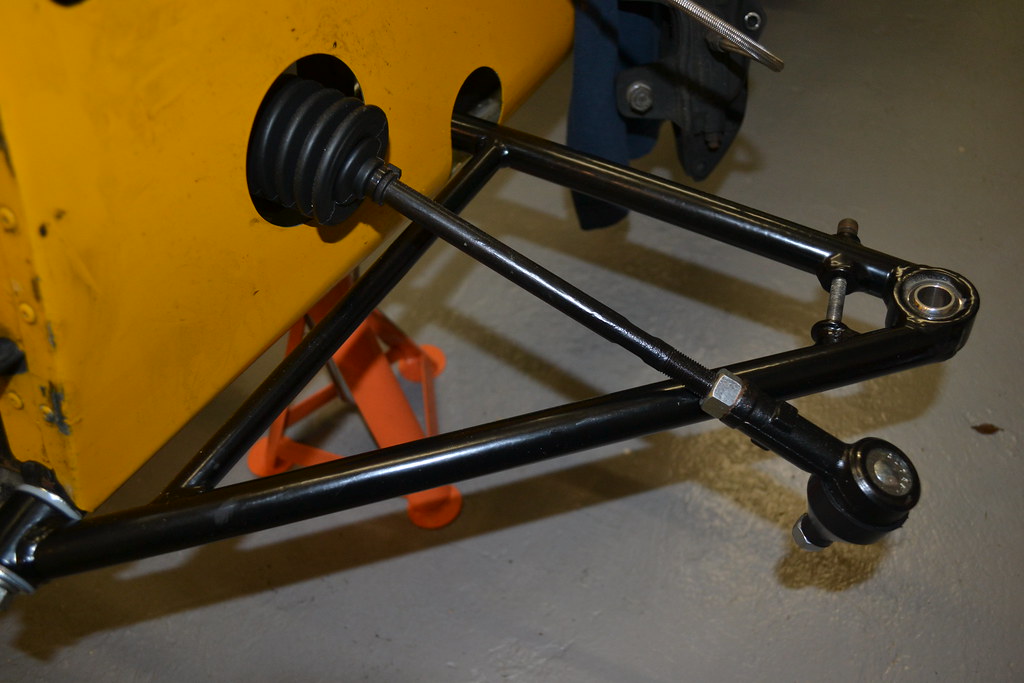
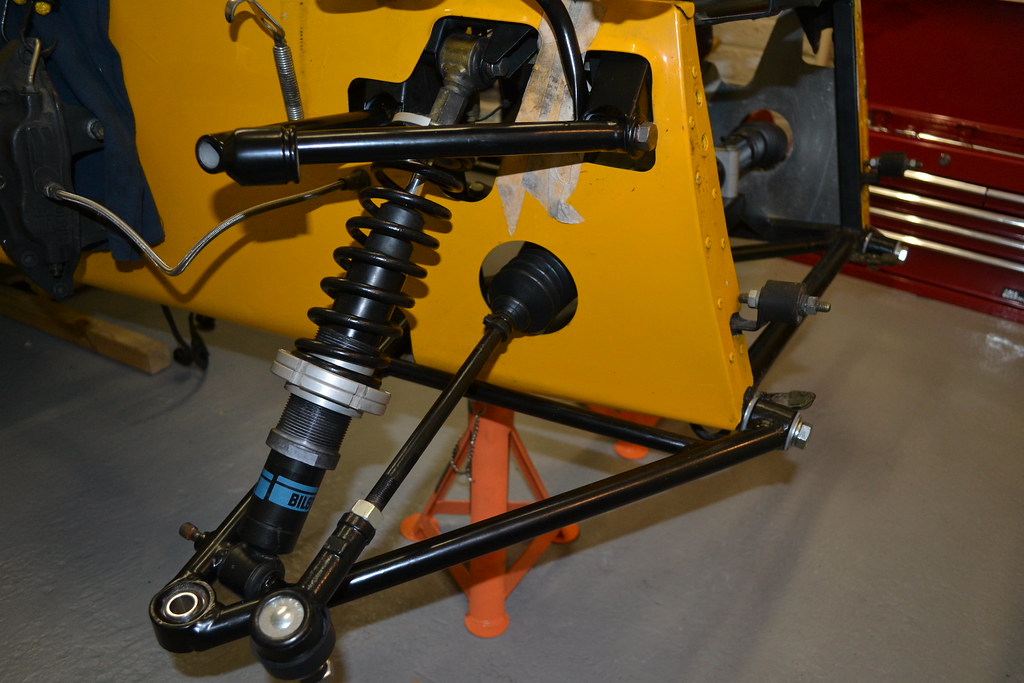
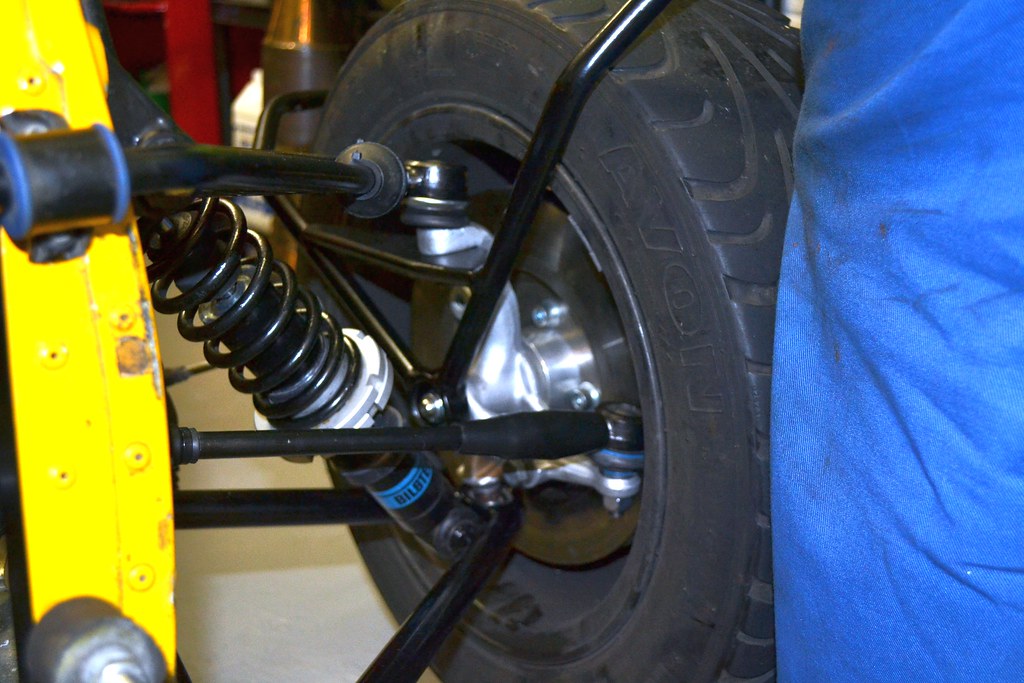
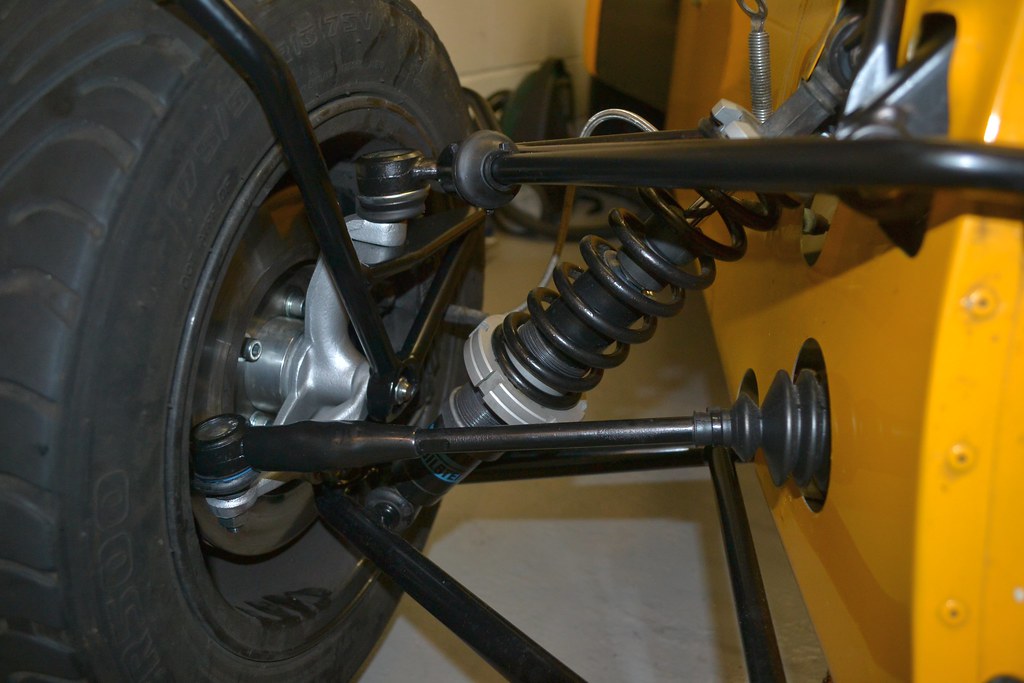
Then, it was front suspension time. The car's done 36k miles and frankly the front end was looking very tired.
I also suspected the bushes were on their way out too. So we totally stripped the front suspension, again this is relatively straight forward apart from one of the upper wishbone bolts that had seized in to the ferrule of the bush. Suffice to say it was an absolute nightmare to get it out and it had to be cut out with a dremel and carbon cutting disc But we got there in the end, despite a few little issues.
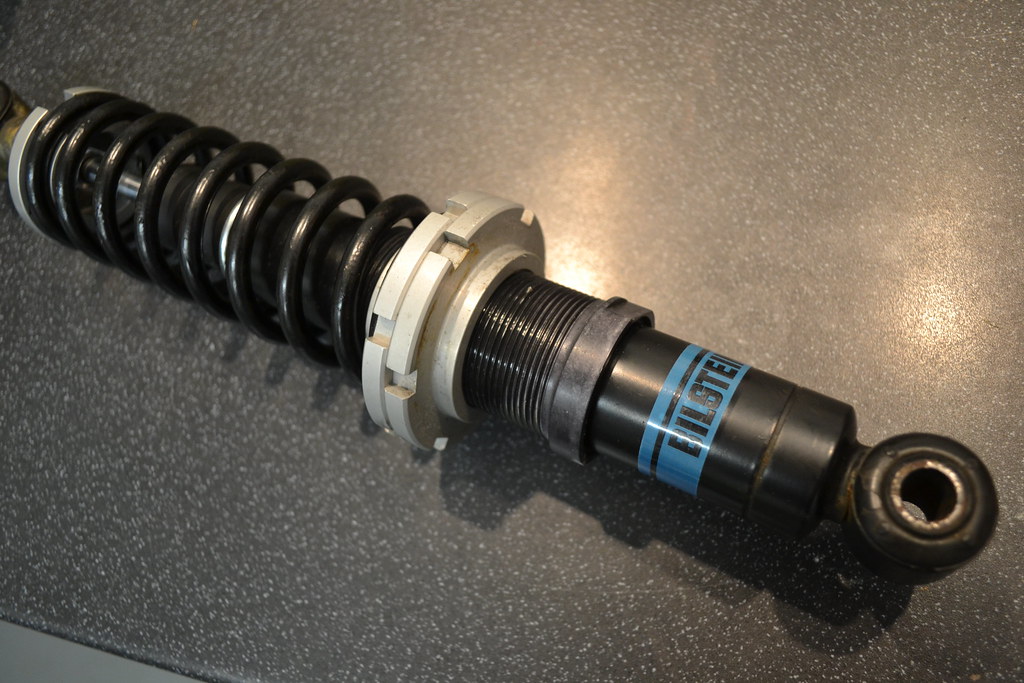
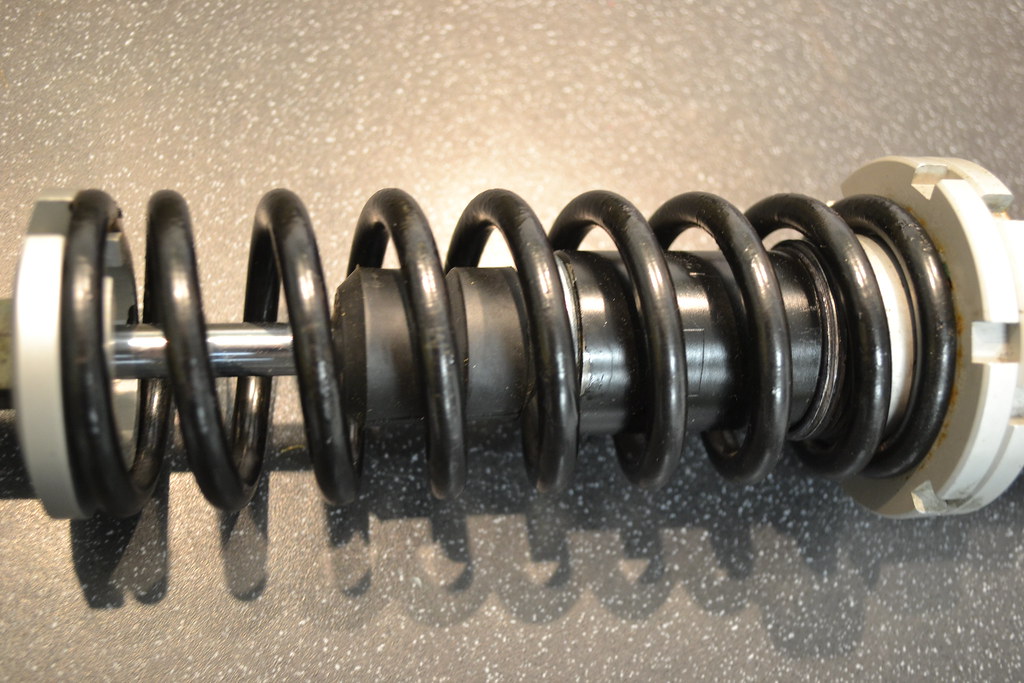
The Bilstein dampers have gone back to Bilstein in Leicester to be reconditioned, they strip and replace the internals and clean them up like new for £100 per damper so well worth doing. In addition, I've also got a full set of these to go on the car:
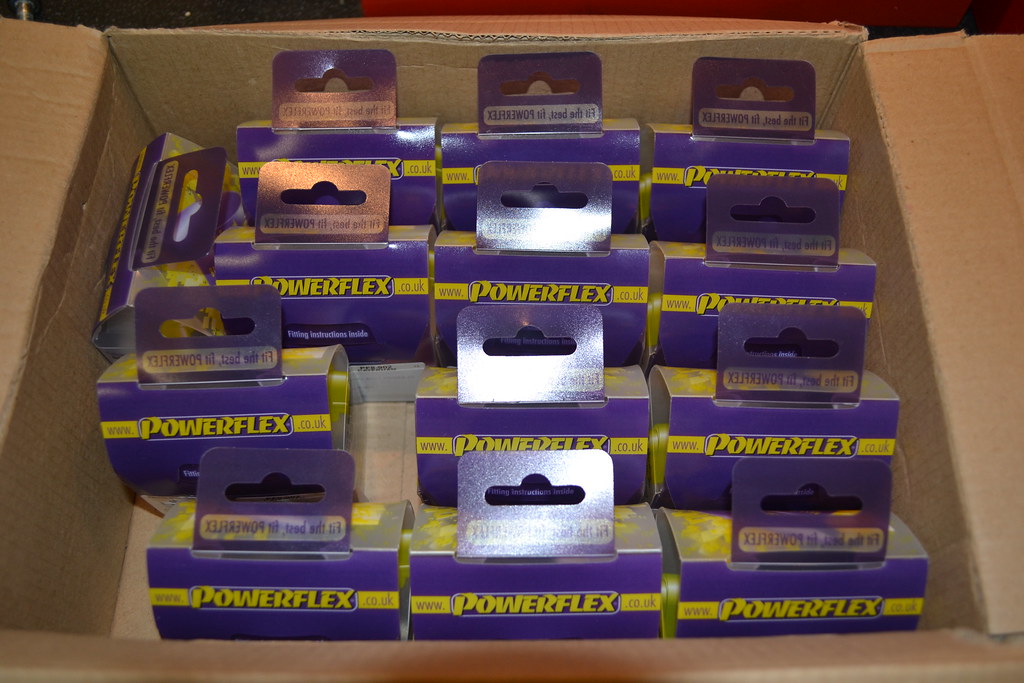
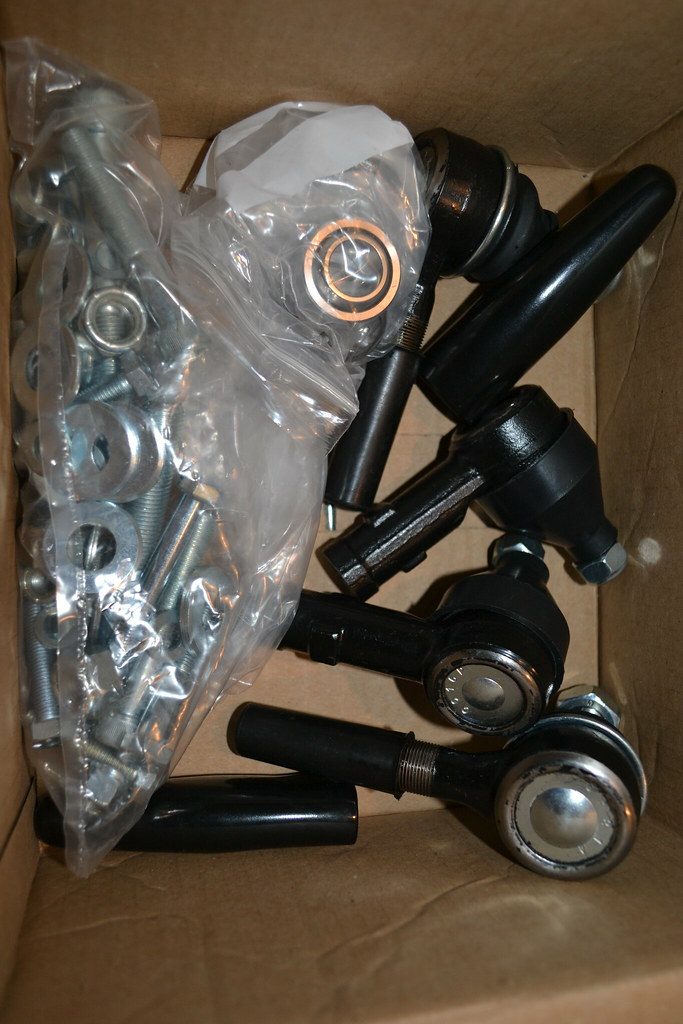
I've also bought all new nuts, bolts, TREs, ball joints and spherical bearings.
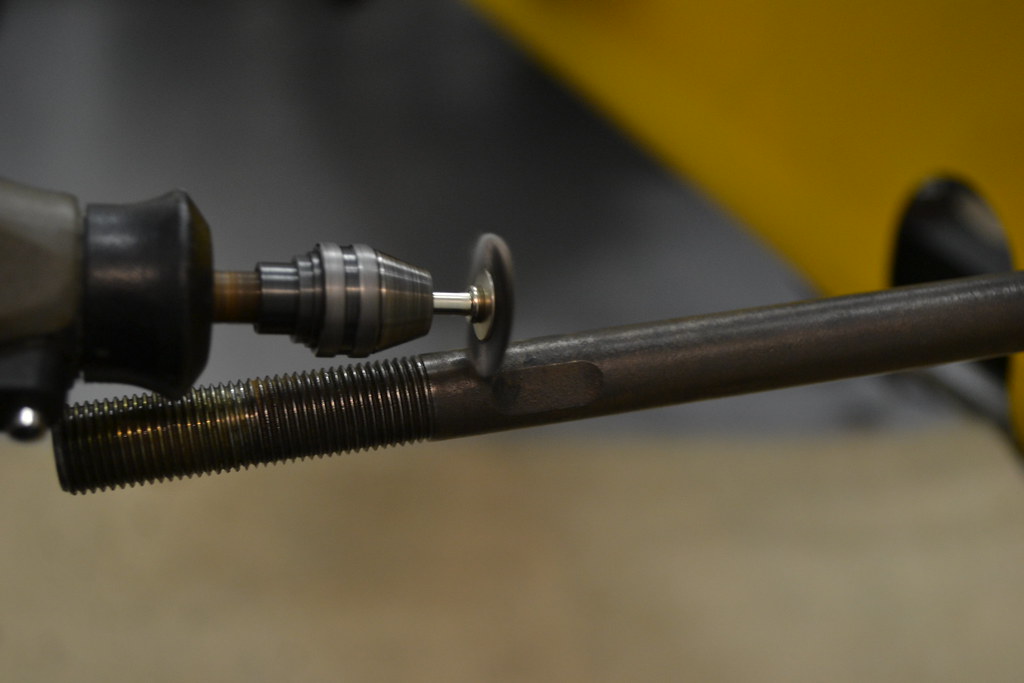
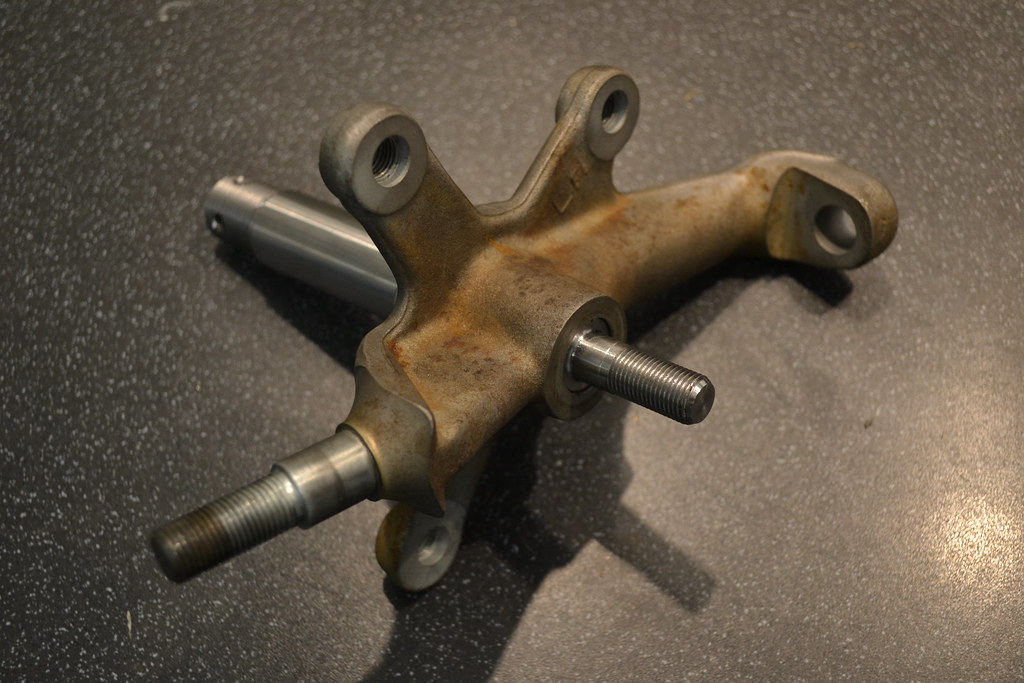
Next job is to get the bushes pressed out of the wishbones and then it's off to the powdercoaters. The uprights and steering rods will get blasted/cleaned up too. In the meantime, I've sorted the tie rods out too, they were dremeled to get the rusty flaky bits off and then given two coats of satin hammerite to make them match the powdercoat. New steering gaitors will top them off.
Well that's it for now, I'll carry on when the bits are back from powdercoating, the powerflex bushes have been fitted and the front suspension has been rebuilt, hopefully looking all like new!
Then it was quite a simple case to unbolt the 'box and bellhousing and hook them out (after some disconnecting under the tunnel trim).
The box has been serviced at Road and race Transmissions in Kent who are well known in Seven circles. It's been stripped and had the seals, collets, shims, 3rd gear synchro and a few other bits replaced and also had a bush on the tailshaft put in that should have been present from manufacture! Well worth doing for the piece of mind.
Next up was shortening the passenger footwell for the dry sump install. I don't tend to take passengers very often (if at all) and it's where the external oil tank goes, so off it came. For those that know, it's a complete b
h of a job and took around 3 hours start to finish, as getting to all the internal rivets is tough. In the end the (nicely corroded) battery tray came out (the new gel battery will go on the bulkhead) to make way for access through the top.The Dry Sump Kit should be delivered this week and contains the blanking plate needed to cap off the end. I've also decided where the gel battery will go and have ordered a bespoke oil catch tank
as well as some shift lights, a battery master switch and a new 12v socket for my battery conditioner.I took the opportunity to clean out all the 'grot traps' as they're known, the spaces between the skin and chassis tubes where are the muck, stones and road debris get in. Using my patented 'milk bottle container handle'
I managed to get a huge amount of ste out and then cleaned up the rest of the engine bay with a damp cloth, finishing off with WD40 to protect the gap between the ali and the steel chassis.Then, it was front suspension time. The car's done 36k miles and frankly the front end was looking very tired.
I also suspected the bushes were on their way out too. So we totally stripped the front suspension, again this is relatively straight forward apart from one of the upper wishbone bolts that had seized in to the ferrule of the bush. Suffice to say it was an absolute nightmare to get it out and it had to be cut out with a dremel and carbon cutting disc
But we got there in the end, despite a few little issues.The Bilstein dampers have gone back to Bilstein in Leicester to be reconditioned, they strip and replace the internals and clean them up like new for £100 per damper so well worth doing. In addition, I've also got a full set of these to go on the car:
I've also bought all new nuts, bolts, TREs, ball joints and spherical bearings.
Next job is to get the bushes pressed out of the wishbones and then it's off to the powdercoaters. The uprights and steering rods will get blasted/cleaned up too. In the meantime, I've sorted the tie rods out too, they were dremeled to get the rusty flaky bits off and then given two coats of satin hammerite to make them match the powdercoat. New steering gaitors will top them off.
Well that's it for now, I'll carry on when the bits are back from powdercoating, the powerflex bushes have been fitted and the front suspension has been rebuilt, hopefully looking all like new!
So, update time 
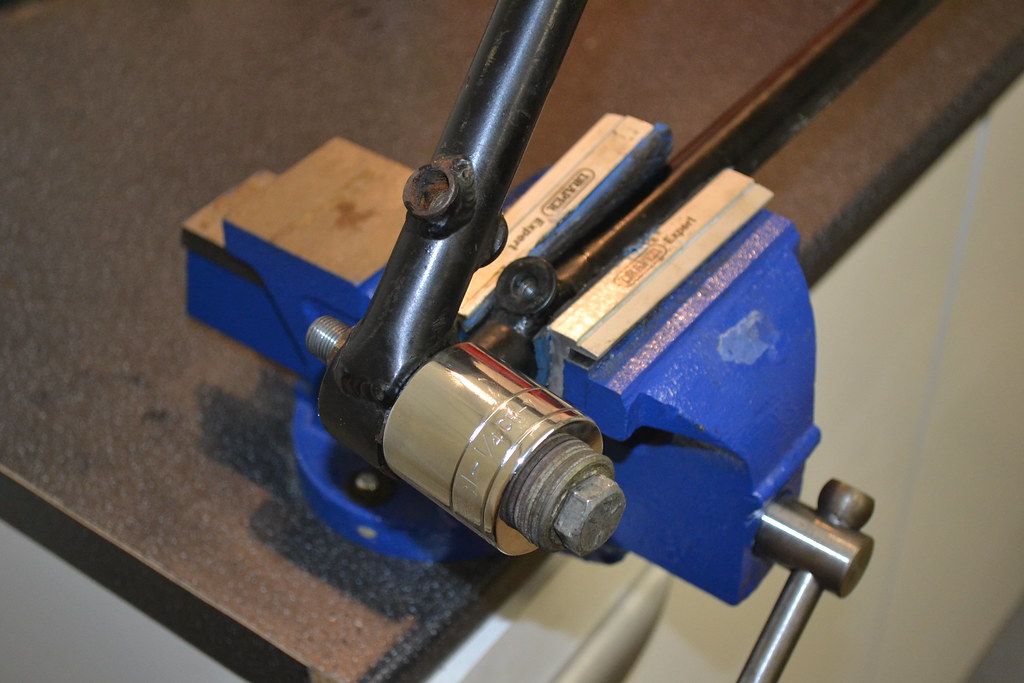
Before the suspension arms and lots of other bits could all go to the powdercoaters the bearings were all pressed out. As I thought, they were in a bit of a state and were a nightmare to remove. I got a local garage to do most of them except the lower wishbone spherical bearings that I did myself with the aid of a vice, some washers and a socket.
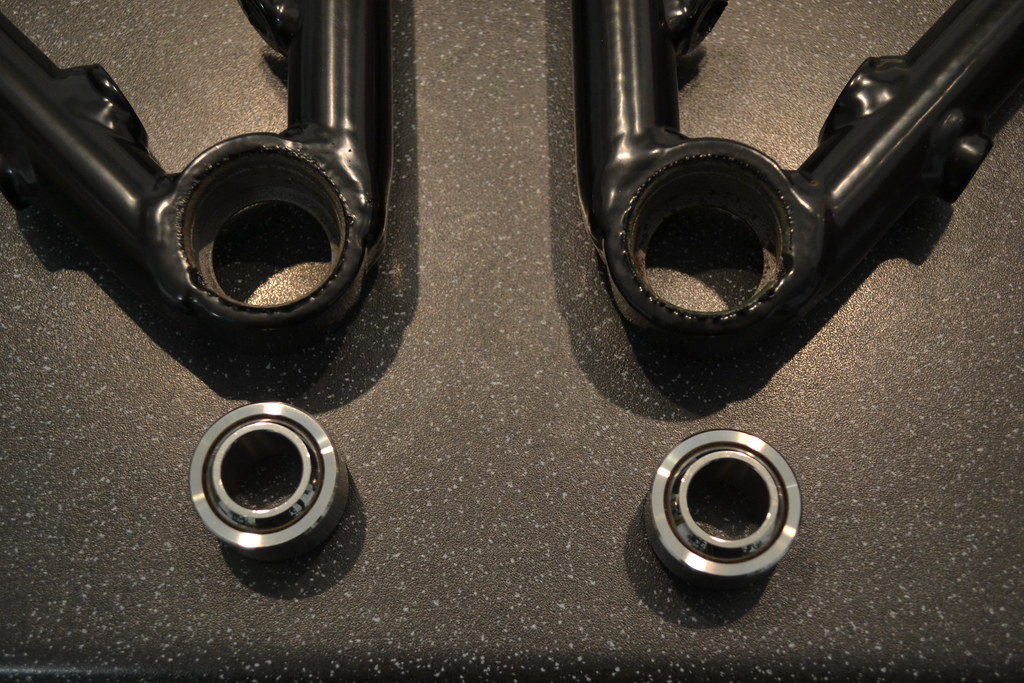
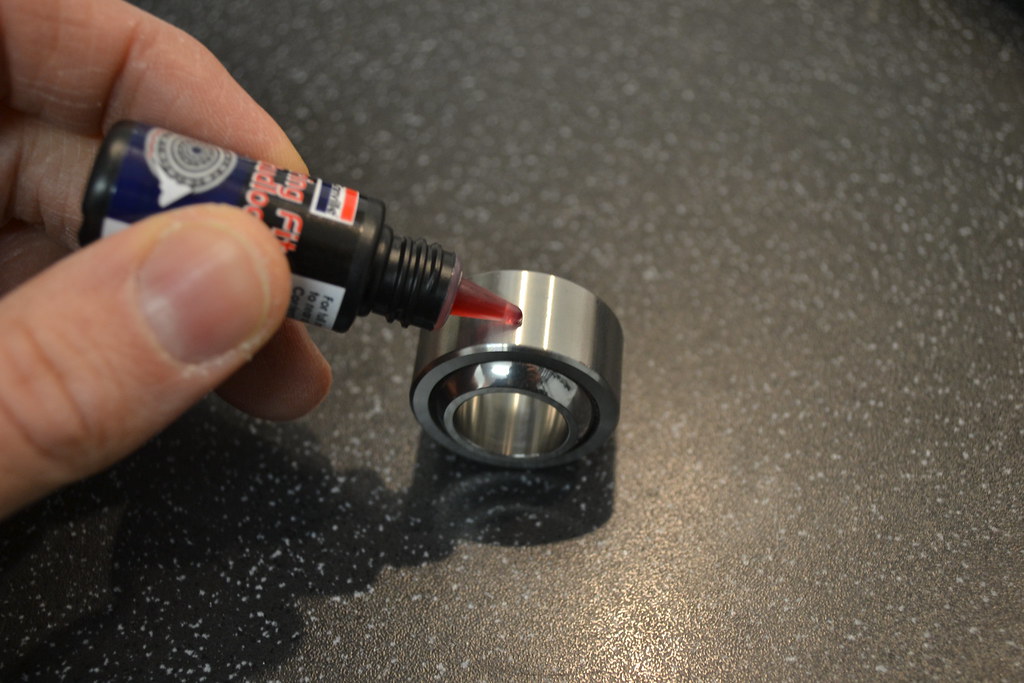
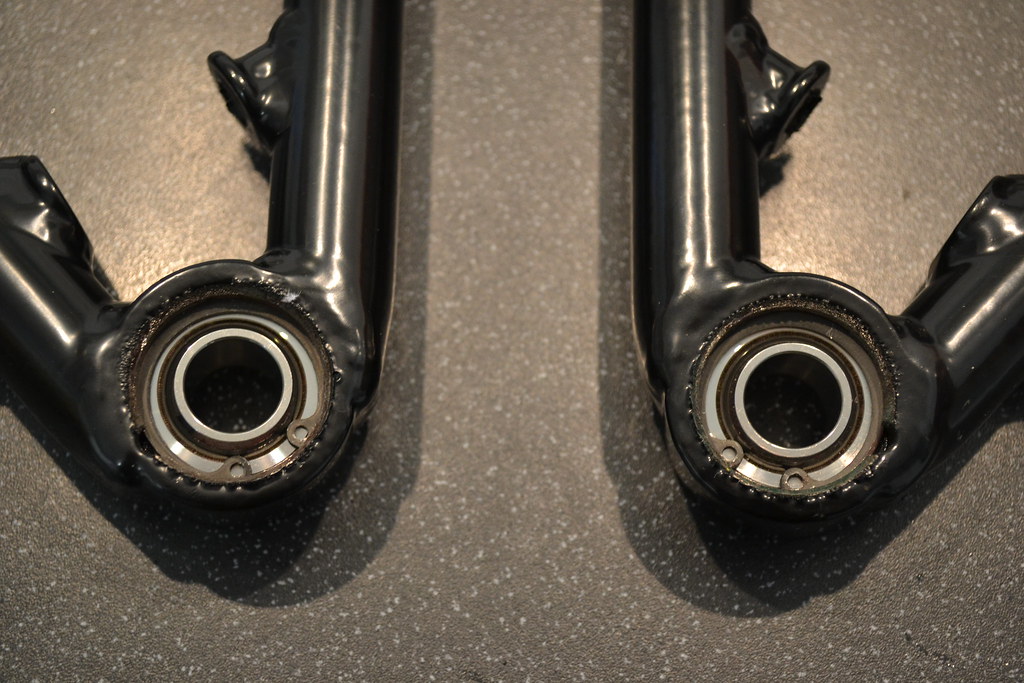
Once the bits came back from the powdercoaters looking all shiny, I put the new spherical bearings in with bearing lock and the new circlips fitted (the powdercoat edges on the tops were cleaned off after the image was taken!)
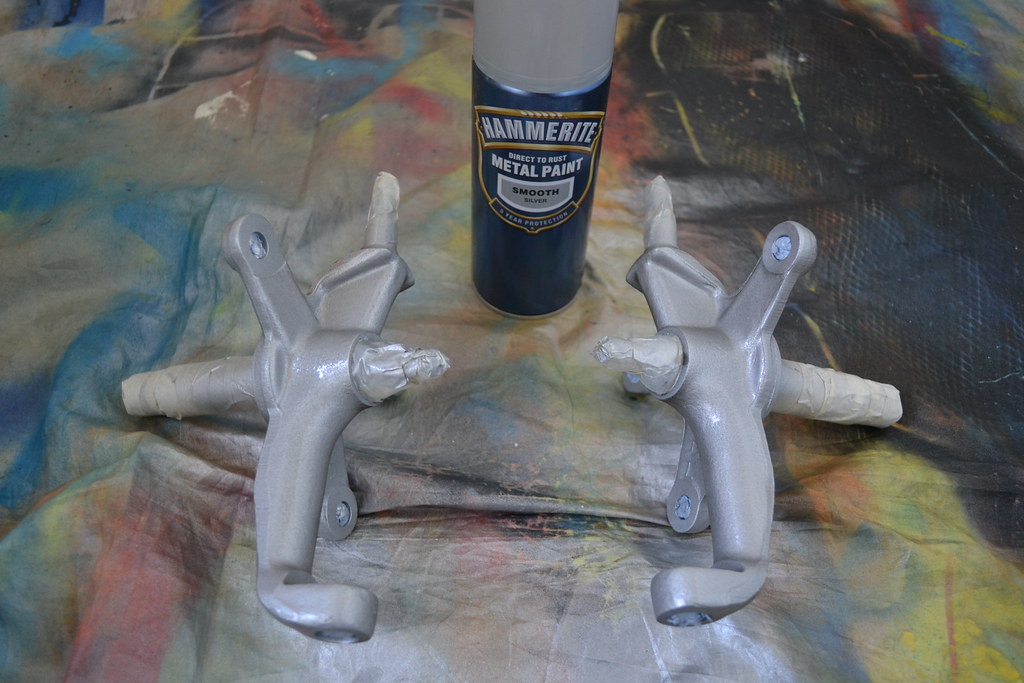
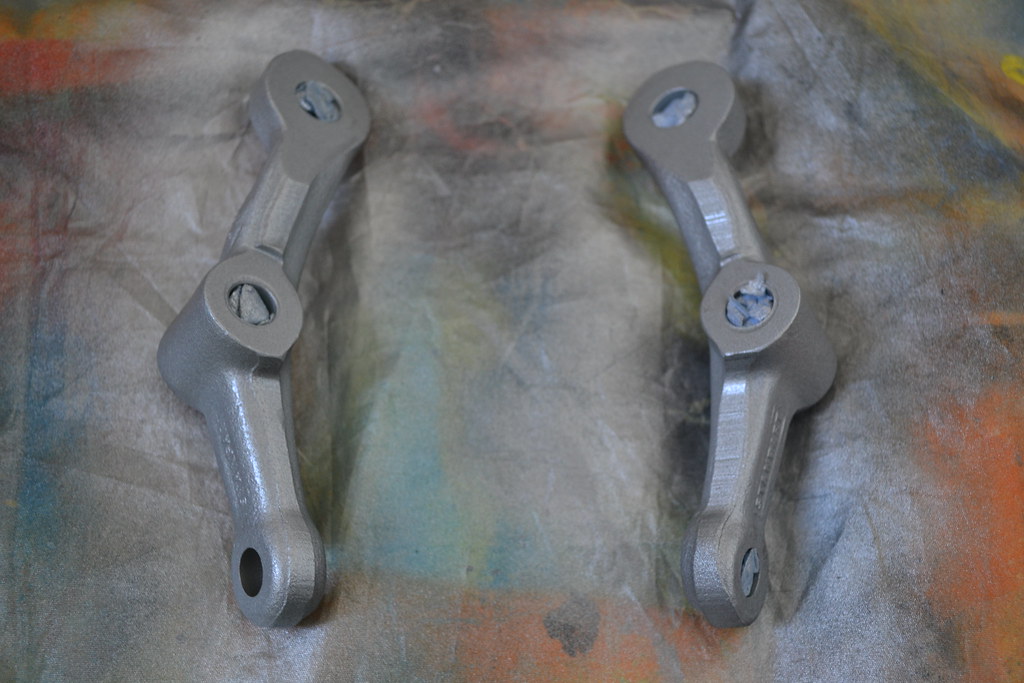
Next up were the uprights and steering arms. As you'll have seen from above they were manky, so I had them blasted back and then had the new stub axles fitted. Technically Caterham say you don't need them pressed in but I didn't want them rotating in the upright so had them done anyway. As you can see they came back looking much better with only some slight discolouration. So, out came the Hammerite and they were given a quick tidy up. Point to note is that spray hammerite takes ages to dry so they were popped in front of a 2Kw fan heater to help things along
Once they were done, the powerflex bushes were fitted. This was very straightforward and the fit was excellent. To aid the fitting of the wishbones back in the chassis (and after test fitting) all the powdercoat on the faces had to be scraped off. You'll notice the scratch I made on the wishbone Thankfully this is underneath the car and quite recessed so very hard to see, however I was still pretty miffed with myself!

In the meantime, the dampers came back from Bilstein having been reconditioned with completely new innards and a tidy up. I spruced up the springs with some Hammerite to make them look presentable as there were a few little rust spots.
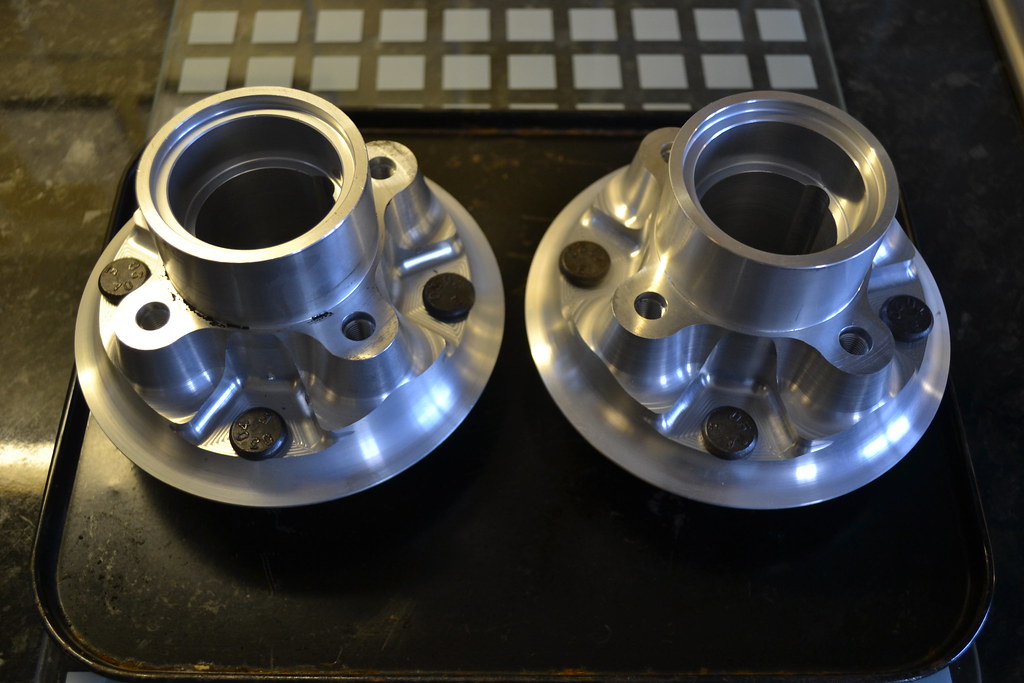
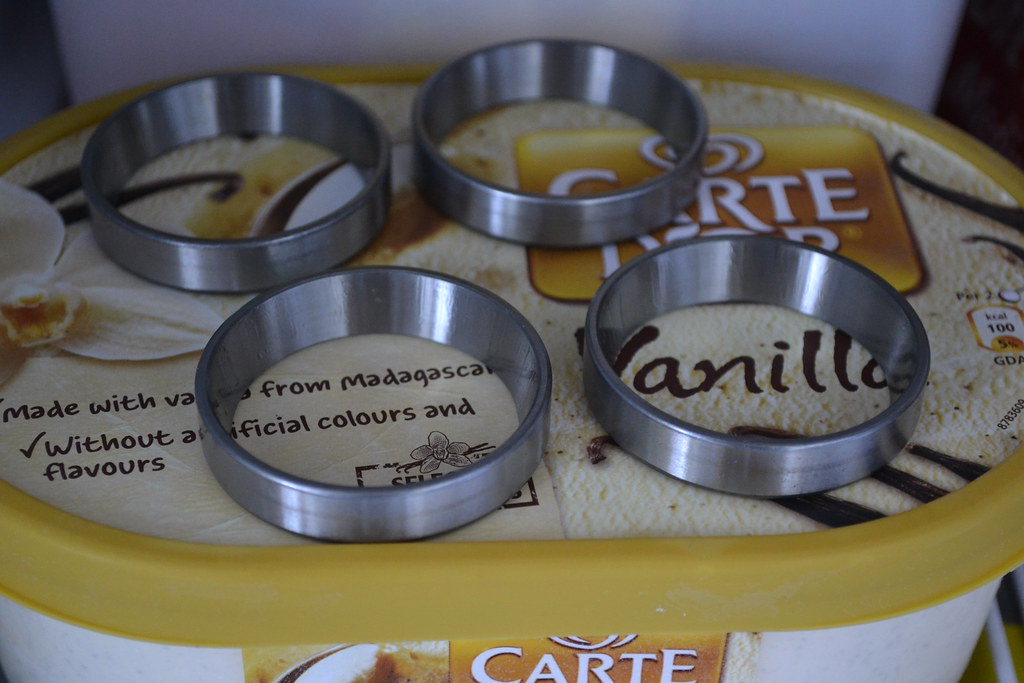
Next I had to get the bearing races in to the new lightweight and uprated hubs. So the hubs went in to the oven at 150 degrees (I made sure my lovely wife was out first!) and the bearing cups went in the freezer as per Caterham's instructions, the idea being 'they should drop straight in'. Well they didn't and I had to do ANOTHER trip to my local garage to get that sorted.
Anyway, finally the suspension was assembled, taking around 4 hours and at least 5 cups of tea with the help of a mate. It's a fairly easy procedure, lower wishbones first, then the uppers, then fit the uprights and front ARB. The steering arms are handed on the uprights but it's all pretty obvious.

Once the front discs were cleaned (they were pretty minging round the centres) they were fitted to the new hubs and the new bearings greased and installed.
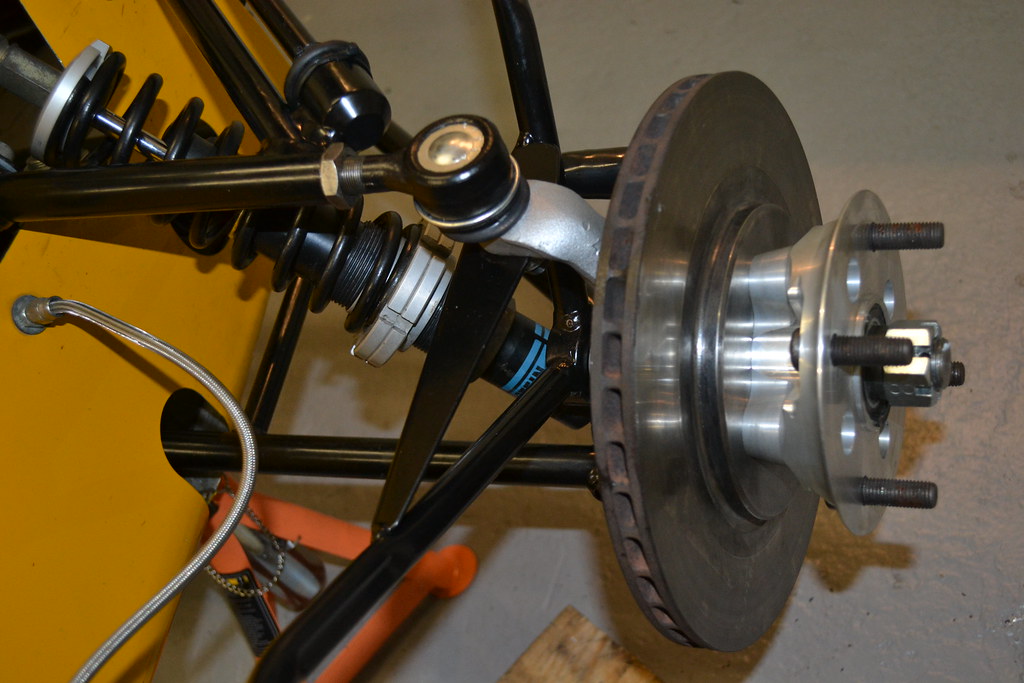
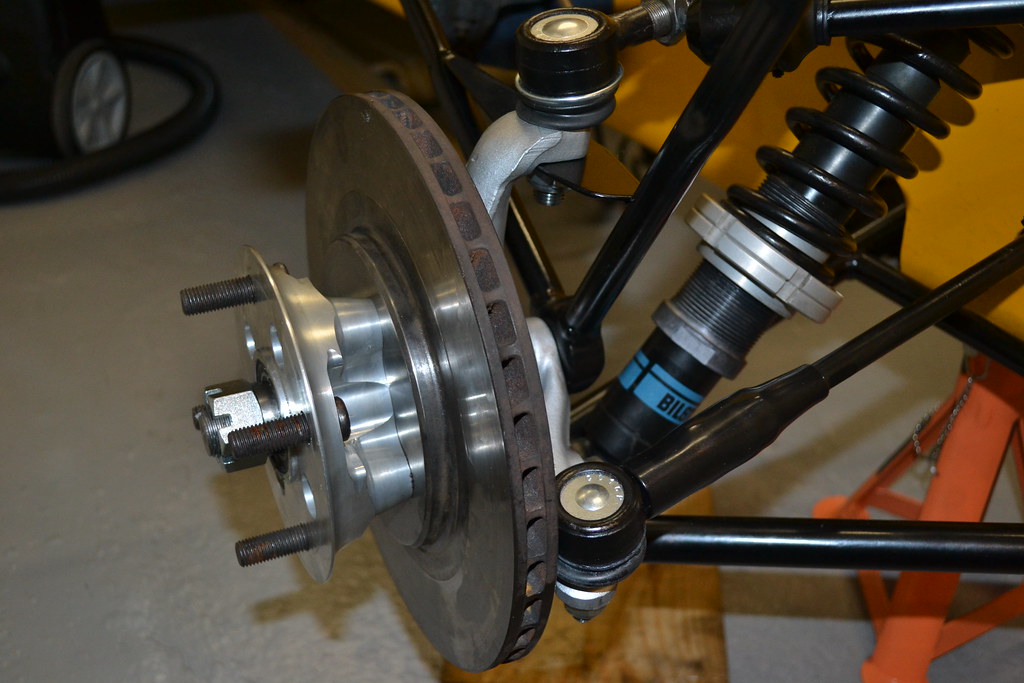
Finally, the brake callipers were given a good scrub and bolted on and the wheels put back on - job done
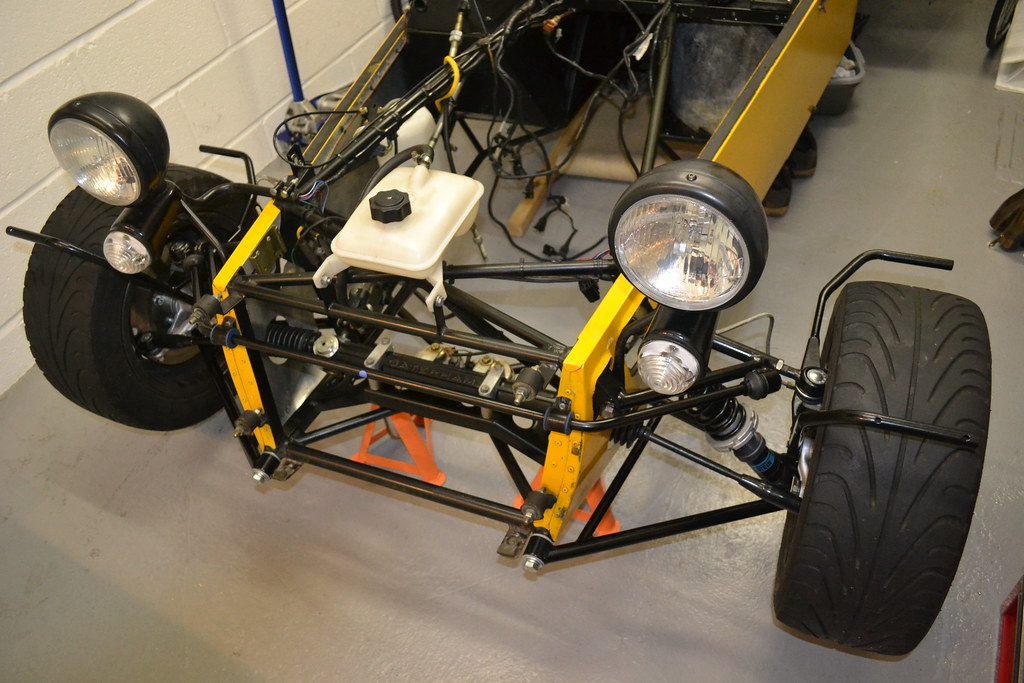
The obligatory before and after shot!
BEFORE
AFTER
Before the suspension arms and lots of other bits could all go to the powdercoaters the bearings were all pressed out. As I thought, they were in a bit of a state and were a nightmare to remove. I got a local garage to do most of them except the lower wishbone spherical bearings that I did myself with the aid of a vice, some washers and a socket.
Once the bits came back from the powdercoaters looking all shiny, I put the new spherical bearings in with bearing lock and the new circlips fitted (the powdercoat edges on the tops were cleaned off after the image was taken!)
Next up were the uprights and steering arms. As you'll have seen from above they were manky, so I had them blasted back and then had the new stub axles fitted. Technically Caterham say you don't need them pressed in but I didn't want them rotating in the upright so had them done anyway. As you can see they came back looking much better with only some slight discolouration. So, out came the Hammerite and they were given a quick tidy up. Point to note is that spray hammerite takes ages to dry so they were popped in front of a 2Kw fan heater to help things along
Once they were done, the powerflex bushes were fitted. This was very straightforward and the fit was excellent. To aid the fitting of the wishbones back in the chassis (and after test fitting) all the powdercoat on the faces had to be scraped off. You'll notice the scratch I made on the wishbone
Thankfully this is underneath the car and quite recessed so very hard to see, however I was still pretty miffed with myself!In the meantime, the dampers came back from Bilstein having been reconditioned with completely new innards and a tidy up. I spruced up the springs with some Hammerite to make them look presentable as there were a few little rust spots.
Next I had to get the bearing races in to the new lightweight and uprated hubs. So the hubs went in to the oven at 150 degrees (I made sure my lovely wife was out first!) and the bearing cups went in the freezer as per Caterham's instructions, the idea being 'they should drop straight in'. Well they didn't and I had to do ANOTHER trip to my local garage to get that sorted.
Anyway, finally the suspension was assembled, taking around 4 hours and at least 5 cups of tea with the help of a mate. It's a fairly easy procedure, lower wishbones first, then the uppers, then fit the uprights and front ARB. The steering arms are handed on the uprights but it's all pretty obvious.
Once the front discs were cleaned (they were pretty minging round the centres) they were fitted to the new hubs and the new bearings greased and installed.
Finally, the brake callipers were given a good scrub and bolted on and the wheels put back on - job done
The obligatory before and after shot!
BEFORE
AFTER
Whilst all the suspension stuff was going on, I got on with a few of the smaller jobs as time allowed. First up was sorting out the carbon front wings which needed a good clean and new side repeaters fitting.
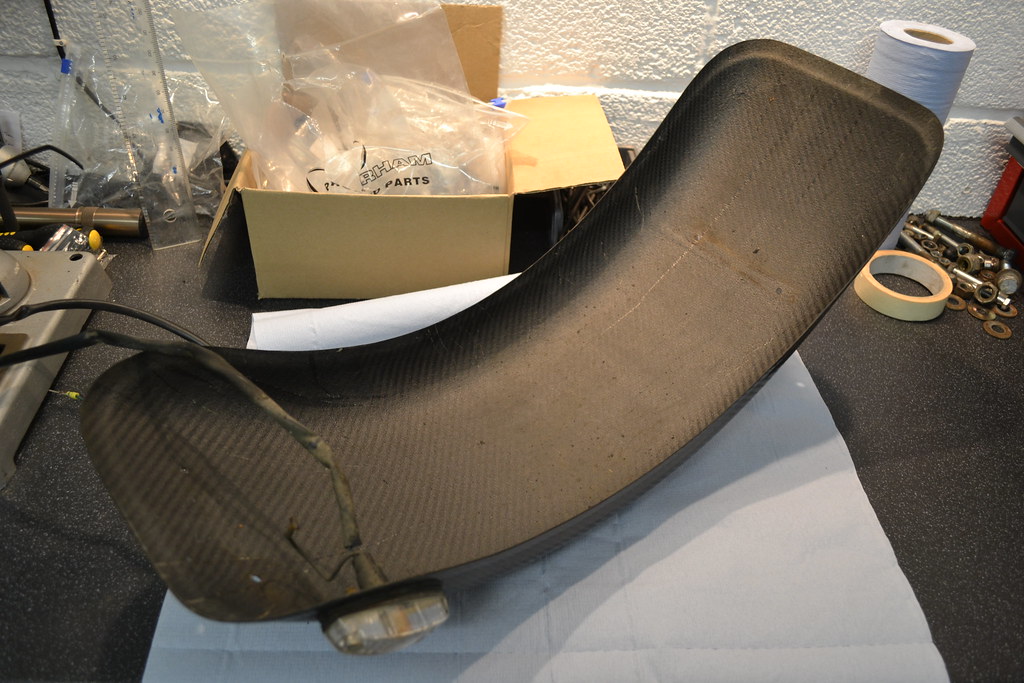
The bolts holding them in were well and truly rusted in so out came the Dremel and some reinforced cutting disc!

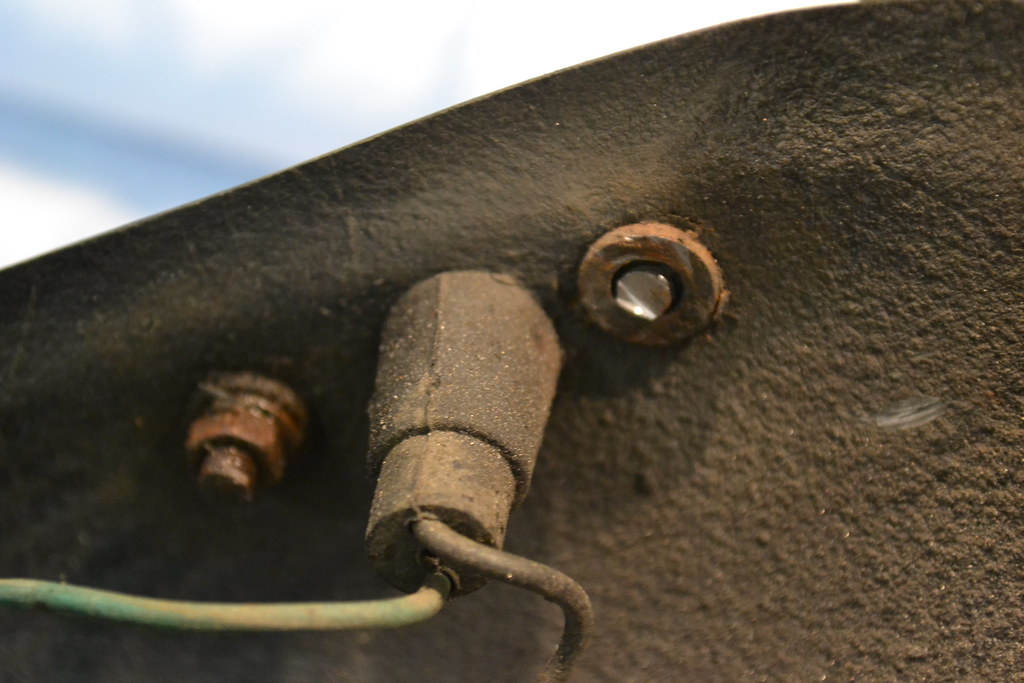
New ones fitted:

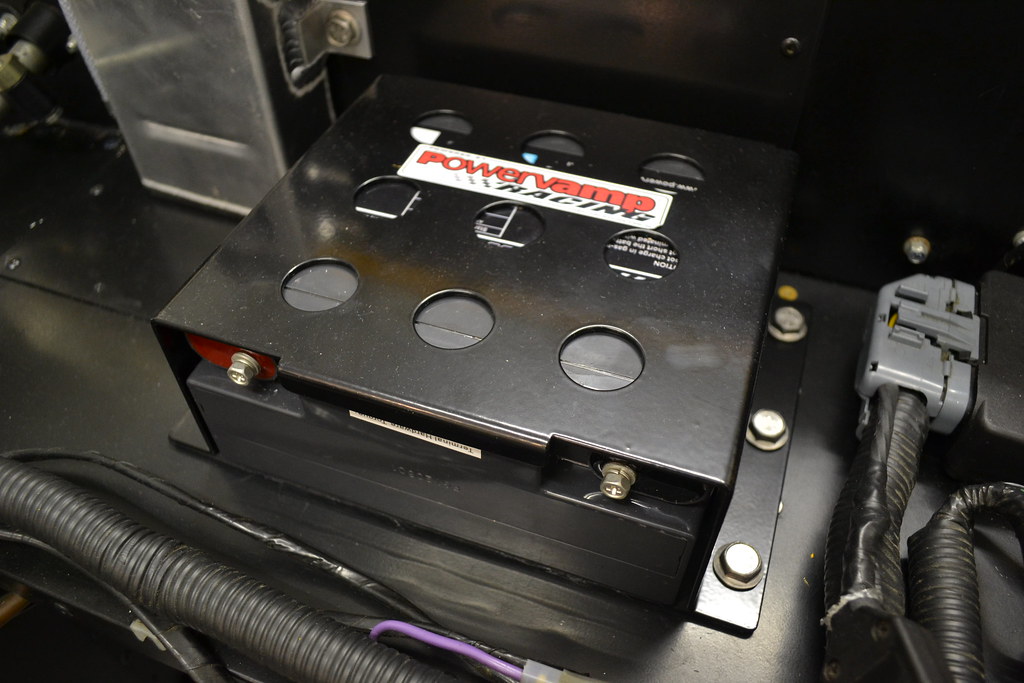
Then, the new Powervamp Clubsport 22 battery was fitted on the bulkhead. This wasn't particularly easy and took me some hours to get right due to the position of the bolts going through the tunnel as they were very close to the fuel lines. Also, the heater blanking plate meant there was a 3mm step so to get the battery level and also to make sure it was isolated from vibration, I cut and fitted sticky backed foam to the back off the battery and bolted it down. I'm pleased I had the cage powdercoated at the same time as the suspension as I think it ties in better.
At the same time, the bespoke catch tank was fitted. Pretty easy stuff, I just made sure it was fitted with some penny washers being the bulkhead to spread the load.

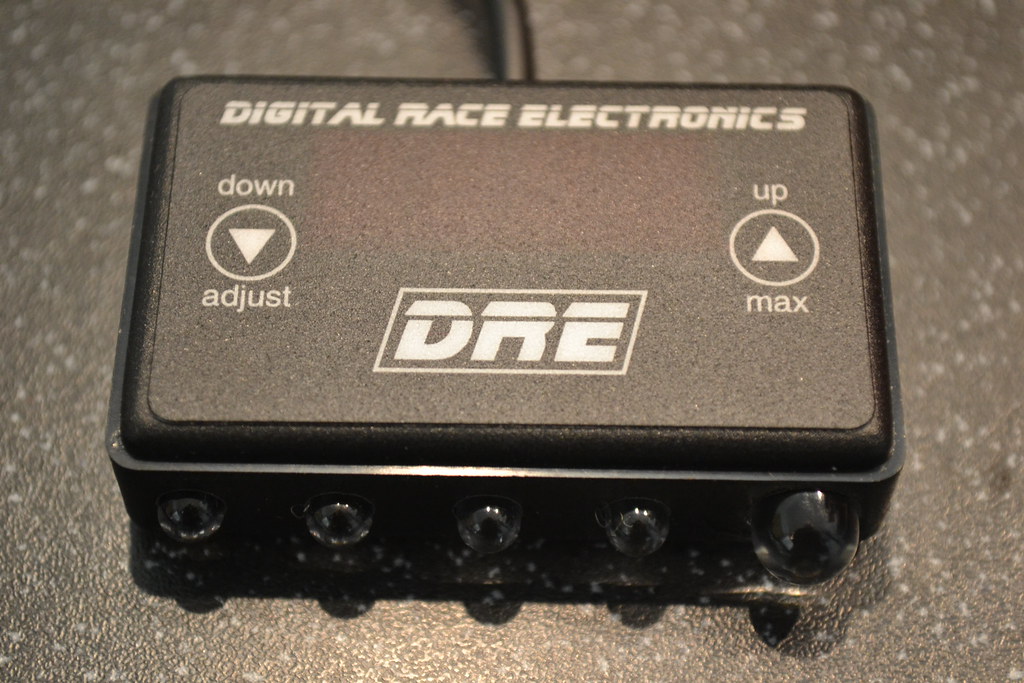
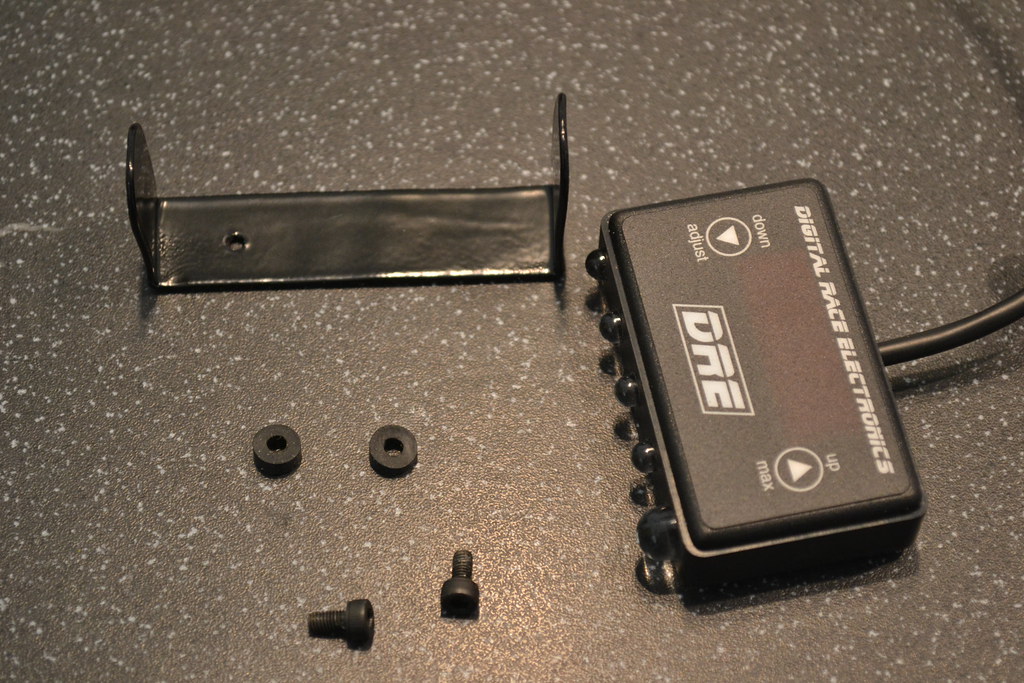
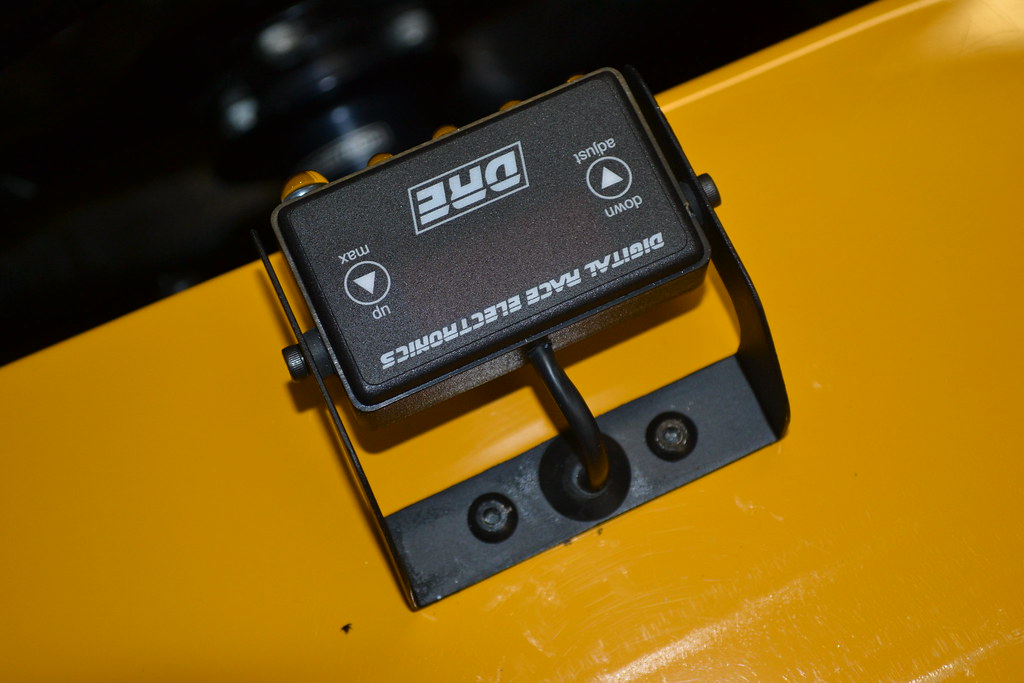
Next up, was the DRE shift lights. The K Series (especially on the throttle bodies) is all about revs and the power is all above 5k rpm. This is great and suits the car well, however, I've always wanted shift lights as I like to keep my eyes on the road!
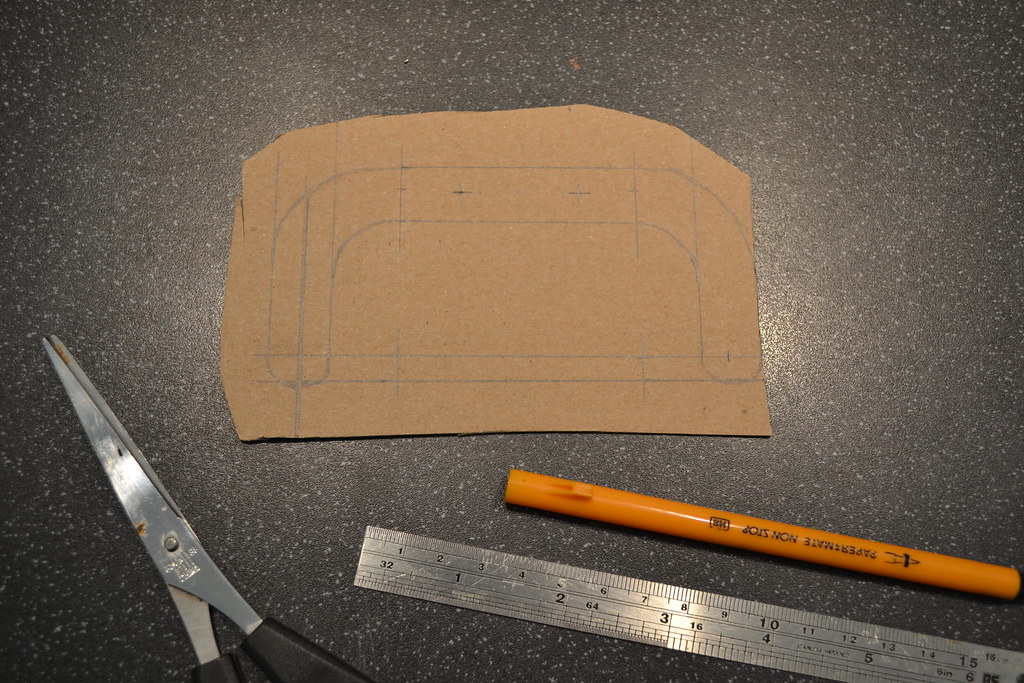
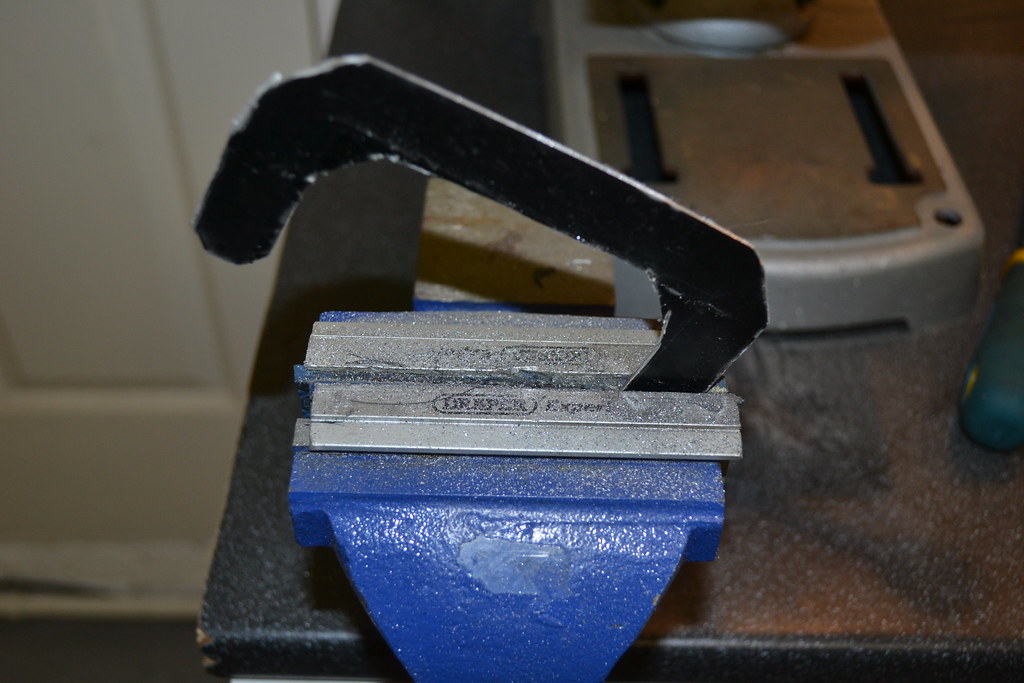
This was a job I really wasn't looking forward to as being a fussy bugger, I knew I'd have to make up a bracket. DRE say to place them on the dash using velcro to the side of the wheel...something I wasn't prepared to do. The bracket can't be symmetical though, as the scuttle isn't level at the point you need to mount the lights so not the easiest thing to get perfectly straight and level. That said, Mk1 bracket was measured, cut, drilled, made up (from some scrap ali) and powdercoated with the other bits...
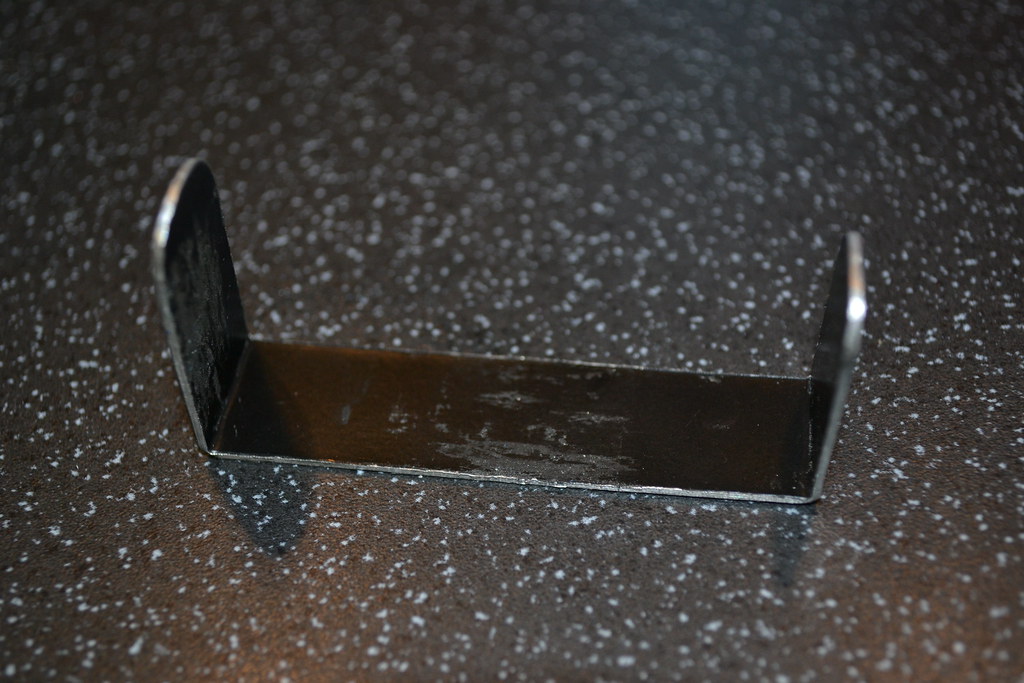
However, when I came to fit it, it didn't work Unfortunately, the rivets holding it on to the scuttle would have gone straight through and chassis tube, so it was back to the drawing board for Mk2. This is shaped to take the mounting point back (but not too far so it fouls the aeroscreen!). Again this was made from scrap ali by hand.
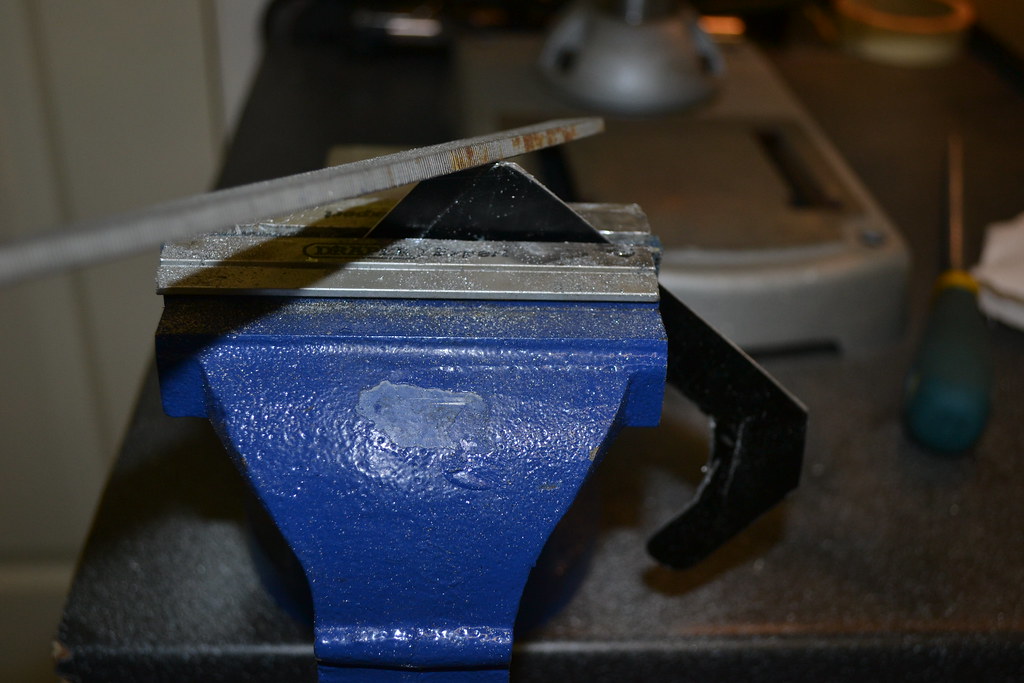
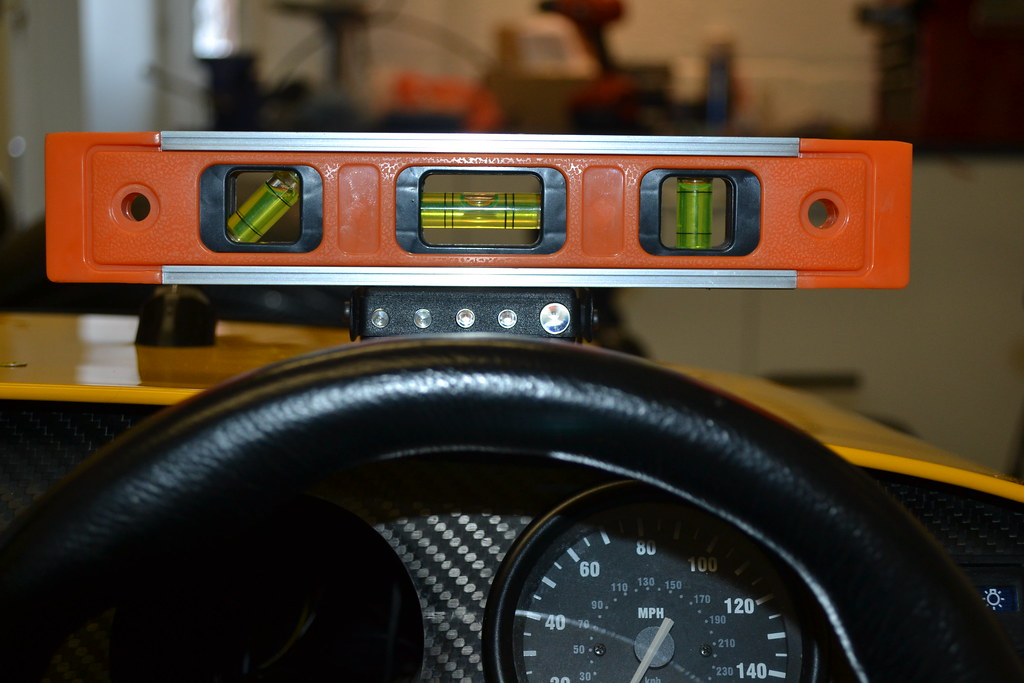
This was then folded and painted with Hammerite, then rivetted to the scuttle having measured it EXTREMELY carefully! Finally it was wired in under the dash.
That's it for now, next up is getting the engine and gearbox back in and the dry sump kit fitted
The bolts holding them in were well and truly rusted in so out came the Dremel and some reinforced cutting disc!
New ones fitted:
Then, the new Powervamp Clubsport 22 battery was fitted on the bulkhead. This wasn't particularly easy and took me some hours to get right due to the position of the bolts going through the tunnel as they were very close to the fuel lines. Also, the heater blanking plate meant there was a 3mm step so to get the battery level and also to make sure it was isolated from vibration, I cut and fitted sticky backed foam to the back off the battery and bolted it down. I'm pleased I had the cage powdercoated at the same time as the suspension as I think it ties in better.
At the same time, the bespoke catch tank was fitted. Pretty easy stuff, I just made sure it was fitted with some penny washers being the bulkhead to spread the load.
Next up, was the DRE shift lights. The K Series (especially on the throttle bodies) is all about revs and the power is all above 5k rpm. This is great and suits the car well, however, I've always wanted shift lights as I like to keep my eyes on the road!
This was a job I really wasn't looking forward to as being a fussy bugger, I knew I'd have to make up a bracket. DRE say to place them on the dash using velcro to the side of the wheel...something I wasn't prepared to do. The bracket can't be symmetical though, as the scuttle isn't level at the point you need to mount the lights so not the easiest thing to get perfectly straight and level. That said, Mk1 bracket was measured, cut, drilled, made up (from some scrap ali) and powdercoated with the other bits...
However, when I came to fit it, it didn't work
Unfortunately, the rivets holding it on to the scuttle would have gone straight through and chassis tube, so it was back to the drawing board for Mk2. This is shaped to take the mounting point back (but not too far so it fouls the aeroscreen!). Again this was made from scrap ali by hand. This was then folded and painted with Hammerite, then rivetted to the scuttle having measured it EXTREMELY carefully! Finally it was wired in under the dash.
That's it for now, next up is getting the engine and gearbox back in and the dry sump kit fitted
Even more outstanding work. My Seven is going to look so scruffy compared to the other local ones this year!
Duly noted on the profile pic - I really wasn't on the ball!
Loving the OCD in the garage, tool chest and shift light positioning. I'm exactly the same. Spent a pleasant afternoon the other day cleaning and reorganising my garage. Is it mean to ask if you were sitting in the car when you took the pic...?
Gassing Station | Readers' Cars | Top of Page | What's New | My Stuff