The Stealth Vivaro Camper Conversion
Discussion


Following on from the threads about converting panel vans into campers, I thought I'd share my project. Basically I'm on my summer break before my final year of uni and therefore wanted to do something a bit different. I'm into my mountain biking and I was keen to go explore the alps a bit more than my usual summer trip to the portes du soleil region and therefore needed a wagon of some description.
I was after something comfortable for one but able to cope with two if necessary and settled on a lwb vivaro. The best condition one I could find with the newer engine and 6 speed box came in a colour to match the yellow peril of tampon, top bloke for advice when I emailed him.
All in I wanted this project done in less than a month and during this time I was mainly working 6 day weeks to pay for it so the majority was done in the evenings and on a few Sundays. Thankfully one of my mates was great here and helped out most nights.
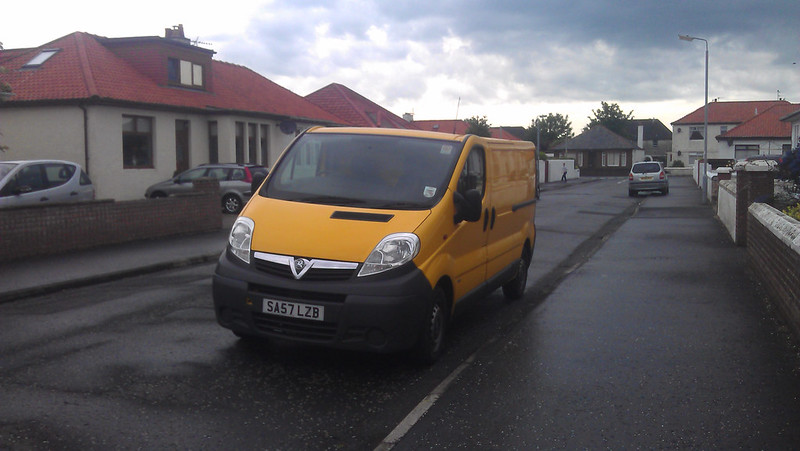 image by poloding along, on Flickr
I wanted a side window so got that installed by a company in Glasgow and apart from the vinyl was the only thing I didn't do myself.
 image by poloding along, on Flickr
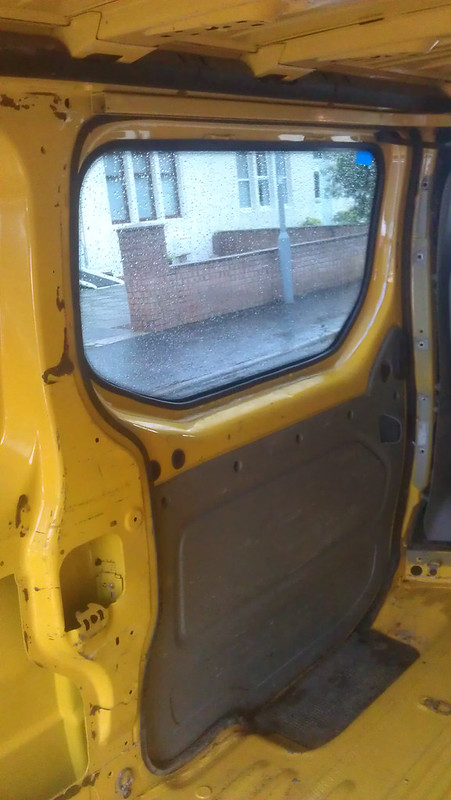 image by poloding along, on Flickr
First step was to strip everything out, right back to the shell including removing the seats and cab floor. The cab floor was rather wet so I dried it out and sorted the door seals.
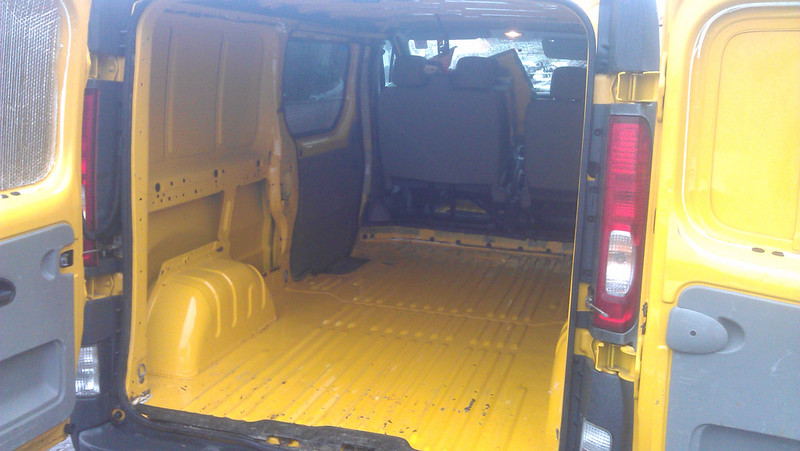 image by poloding along, on Flickr
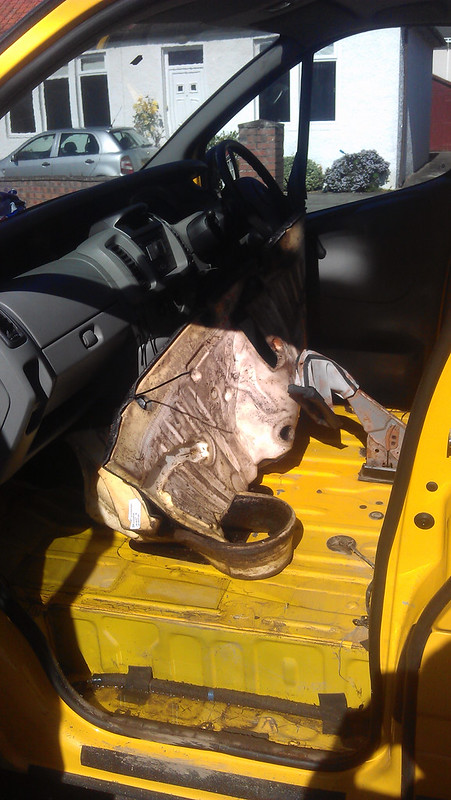 image by poloding along, on Flickr
Next step was to make a start on the walls. I started by cleaning off any old silicone and deburring all the old screw holes. Then the sound deadening was done with flashing tape. This got stuck over the arches and onto every panel until my two rolls ran out. I took a blow torch over the top of all the tape to melt it together and smooth it out.
 Van by poloding along, on Flickr
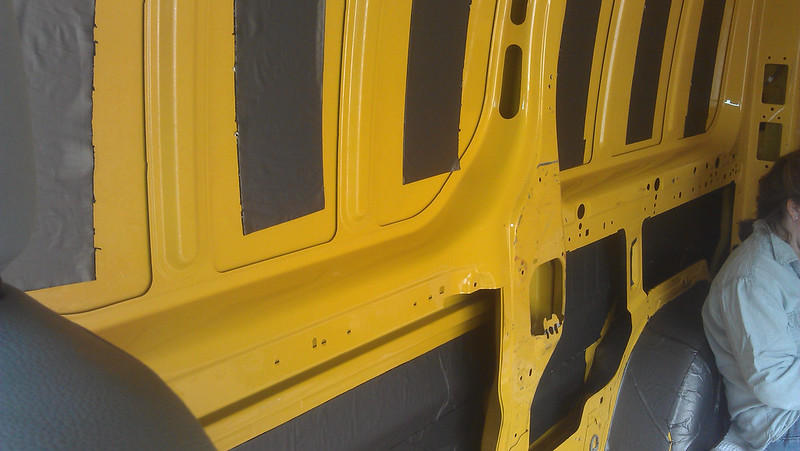 image by poloding along, on Flickr
I insulated the floor next using a insulation mat for concrete floors from b and q, it's supposed to serve as insulation, sound proofing and be water resistant so seemed worth a shot. This was cut to size and put down then the original ply floor put on top.
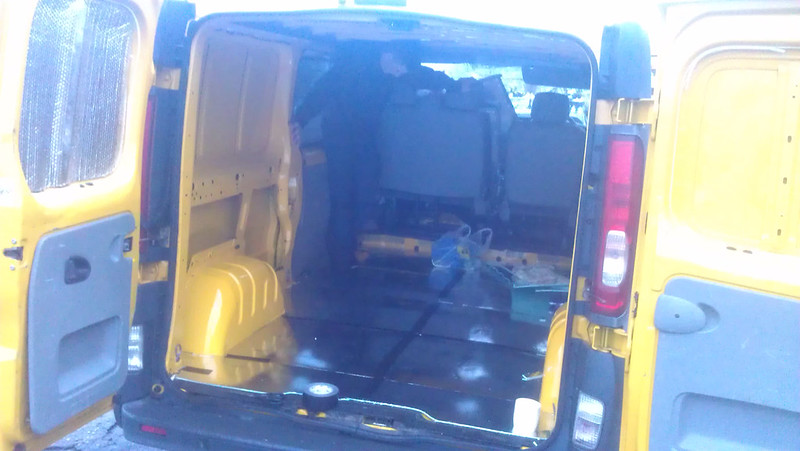 image by poloding along, on Flickr
I then used foil backed camping mats as a first layer of insulation. These were stuck onto all the walls and roof with adhesive spray.
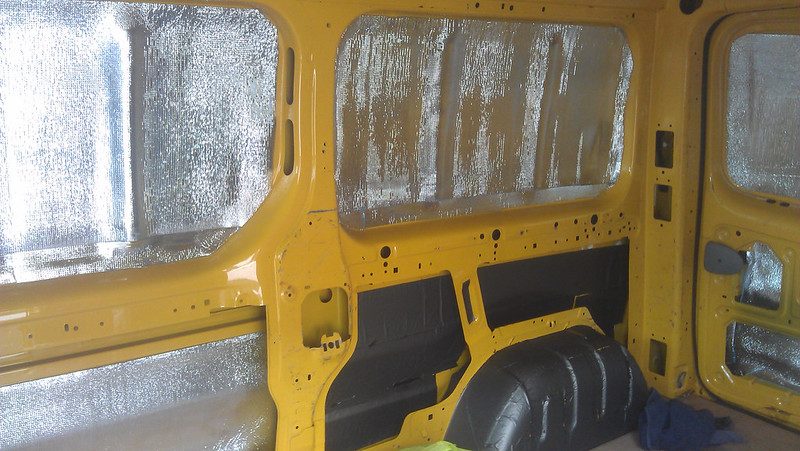 image by poloding along, on Flickr
I made a start on some of the wall insulation, using double layered foil bubble wrap stuff. Keeping it simple I cut two lengths the size of the sides which were taped in place then would be secured once the ply went back on top. The insulation was also rolled up and inserted into the struts and later glued to the roof panels and door panels as well.
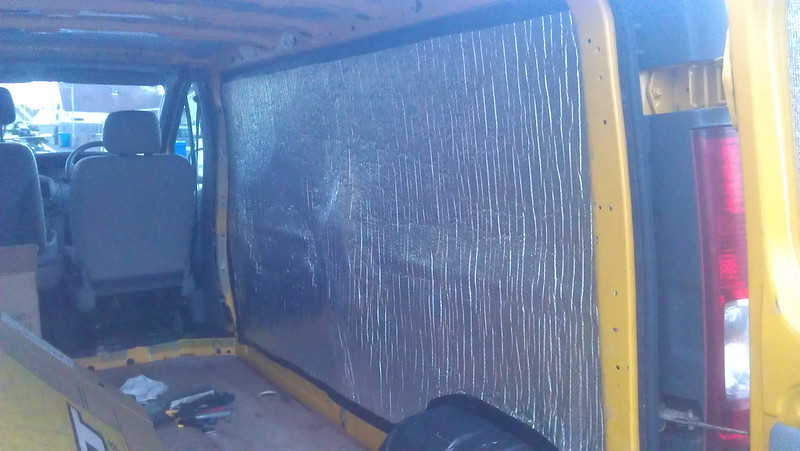 image by poloding along, on Flickr
At this point I also relaid the cab floor and bolted the seats back in place. I installed a seat swivel on the passenger bench which has been superb for opening up the space.
 image by poloding along, on Flickr
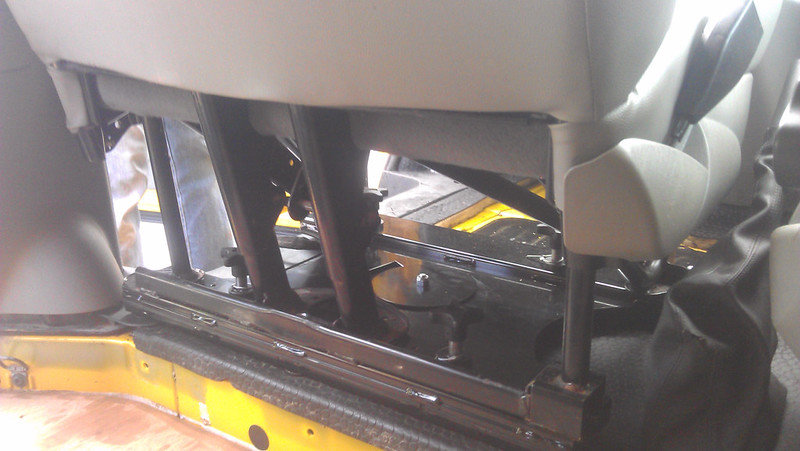 image by poloding along, on Flickr
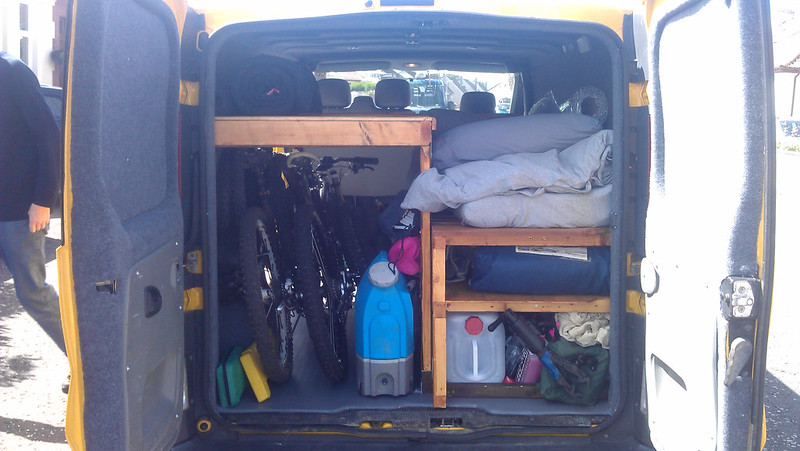
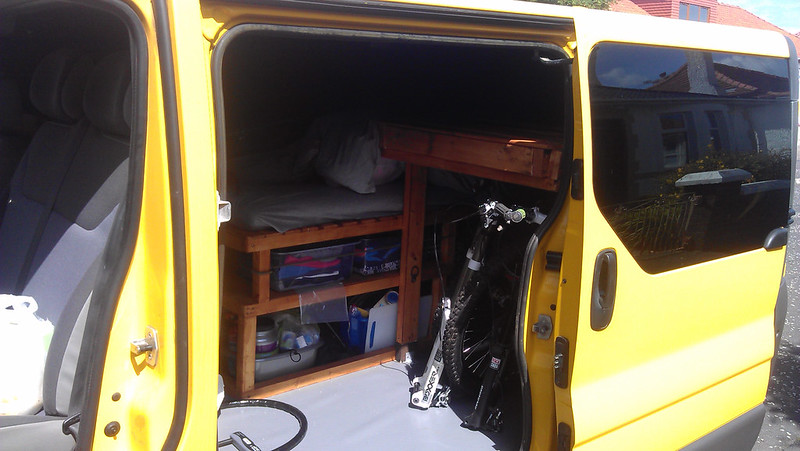
With the floor in place I made a start on the furniture. I wanted a main bed with plenty of storage under it, a cooker unit with a fold up table and a garage area for the bikes with a platform above it which slid out to form a second bed. I cut slots in pieces of two by four and used 6 m12 nuts to make the sliding platform sturdy enough then placed slats on to stapled to a cord so that these would extend with the bed as it is pulled out. The space on top isn't masses but does as a spare bed. All of the furniture was made out of wood I had and some timber yard trips. Top tip here, an impact driver makes joinery work so much quicker.
The cooker also securely housed the leisure battery.
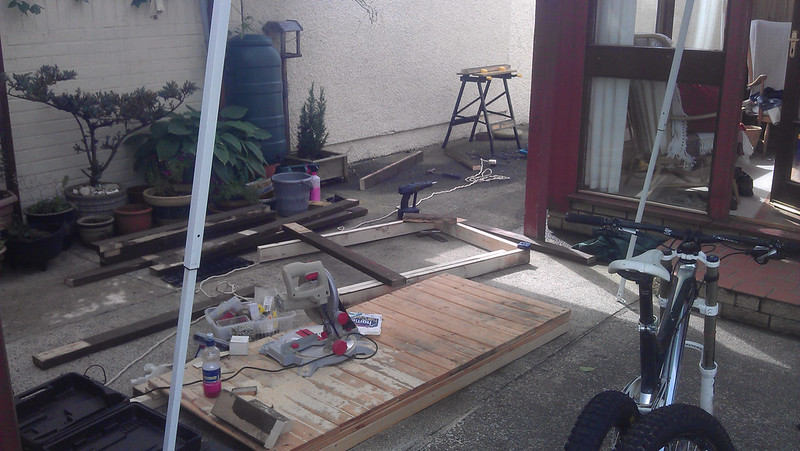 image by poloding along, on Flickr
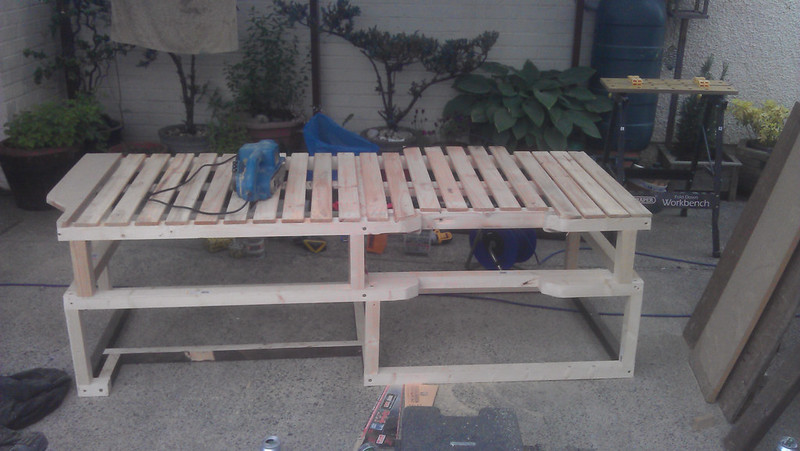 image by poloding along, on Flickr
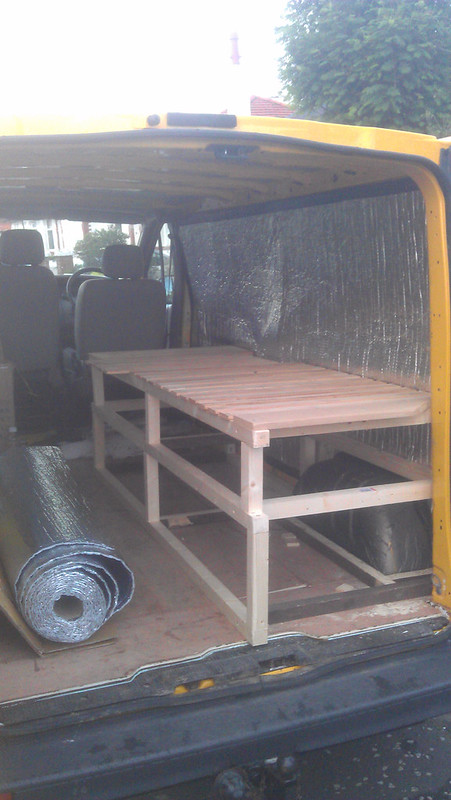 image by poloding along, on Flickr
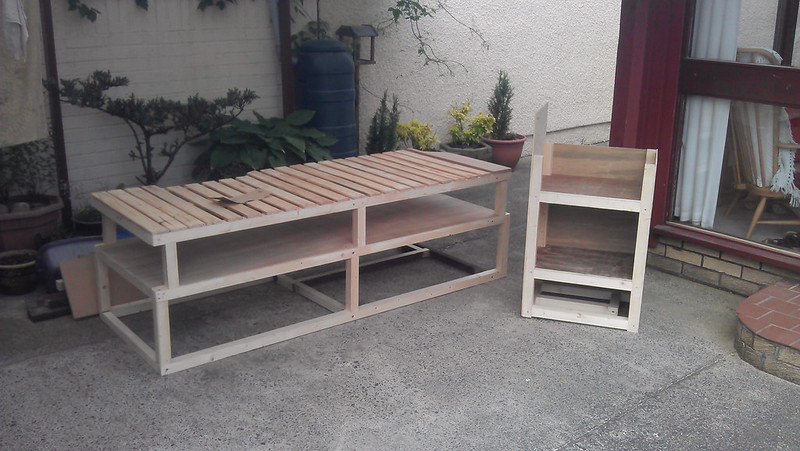 image by poloding along, on Flickr
Unfortunately forgot to picture the sliding bed before it went in.
Each bit of furniture was made to be free standing and once built was slotted into the van and the positions marked. I then removed the furniture, removed the ply floor and inserted t nuts from underneath. With some hand made brackets, the furniture was able to be bolted to the floor and easily removed.
 image by poloding along, on Flickr
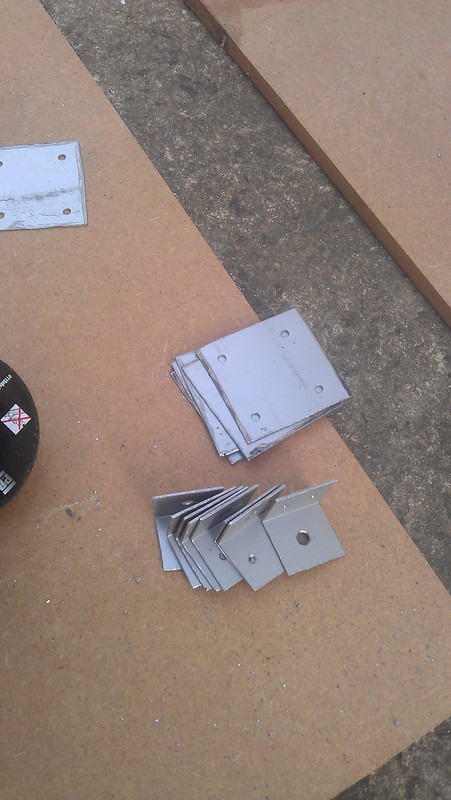 image by poloding along, on Flickr
Next up was the industrial rubber flooring. This got cut to the shape of the floor and then I went round the edges and trimmed by bringing it about tem centimetres up the wall. Once this was sealed down with silicon it formed a fairly robust floor with a decent finish.
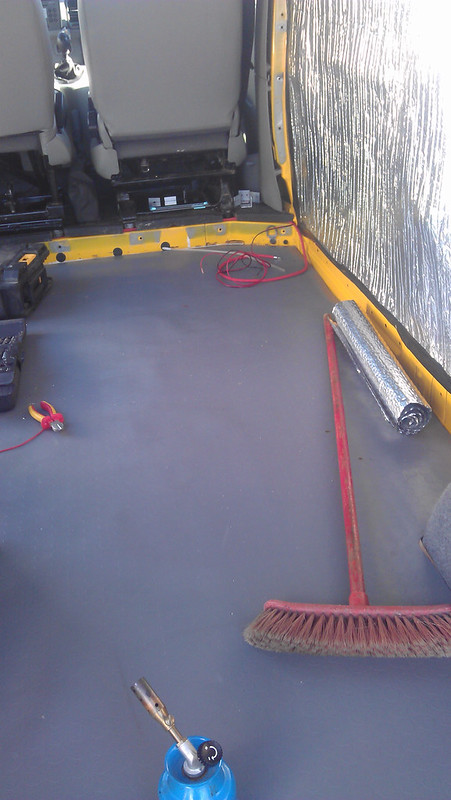 image by poloding along, on Flickr
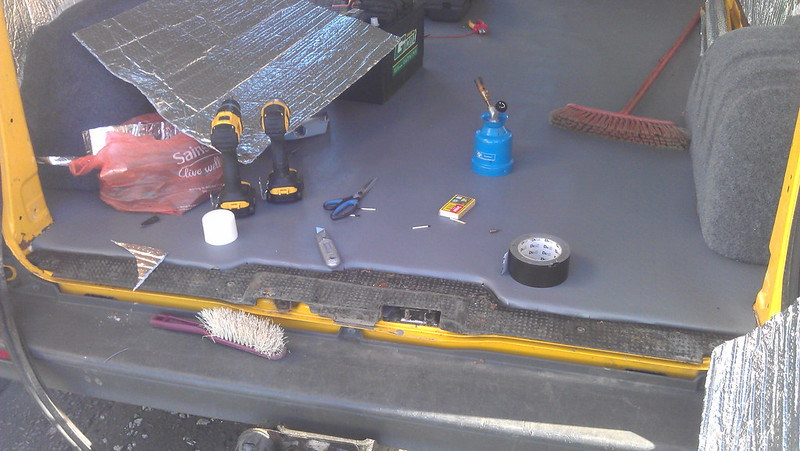 image by poloding along, on Flickr
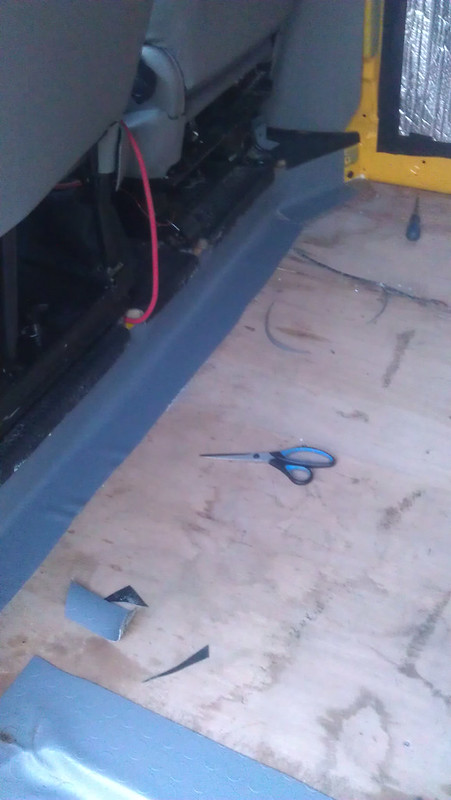 image by poloding along, on Flickr
I also made a start on the interior carpet at this point, practicing on the arches. The carpet turned out to be remarkably easy to do although getting the joins correct was the difficult part. As long as I had a hair dryer and a second pair of hands then it went together fine.
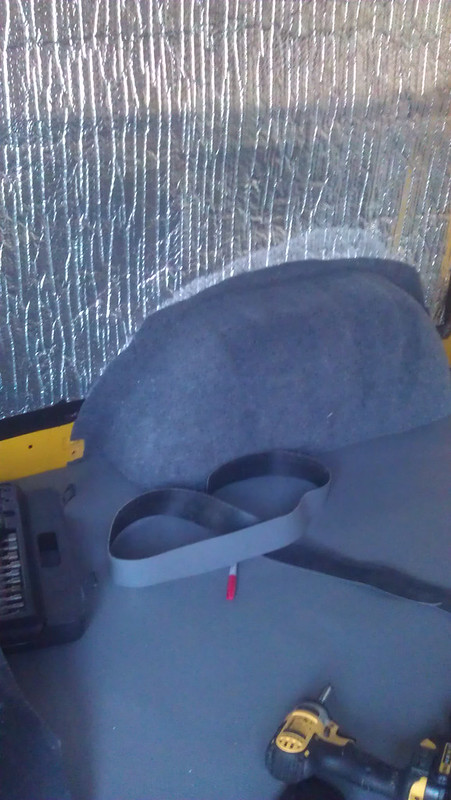 image by poloding along, on Flickr
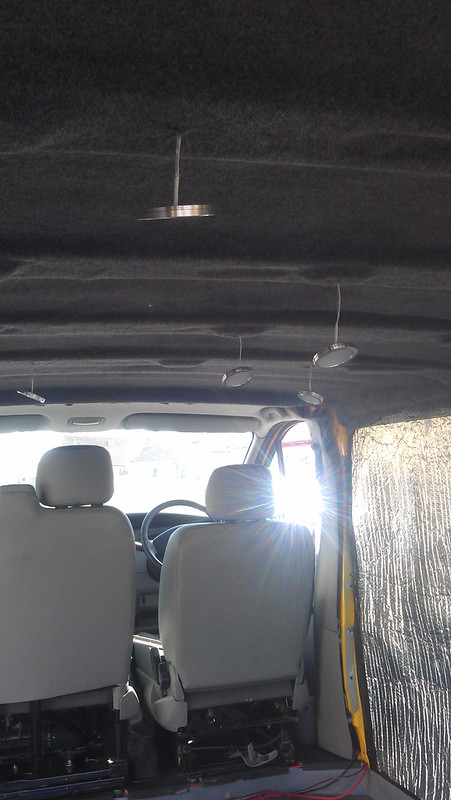
With the arches carpeted I made a start on the electrics as these needed to be in place before the roof carpet went on. For the roof I got 6 led spot lights and to charge the phones and ipad I put one socket next to the bed. I then put a second socket at the back door for the pressure washer for the bikes.
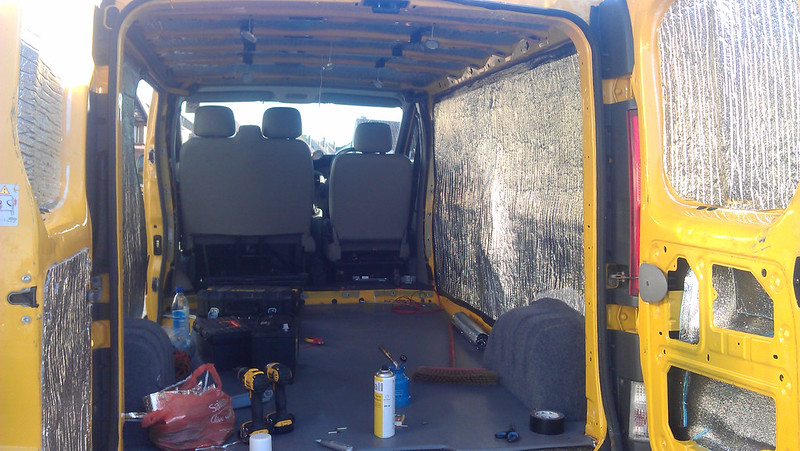 image by poloding along, on Flickr
With the wiring in place I carpeted the ceiling, definitely a two man job.
 Van by poloding along, on Flickr
The side ply panels were then carpeted and the trimming carpet on the interior was done. The panels were then screwed in with screw head collars to look a bit nicer.
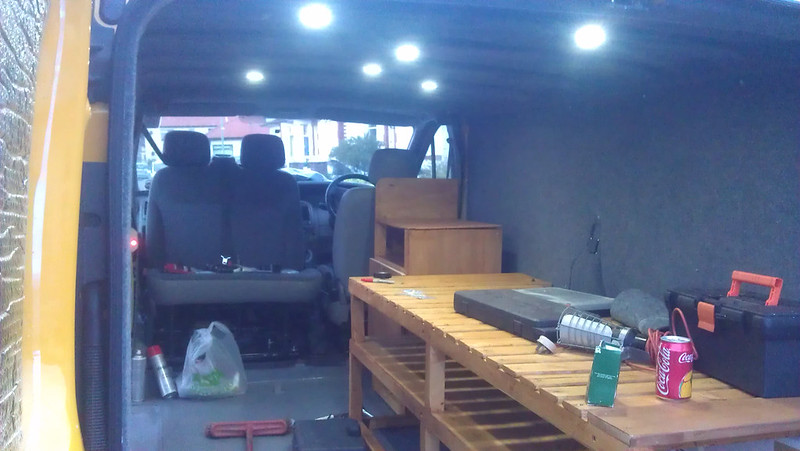 image by poloding along, on Flickr
The furniture, which had been given a nice antique pine varnish was brought in and the rear doors were carpeted.
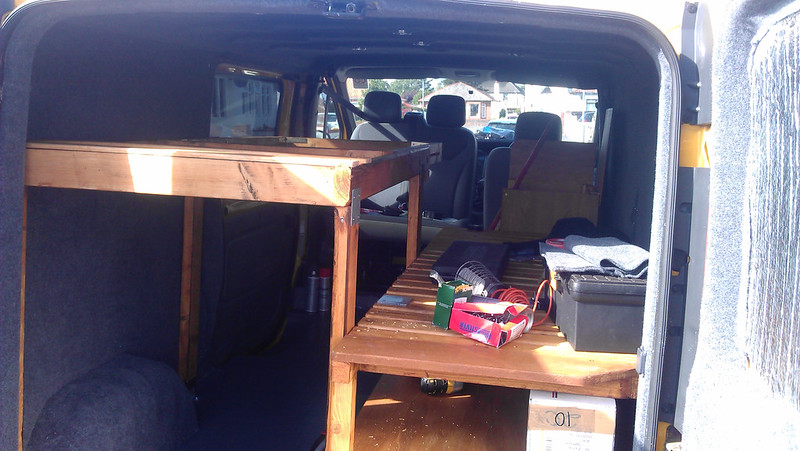 image by poloding along, on Flickr
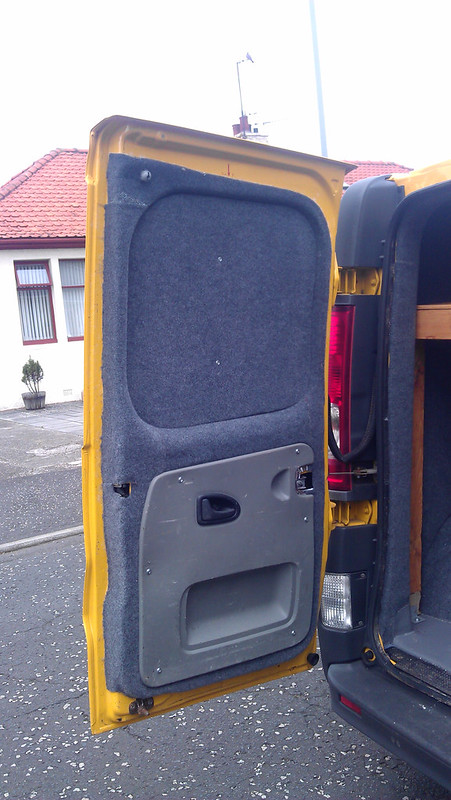 image by poloding along, on Flickr
The electrics were also hooked up at this point. I have a leisure battery sitting under the cooker unit with a split charging relay from the main battery to keep it good. The switch for the lights sits just inside the sliding door.
In order to make it look less like a panel van and more like a camper for getting on the ferry, I had vinyl put into the window inserts right the way round.
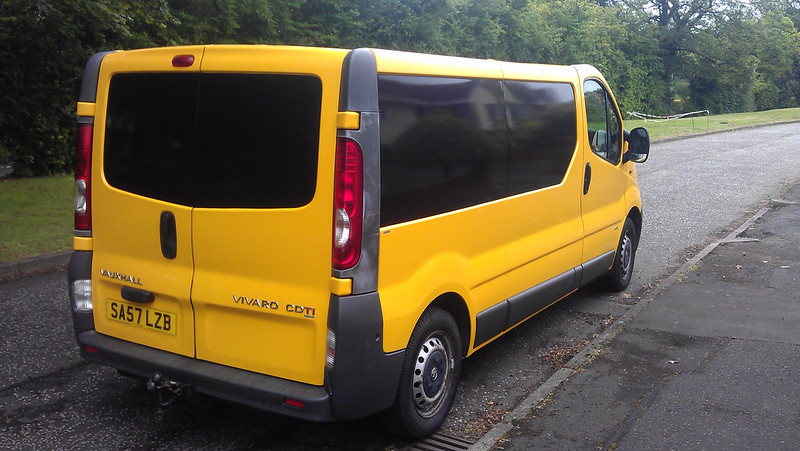 image by poloding along, on Flickr
I think this bit turned out particularly well, especially once I took some black hammerite to the rusted steel wheels.
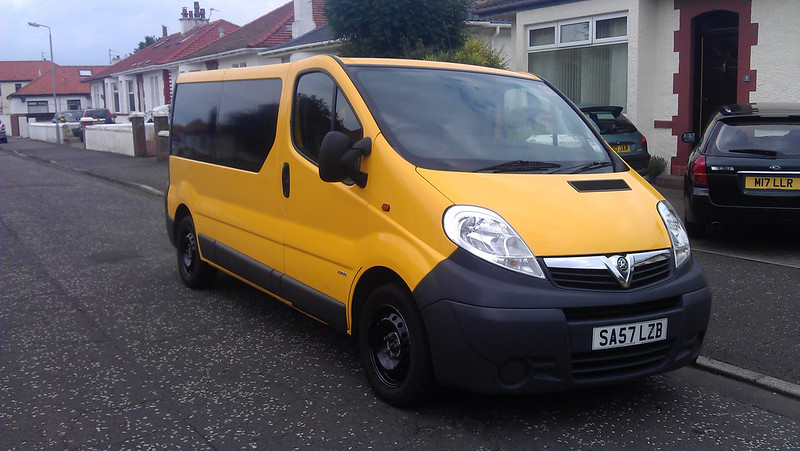 image by poloding along, on Flickr
Finally it was loaded up and all good to go. The bikes fitted nicely under the platform. Clothes and kit boxes fitted into the boxes on the top shelf of the bed and a gazebo, tools and cooking utensils all went underneath. And with that I was all set for the 1100 mile drive to the alps.
 Van by poloding along, on Flickr
 Van by poloding along, on Flickr
All in all, not the easiest project and mainly working in the evenings seriously restricted how much noise I could make. Having a lot of help from my sparky mate made a big difference and as with all projects it's not quite finished, already found a few things I'd like to add such as external lighting and I could do with wind deflectors for leaving the windows open at night. Also 4 CDs are no where near enough when driving through France with French radio as the alternative but once here the views on the cols do make up for it.
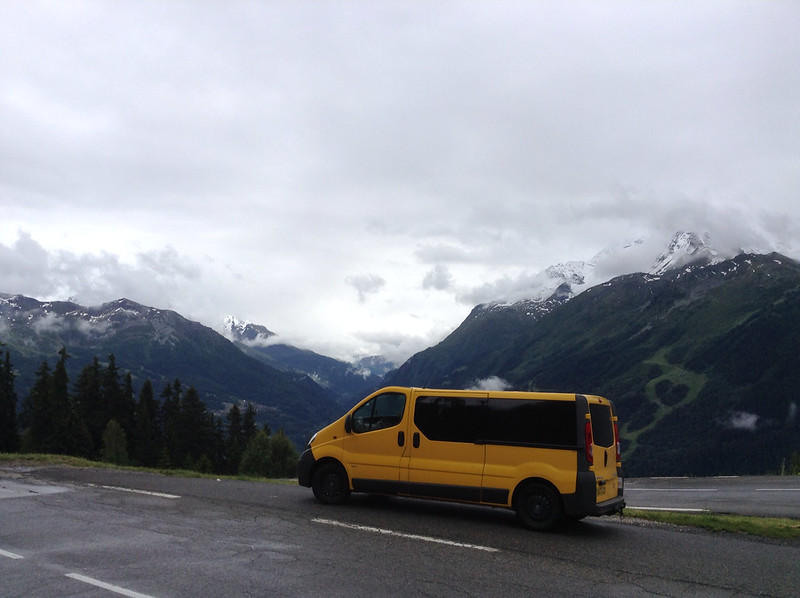 image by poloding along, on Flickr
And a wee trip to Garda, because I could.
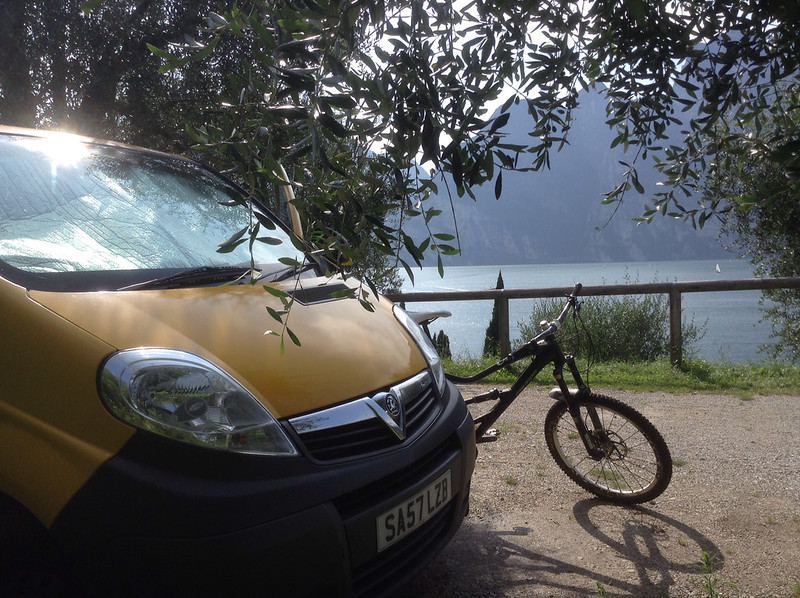 image by poloding along, on Flickr
I was after something comfortable for one but able to cope with two if necessary and settled on a lwb vivaro. The best condition one I could find with the newer engine and 6 speed box came in a colour to match the yellow peril of tampon, top bloke for advice when I emailed him.
All in I wanted this project done in less than a month and during this time I was mainly working 6 day weeks to pay for it so the majority was done in the evenings and on a few Sundays. Thankfully one of my mates was great here and helped out most nights.
image by poloding along, on FlickrI wanted a side window so got that installed by a company in Glasgow and apart from the vinyl was the only thing I didn't do myself.
image by poloding along, on Flickrimage by poloding along, on FlickrFirst step was to strip everything out, right back to the shell including removing the seats and cab floor. The cab floor was rather wet so I dried it out and sorted the door seals.
image by poloding along, on Flickrimage by poloding along, on FlickrNext step was to make a start on the walls. I started by cleaning off any old silicone and deburring all the old screw holes. Then the sound deadening was done with flashing tape. This got stuck over the arches and onto every panel until my two rolls ran out. I took a blow torch over the top of all the tape to melt it together and smooth it out.
Van by poloding along, on Flickrimage by poloding along, on FlickrI insulated the floor next using a insulation mat for concrete floors from b and q, it's supposed to serve as insulation, sound proofing and be water resistant so seemed worth a shot. This was cut to size and put down then the original ply floor put on top.
image by poloding along, on FlickrI then used foil backed camping mats as a first layer of insulation. These were stuck onto all the walls and roof with adhesive spray.
image by poloding along, on FlickrI made a start on some of the wall insulation, using double layered foil bubble wrap stuff. Keeping it simple I cut two lengths the size of the sides which were taped in place then would be secured once the ply went back on top. The insulation was also rolled up and inserted into the struts and later glued to the roof panels and door panels as well.
image by poloding along, on FlickrAt this point I also relaid the cab floor and bolted the seats back in place. I installed a seat swivel on the passenger bench which has been superb for opening up the space.
image by poloding along, on Flickrimage by poloding along, on FlickrWith the floor in place I made a start on the furniture. I wanted a main bed with plenty of storage under it, a cooker unit with a fold up table and a garage area for the bikes with a platform above it which slid out to form a second bed. I cut slots in pieces of two by four and used 6 m12 nuts to make the sliding platform sturdy enough then placed slats on to stapled to a cord so that these would extend with the bed as it is pulled out. The space on top isn't masses but does as a spare bed. All of the furniture was made out of wood I had and some timber yard trips. Top tip here, an impact driver makes joinery work so much quicker.
The cooker also securely housed the leisure battery.
image by poloding along, on Flickrimage by poloding along, on Flickrimage by poloding along, on Flickrimage by poloding along, on FlickrUnfortunately forgot to picture the sliding bed before it went in.
Each bit of furniture was made to be free standing and once built was slotted into the van and the positions marked. I then removed the furniture, removed the ply floor and inserted t nuts from underneath. With some hand made brackets, the furniture was able to be bolted to the floor and easily removed.
image by poloding along, on Flickrimage by poloding along, on FlickrNext up was the industrial rubber flooring. This got cut to the shape of the floor and then I went round the edges and trimmed by bringing it about tem centimetres up the wall. Once this was sealed down with silicon it formed a fairly robust floor with a decent finish.
image by poloding along, on Flickrimage by poloding along, on Flickrimage by poloding along, on FlickrI also made a start on the interior carpet at this point, practicing on the arches. The carpet turned out to be remarkably easy to do although getting the joins correct was the difficult part. As long as I had a hair dryer and a second pair of hands then it went together fine.
image by poloding along, on FlickrWith the arches carpeted I made a start on the electrics as these needed to be in place before the roof carpet went on. For the roof I got 6 led spot lights and to charge the phones and ipad I put one socket next to the bed. I then put a second socket at the back door for the pressure washer for the bikes.
image by poloding along, on FlickrWith the wiring in place I carpeted the ceiling, definitely a two man job.
Van by poloding along, on FlickrThe side ply panels were then carpeted and the trimming carpet on the interior was done. The panels were then screwed in with screw head collars to look a bit nicer.
image by poloding along, on FlickrThe furniture, which had been given a nice antique pine varnish was brought in and the rear doors were carpeted.
image by poloding along, on Flickrimage by poloding along, on FlickrThe electrics were also hooked up at this point. I have a leisure battery sitting under the cooker unit with a split charging relay from the main battery to keep it good. The switch for the lights sits just inside the sliding door.
In order to make it look less like a panel van and more like a camper for getting on the ferry, I had vinyl put into the window inserts right the way round.
image by poloding along, on FlickrI think this bit turned out particularly well, especially once I took some black hammerite to the rusted steel wheels.
image by poloding along, on FlickrFinally it was loaded up and all good to go. The bikes fitted nicely under the platform. Clothes and kit boxes fitted into the boxes on the top shelf of the bed and a gazebo, tools and cooking utensils all went underneath. And with that I was all set for the 1100 mile drive to the alps.
Van by poloding along, on FlickrVan by poloding along, on FlickrAll in all, not the easiest project and mainly working in the evenings seriously restricted how much noise I could make. Having a lot of help from my sparky mate made a big difference and as with all projects it's not quite finished, already found a few things I'd like to add such as external lighting and I could do with wind deflectors for leaving the windows open at night. Also 4 CDs are no where near enough when driving through France with French radio as the alternative but once here the views on the cols do make up for it.
image by poloding along, on FlickrAnd a wee trip to Garda, because I could.
image by poloding along, on Flickr
Gassing Station | Tents, Caravans & Motorhomes | Top of Page | What's New | My Stuff