Terry's tale. (S3 resto ++)
Discussion


Engine sump mod looks good
My engine sits a little higher but the drain point still about 10mm below the chassis - but I thought still high enough off the ground - time will tell as I have one of the lowest S's in existence. If it does touch then I can always copy your mod. Adding the oil cooler also increased capacity.
I concentrated on getting the exhaust up into the chassis to give ground clearance.
Around 3yrs ago (maybe 4) I bought a hood plus targa material from BAS International, mainly as I had used their product before (Mx5) which was quality.
At that time it went into the garage rafters to be retrieved at a later date..... Now !
I read what I could on S series DIY hood fitting.
Started with the targa panels. Strip the old covers off in one piece if possible and keep them as they will give you a rough sizing pattern (leave surplus), plus how the folds are done.
Oh, I had previously replaced the locating tangs. The targa material supplied by BAS is just that, a piece of material ! There is plenty to cut both panels from, but it doesn't have the door side sewn rainwater edge. This makes a tricky job even more involved. I glued the fold then clamped it so that a good secure square edge was achieved. After that has set it's just stick, cut & fold it onto the panel. Lol.
Three seperate sessions later I have completed one panel. Hopefully the other will go the same. Then it's the rear hood to do. More reading of "how to" first.
As others have stated, this isn't a job for the faint hearted. Patience being the key word.
T.
Re - roof seals..
Not sure yet. I know that both the TVR early and late designs are available, but being a tight ar#e, I thought I would wait until I've done the rear hood. Then maybe buy something (read cheap) off fleebay, maybe soft foam hollow square section. Or something to suit the gaps I have once the targa's are in place.
Doing the rear hood could be a while yet due to the drive being done, as I want to do it outside.
I'll let you know.
T.
Frustrating but satisfying job. Includes info on roof seals that are still working fine
https://www.pistonheads.com/gassing/topic.asp?h=0&...
https://www.pistonheads.com/gassing/topic.asp?h=0&...
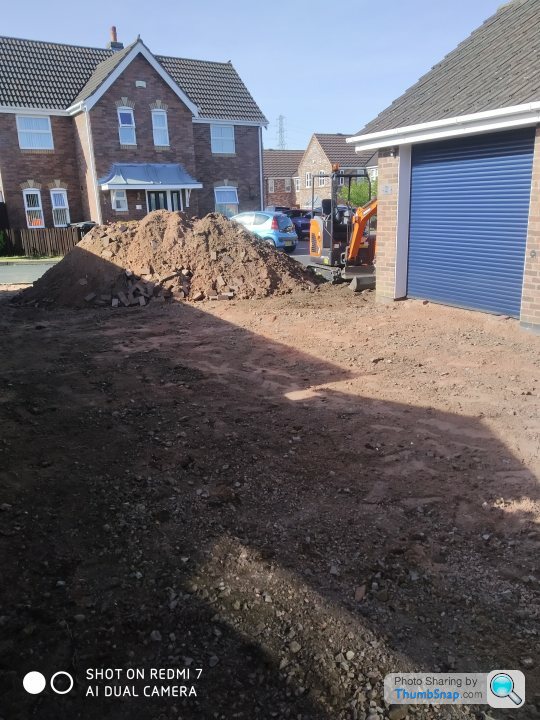
At last the drive and house works are finished. So I can get back into my garage.
Water is now in the cooling system, no leaks !
Engine run up to temp (not driving), all seems okay, no other oil leaks etc. Power steering seems to work (static tests only). Trying to fine tune the bonnet fit & catch engagement. It'll take a while, me thinks !!
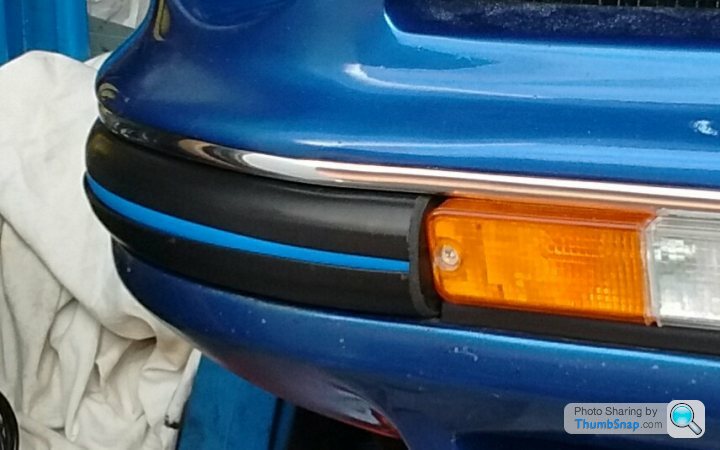
So done a bit more cosmetic work.
Here's my version of the factory body stripes.
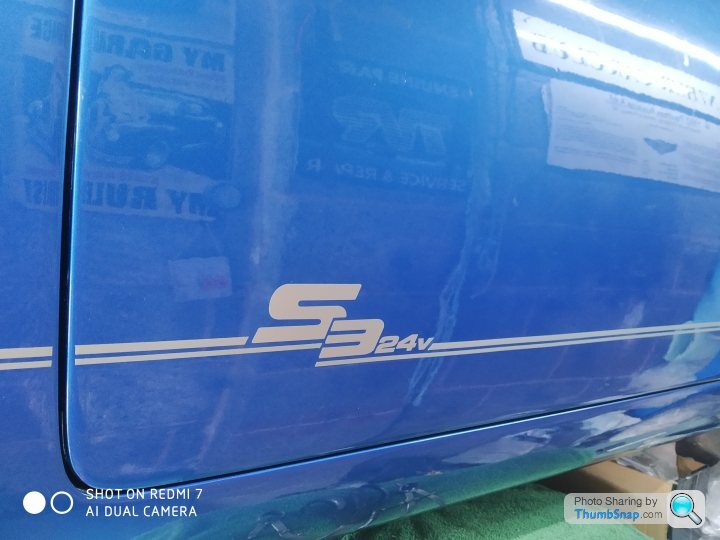
T.
Water is now in the cooling system, no leaks !
Engine run up to temp (not driving), all seems okay, no other oil leaks etc. Power steering seems to work (static tests only). Trying to fine tune the bonnet fit & catch engagement. It'll take a while, me thinks !!
So done a bit more cosmetic work.
Here's my version of the factory body stripes.
T.

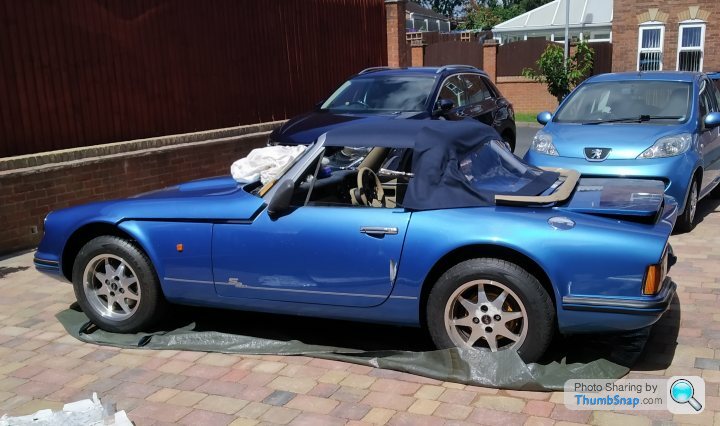
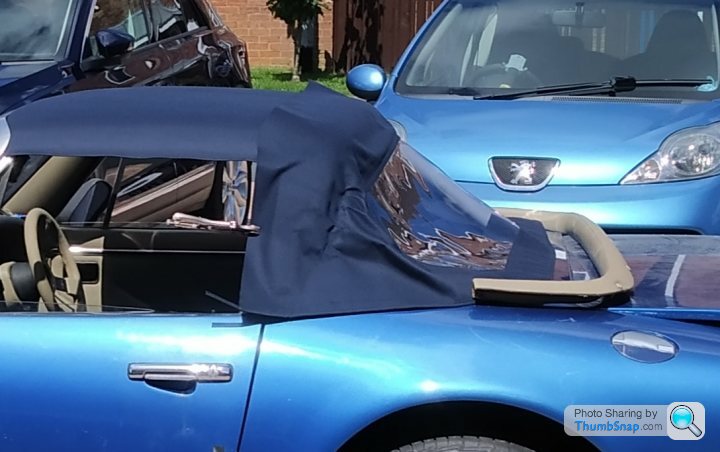
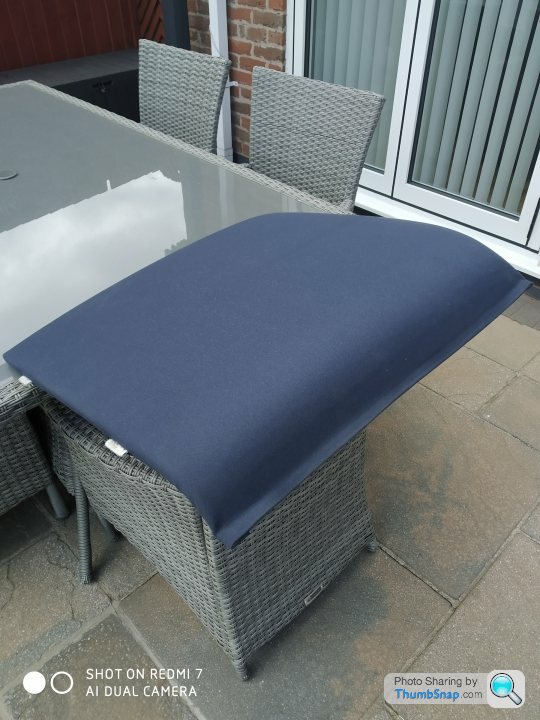
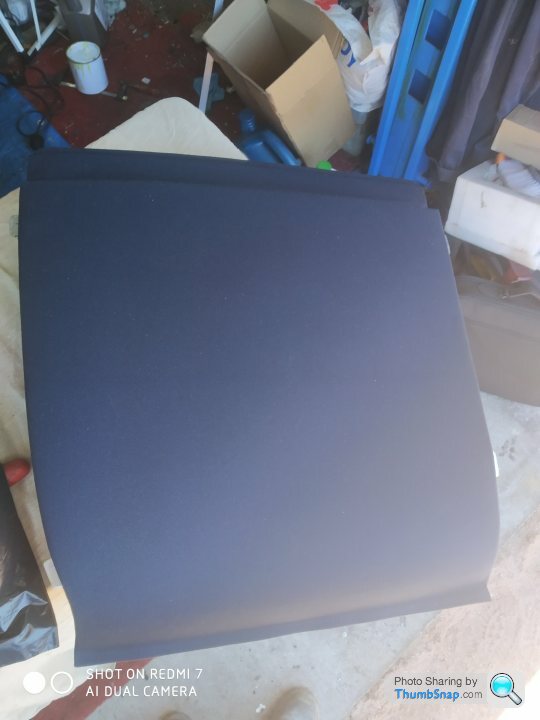
My do it yourself new rear hood fitting continues.
See 'flappy crappy Velcro' post for my mod on top of an already existing mod.
The only other advice I can give (based on info that's already out there), is the measure, and mark with tailors chalk until you're happy that the hood is centred, mainly to the rear padded capping, but also to the hoop. The sewn Velcro on the new hood should give you a reference point. Once the rear of the hood has been glued to the capping, and that has been fixed to the car, pull, stretch, wrestle with the hood to get it tight over the hoop. Mark it with the chalk.
I did a narrow glue line and stuck the hood onto the hoop deliberately misaligning the chalk mark by about 1/4". This give the required stretch.
That only took me x2 attempts !!!
As has been said many times, this ain't an easy job. So don't take it on if you're not prepared for some cussing.... At least.
So far I've been on it for 5 days (on and off), all I have left to do is glue it into the recess, then clip the new weather strip in place.... No, I won't do one for anyone else.
An auto upholsterers tip to me, is to leave the newly finished hood up for at least a month to allow it to stretch, de-stress etc.
T.
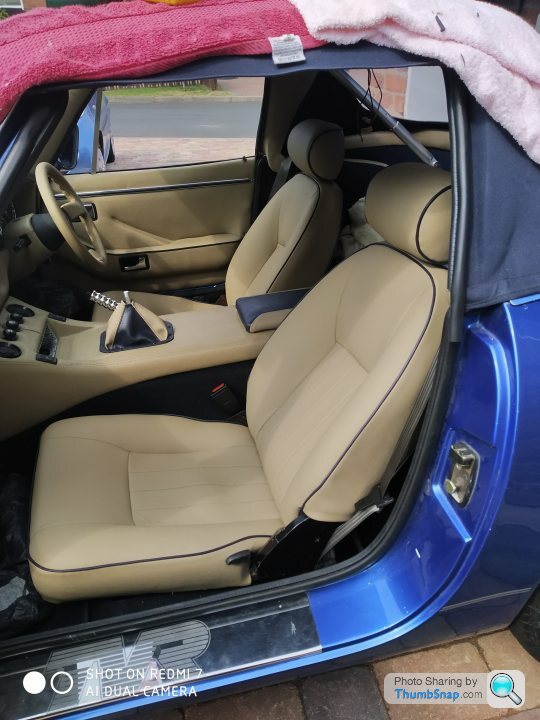
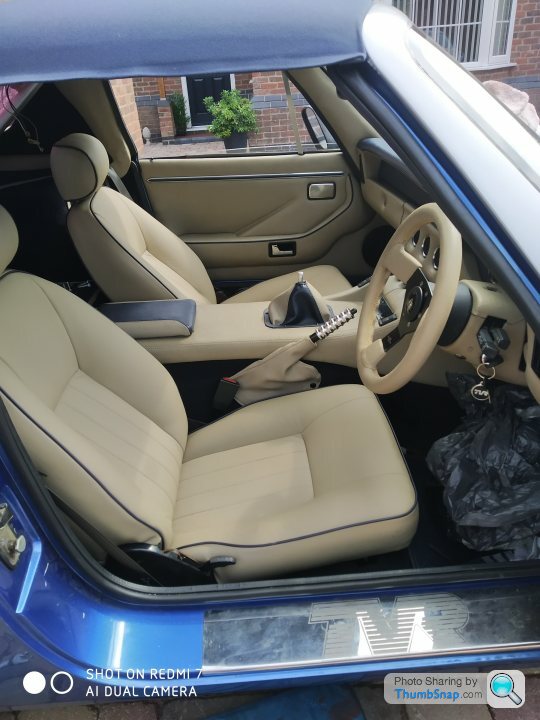
Being as the new hood is now done, and left to stress relieve itself, I thought it was an appropriate time in proceedings to refit the reupholstered seats (as they have only been bagged up and stored for 3yrs!).
Still loads to do, but they definitely give a boost in morale. Of course, I'll be re bagging them very soon, in an attempt to keep them clean.
T.
Still loads to do, but they definitely give a boost in morale. Of course, I'll be re bagging them very soon, in an attempt to keep them clean.
T.
Blue 30 said:
Being as the new hood is now done, and left to stress relieve itself, I thought it was an appropriate time in proceedings to refit the reupholstered seats (as they have only been bagged up and stored for 3yrs!).
Still loads to do, but they definitely give a boost in morale. Of course, I'll be re bagging them very soon, in an attempt to keep them clean.
T.
Very nice indeed. You must be virtually complete now, have you much to do. How did the hood turn out eventually, what I’d seen so far looked good, I have mine to do (eventually). Still loads to do, but they definitely give a boost in morale. Of course, I'll be re bagging them very soon, in an attempt to keep them clean.
T.
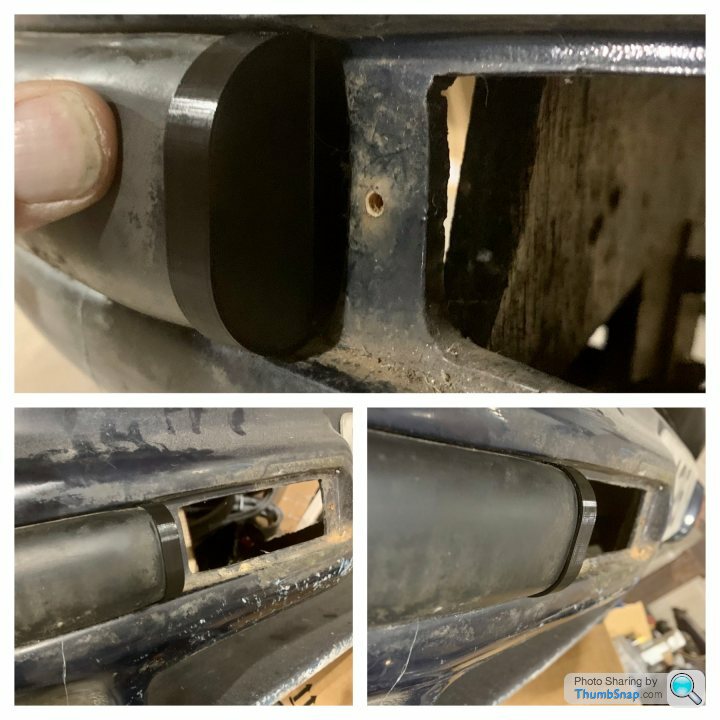
Blue 30 said:
Hi Lee... In the end I decided to just superglue some flat section rubber onto the ends of the strips, then fine grind it to shape. I think it looks OK. See below.
But thanks for the offer of 3D printing some caps.
T.
TerryBut thanks for the offer of 3D printing some caps.
T.
I got round to 3D printing some end caps for a fellow S1 owner who has been a godsend to me, do you want a pair, you may need to reduce the depth down to suit your cars dims or if you tell me the depth I’ll make to suit as his was a few mm shallower than mine. Not sure if I have your address still, you may need to PM it me if you do.


88S1 said:
Very nice indeed. You must be virtually complete now, have you much to do. How did the hood turn out eventually, what I’d seen so far looked good, I have mine to do (eventually).
Many thanks.I'm pleased with my DIY hood fitting. I'll rate it as I'm 95%+ satisfied.
Tip... Don't buy it 3+ years before you fit it. As those fold creases just don't want to come out.
I'll take a photo or 3, when its next out of my garage.
As far as "not much left to do".
Mmmm... it's those little jobs, that take forever, plus on the day, as I think em up, that's occupying my free time now. I've just put a post on FB S group asking if anyone has done a glovebox catch mod, where a key isn't required.
I have decided now not to use it this year, so Iwon't be tax or mot'ing it. That'll also mean I will delay buying new tyres until the spring, so those won't be flat spot'ing over the winter.
The big (and pita) jobs left to do are.
Getting the ECU rolling road tuned.
Getting the steering & suspension geometry set up.
Both need to be done professionally away from home, so it will need trailering to each.
And being a tight a*se, that's something I'll need to do some more heavy thinking about.
The rest will be done at my leisurely pace over the winter months.
T.
Gassing Station | S Series | Top of Page | What's New | My Stuff