S1 rebuild....not one for the purist
Discussion


Alan Whitaker said:
Cruise Control, you lucky bugger. Did you sort out the hand brake cable
Yes thanks,Edited by Alan Whitaker on Sunday 12th February 20:06
Caterham De Dion, as suggested, I'm not far from their spares dept so went to have a look. Still sorting the compensator but needed the gearbox in place.
The cruise control is an after market unit from Waeco and very simple to use, http://www.conrad-electronic.co.uk/ce/en/product/8... I've added a steering column stalk.
Alan 1209 said:
Yes thanks,
Caterham De Dion, as suggested, I'm not far from their spares dept so went to have a look. Still sorting the compensator but needed the gearbox in place.
The cruise control is an after market unit from Waeco and very simple to use, http://www.conrad-electronic.co.uk/ce/en/product/8... I've added a steering column stalk.
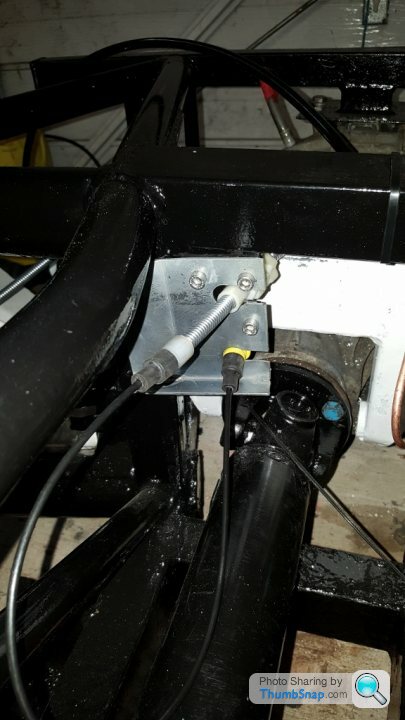
And here's the new bracket,Caterham De Dion, as suggested, I'm not far from their spares dept so went to have a look. Still sorting the compensator but needed the gearbox in place.
The cruise control is an after market unit from Waeco and very simple to use, http://www.conrad-electronic.co.uk/ce/en/product/8... I've added a steering column stalk.
 [url]
[url] |http://thumbsnap.com/RmFbXVkU[/url]
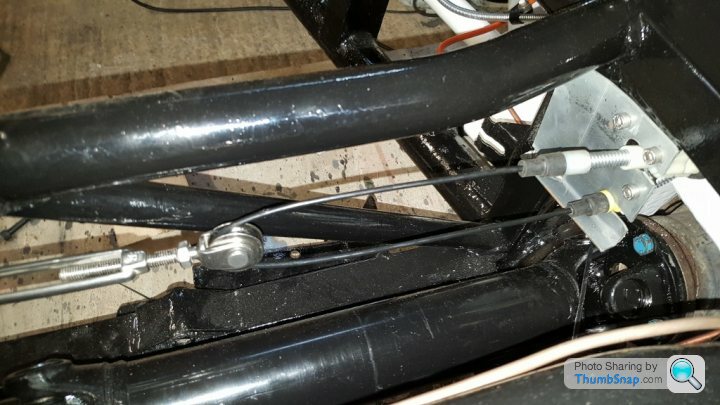
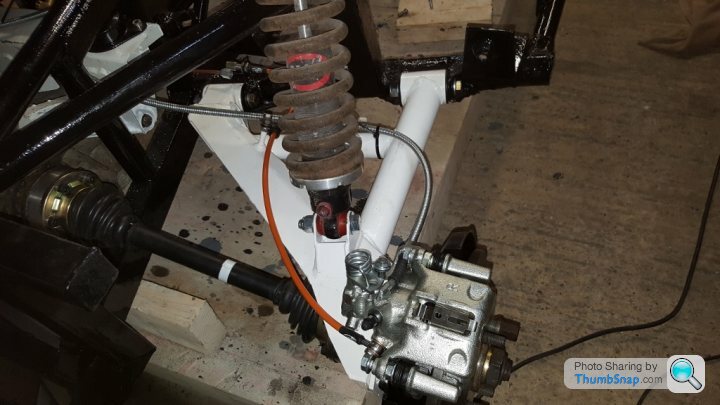
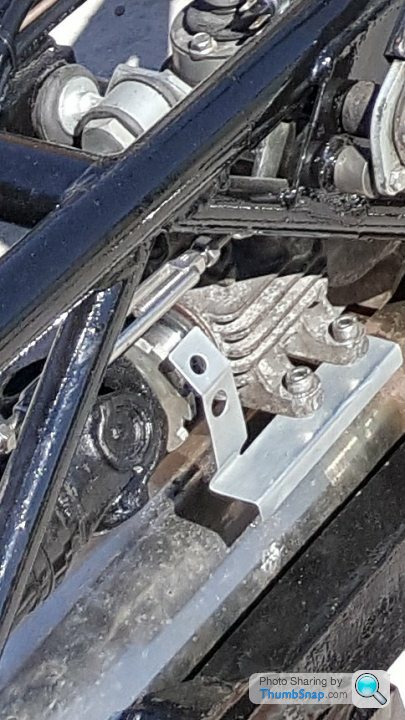
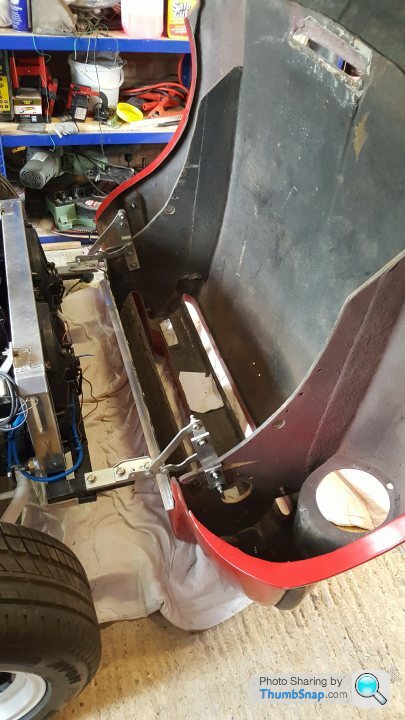
So here’s the handbrake compensator in place, using a stainless m8 turnbuckle with a 30mm sheeve wheel.
The next issue is the oil filter. I know these are a problem due to lack of space, and the removal of the plate oil cooler messes up the plumbing, but I have a different issue.
The engine I have has an M20 x 1.5 filter mount, the standard English sourced cologne one is ¾” x 16 TPI. But as I’m using a cooler and remote mount I wasn’t over worried, after all I had the filter I’ve removed as a pattern.
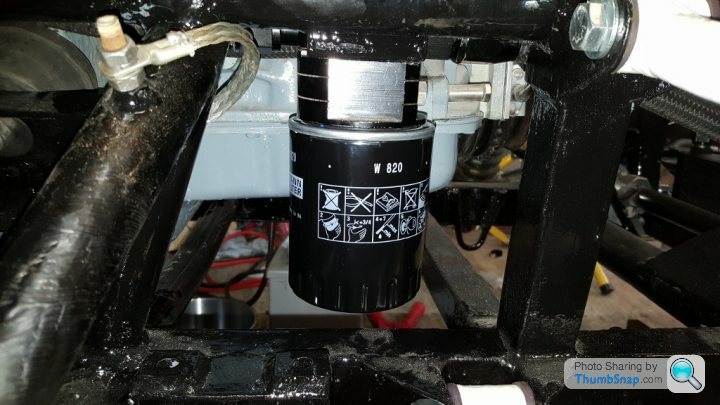
Turns out the filter I have is obsolete and has no apparent after-market equivalent, so a couple of hours research on the Mann filters website revealed the following:-
The filter I have (a motorcraft EFL 164) was used on a ford 2.5 diesel and the fiat derivative. No cologne has had a metric filter! So I began to question the provenance of the engine, maybe someone can assist.
Its casting marks show that it was produced in 88, but it was equipped with hydraulic tappets and EGR plumbing on the exhaust, the injectors are the cat version type which I think was introduced in the uk in 93, and the CR is 9.5:1 I’m guessing this is a European spec engine and never intended for the uk. No engine number so I can’t trace it that way.
Back to the filter, Mann has a direct equivalent to the EFL 164, it’s a W930/11 but no one local had one, so I’ve used a W820, used on a Citroen CX.
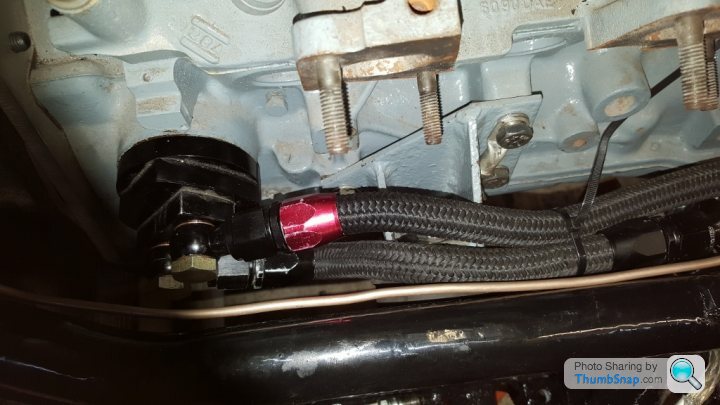
On the plus side the disc conversion worked out just fine and iv'e bitten the bullet and fitted braided pipes all round.


Alan 1209 said:
Alan Whitaker said:
Cruise Control, you lucky bugger. Did you sort out the hand brake cable
Yes thanks,Edited by Alan Whitaker on Sunday 12th February 20:06
Caterham De Dion, as suggested, I'm not far from their spares dept so went to have a look. Still sorting the compensator but needed the gearbox in place.
The cruise control is an after market unit from Waeco and very simple to use, http://www.conrad-electronic.co.uk/ce/en/product/8... I've added a steering column stalk.
On the other hand the Fuel Tank.
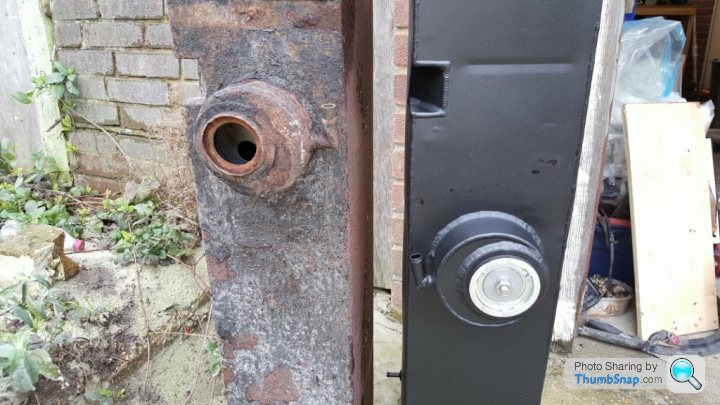
My old tank was rusty and porous round the top, so i decided to replace it. I ordered a new ally tank from Radtec, and in a relatively short time it turned up. But it was cleary not for an S1, I suspect it's for a V8 with the divided exhaust. The swirlpot sat right over the exhaust and the outlet was on the wrong side so a quick phone call to Darren in sales and the old and replacement tanks were collected and a new tank made to the S1 pattern.
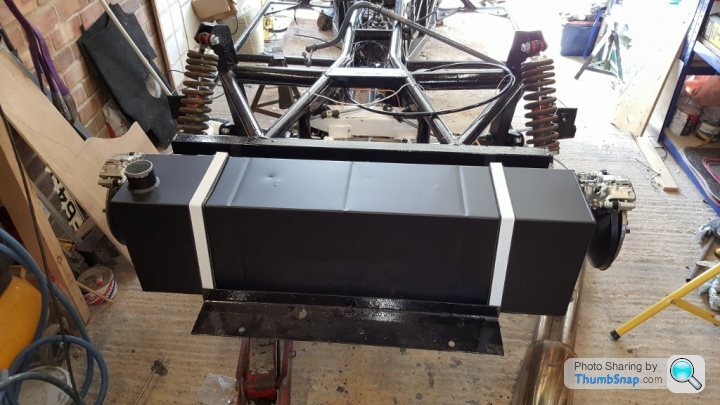
It came with straps and a blanking plate in the bottom and now they can supply tanks to either pattern.
Thats how service should work.
The Body is back at the man cave so time to start on the wiring but first the thorny issue of S heaters.
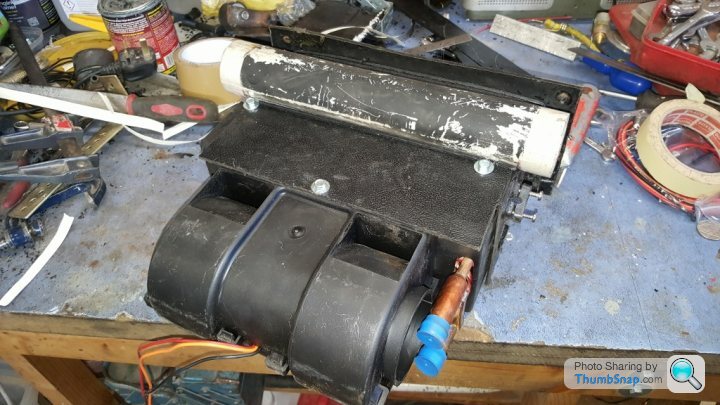
Mine had a leaky matrix and an aftermarket motor.
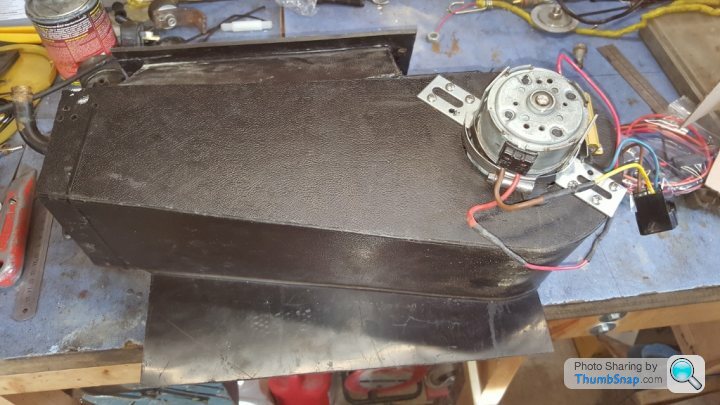
So I bought a heater from CBS, their Heat2 model, found a workshop and cued the music.
a bit of jigsawing later and my old heater looked like this.
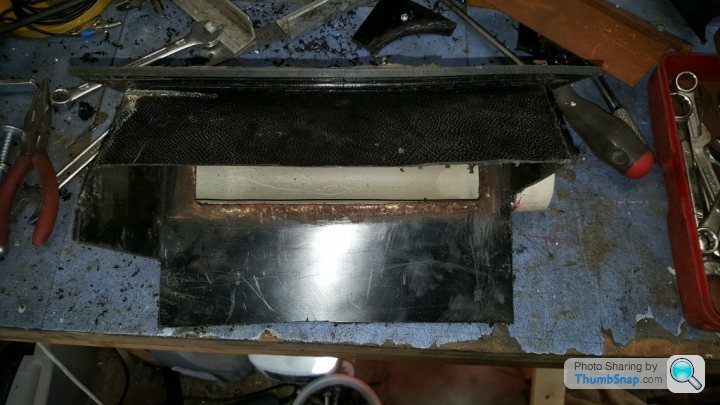
Then a visit to the bender for the divertor flap,
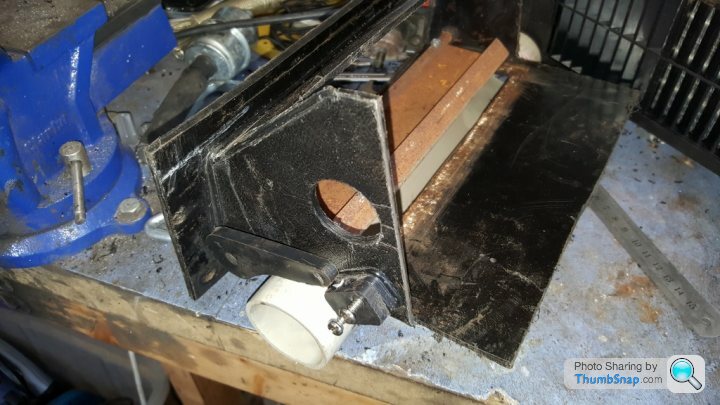
Finaly some foam rubber and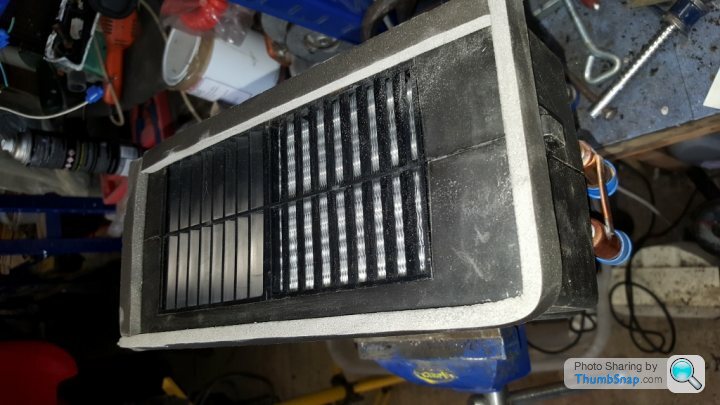
Hey presto.

Mine had a leaky matrix and an aftermarket
motor.So I bought a heater from CBS, their Heat2 model, found a workshop and cued the music.
a bit of jigsawing later and my old heater looked like this.
Then a visit to the bender for the divertor flap,
Finaly some foam rubber and
Hey presto.


Its been a while, annual budget and company takeover to be managed have kept me out of the garage other than a couple of hours here and there.
But there has been a bit of a leap forward in the last few days.
As part of the modernising agenda, and following the advice of other PH'ers I set about the door mirrors and following extensive research ( a walk down the road with a tape measure) I settled on a pair off a Punto Grande. A pair of new after market electrically adjustable ones set me back £55. I figured if I was going that far electric windows were a must. More research needed.
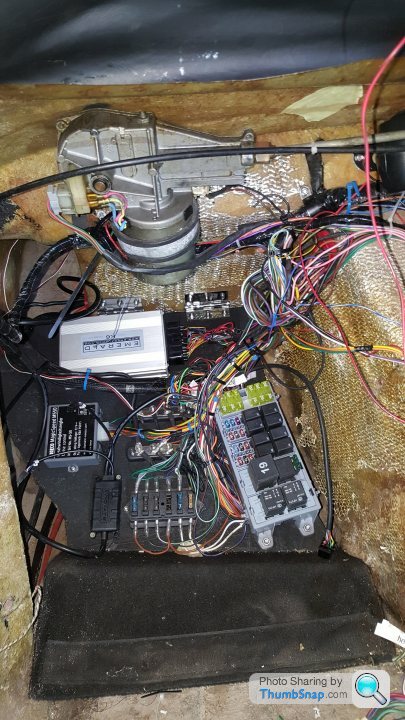
So now I have a pair of motors and cables from a Corsa 'D' along with 2 door looms, a full front body loom and both switches.
The main loom needed a bit of un-knitting :-
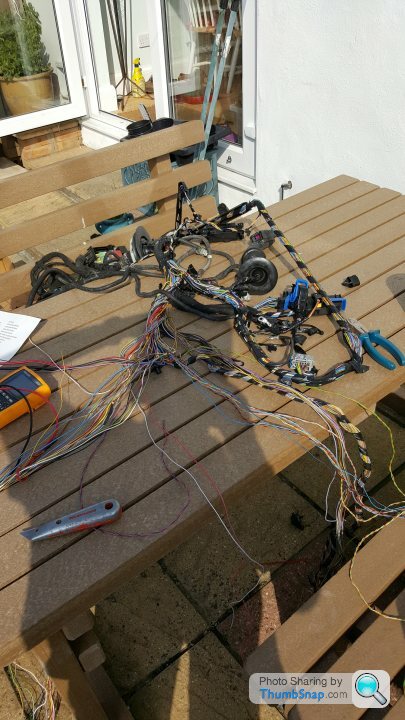 ,
,Then a bit of weaving into the new main loom and electronics.
But the major event was the re-uniting of the body and chassis,
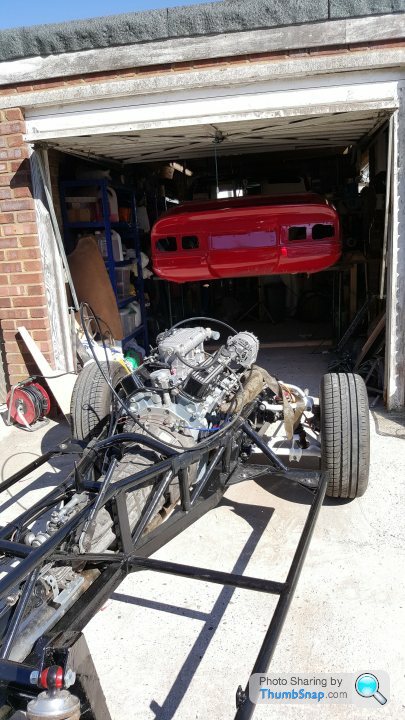
the money saved just gets spent on more toys, more wine and an osteopath for the over-stretched back muscles.
But onwards and upwards.
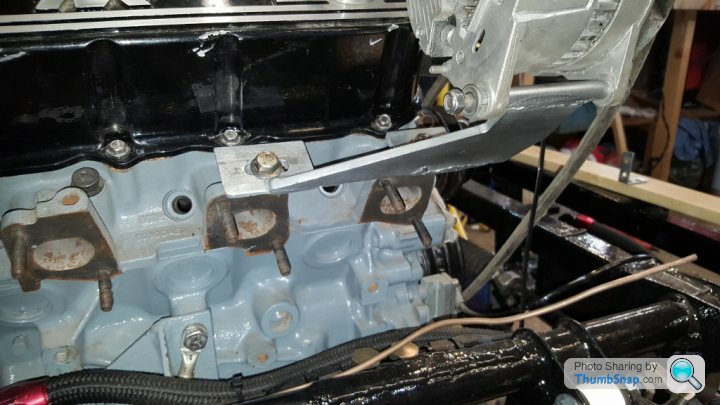
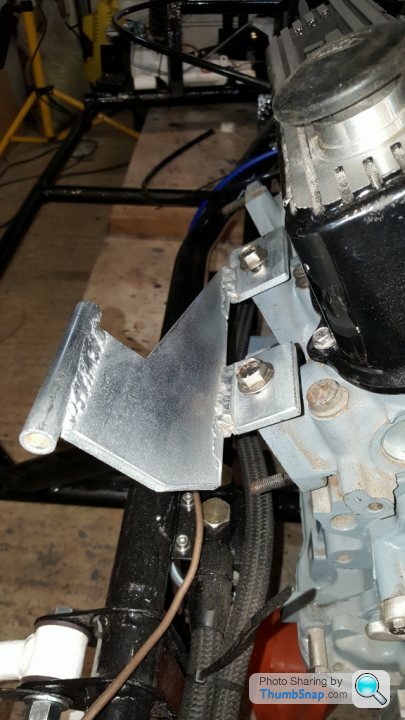
This is my power steering column.
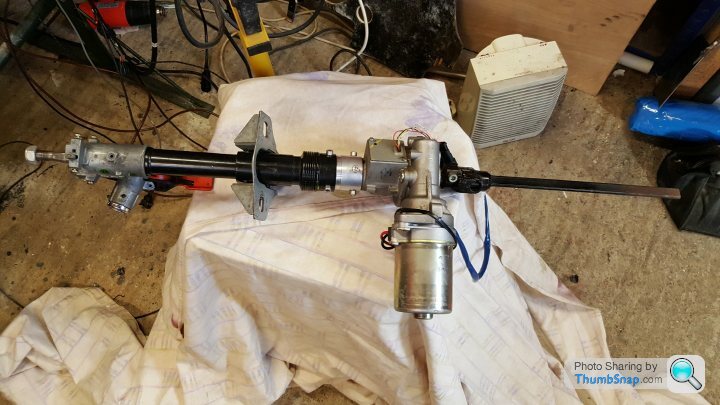
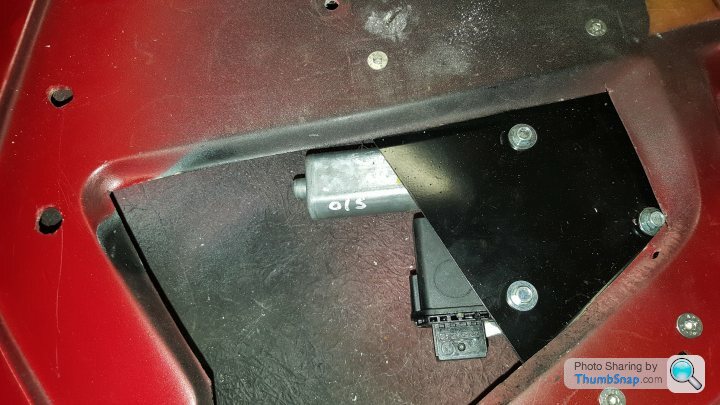
And this is the mounting bracket for the speed sensors, the speedo and cruise control need a PNP +12 pull up signal, and the power steering needs an NPN pull down, hence 2 sensors.
 |https://thumbsnap.com/xwfqg48K[/url]
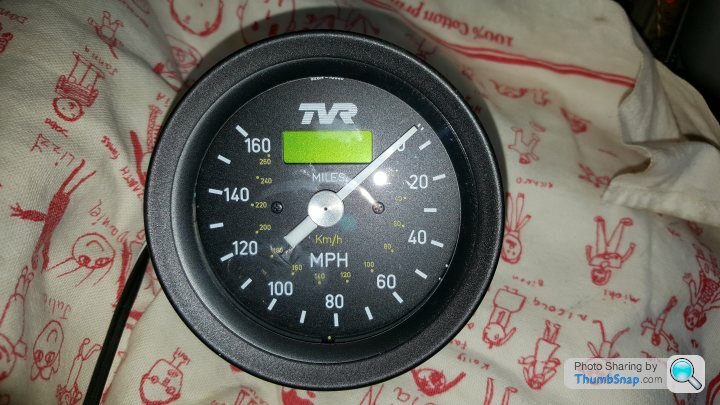
The speedo was modified from a cable driven unit by Speedy Cables so that i could retain the original upside down face.
 ,
,
I've also had to add a reverse light switch as the chassis got in the way of the mazda switch.
 [url].
I'll be working on all the engine connections tomorrow, may even have a running motor by the weekend
But onwards and upwards.
This is my power steering column.
And this is the mounting bracket for the speed sensors, the speedo and cruise control need a PNP +12 pull up signal, and the power steering needs an NPN pull down, hence 2 sensors.
|https://thumbsnap.com/xwfqg48K[/url]The speedo was modified from a cable driven unit by Speedy Cables so that i could retain the original upside down face.
,I've also had to add a reverse light switch as the chassis got in the way of the mazda switch.
[url].I'll be working on all the engine connections tomorrow, may even have a running motor by the weekend
No Luck with the engine. The starter solenoid had disintegrated. New one on order, so time to sort the doors,
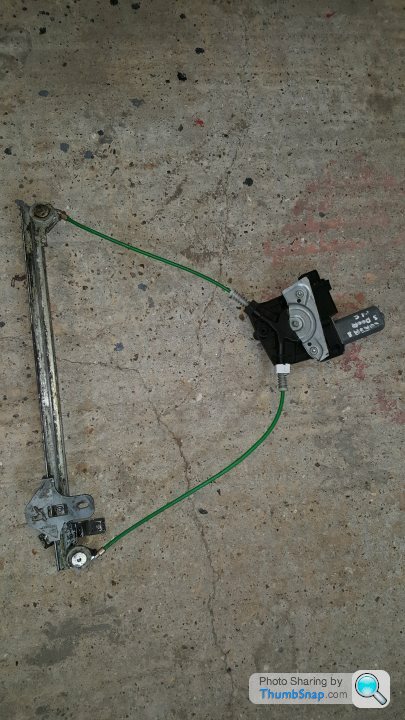
This is an Astra window motor fitted to the standard, manual, window lifter. the old drive is of VW origin so if your looking for a winder handle check out early golf or polo. I had to shorten the cables, make some ferrules and modify the cable clamp arrangement.
Mounting brackets were needed, so :-
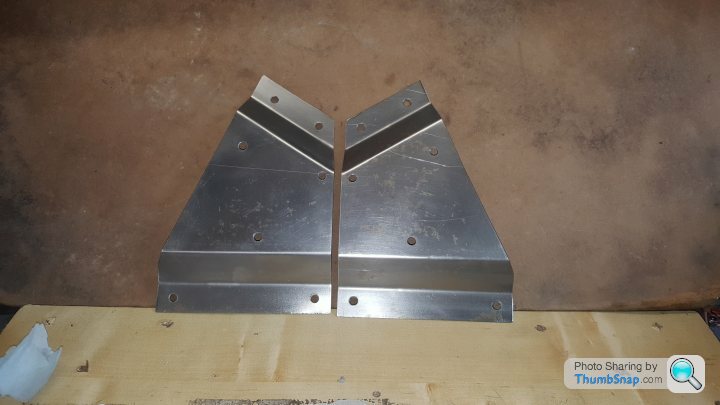
bent and ready for paint.
and fitted.

This is an Astra window motor fitted to the standard, manual, window lifter. the old drive is of VW origin so if your looking for a winder handle check out early golf or polo. I had to shorten the cables, make some ferrules and modify the cable clamp arrangement.
Mounting brackets were needed, so :-
bent and ready for paint.
and fitted.
well after another enforced break progress has been slow with a bit of pottering here and there. Good news is the engine runs just fine.
So now its mostly down to sorting the trim and that job starts at the back and works forward.
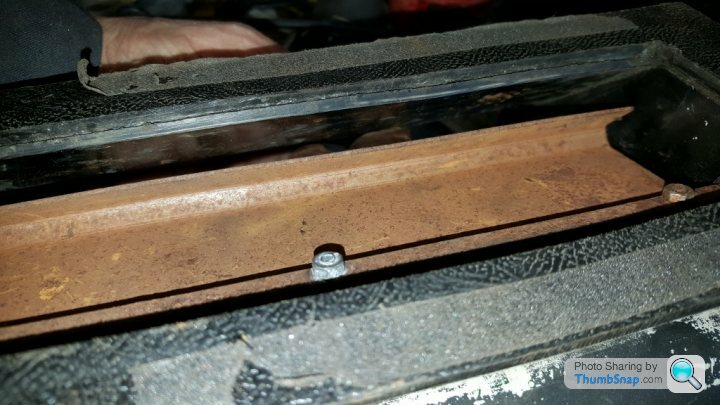
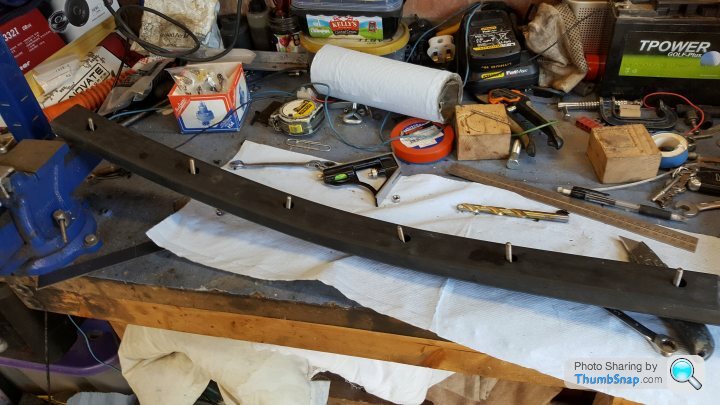
and as far back as you can get, Rubber Bumpers.
following advice elsewhere on PH I got 4 mtrs of D section from Polymax then I got 4 mtrs of 25wd x 1.5 thick stainless from ebay along with a couple of mtrs of m6 stainless studding from my stash behind the lathe, cut into 12 35mm studs.
And here we go. First job was to open up the existing holes to 10mm and add a couple of new ones near the bend.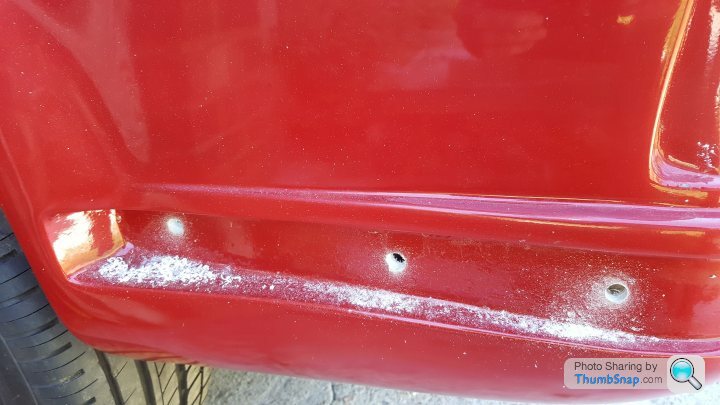 img]https://thumbsnap.com/sc/9Zgjrd0I.jpg[/img]
The Countersunk holes are for the new battery tray. More later.
The rubber has been cut using the old piece as a pattern, Then a strip of stainless cut approx 10mm shorter.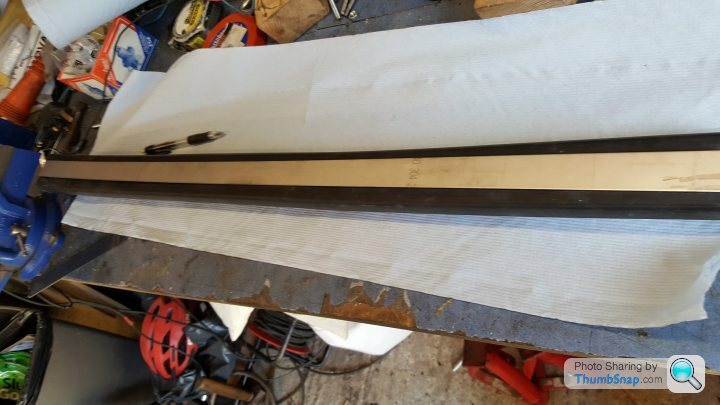
Then the rubber is held up against the body at the side and the first 3 holes spotted thru'. the postions of the holes are marked out on the stainless which is drilled and tapped M6. The holes in the rubber are then opened out to 12mm using an end mill.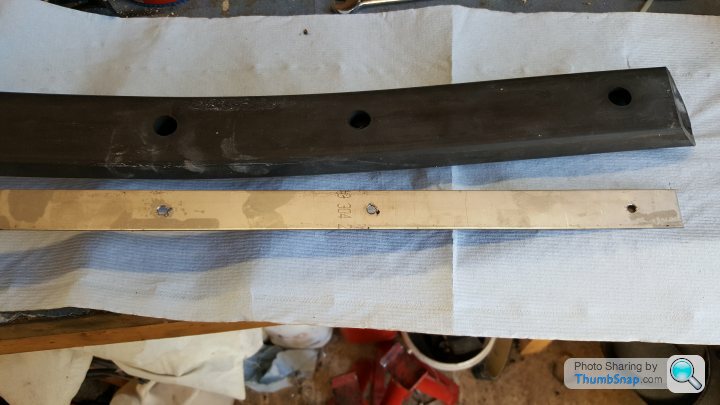
then 3 studs are screwed in, the rubber is bolted into place and the remaining 3 holes spotted thru' and the process repeated. The studs are loctited into the strip with around 20mm protruding past the rubber
then a liberal bead of butyl sealant is applied
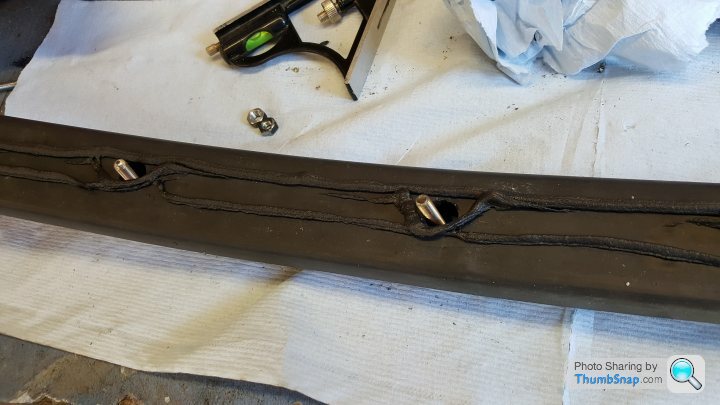
and the bumper is bolted into place using m6 penny washers and standard nuts.
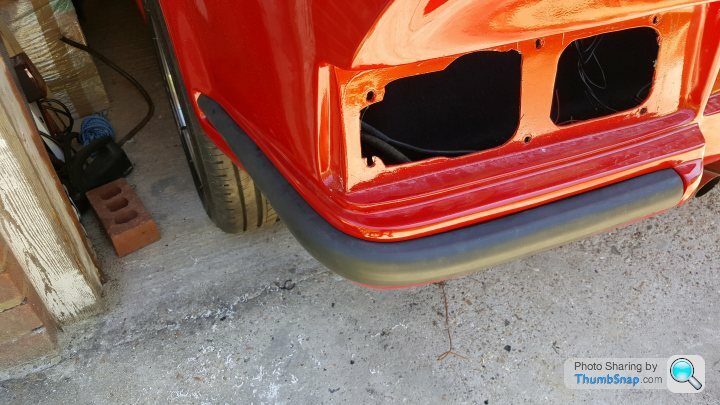
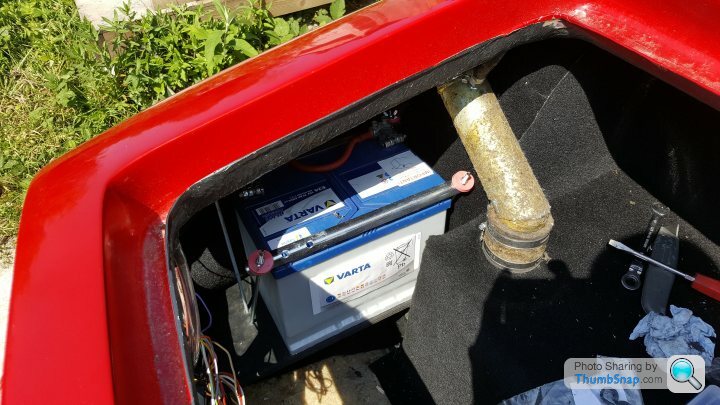
then after replacing the carpet the battery is given a new home.
Tomorrow I will be fitting the electric boot lock, speakers and power amp.
So now its mostly down to sorting the trim and that job starts at the back and works forward.
and as far back as you can get, Rubber Bumpers.
following advice elsewhere on PH I got 4 mtrs of D section from Polymax then I got 4 mtrs of 25wd x 1.5 thick stainless from ebay along with a couple of mtrs of m6 stainless studding from my stash behind the lathe, cut into 12 35mm studs.
And here we go. First job was to open up the existing holes to 10mm and add a couple of new ones near the bend.
img]https://thumbsnap.com/sc/9Zgjrd0I.jpg[/img]The Countersunk holes are for the new battery tray. More later.
The rubber has been cut using the old piece as a pattern, Then a strip of stainless cut approx 10mm shorter.
Then the rubber is held up against the body at the side and the first 3 holes spotted thru'. the postions of the holes are marked out on the stainless which is drilled and tapped M6. The holes in the rubber are then opened out to 12mm using an end mill.
then 3 studs are screwed in, the rubber is bolted into place and the remaining 3 holes spotted thru' and the process repeated. The studs are loctited into the strip with around 20mm protruding past the rubber
then a liberal bead of butyl sealant is applied
and the bumper is bolted into place using m6 penny washers and standard nuts.
then after replacing the carpet the battery is given a new home.
Tomorrow I will be fitting the electric boot lock, speakers and power amp.
Edited by Alan 1209 on Friday 26th May 21:08
no. Its an engineering term for an end mill. The drill just doesn't cut it with rubber 
Tapping stainless is a bit of a pig at the best of times but just use a good quality 2nd cut tap, plenty of lubricant and a slow speed on your electric drill.
I will be doing the same job at the front, but currently the bonnet is stored elsewhere due to space constraints. my garage is only 20 x 10, and that's on the outside.
Edited by Alan 1209 on Saturday 27th May 08:51
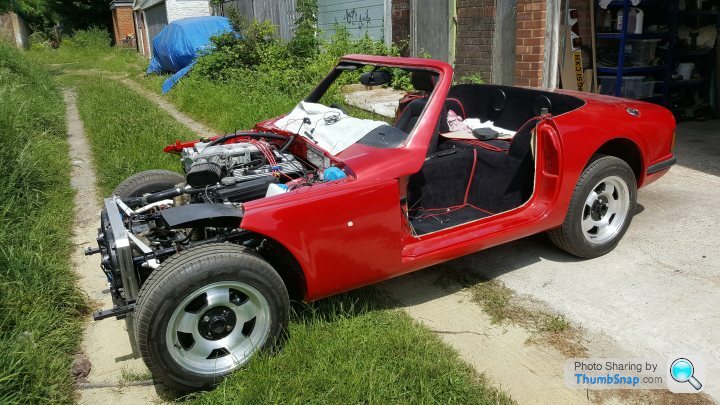
 What's under the blue tarp???
 Seems like ages since my last post. Its been a rough time in local government in London recently, and an unnecessary general election have put a bit of a crimp in progress on the S recently but the last couple of weeks have been quite productive so here we go.
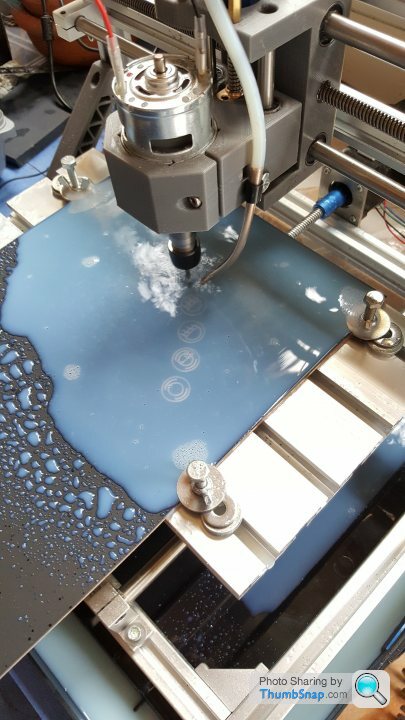
My car came without that arcing warning panel cover, and no one seems able to supply one so a started work on that. I have a few extras to add so a standard one was never going to cut it ( whatever standard is, I've seen a couple of different options), so here is my first attempt.
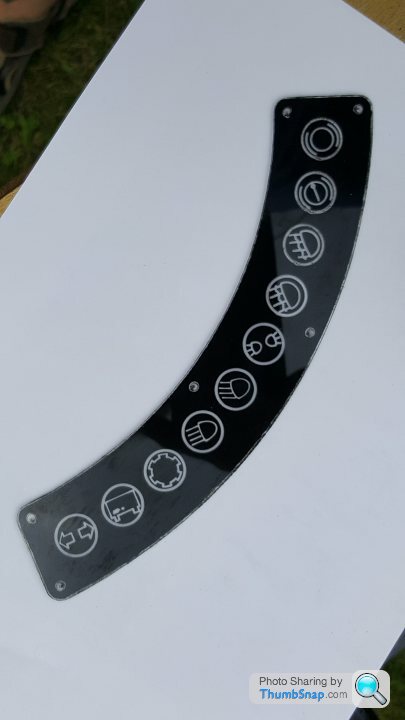

Curvatures not quite right and the corner rads need increasing but this reverse engineering stuff is harder than it looks. this is a sheet of 2mm thk polycarbonate, sprayed black on the reverse then engraved to remove the rear coating.
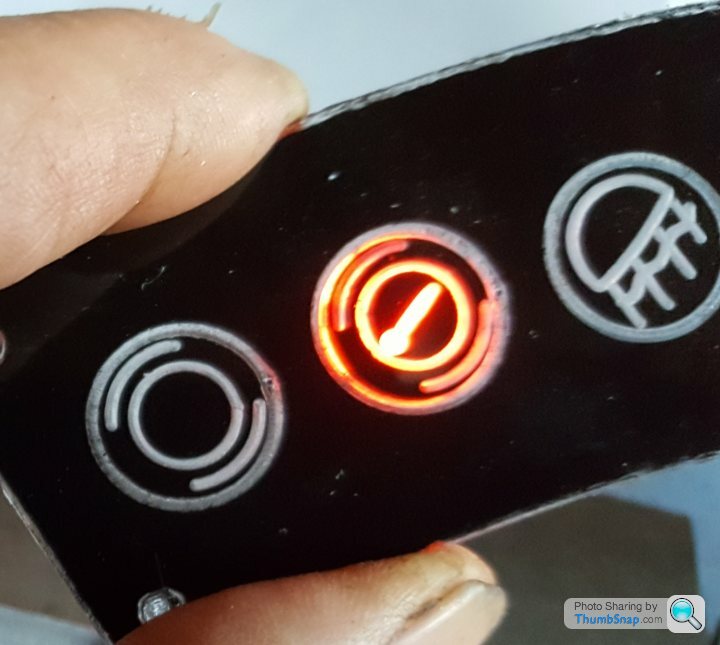
Looks a bit like this with a light behind it
Still a work in progress but fairly positive so far.
Elsewhere I've been dealing with the issue of my left leg, I'm assuming its a muscle issue that the clutch is so heavy, but it might be the coupling of an RX8 mechanism with a cologne clutch, so I've added power to the system,
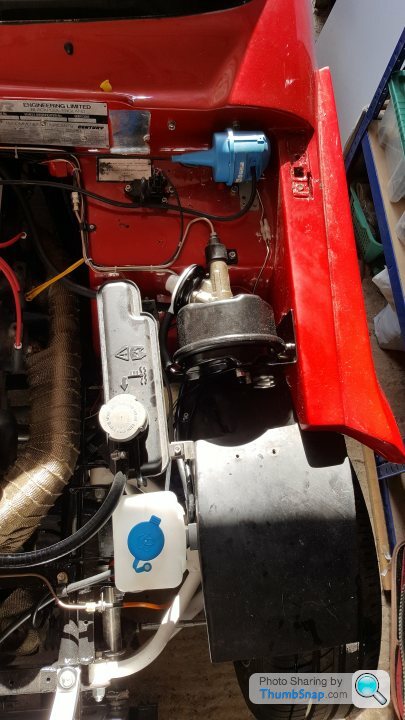
Courtesy of an MGB remote servo, giving 1.9:1 assistance.
Now its time for a small glass of vino (or 2)
My car came without that arcing warning panel cover, and no one seems able to supply one so a started work on that. I have a few extras to add so a standard one was never going to cut it ( whatever standard is, I've seen a couple of different options), so here is my first attempt.
Curvatures not quite right and the corner rads need increasing but this reverse engineering stuff is harder than it looks. this is a sheet of 2mm thk polycarbonate, sprayed black on the reverse then engraved to remove the rear coating.
Looks a bit like this with a light behind it
Still a work in progress but fairly positive so far.
Elsewhere I've been dealing with the issue of my left leg, I'm assuming its a muscle issue that the clutch is so heavy, but it might be the coupling of an RX8 mechanism with a cologne clutch, so I've added power to the system,
Courtesy of an MGB remote servo, giving 1.9:1 assistance.
Now its time for a small glass of vino (or 2)
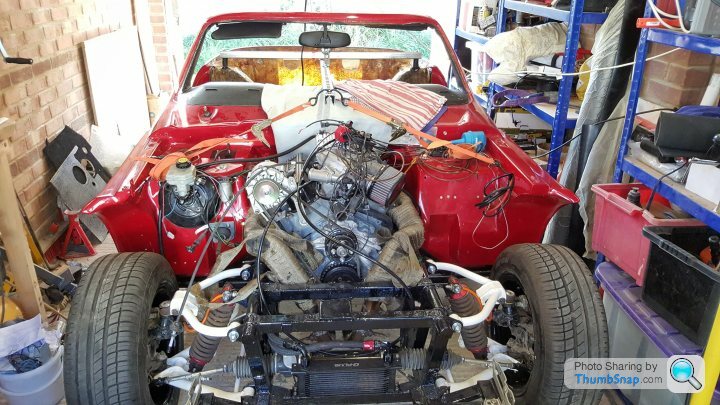
didn't quite make it to the doors today but most of the front end is now in place.
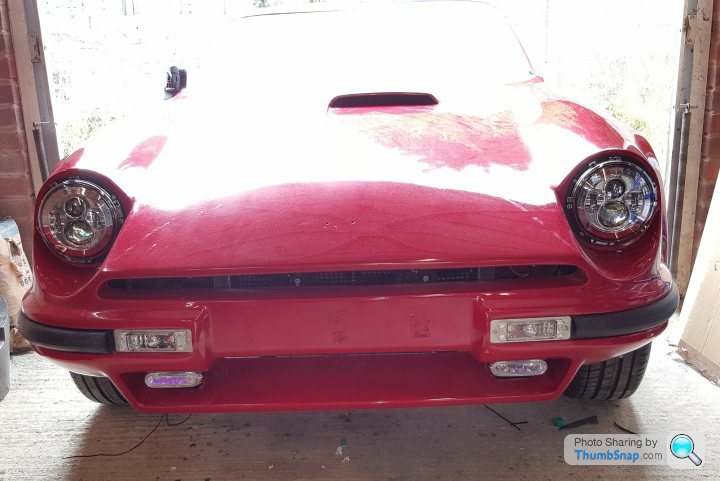
Side light/ indicators are MK2 Golf, small bumper, in a stainless mounting plate. Headlights are LED units.
Did make some progress on the door hinges, Assembled and ready to go in.
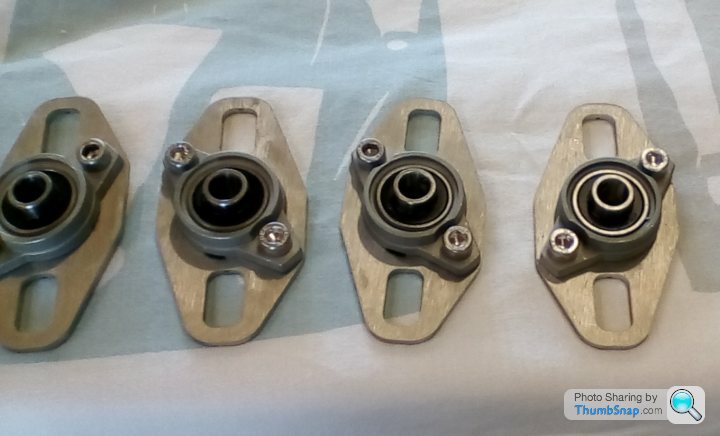
10id self aligning ball bearings on a stainless plate. Still considering a right through hinge pin and a hole in the sill, or 2 separate pins. Ideal would be a through pin, but haven't worked out how to seal the sill yet.
Side light/ indicators are MK2 Golf, small bumper, in a stainless mounting plate. Headlights are LED units.
Did make some progress on the door hinges, Assembled and ready to go in.
10id self aligning ball bearings on a stainless plate. Still considering a right through hinge pin and a hole in the sill, or 2 separate pins. Ideal would be a through pin, but haven't worked out how to seal the sill yet.
Gassing Station | S Series | Top of Page | What's New | My Stuff