Cossy sold and Jag bought - the hard work begins next week
Discussion


GreenV8S said:
It looks as if those joining hoses are going to be under vacuum, which might be a problem. (You might get away with it if they are joining metal tubes which butt up tight to each other.)
If they do start to collapse I'll fit more stainless tube in them so only the actual bend is un-supported.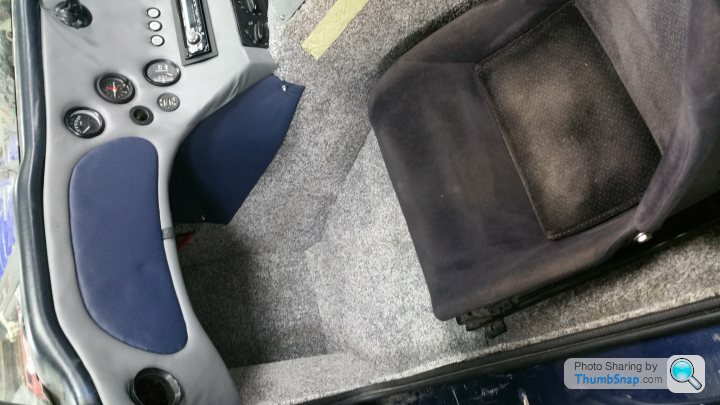
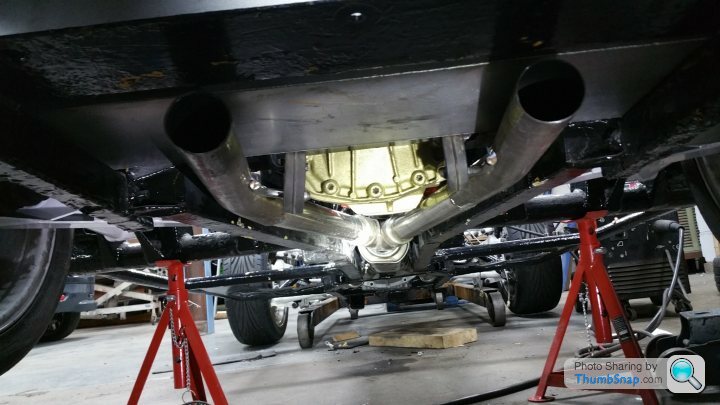
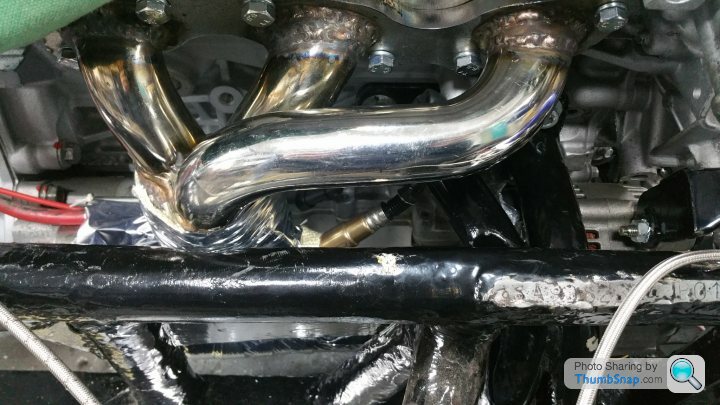
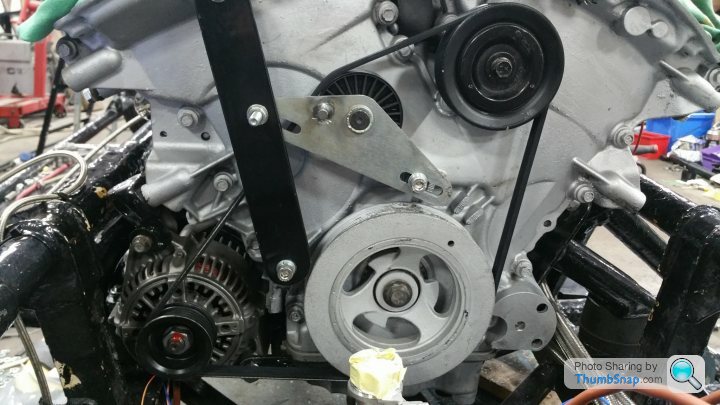
Exhaust off for final welding. Drivers side manifold completed, wrapped and about to be torqued on. Starter also wrapped as vertical close to the manifold. Alternator final fitted, also heat shielded, drive belt pullies aligned, belt tensioned and all fixings tightened. Propshaft fitted and fixings torqued. Need to clip and shield the alternator, starter and O2 sensor cables.
Hope I haven't forgotten anything that needed doing before the body has been refitted. Body a bit tight on the chassis and sitting about 15mm high at the front, but should settle as it was OK when removed. Outriggers wrapped in grease impregnated cloth Denso tape. Cannot upload photos for some reason.
Edited by magpies on Tuesday 29th October 18:21
Body now tightened down. Hand brake fitted and adjusted - easy with the turnbuckle I fitted - only takes 5 min and no crawling under the car.
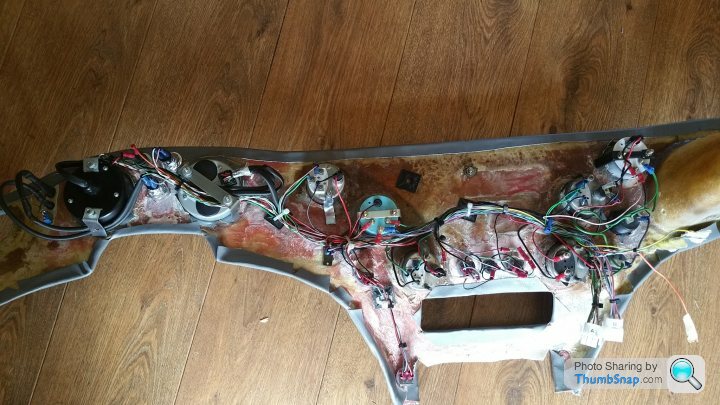
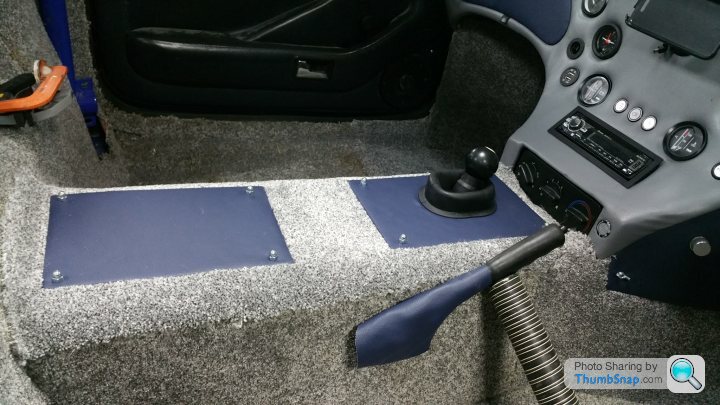
Seats in along with the harnesses. Rear cage also in and bolted down. New larger sun visors fitted. That just about completes the interior. Can't upload photos from my phone for some reason? - have uploaded the photos on the facebook S page
Fuel pump, fuel level gauge and fuel pressure gauge all wired and connected.
Edited by magpies on Saturday 2nd November 16:19

LLantrisant said:
i started reading this thread with interest...until the stage where the chassis got painted....i was shocked...how somebody can invest so much work in a car and than the chassis-paintjob is done in such a way?
it would have been so easy in that stage to get the chassis on bare metal (e.g. chemical reoval by a specialst) and than built up a new coating (powder, galvanizing, paint)....now it really looks like a botch in a shed job....sorry to say that.
The chassis was stripped and repaired 8 years ago and painted wit 3 coats of metal paint used in the marine industry, each of a different colour so I could tell how deep a chip is) This year I took the body off to change the engine to I also thoroughly checked for any signs of rust. None found on the chassis but I found a couple of brown marks on the (new and powder coated 10 years ago) so investigated and found a layer of rust under the powder coating! £100 later and newly powder coated were refitted ( too difficult to properly paint them). I decided to change the colour to black so just painted again with smooth hammerite. I wrapped the outriggers in Denso tape. it would have been so easy in that stage to get the chassis on bare metal (e.g. chemical reoval by a specialst) and than built up a new coating (powder, galvanizing, paint)....now it really looks like a botch in a shed job....sorry to say that.
So in conclusion: No rust found on any painted sections
Rust found under the only two powder coated items.
The car was never going to be pristine and intended to us in competition so happy with a painted finish.
Oh I rescued the car from being scrapped as had been in an accident - the powder coated outriggers were so badly rusted they fell apart when rmovingg the body.
I am not paying others to do this work and if it looks amateurish that is because I am. I have never worked in the motor industry
LLantrisant said:
i started reading this thread with interest...until the stage where the chassis got painted....i was shocked...how somebody can invest so much work in a car and than the chassis-paintjob is done in such a way?
it would have been so easy in that stage to get the chassis on bare metal (e.g. chemical reoval by a specialst) and than built up a new coating (powder, galvanizing, paint)....now it really looks like a botch in a shed job....sorry to say that.
Oh and I use my car all year round - suitably power washed underneath as and when needed. Obviously you only use yours in dry and sunny June / July / August to keep your powder coated chassis from falling apart. There are plenty of TVR chassis that have been blasted of their flaky powder coating and good marine 2--pack paints applied.it would have been so easy in that stage to get the chassis on bare metal (e.g. chemical reoval by a specialst) and than built up a new coating (powder, galvanizing, paint)....now it really looks like a botch in a shed job....sorry to say that.
Blue 30 said:
Why does anyone feel the need to criticise others hard work (although well intended I'm sure) ?
If its not for you that's fine, but personally I would prefer to read promotion (ie. Of your work) rather than the condemnation of others efforts.
(Politicians take note)
T.
I'm sure it was well intended, but there are usually more than one way to do any job correctly. There has been a few recent threads on various coatings used on chassis with probable better longevity than powder coating. My experience is that unless the preparation is spot on then powder coating can end up with rust under it. But it would be the preferred method if brushing or spraying cannot reach all areas e.g. trailing arms. If its not for you that's fine, but personally I would prefer to read promotion (ie. Of your work) rather than the condemnation of others efforts.
(Politicians take note)
T.
The chassis on my S is in great condition with no rust but I wanted to change it's colour to black hence a couple of coats of smoothrite.
Back to the build - This is my last week off before going back full time for 2 months.
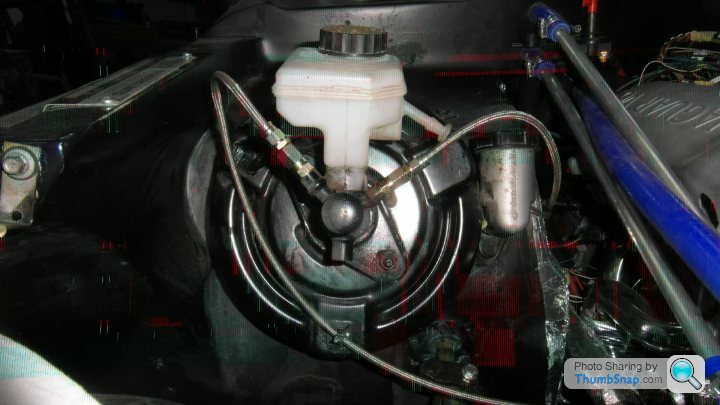
Plumbed the clutch and brake lines to the master cylinders - will add fluid tomorrow
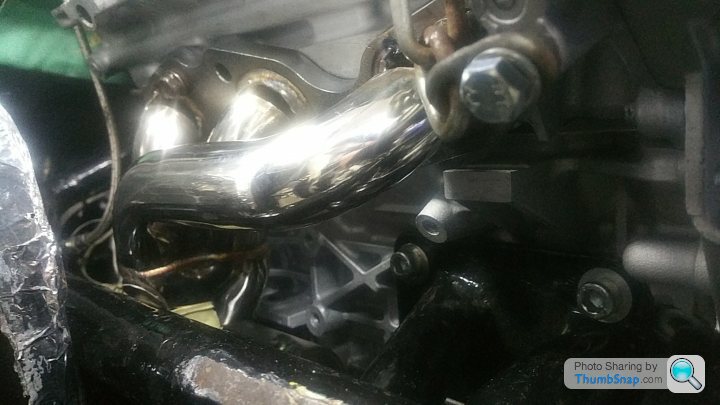
Wired the Speedo and Reverse to the gearbox - sod of a job and had my hand stuck for ten minutes while trying to get my hand back out from above the exhaust - trapped

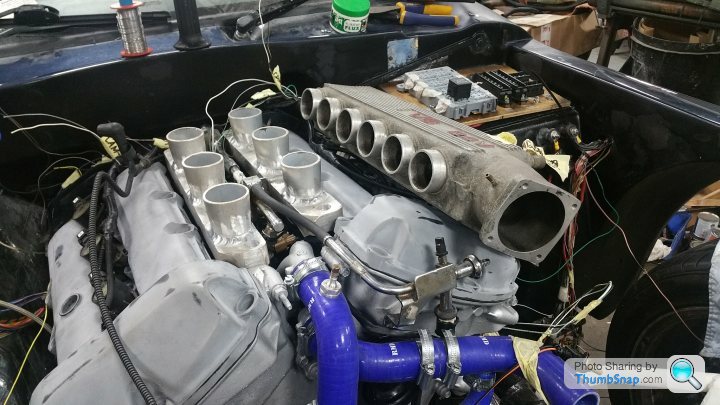
Wired the crank sensor, all 6 coil on plugs, both vvt's, cam sensor and the O2 sensor in the exhaust.
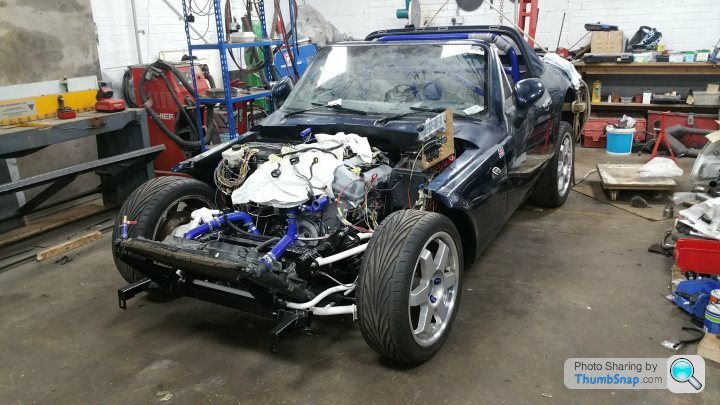
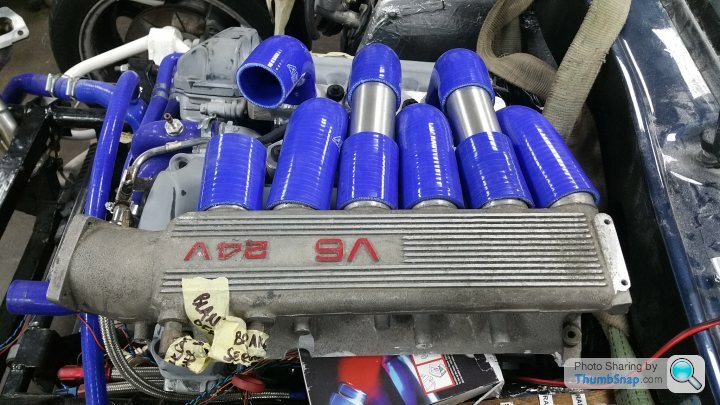
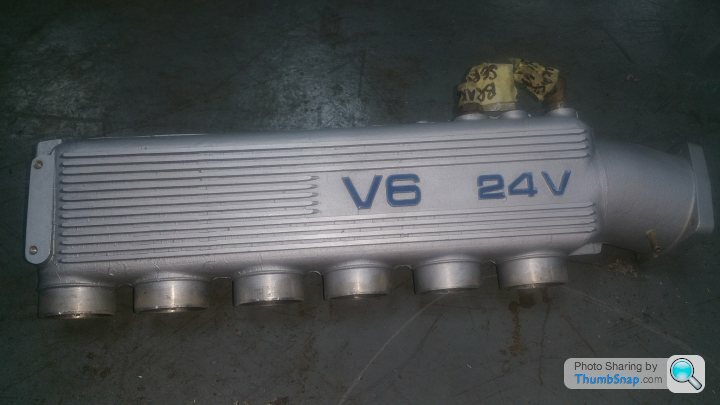
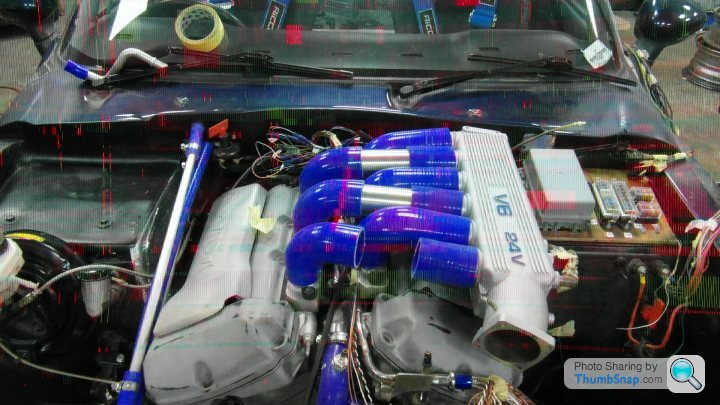
Started to make the inlet
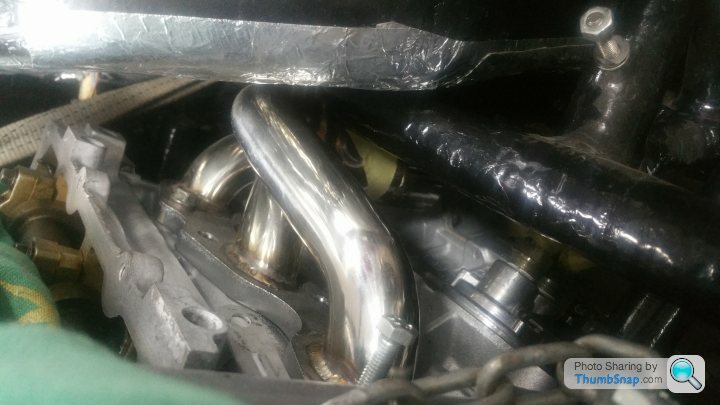
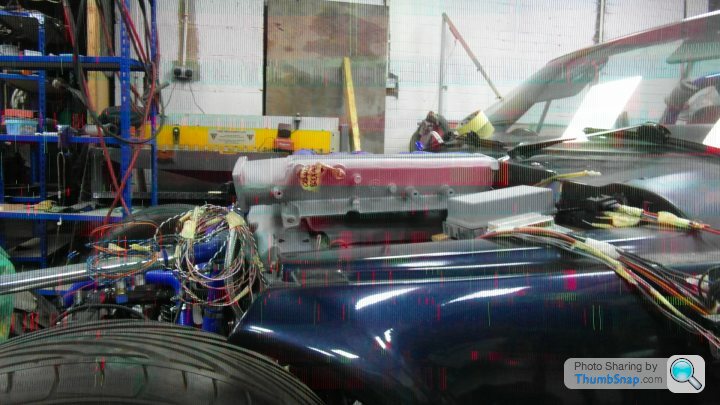
sits nice and low
Plumbed the clutch and brake lines to the master cylinders - will add fluid tomorrow
Wired the Speedo and Reverse to the gearbox - sod of a job and had my hand stuck for ten minutes while trying to get my hand back out from above the exhaust - trapped
Wired the crank sensor, all 6 coil on plugs, both vvt's, cam sensor and the O2 sensor in the exhaust.
Started to make the inlet
sits nice and low
Gassing Station | S Series | Top of Page | What's New | My Stuff