Water Leaks - Known Knowns and Known Unknowns
Discussion


What about this for a catalogue of bodges? This saturated block of wood was supporting the battery tray.....
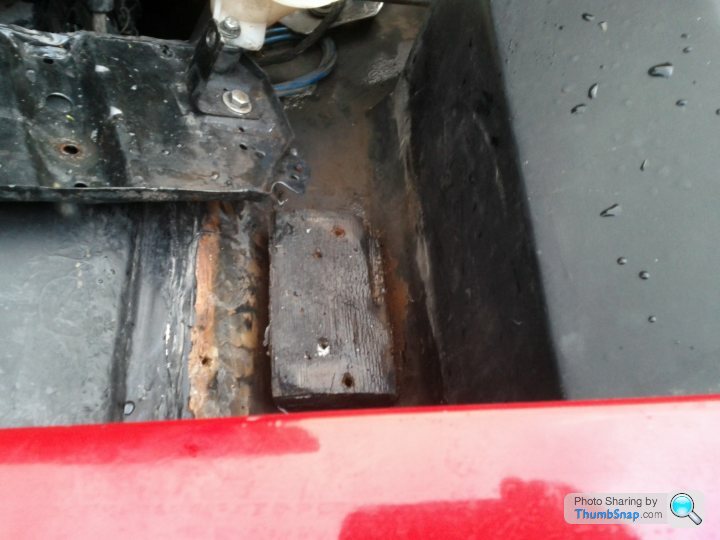
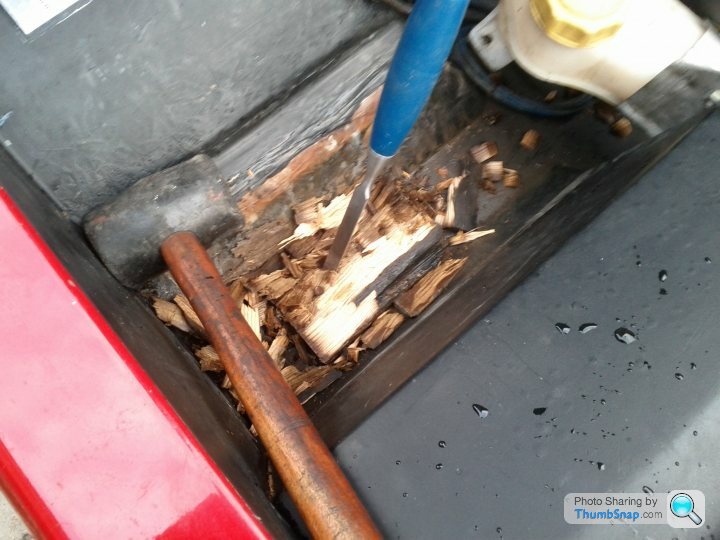
This was screwed to the bulkhead with two long self-tappers with no sealing. Getting it off was fun! It had to be chopped out with a chisel....
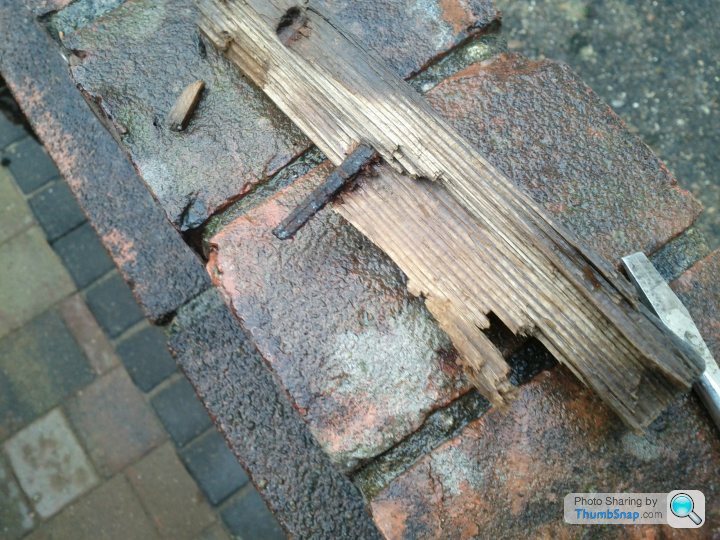
I don't know where he got the wood from, but it had several old nails in it!
There were another two holes 10mm to the side of these holes, presumably from where the pillock who did this initially positioned the tray in the wrong place. So water was percolating down and through these holes as well.
And just in case these weren't enough, to make sure plenty of water could get in, there were a few more....
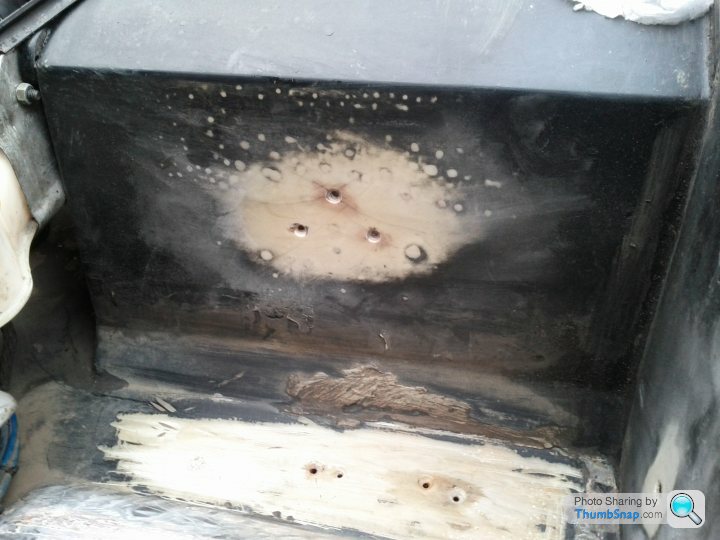
A total of 11 holes! All now plugged and sealed with P40
So as far as the left side goes, that's 11 known unknowns dealt with today plus the 5 yesterday. That leaves the known known of the leaking door seal plus any unknown unknowns which won't become known unknowns until I pour some water into that area tomorrow. There's also quite a large known unknown on the right side, somewhere under the heater inlet. What fun
This was screwed to the bulkhead with two long self-tappers with no sealing. Getting it off was fun! It had to be chopped out with a chisel....
I don't know where he got the wood from, but it had several old nails in it!
There were another two holes 10mm to the side of these holes, presumably from where the pillock who did this initially positioned the tray in the wrong place. So water was percolating down and through these holes as well.
And just in case these weren't enough, to make sure plenty of water could get in, there were a few more....
A total of 11 holes! All now plugged and sealed with P40
So as far as the left side goes, that's 11 known unknowns dealt with today plus the 5 yesterday. That leaves the known known of the leaking door seal plus any unknown unknowns which won't become known unknowns until I pour some water into that area tomorrow. There's also quite a large known unknown on the right side, somewhere under the heater inlet. What fun
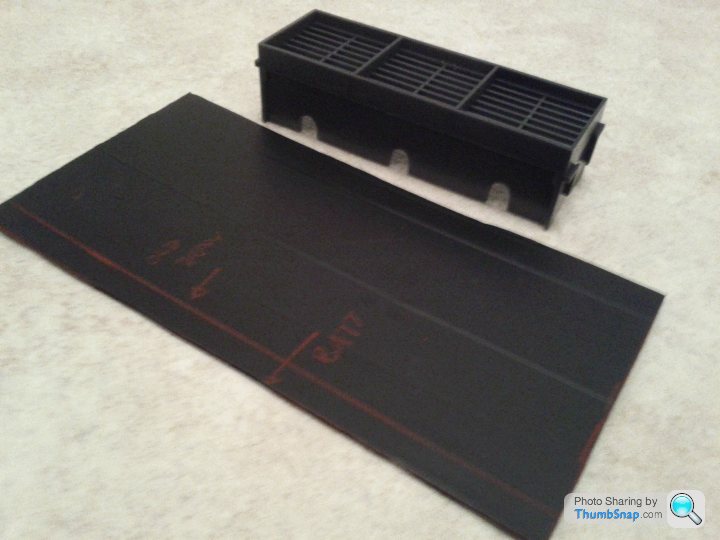
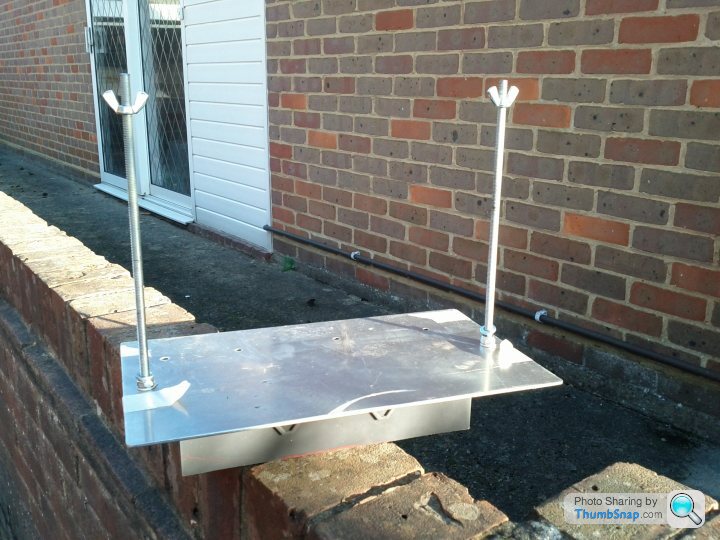
The block of sodden timber will be replaced with a light weight plastic spacer block* and a new battery tray made from a sheet of 3mm alloy plate. What you can see in the photo is a plastic template.
 )
)
- A Blue Peter Badge to the first one who can spot where the plastic spacer block came from
)
phillpot said:
... Jewson's?
Give the man a cigar It's dawned on me that the drainage holes aren't a good idea. If I leave the lower edge solid I'll be able to seal the block/spacer top and bottom so it will be easy to make the holes through the bulkhead for the securing bolts (stainless of course!) completely watertight. Oh well, another £1.09 out of my pocket money next week
That would be an excellent suggestion if the crack ran vertically and the resin could percolate down into the crack. Unfortunately I think this crack runs horizontally. I'm going to have to fix the battery tray first so I can get the engine running and get that part of the bulkhead nice and hot to dry it out, and then go from there.
I think I'm also going to have to remove the heater air intake scoop to get at the seam from the outside.
I think I'm also going to have to remove the heater air intake scoop to get at the seam from the outside.
adam quantrill said:
You could pour in some diluted resin
What do you dilute resin with?Sounds to me like a job for Capt. Tolley

looks like you've already tried chewing gum?

Edited by phillpot on Monday 16th January 23:19
phillpot said:
....looks like you've already tried chewing gum?
...
Plasticine. A temporary plug in one of the more obvious holes to rule that out as the ultimate source of the leak. Unfortunately it wasn't that obvious/simple!...
A bottle of Tolley's on order. Watch this space to see if it works.
Edited by v8s4me on Tuesday 17th January 00:10
I know it may sound like a bodge but bathroom sealant is designed to be waterproof in very wet conditions.
You need to let the area be completely dry first but you can get stuff that sets in 60 mins. It comes in black too.
There's butyl rubber that stays flexible and doesn't go really hard, and at a price, you can get stuff that can be applied in wet conditions, even under water. Designed for marine and watercourse applications.
SIKAFLEX 221 would be my first choice for this type of job.
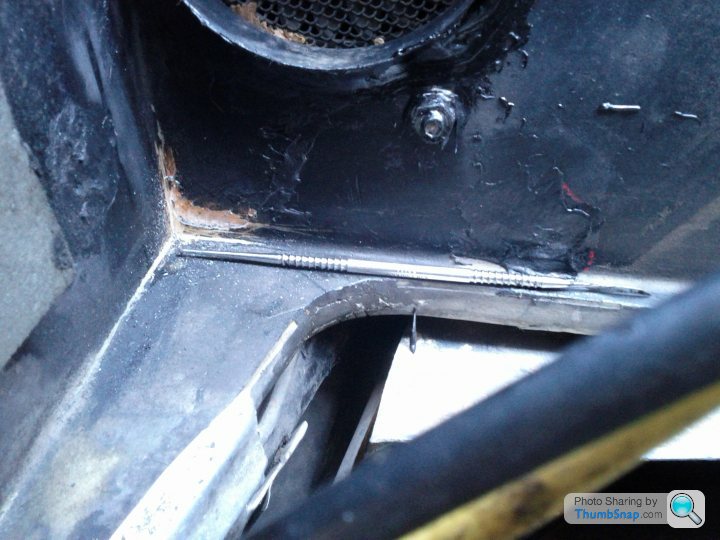
Finally got the air scoop off ......
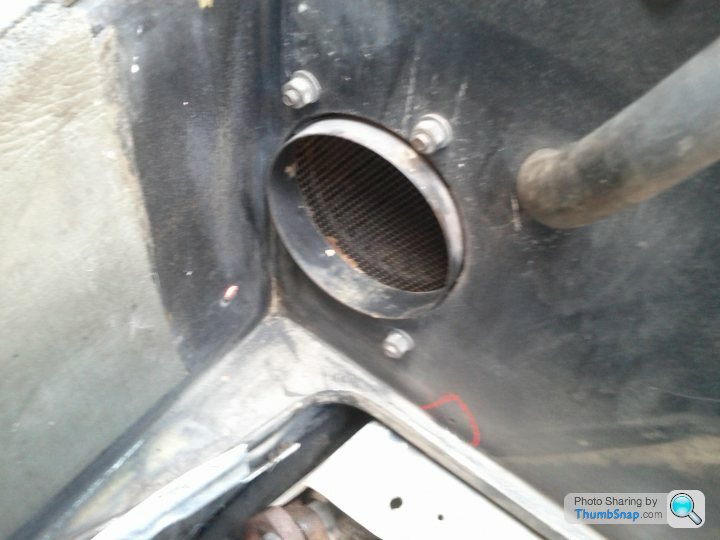
I can't see a crack around the area corresponding with the leak on the inside. The favorite culprits are the little hole where the lower scoop screw was, the big hole with the Plasticine plug and the hole around the fan
inlet.
This whole area was covered with sodden sound insulation material which can't have been helping.
Hopefully the Tolley's will be here tomorrow so we can give that a try.
The hunt continues.......
Finally got the air scoop off ......
I can't see a crack around the area corresponding with the leak on the inside. The favorite culprits are the little hole where the lower scoop screw was, the big hole with the Plasticine plug and the hole around the fan
inlet.
This whole area was covered with sodden sound insulation material which can't have been helping.
Hopefully the Tolley's will be here tomorrow so we can give that a try.
The hunt continues.......
After thinking I'd sorted out the left side I found another two holes hiding underneath the expansion tank. These were easy to find because of the icicles hanging down into the foot well
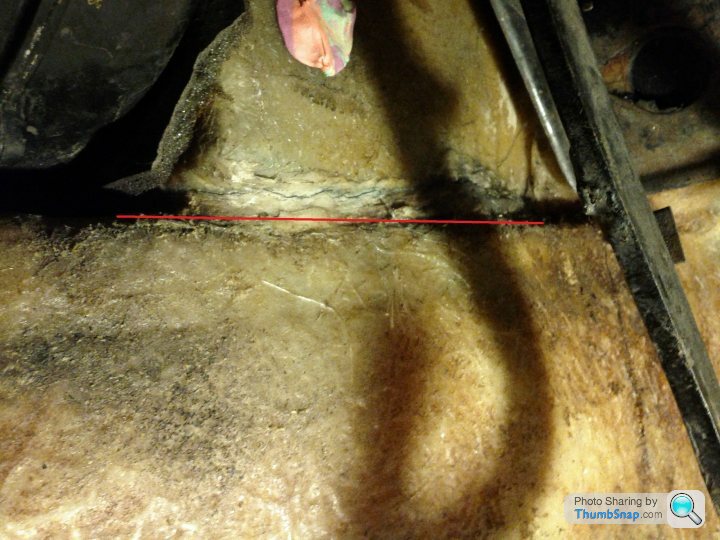
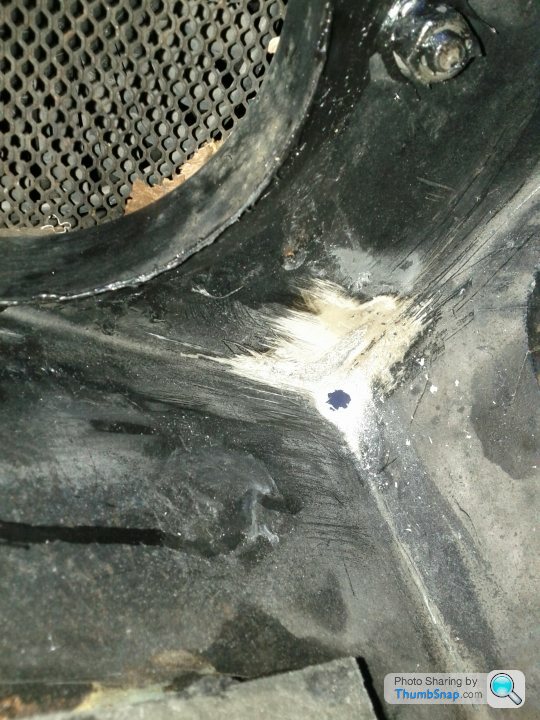
After plugging those it was back to the right side to try and find the hairline crack. After a bit of poking and scraping I found that the fibreglass was wafer thin in the corner of the moulding...

I've come across this before ie corners where TVR didn't put enough matting and resin in. Water may have been weeping through here since it left the factory. Anyway, the only way to fix this type of thing is to make a proper hole and then fill it using resin and matting and then tidy up with P40 when the matting has hardened.
I've just poured three buckets of water over these areas. There's nothing in the footwells at the moment but lets see whether or not we have any more icicles in the morning.
While the resin was drying I finished off the new battery tray...
After plugging those it was back to the right side to try and find the hairline crack. After a bit of poking and scraping I found that the fibreglass was wafer thin in the corner of the moulding...
I've come across this before ie corners where TVR didn't put enough matting and resin in. Water may have been weeping through here since it left the factory. Anyway, the only way to fix this type of thing is to make a proper hole and then fill it using resin and matting and then tidy up with P40 when the matting has hardened.
I've just poured three buckets of water over these areas. There's nothing in the footwells at the moment but lets see whether or not we have any more icicles in the morning.
While the resin was drying I finished off the new battery tray...
After thinking I'd sorted out the left side I found another two holes hiding underneath the expansion tank. These were easy to find because of the icicles hanging down into the foot well
After plugging those it was back to the right side to try and find the hairline crack. After a bit of poking and scraping I found that the fibreglass was wafer thin in the corner of the moulding...
I've come across this before ie corners where TVR didn't put enough matting and resin in. Water may have been weeping through here since it left the factory. Anyway, the only way to fix this type of thing is to make a proper hole and then fill it using resin and matting and then tidy up with P40 when the matting has hardened.
I've just poured three buckets of water over these areas. There's nothing in the foot wells at the moment but lets see whether or not we have any more icicles in the morning.
While the resin was drying I finished off the new battery tray...
Edited by v8s4me on Wednesday 18th January 23:24
Gassing Station | Wedges | Top of Page | What's New | My Stuff