Discussion


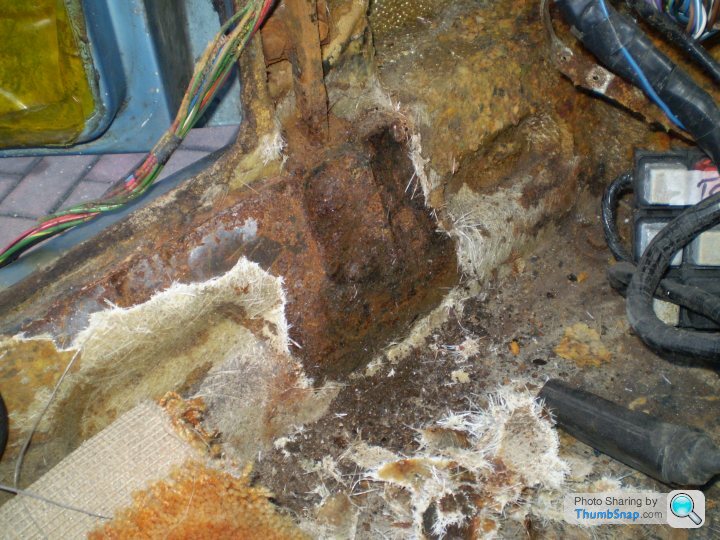
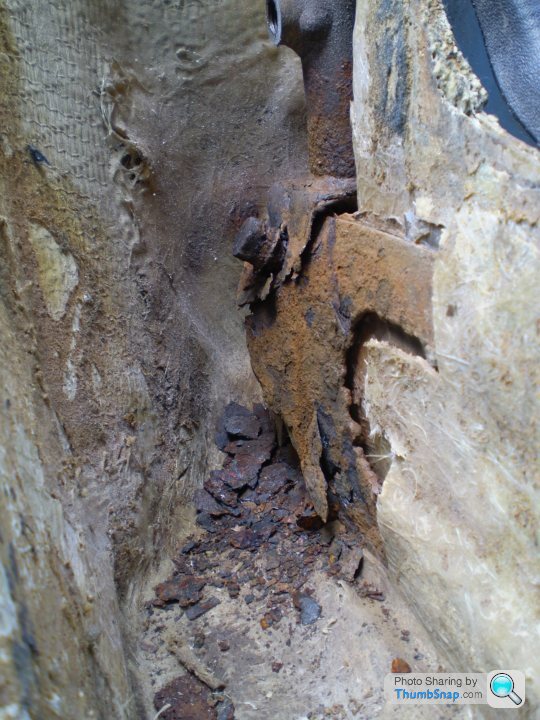
Stripped almost all of the interior out now; I've investigated all the metalwork inside the car and it's not as bad as I had feared. This is the passenger side footwell with the mounting for the door hinge re-enforcement, after peeling away the de-laminated fibreglass. It looks pretty awful in the pic but the metal is sound under the corrosion so it just needs treating and re-glassing over.
Driver's side is even better, the glassfibre is still holding tight:
The seat belt mount on the driver's side is much better than the passenger side; but I'm not happy with the original design so I'm going to re-enforce it anyway. I'm going to make something up to tie the H-frame behind the seats back to the chassis; I reckon I can hide most of it behind the original trim so it should look OK. I can then think about roll bars later if necessary; a cursory look hasn't identified any obvious mounting positions for a roll bar.
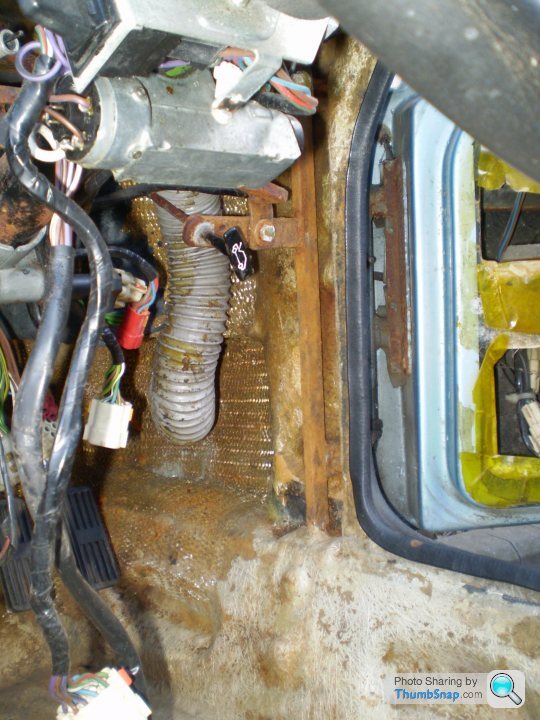
Took the heater out too: it looks like a right Heath Robinson affair! It's made of flat sheets of plastic with some scored folds, bathroom waste pipes and gallons of mastic. I'm going to have to cut it open to re-attach the heater control cables, plus it appears to have been built in situ and wouldn't come out without some 'modification' to the windscreen duct.

It also projects through into the engine bay; I don't think I've seen another wedge like it?
PS note the condition of the chassis exposed around the gearstick...
Driver's side is even better, the glassfibre is still holding tight:
The seat belt mount on the driver's side is much better than the passenger side; but I'm not happy with the original design so I'm going to re-enforce it anyway. I'm going to make something up to tie the H-frame behind the seats back to the chassis; I reckon I can hide most of it behind the original trim so it should look OK. I can then think about roll bars later if necessary; a cursory look hasn't identified any obvious mounting positions for a roll bar.
Took the heater out too: it looks like a right Heath Robinson affair! It's made of flat sheets of plastic with some scored folds, bathroom waste pipes and gallons of mastic. I'm going to have to cut it open to re-attach the heater control cables, plus it appears to have been built in situ and wouldn't come out without some 'modification' to the windscreen duct.
It also projects through into the engine bay; I don't think I've seen another wedge like it?
PS note the condition of the chassis exposed around the gearstick...
Edited by The Hatter on Saturday 9th April 21:25

Roll bar rear support bars each have a tubular mount bolted to chassis on both sides where top of rear shock absorbers are mounted. Then pass through the boot floor and come through bulkhead and into the passenger compartment. Front legs of the roll bar are bolted each side on the chassis plate behind where the floor seat belt is fitted. Bolt holes filled with black mastic on photo.


Investigated the oil tank today. The installation means that I can't get the roof panel into the boot, so it needs a rethink.
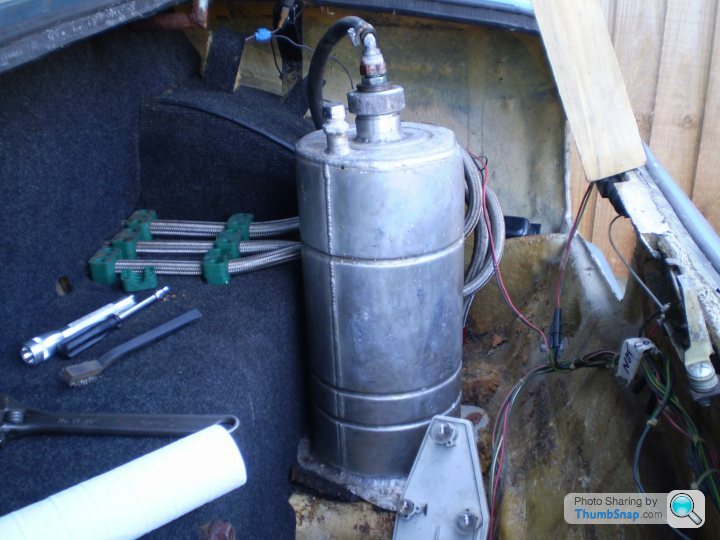
There's only a couple of inches of oil in the bottom of the tank, but at least the oil's fairly clean...
Anyone know what level of oil there should be in the tank? Also, there's no drain plug in the bottom so I'll have to dream up a way of emptying it.
There's only a couple of inches of oil in the bottom of the tank, but at least the oil's fairly clean...
Anyone know what level of oil there should be in the tank? Also, there's no drain plug in the bottom so I'll have to dream up a way of emptying it.


I've never tried to get the roof behind the seats, it looks too small a space. I'll try it on my 350.
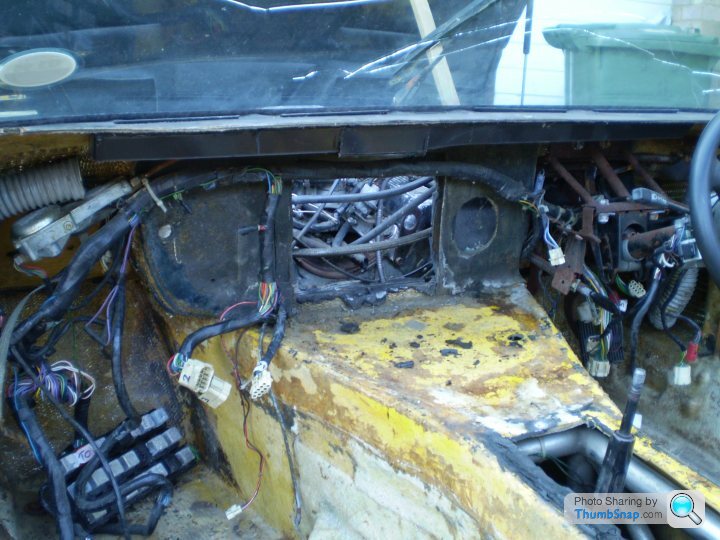
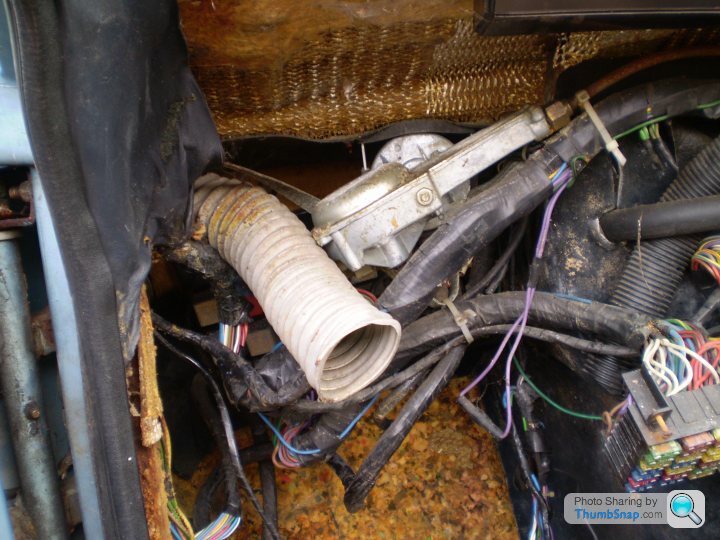
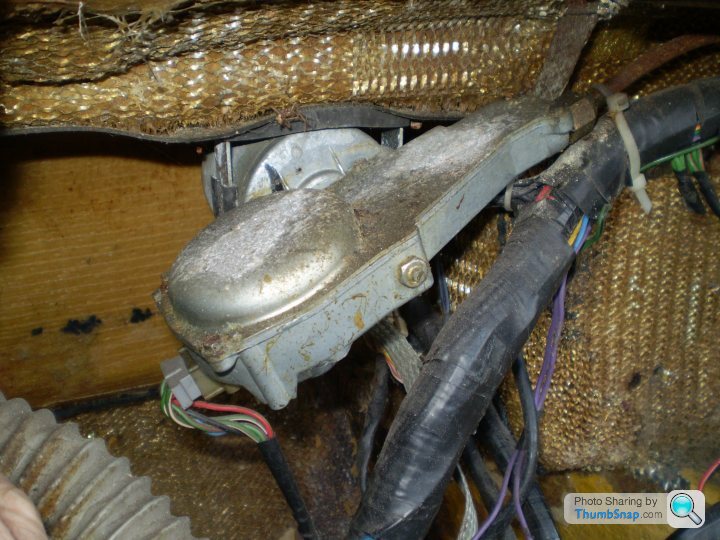
Here's the wiper motor as I was taking things apart... good luck with getting access to that with the dash in place mate! I'll take some photos from underneath as it is now; all the wiring's out of the way now.
I think there's enough slack in the oil tank pipes to turn the tank over in the boot; it'll come out in the rebuild anyway so I can clean it properly then, then the problem won't come back for a while!
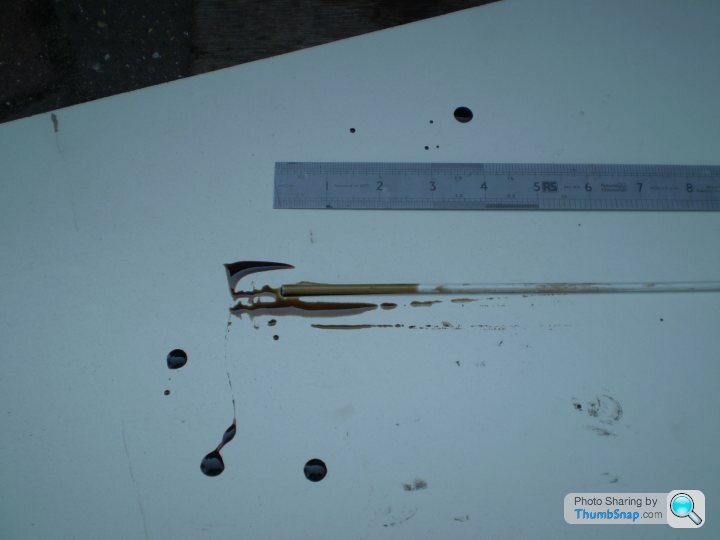
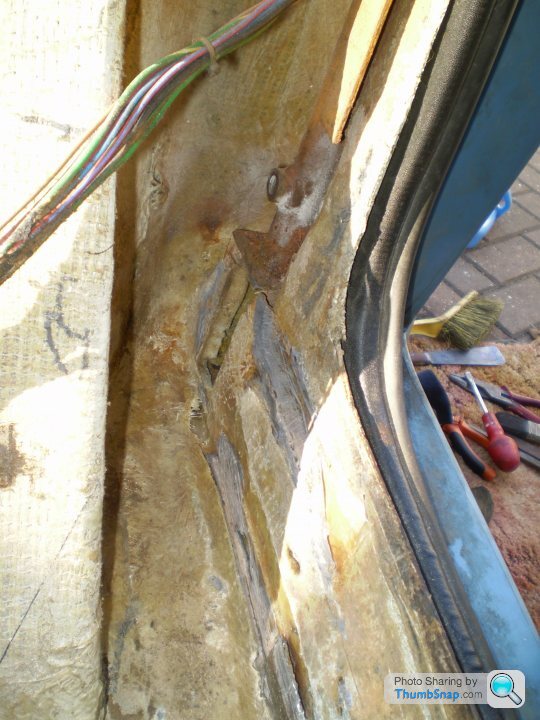
I attacked the area around the seat belt reel mount on the passenger side today; it was in a sorry state! This is what happened when I tried to turn the one remaining bolt:
There's a curious steel sheet shape formed with flame cutting. The steelwork did go back to the chassis through a very tortuous route with a piece of steel approx 1.5mm thick and 25mm wide; plus a double bent piece that appears to go to lap harness strap positions - not enough strength there I think.
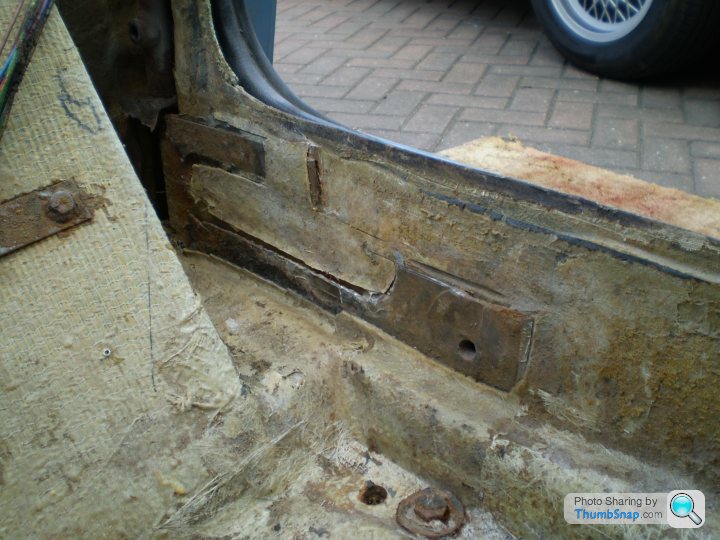
I cut all the rotten metal out (very slowly and carefully making sure the door gap wasn't going to be lost). I'll get some more plates made up and glass them in, making bolt on brackets as necessary. I need to dream up a way of tying them back to the chassis; Dave Barrington's photos of his chassis have shown mine is very different and is missing the 'normal' seat belt mounting plates.
This is how it is now; you can see chunks of foam within the sills where the plates have exposed the insides. What's the foam all about?
There's a curious steel sheet shape formed with flame cutting. The steelwork did go back to the chassis through a very tortuous route with a piece of steel approx 1.5mm thick and 25mm wide; plus a double bent piece that appears to go to lap harness strap positions - not enough strength there I think.
I cut all the rotten metal out (very slowly and carefully making sure the door gap wasn't going to be lost). I'll get some more plates made up and glass them in, making bolt on brackets as necessary. I need to dream up a way of tying them back to the chassis; Dave Barrington's photos of his chassis have shown mine is very different and is missing the 'normal' seat belt mounting plates.
This is how it is now; you can see chunks of foam within the sills where the plates have exposed the insides. What's the foam all about?
Mike,
The wiper motor cover appears to be on the top side, so It's not clear how you'll get to it with the dash in place.
Bottom view:
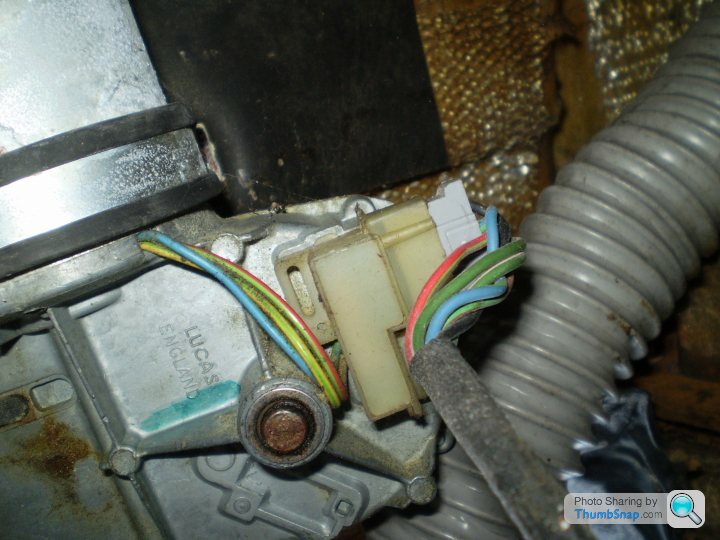
Top side:
Mine appears to park in the middle of the screen and that'll annoy me so I'll have to connect up the power while I have access and see what I can do to get back to the original park position.
It may be easier to replace the motor - anyone know what it's from?
The wiper motor cover appears to be on the top side, so It's not clear how you'll get to it with the dash in place.
Bottom view:
Top side:
Mine appears to park in the middle of the screen and that'll annoy me so I'll have to connect up the power while I have access and see what I can do to get back to the original park position.
It may be easier to replace the motor - anyone know what it's from?
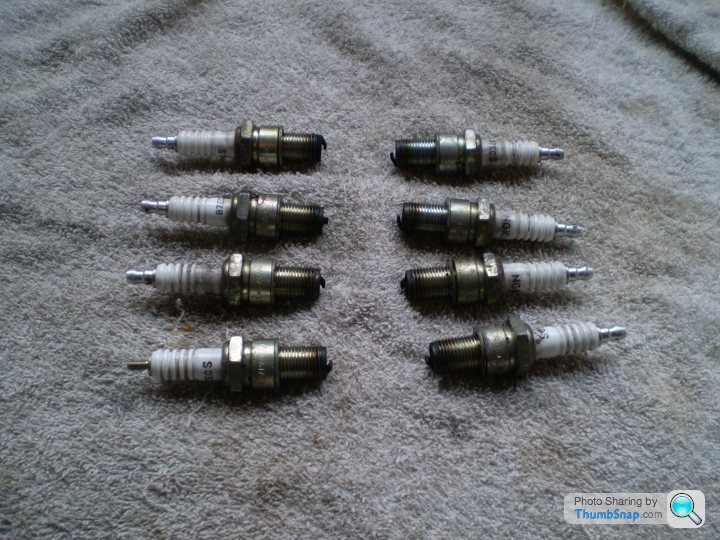
Got it in the garage now so time to take the bonnet off and take a long awaited look at the engine. All the plugs came out cleanly after soaking in oil for a while, looking in good condition; all the same shade of black... and no condensation/rust.
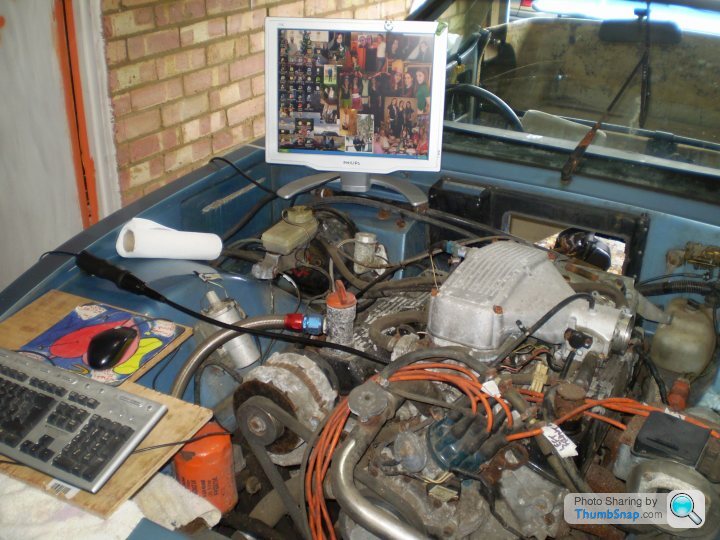
Set up an endoscope; it disagreed with the two laptops in the house so I had to resort to setting up an office in the garage...
Excellent news, no corrosion in the bores... positvely shiney!!
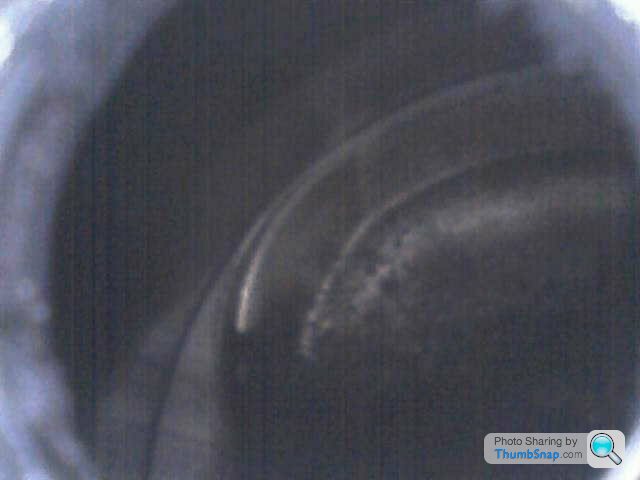
...Anyone recognise the pistons?
I put some oil down the bores and then tried turning it over... nice and smooth with no nasty noises, all's well it appears - thank god!!
Set up an endoscope; it disagreed with the two laptops in the house so I had to resort to setting up an office in the garage...
Excellent news, no corrosion in the bores... positvely shiney!!
...Anyone recognise the pistons?
I put some oil down the bores and then tried turning it over... nice and smooth with no nasty noises, all's well it appears - thank god!!
I had a problem with my wiper many years ago and found that there are 3 basic motors 14W 16W and 27W. The wedge one is the 16W and is shared with TR7s Stags and Scimitars It is seemingly impossible to get a overhauled one with the park switch in the correct position. I got an exchange one from Moss for £88 but I retained the Wedge gearwheel as it’s 170 degrees whereas TR7 is about 130.
A wedge needs a 40 tooth 2¼ inch wheel box with a tapering spline.
Excellent project!
A wedge needs a 40 tooth 2¼ inch wheel box with a tapering spline.
Excellent project!
Gassing Station | Wedges | Top of Page | What's New | My Stuff