Discussion


Getting the car ready for BBWF; trailer borrowed...
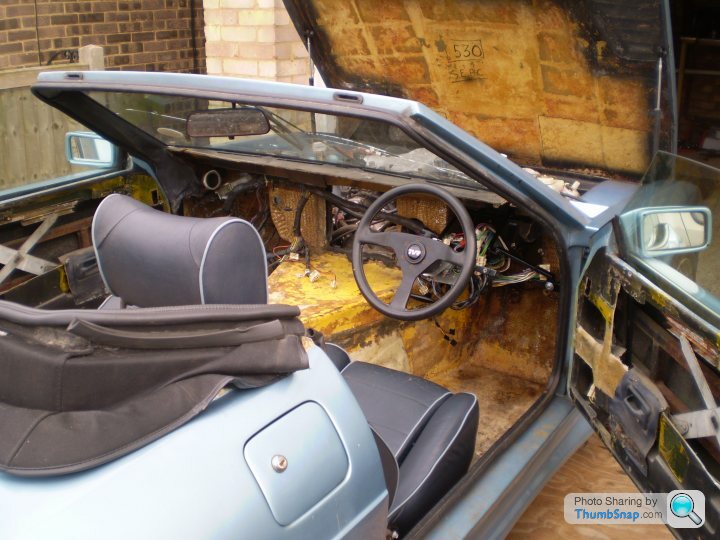
Bonnet back on, surrogate roof on, steering column back in, handbrake functioning, seat rejuvenated and in place... all I need is for people to push the car around while I make brum brum noises!
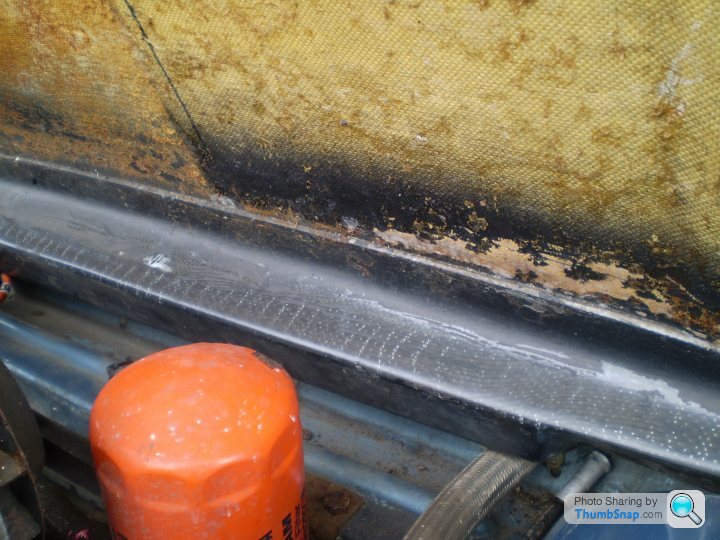
The bonnet's interesting; different Kevlar weave to the rest of the car with carbon fibre re-enforcement - Quite advanced for 1986? It's sagged badly though and the paint finish is pretty bad so it needs some serious work.
Bonnet back on, surrogate roof on, steering column back in, handbrake functioning, seat rejuvenated and in place... all I need is for people to push the car around while I make brum brum noises!
The bonnet's interesting; different Kevlar weave to the rest of the car with carbon fibre re-enforcement - Quite advanced for 1986? It's sagged badly though and the paint finish is pretty bad so it needs some serious work.

Henry Harris said:
Wedg1e said:
That seems a bit odd given that TVR had been making their own wiring looms for years.
I understand, but for some reason it could have been a previous rebuild, mine does not always correspond to any of those in the bible.adam quantrill said:
Wasn't the injector/ECU loom from an RR or SDi Vitesse, but the rest of the car wiring made by TVR?
Pretty much! My original injection loom was Rangey as it had the wiring for the over-run fuel shutoff, which as far as I know wasn't used on the SD1. I made a new loom that only retained three components of the original; the ECU, resistor pack and throttle pot. connector housings... all their terminals were replaced, I just couldn't get the housings. Everything was available from Vehicle Wiring Products bar one particular colour combination of wire... cost about £60 but removed the uncertainty of dodgy connectors and brittle wiring!I also made it just the length it needed to be, rather than having the original's spare three feet coiled up under the dash

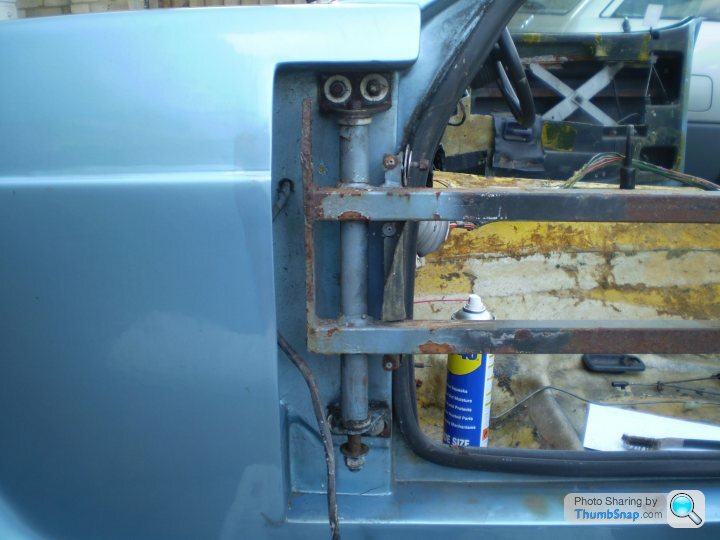
Back from BBWF and time to rip the car apart again... Passenger door off in an attempt to try and sort out the slack in the hinge tube and make the door open/close properly. It seems like the nylon bushes are actually functioning OK (even though one is split) but the movement is between the long vertical hinge bolt (which was not tight, it turned easily before I touched the nuts) and the 90 Degree brackets that go back to the body. The holes are not ovalised in the 90 Deg brackets so I assume the long bolt should be tightened until there's no movement? Anyone know? Seems a pretty odd design but I can't see how else TVR expected it to work!
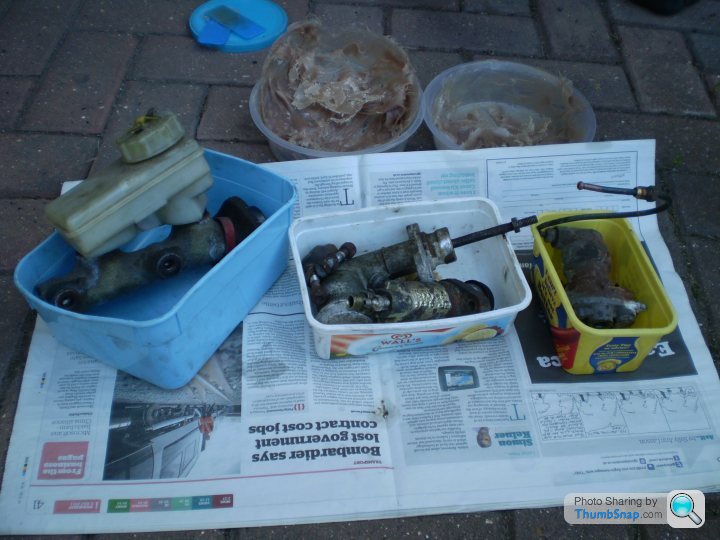
Clutch and brake hydraulics came off without too much of a fight, now I need to source replacements.
The clutch release fork in the gearbox is free so I'll try and get the engine running and then see if the clutch plate is free... I'm hoping even if it is stuck to the flywheel it'll give up the unequal battle with the engine and free off under power. Otherwise the engine's got to come out.
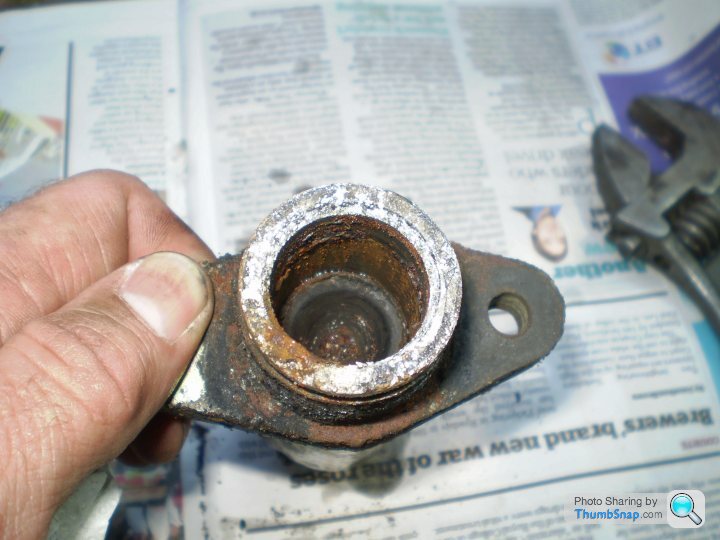
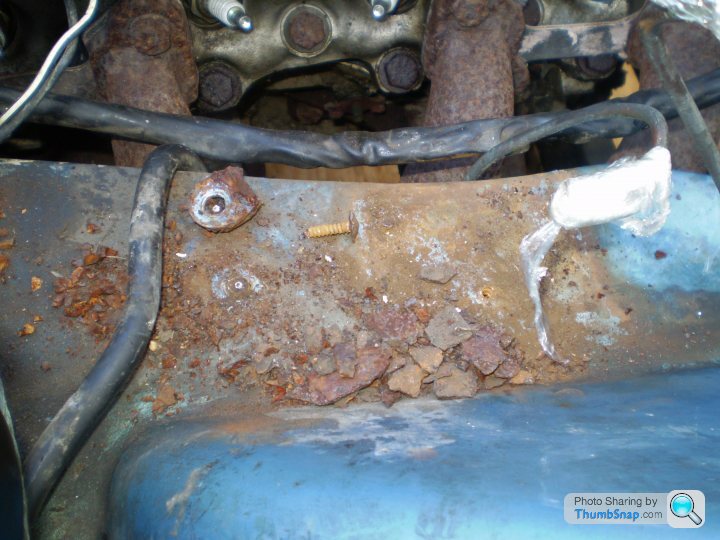
Sea of rust and carnage under the brake rear G-valve... I only got one screw out of four out. I'll have to drill out the remains or reposition them.
Clutch and brake hydraulics came off without too much of a fight, now I need to source replacements.
The clutch release fork in the gearbox is free so I'll try and get the engine running and then see if the clutch plate is free... I'm hoping even if it is stuck to the flywheel it'll give up the unequal battle with the engine and free off under power. Otherwise the engine's got to come out.
Sea of rust and carnage under the brake rear G-valve... I only got one screw out of four out. I'll have to drill out the remains or reposition them.
did the doors come off easy? is it just the bolts where the lock is that hold it on then slide it backwards? I have to remove mine soonish as the window mech. is more or less rottern so i need to do it, although it still works....but for how long????
very much enjoying your restoration thread
Adam
very much enjoying your restoration thread
Adam
From memory, the door frame should turn, with the nylon bushes, whilst the pivot shaft stays still. There's usually a grease nipple on the vertical tube but quite what grease was meant to be used, bearing (pun intended!) that many greases react with nylon causing it to swell, is information I don't have 
Thanks guys... I do have the bible but it doesn't cover the hinge in enough detail. I think you're right Wedgie, and the hinge pin shouldn't turn, thanks for that. I'll have to take out some washers so that the long hinge bolt doesn't clamp the door frame tube and then tighten it so that it doesn't rotate; hopefully the vertical bar on the inside of the body can take that.
Getting the door off wasn't particularly difficult; I suspect getting it back on and lined up won't be so easy. You have to be methodical to get it off, plus mark the positions of everything so you can get it back in the same position,plus count all the washers at each fixing... so:
-leave the window fully up
-Remove the door trim and all the plastic sheeting
-remove the interior door release (good luck with not breaking the plastic screw cap) and actuation rods
-disconnect the wiring connectors
-disconnect the window upper limit cable at the bottom (9mm spanner on the nut)
-unbolt the electric window motor, and then push it towards the front of the car while holding the window up; wedge the window up with a block of wood and remove the mechanism from the door
-remove the block of wood, slide the window half way down then tip it forwards, then remove it from the top
-remove the rear window runner
-remove the door latch mechanism, having unclipped the actuator rods. The exterior handle can stay in place
-remove the front window runner with the mirror and binnacle attached (you'll have to cut the wires, TVR in their infinite wisdom apear to have put the connector on after assembling the door-doh!)
-now you can remove the four bolts that hold the door to the frame and slide the door off; two on the leading edge and two on the trailing edge.
I never said it was easy!!! Expect siezed bolts and rounded/rusted screw/bolt heads along the way too.

A bit of fibreglassing today... plates in position
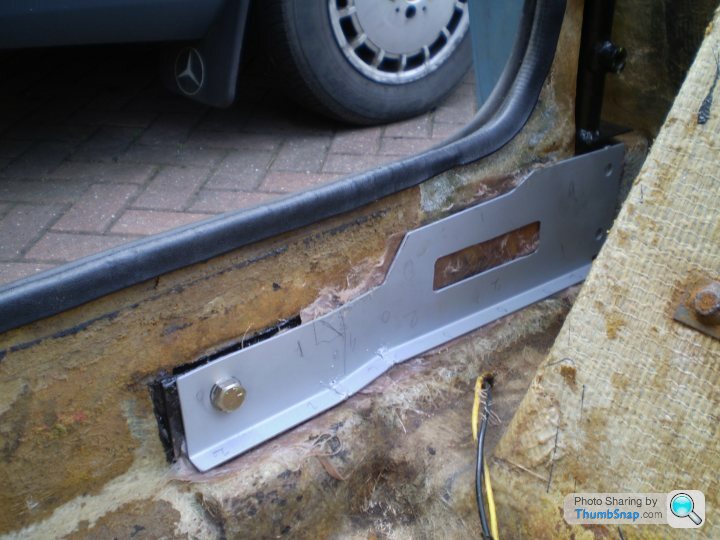
and glassed over...
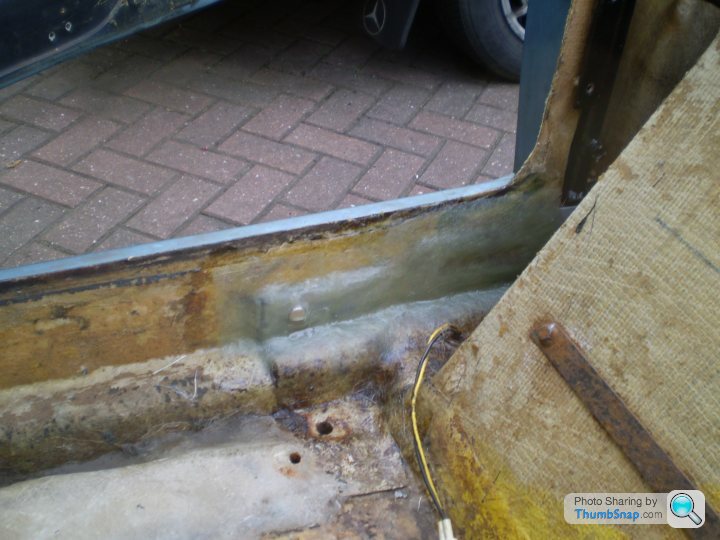
I was dreading doing this but it was surprisingly straightforward and very satisfying... I could grow to like the smell of the resin! It feels like I'm actually starting to put things back together; still a hell of a long way to go though.
and glassed over...
I was dreading doing this but it was surprisingly straightforward and very satisfying... I could grow to like the smell of the resin! It feels like I'm actually starting to put things back together; still a hell of a long way to go though.
Gassing Station | Wedges | Top of Page | What's New | My Stuff