MFH 1/12 BT52b
Discussion


Spice_Weasel said:
Simply fantastic work. It just looks like the real thing, like it might be 1:1.
Absolutely right - makes me want to see the real thing and look at the detail on that. Superb work OP, and look forward to seeing the finished article. ETA: And entirely separately, and extremely belatedly, thanks OP for the comprehensive section on your webpage about Caterham diffs. Really good when I was researching them about 6 years ago - only just noticed it was your page!
Edited by _Neal_ on Monday 10th October 10:37
A few updates...
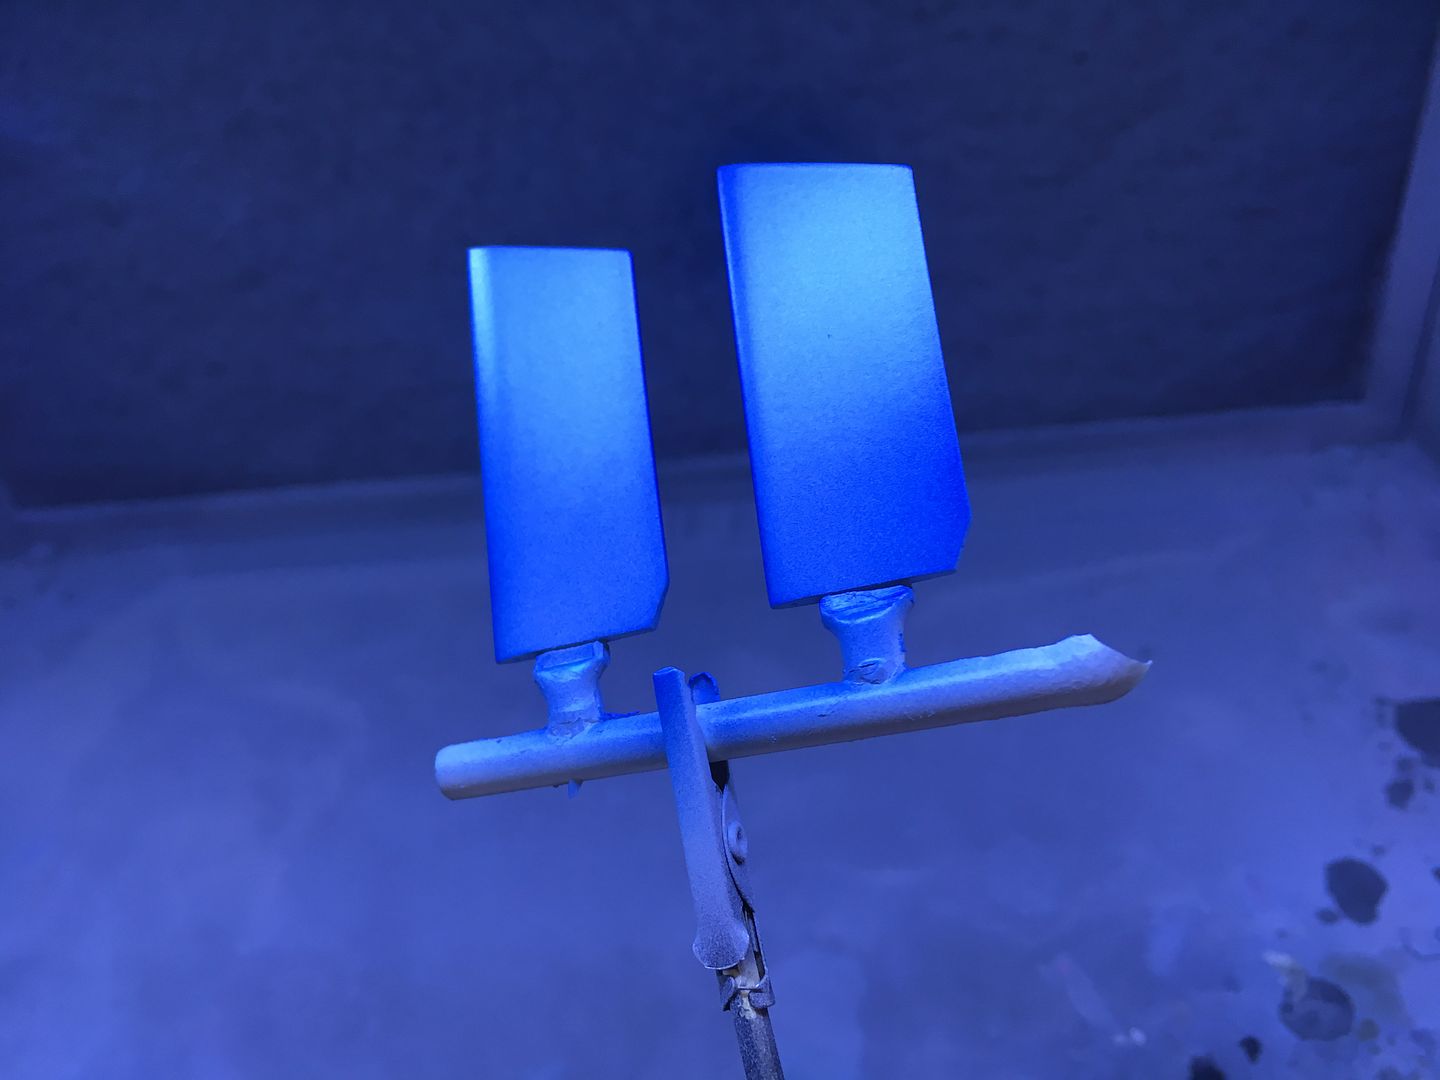
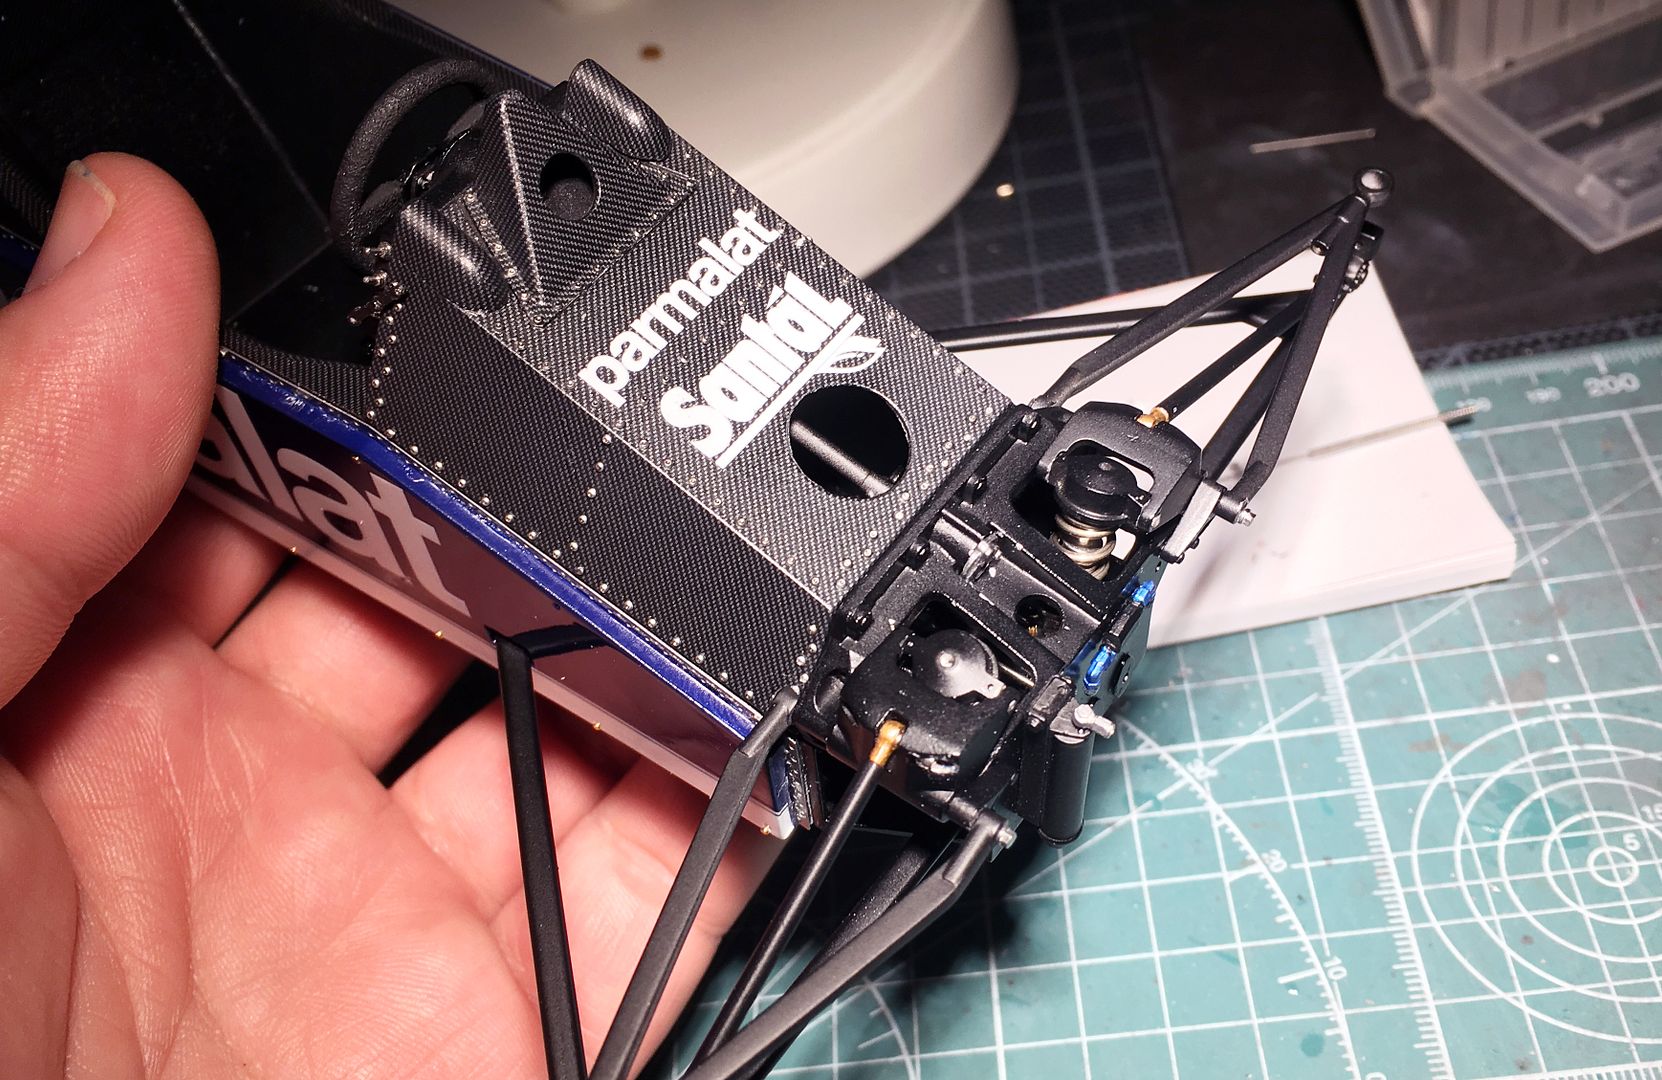
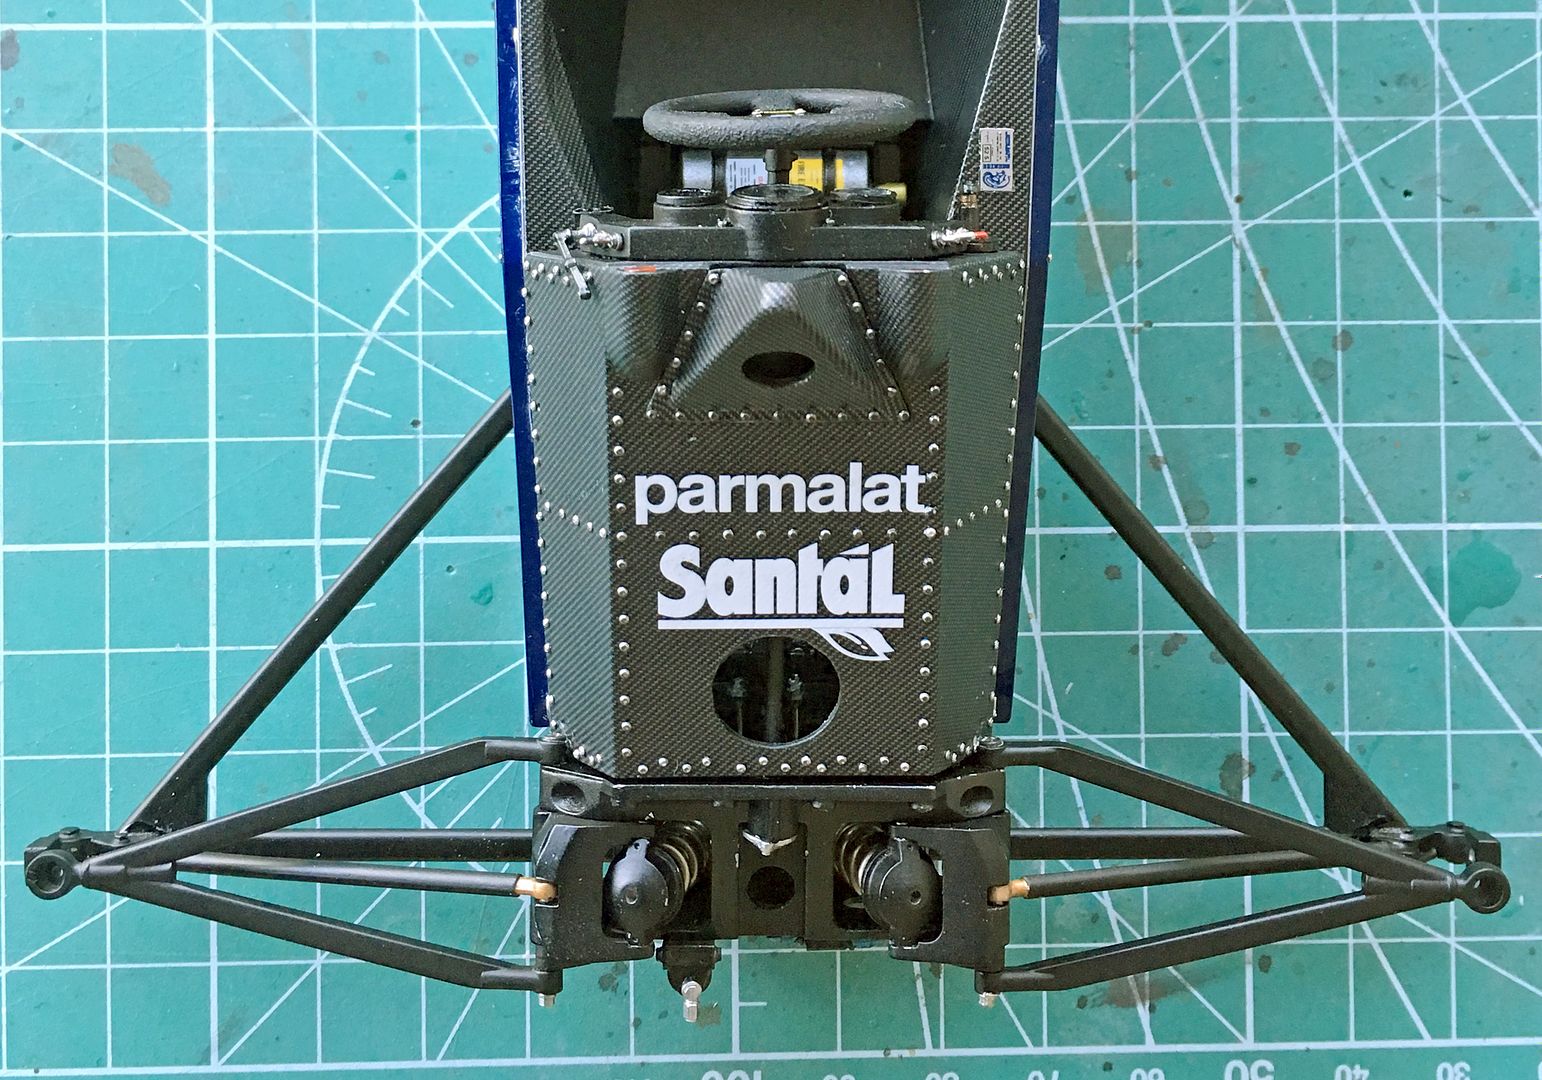
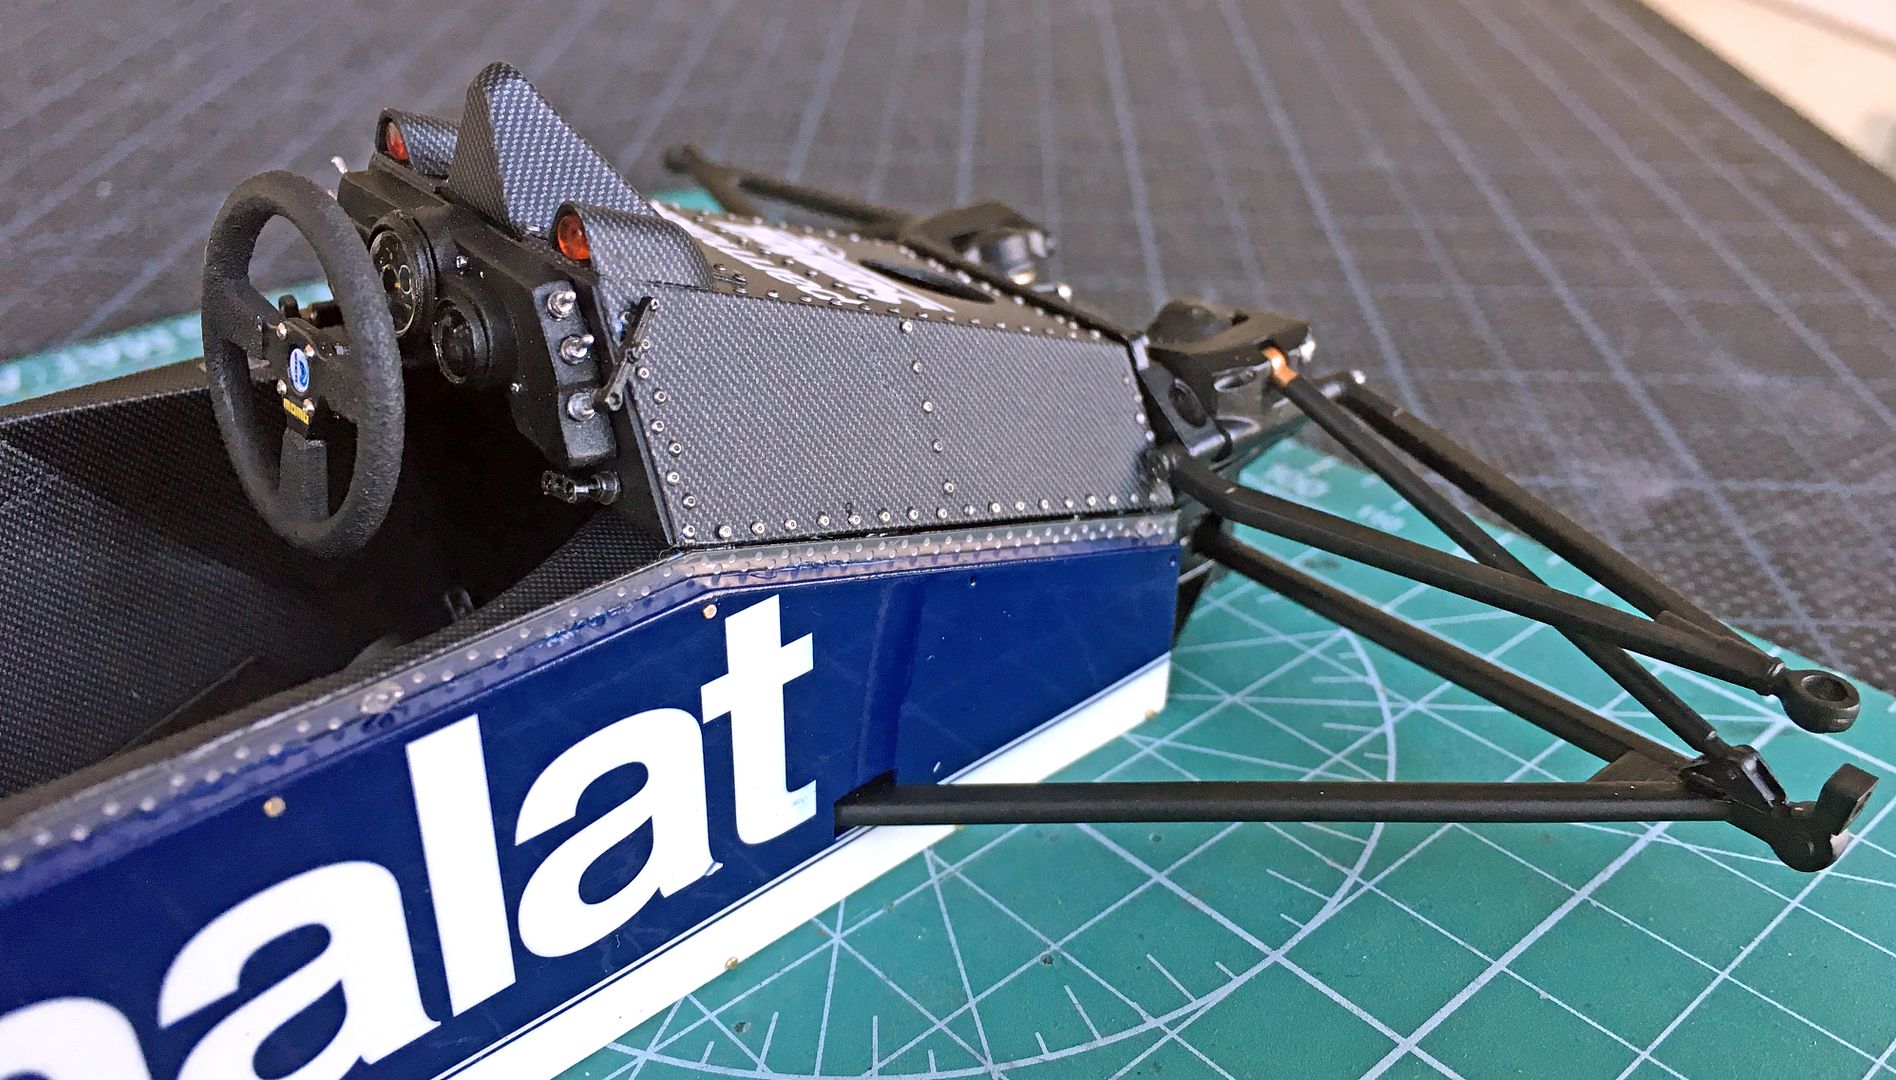
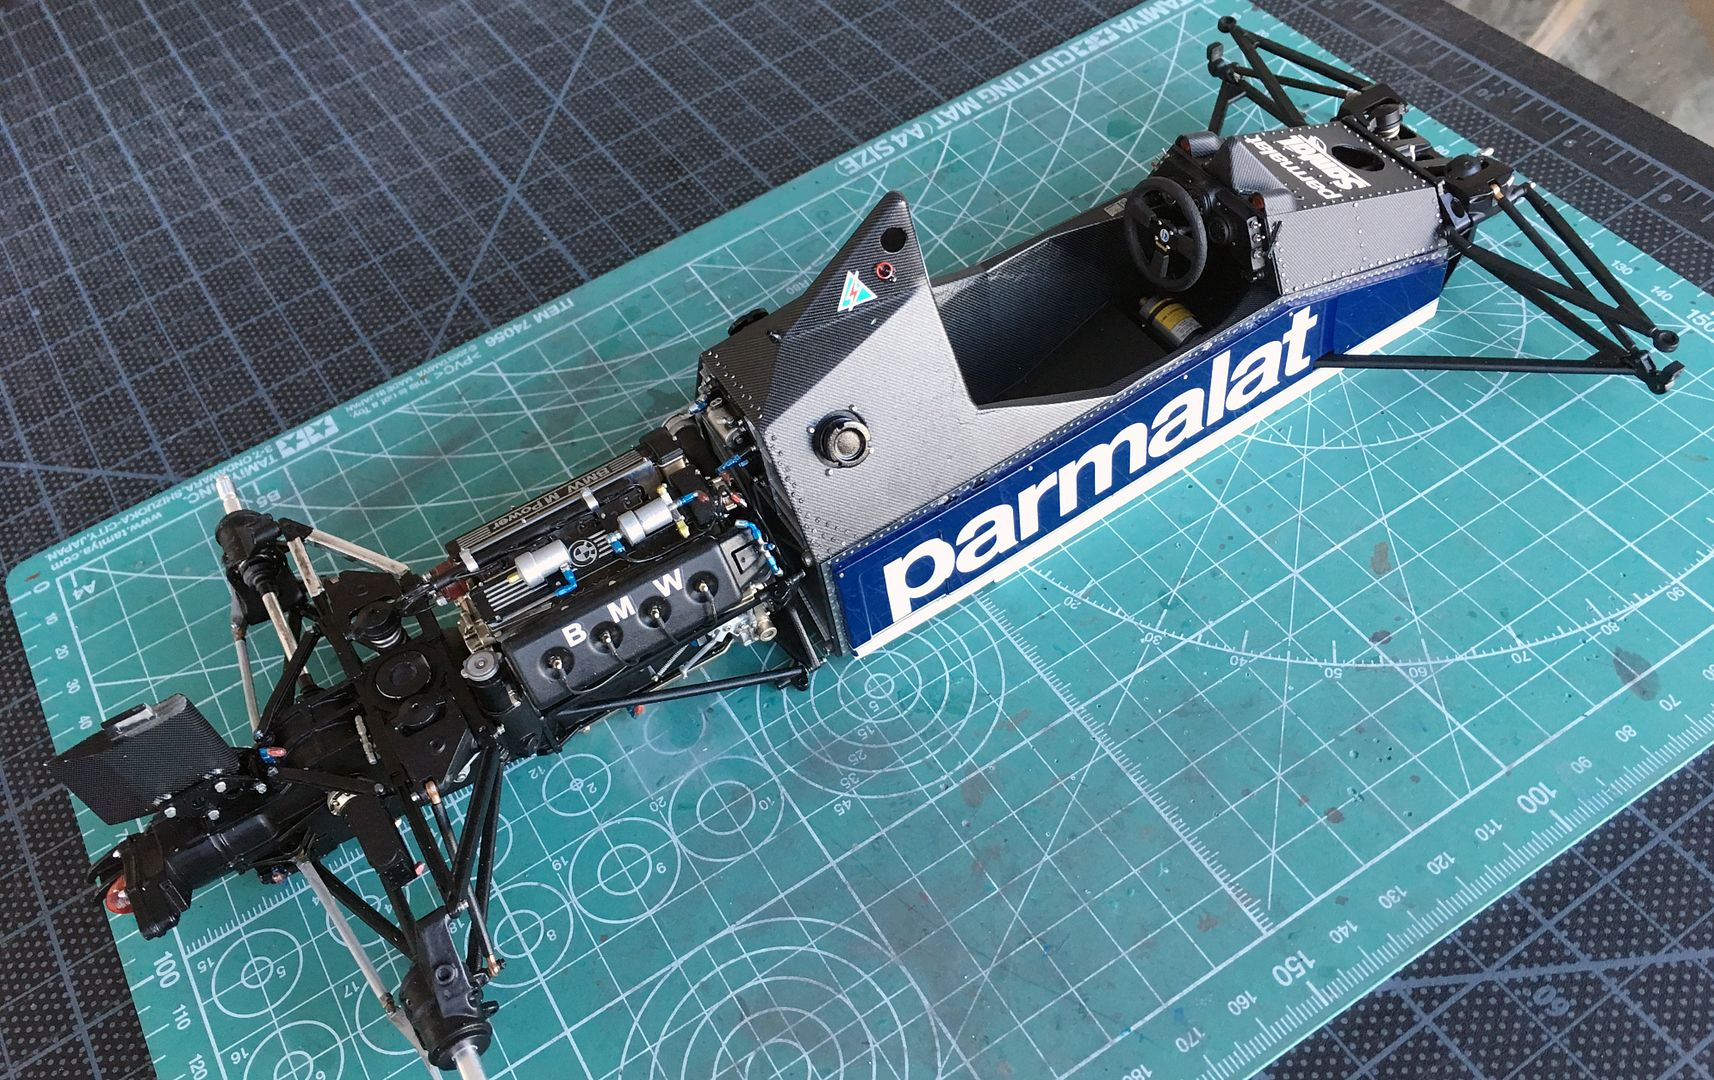
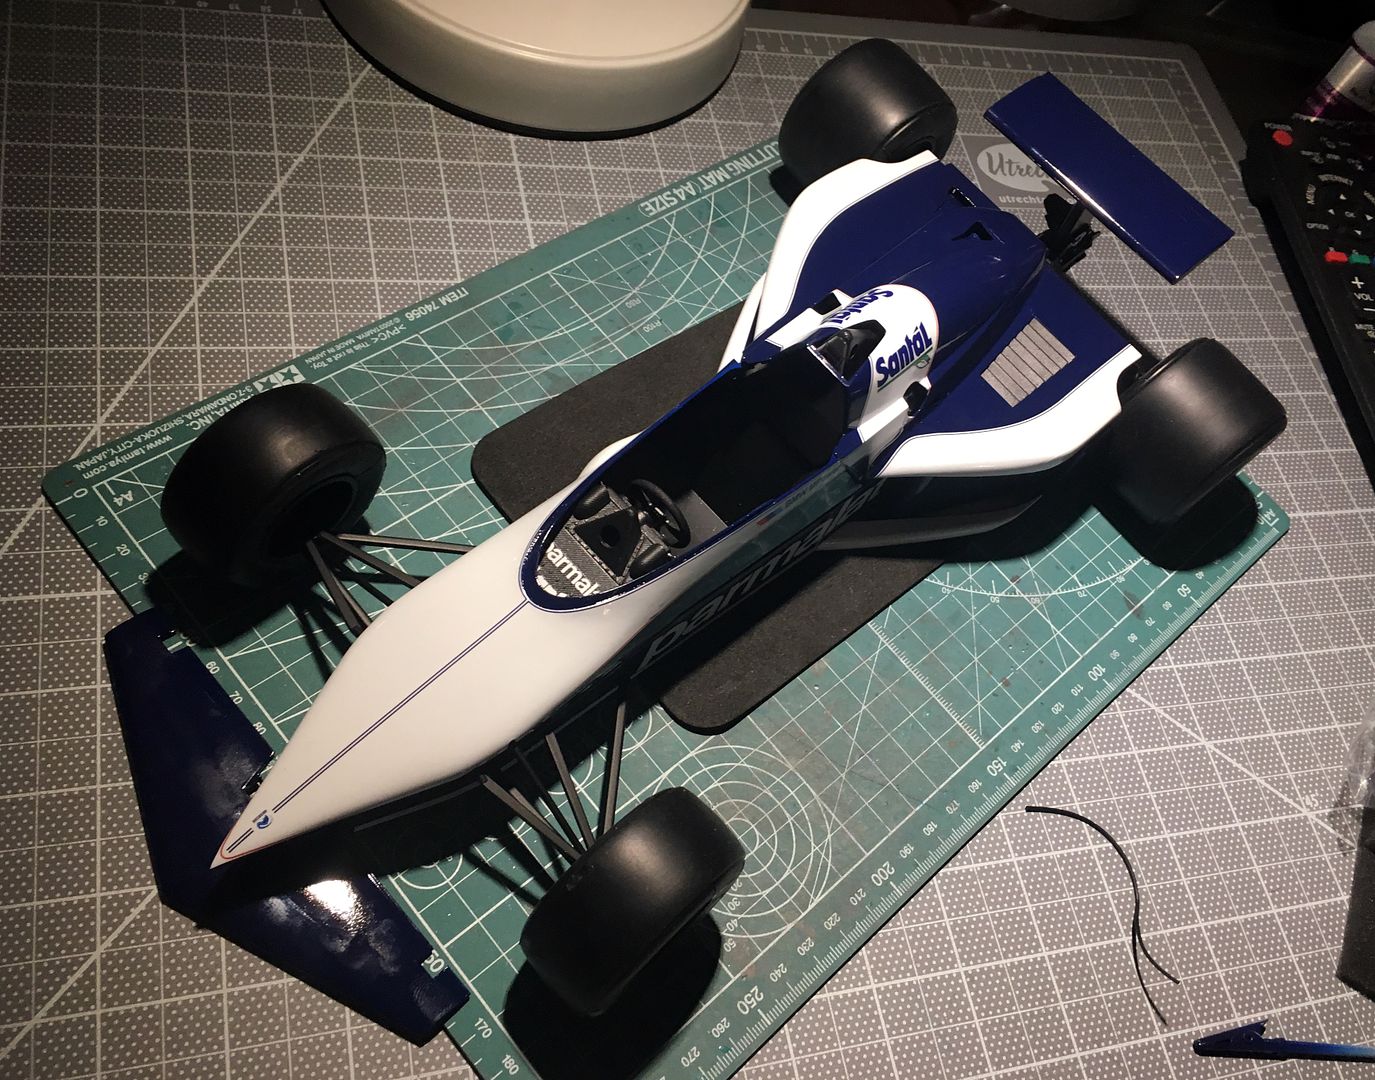
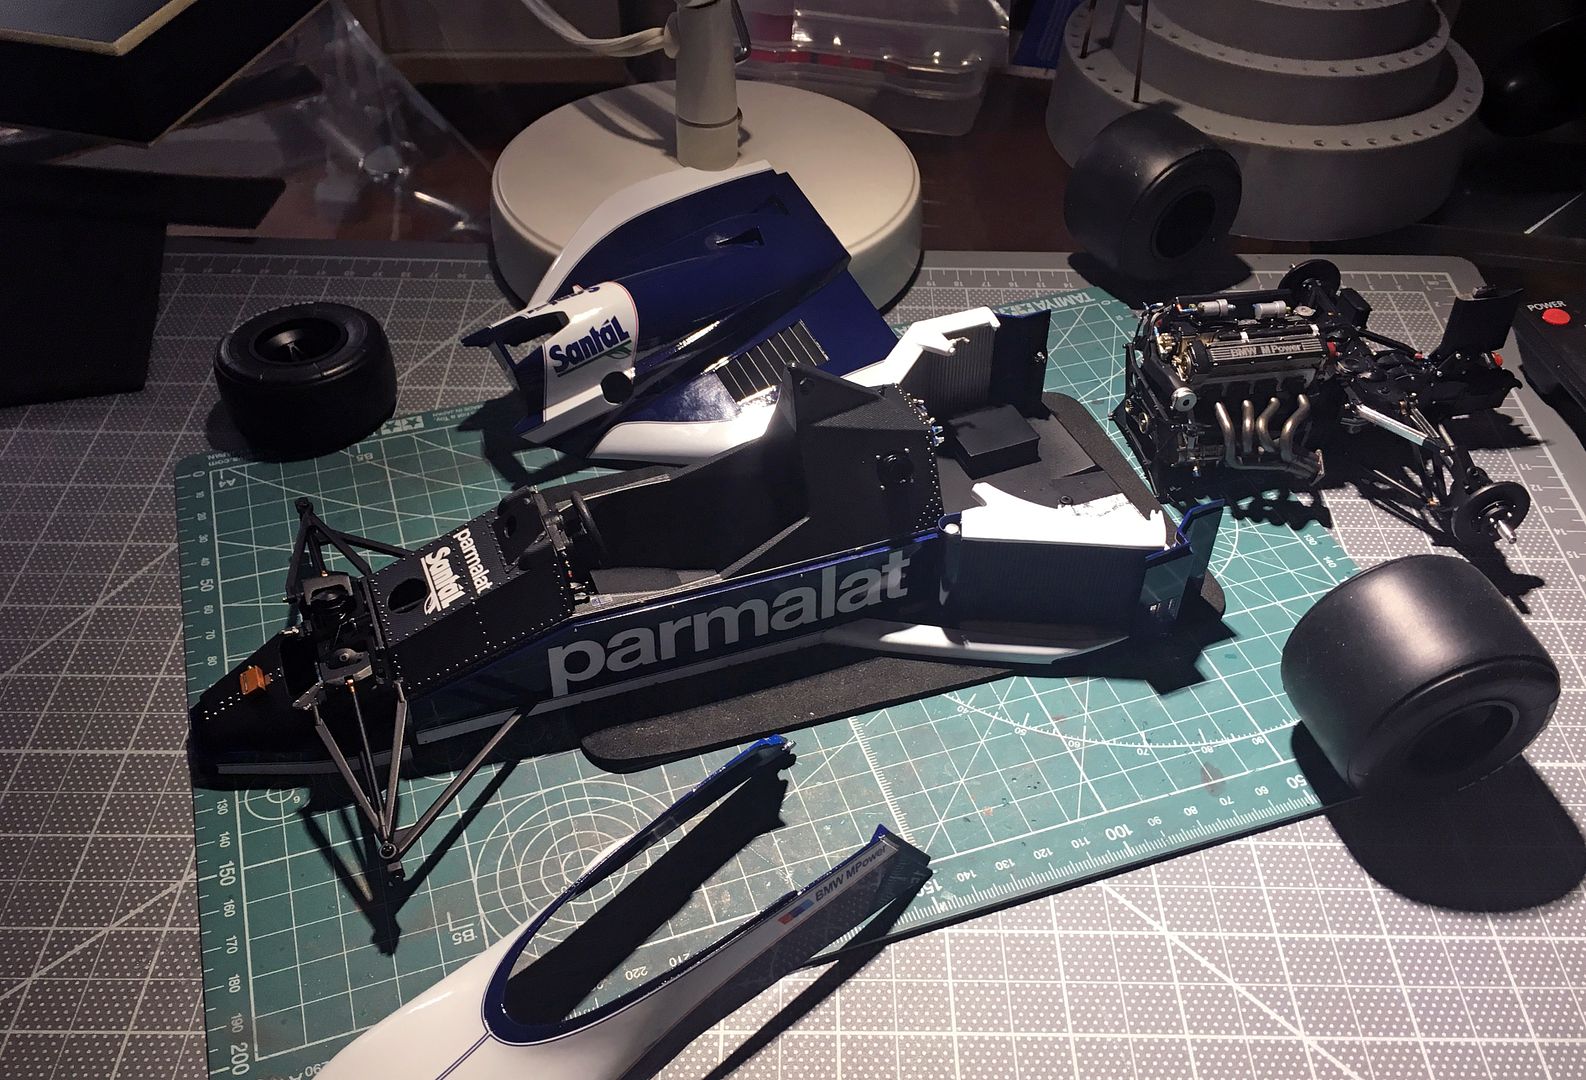
Test wing fitting!
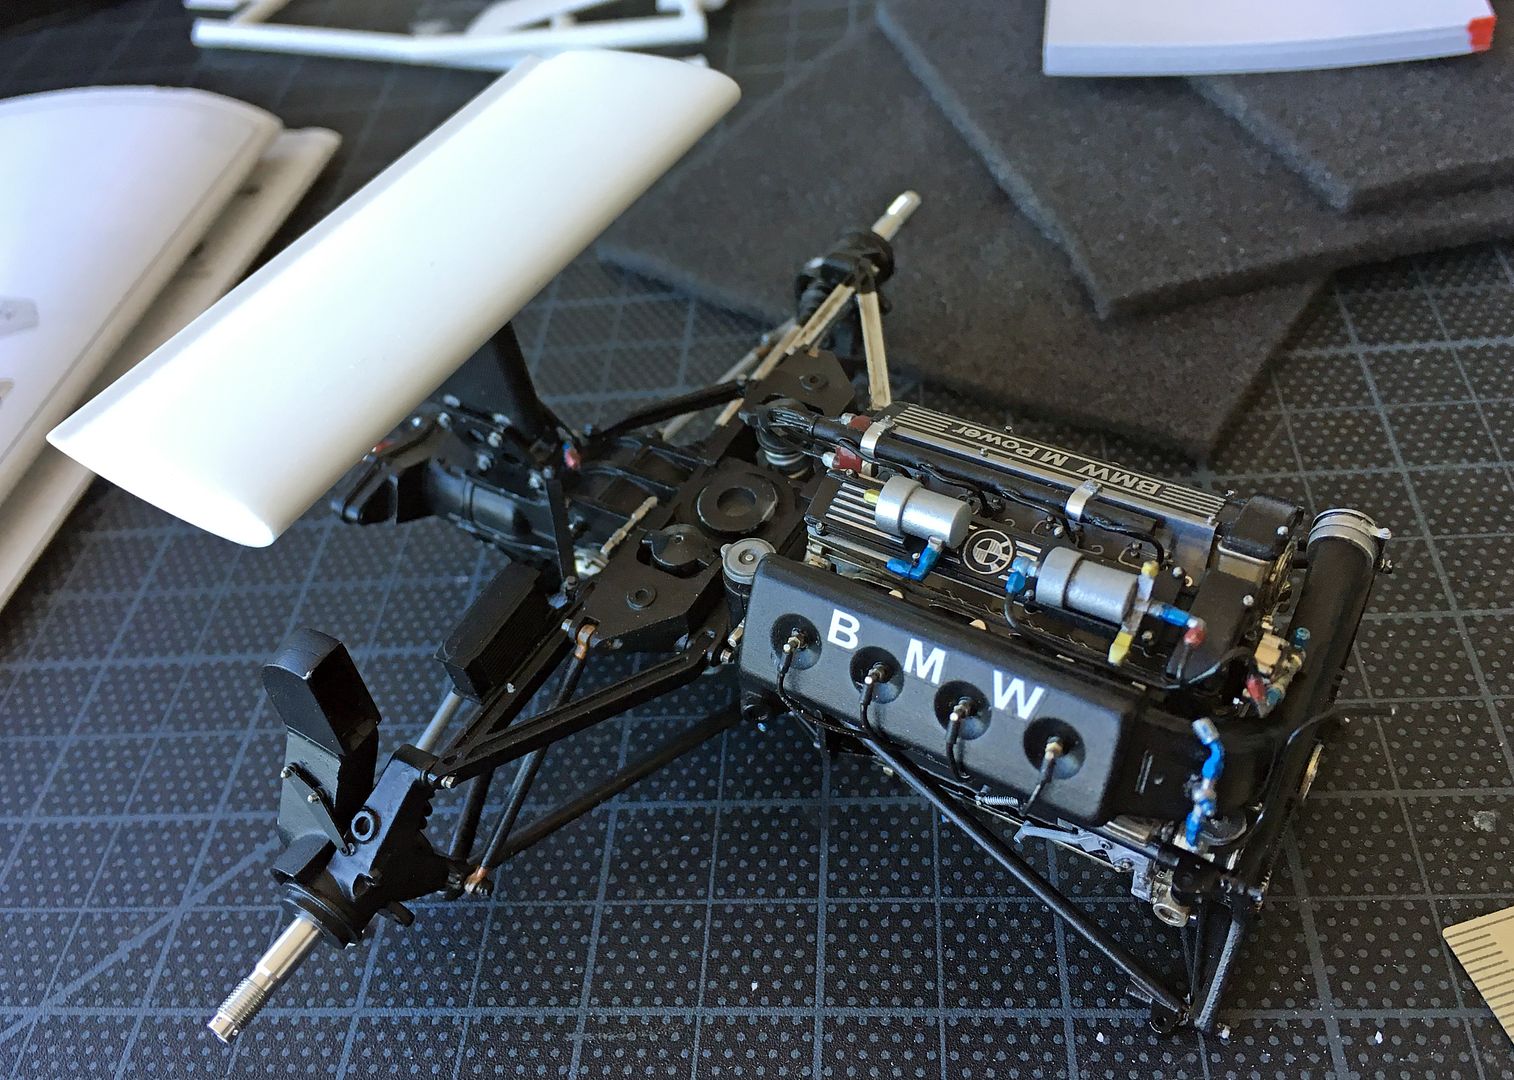
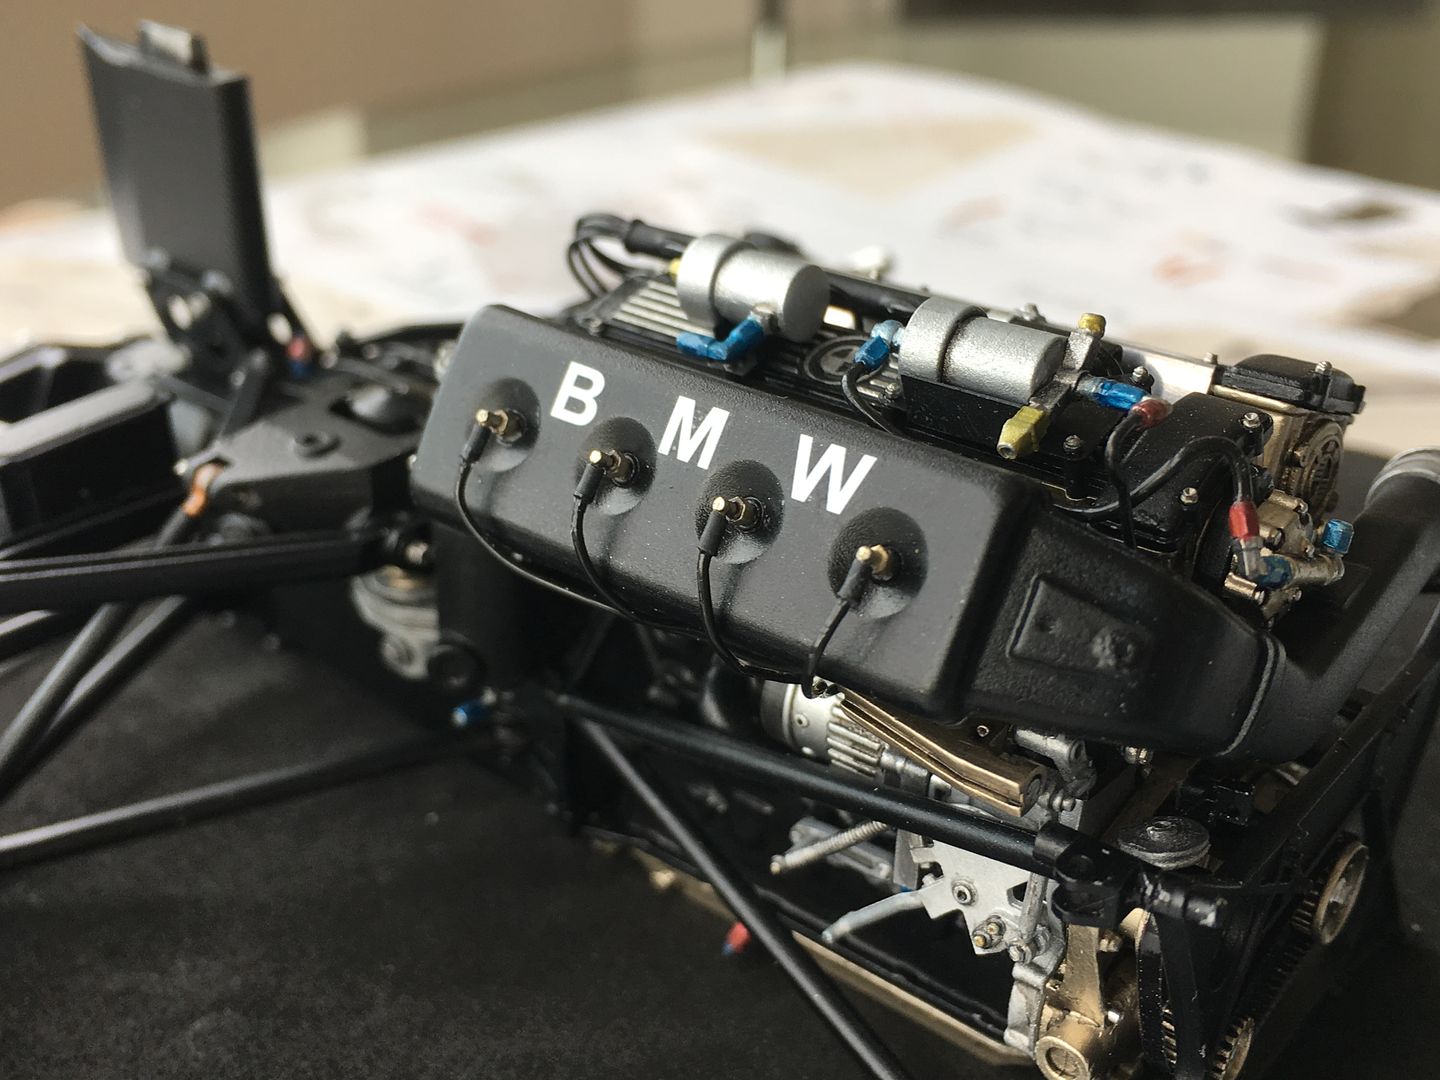
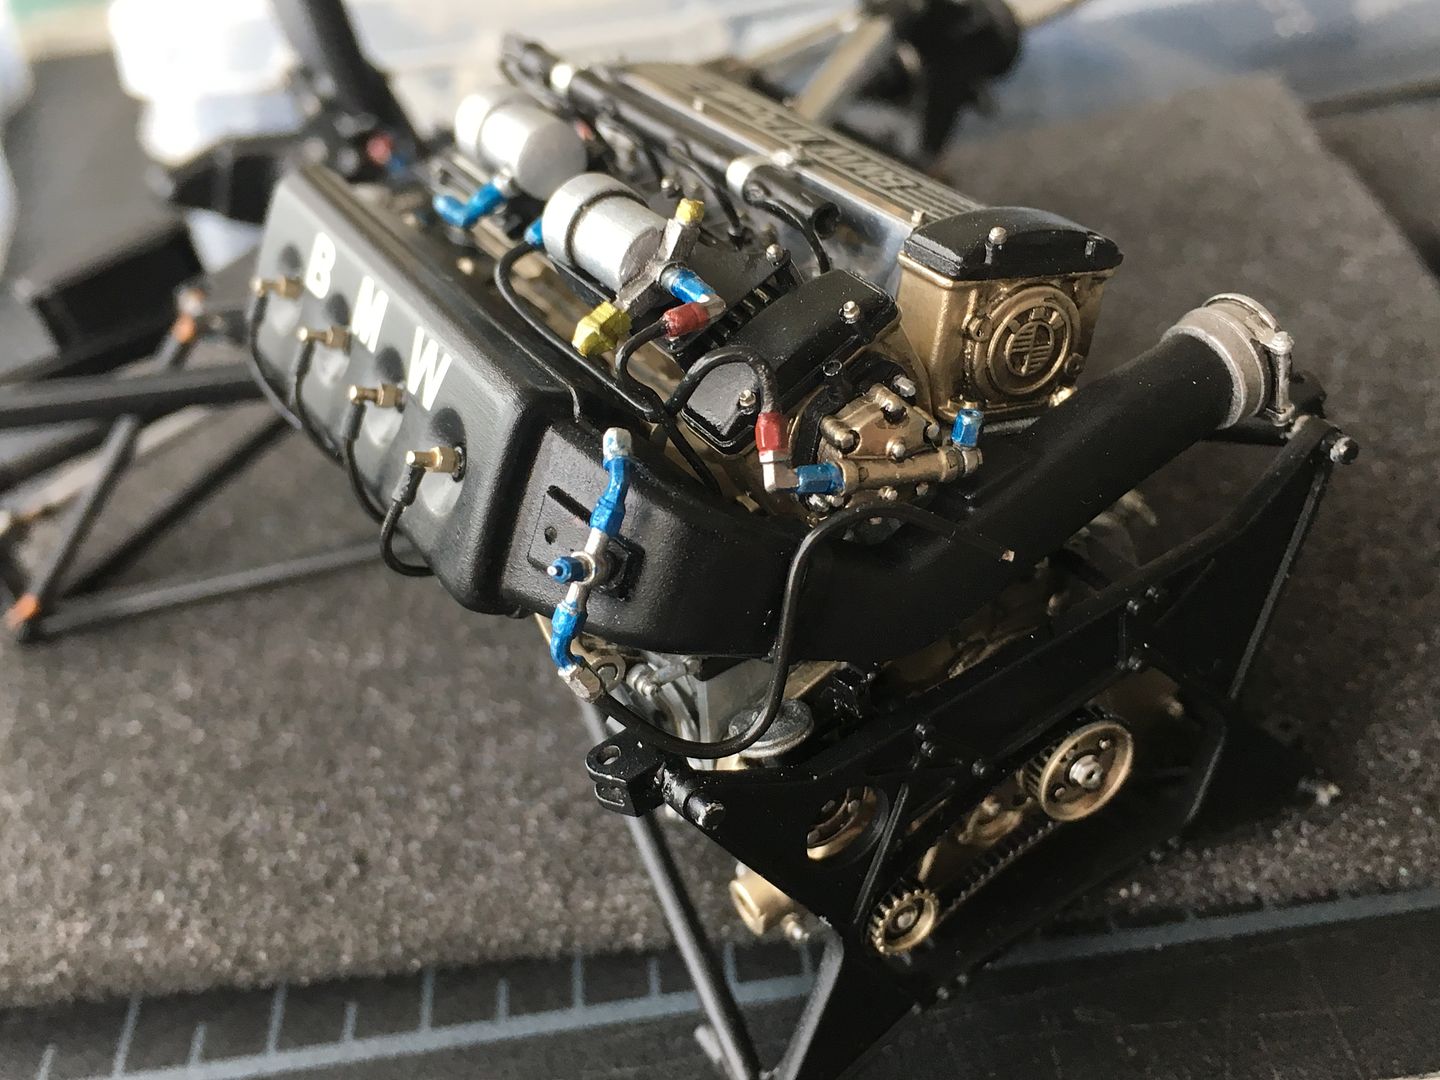
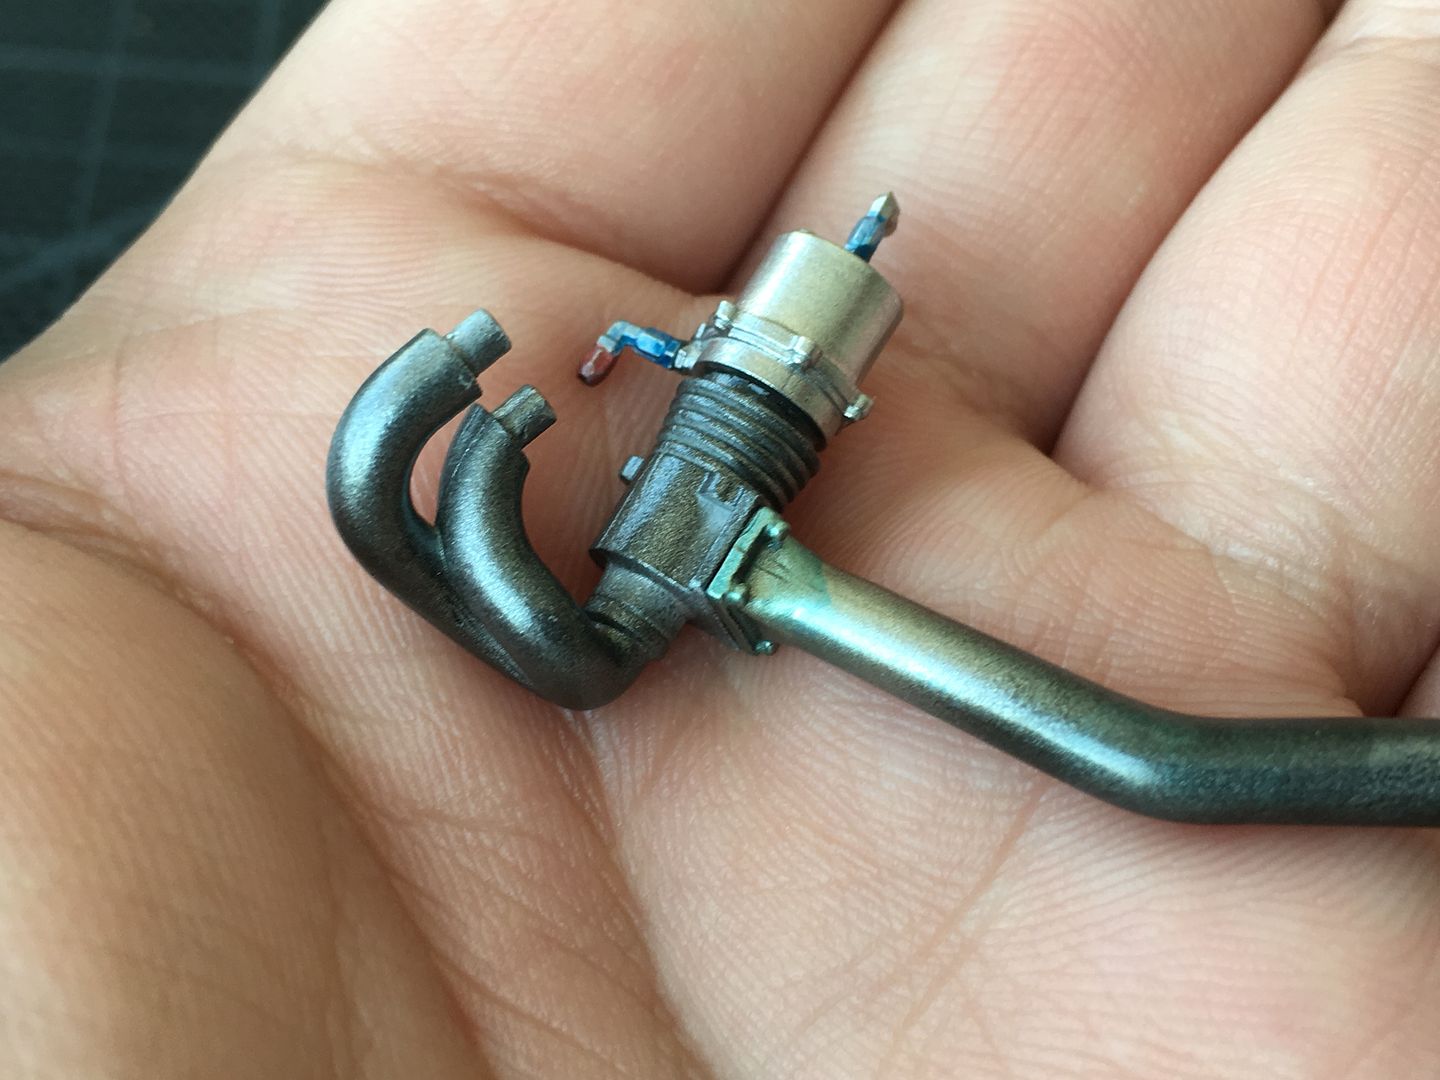
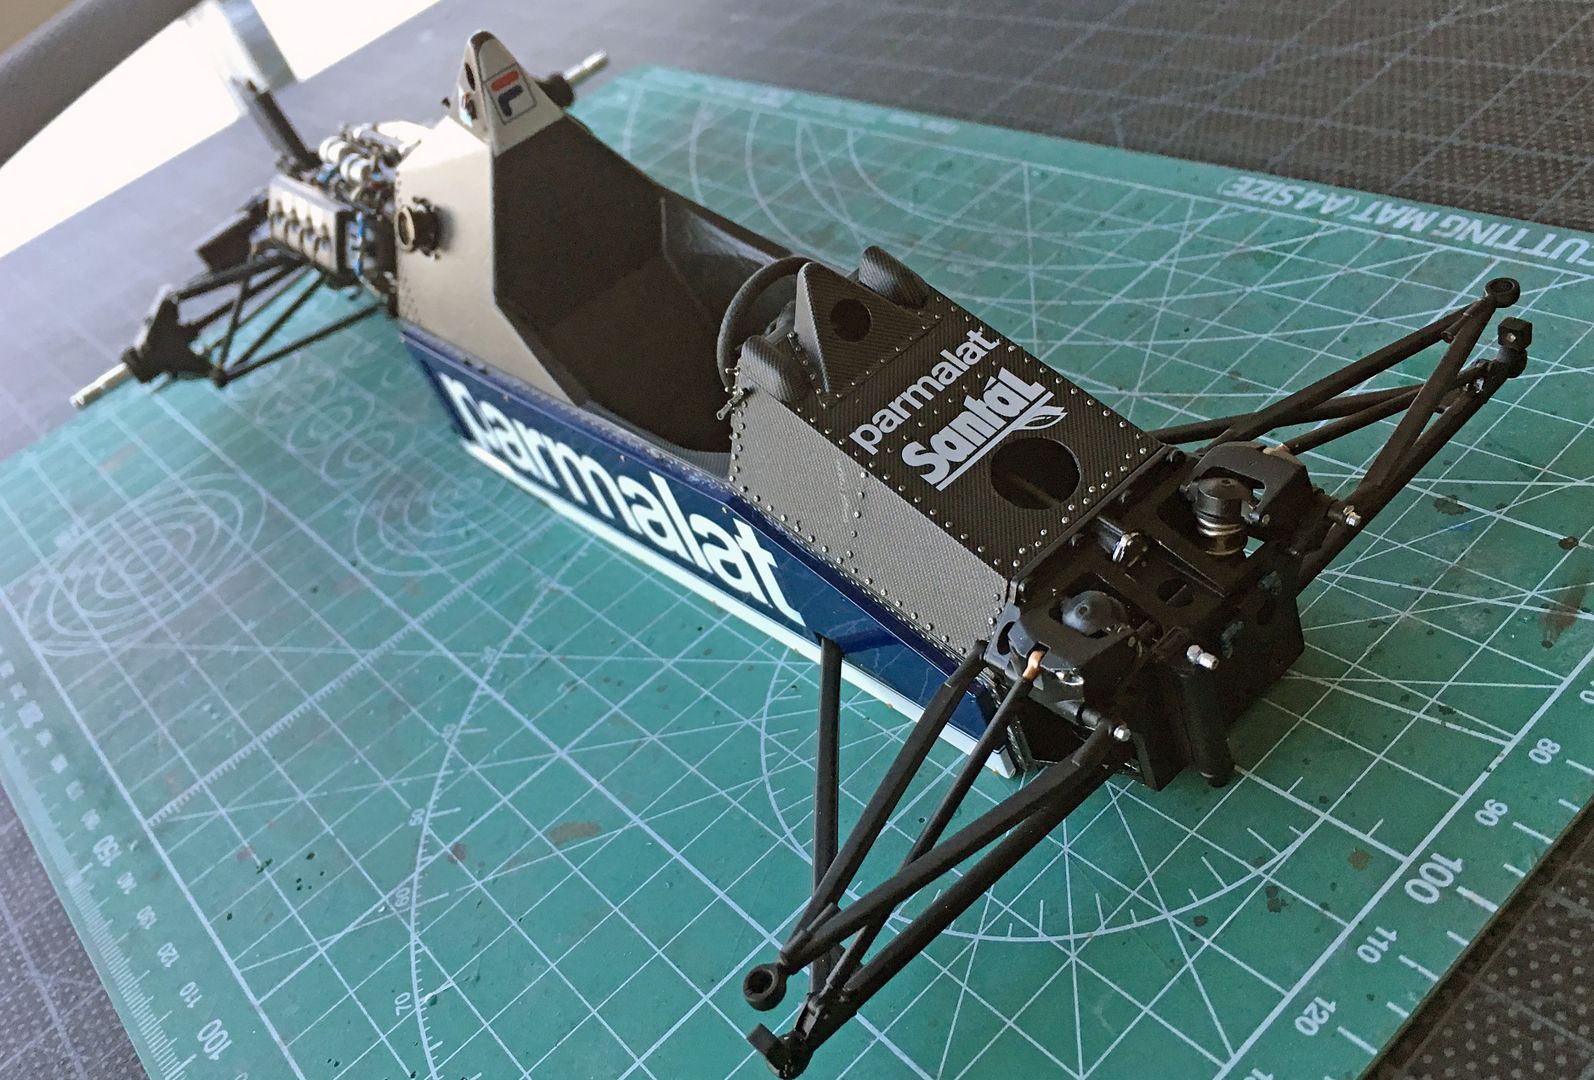
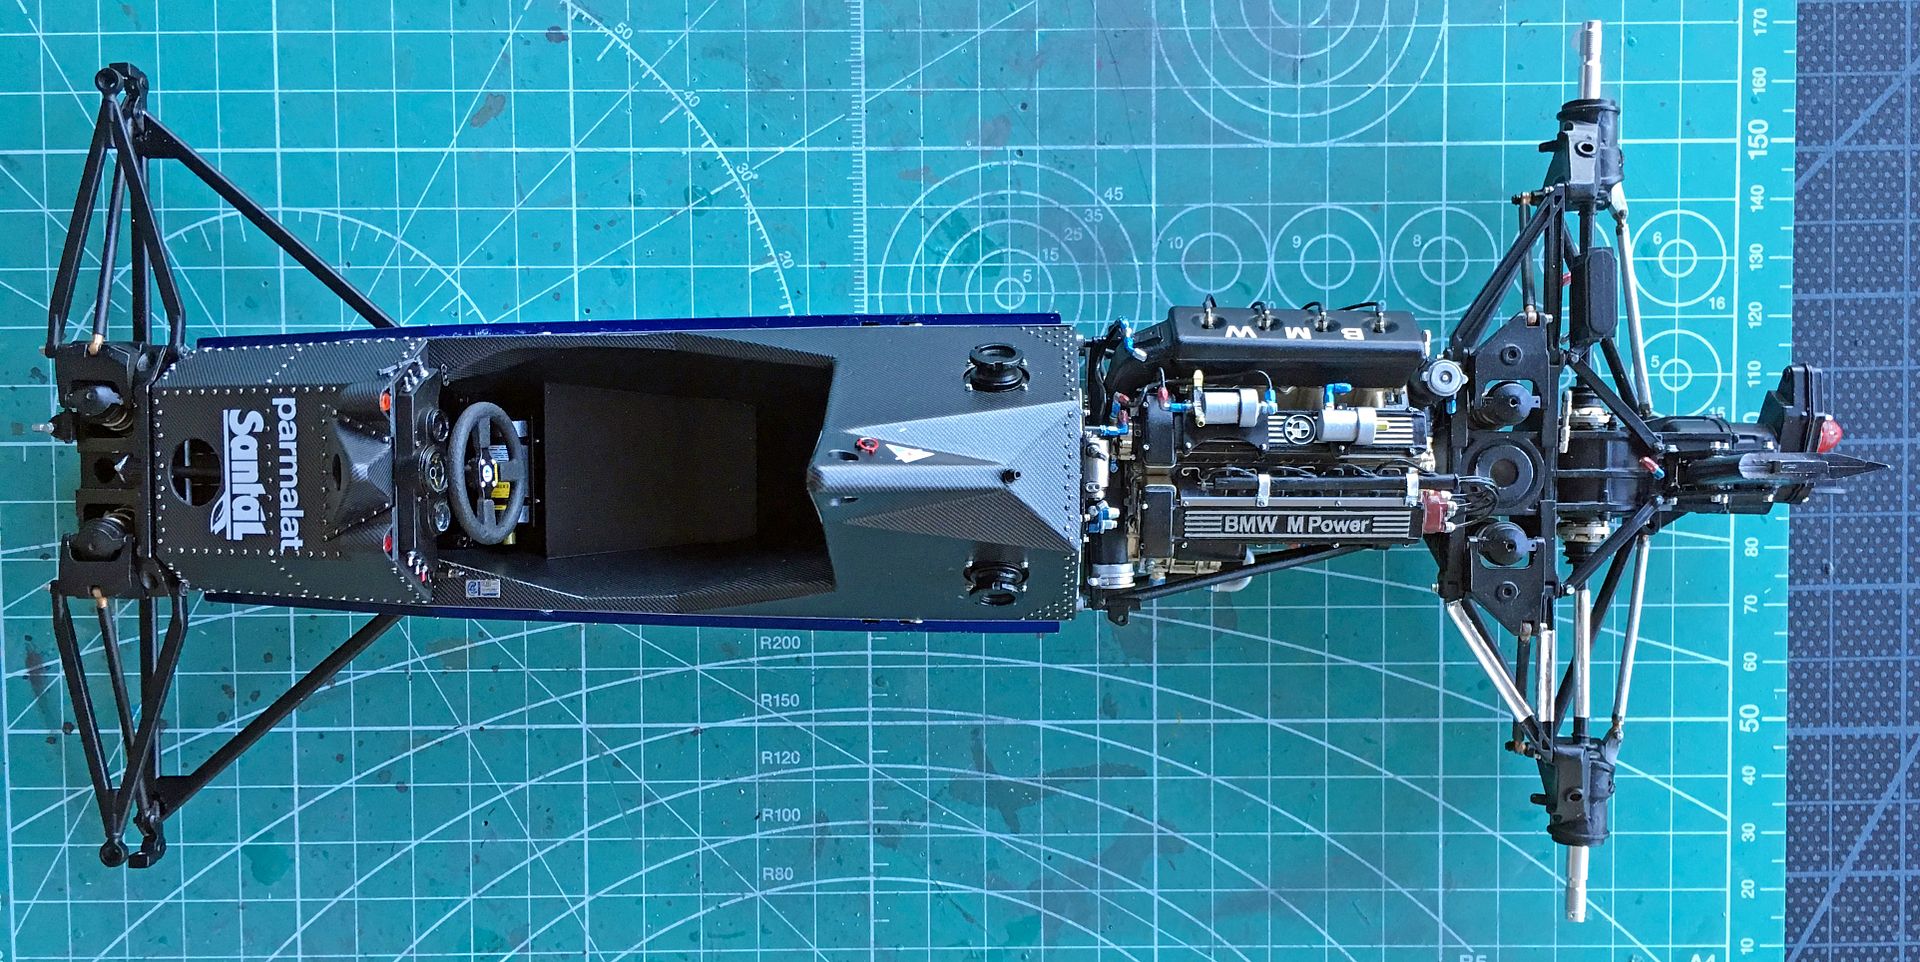
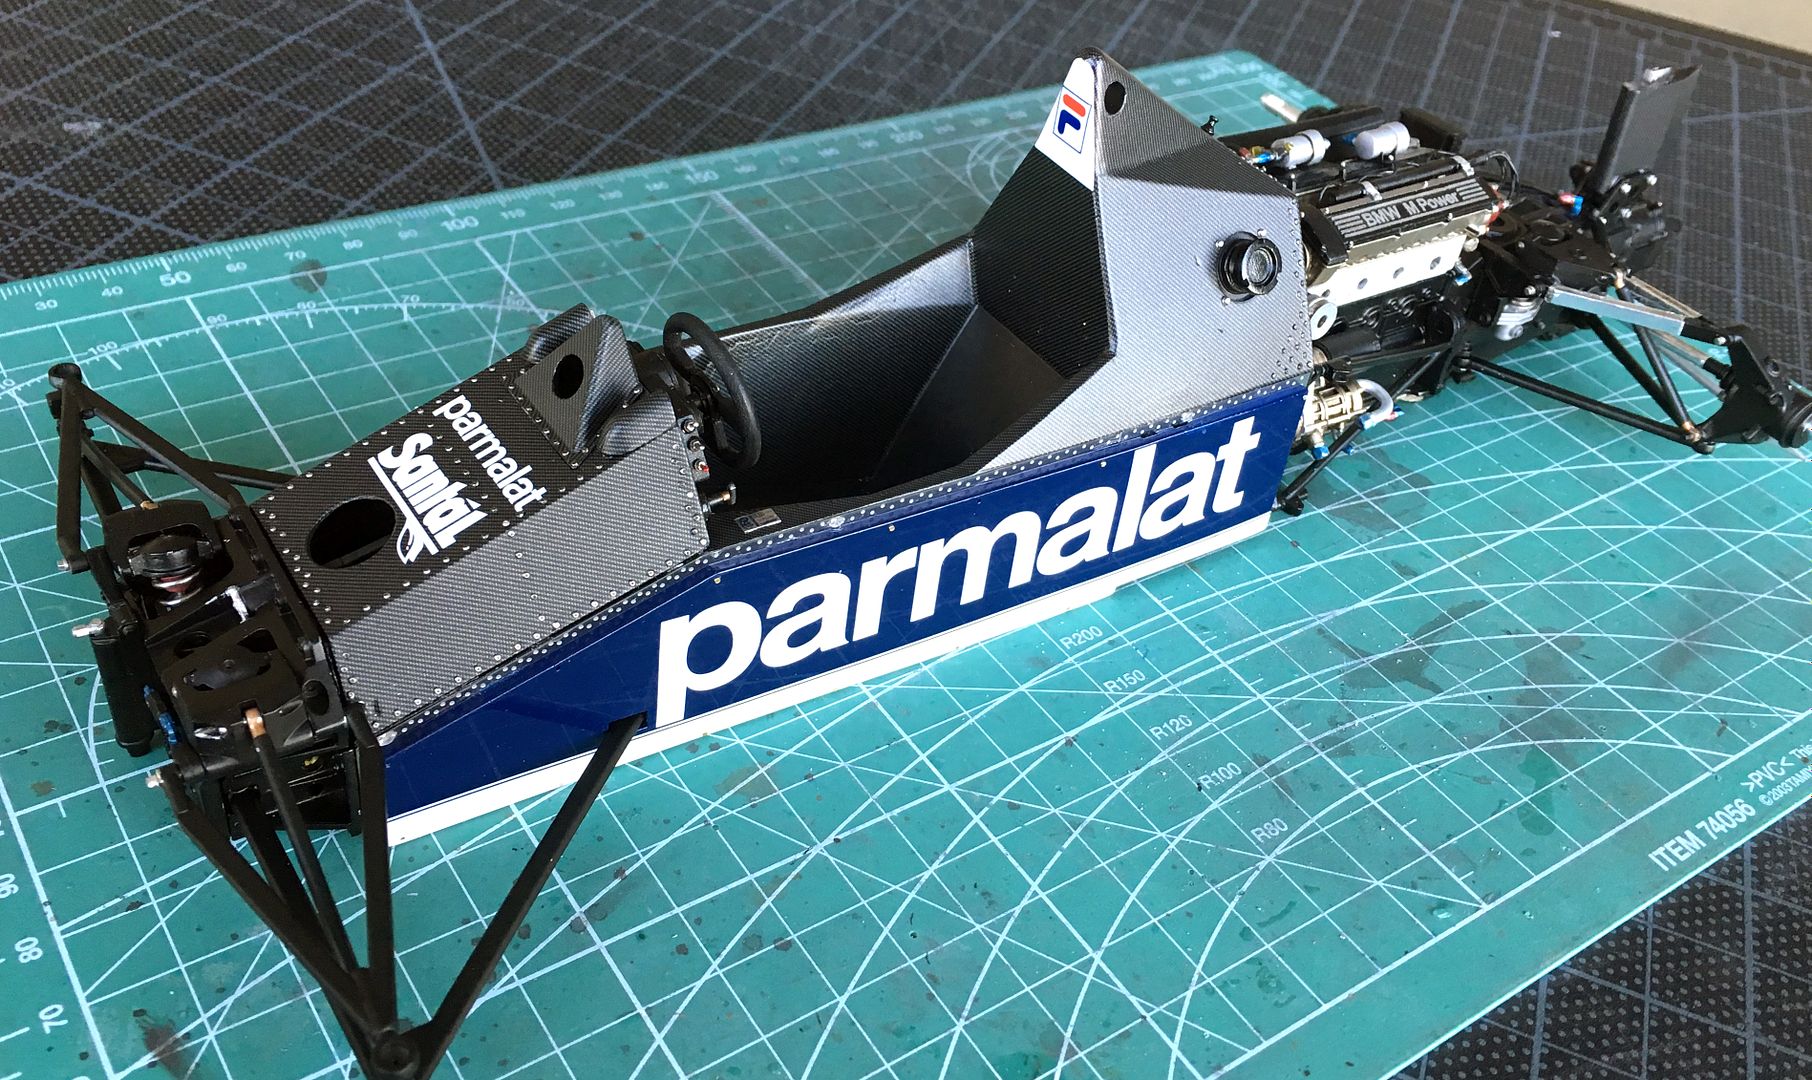
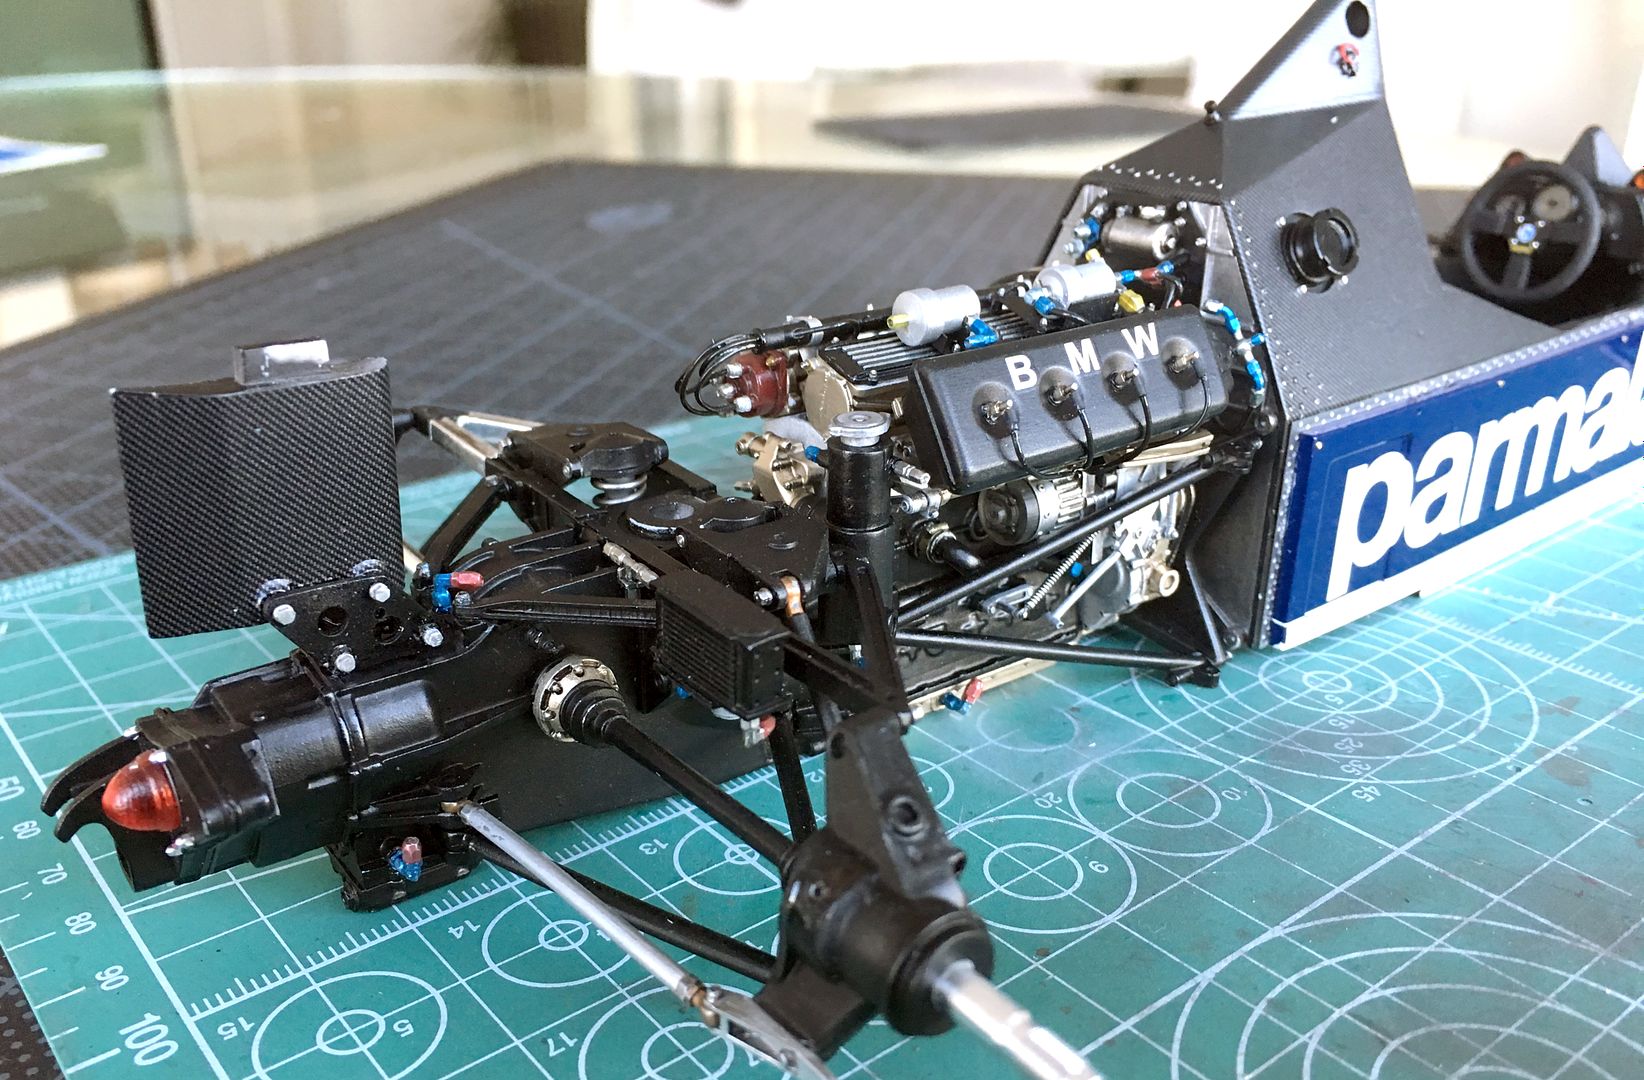
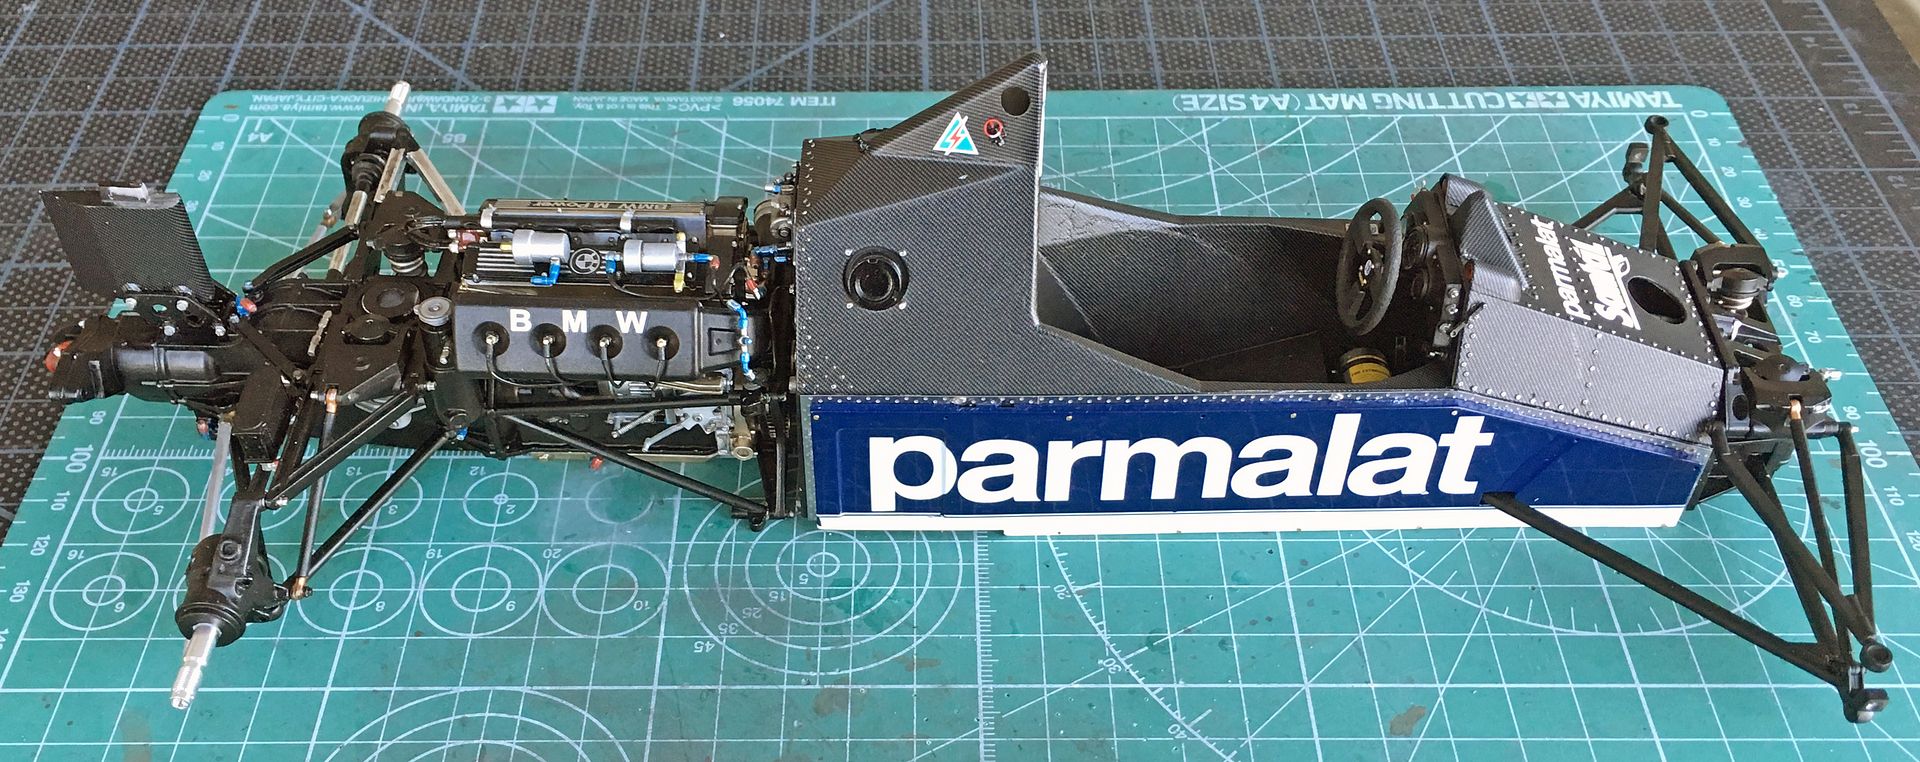
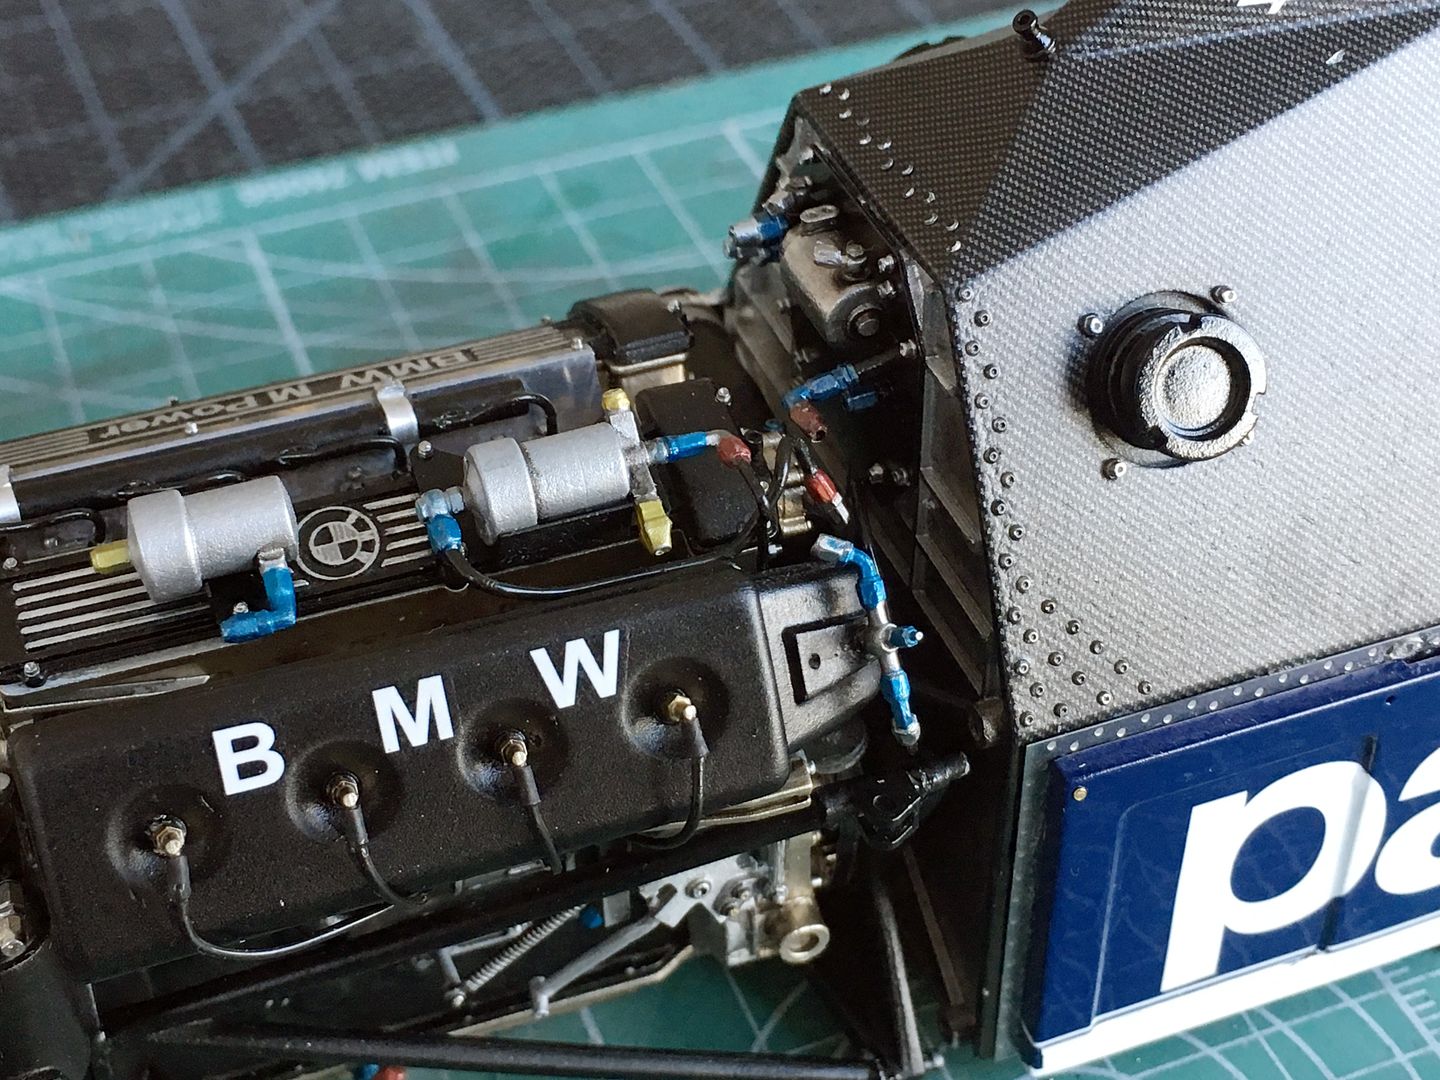
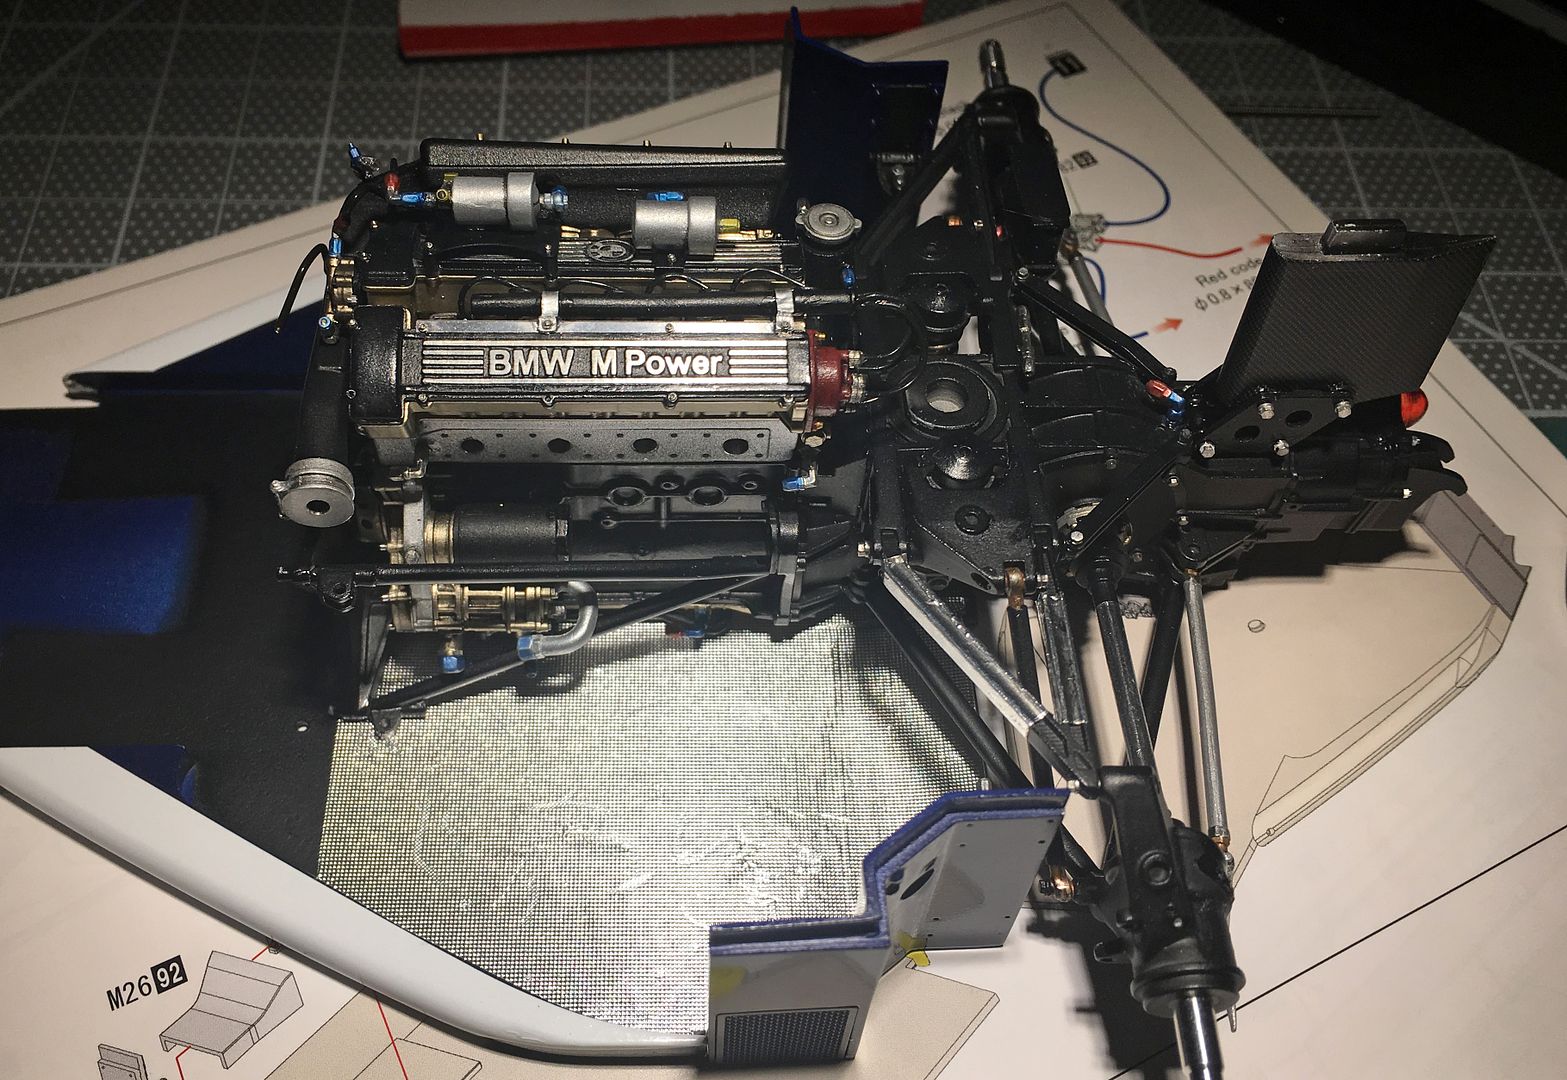
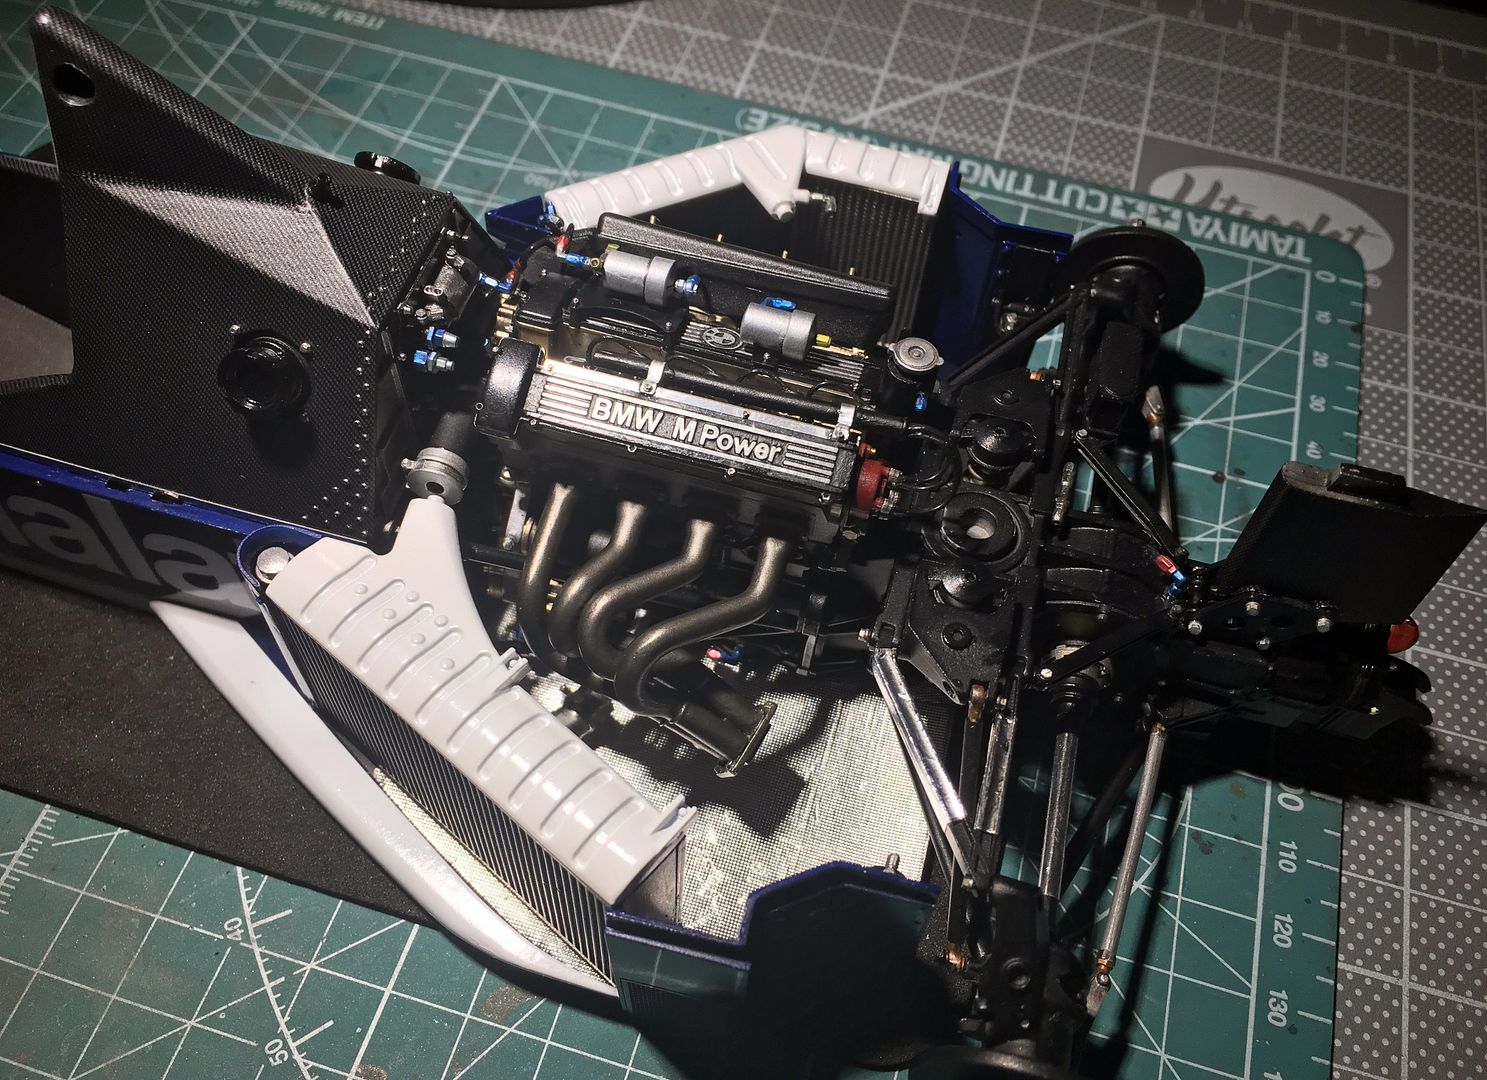
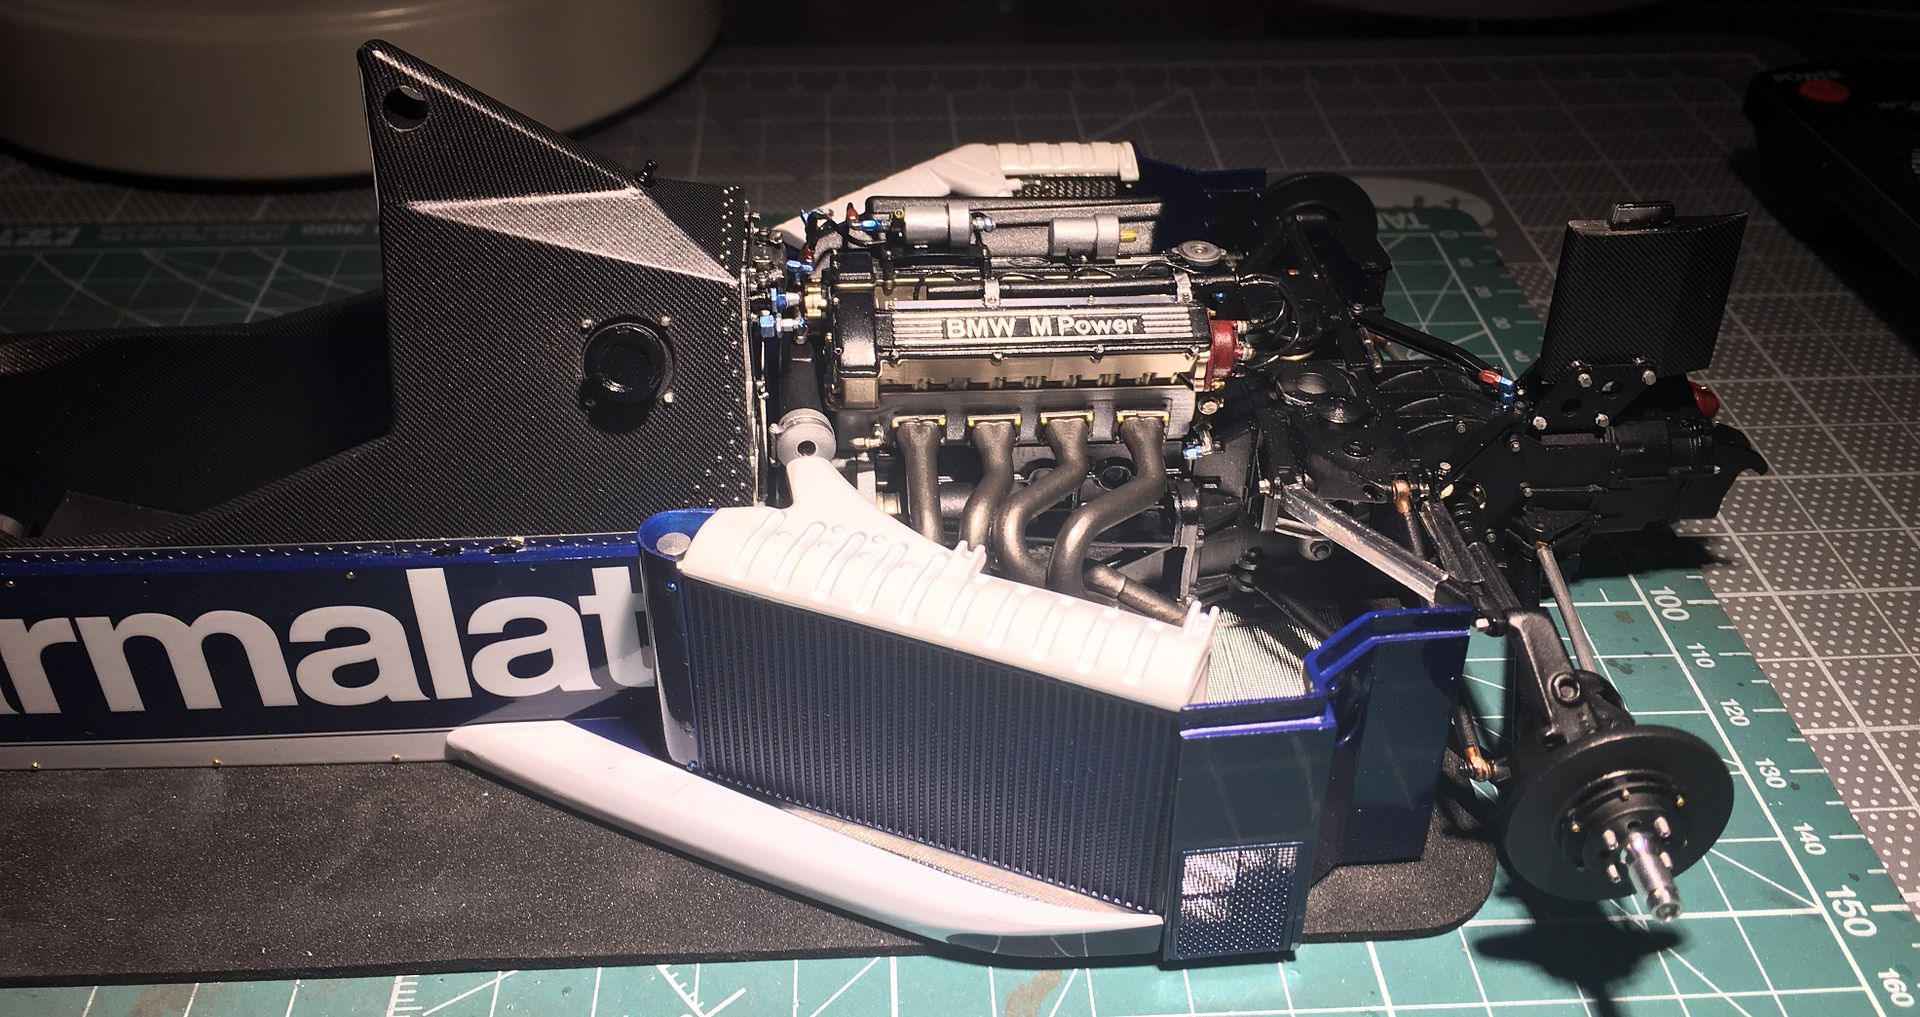
Started adding wires. I think this will be easier when the engine is joined to the bulkhead (before fitting the floor) as the cables/wires/pipes will have somewhere to go...
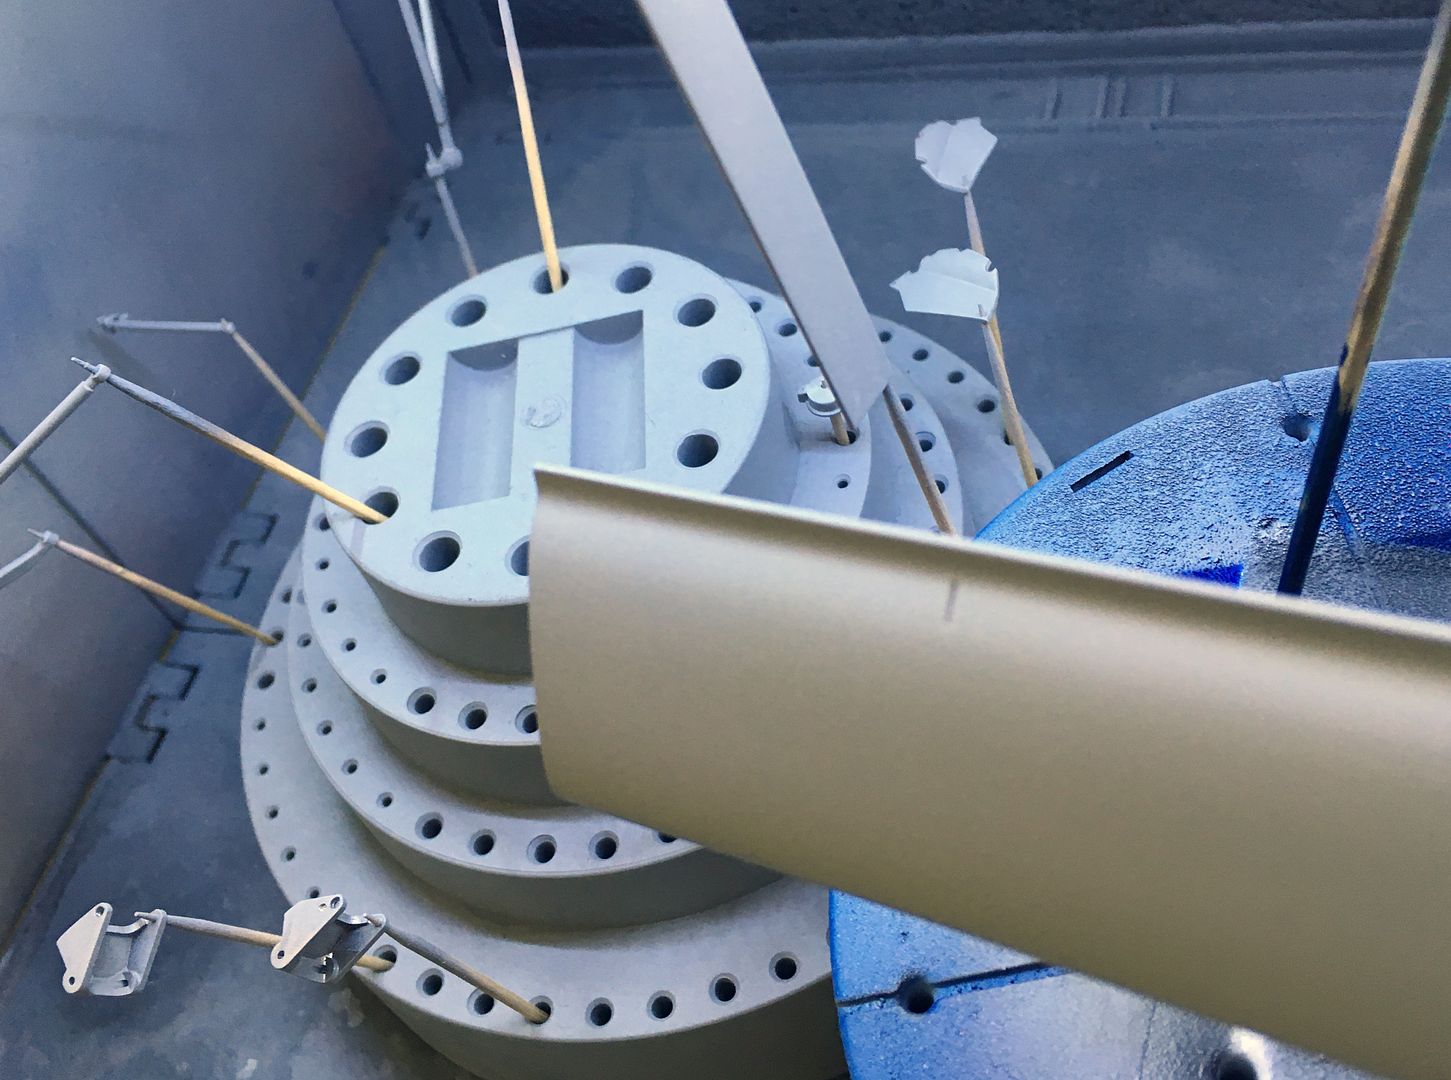
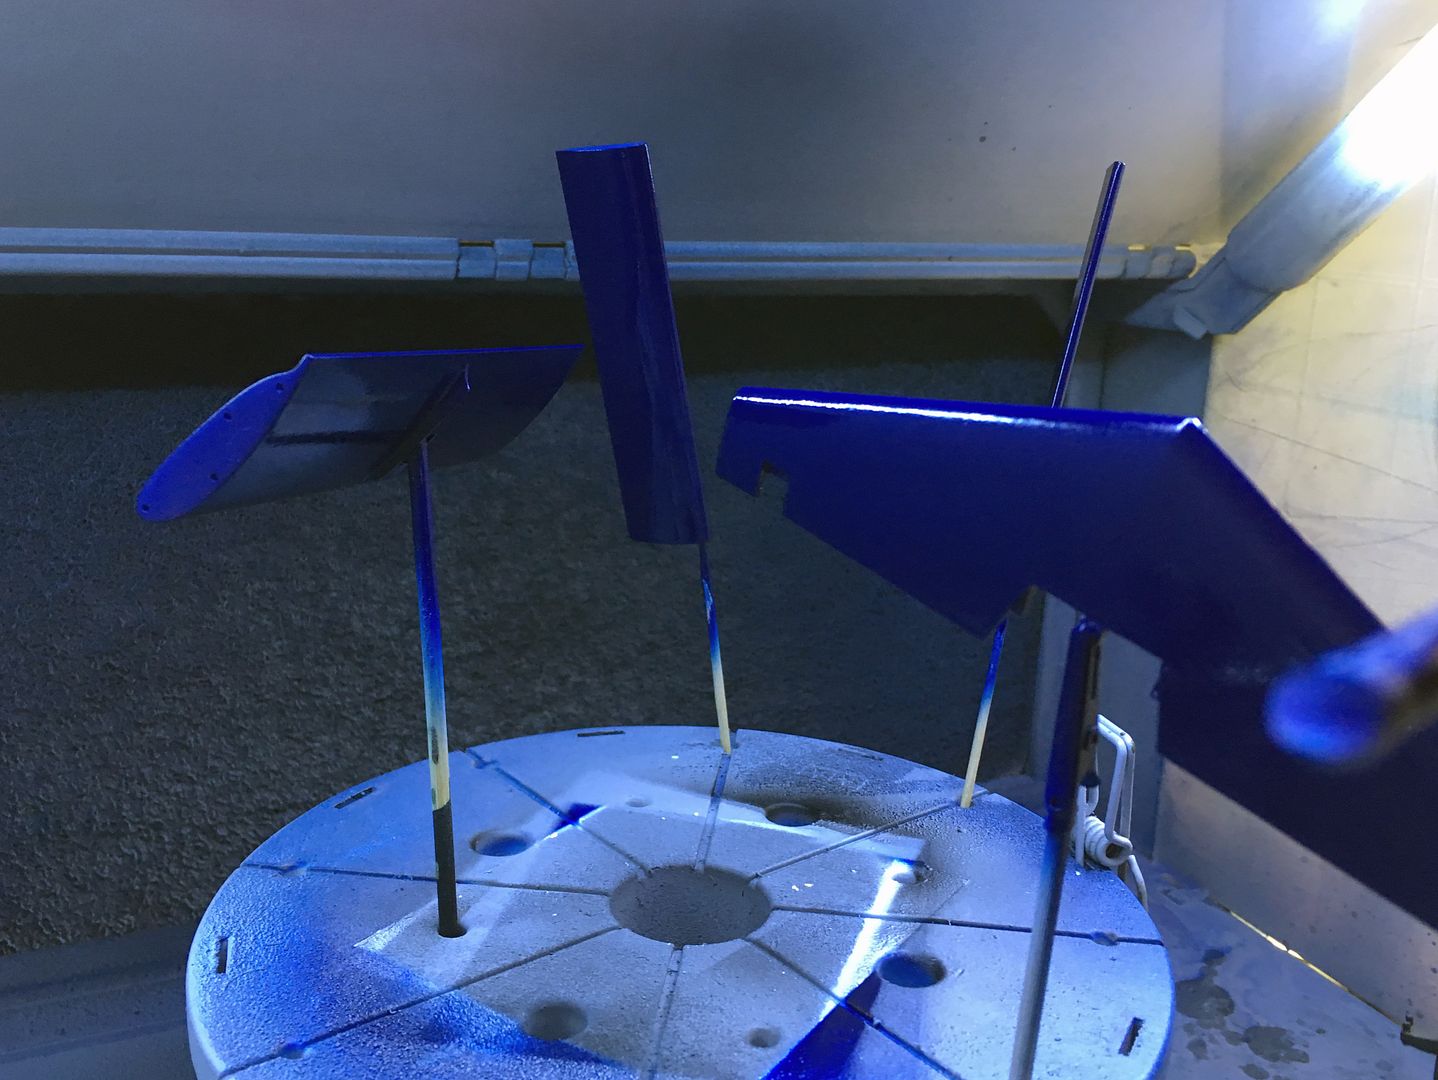
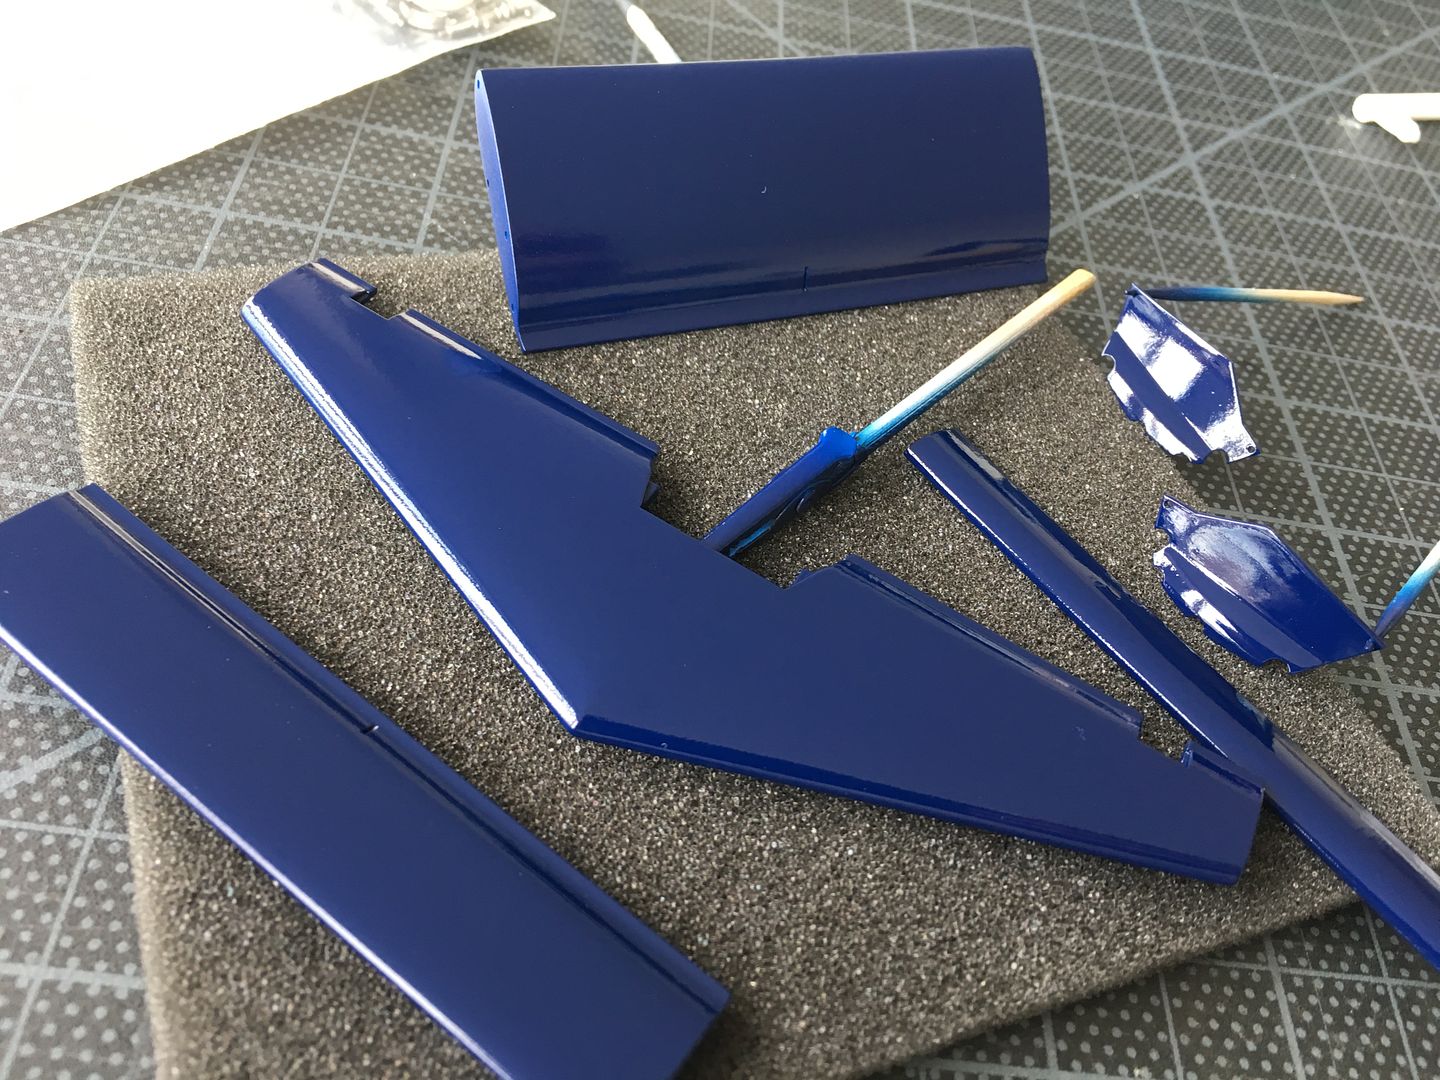
Primed and colored the wing elements. These are resin, and required just about no work before spraying...
Very light first coat of blue - just a dust really...
Then quite a few more to get to the dark blue...
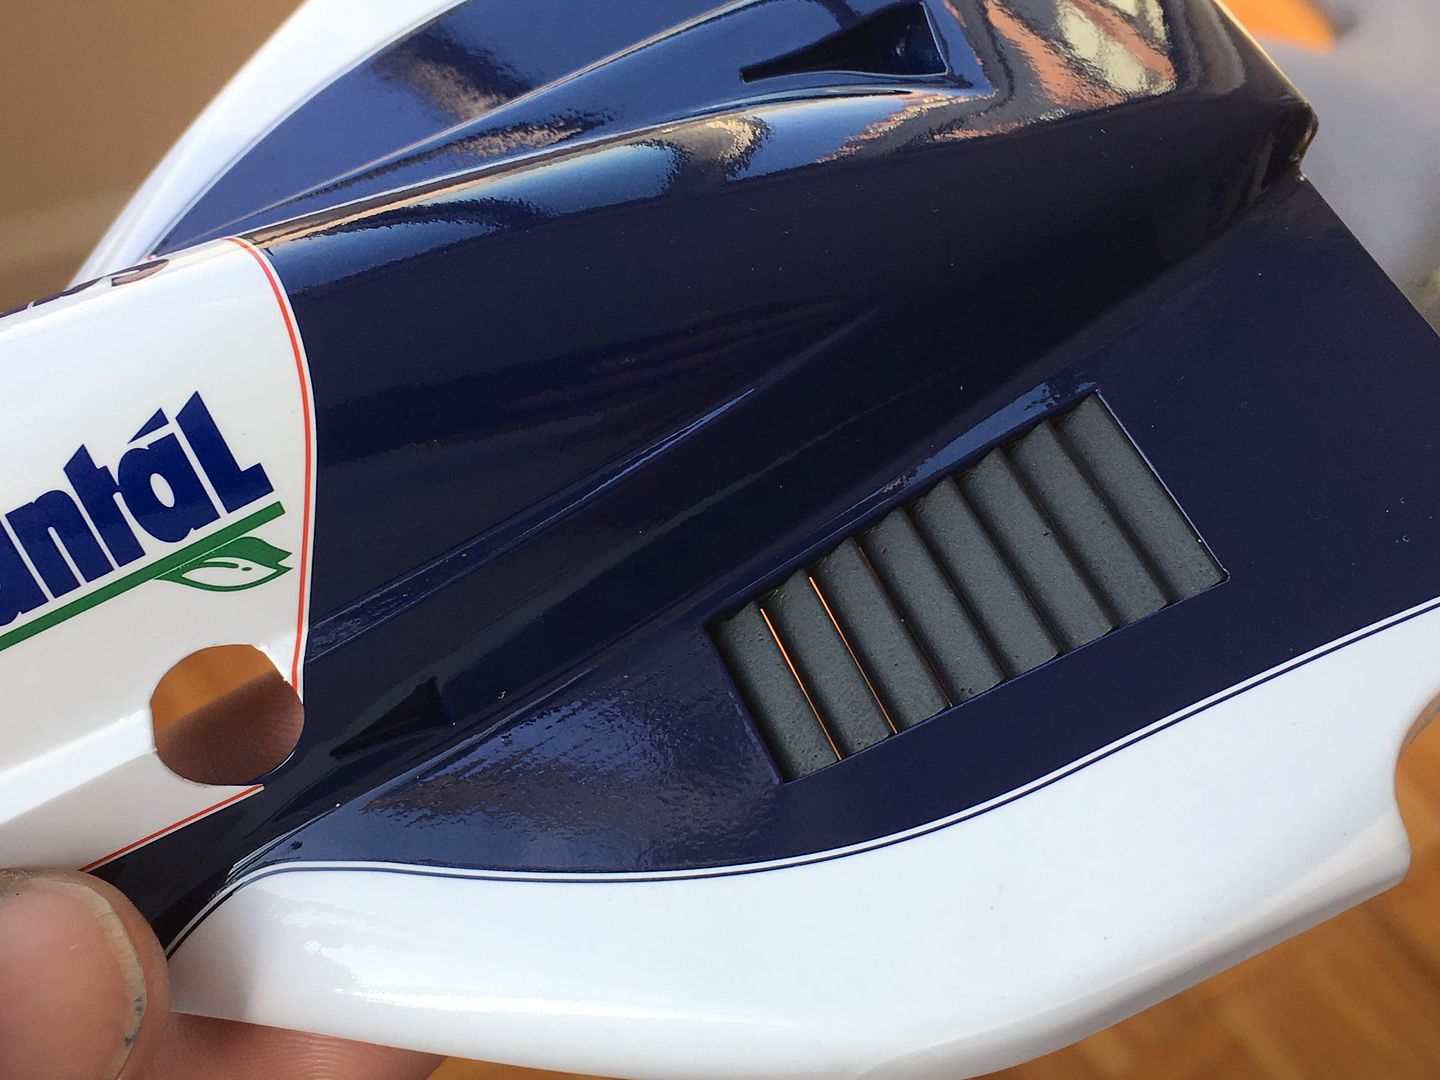
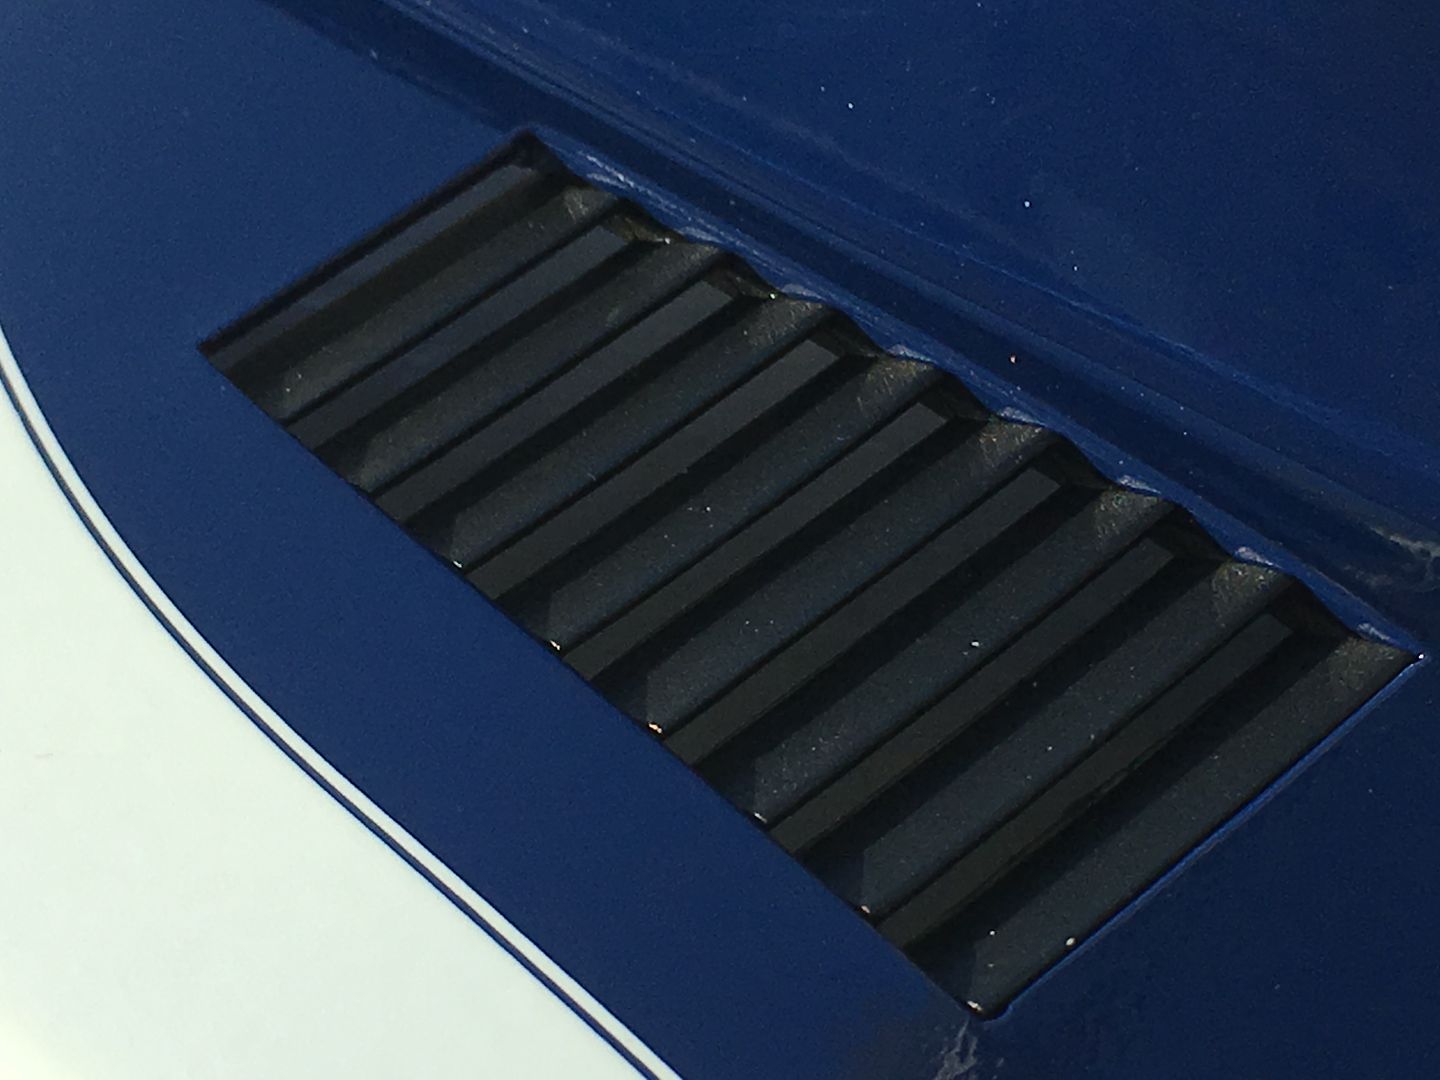
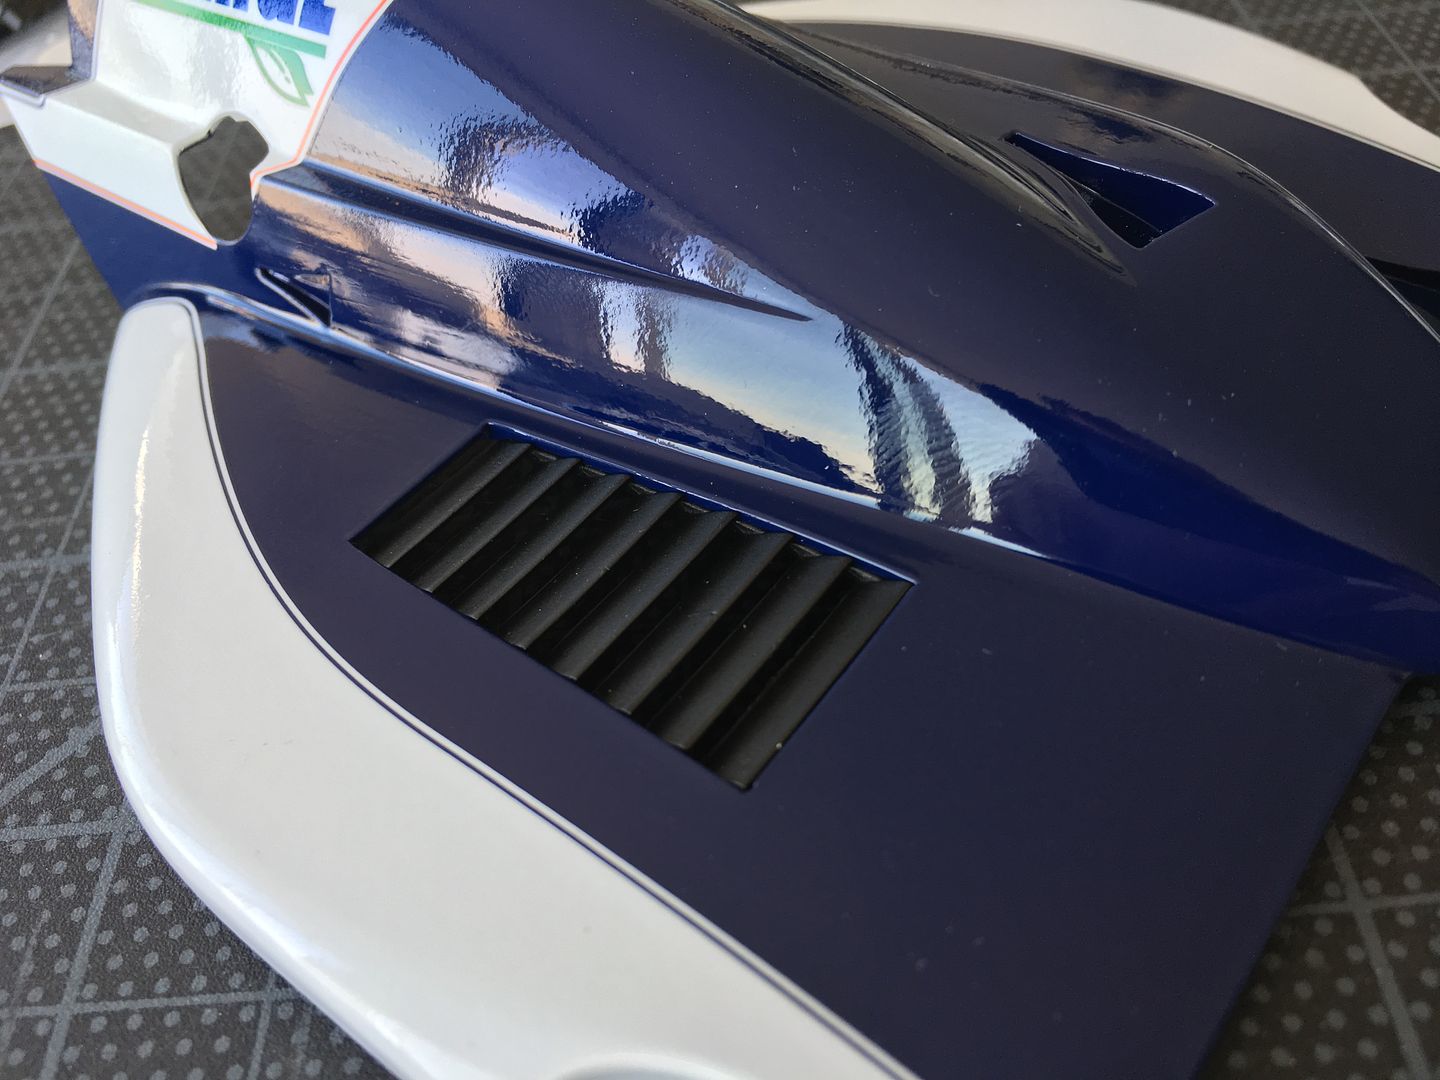
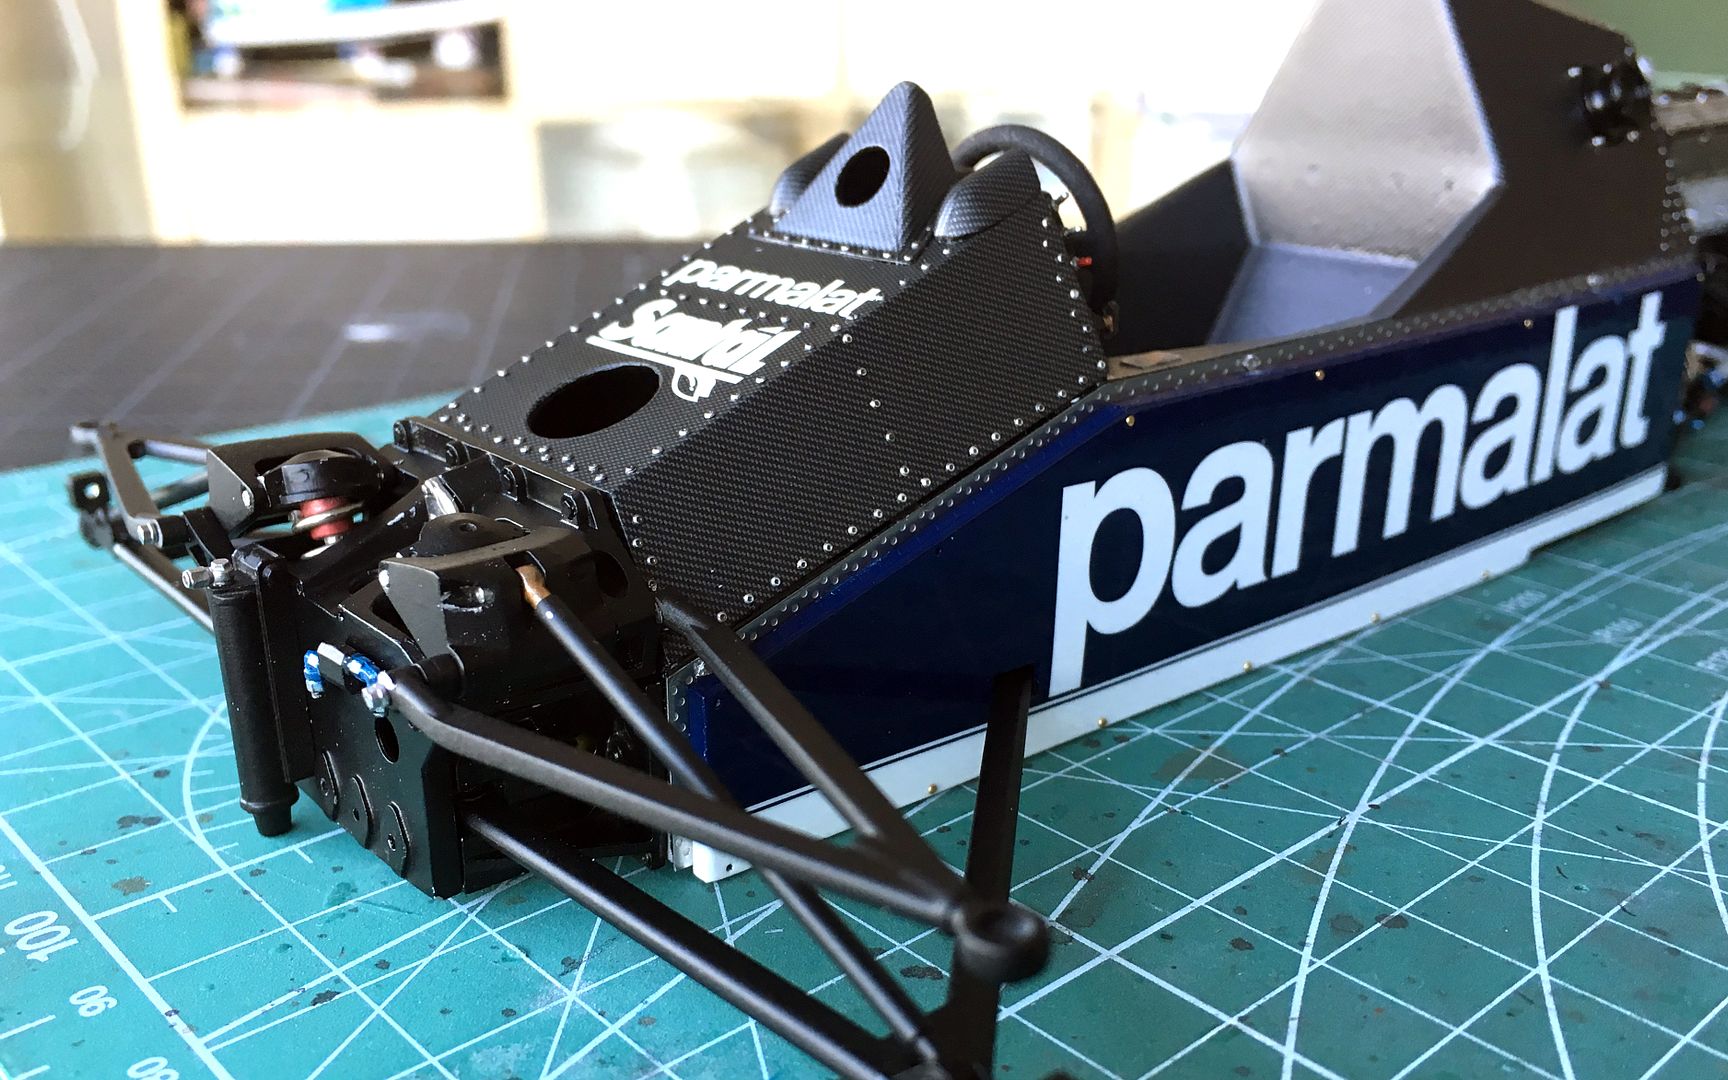
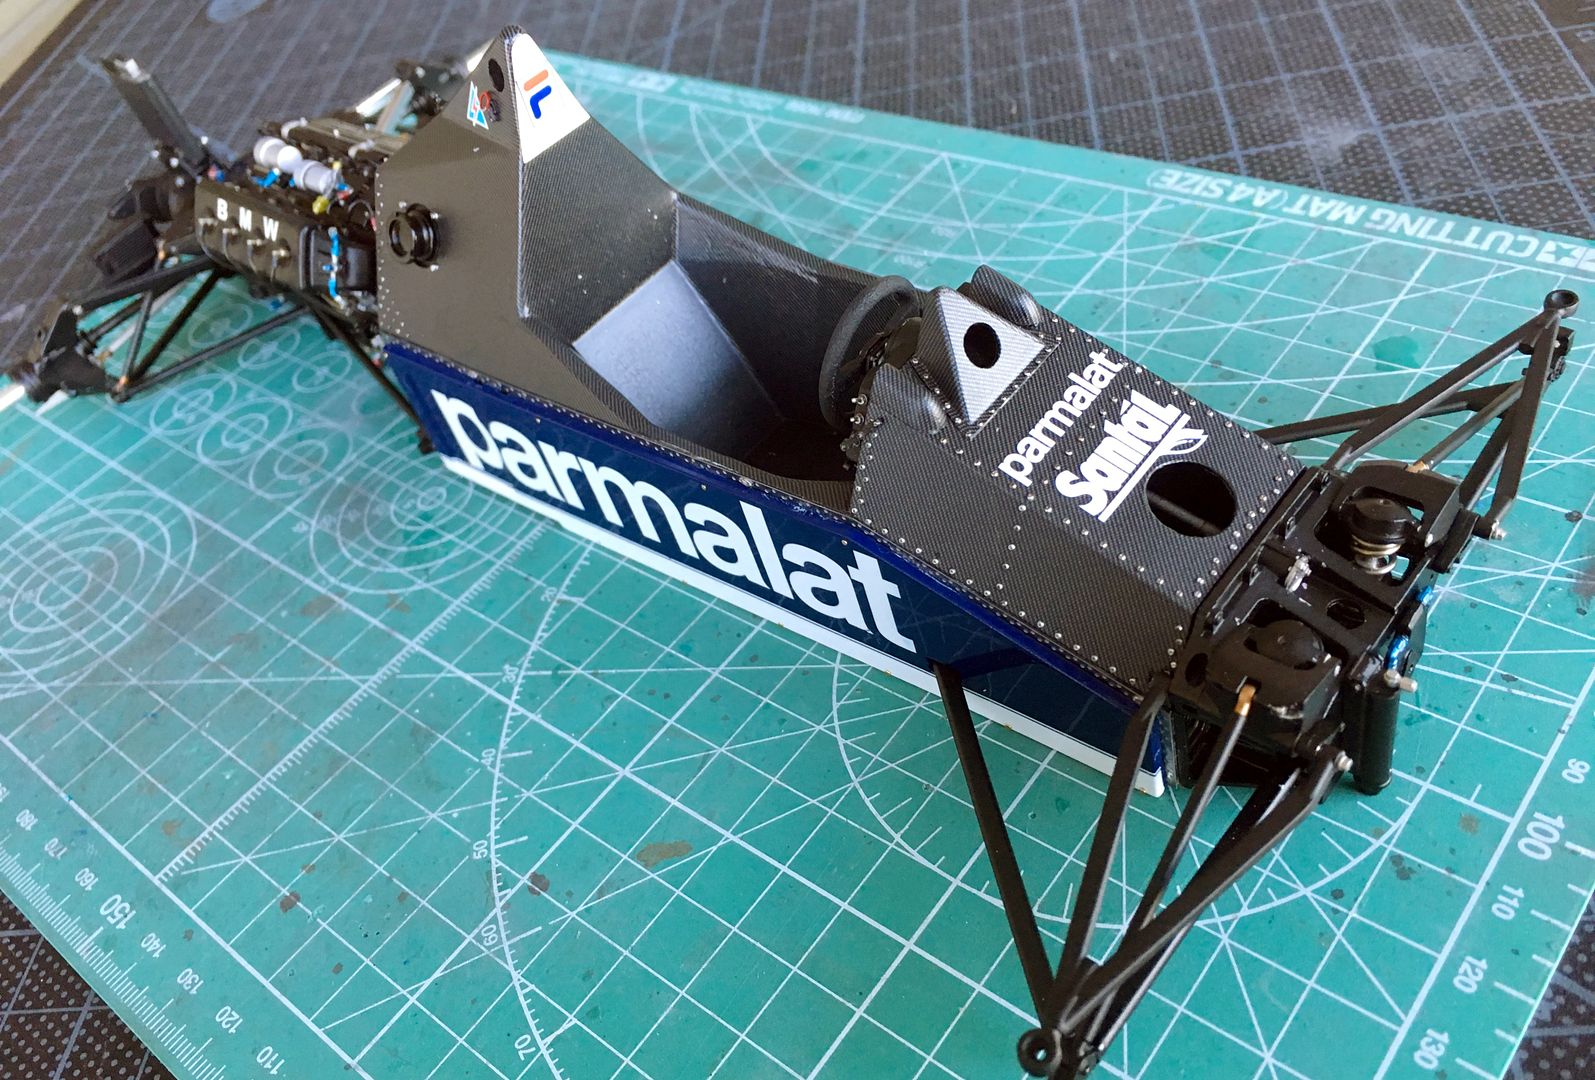
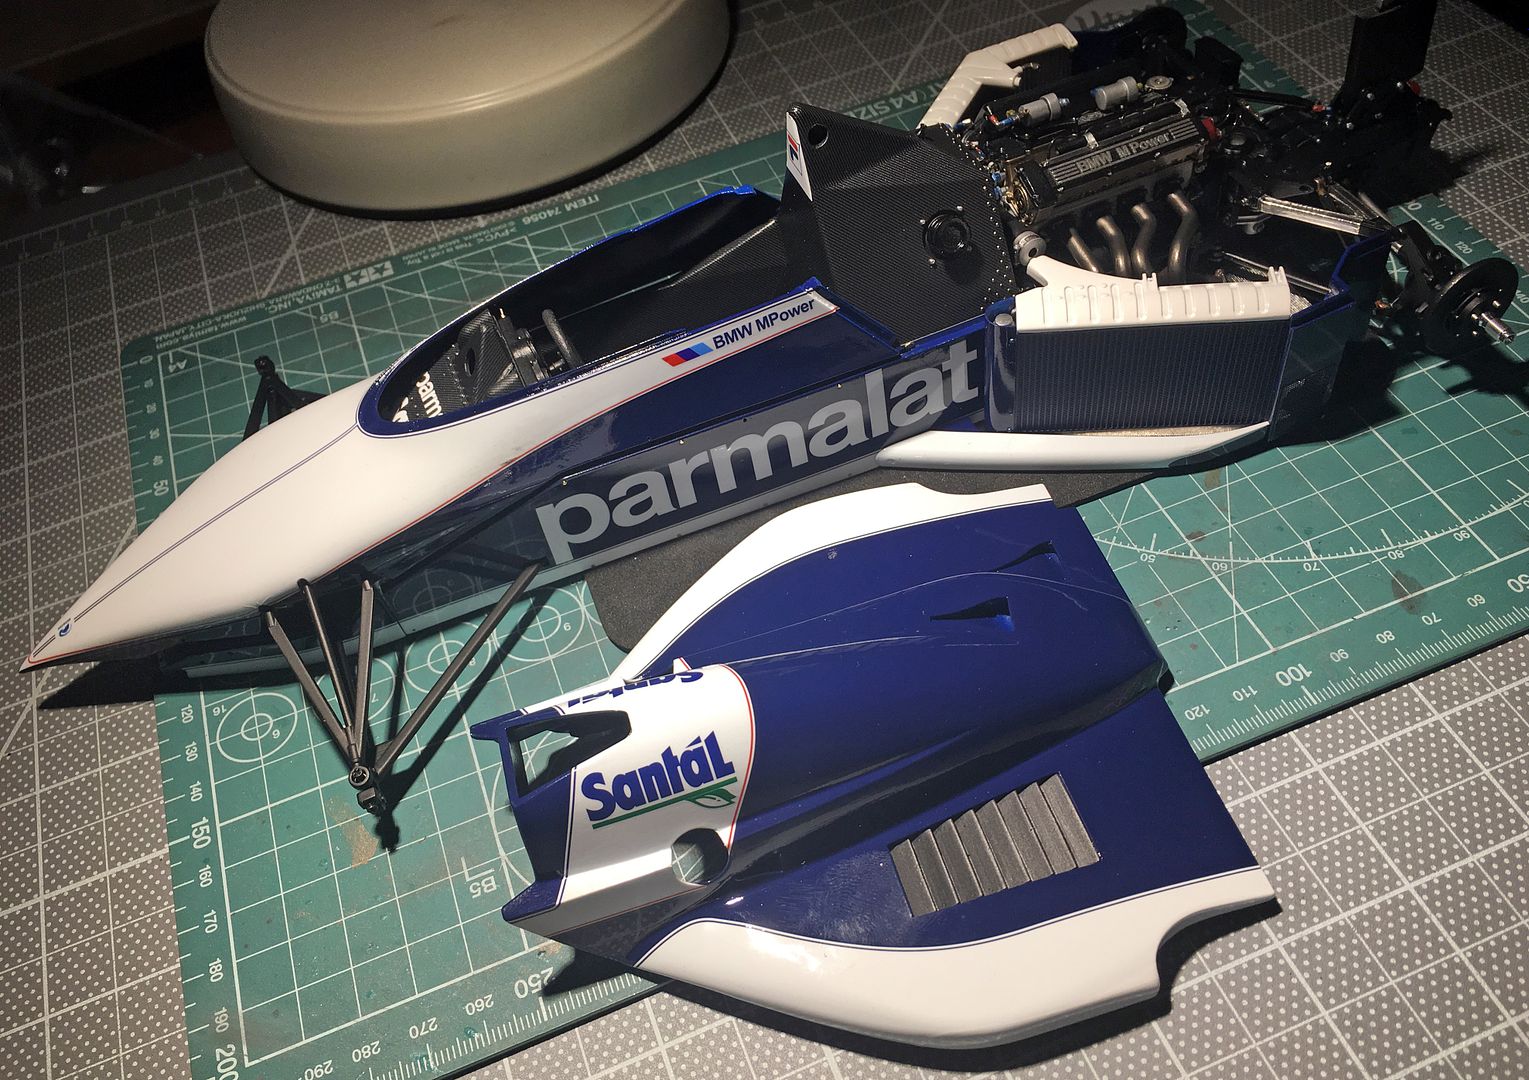
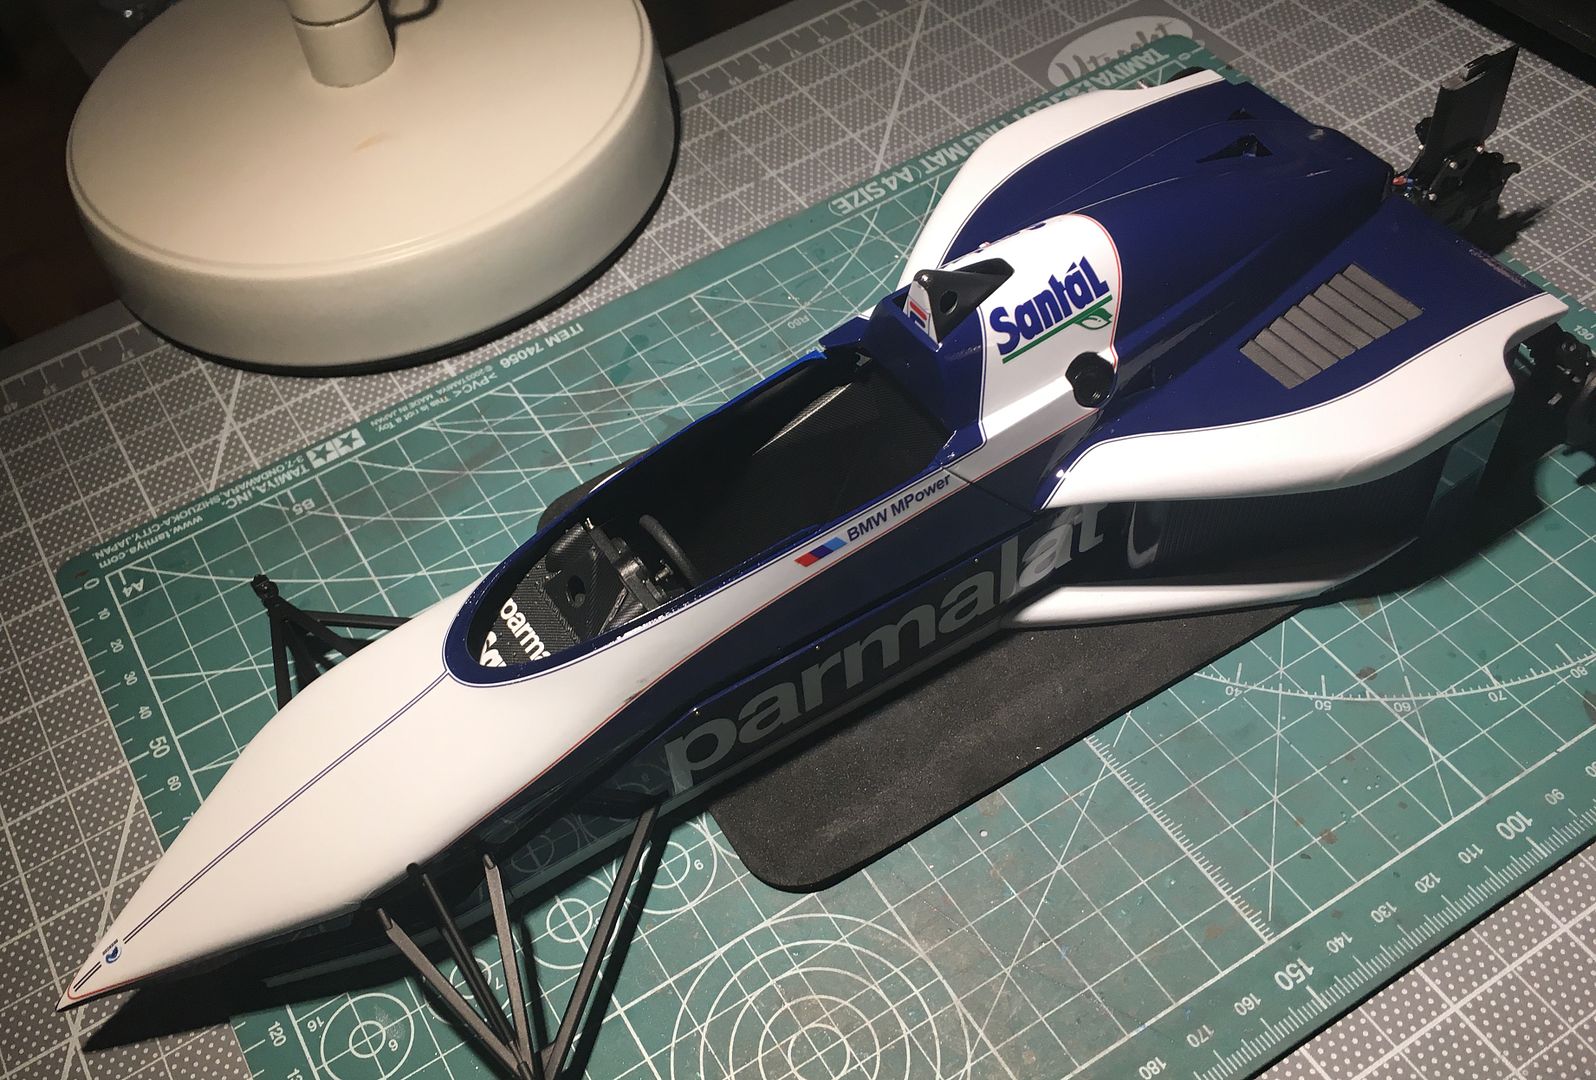
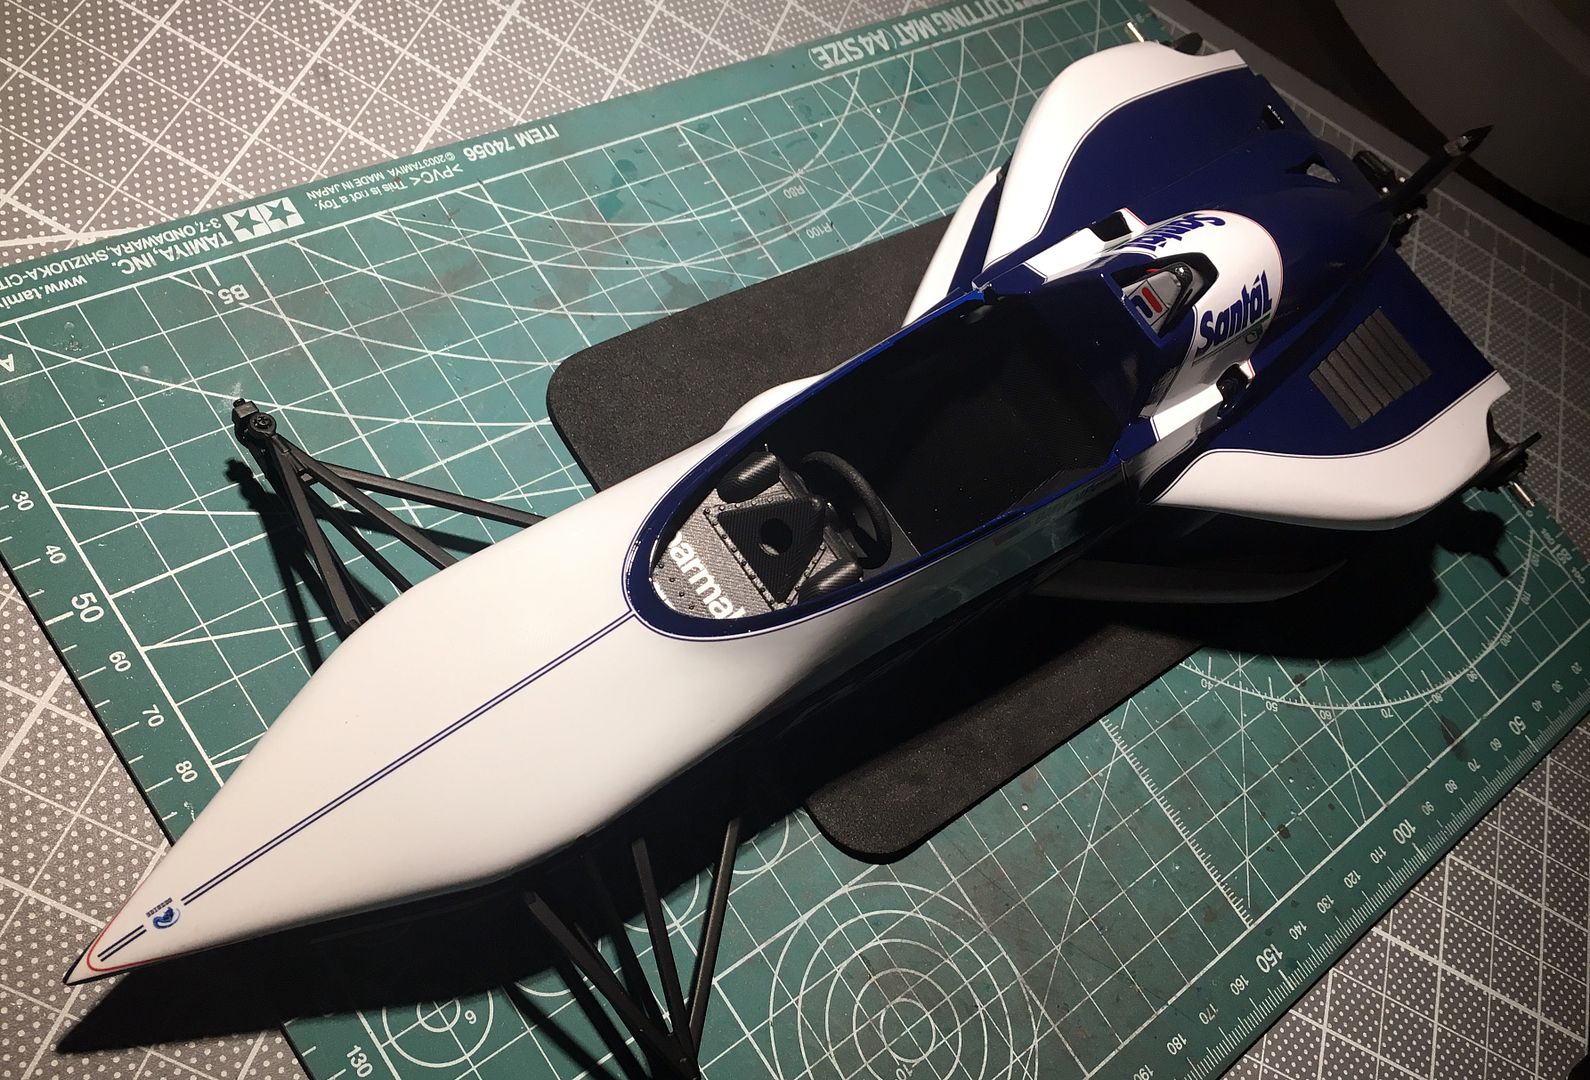
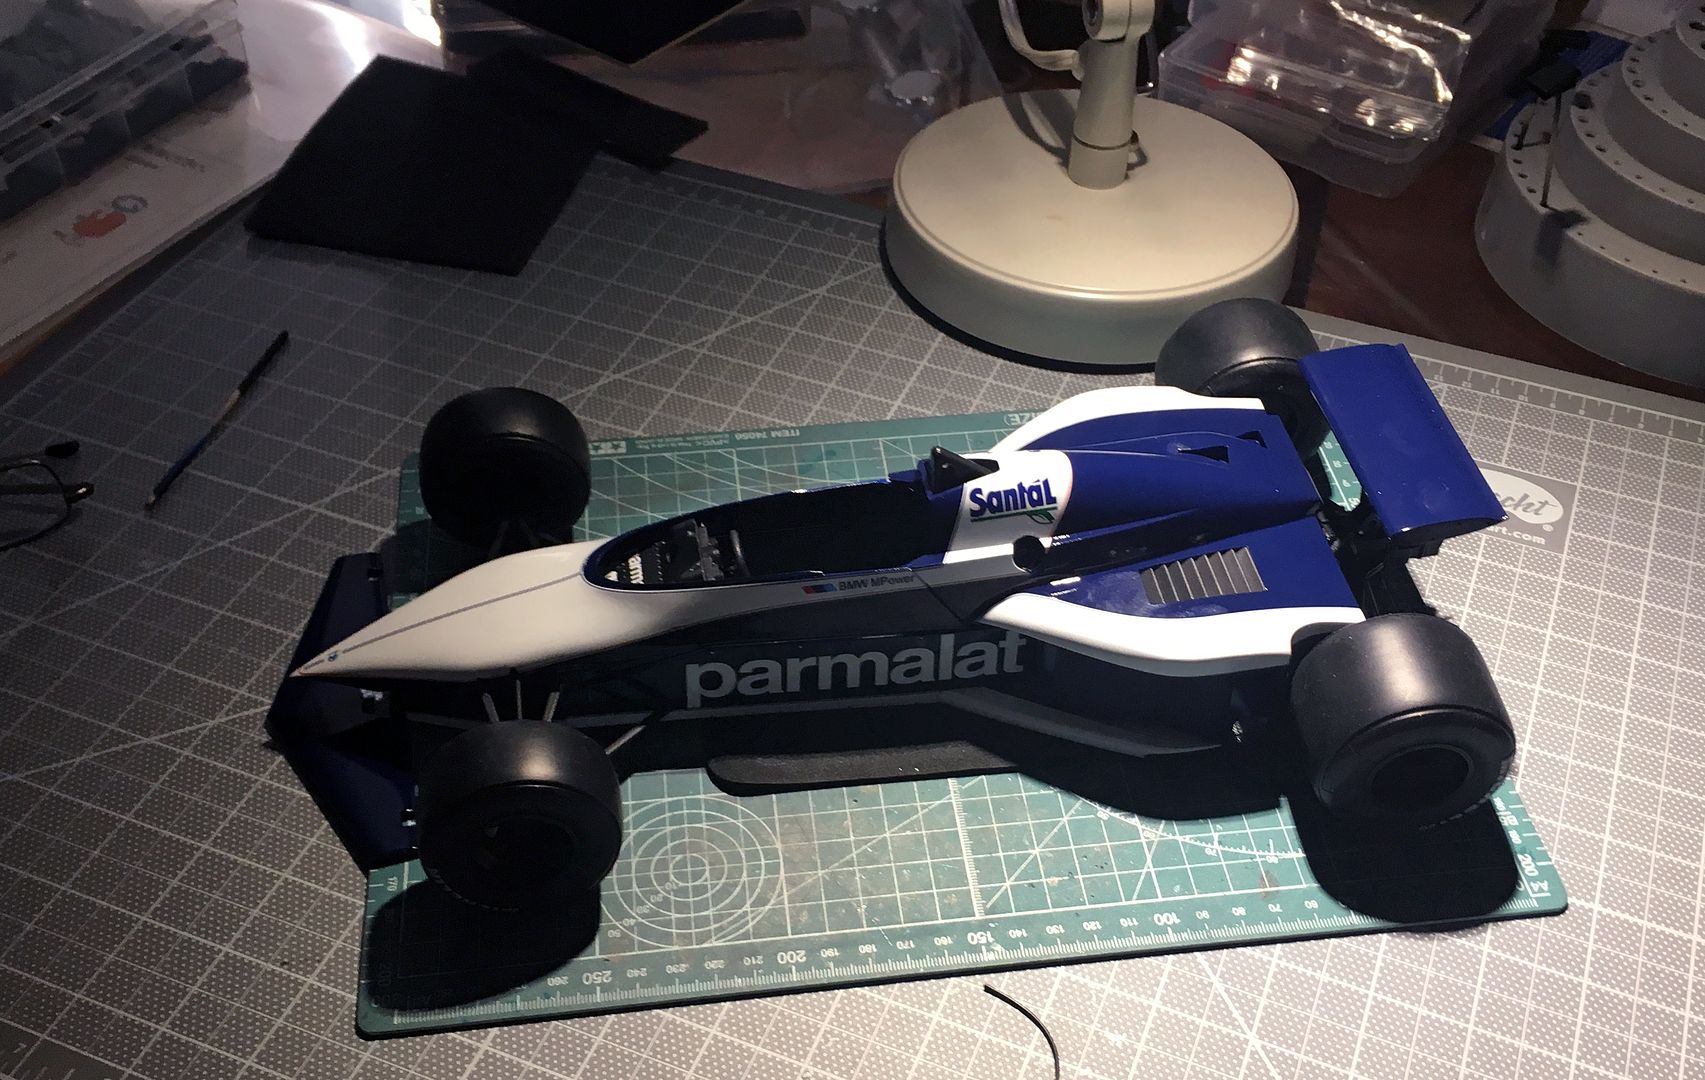
Added some vents to the main upper bodywork...
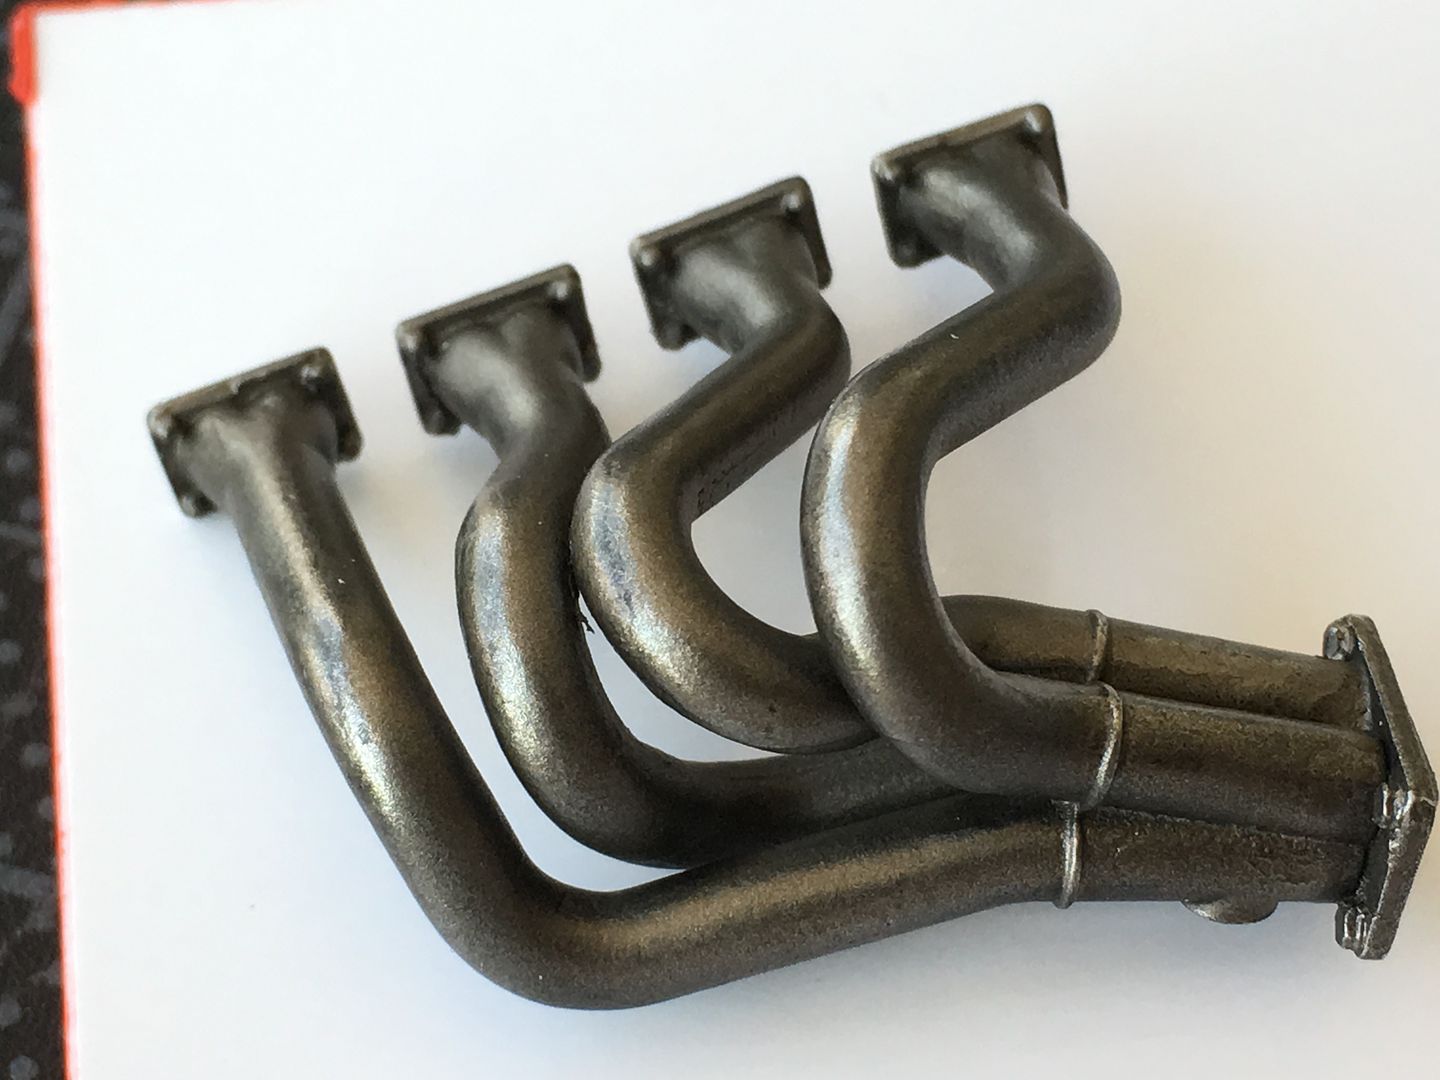
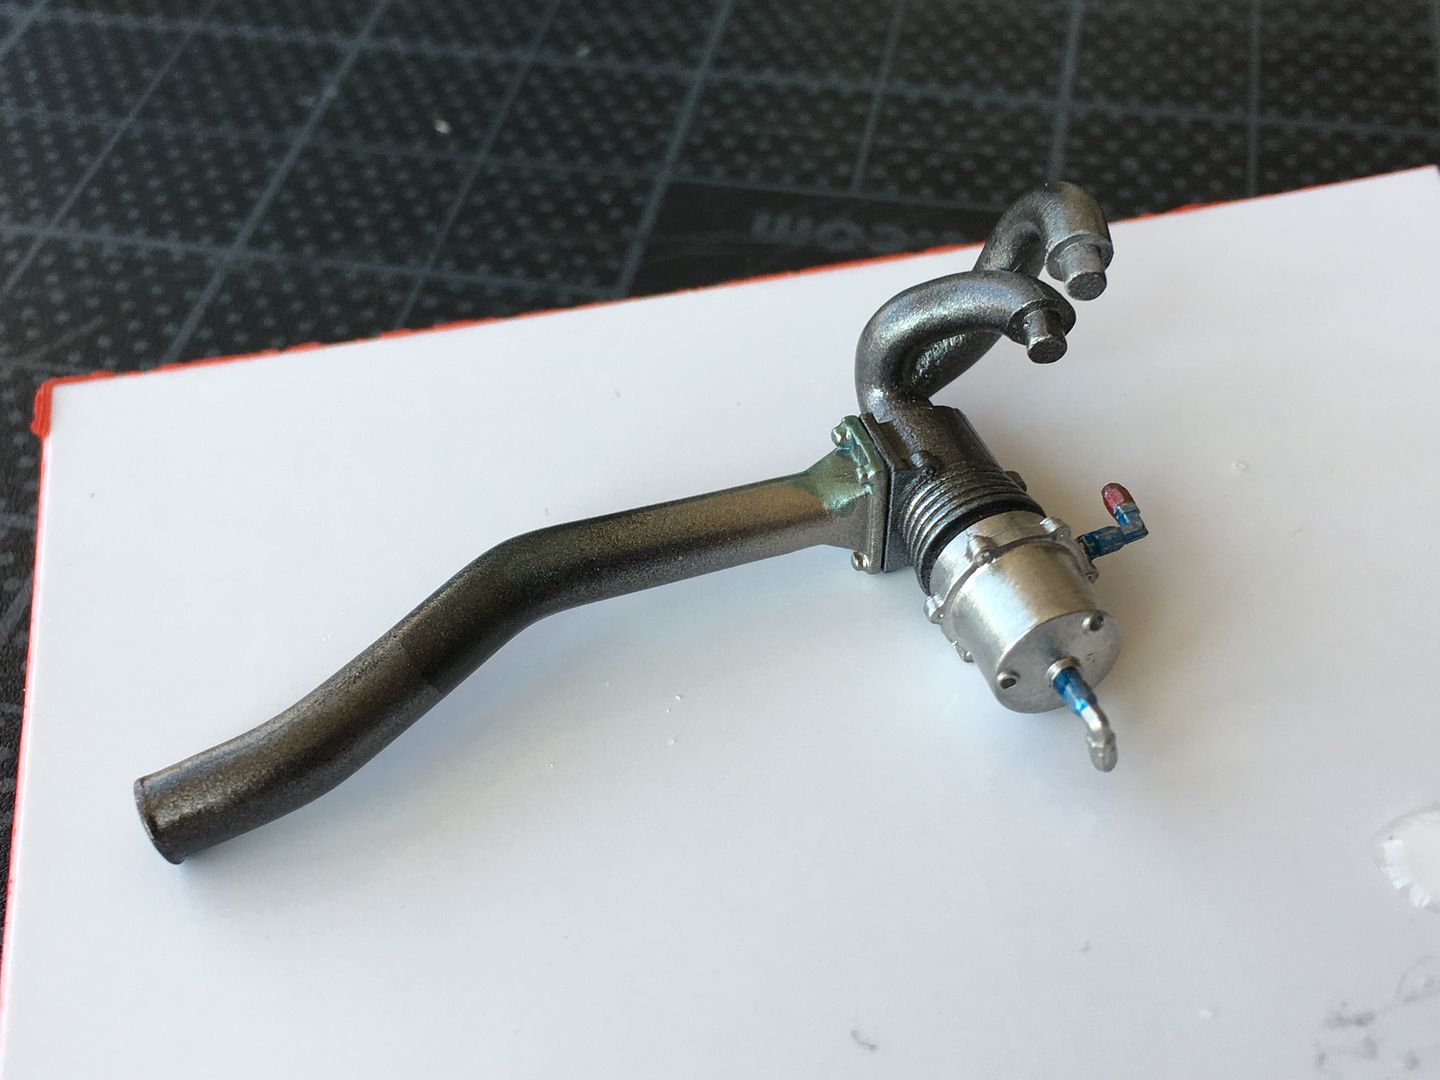
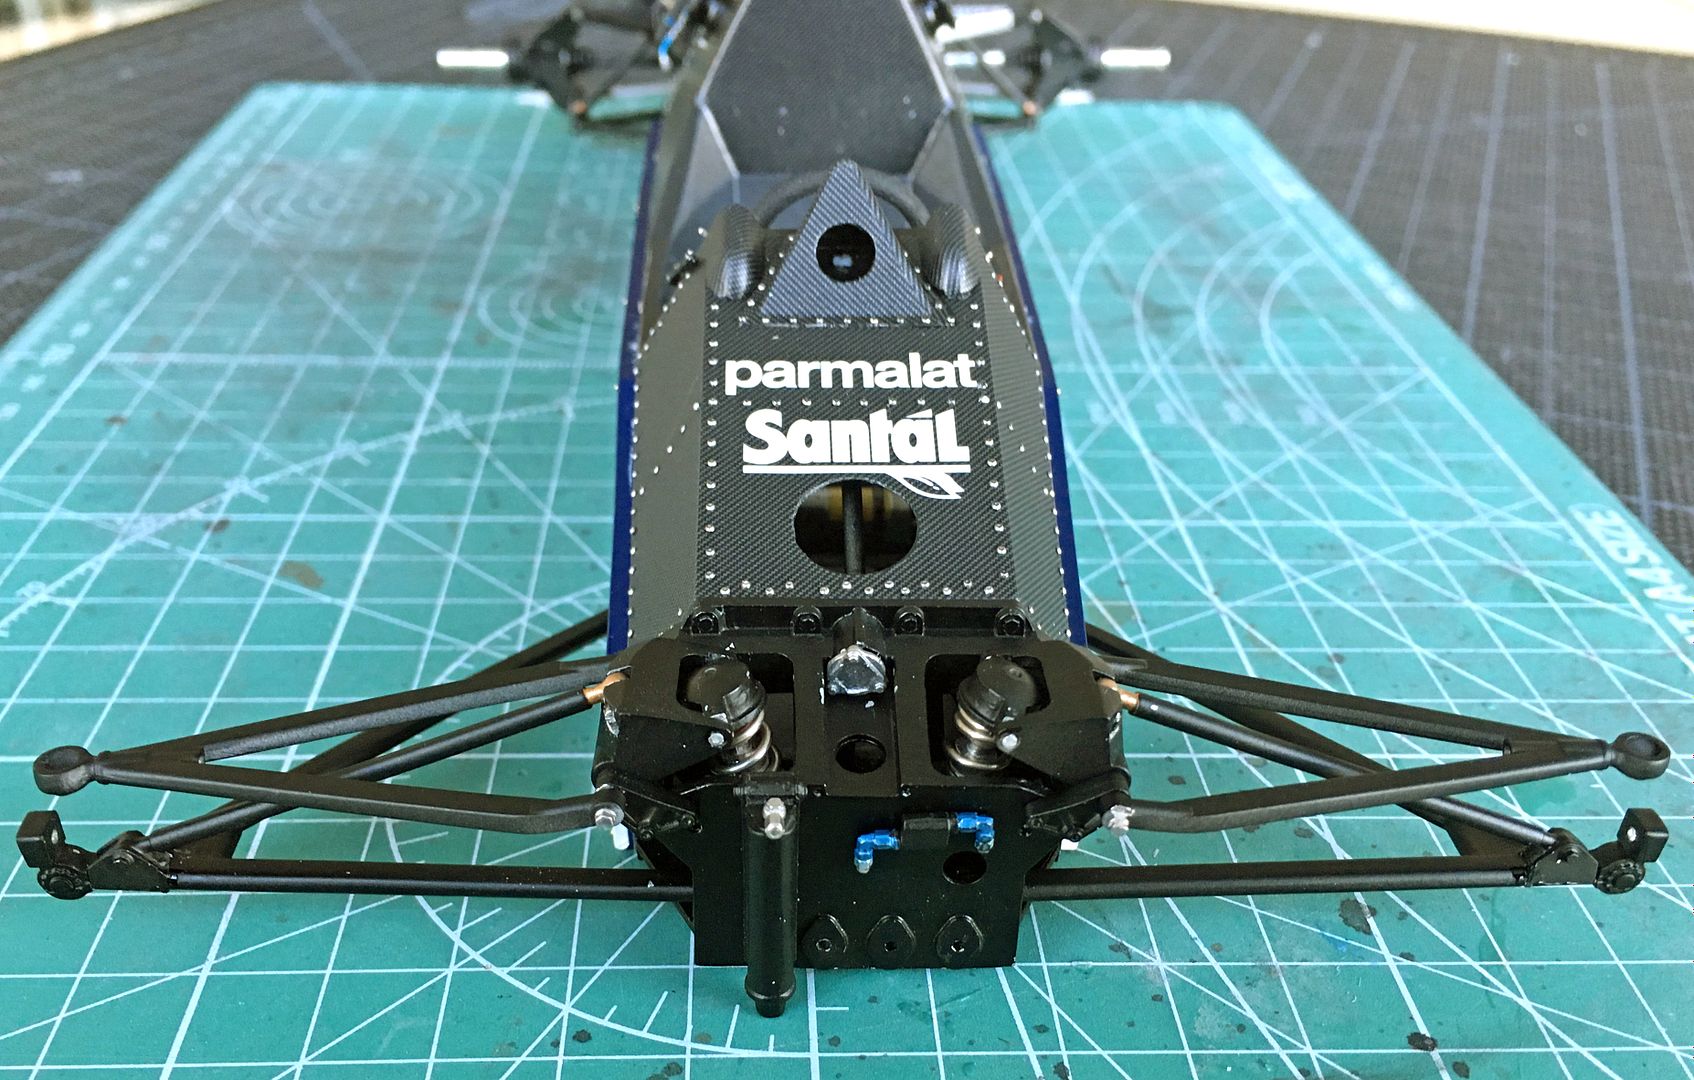
Some other details...
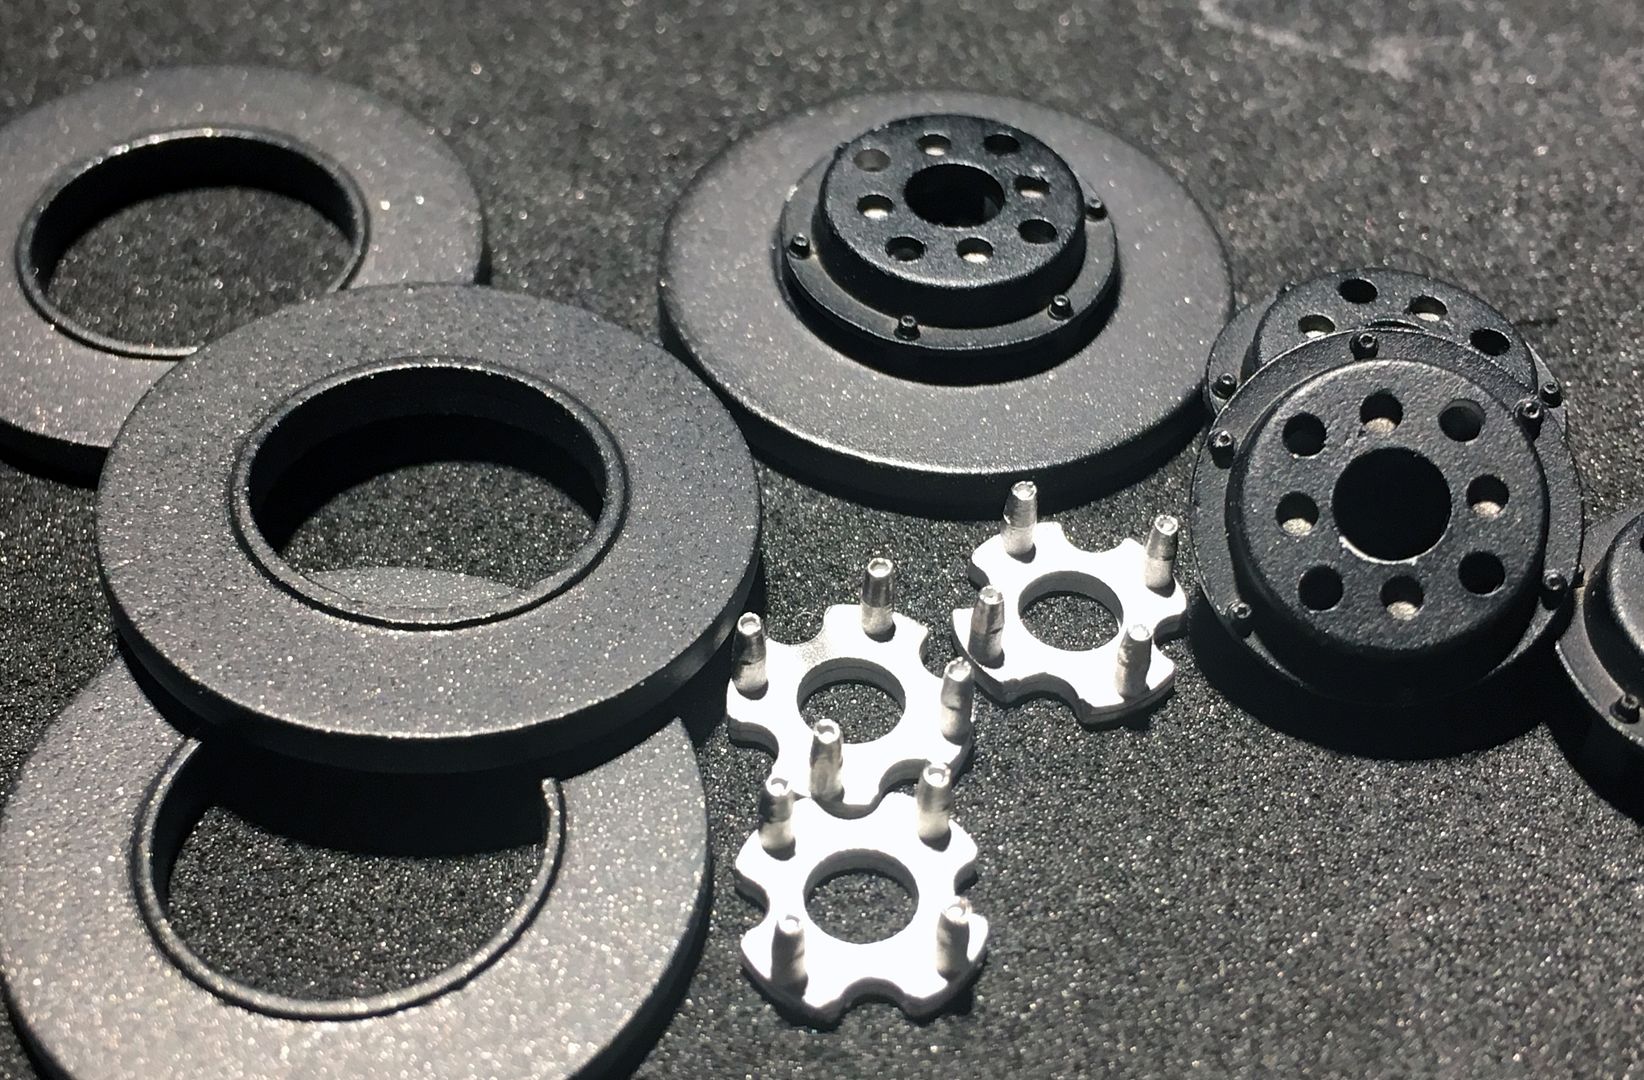
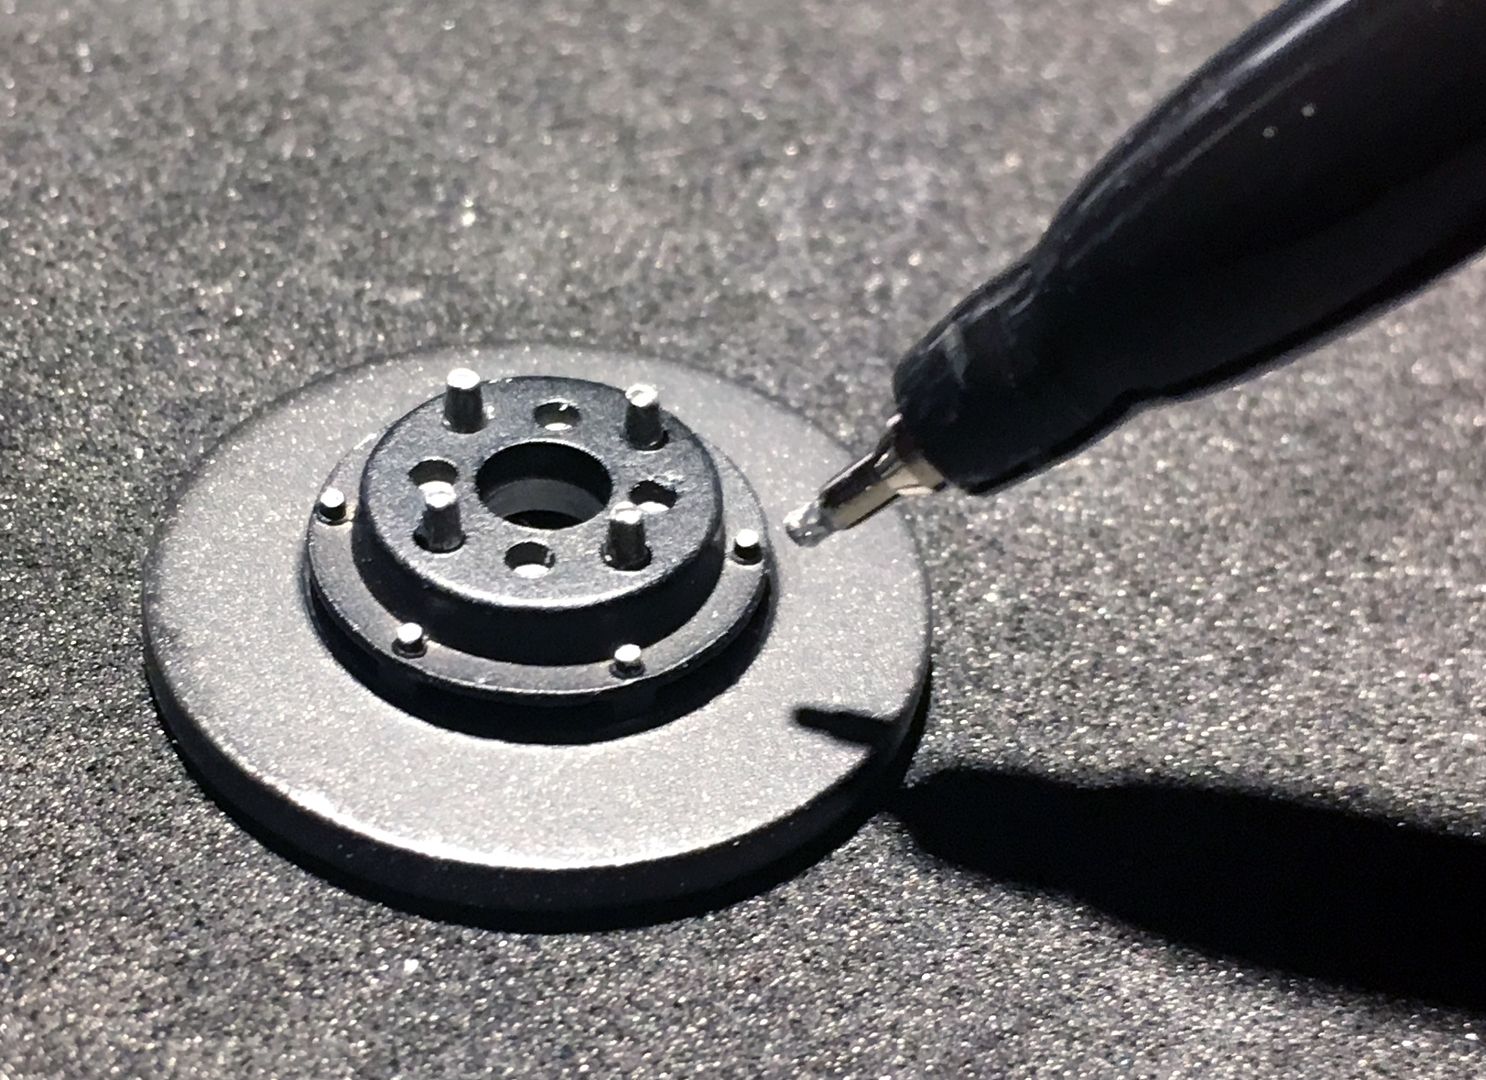
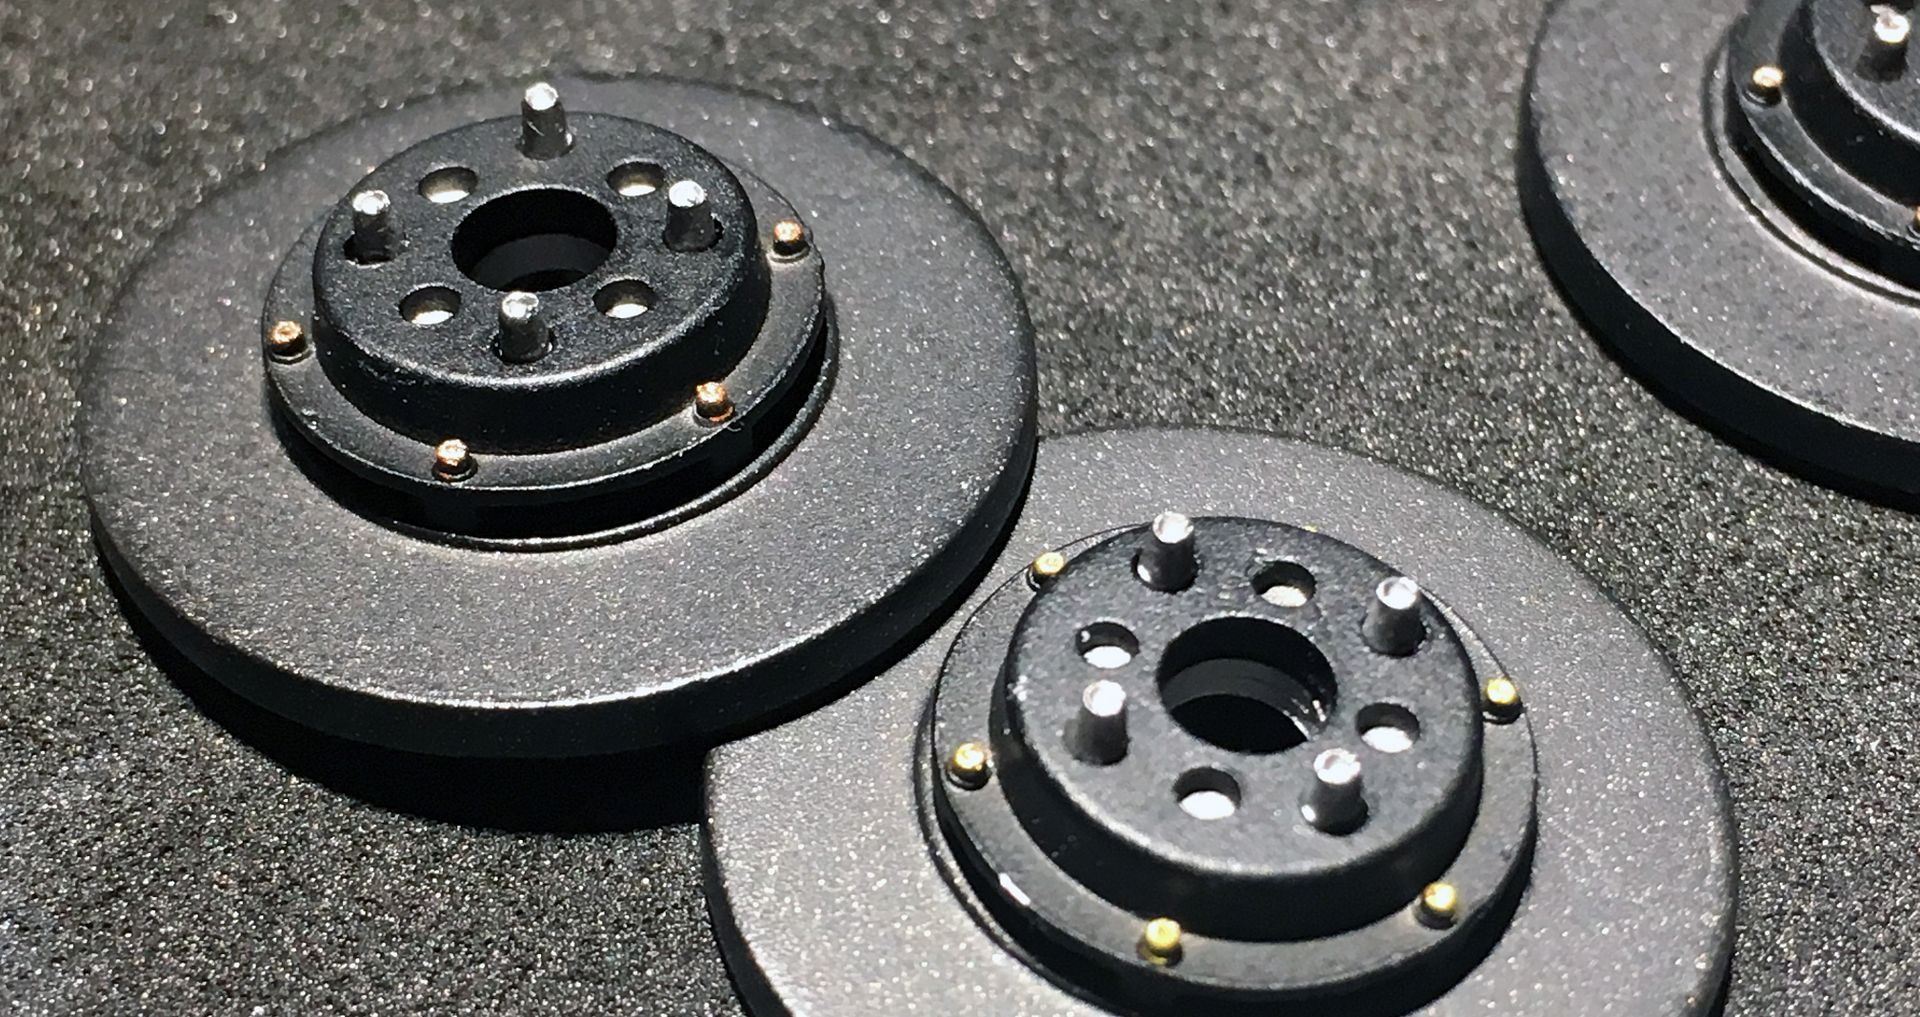
Some - this is cool. Carbon disc spray from Zero. (Not actual name, I'll check and add pic) - sprayed onto the white metal discs for the BT52, and it really does look like carbon - no post work at all, exactly as sprayed.
More later...
Test wing fitting!
Started adding wires. I think this will be easier when the engine is joined to the bulkhead (before fitting the floor) as the cables/wires/pipes will have somewhere to go...
Primed and colored the wing elements. These are resin, and required just about no work before spraying...
Very light first coat of blue - just a dust really...
Then quite a few more to get to the dark blue...
Added some vents to the main upper bodywork...
Some other details...
Some - this is cool. Carbon disc spray from Zero. (Not actual name, I'll check and add pic) - sprayed onto the white metal discs for the BT52, and it really does look like carbon - no post work at all, exactly as sprayed.
More later...


Nice- I have a MFH 1/43rd to do (I had the paint....) - will need stronger magnifying glasses!
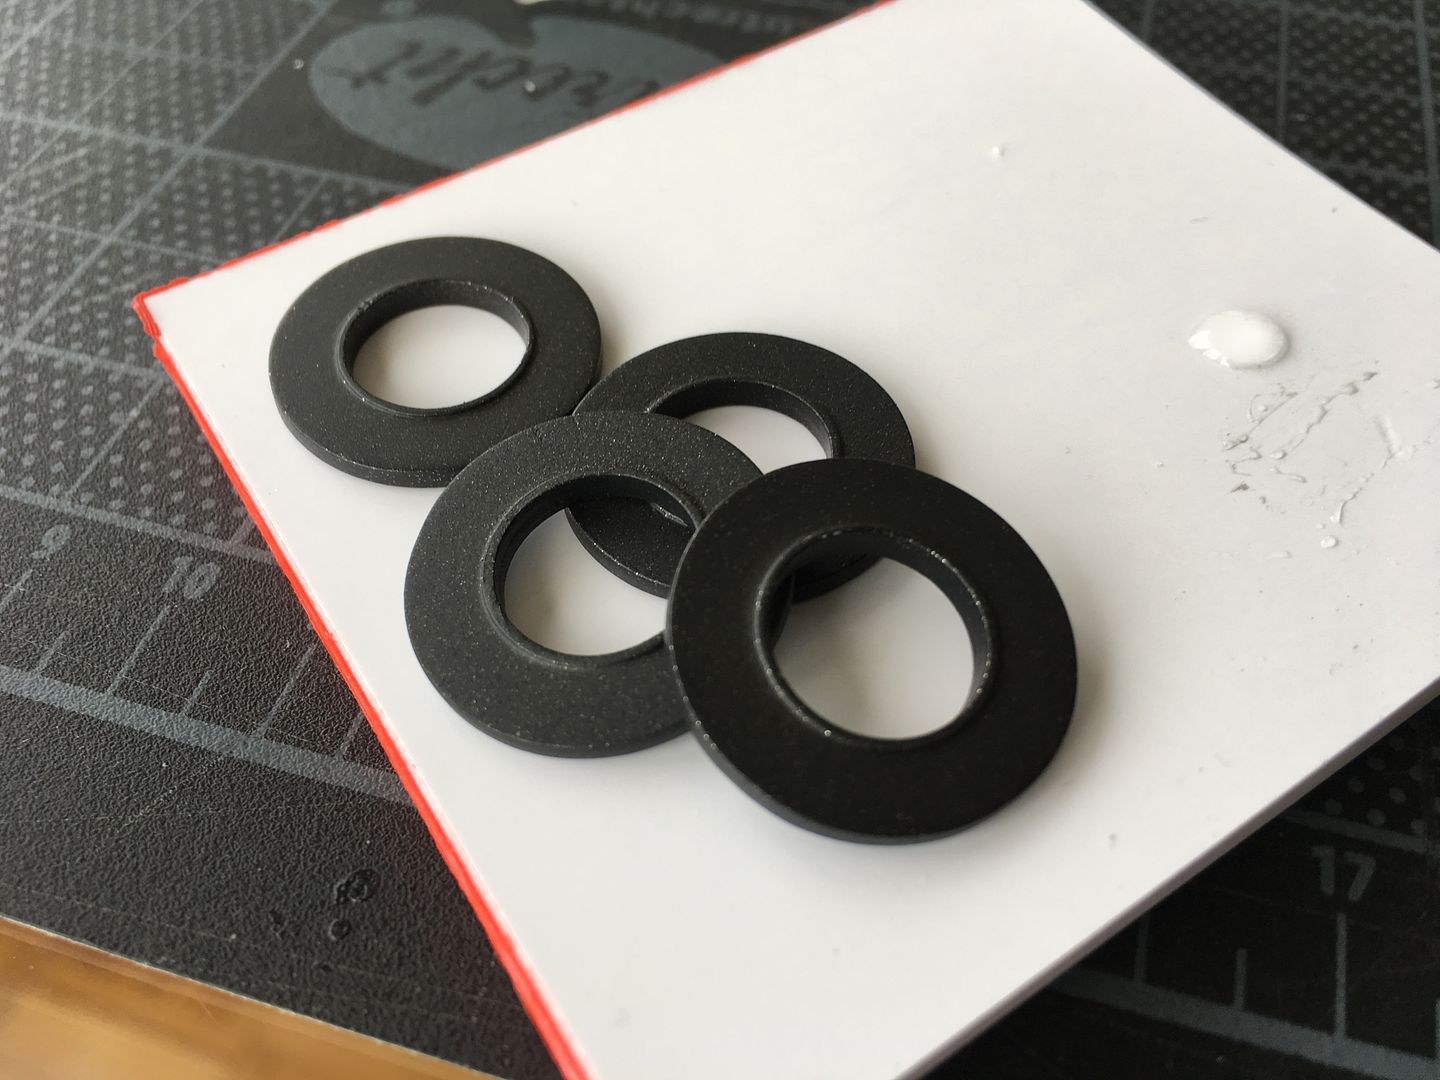
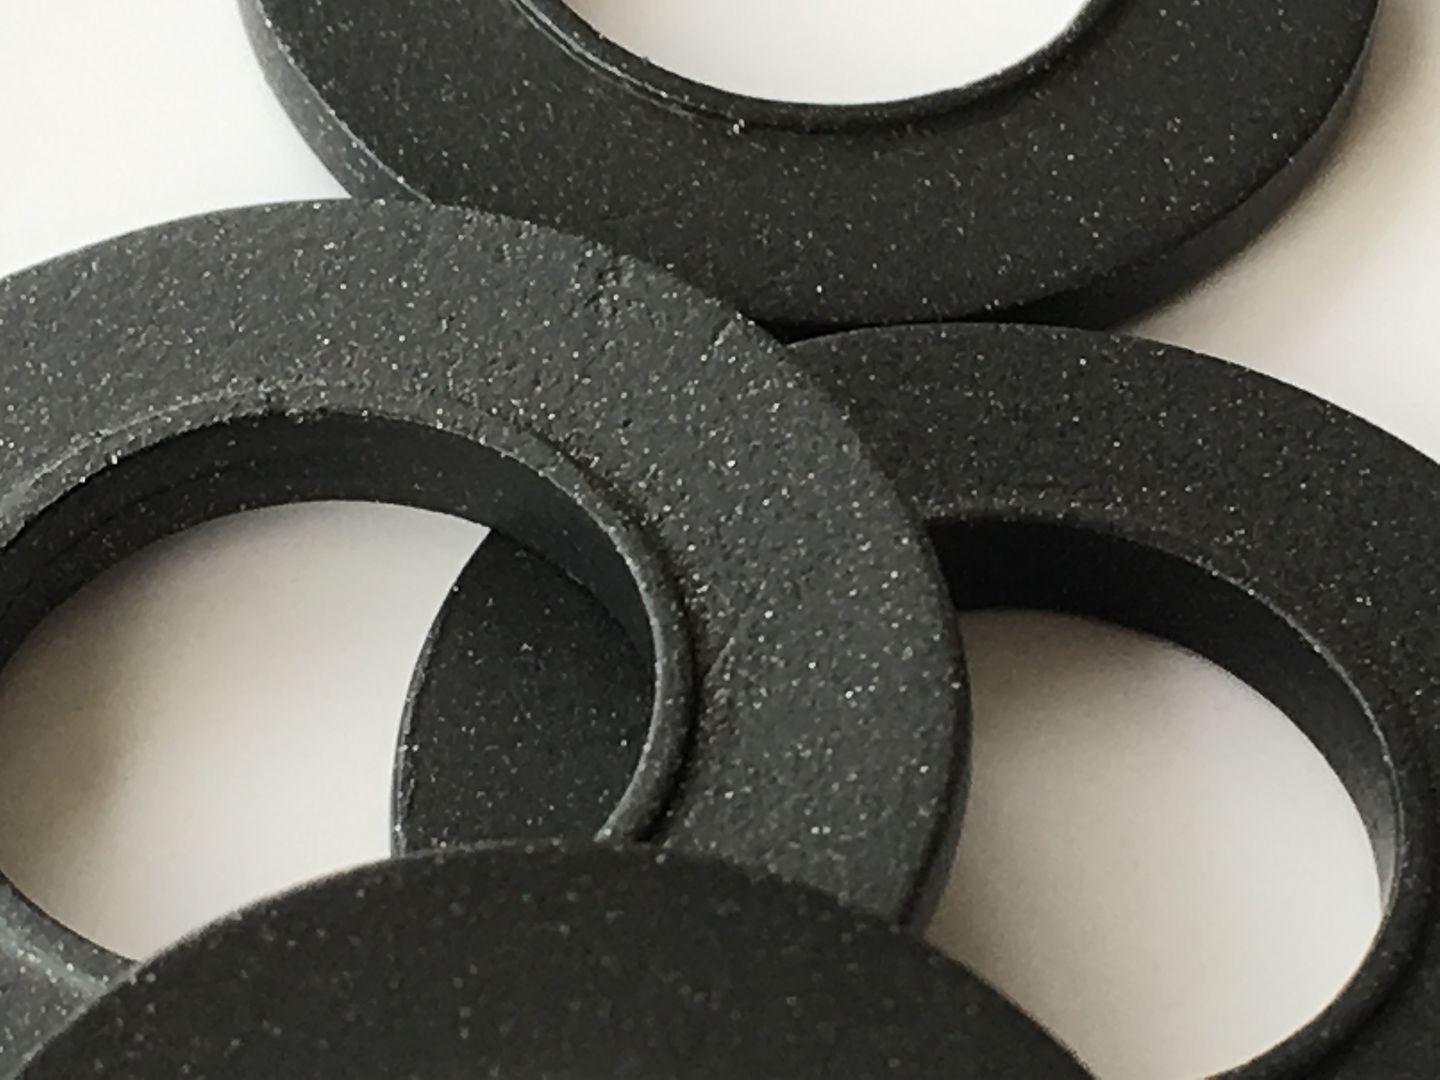
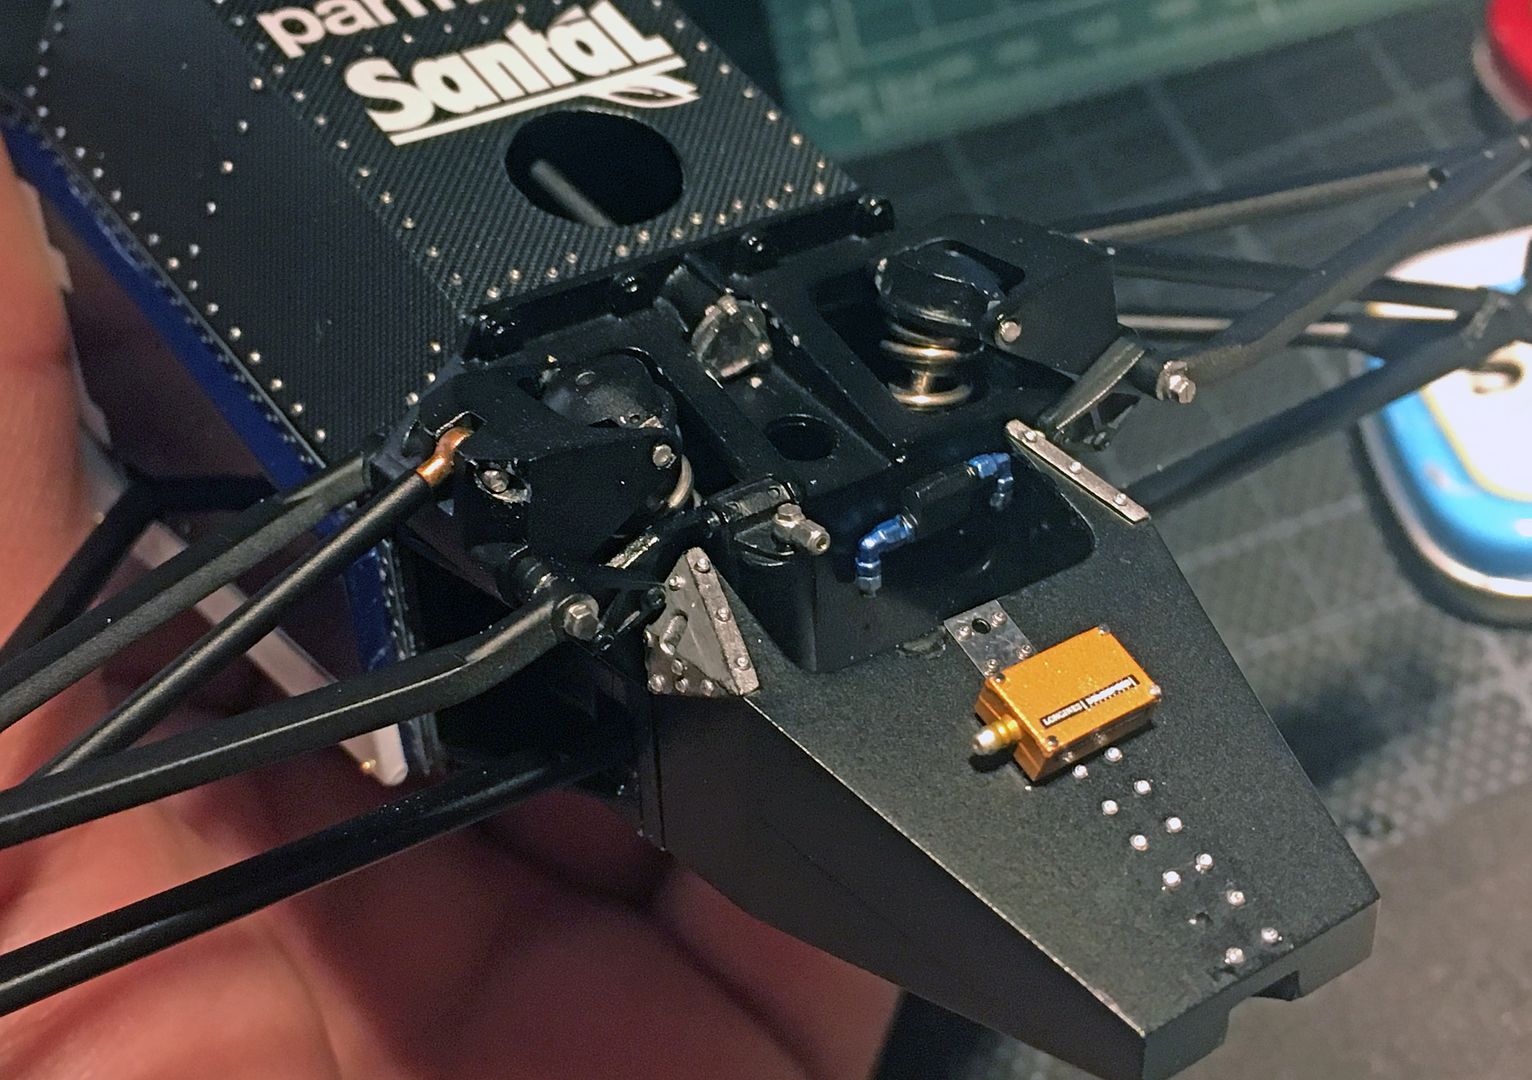
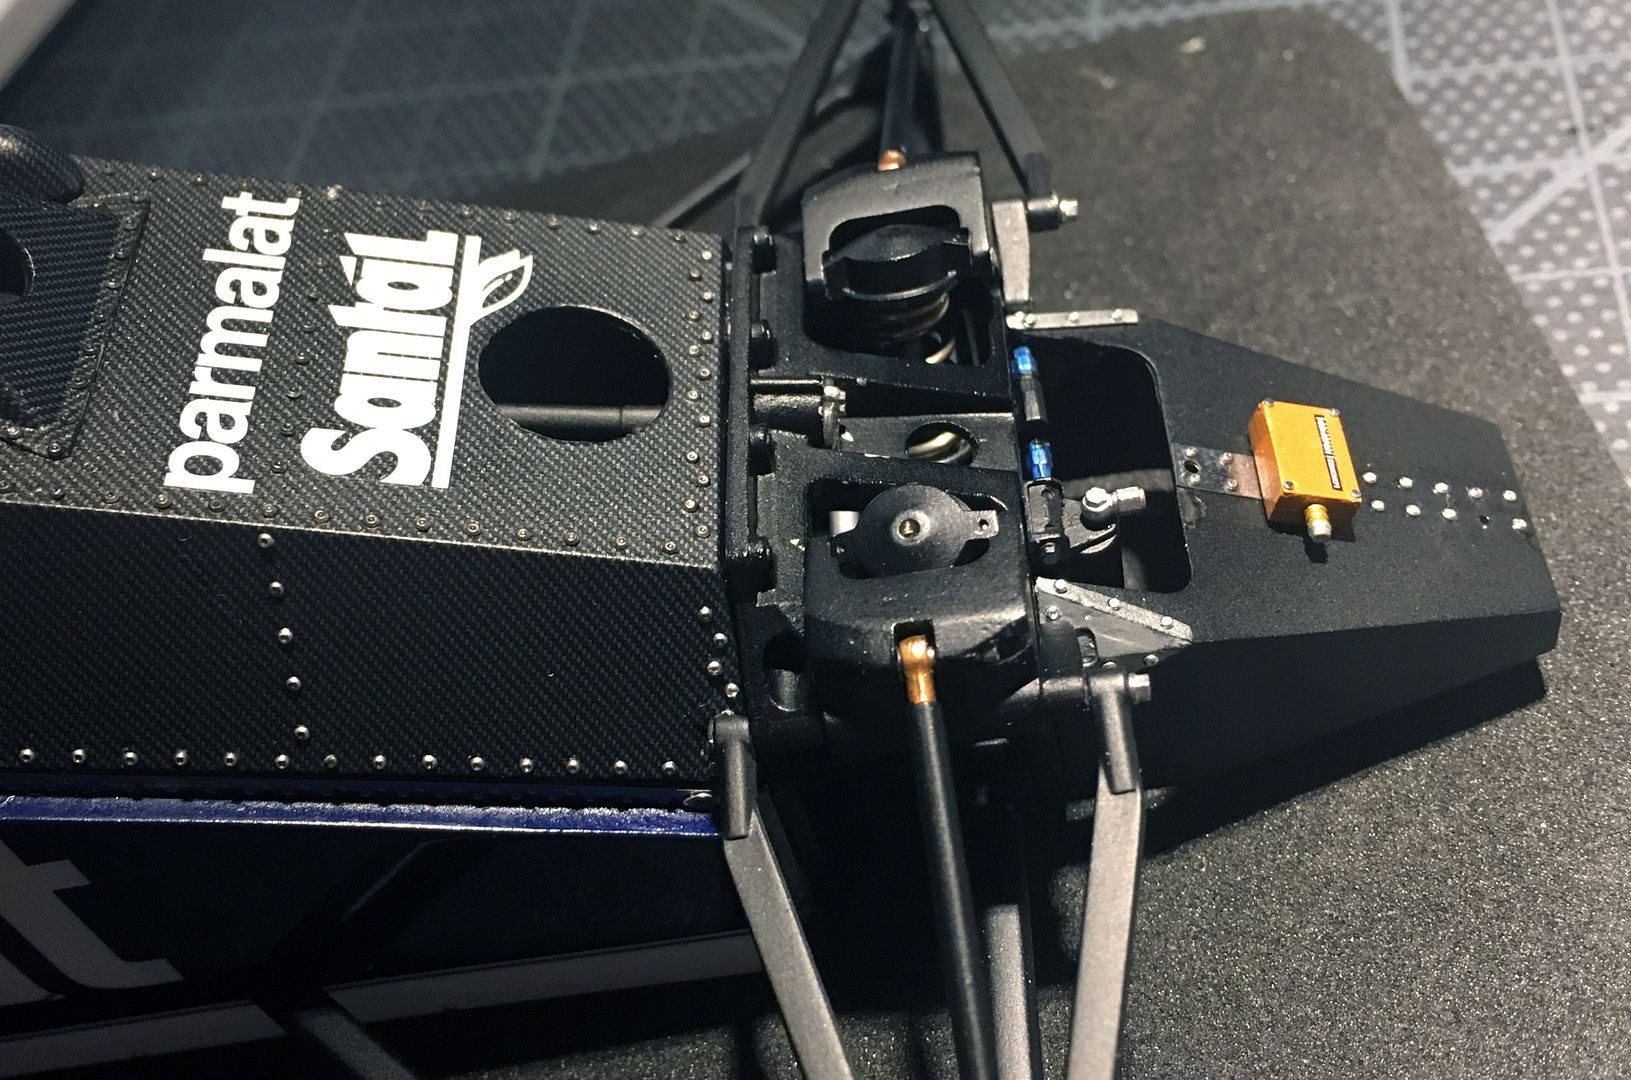
Some heat shielding. I think I'll dull this down a bit - it is very bright and 'fresh'.

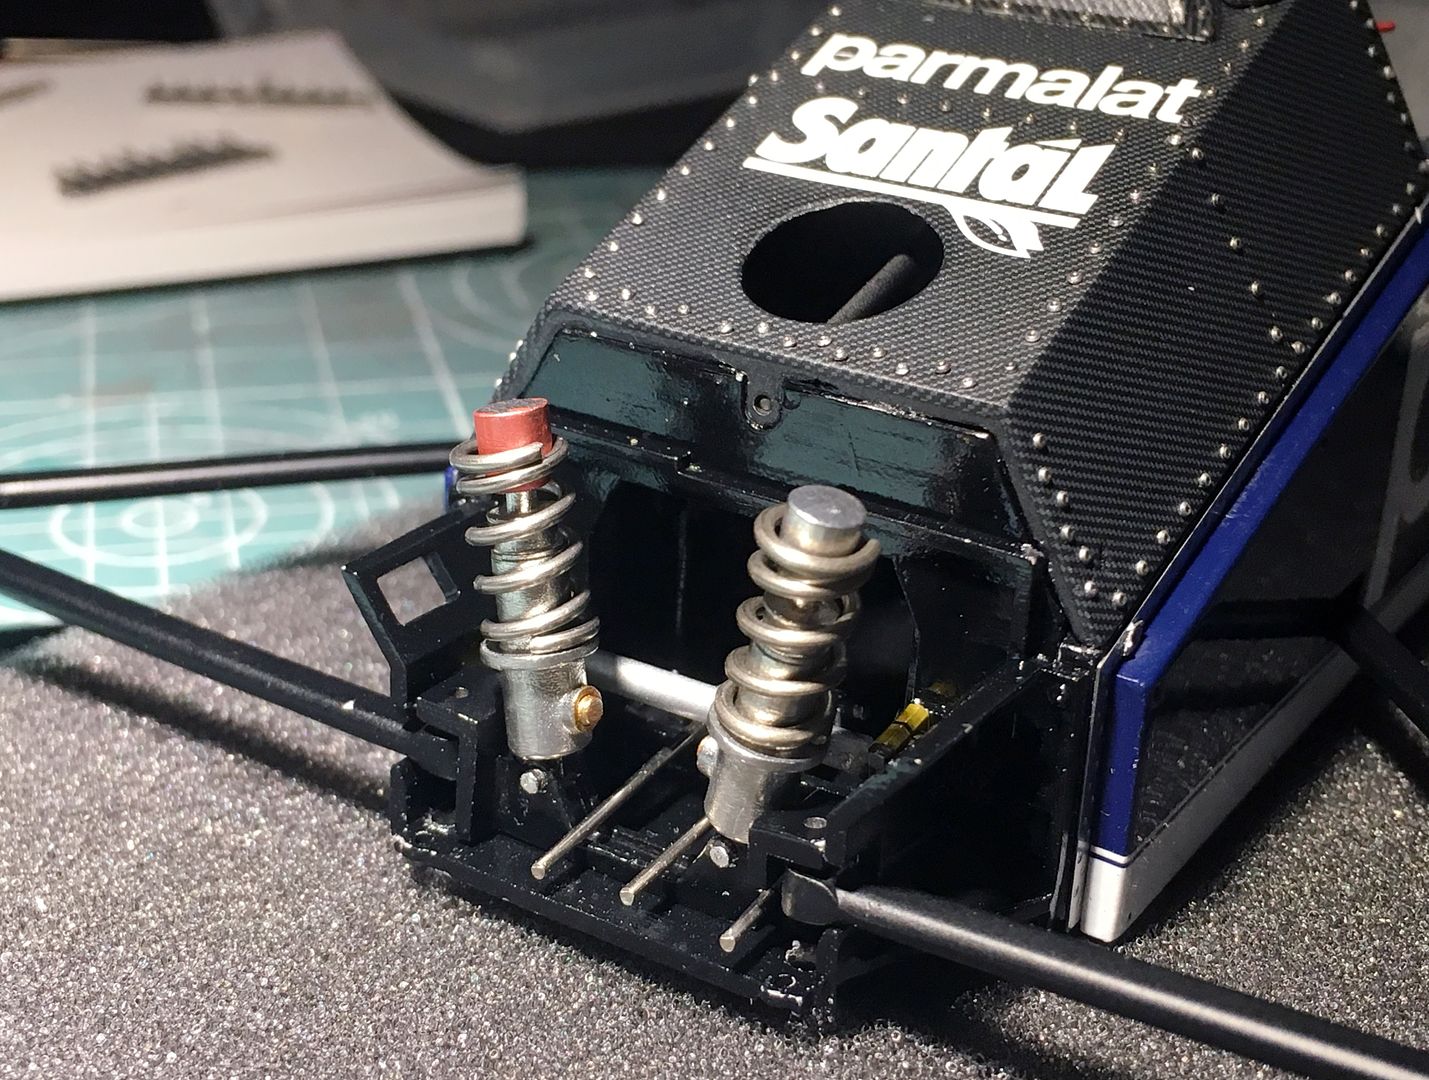
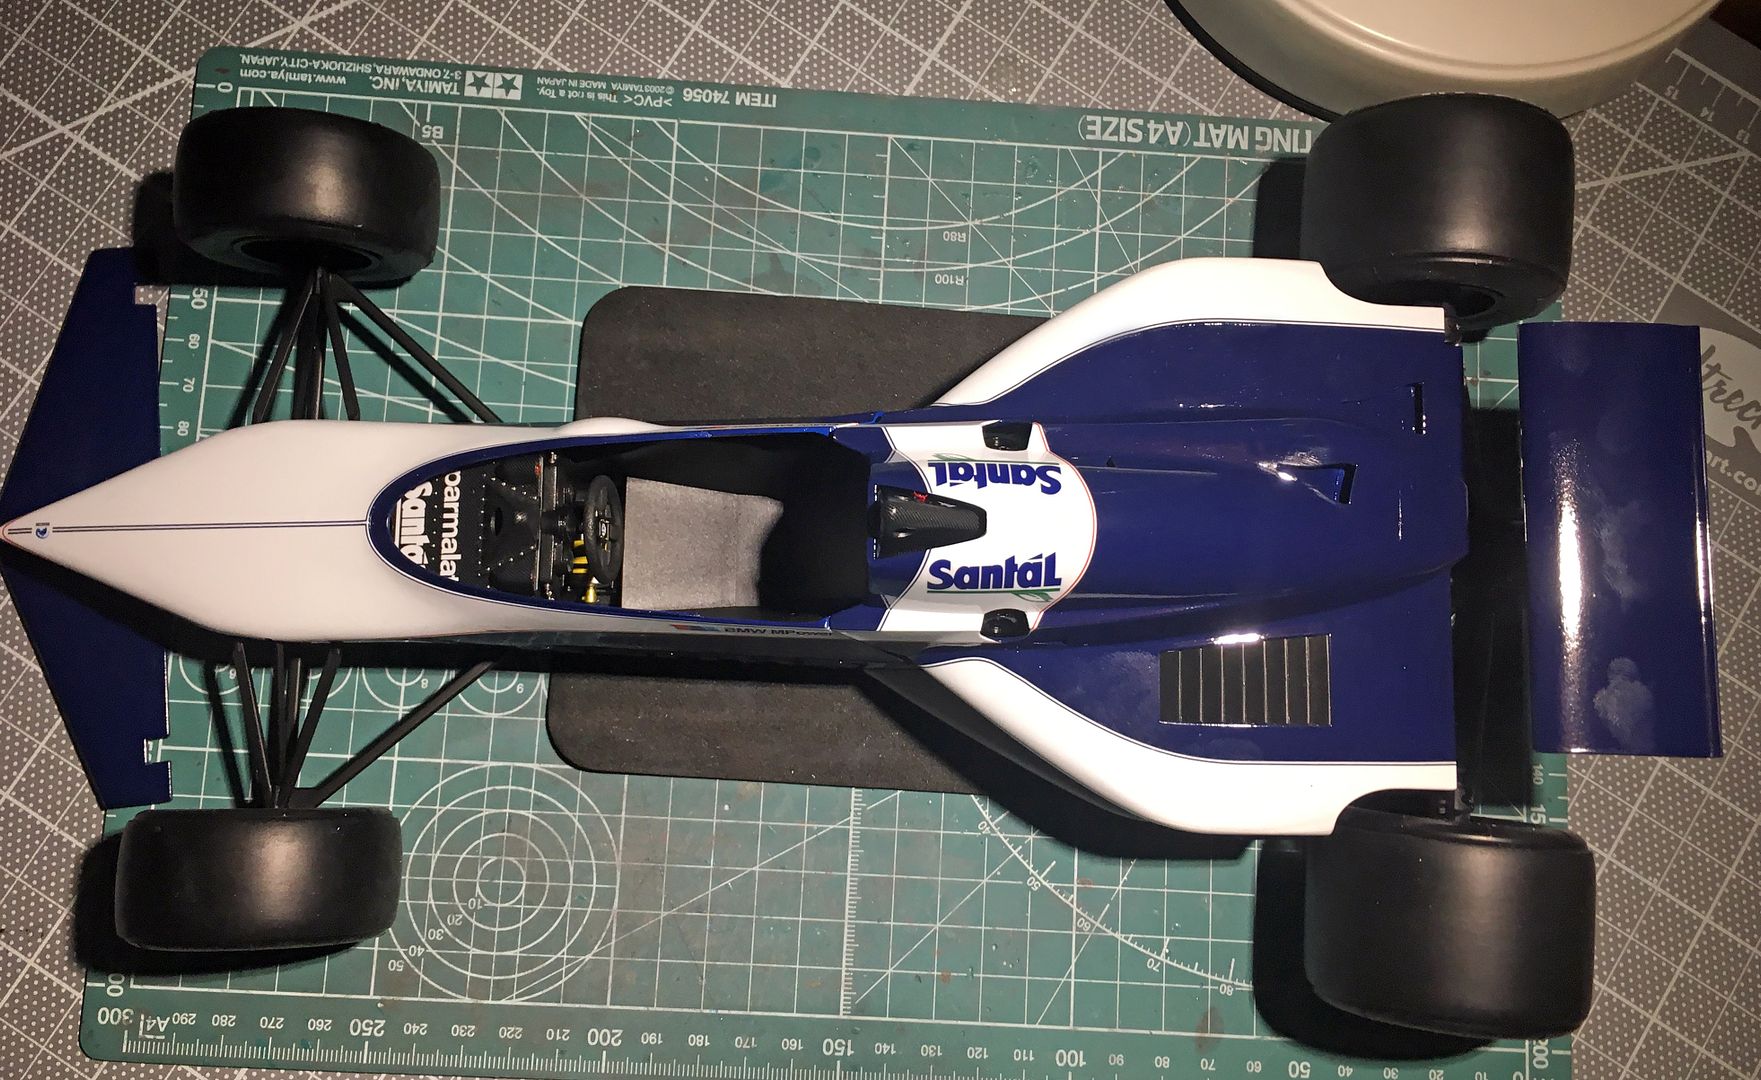
Nothing fixed together in these few shots - just placed!


HAD to play with those slicks - again, just placed, so ignore any weird gaps etc...

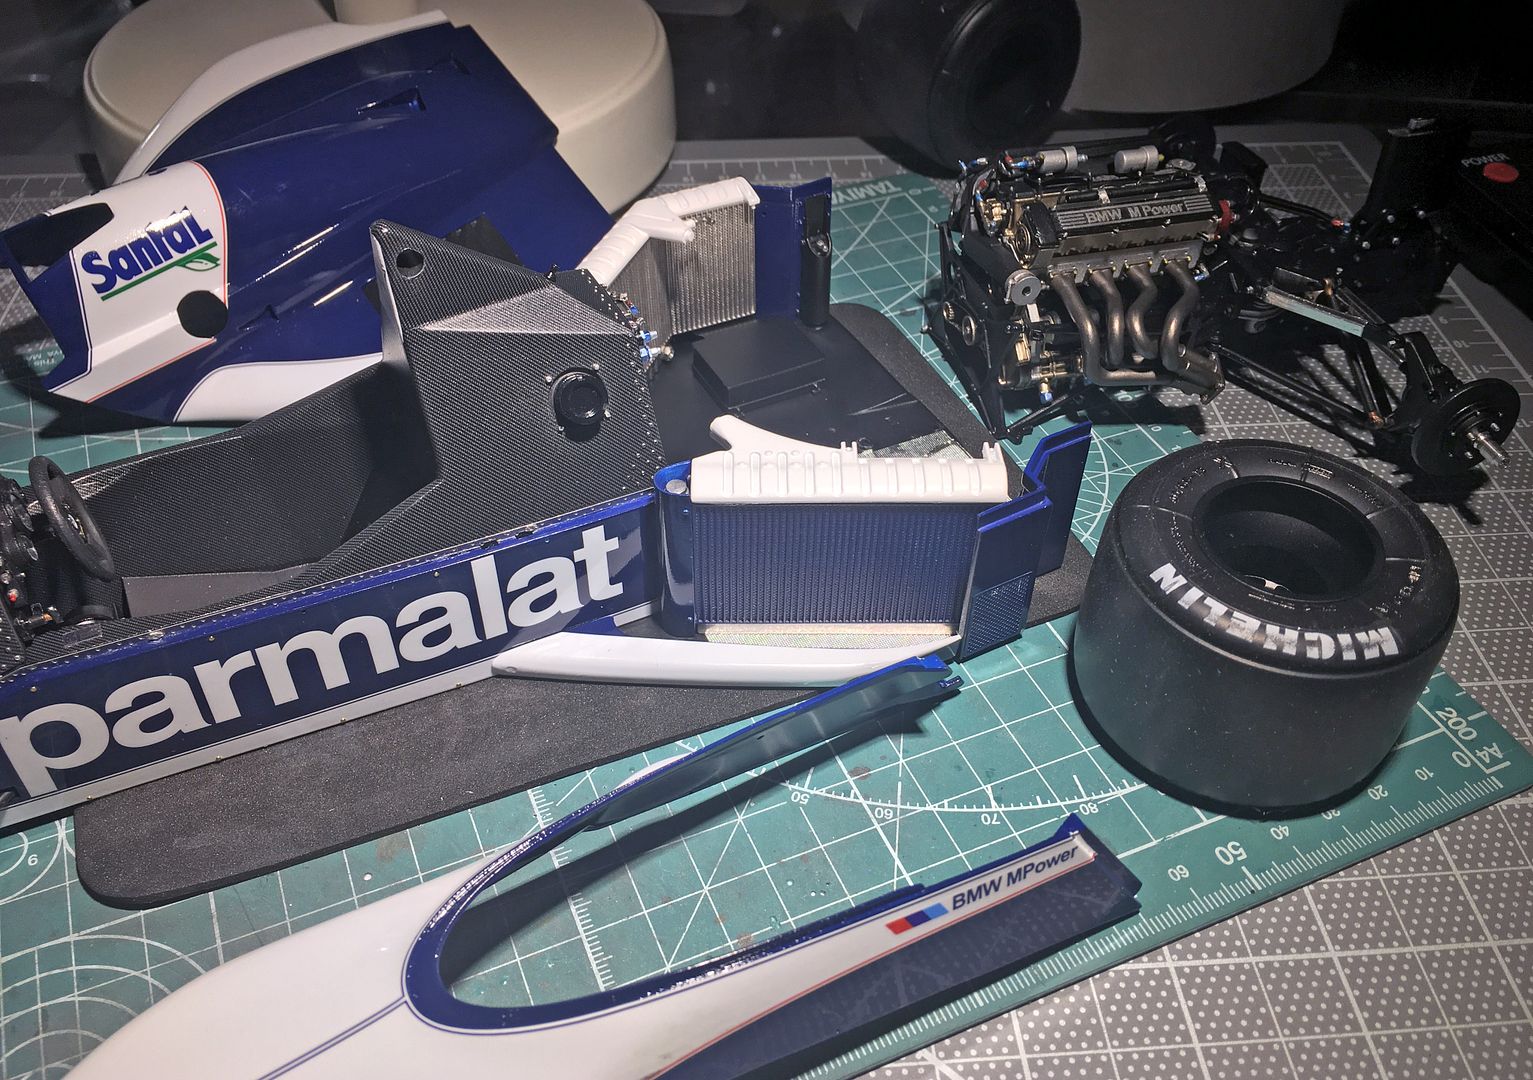
Some heat shielding. I think I'll dull this down a bit - it is very bright and 'fresh'.
Nothing fixed together in these few shots - just placed!
HAD to play with those slicks - again, just placed, so ignore any weird gaps etc...
Gassing Station | Scale Models | Top of Page | What's New | My Stuff