Airfix 1:72 Vulcan B.2
Discussion


Mark V GTD said:
Right - wrap around sounds like a very appropriate name for it! White should be much easier to handle. I do wonder what the thinking was behind the lower surface camou. Our area of expertise ends suddenly in 1945 so it’s a puzzle for me as it’s unheard of in the wartime period.
Yes, I think the RAF GR. designated aircraft: Tornados, Harriers and Jaguars (and Hawks too) had wrap-around schemes for low level stuff, where they could be manoevreing against a background of hills etc.Continued with fettling the main parts today - starting with the sink marks in the wings:
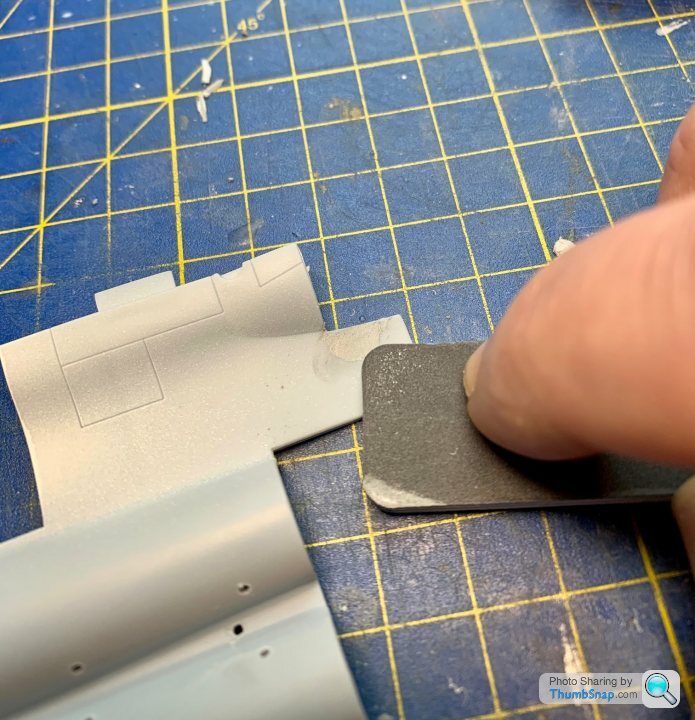
And filled a few gaps around the engine ancilliary intakes/oulets with Mr.Surfacer:
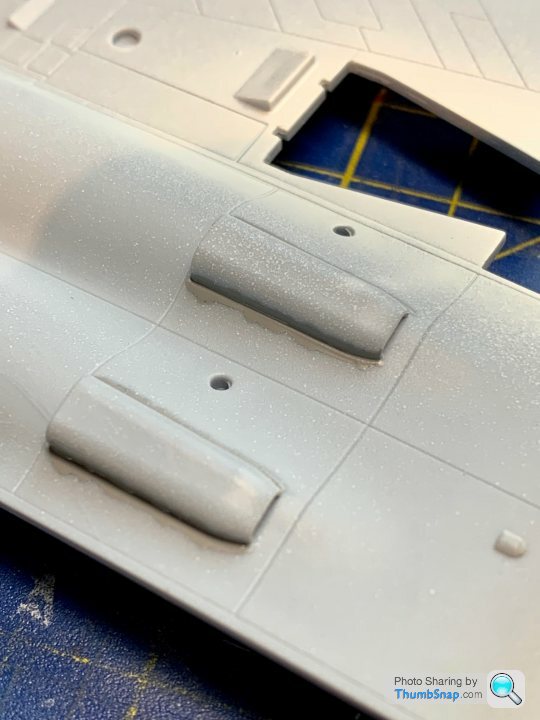
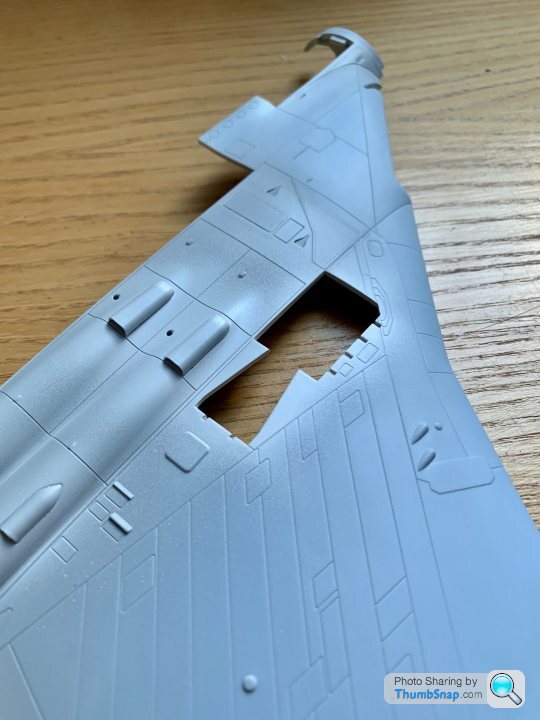
Then re-scribed the flatted joints around the hatch/bombing window:
I offset the lines a bit from the actual joint becasue it's always earsier to scribe plastic than filler. I use Dymo tape as a flexible guide:
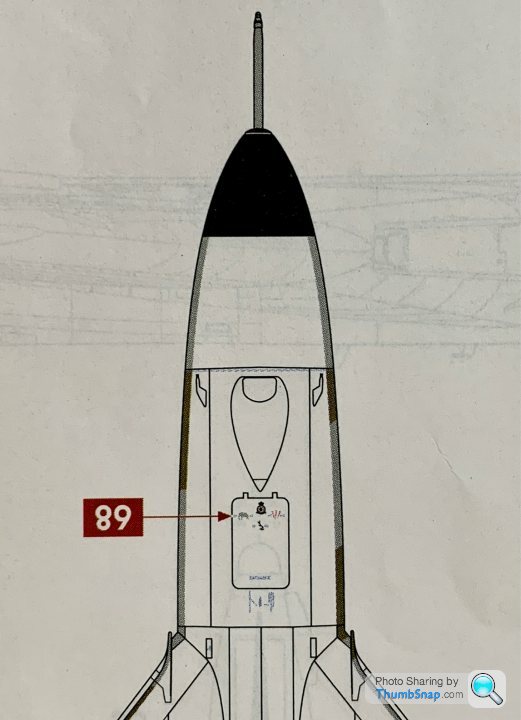
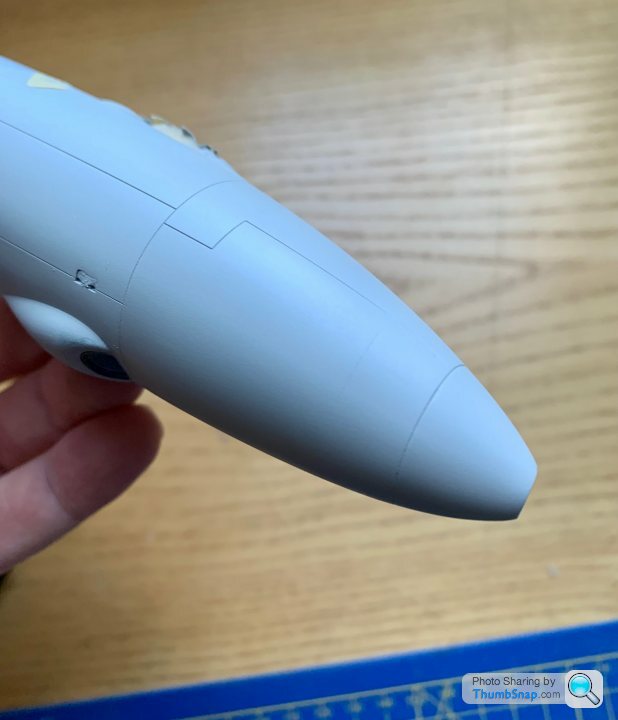
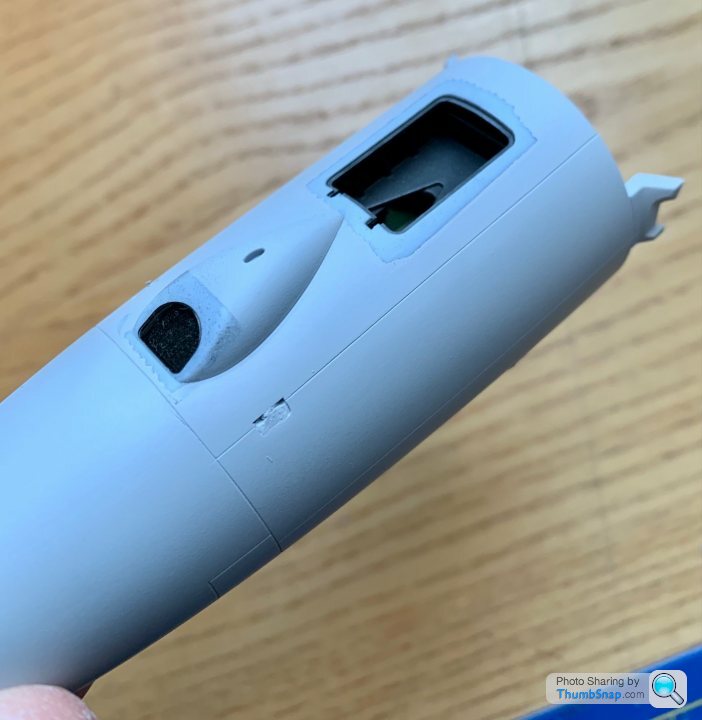
There's a panel line missing for the rear of the radome:
It's unfortunate becasue it needs to be a perfect vertical line in projection, ie parallel to the adjacent panel lines. It's tricky to get straight projections on a compound curved surface. I did it by eying up a rule on a grid, and dotting pencil onto the surface to coincide with the straight edge:
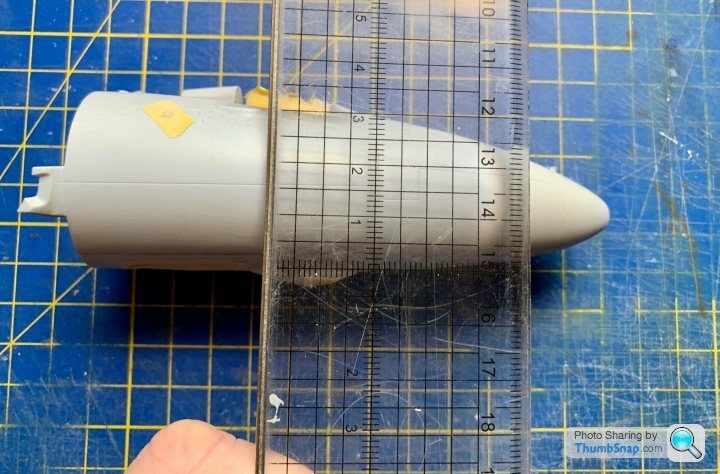
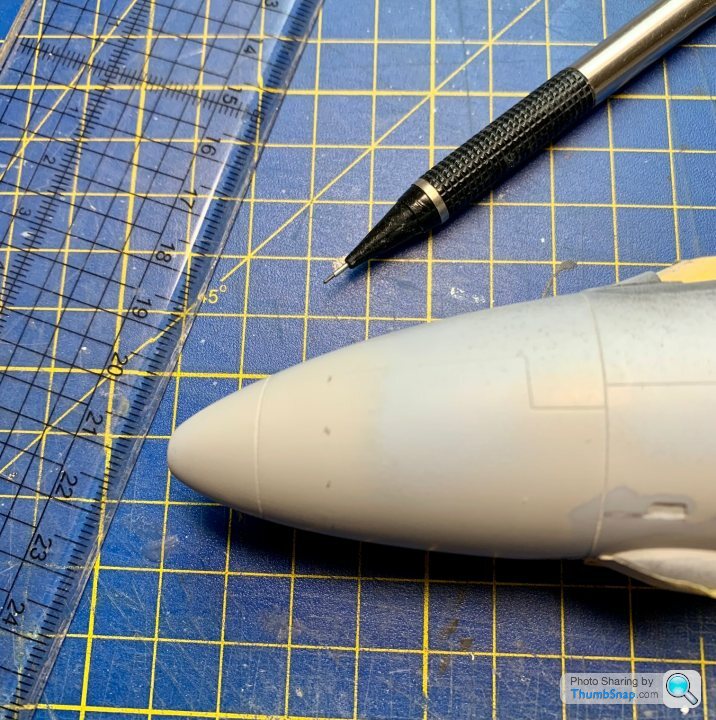

I did a very fine scribe becasue all it's for is a guide for masking. I want to make the mistakes now, rather than ruining the finished camo right at the end.
Both areas look OK under a coat of primer:
There are some gaps in the front faces of the main wheel bays, so I painted the sub-structure in that area, so that you won't see grey plastic if you happen to look inside there:
Similarly, painted the edges of the wheel bay and bomb-bay apertures, and will weather them to match the bays themselves:
The intakes are proving to be a nightmare to get flat, and to paint without getting sandpaper effects or runs, but once done, I can make a start on assembling the man bits.
And filled a few gaps around the engine ancilliary intakes/oulets with Mr.Surfacer:
Then re-scribed the flatted joints around the hatch/bombing window:
I offset the lines a bit from the actual joint becasue it's always earsier to scribe plastic than filler. I use Dymo tape as a flexible guide:
There's a panel line missing for the rear of the radome:
It's unfortunate becasue it needs to be a perfect vertical line in projection, ie parallel to the adjacent panel lines. It's tricky to get straight projections on a compound curved surface. I did it by eying up a rule on a grid, and dotting pencil onto the surface to coincide with the straight edge:
I did a very fine scribe becasue all it's for is a guide for masking. I want to make the mistakes now, rather than ruining the finished camo right at the end.
Both areas look OK under a coat of primer:
There are some gaps in the front faces of the main wheel bays, so I painted the sub-structure in that area, so that you won't see grey plastic if you happen to look inside there:
Similarly, painted the edges of the wheel bay and bomb-bay apertures, and will weather them to match the bays themselves:
The intakes are proving to be a nightmare to get flat, and to paint without getting sandpaper effects or runs, but once done, I can make a start on assembling the man bits.
spitfire-ian said:
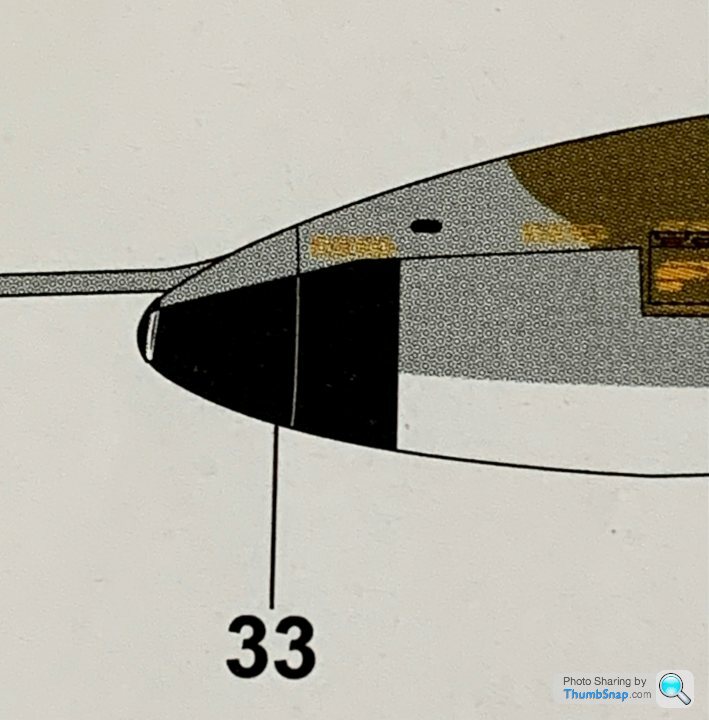
That panel line you scribed doesn’t actually run under the radome. It should only be on the top above the black section.
I’ll dig an image out to illustrate it.
Edited to add image:
That’s not actually the one I scribed, that one is formed when you glue the nose cone onto the fuselage. Good call though - I’ll now fill the lower trench up and flat it back. That will leave it correct, and the one I lightly scribed will still be right as a guide for masking the black part.I’ll dig an image out to illustrate it.
Edited to add image:
Edited by spitfire-ian on Saturday 1st January 16:17
Cheers.
Taita said:
Holy hell how did I miss this thread until now!
Looks absolutely great - keep up the good work and I can live vicariously through you!
Can't wait to see it fully completed and painted!
Thanks! I’m looking forward to completing this one too.Looks absolutely great - keep up the good work and I can live vicariously through you!
Can't wait to see it fully completed and painted!
My modelling projects are quite eclectic, and I often end up with several projects at a time, so the threads get a bit disjointed, and have long gaps between updates…I usually get there in the end though.
Thanks for sharing this for two reasons, I'm a massive fan of the Vulcan but also used to build Tamiya kits back in the late 80's.
Not sure where you are based but there is a Vulcan, XM655, that you can visit at Wellesbourne airfield in Warwickshire.
https://xm655.com
It is currently the only original Vulcan that is serviceable. XH558 had lots of changes made to fit in with CAA regulations.
Not sure where you are based but there is a Vulcan, XM655, that you can visit at Wellesbourne airfield in Warwickshire.
https://xm655.com
It is currently the only original Vulcan that is serviceable. XH558 had lots of changes made to fit in with CAA regulations.
curvature said:
Thanks for sharing this for two reasons, I'm a massive fan of the Vulcan but also used to build Tamiya kits back in the late 80's.
Not sure where you are based but there is a Vulcan, XM655, that you can visit at Wellesbourne airfield in Warwickshire.
https://xm655.com
It is currently the only original Vulcan that is serviceable. XH558 had lots of changes made to fit in with CAA regulations.
Thanks for that. The Airfix kit is based on XM594, currently on display at Newark Air Museum. I think there are a couple of kit errors (such as the missing middle windscreen wiper and the extra u/c locking bar on the main gear which wouldn't have been present on an active aircraft) which resulted from using that airframe as a reference. Anyway, I guess that's a good enough excuse to go and visit again (I'm just up the road in Sheffield).Not sure where you are based but there is a Vulcan, XM655, that you can visit at Wellesbourne airfield in Warwickshire.
https://xm655.com
It is currently the only original Vulcan that is serviceable. XH558 had lots of changes made to fit in with CAA regulations.
dr_gn said:
curvature said:
Thanks for sharing this for two reasons, I'm a massive fan of the Vulcan but also used to build Tamiya kits back in the late 80's.
Not sure where you are based but there is a Vulcan, XM655, that you can visit at Wellesbourne airfield in Warwickshire.
https://xm655.com
It is currently the only original Vulcan that is serviceable. XH558 had lots of changes made to fit in with CAA regulations.
Not sure where you are based but there is a Vulcan, XM655, that you can visit at Wellesbourne airfield in Warwickshire.
https://xm655.com
It is currently the only original Vulcan that is serviceable. XH558 had lots of changes made to fit in with CAA regulations.
Thanks for that. The Airfix kit is based on XM594, currently on display at Newark Air Museum. I think there are a couple of kit errors (such as the missing middle windscreen wiper and the extra u/c locking bar on the main gear which wouldn't have been present on an active aircraft) which resulted from using that airframe as a reference. Anyway, I guess that's a good enough excuse to go and visit again (I'm just up the road in Sheffield).
r159 said:
dr_gn said:
curvature said:
Thanks for sharing this for two reasons, I'm a massive fan of the Vulcan but also used to build Tamiya kits back in the late 80's.
Not sure where you are based but there is a Vulcan, XM655, that you can visit at Wellesbourne airfield in Warwickshire.
https://xm655.com
It is currently the only original Vulcan that is serviceable. XH558 had lots of changes made to fit in with CAA regulations.
Not sure where you are based but there is a Vulcan, XM655, that you can visit at Wellesbourne airfield in Warwickshire.
https://xm655.com
It is currently the only original Vulcan that is serviceable. XH558 had lots of changes made to fit in with CAA regulations.
Thanks for that. The Airfix kit is based on XM594, currently on display at Newark Air Museum. I think there are a couple of kit errors (such as the missing middle windscreen wiper and the extra u/c locking bar on the main gear which wouldn't have been present on an active aircraft) which resulted from using that airframe as a reference. Anyway, I guess that's a good enough excuse to go and visit again (I'm just up the road in Sheffield).
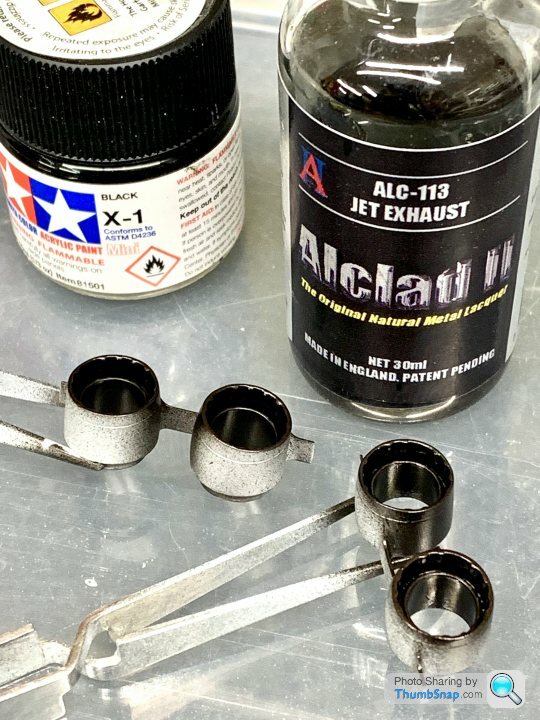
Tried flatting and re-painting the intakes tonight, but still finding it impossible to get a good finish. Light coats cause a sandpaper finish with the paint drying as it hits the furthest recesses of the pipes, any thicker coats cause runs. Factor in that white doesn’t cover too well and it’s very frustrating.
Anyway, got the insides of the jet pipes primed with gloss black, followed by Alclad “Jet Exhaust”:
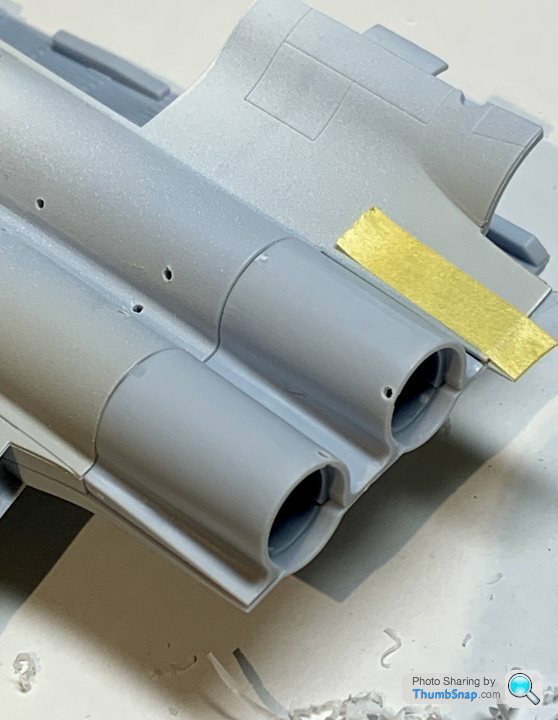
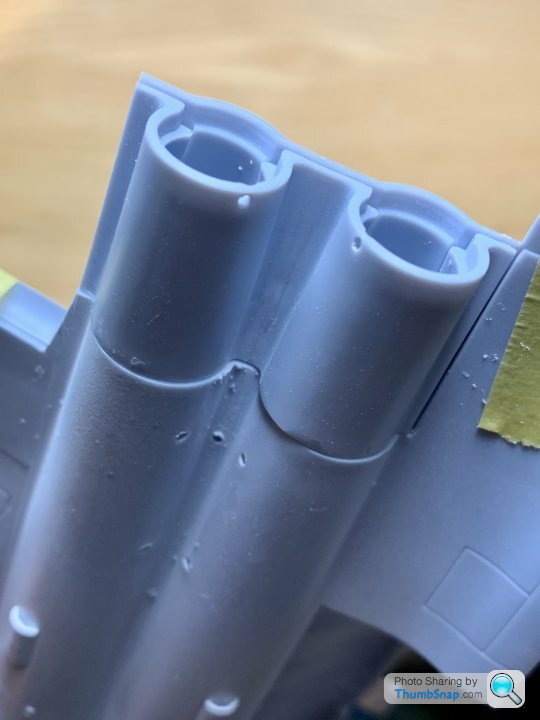
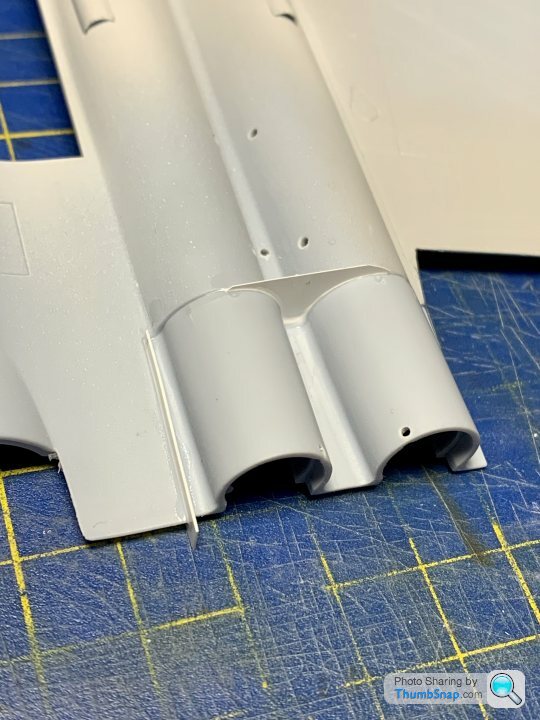
Still plenty to do to get them looking right, but I want to do all the weathering on the pipes at once. With that in mind, I had a look again at the wing halves, where the exhausts fit onto the fairings. Not a great fit:

And even after a load of scraping and flatting of the mating surfaces, it’s still going to be a challenge to get all that seamlessly blended together:

The other side is a bit better:
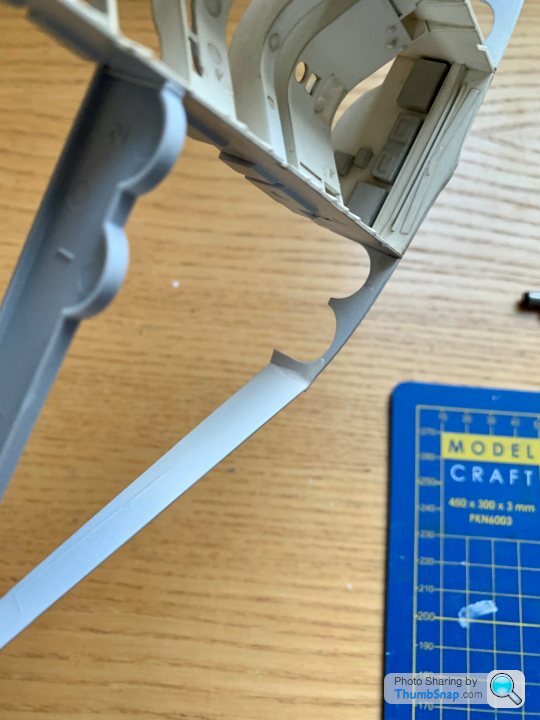
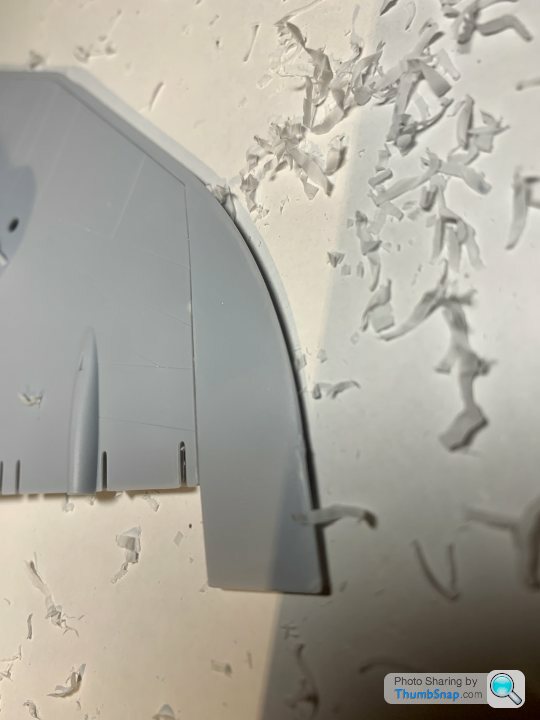
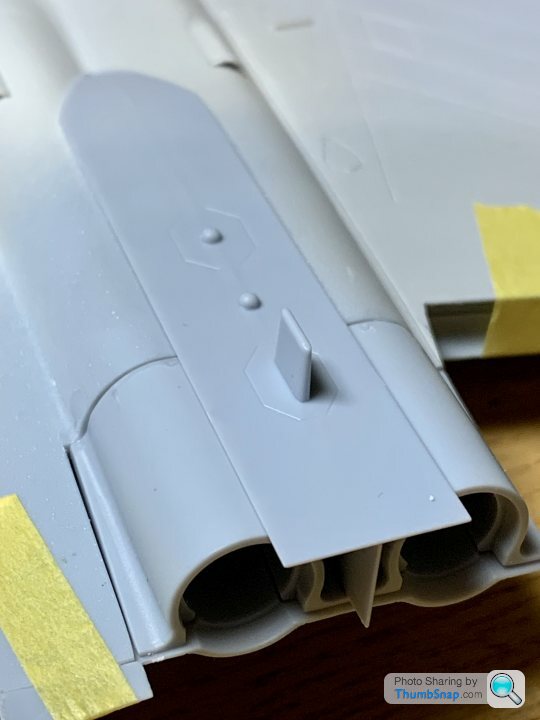
The wing tip undersides also stand proud where they mate together:

But after a hell of a lot of scraping and flatting:

They now fit quite well:
So feels like more shavings made than visible progress, and more to come, but I’ll get there in the end.
Anyway, got the insides of the jet pipes primed with gloss black, followed by Alclad “Jet Exhaust”:
Still plenty to do to get them looking right, but I want to do all the weathering on the pipes at once. With that in mind, I had a look again at the wing halves, where the exhausts fit onto the fairings. Not a great fit:
And even after a load of scraping and flatting of the mating surfaces, it’s still going to be a challenge to get all that seamlessly blended together:
The other side is a bit better:
The wing tip undersides also stand proud where they mate together:
But after a hell of a lot of scraping and flatting:
They now fit quite well:
So feels like more shavings made than visible progress, and more to come, but I’ll get there in the end.
IJWS15 said:
Out of curiosity googled Blue Steel and there is one at the museum near Coventry airport.
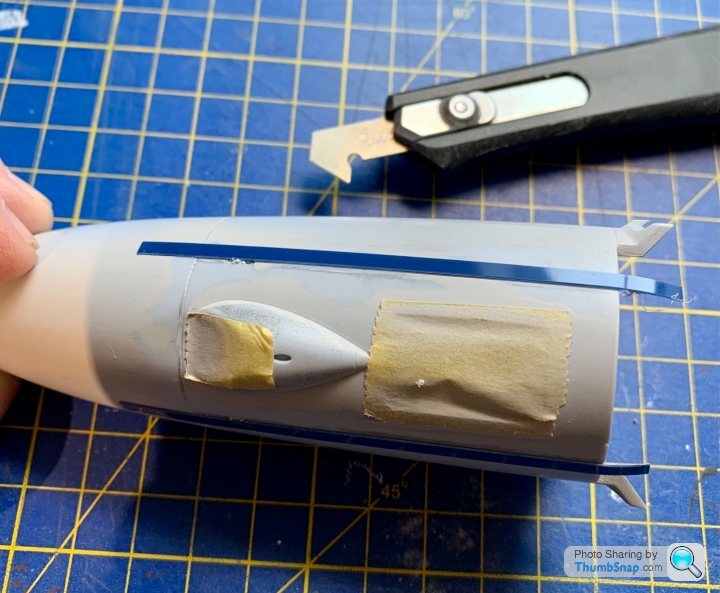
Looks like it’s on a different trolley to the one I want unfortunately.Still struggling with the fit of various parts. The port side lower jet pipe end seems distorted. I’ve ended up deviating from the instructions, because I don’t think it’ll be possible to fit this part later without even worse mis-alignment than this best-fit:
It literally fits where it touches, so I’ve had to fill the gaps with plasticard, and liberally dosed with liquid cement:
I’ll have to cut, fill and flat it all to profile once fully cured. At least I remembered that there’s a fairing that covers up about half the mess, so not a total disaster:
What potentially is a disaster waiting to happen is the fuselage spine joint. The parts seem distorted, and can be just about wrestled into place - and only then using engineering clamps and locking forceps:
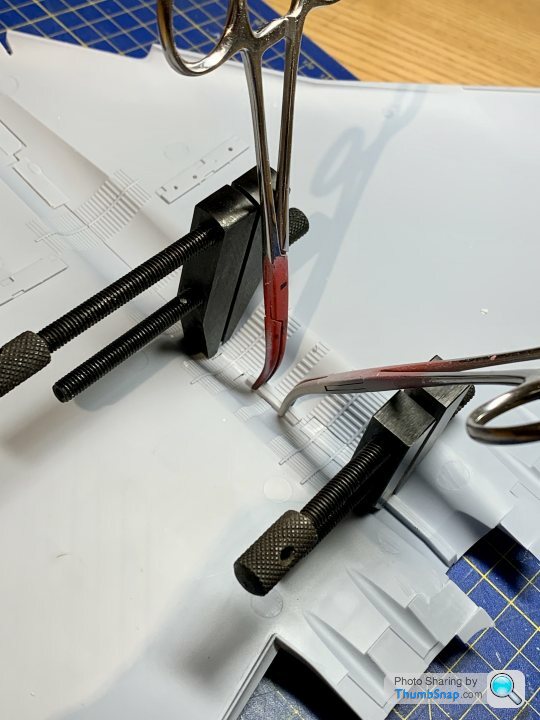
I’m concerned that if I now bond the join, it might spring apart at some point after painting, which would scrap the model.
If I flat the edges to fit without pressure, I’m concerned other parts such as the fin and bomb bay arches then won’t fit. There are two tabs visible in the bomb bay, with corrugation detail on them. Strange because it looks like they should be intentionally proud of the rest of the roof in that area. There are gaps all around them, and I’m not looking forward to filling and fettling them.
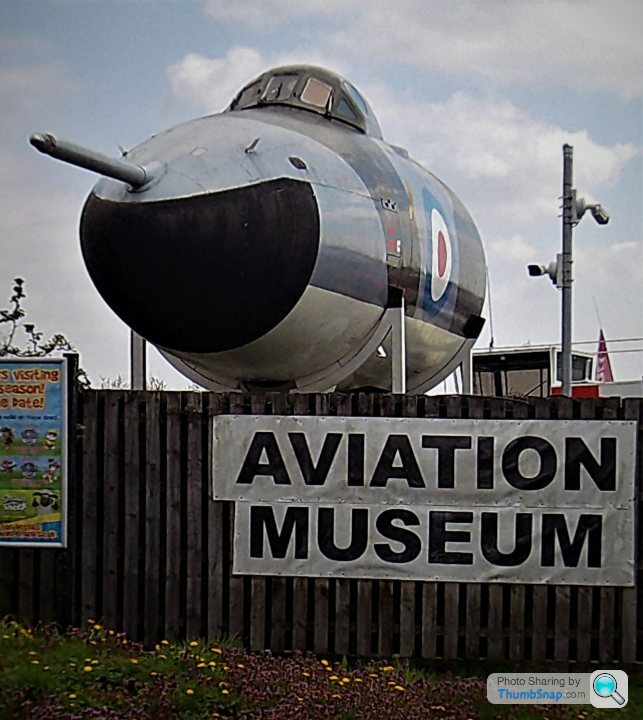
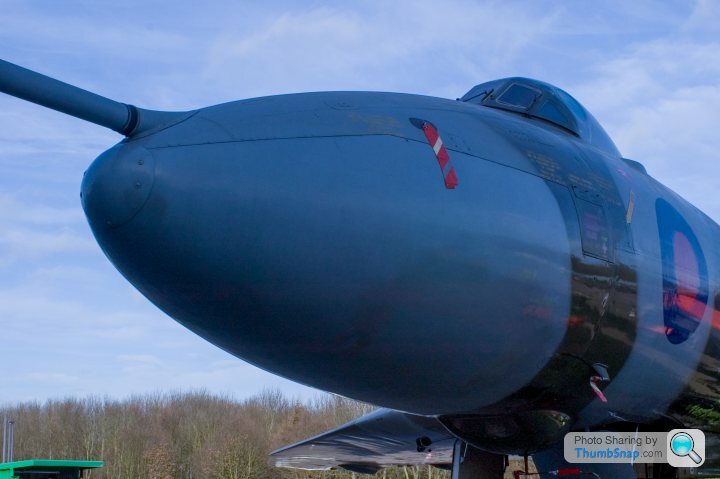
Not sure if this image is of any use to you. It's the nose section of Vulcan B.2MRR XH537 at Bournemouth Aviation Museum.
https://www.bamhurn.org/exhibits/avro-vulcan/
https://www.google.com/maps/@50.7759202,-1.843393,...
Edited by yellowjack on Thursday 6th January 23:36
yellowjack said:
Not sure if this image is of any use to you. It's the nose section of Vulcan B.2MRR XH537 at Bournemouth Aviation Museum.
https://www.bamhurn.org/exhibits/avro-vulcan/
https://www.google.com/maps/@50.7759202,-1.843393,...
Edited by yellowjack on Thursday 6th January 23:36

Gassing Station | Scale Models | Top of Page | What's New | My Stuff