Paper Ship: Bismarck, HMV, 1:250
Discussion


Regbuser said:
Great work :thumb:
Thanks!On to the port side. I’ve had to re-position the cranked section at the stern. Luckily I’ve got a spare hull piece, so made a good one from two:


Also joined the multiple hull armour sides:

And scored the returns. Also visible is one of the datums, which is a piece of tape with a line drawn on it. There’s another on the deck. Trying to adjust fit by trial end error without them is a frustrating exercise…and even with them, there are inevitably some small errors.

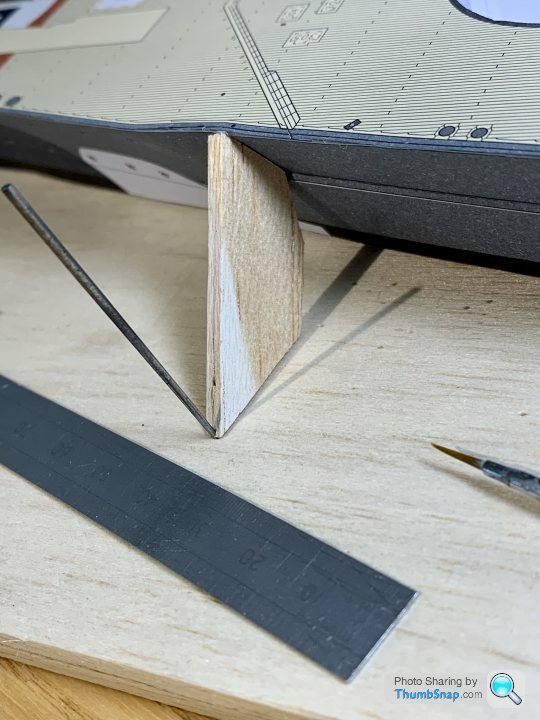
I then needed to think about bracing the almost complete stbd. side, to clamp the balsa and hull sides against, but without damage. I opted to pin a balsa strip to the waterline profile:

Then I could spin the board around and glue and clamp the balsa packing along the belt:
Followed by dry-fitting the sides as a check, and to hopefully give them a bit of a set overnight ready for the next stages. These are the tapered infill pieces at each end of the armour return, and then finally fitting the hull sides:

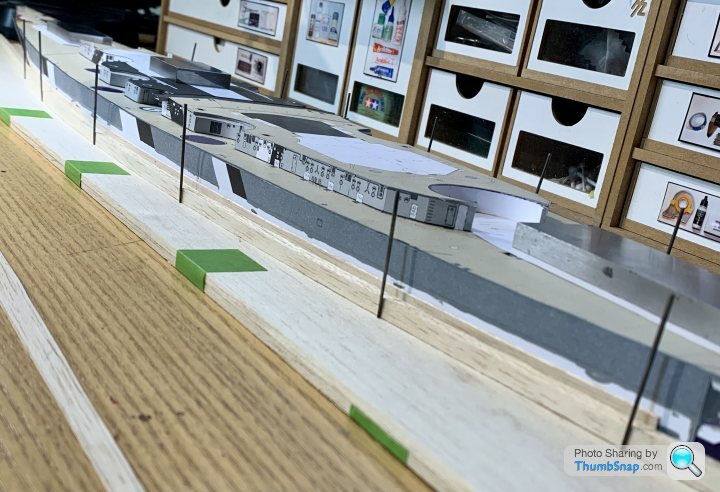
Now back on it’s temporary shelf:

Continued with preparation for finally glueing the port sides on. Started by cutting and attaching the armour end returns, and backing-up with paper:


Put to one side to dry:

Also random things like blocking the balsa in black, behind where the armour joint will be:
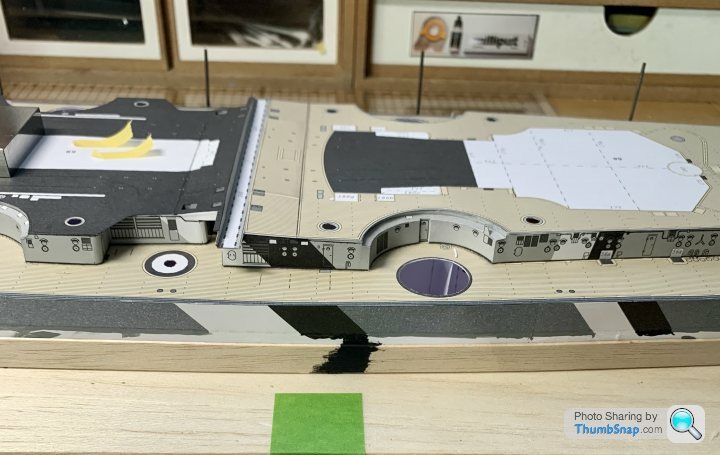
Looks a mess, but will be covered up. Simple things like this, planned in advance, will massively reduce the visual effect of any slight mis-match between the final joint (which can’t be done with any accuracy before attaching the two ends).
Put to one side to dry:
Also random things like blocking the balsa in black, behind where the armour joint will be:
Looks a mess, but will be covered up. Simple things like this, planned in advance, will massively reduce the visual effect of any slight mis-match between the final joint (which can’t be done with any accuracy before attaching the two ends).

I know - it might seem like this is the same post over and over again, but this thing has so many parts that all need setting just right so that they act as datums for the adjoining parts.
So the port front side fixed:

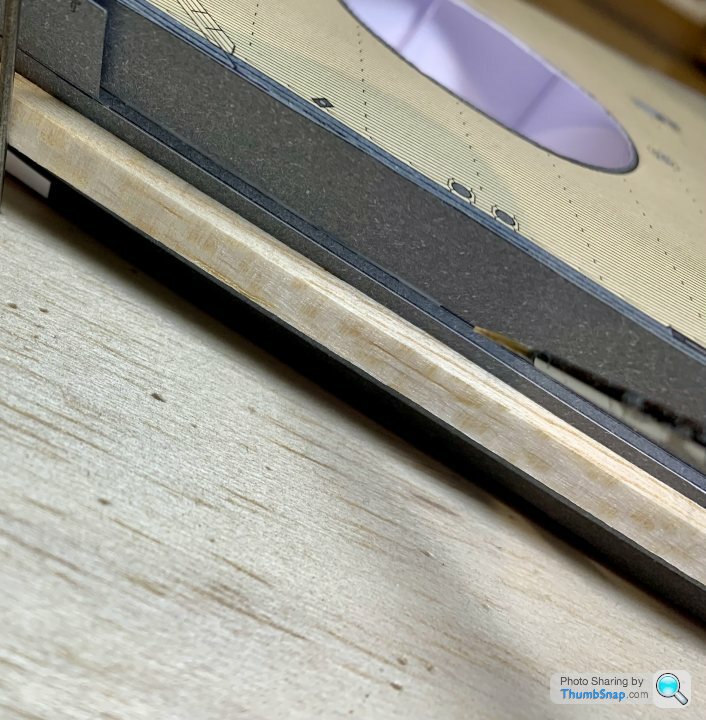
and profile clamped:

Then once set, on to the port side stern piece:

After all that, I’d missed scoring the return fillet, so got creative with some plasticard while propping the hull on its side with some rather nice velvet-esque covered boxes I’ve got lying around:

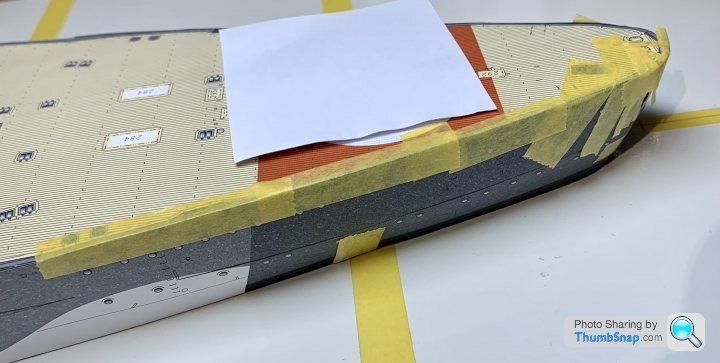
Then made a tape bracket to stretch the side, and mark to cut the excess to match the front chevron:

Then used an oblique cut to hopefully get an invisible join again:

Glue, stretch, tape, clamp:


Tomorrow, attention turns to getting the bow and stern joints vertical and as invisible as possible.
So the port front side fixed:
and profile clamped:
Then once set, on to the port side stern piece:
After all that, I’d missed scoring the return fillet, so got creative with some plasticard while propping the hull on its side with some rather nice velvet-esque covered boxes I’ve got lying around:
Then made a tape bracket to stretch the side, and mark to cut the excess to match the front chevron:
Then used an oblique cut to hopefully get an invisible join again:
Glue, stretch, tape, clamp:
Tomorrow, attention turns to getting the bow and stern joints vertical and as invisible as possible.
Edited by dr_gn on Tuesday 18th January 21:41
Regbuser said:
Sterling work!
Would you estimate that once the hull is done, the rest is, erm, plain sailing?
Thanks. I’m hoping so, although some of the sub-structures are a similar size to a couple of my other complete ships. The upcoming structures are mainly straight sided or faceted, so shouldn’t pose much of a problem. I’d estimate another year of work though.Would you estimate that once the hull is done, the rest is, erm, plain sailing?


Murph7355 said:
Incredible stuff.
Is the glue permanent? I'd be frightened to death of it degrading.
It does cross my mind a lot! Then again it’s just water soluble PVA. The first paper ship I used it on was 2014, and that’s still fine, so I can’t see it being an issue. Same with model aircraft canopies over many years - it’s pretty strong stuff. Is the glue permanent? I'd be frightened to death of it degrading.
If the models were to get damp, then it would dissolve, but with a paper ship, getting that degree of damp would be disastrous anyway. There’s also a coat of varnish over everything, which I guess helps to seal against moisture a bit.
dr_gn said:
It does cross my mind a lot! Then again it’s just water soluble PVA. The first paper ship I used it on was 2014, and that’s still fine, so I can’t see it being an issue. Same with model aircraft canopies over many years - it’s pretty strong stuff.
If the models were to get damp, then it would dissolve, but with a paper ship, getting that degree of damp would be disastrous anyway. There’s also a coat of varnish over everything, which I guess helps to seal against moisture a bit.
I remember building roman dioramas at school out of paper and thinking it was a bugger to get lines straight, paper not to wrinkle and glue to set.If the models were to get damp, then it would dissolve, but with a paper ship, getting that degree of damp would be disastrous anyway. There’s also a coat of varnish over everything, which I guess helps to seal against moisture a bit.
The skill and patience on display here is off the scale.
Do you think you'll ever sell them - your models are better than museum quality IMO.
Murph7355 said:
dr_gn said:
It does cross my mind a lot! Then again it’s just water soluble PVA. The first paper ship I used it on was 2014, and that’s still fine, so I can’t see it being an issue. Same with model aircraft canopies over many years - it’s pretty strong stuff.
If the models were to get damp, then it would dissolve, but with a paper ship, getting that degree of damp would be disastrous anyway. There’s also a coat of varnish over everything, which I guess helps to seal against moisture a bit.
I remember building roman dioramas at school out of paper and thinking it was a bugger to get lines straight, paper not to wrinkle and glue to set.If the models were to get damp, then it would dissolve, but with a paper ship, getting that degree of damp would be disastrous anyway. There’s also a coat of varnish over everything, which I guess helps to seal against moisture a bit.
The skill and patience on display here is off the scale.
Do you think you'll ever sell them - your models are better than museum quality IMO.
I found wrinkling is only an issue on large, un-supported parts (that's why I scrapped the first attempt). I now use UHU on parts like that - it's not water based, so doesn't soak in as easily. PVA is fine for any smaller parts, or assemblies that are stiff enough not to deform too much.
I don't know what will happen to my models - I guess they will end up either in a box in one of my kids' lofts, or in the bin like I guess the majority do. By that time I will be past caring I suppose. Either way I will have had a lot of pleasure in building them and going to shows with my son.


Moved on to the bows, and the anchor recesses. These are made up of two curved and faceted parts:

Took a lot of figuring out that 79b and 79c are marked wrongly on the instructions:

After cutting out, scoring, and painting the edges, I followed usual procedure and taped and glued the recess in place:

Followed by the stiffener (should form a radiussed edge, but I guess one of the approximations required for design in paper):

Then the hawser pipe, which rolls to oblique ends:
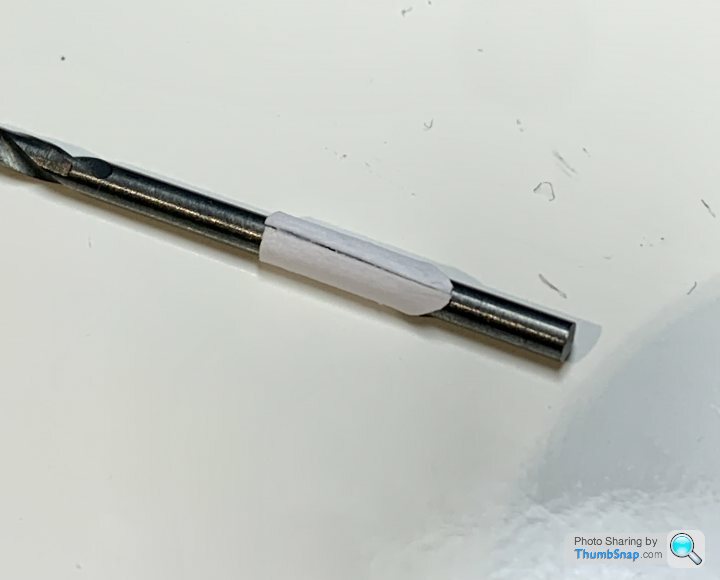
It’s going to take some fiddling and luck not to loose it forever on installation:

Still a lot of doubled-up parts to get right, around the recesses:

Other side should go quicker now I’ve figured out how it goes together.
Took a lot of figuring out that 79b and 79c are marked wrongly on the instructions:
After cutting out, scoring, and painting the edges, I followed usual procedure and taped and glued the recess in place:
Followed by the stiffener (should form a radiussed edge, but I guess one of the approximations required for design in paper):
Then the hawser pipe, which rolls to oblique ends:
It’s going to take some fiddling and luck not to loose it forever on installation:
Still a lot of doubled-up parts to get right, around the recesses:
Other side should go quicker now I’ve figured out how it goes together.
AlfaCool said:
Im just here to say i always love your builds. Your patience and exactness of components is top notch Doc.
This paper modelling malarkey is such a test for the sanity and something i know i could not do well enough for me to be happy with.
But crack on Sir we are watching.
Appreciate your comments, thanks.This paper modelling malarkey is such a test for the sanity and something i know i could not do well enough for me to be happy with.
But crack on Sir we are watching.
Some kits I end up hating and just want to be over as soon as possible, others I find very therapeutic - like this one, at least now that the hull’s nearly done!
I’ve already bought this one to build next:


It’s a bit smaller than than this Bismarck, but just as complex. The hull seems far simpler though. I saw the ship in dock in Hamburg a few years back - pretty impressive.
I am wathing your builds with total respect to the stamina, patience,
creativity to overcome design / manufacturing flaws and the various challenges arising with the material(s).
Even if "building" is more satiyfying to you than "looking at" or "presenting" your models,
Do some of them really go in the bin ?
Would be quite fitting for the Bismarck (sunk on the first outing) but I would think a model of that scale,
and perfection, could fetch some money from a "collect only" buyer ?
Profit could go in your model-stuff fund or maybe to a charity like RNLI ?
€dit : Holy crapp, I just did a quick search and this came up :
https://www.ebay.com/itm/174928595928?hash=item28b...
Benni said:
I am wathing your builds with total respect to the stamina, patience,
creativity to overcome design / manufacturing flaws and the various challenges arising with the material(s).
Even if "building" is more satiyfying to you than "looking at" or "presenting" your models,
Do some of them really go in the bin ?
Would be quite fitting for the Bismarck (sunk on the first outing) but I would think a model of that scale,
and perfection, could fetch some money from a "collect only" buyer ?
Profit could go in your model-stuff fund or maybe to a charity like RNLI ?
€dit : Holy crapp, I just did a quick search and this came up :
https://www.ebay.com/itm/174928595928?hash=item28b...
Thanks Benni. No, none of the finished models go in the bin, someone asked what would happen to them when I snuff it, and I said I suppose they would be thrown out, or end up in someone's loft. I've thrown away a few models mid-build, because I'd made a mistake I couldn't correct, but always got another and finished then in the end. In general, kits from quality manufacturers like Eduard and Tamiya are fine, and are enjoyable builds.creativity to overcome design / manufacturing flaws and the various challenges arising with the material(s).
Even if "building" is more satiyfying to you than "looking at" or "presenting" your models,
Do some of them really go in the bin ?
Would be quite fitting for the Bismarck (sunk on the first outing) but I would think a model of that scale,
and perfection, could fetch some money from a "collect only" buyer ?
Profit could go in your model-stuff fund or maybe to a charity like RNLI ?
€dit : Holy crapp, I just did a quick search and this came up :
https://www.ebay.com/itm/174928595928?hash=item28b...
That Bismarck you linked to looks like a plastic kit, and it's smaller and less detailed than my paper version. Even so, the hourly rate for the builder can't be much, especially if you subtract initial kit cost, materials and overheads from the final price. I've seen a few "Pro built" models on EBay, and some individuals who make custom-built kits for people, but I fail to see how it can be a viable business for what they charge.
Continued with detail work on the bows - fitted the hawser pipe, and formed the small cutouts at either side:

There is a doubler plate that fits over everything, eventually:
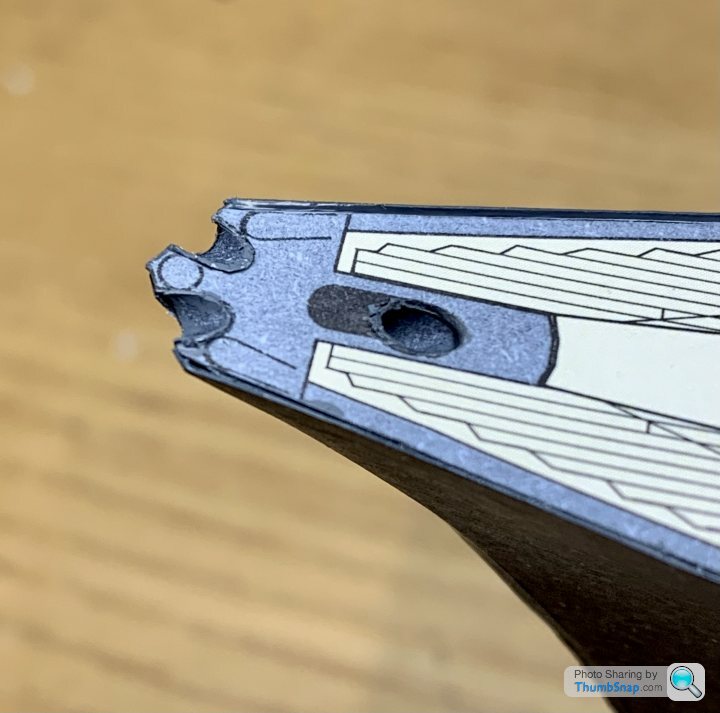
The pipe fitted ok, and kept itself fairly round. Good job, because the front anchor shank and shackle have to pass through it eventually:

Also started on the port side anchor recess. Began by painting out the location lines:

The fillet piece will cover any gaps in the structure behind, but I’ll do that tomorrow when the first parts are secure.
There is a doubler plate that fits over everything, eventually:
The pipe fitted ok, and kept itself fairly round. Good job, because the front anchor shank and shackle have to pass through it eventually:
Also started on the port side anchor recess. Began by painting out the location lines:
The fillet piece will cover any gaps in the structure behind, but I’ll do that tomorrow when the first parts are secure.
Continued this evening with some of the bow details. There's a separate panel to make the deck double thickness under the main anchor chains, and then a further two doubled pieces to reinforce the area around the anchor recesses. There's also a small doubled panel that fits around the hawser pipe bell mouth:

I applied cyano along the visible edges of the cut-out reinforcements, to get rid of the laminations, then painted grey:

Then attached to the deck doubler plate:

Then, after carefully aligning the deck doubler (and the missing swastika I painted on), dotted PVA underneath, and weighted down with slip gauges:
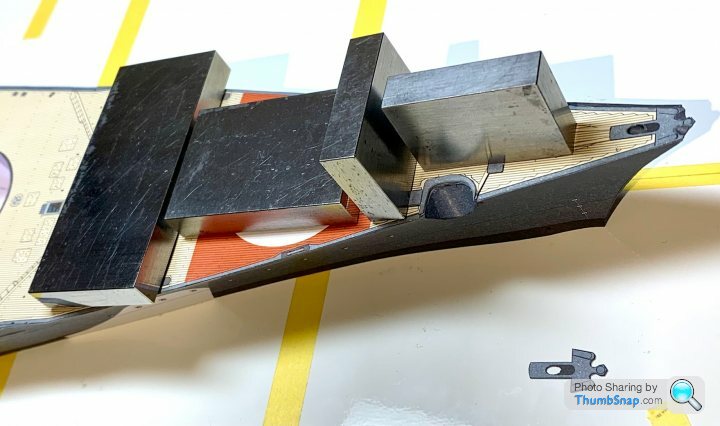
And wicked dilute PVA around the periphery to stop it lifting;

Then added the hawser doubler:

That pretty much covers the basic structure of the bows:

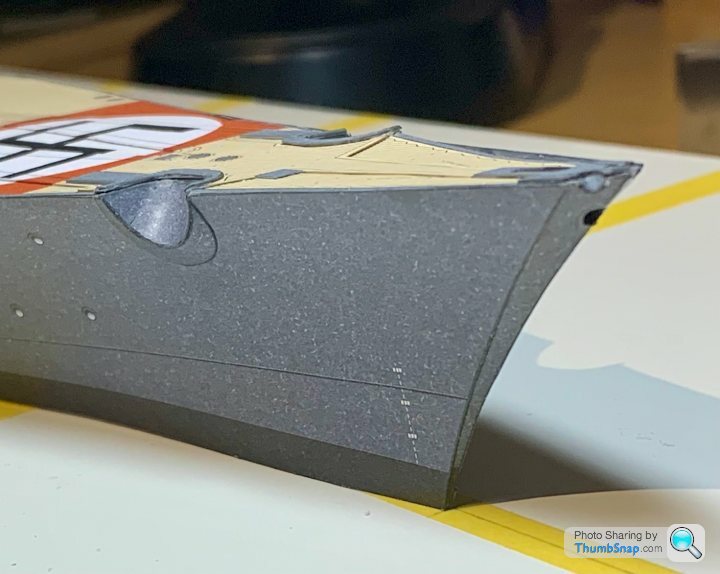
The main anchors will cover the small gaps around the recesses. Might add some more PVA anyway, but no big deal either way.
I applied cyano along the visible edges of the cut-out reinforcements, to get rid of the laminations, then painted grey:
Then attached to the deck doubler plate:
Then, after carefully aligning the deck doubler (and the missing swastika I painted on), dotted PVA underneath, and weighted down with slip gauges:
And wicked dilute PVA around the periphery to stop it lifting;
Then added the hawser doubler:
That pretty much covers the basic structure of the bows:
The main anchors will cover the small gaps around the recesses. Might add some more PVA anyway, but no big deal either way.
Gassing Station | Scale Models | Top of Page | What's New | My Stuff