Christmas Group Build?
Discussion


I just spent 2 hours on this P.O.S. Spitfire. Re-scribed the engine cover line:
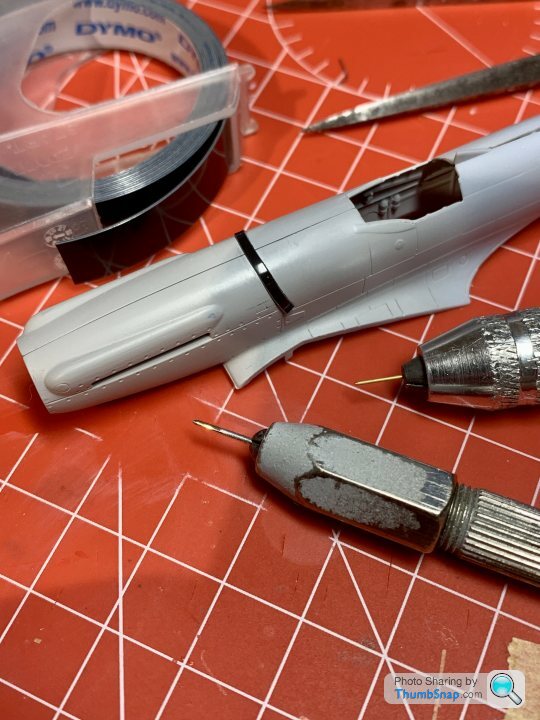
Which looked fine, but making the cover fastener dimples proved too much - they looked OK but the spacing was wrong:
So, more dissolved plastic, another day to let it set. Then it’ll need flatting, priming again and another go.
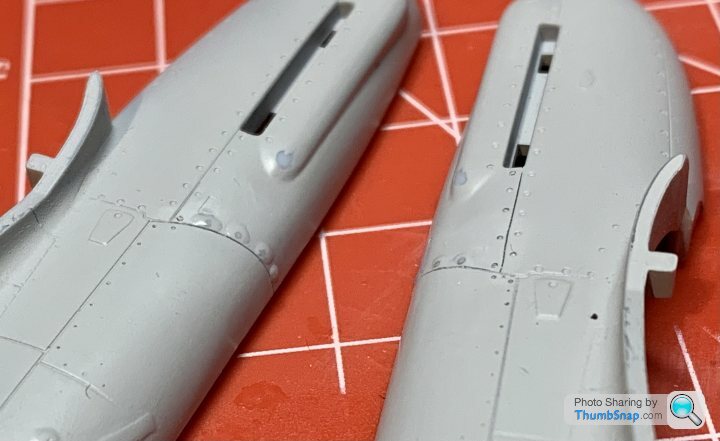
Moved on to the atrocious wheel wells to try and smooth the filled ejector pin marks, but it’s so confined in there it’s almost impossible to get right:
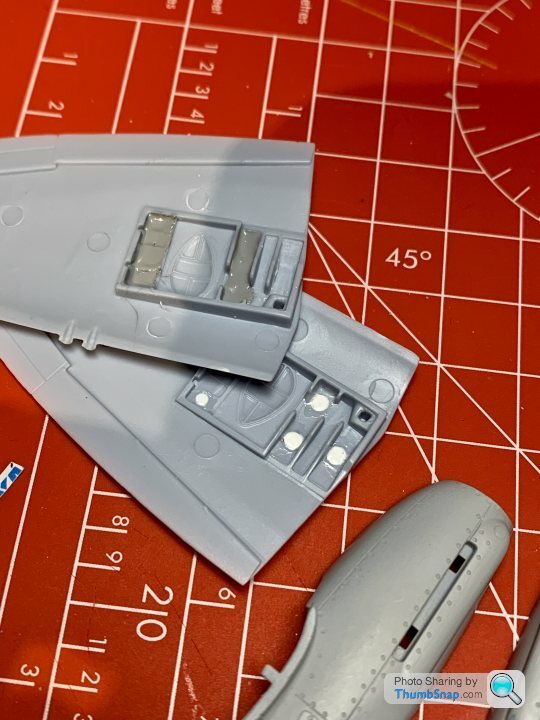
Short of scraping the whole lot away and making my own details from plastic card, I have no idea how to correct this.
So, like the Vulcan, an utterly miserable experience. I get the folks who say just finish it, but tbh I’d get no pleasure whatsoever from completing it without correcting the obvious errors. The irony of starting a group build thread and then probably not completing a model myself isn’t lost on me by the way.
Which looked fine, but making the cover fastener dimples proved too much - they looked OK but the spacing was wrong:
So, more dissolved plastic, another day to let it set. Then it’ll need flatting, priming again and another go.
Moved on to the atrocious wheel wells to try and smooth the filled ejector pin marks, but it’s so confined in there it’s almost impossible to get right:
Short of scraping the whole lot away and making my own details from plastic card, I have no idea how to correct this.
So, like the Vulcan, an utterly miserable experience. I get the folks who say just finish it, but tbh I’d get no pleasure whatsoever from completing it without correcting the obvious errors. The irony of starting a group build thread and then probably not completing a model myself isn’t lost on me by the way.
MBBlat said:
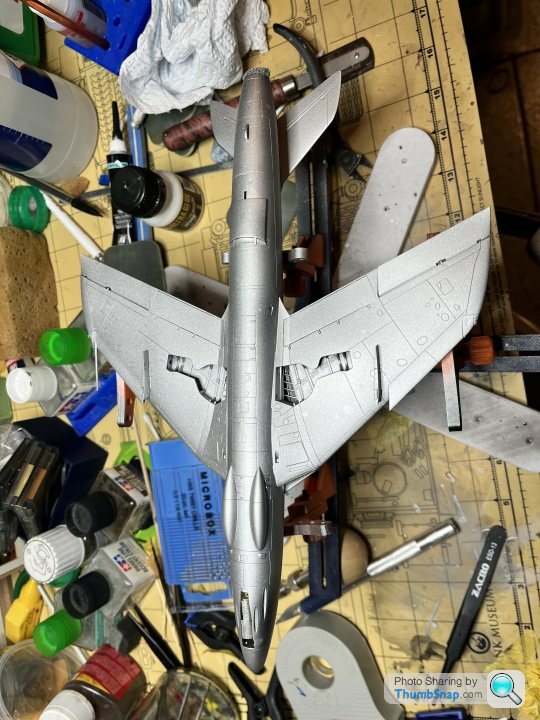
Underside painted in XF-16, may be a bit bright as although the instructions call out silver, and it was apparently dull aluminium, period photos seem to look more as a satin light grey.
I will let it dry overnight then start on the cammo tomorrow.
MBBlat said:
dr_gn said:
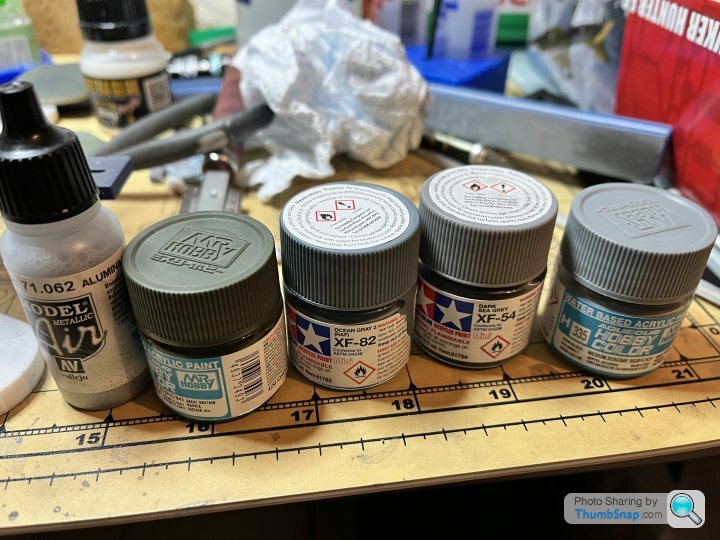
It’ll be “High Speed Silver”, which was basically aluminium colour that often looks like a dull grey in photos. I find XF-16 is a bit glitter-ball. Vallejo Air aluminium is my go-to paint for that type of thing, over coated with Matt varnish.
I like, read am actually capable of getting good results, Tamiya for airbrushing, plus I had XF-16 to hand and all my other aluminium paints are shinier. Just as an experiment I tried painting one of the spare rocket pods with Vallejo Air Aluminium - it may be me but I find it almost too thin.
Next problem is which grey to use, Mr Hobby 385 is the correct BS code but looks too light, XF-82 is too dark.
robemcdonald said:
dr_gn said:
robemcdonald said:
Looks spot-on.I need to seek an alternative for my next build
- that’s the only one that’s worked consistently well for me after trying pretty much everything.
robemcdonald said:
dr_gn said:
robemcdonald said:
dr_gn said:
robemcdonald said:
Looks spot-on.I need to seek an alternative for my next build
- that’s the only one that’s worked consistently well for me after trying pretty much everything.
It’s quite an old and I’m not exactly diligent when it comes to correct storage of my consumables, so I’ll just buy a new pot of the same. I have no doubt contaminated it over the last four or so years.
robemcdonald said:
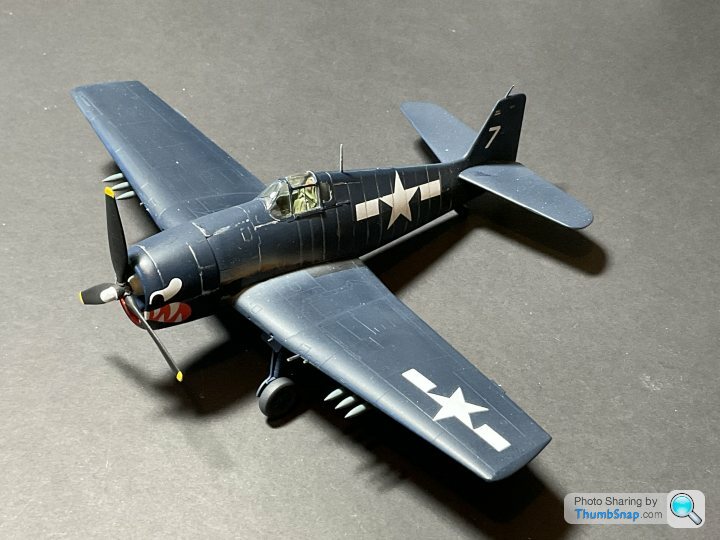
Well, it’s not my best work, but I’m calling it done.
It’s been nice to do a really quick build and not worrying too much about it looking rubbish.
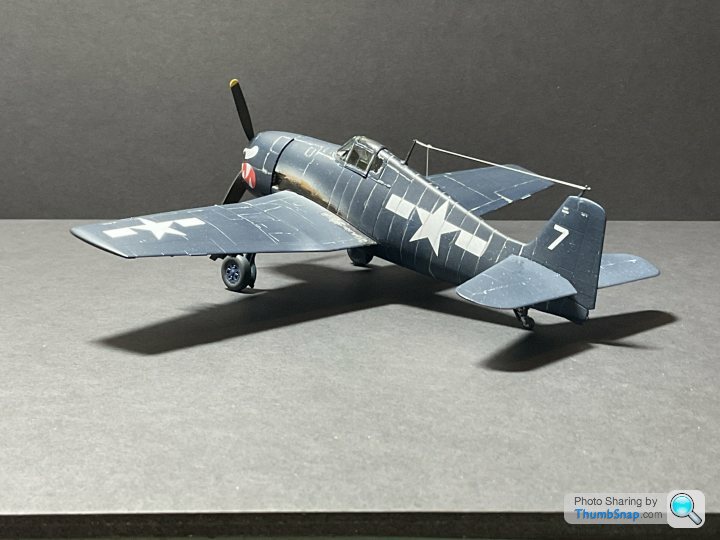

It looks brilliant. It’s been nice to do a really quick build and not worrying too much about it looking rubbish.
I’m still re-re-re-scribing the panel lines on the nose of mine.
I also noticed the control column is missing from the sprue, so yet another thing to make.
I made a huge mistake in picking an Airfix kit for a quick build. I never learn.
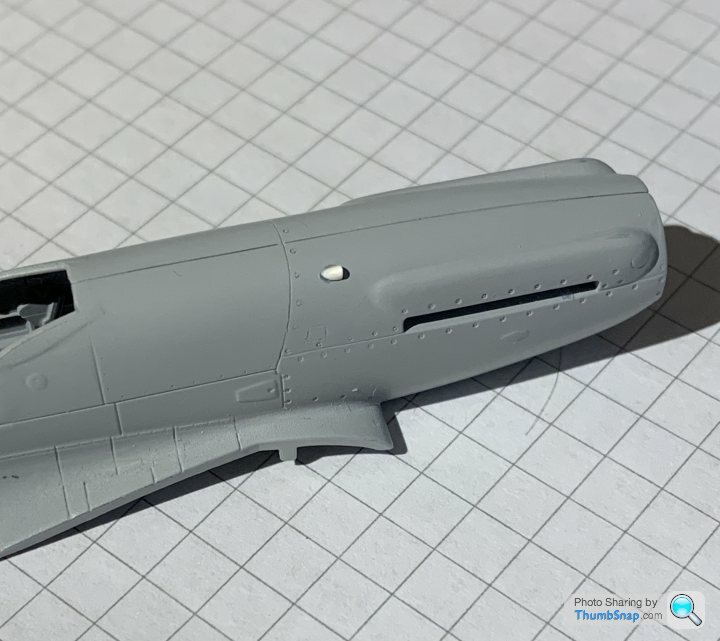
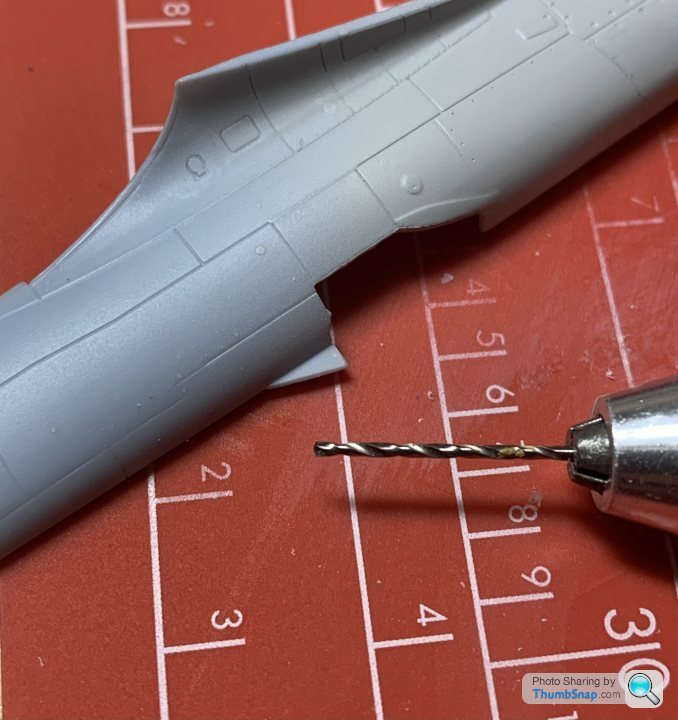
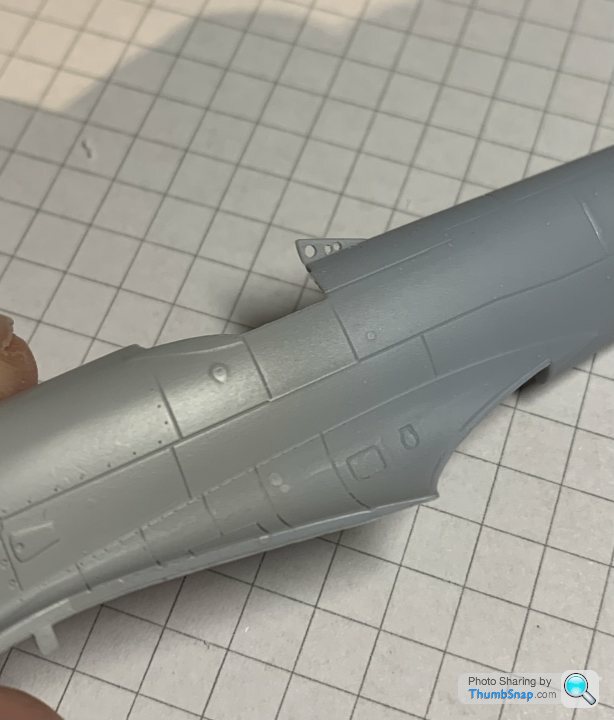
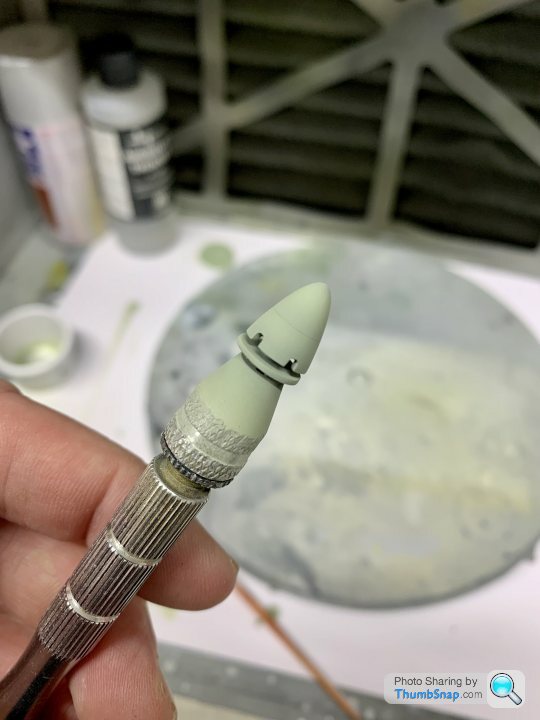
I’ve made a bit of progress - finally got the re-scribing done to a decent standard:

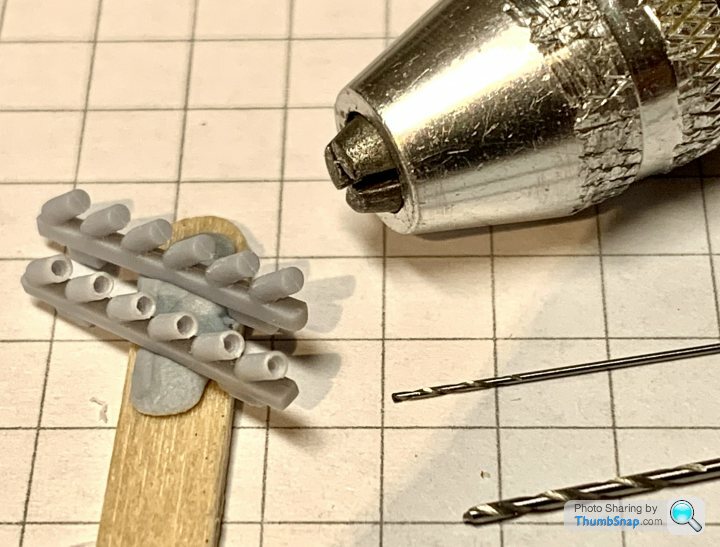
And added the beginnings of the air intake from plastic rod:
Also drilled out the bulkhead fairing:
And cleaned-up and drilled the exhausts and u/c leg locks:

Drilled and slotted the harness aperture in the bulkhead:

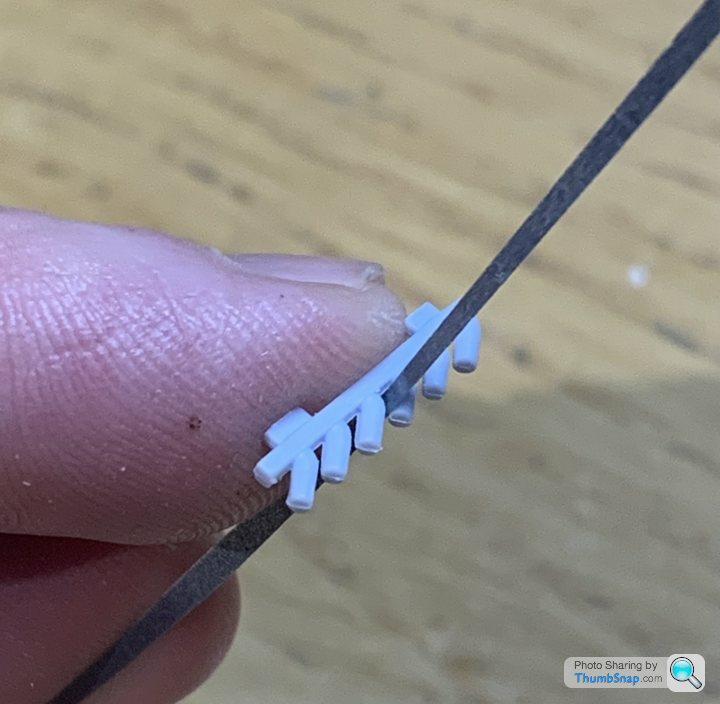
And began removing the odd shaped gun barrels from the fairings, to be replaced by brass tube:
Found a flaw in the windscreen moulding, which I hoped would disappear with Klear, but no such luck. Seems to be a flaw within the part:
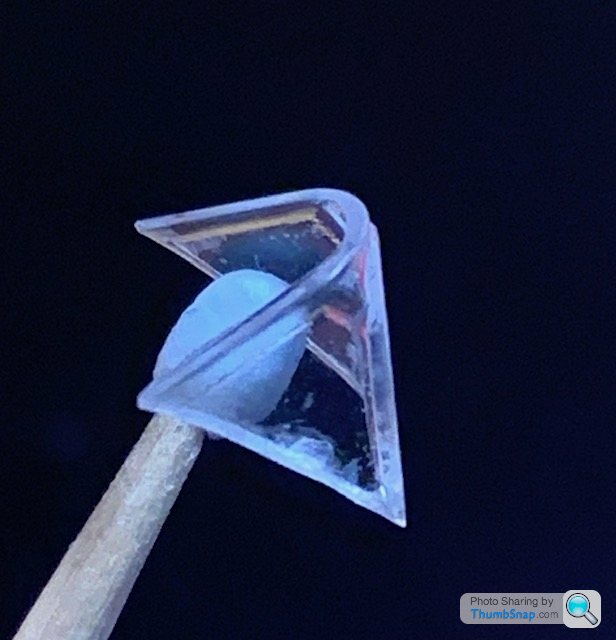
So yet another spare part request to Airfix, and am now waiting for what I fully expect to be another part with an identical flaw to arrive.
And added the beginnings of the air intake from plastic rod:
Also drilled out the bulkhead fairing:
And cleaned-up and drilled the exhausts and u/c leg locks:
Drilled and slotted the harness aperture in the bulkhead:
And began removing the odd shaped gun barrels from the fairings, to be replaced by brass tube:
Found a flaw in the windscreen moulding, which I hoped would disappear with Klear, but no such luck. Seems to be a flaw within the part:
So yet another spare part request to Airfix, and am now waiting for what I fully expect to be another part with an identical flaw to arrive.

Geoff391 said:
dr_gn said:
It’s going together quite well so far , not Tamiya quality and the plastic is soft in comparison but hopeful this will stop any parts snapping whilst being cut off of the spru’s. I did a trial fit of the two Tank halves , going to be hard to get them to join well as only have four tiny pin and socket locators in the corners , nothing along the length of the tank .gruffgriff said:
Lovely diversity here, great idea of yours dr_gn. Thanks.
Will post in a bit, found some hidden rust in my DUKW....
No problem. Didn’t go quite as expected for me, but it’s nice to see quite a few models getting started. I called at my Mum’s yesterday, and completely by chance she had daytime BBC news on TV. To my amazement, there was a feature on Airfix, and how modelling had really taken off again during lockdown. They featured the Spitfire that Robemcdonald is building. Made in England apparently. They showed a bloke checking the sprues against a template. Had to chuckle at that.Will post in a bit, found some hidden rust in my DUKW....
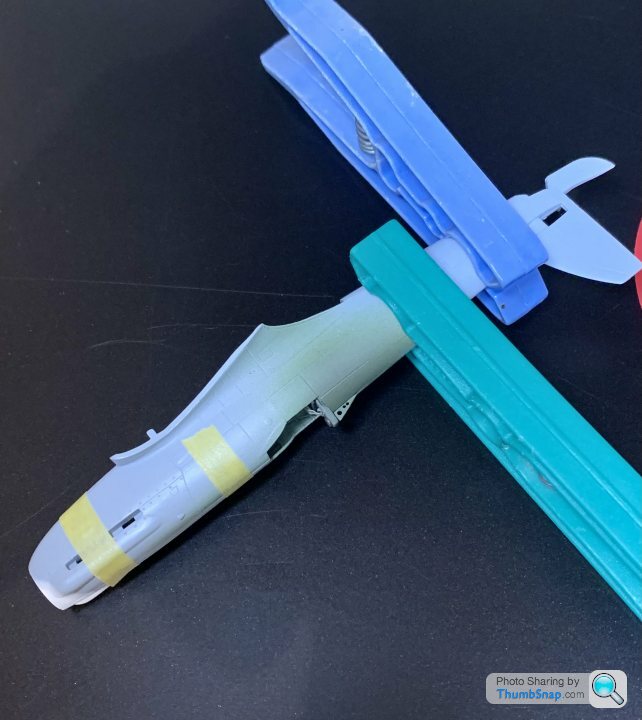
So for the first time, I’ve enjoyed some progress tonight. After midnight, everyone else in bed - concentrating on detail painting:
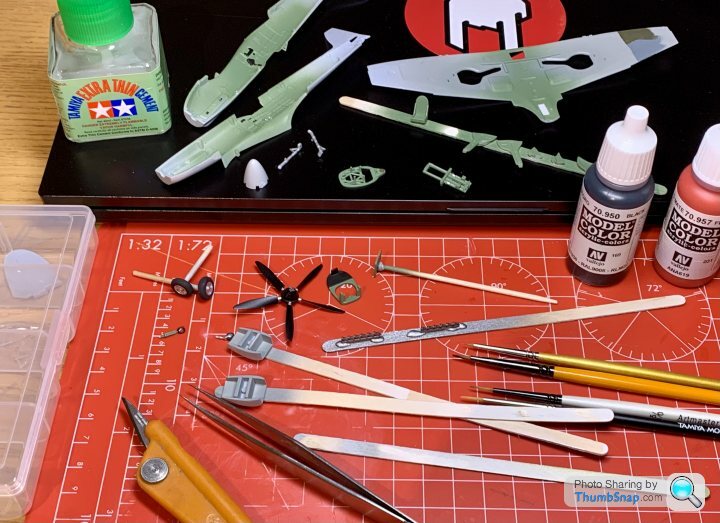
Ended up making a control column out of some scrap plastic from the spares box, and a photo-etched rivet. The Q.C. Bloke must have missed that one:

Also did a bit of a check on colours. The underside colour XF-83 looked way too dark until side-by-side with the upper Ocean Grey and Dark Green:

I can only hope Airfix send me a decent windscreen, otherwise it’s all for nowt.


Rtig said:
dr_gn said:
gruffgriff said:
Lovely diversity here, great idea of yours dr_gn. Thanks.
Will post in a bit, found some hidden rust in my DUKW....
No problem. Didn’t go quite as expected for me, but it’s nice to see quite a few models getting started. I called at my Mum’s yesterday, and completely by chance she had daytime BBC news on TV. To my amazement, there was a feature on Airfix, and how modelling had really taken off again during lockdown. They featured the Spitfire that Robemcdonald is building. Made in England apparently. They showed a bloke checking the sprues against a template. Had to chuckle at that.Will post in a bit, found some hidden rust in my DUKW....
So for the first time, I’ve enjoyed some progress tonight. After midnight, everyone else in bed - concentrating on detail painting:
Ended up making a control column out of some scrap plastic from the spares box, and a photo-etched rivet. The Q.C. Bloke must have missed that one:
Also did a bit of a check on colours. The underside colour XF-83 looked way too dark until side-by-side with the upper Ocean Grey and Dark Green:
I can only hope Airfix send me a decent windscreen, otherwise it’s all for nowt.
tangerine_sedge said:
Whirlwind 'chopper' build - I'm calling this one just about finished.
Good things :
I've learnt important lessons about temperatures and spray-painting.
Modern Airfix decals are excellent.
If approached as a quick and dirty build - then can be lots of fun.
Bad things:
It fits where it touches.
The transparencies seem to be for a different kit.
Nostalgia isn't as good as it used to be.
Almost every component is wrong and would need some extensive rework to correct.
The transparencies are just badly shaped and needed extensive work to make them fit (they are still bad!). Used white glue to fix them in place, and it's doing a lot of heavy lifting to fill the gaps.

I sprayed the white which went on OK, left it overnight to dry, then really struggled to get the green down. I worked in the very cold conservatory and the temperature really changed how the paint sprayed. It came out 'lumpy', blocked the spray gun and was just a pain. I finally got an OK finish, but my masking seems to have lifted slightly in the cold/damp air overnight. leaving a lot of clean up of the white.

I cleaned up the white (mostly by handpainting over the mess), then prepared some of the smaller components prior to decalling. You can see how simplified almost every component is - look at the rotor hub! To bring this kit up to standard would require lots of aftermarket.

The decals went down very well with some MIG decal softener/fixer. I tidied up some of the paint around the front transparency which lifted when I took off the masking.

All assembled (i've just noticed that there is some detail painting around the undercarriage required and around the nose vents, and it would likely benefit a little weathering to hide some of the mess )
)


Pretty good for such an old kit.Good things :
I've learnt important lessons about temperatures and spray-painting.
Modern Airfix decals are excellent.
If approached as a quick and dirty build - then can be lots of fun.
Bad things:
It fits where it touches.
The transparencies seem to be for a different kit.
Nostalgia isn't as good as it used to be.
Almost every component is wrong and would need some extensive rework to correct.
The transparencies are just badly shaped and needed extensive work to make them fit (they are still bad!). Used white glue to fix them in place, and it's doing a lot of heavy lifting to fill the gaps.
I sprayed the white which went on OK, left it overnight to dry, then really struggled to get the green down. I worked in the very cold conservatory and the temperature really changed how the paint sprayed. It came out 'lumpy', blocked the spray gun and was just a pain. I finally got an OK finish, but my masking seems to have lifted slightly in the cold/damp air overnight. leaving a lot of clean up of the white.
I cleaned up the white (mostly by handpainting over the mess), then prepared some of the smaller components prior to decalling. You can see how simplified almost every component is - look at the rotor hub! To bring this kit up to standard would require lots of aftermarket.
The decals went down very well with some MIG decal softener/fixer. I tidied up some of the paint around the front transparency which lifted when I took off the masking.
All assembled (i've just noticed that there is some detail painting around the undercarriage required and around the nose vents, and it would likely benefit a little weathering to hide some of the mess
)Re. the rotor head, you could easily thin the upper and lower plates, and add some drilled holes and / or some bits of sprue to add some detail. It doesn't even have to be accurate, just the suggestion that there's 'something' there.
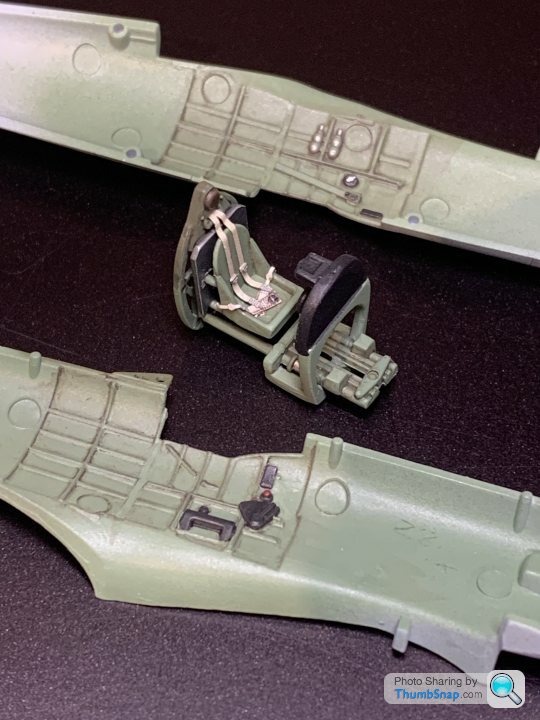
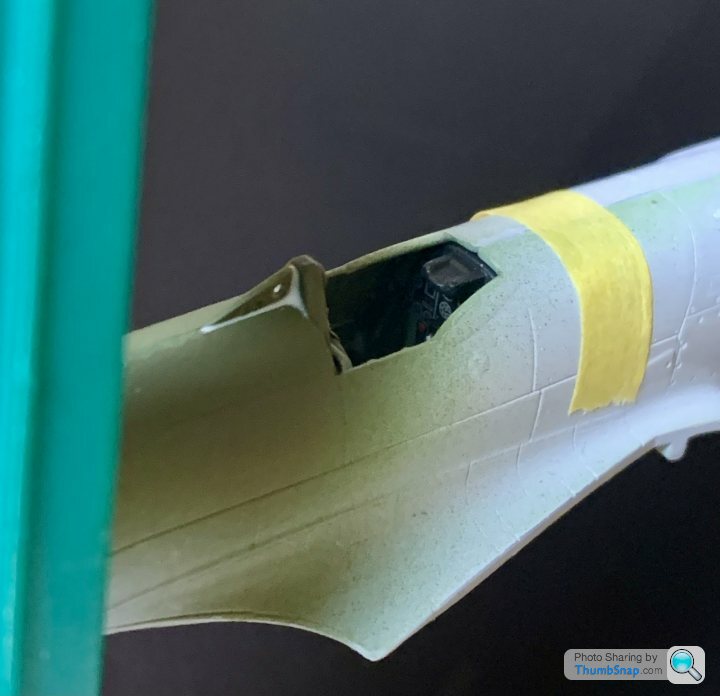
Cockpit is nearly ready to fit, only addition was the Eduard belts, and the home-made control column to replace the missing kit item:

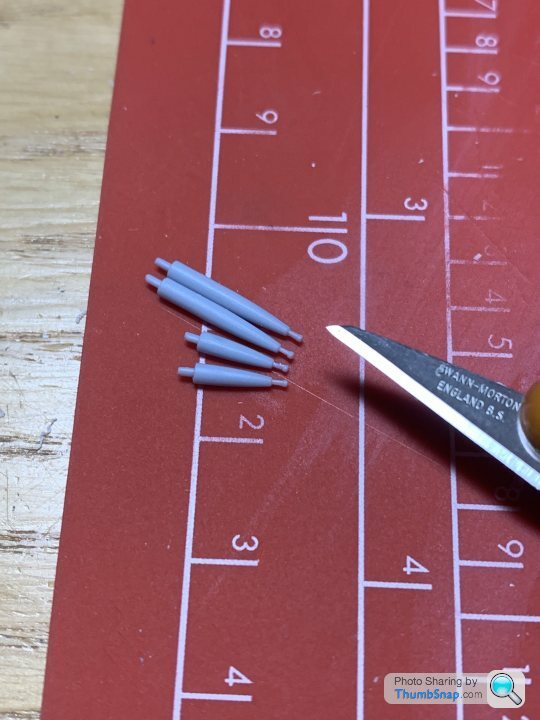
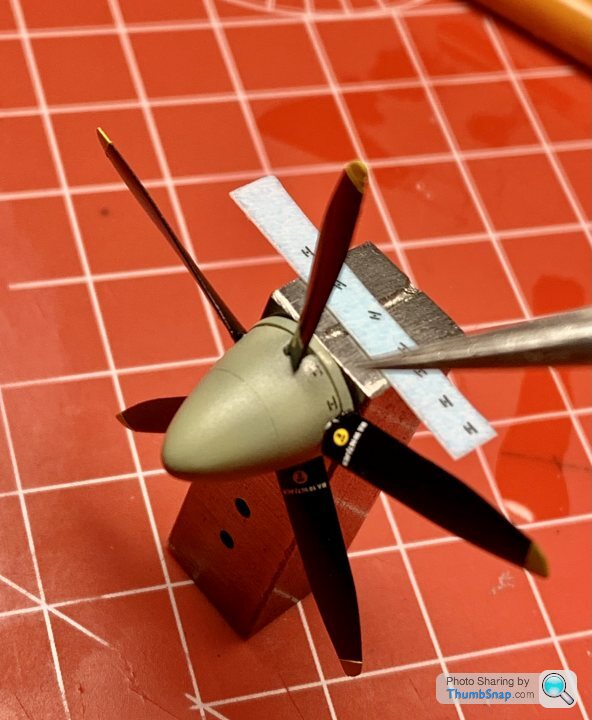
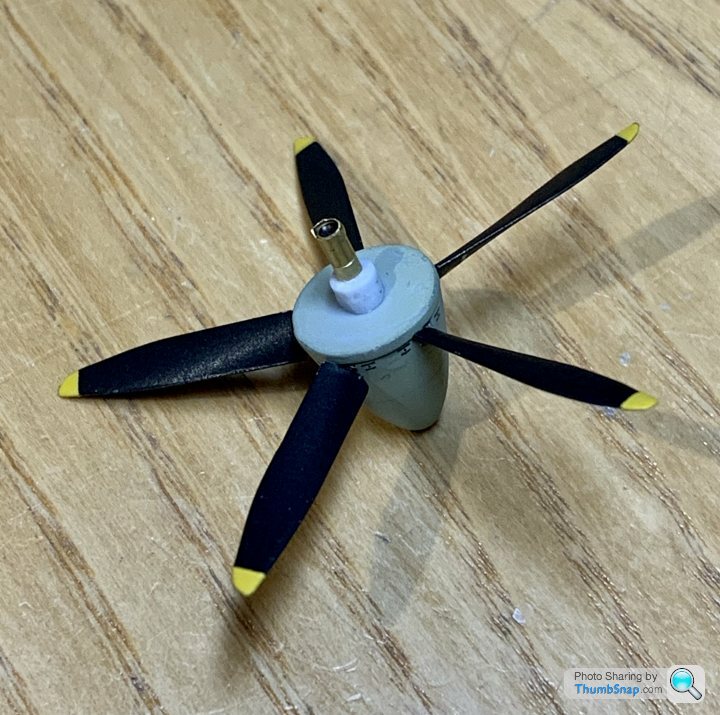
Also finished the propeller assembly:
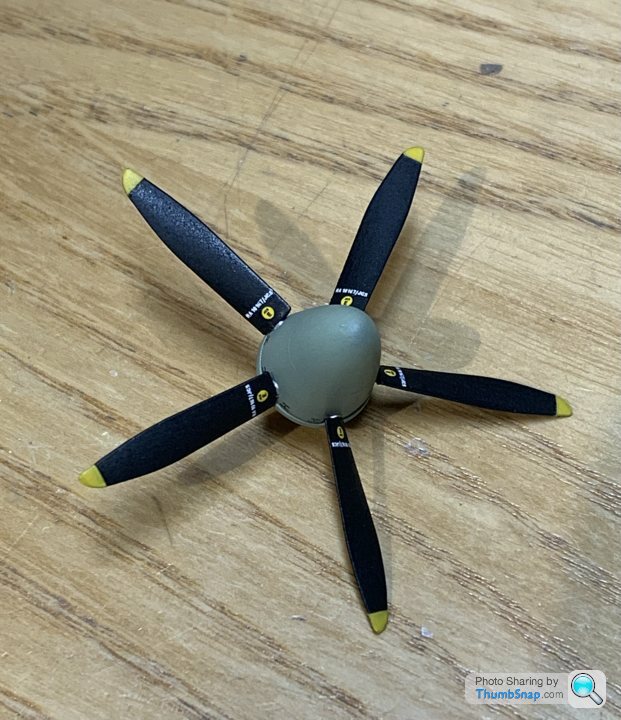
I modified it with a brass spindle in the cut-down original retainer so that I can fit it last, and it will spin:
I hope Airfix send the replacement windscreen soon.
Also finished the propeller assembly:
I modified it with a brass spindle in the cut-down original retainer so that I can fit it last, and it will spin:
I hope Airfix send the replacement windscreen soon.
gruffgriff said:
Despite looking pretty much the same as it did in previous pics, a fair few washes built up and the driest of dry brushings sees it finally done:
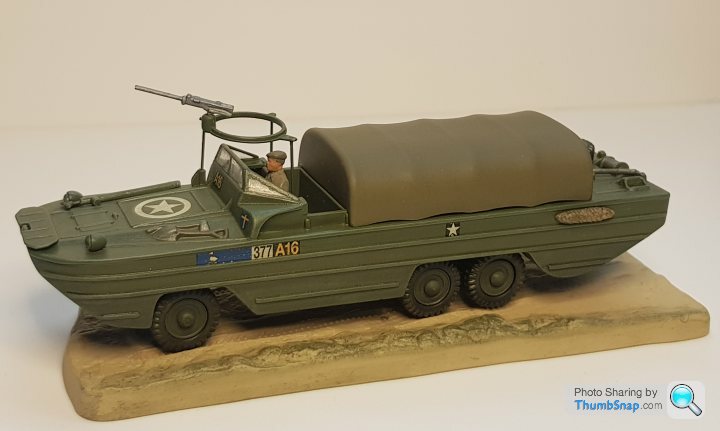
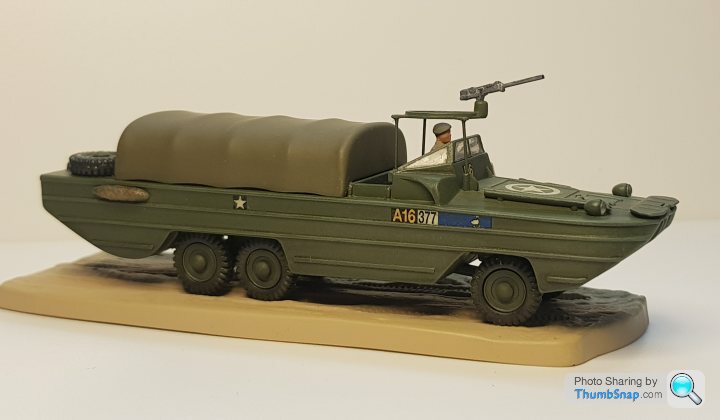
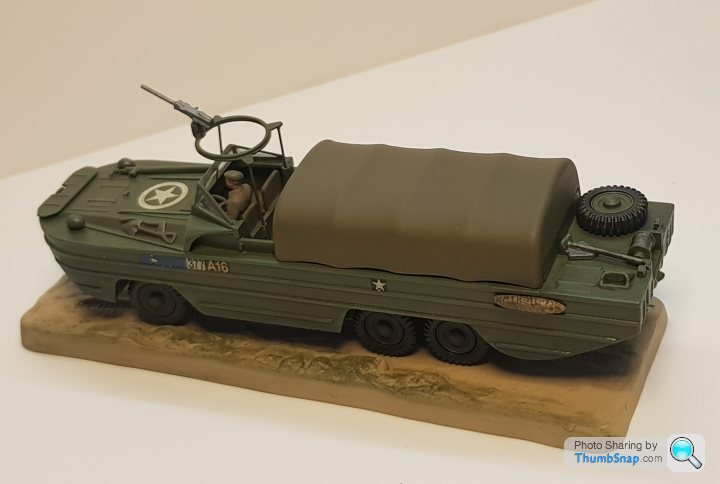
It can run and play with it's vintage Airfix friends now:
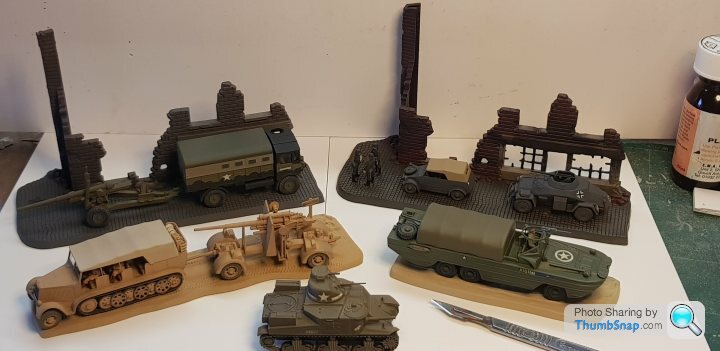
I was pleasantly surprised how well it built with just a bit of flash removal over the usual general part prep needed. A big win was finding the clear light lens that pinged-off the tweezers and in to the distance, twice!
Excellent result. The Matchbox military vehicles with the bases are still great kits. Some originals are getting expensive now - I wanted the set with the two French tanks, but I saw one on Friday at a show - they wanted £35+ for it. The Revell re-boxing’s are more reasonable, but don’t have the nostalgia value for me.It can run and play with it's vintage Airfix friends now:
I was pleasantly surprised how well it built with just a bit of flash removal over the usual general part prep needed. A big win was finding the clear light lens that pinged-off the tweezers and in to the distance, twice!
Geoff391 said:
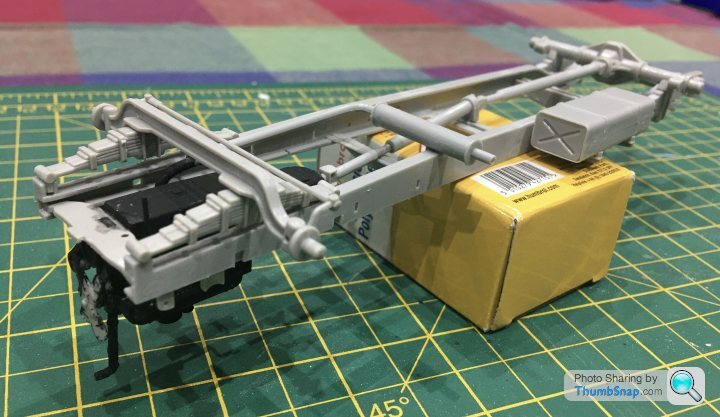
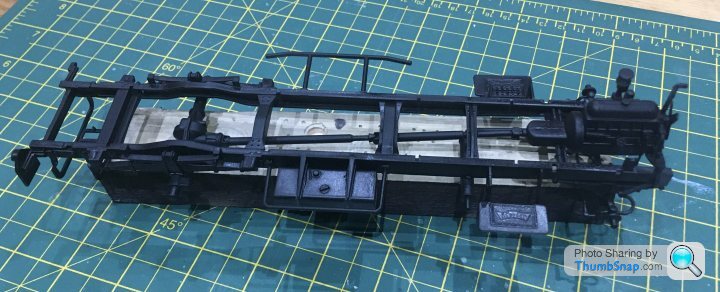
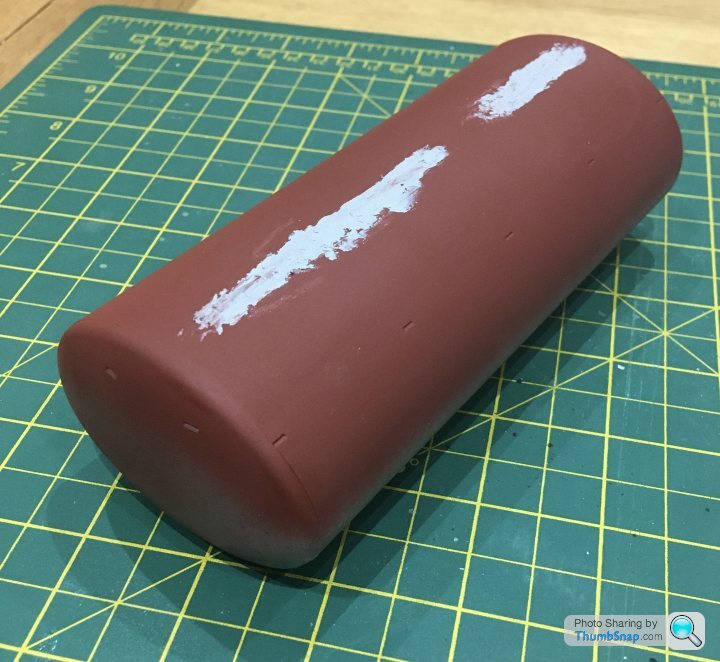
More progress on the tanker , started painting the chassis , wheels done in my chosen colour ( didn’t fancy blue ) and filling and sanding on the tank.
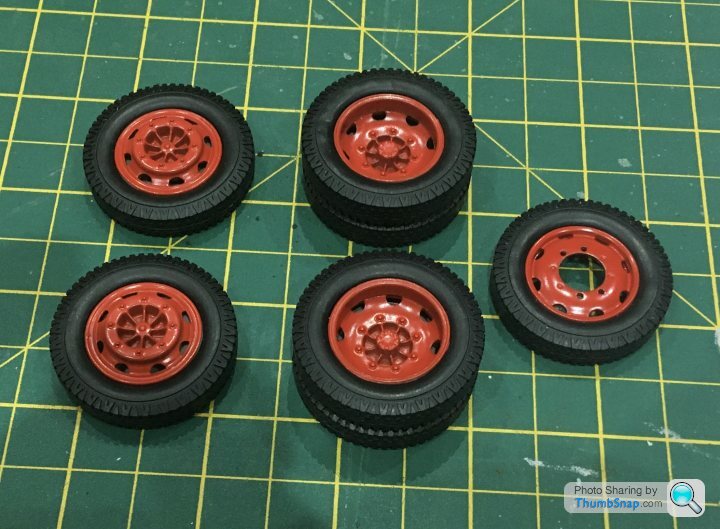
Nice progress. The wheels look very well detailed - will you be giving them a dark wash or any weathering?Edited by Geoff391 on Wednesday 4th January 16:48
Gassing Station | Scale Models | Top of Page | What's New | My Stuff