GB: Academy : DR_GN
Discussion


pacman1 said:
dr_gn said:
..It's definitely lighter than it was originally painted by me years ago.
..I'm positive that matt enamels didin't take so long to dry in the good old days.
At the risk of statin' the bleedin' obvious, did you stir it properly?..I'm positive that matt enamels didin't take so long to dry in the good old days.
Edited by pacman1 on Wednesday 19th January 08:29
Mr. Potato Head said:
dr_gn said:
Instrument panel painted:
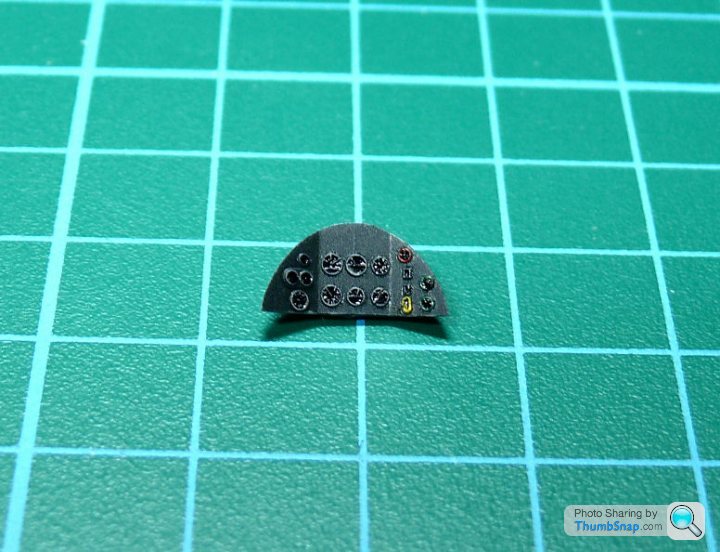
Did you paint the instrements with a brush? I had a go at mine last night, doesn't look anywhere near as good as that!1) Started by spraying it with Tamiya NATO Black.
2) Then dotted some (very lightly shaken) Vallejo Air 'Black' into the instrument centres with a cocktail stick.
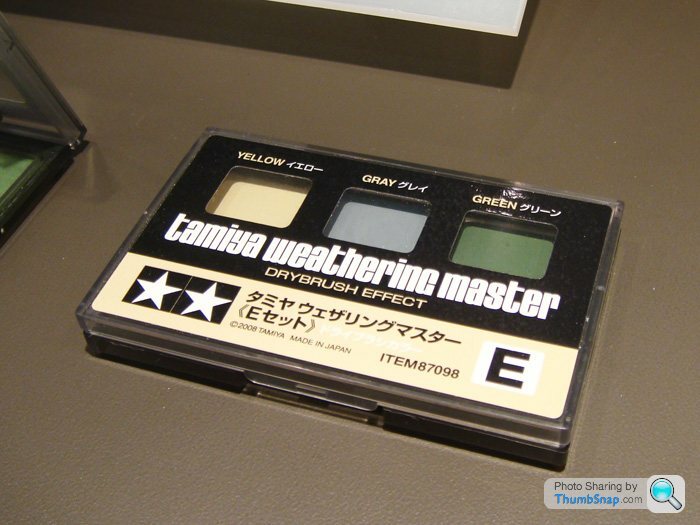
3) Then very lightly brushed it over with Tamiya "Weathering Master" powder (White). This brings out the bezels and markings, and is way easier than dry brushing.
4) Then dotted around the red/green/yellow bezels with a cocktail stick.
5) Then dotted johnsons Klear around the panel (not instrument centres). Capillary action helps here.
6) Finally dotted the instrument glasses with Revell Gloss varnish.
Eric Mc said:
Makes note to myself - that Tamiya White Powder sounds like good stuff.
Oh yeahhh 
I'm experimenting with the Tamiya 'mascara' sets instead of dry brushing liquid paint. I always seem to get it too wet or too dry with paint, and it's a pain in the arse. With powders its dry, and consistent to start with, so it removes a variable.
I've got 3 Tamiya sets, that's 9 colours, and you can mix them to get different effects.
pacman1 said:
Eric Mc said:
Makes note to myself - that Tamiya White Powder sounds like good stuff.
How does it work then? Would chalk be as effective, or is it more like fingerprint dust?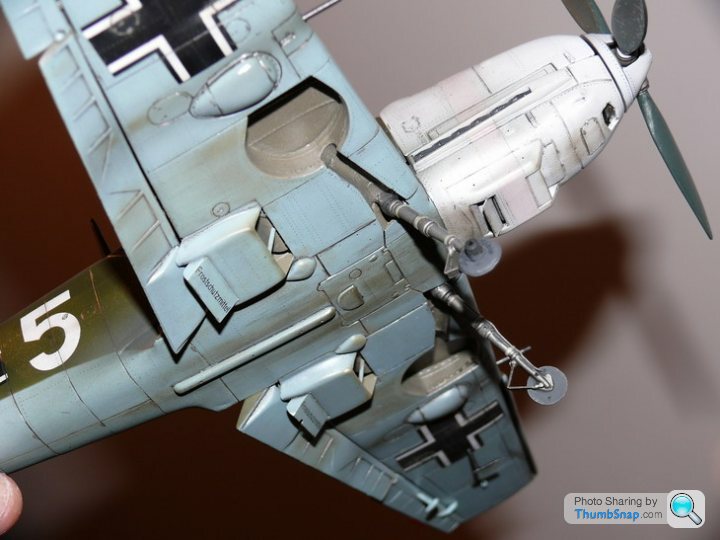
It's almost a substitiute for airbrushing weathering, and less messy and permanent.
perdu said:
Eric Mc said:
Maybe a surrepticous trip to Boots might be in order. I could always send my wife in on an undercover operation.
I've heard that Max Factor supplies camouflage make-up to the Army.
TrueI've heard that Max Factor supplies camouflage make-up to the Army.
Edited by Eric Mc on Wednesday 19th January 12:44
It used to be in dark green squeezy bottles in the seventies.
Where did that modelmascara come from doc, I went into Brum today seeking supplies and found the totally crappiest "model shop" on the planet.
Staff who knew nothing and didn't listen to the old duffer asking the questions
Didn't even have colour charts available
(They did have two Tempest kits on the shelf but I think I have enough on hand without joining the GB this time around)
You and Eric will be able to point out the best internet traders I hope.
I did leave Modelzone with a pack of Millput, a bottle of Testors MEK type liquid and a "packet"? of Revell Aqua color no 361-67 grungrau in the vague hope it will look enough like cockpit green grey to use on my Tiffie...

NO COLOUR CHARTS in a model paint section, are these people MAD?
The said model emporium's spotty oik actually told me I would be better to buy "stuff" on t'internet than expect to find it in a model shop!

I found Revell Aqua Colour Ok...so long as you could persuade it to stay stuck to the surface you painted. It does seem prone to peeling when you remopve masking tape for example, so beware!
There are paint charts online I think.
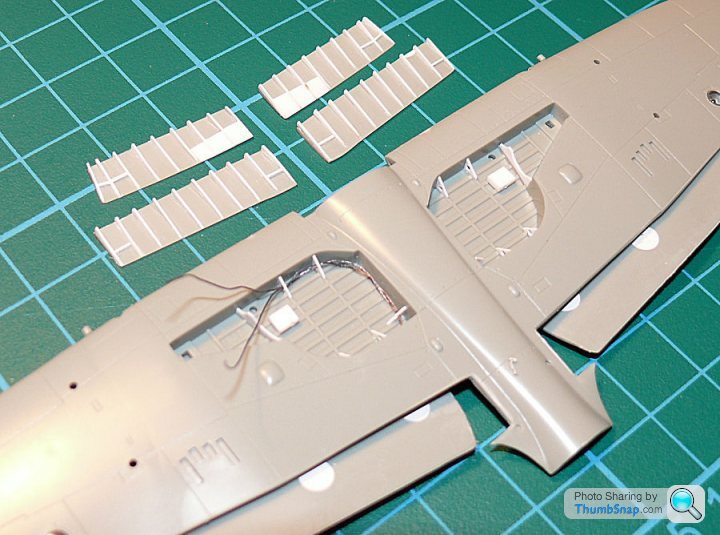
Tonights fun:
Installed lenses into wings with tin foil over the top to represent reflectors:
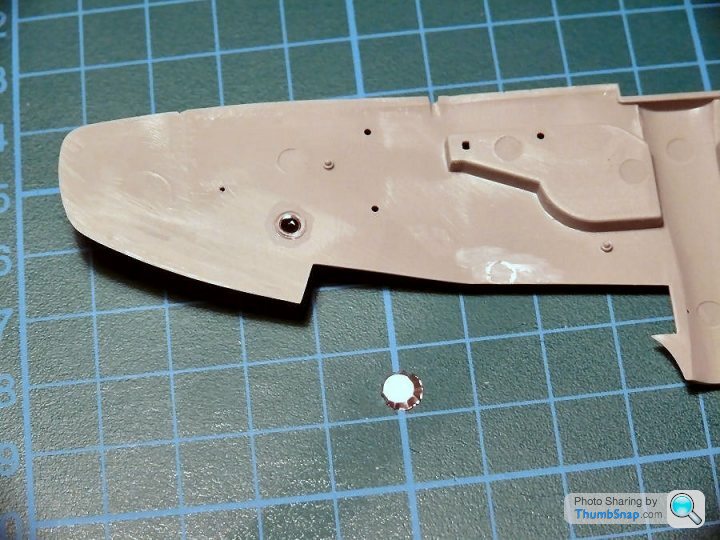
Then a dab of Araldite on top before glueing the wings together (don't want the lenses popping out when I press the masking tape onto them!
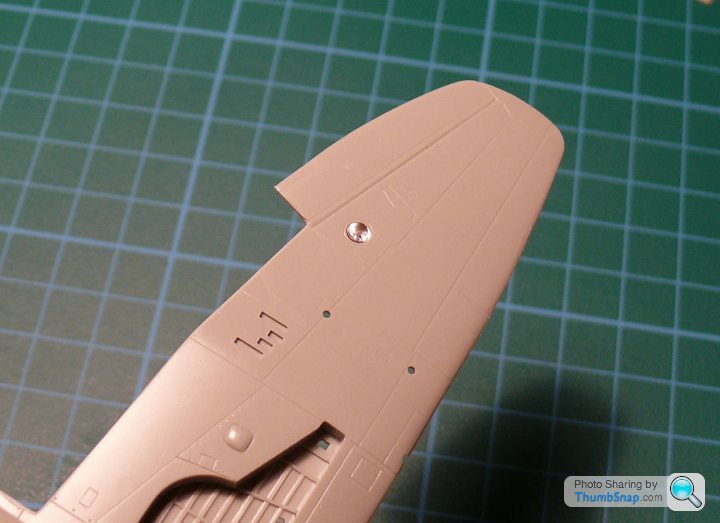
Then the riblets on the inner faces of the flaps. Tricky. Settled on sticking oversized plasticard 'plates' in the correct positions (spaced accurately by using a twist drill as a jig):
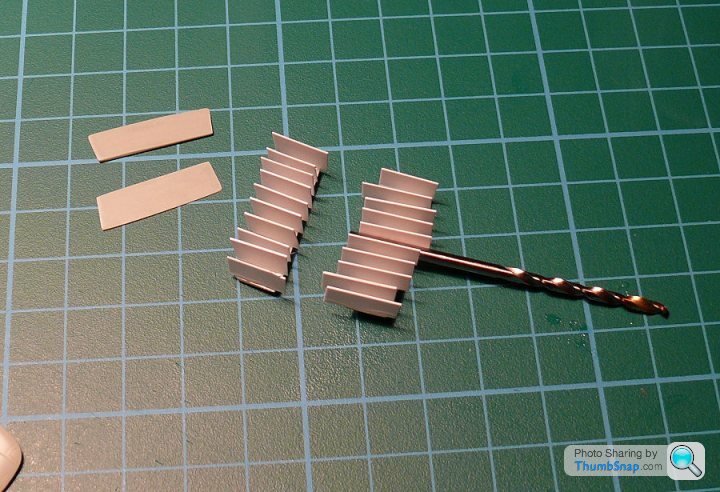
Then the plates were chopped to the right length and angle with a razor on a platten (formed by a hefty steel rule trapped under my cutting mat):
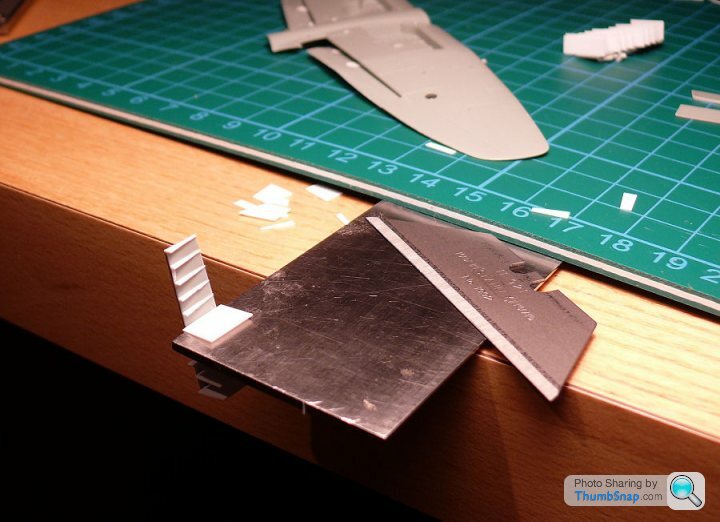
Then sanded on a block to finally get all the ribs the same size and angle:
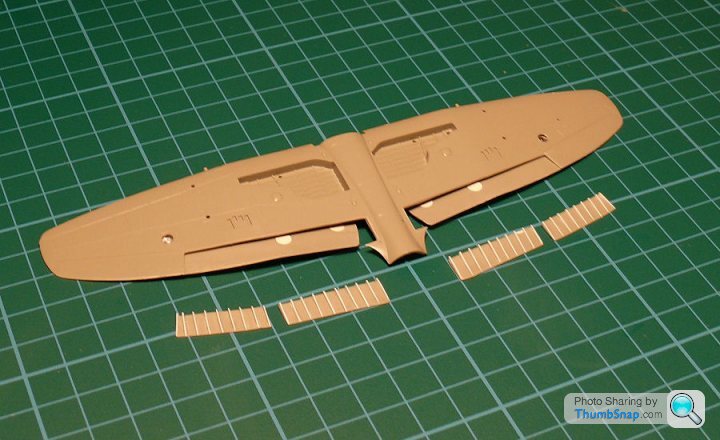
Of course all that could have been avaoided by buying the ready made resin set, but where's the fun in that?
They just neeed the torque tubes fitting to their inner edges, and a few stiffeneres followed by a coat of Mr. Surfacer 1200 to blend all the joints.
Installed lenses into wings with tin foil over the top to represent reflectors:
Then a dab of Araldite on top before glueing the wings together (don't want the lenses popping out when I press the masking tape onto them!
Then the riblets on the inner faces of the flaps. Tricky. Settled on sticking oversized plasticard 'plates' in the correct positions (spaced accurately by using a twist drill as a jig):
Then the plates were chopped to the right length and angle with a razor on a platten (formed by a hefty steel rule trapped under my cutting mat):
Then sanded on a block to finally get all the ribs the same size and angle:
Of course all that could have been avaoided by buying the ready made resin set, but where's the fun in that?
They just neeed the torque tubes fitting to their inner edges, and a few stiffeneres followed by a coat of Mr. Surfacer 1200 to blend all the joints.
Nick_F said:
I think I might look again at that comprehensive resin set and see how well it works.
Mine arrived today. Many of the parts are - honestly - invisible to me, never mind assembling them, I can't even see them. The sidewall and seat castings are brilliant though, and are worth £10 alone IMO.Here's the resin/etch/vac vs. some of the original kit details. Not convinced the instrument panel is better overall - no raised numerals or needles:

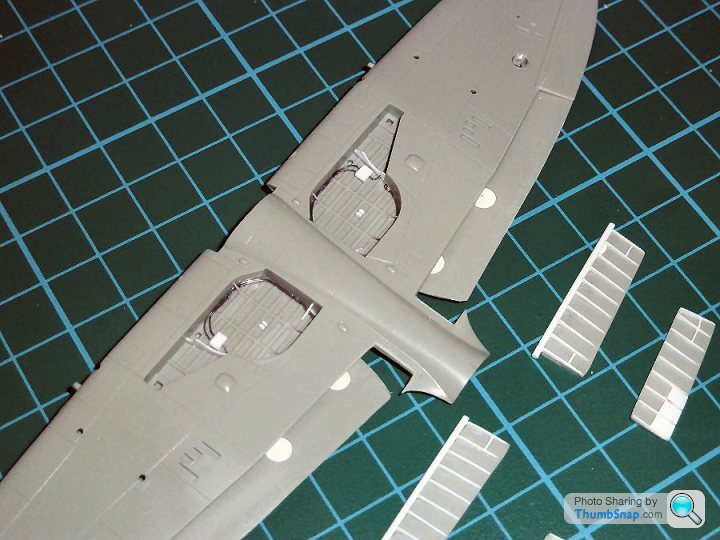
Other stuff tonight was adding stiffeners to the flaps, and adding some detail to the wheel wells. Just needs some plumbing now and that lot's ready for paint :
Other stuff tonight was adding stiffeners to the flaps, and adding some detail to the wheel wells. Just needs some plumbing now and that lot's ready for paint :
The_Jackal said:
I still have to sit back and be amazed at the scratch building you guys do.
I know you'll say it is simple, but half the skill is knowing what to add.
Looking at that pic, tells a thousand words. I guess half the skill is having the tools to make fine enough cuts to make the shape.
BTW: Just found out tonight how easily a Windsor & Newton wash runs along the creases (even on a matt finish). and here was me using Promodellers for everything.
Actually it's just a razor blade and a scalpel ! I know you'll say it is simple, but half the skill is knowing what to add.
Looking at that pic, tells a thousand words. I guess half the skill is having the tools to make fine enough cuts to make the shape.
BTW: Just found out tonight how easily a Windsor & Newton wash runs along the creases (even on a matt finish). and here was me using Promodellers for everything.
RE. knowing what to add - it's trial and error. I'm going to remove 4 of the triangular fillets per well, becasue they look too big compared with a photo, plus the pipework didn't look right fed through them. Same with the flaps, the large reinforcements should really be rectangular, not tapered, so I'll fill them to make them look better. It's sometimes very difficult to know if something will look right until everything is glued in place!
Just have a go. Sometimes it's better to leave alone, sometimes to add all the detail, but more often than not, just add a bit to suggest what's really there.
Bit more progress tonight. The original plastic wing stubs were removed and drilled out, and the 20mm cannon barrels were made out of 1mm o/d brass tube (machined metal parts always look better in real machined metal IMO):

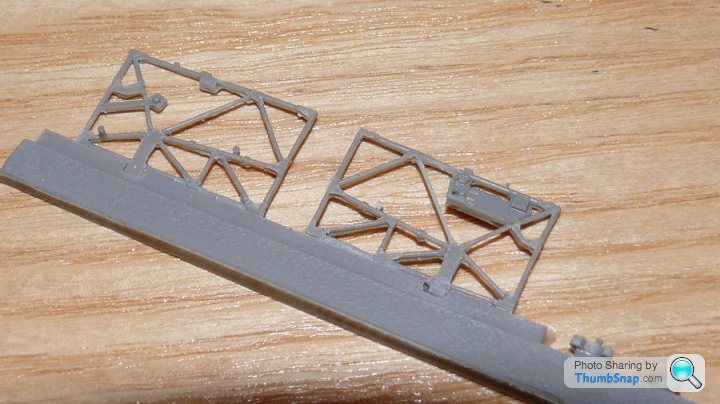
And made a start on removing flash from some of the resin cockpit spaceframe. You can see on the right one that I had to make a new tubular member out of sprue becasue the original one disintegrated when I was smoothing it with a blade. Never used resin before as a detail kit, so thought it would be a good opportunity to practice on a model I'm not too bothered about:
I thought 1:72 would be my preferred scale for future builds after the 1:32 '109, but after this Tempest I think 1:48 will be my personal preference for aircraft. I like to model mechanical detail, and 1:72 just isn't big enough, and 1:32 aircraft take up a lot of room.
perdu said:
This is all looking very interesting
I think I'd miss out the resin sidewall details, not convinced there is room enough to do them credit in there (Not convinced I should have done the same with polyrod in mine either)
The control units are worth while if they can be seen down there, throttle quad, radio units and u/c handles etc
Did I mention how much I like the flaps
wizzzzzard stuff

Ta Perdu, it's kind of like your cockpit only cheating. I'm cutting the emergency hatch out and having it resting on the wing or on a table next to the fuselage, that way a lot more of the interior detail can be seen I reckon.I think I'd miss out the resin sidewall details, not convinced there is room enough to do them credit in there (Not convinced I should have done the same with polyrod in mine either)
The control units are worth while if they can be seen down there, throttle quad, radio units and u/c handles etc
Did I mention how much I like the flaps
wizzzzzard stuff
The flaps I posted weren't the latest incarnation - I wasn't happy with the filled in bits of the outboard ones, and the inner riblet spacing of the inboard ones wasn't perfectly symmetrical so I ripped all the offending riblets off and started again. Spot on now.
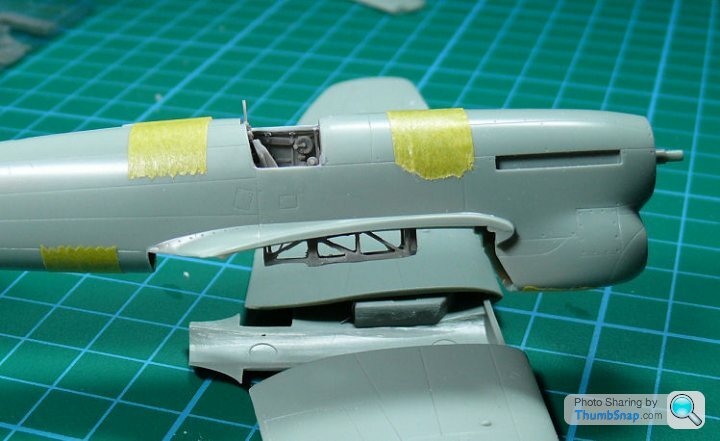
Finally decided on interior green for the wheel wells and flap inners. Couldn't live with silver, and I want some contrast with the u/c legs.
Not happy with the 3 bar gate things on the Academy u'c legs, they look crap. Can't do much about them really though 'cos they are a fairly integral part of the assembly. Still, all will be invisible when it's on a base I guess!
Yertis said:
Your build is very impressive Dr, as is Perdu's. Everything is so small though – no way I'm trying that! Whatever the next build theme is, I'm going to try and do it in 1/32.
Going to try assembling some resin tonight all being well. The instructions with the Resin Art kit are....shall we say vague? That, coupled with invisible parts might make this exercise a bit frustrating. Edited by Yertis on Tuesday 25th January 17:08
Can't wait to start on the 1:32 SE5a TBH !
I think the next GB (if there is one) should be 1:48, I'm convinced it'll be easier!
So I think the cockpit detail set is almost ready for assembly (somehow). This Resin Art kit is pretty s t overall. The instructions are almost non-existant, many of the components are poorly moulded, covered in flash and warped, and basically it's a nightmare. A lot of the levers and knobs I've had to make myself because they weren't on the sprues.

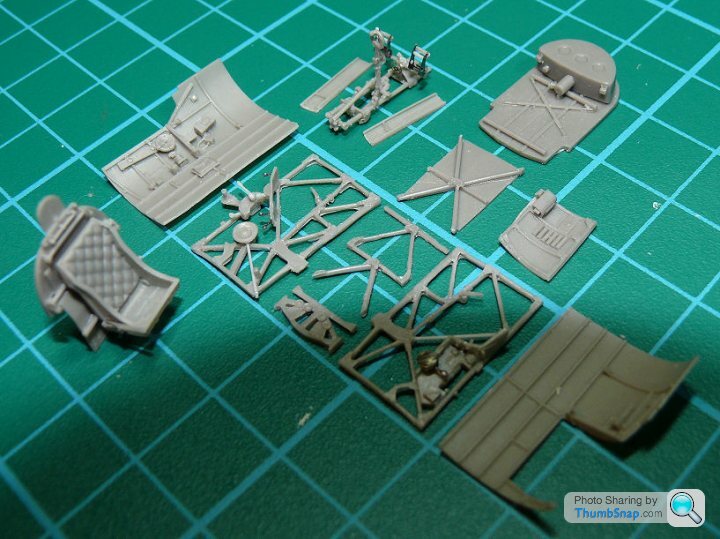

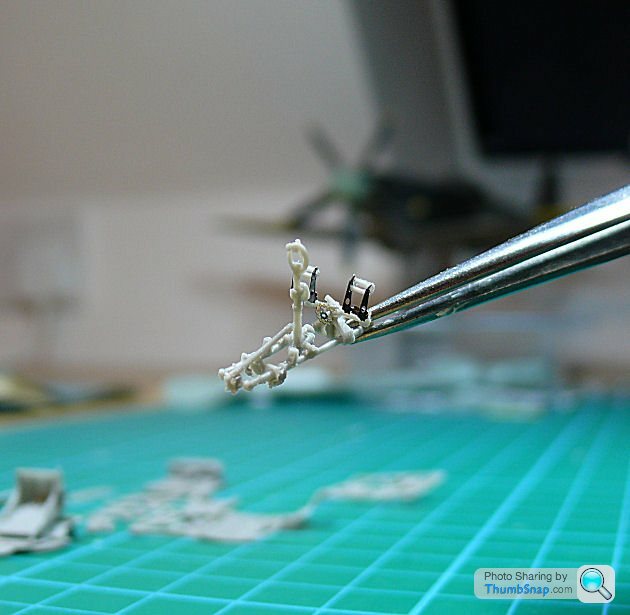
I've not been able to find a photo of a completed one yet, and it's no surprise. I seriously doubt whether anyone at Resin Art bothered to build a production kit and fit it to a model, if they had have done, they would have realised that the instructions needed re-drawing. Still, it was only £10.
t overall. The instructions are almost non-existant, many of the components are poorly moulded, covered in flash and warped, and basically it's a nightmare. A lot of the levers and knobs I've had to make myself because they weren't on the sprues.I've not been able to find a photo of a completed one yet, and it's no surprise. I seriously doubt whether anyone at Resin Art bothered to build a production kit and fit it to a model, if they had have done, they would have realised that the instructions needed re-drawing. Still, it was only £10.
tangerine_sedge said:
I look forward to seeing how all that is going to fit inside the fuselage! I dry-fitted the fuselage sides on the Revell kit, and couldn't see anything other than the pilot - hence why I didn't bother with an interior at all!
It doesn't fit inside the fuselage (it *can't* fit inside the fuselage, because it's about 5mm too deep). It doesn't even fit together to itself. It's the biggest sack of st I've ever had the misfortune to try to assemble. I cut the door away, and you can see quite a lot of the interior, but it's a monumental struggle. No way am I ever buying Resin Art s
t again.mcdjl said:
And I thought I was struggling to get the exhausts off the sprue...both of them broke in 3
Having tried it, I'm not sold on resin detailing.
Whoever designed these Resin Art kits are a bunch of fHaving tried it, I'm not sold on resin detailing.
king retards. A bit of very simple redesign would make assembly foolproof and accurate (in fact it's easier to design them to fit, than to make them not fit).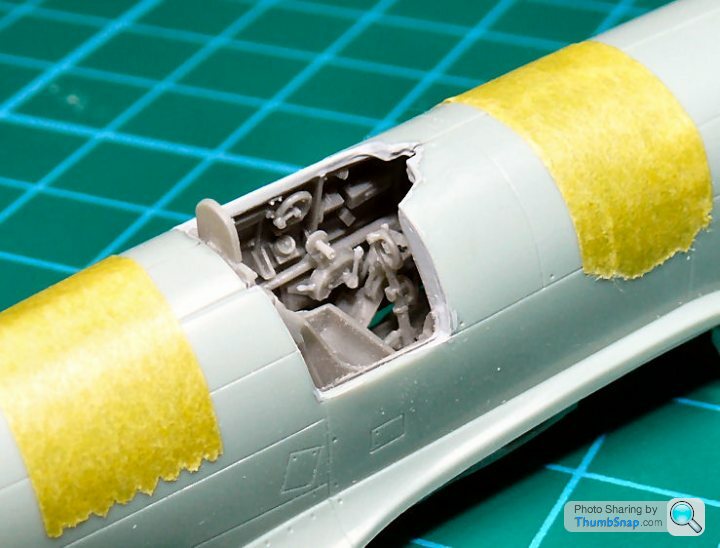
How in f
ks name is a 5mm spaceframe depth going to fit into a 2mm deep recess? Idiots. I've a good mind to send the damn thing back crushed up in a bag and ask for my money back - blatantly not fit for purpose. The quality of the resin is st too. Glad I scratch-built the flaps myself, far better quality I've absolutely no doubt.Zaxxon said:
Thank god for that a properly talented modeller like Dr_Gn has found the same problems that I did with the Resin Arts ste. I was thinking that it was my fault.
However I was not quite as patient with my temper
£34.00 wasted.
Now consoling myself with the very nice Tamiya Swordfish...1/48 my preferred size.
Not properly talented, just infinitely patient. te. I was thinking that it was my fault.However I was not quite as patient with my temper
£34.00 wasted.
Now consoling myself with the very nice Tamiya Swordfish...1/48 my preferred size.
If you've scrapped the whole model (you said £34 wasted, my Resin Art kit was 'only' £10) you should get another and build it OOB, it is a nice model.
Zaxxon said:
Resin Art 2 sets, PE, Kit, spare decals and masks were £34
Will see about a OOB build, enjoying the Swordfish at the mo, and then the big one...the Wingnut Wings DVa.
Buy another and build it OOB. Will see about a OOB build, enjoying the Swordfish at the mo, and then the big one...the Wingnut Wings DVa.
As it stands you've spent £34 and have nothing to show for it. Spend £40 and you have a model, and some practice, and some bad experience you'll learn from.
Presumbly you can still use the decals and masks?
pacman1 said:
In the supermarket today, I managed to pick up some of this, another in dark grey, and one of these, all end of line, the lot for a fiver! 
Very clever, but this is you in a couple of years' time:http://www.youtube.com/watch?v=CCm1ZxDs8io
Best of luck!
Gassing Station | Scale Models | Top of Page | What's New | My Stuff