Airfix 1/24 Spitfire Mk VB
Discussion


Not sure what you are asking.
As far as I know, none of the currently flying Spitfire Vs carry those markings. The V was the most produced of all the Spitfire variants so there is a huge variety of colour schemes available to chose from.
The old (1973/74) 1/72 Airfix Vb was issued with Zumbach's markings as was the more recent 1/32 Hobby Boss Vb.
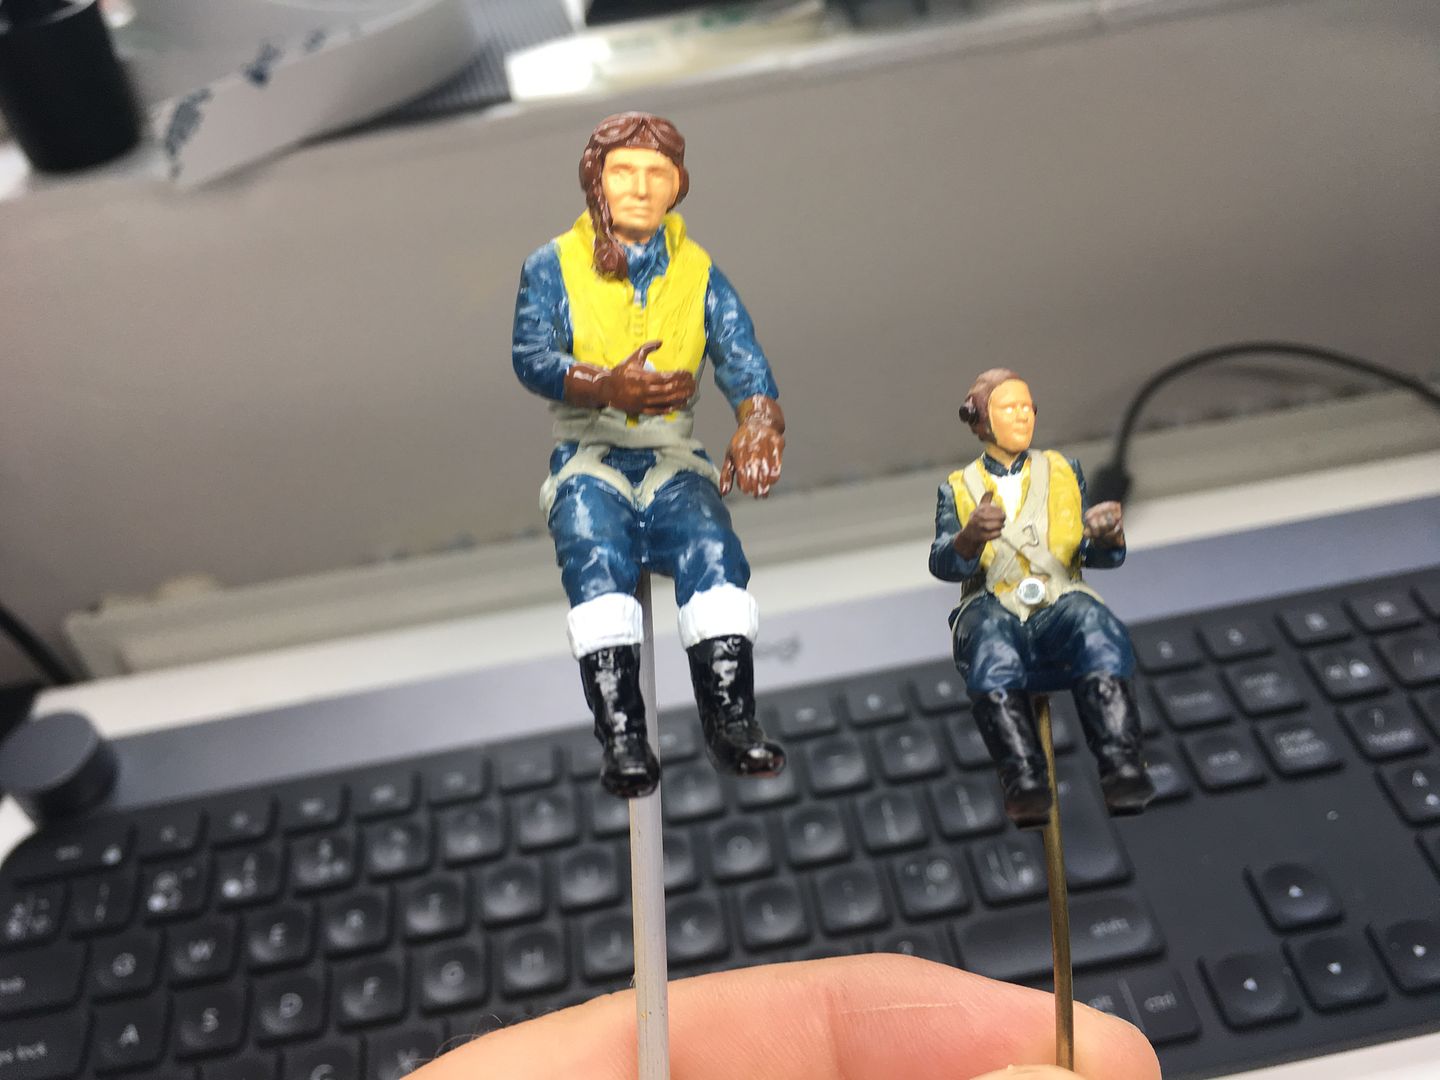
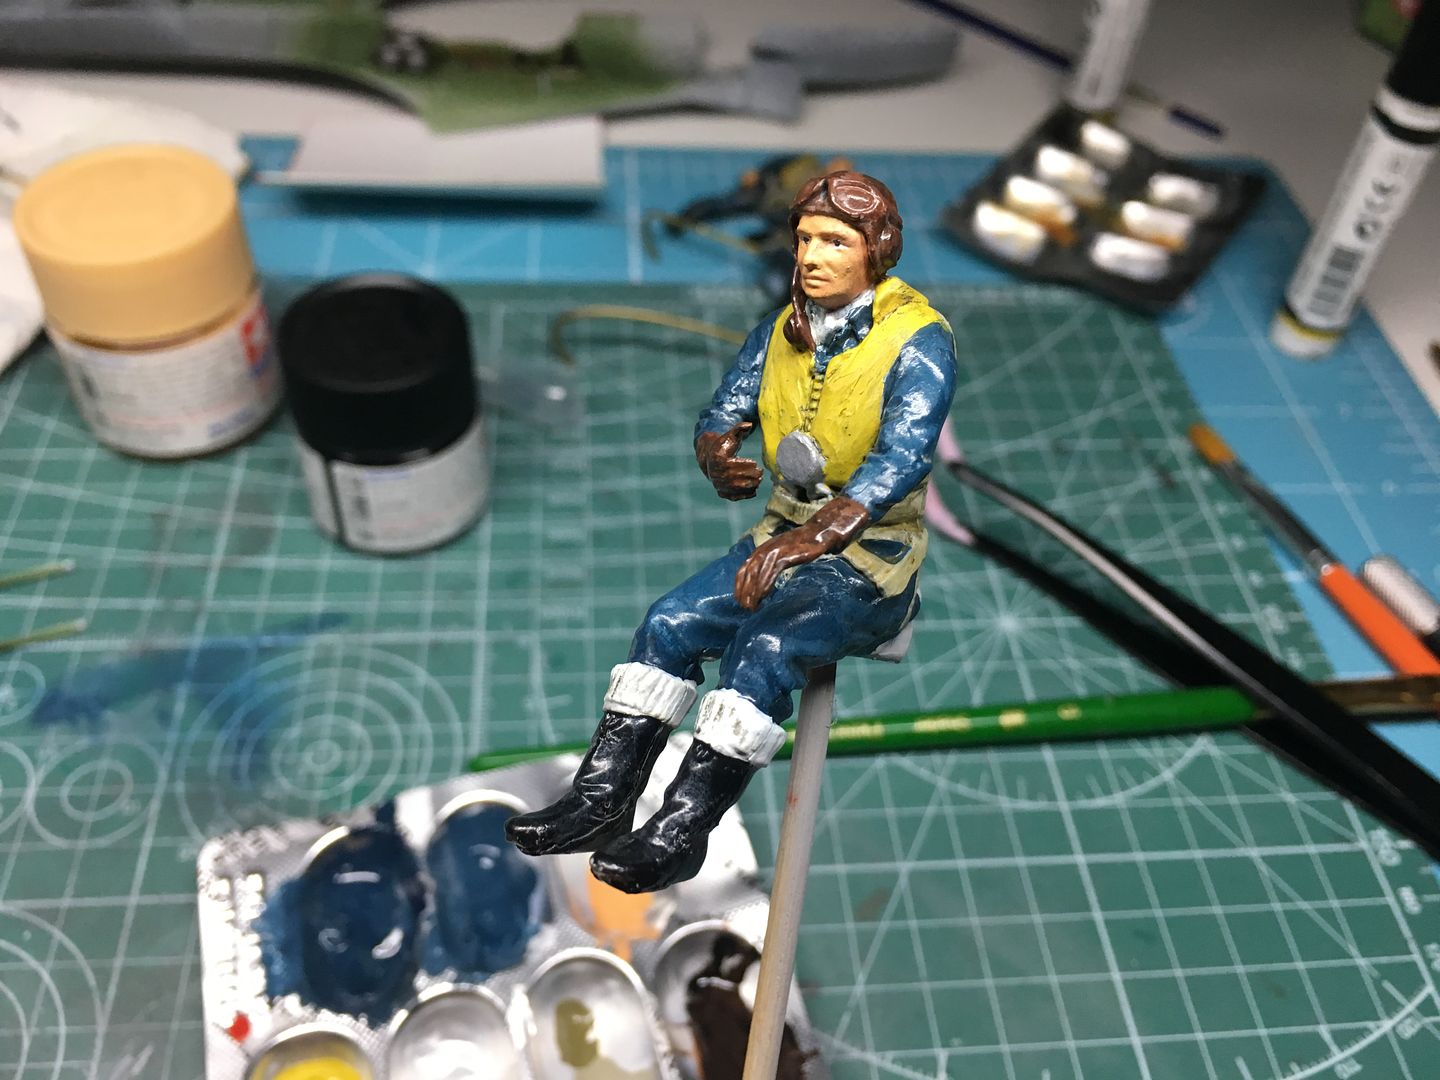
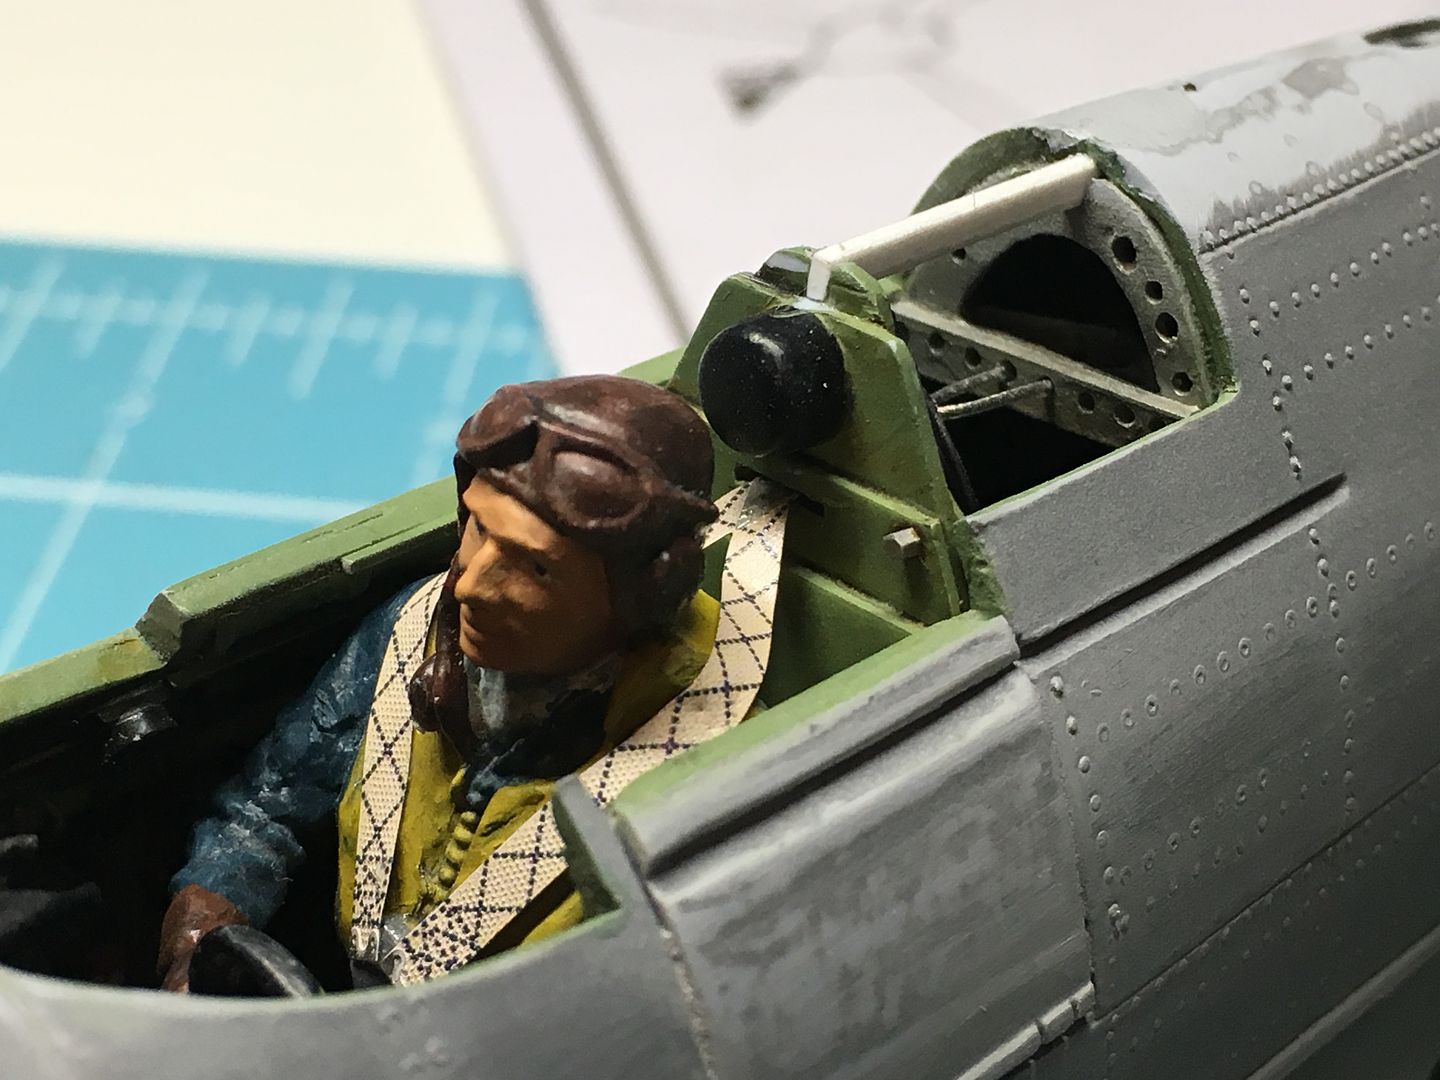
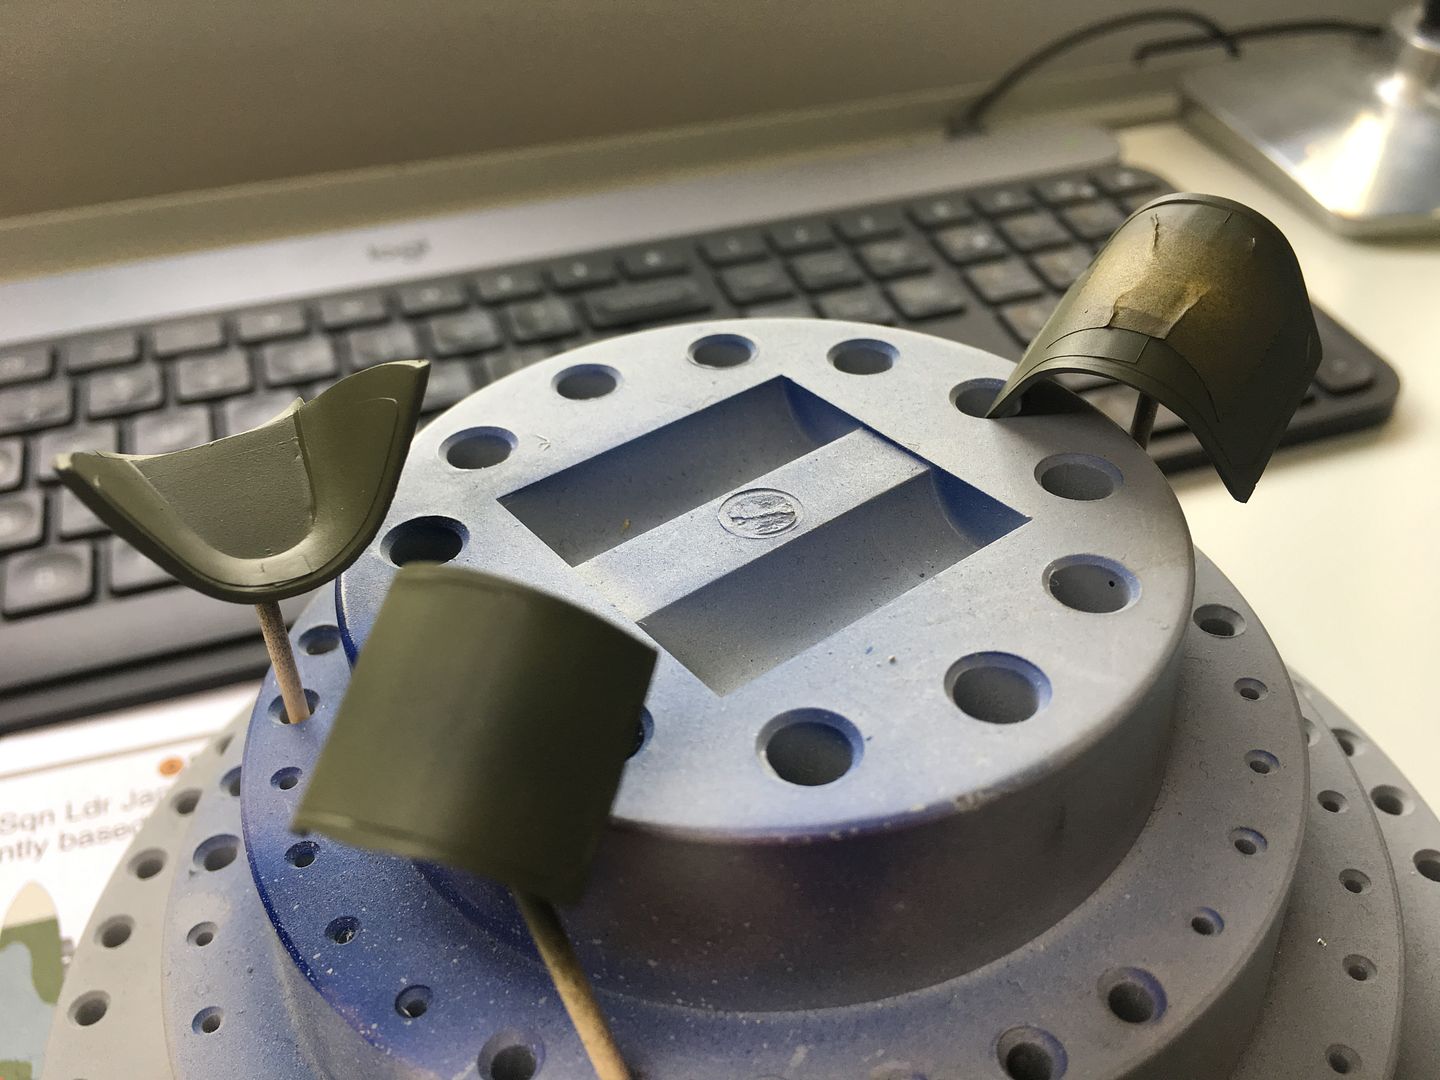
Here are my attempts at the figure painting!!
This is obviously a new skill to learn - I'll show some of the Mossie crew here as well for comparison, as I have done them at the same time - not finished yet.

Amazing the difference in size from 1/32nd to 1/24!
1/32nd

Test fit:

I also applied some basic washes to the interior of the cockpit...


This is obviously a new skill to learn - I'll show some of the Mossie crew here as well for comparison, as I have done them at the same time - not finished yet.
Amazing the difference in size from 1/32nd to 1/24!
1/32nd
Test fit:
I also applied some basic washes to the interior of the cockpit...
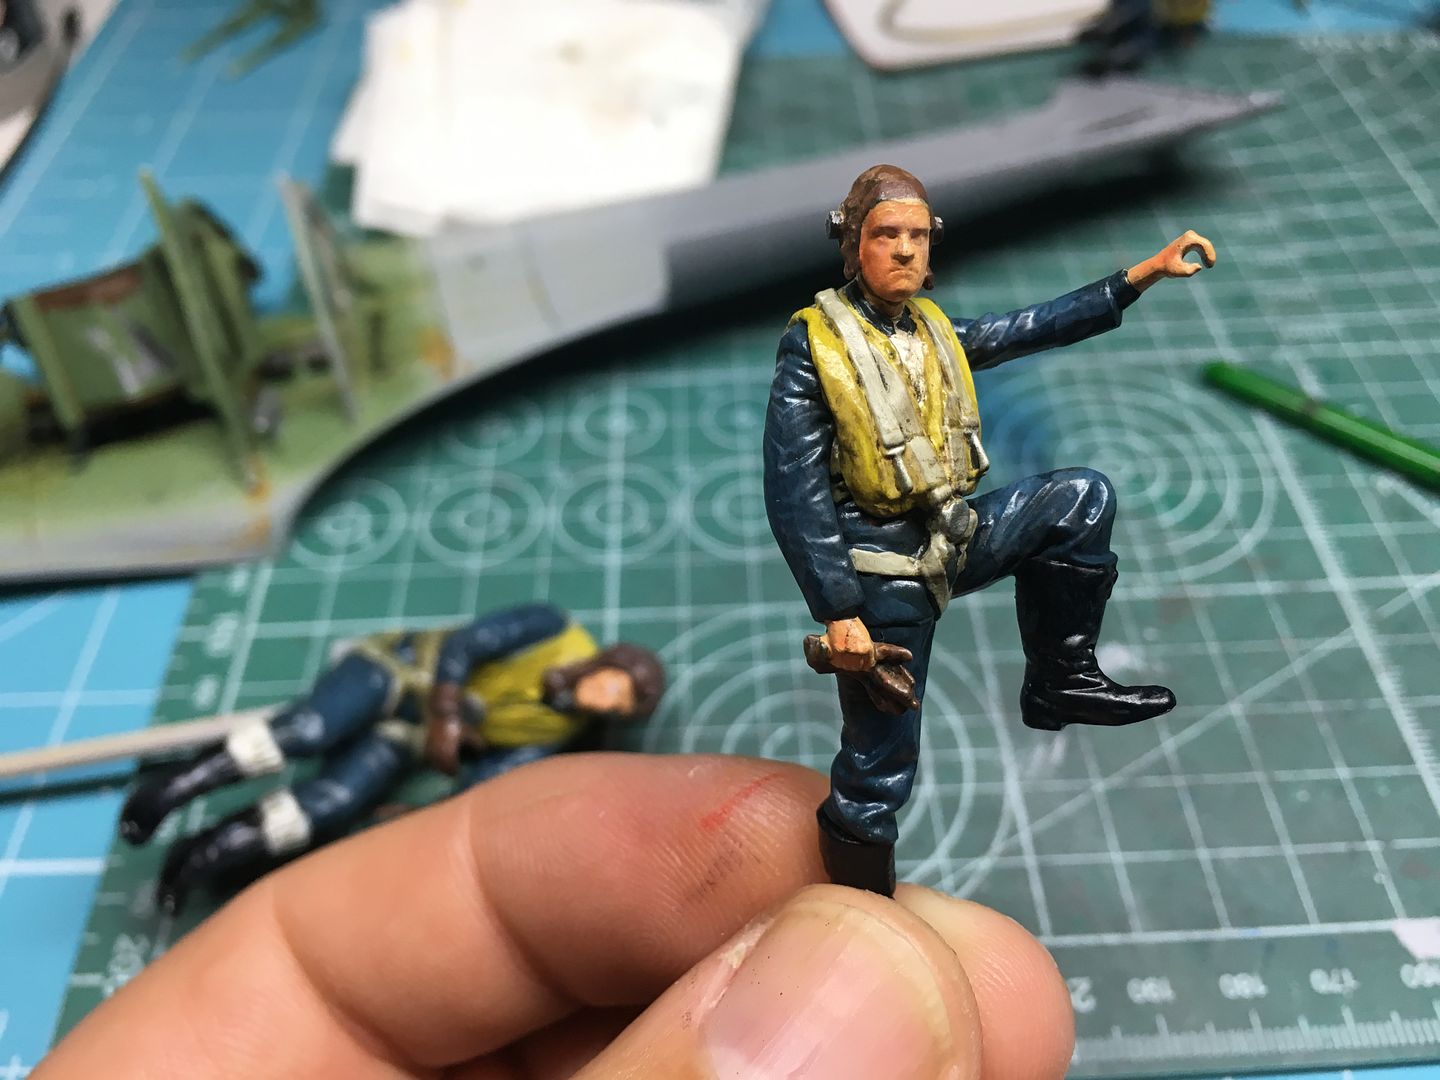
It’s looking great so far. The mosquito crewman in particular.
One minor observation though. The spitfire pilot is suffering at bit from fried egg eye syndrome. I used to have the same problem with my figures, so I gave up painting the eyes at all and just used a darker tone so it looks like a shadow. Pretty much like your mossie crewman. Which despite being half the size looks better.
Please don’t take this as criticism though, this like your overs is an excellent build.
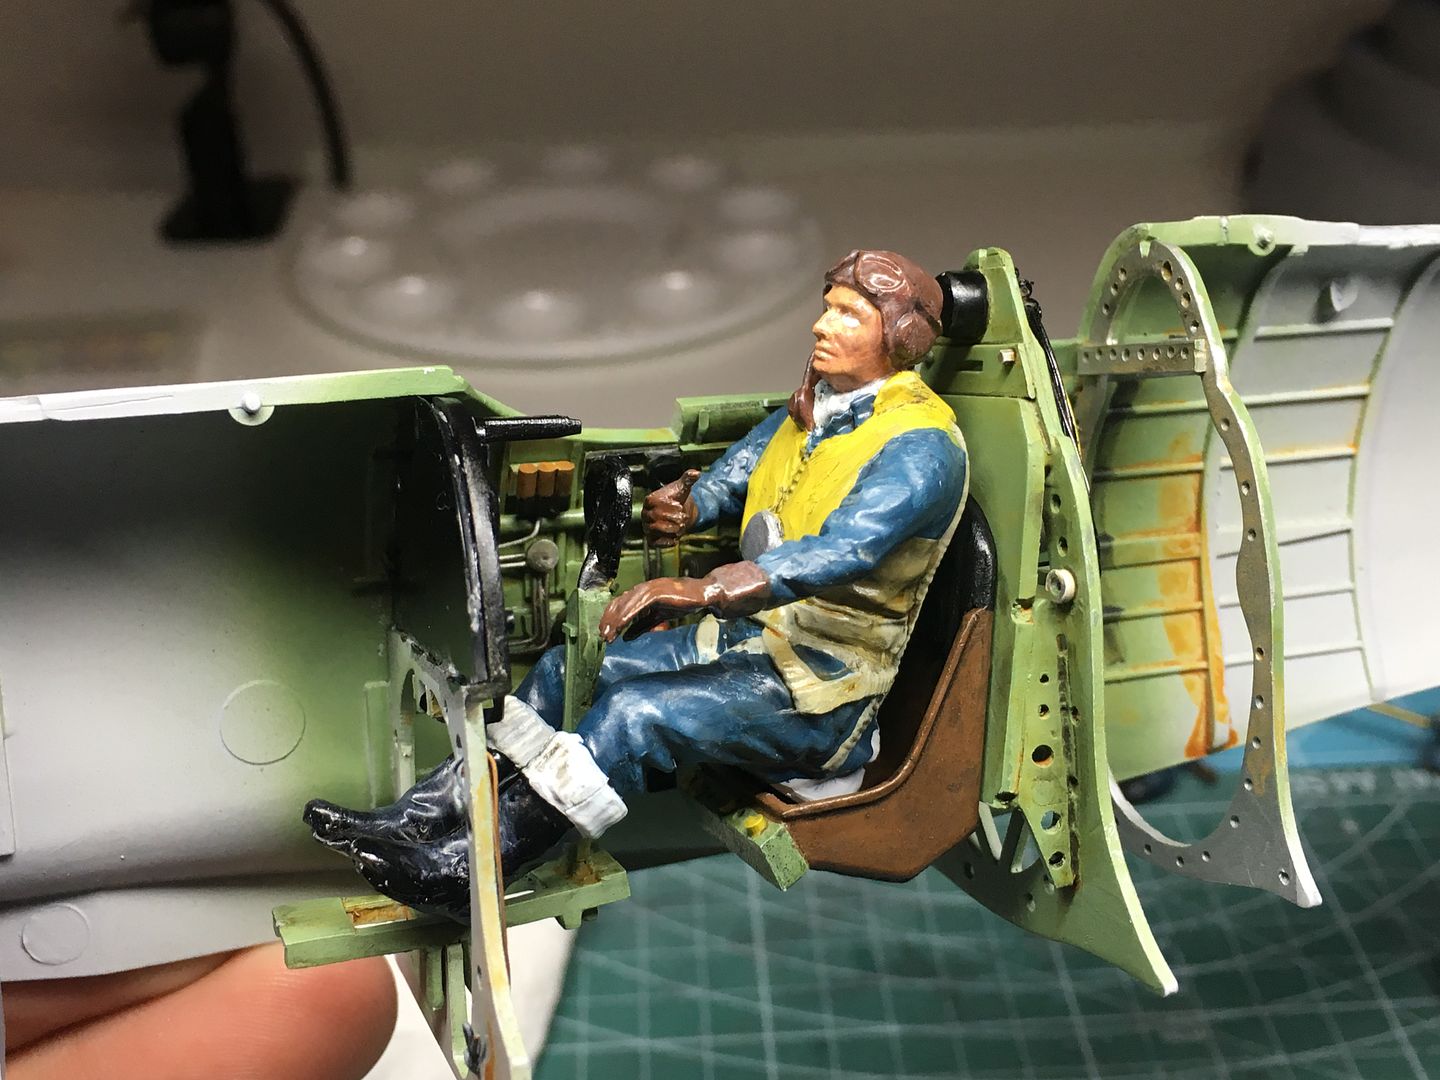
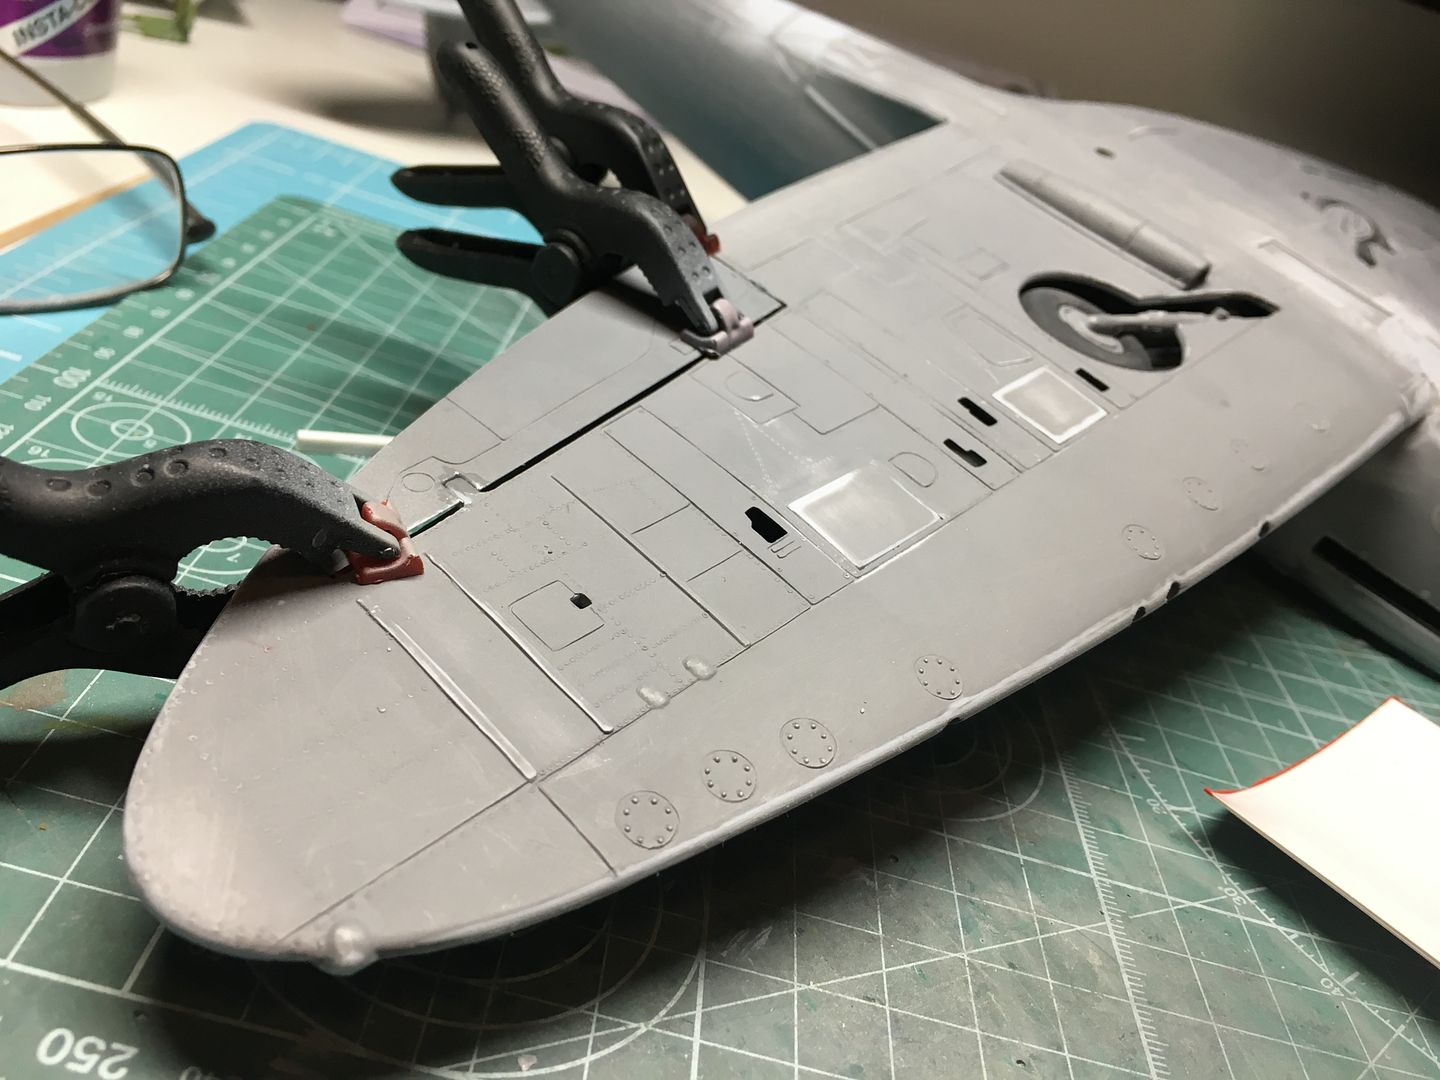
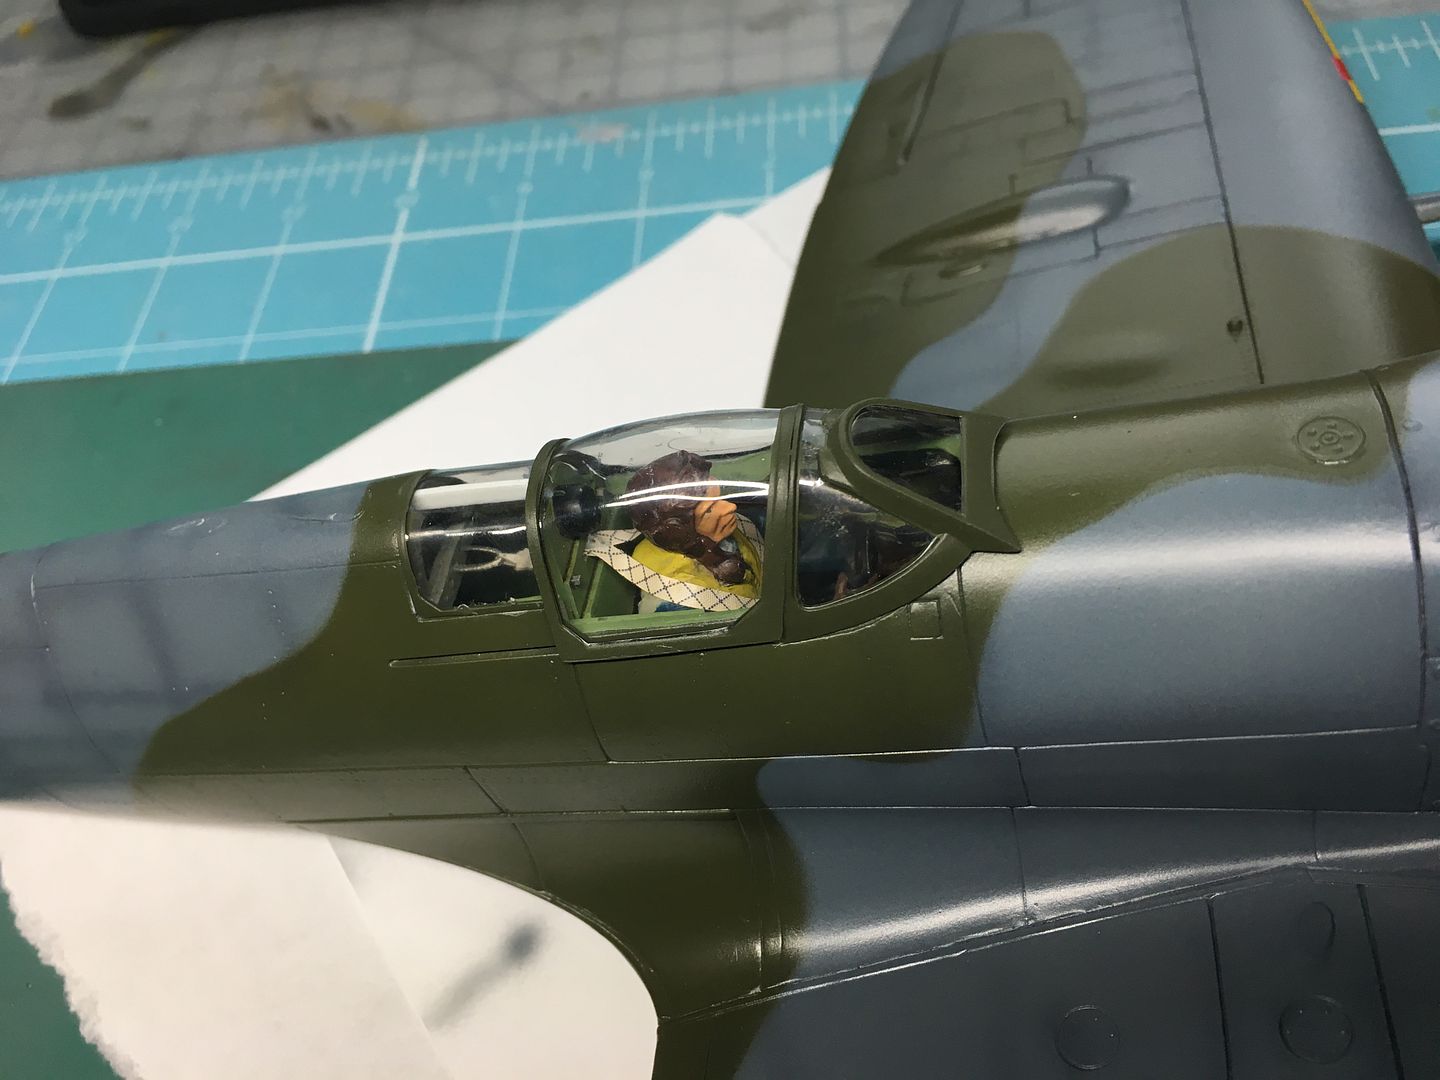
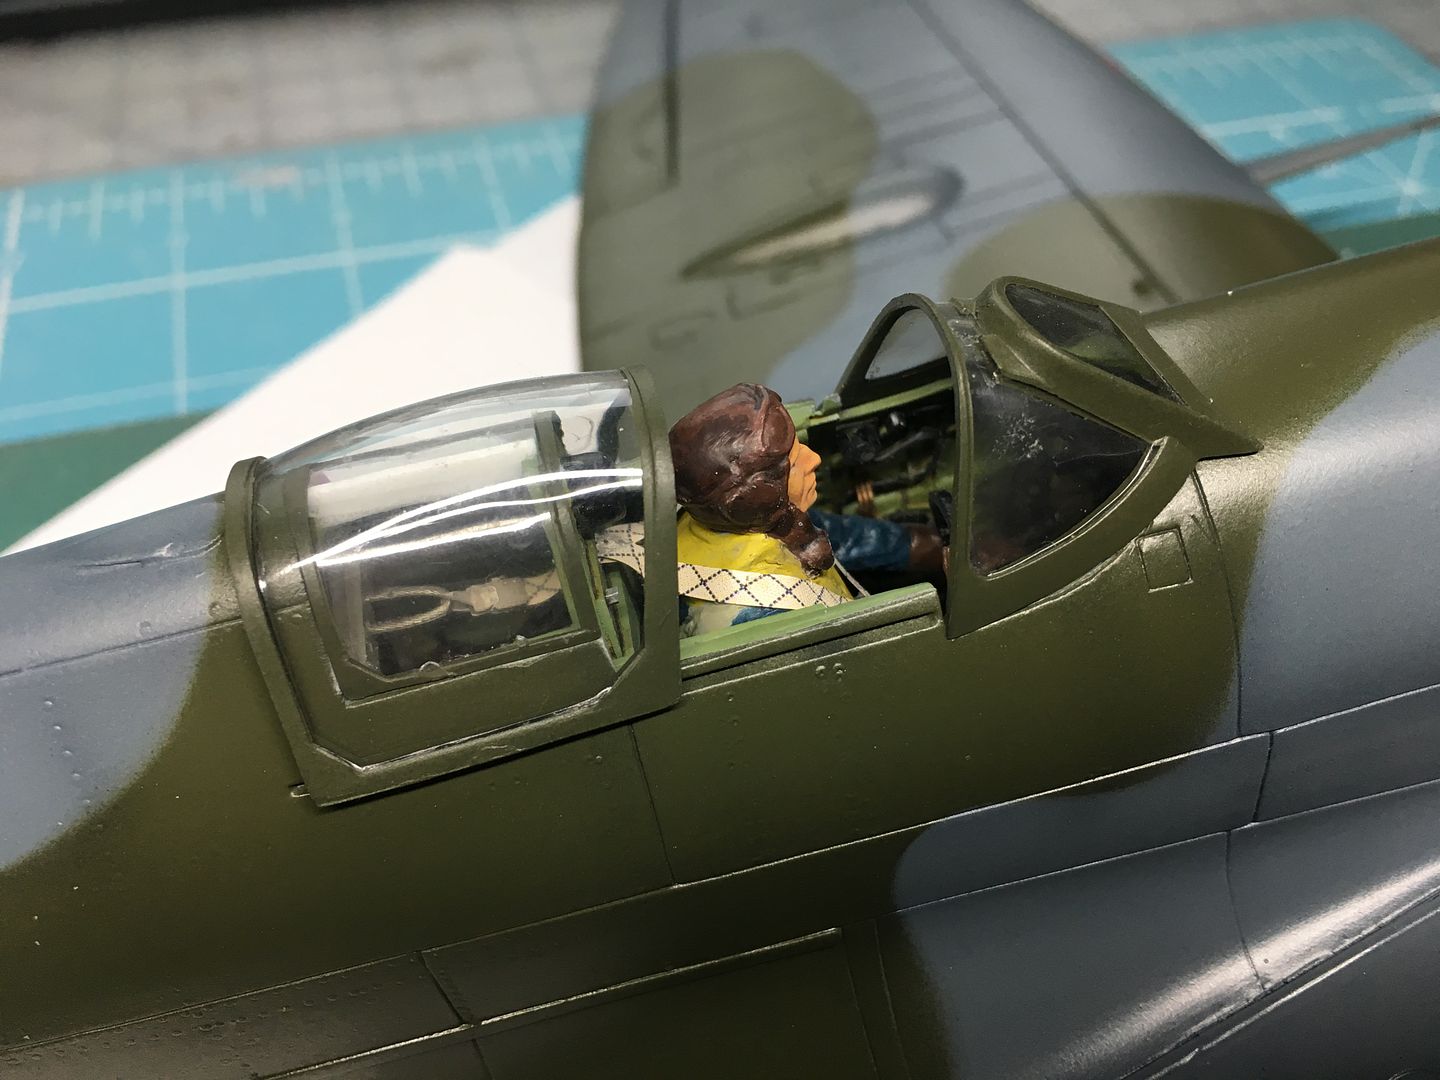
I'd bought the Eduard harness set before I knew I was going to have Ginger in place, but still wanted to use at least some of it! Added the linkage I had seen in various source pics...


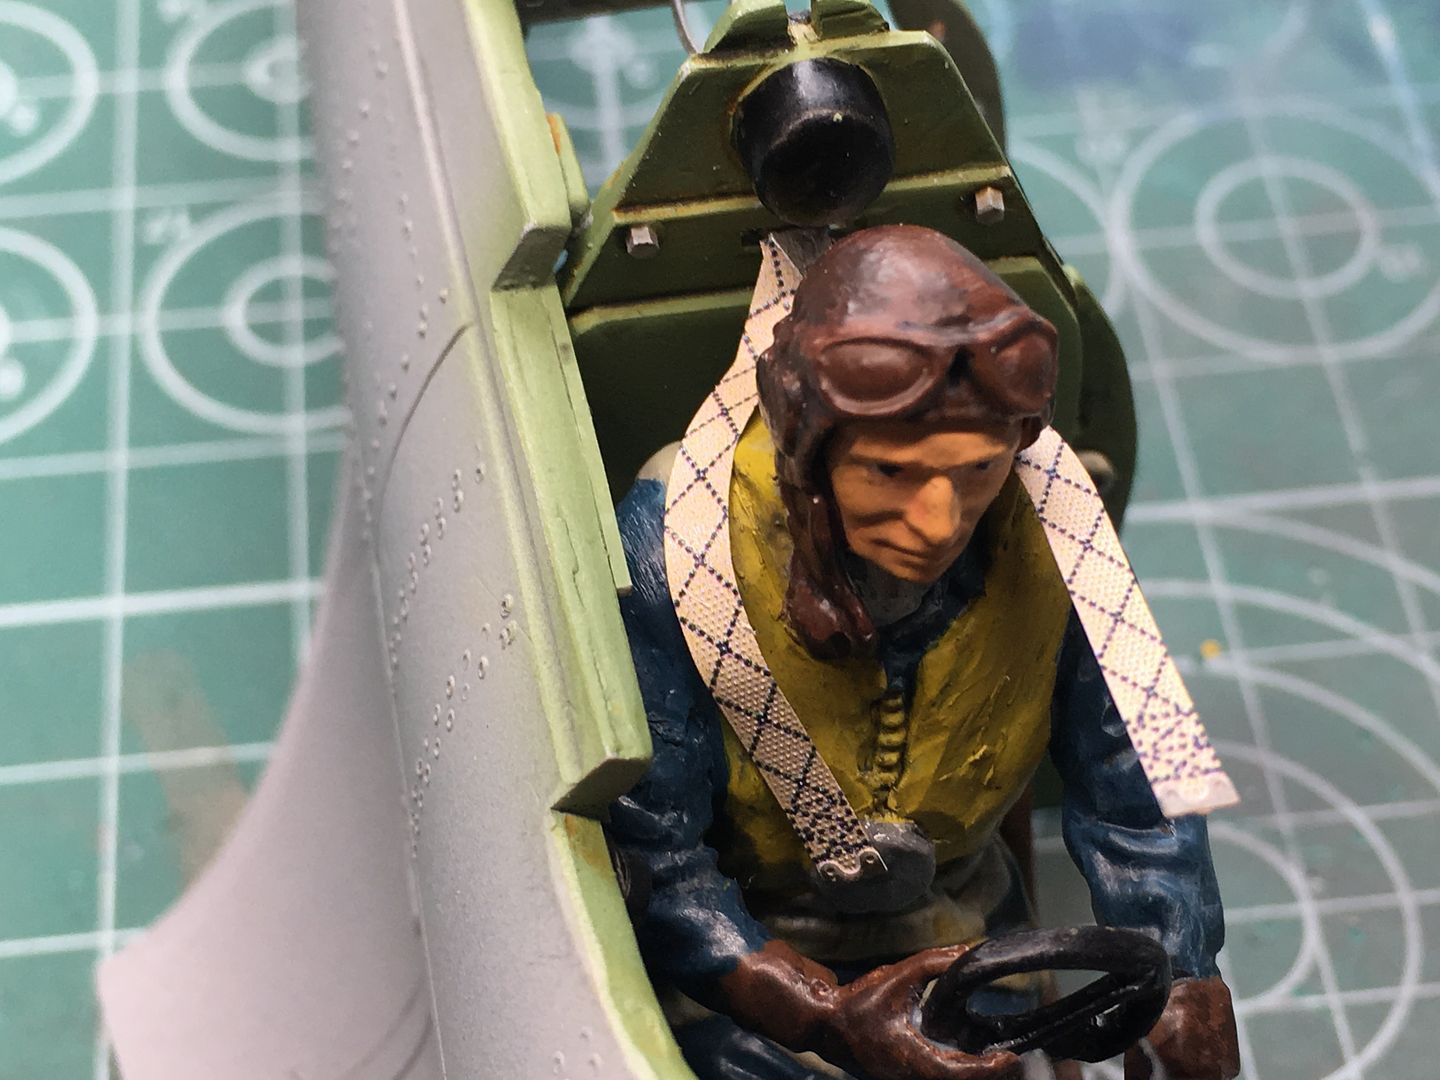
I had already filed off the moulded in harness, glued these on top...I'll certainly add some wash etc to these, as they are far to clean and flat!
With that - I glued the two halves together...
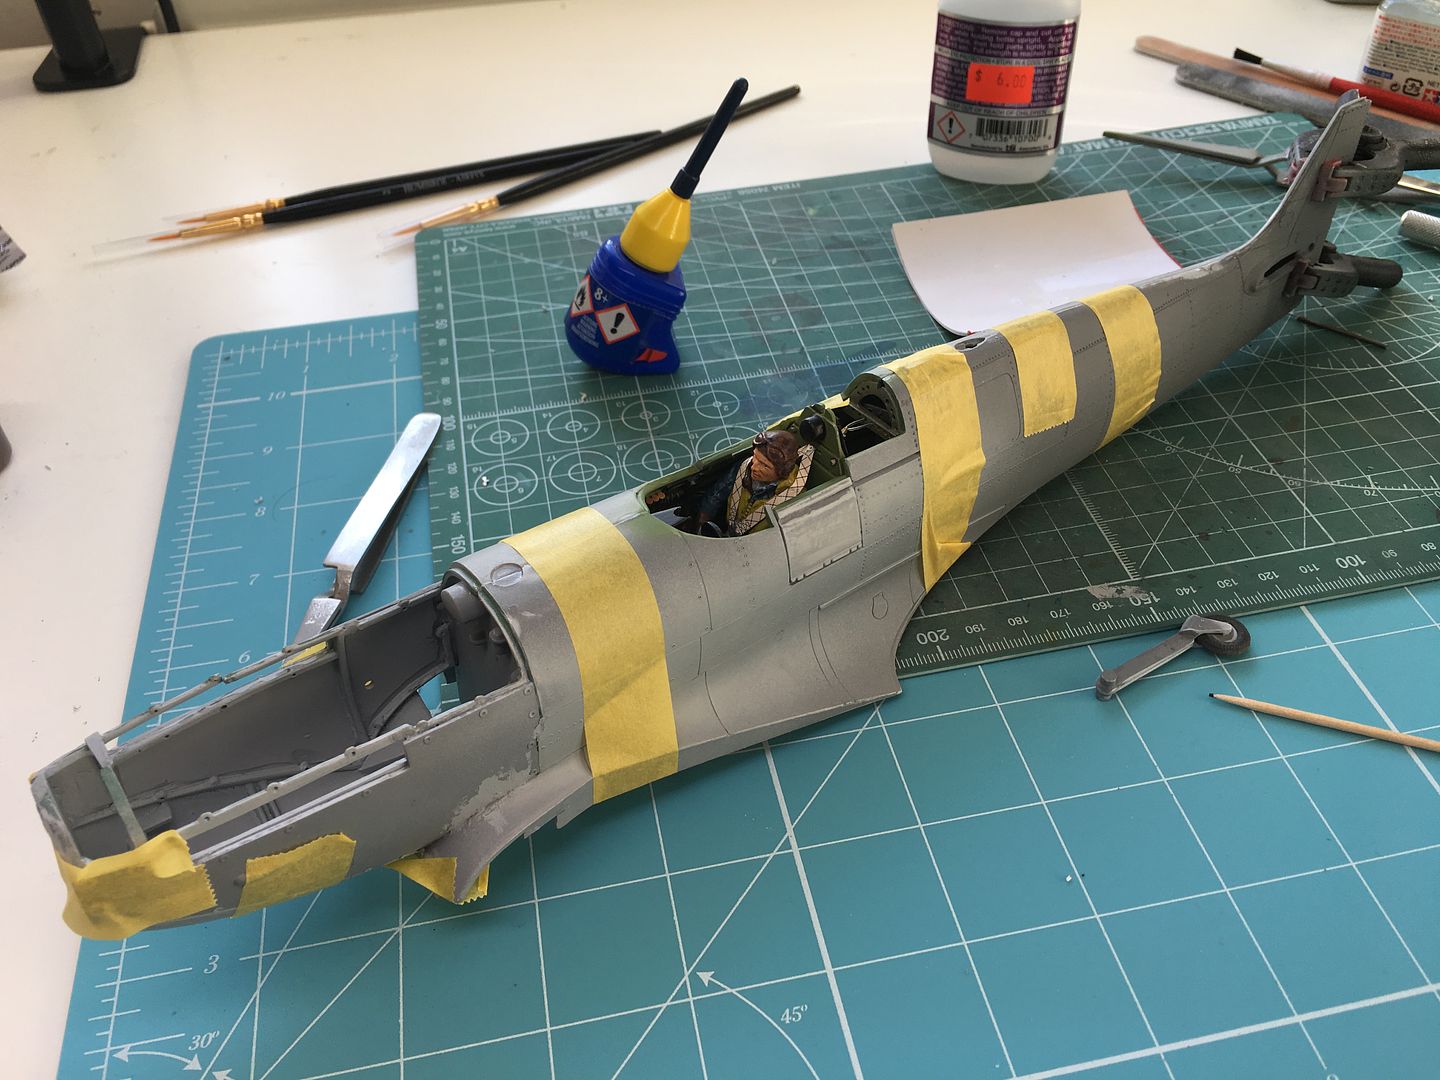
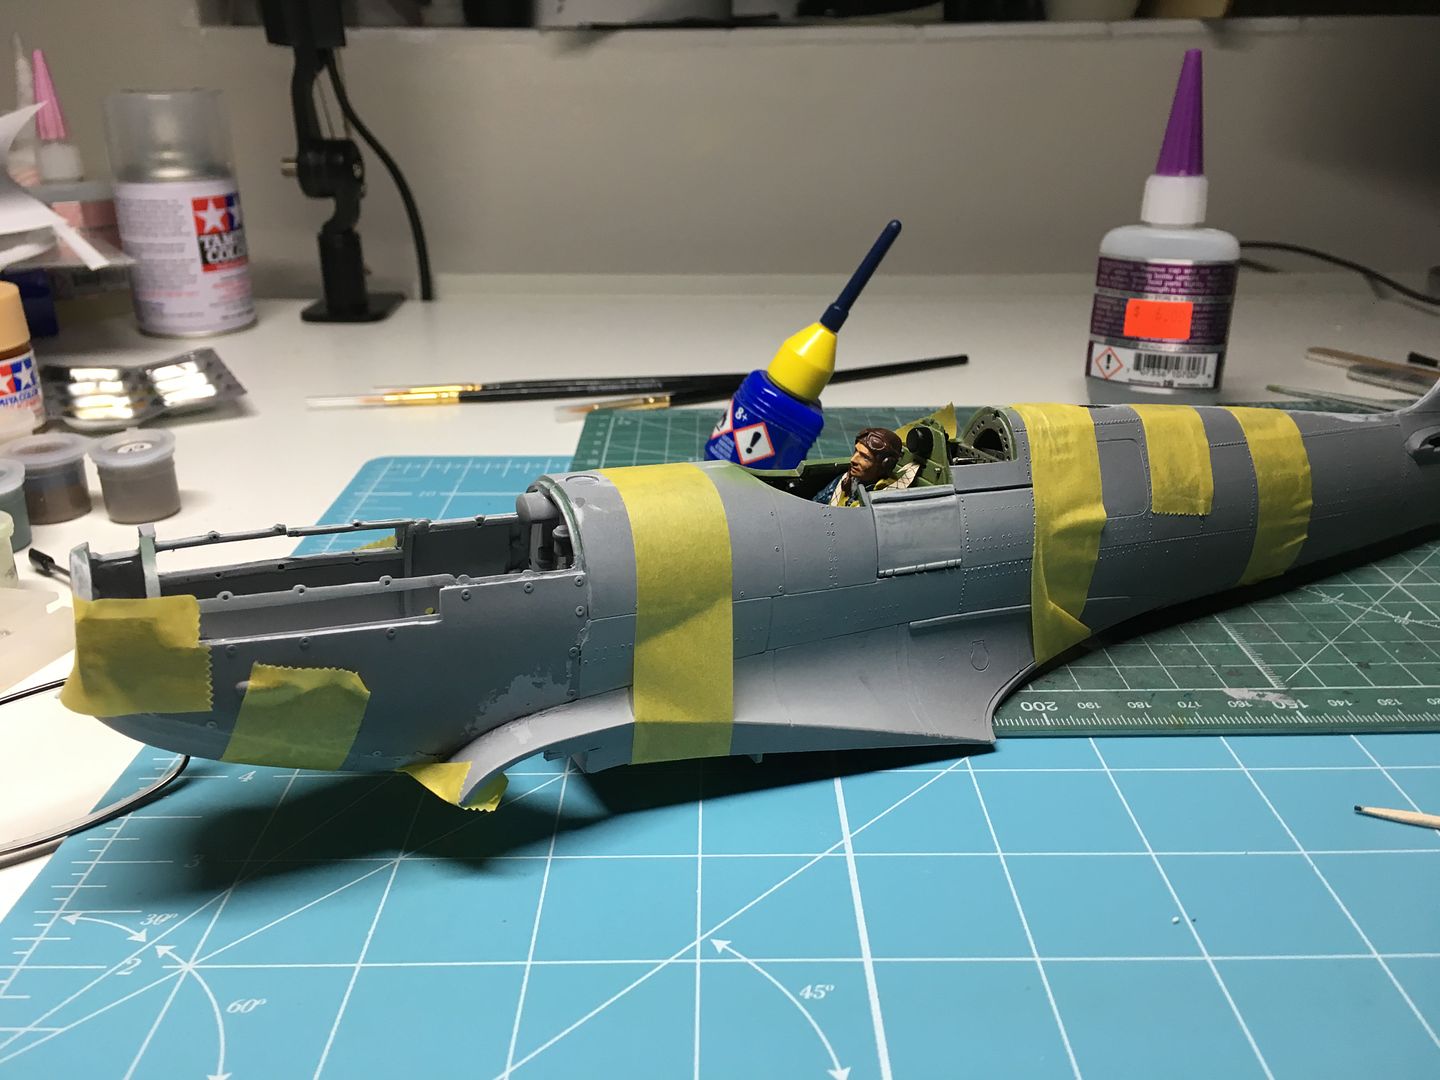
I can still reach what I need to reach at final touch-up stage.

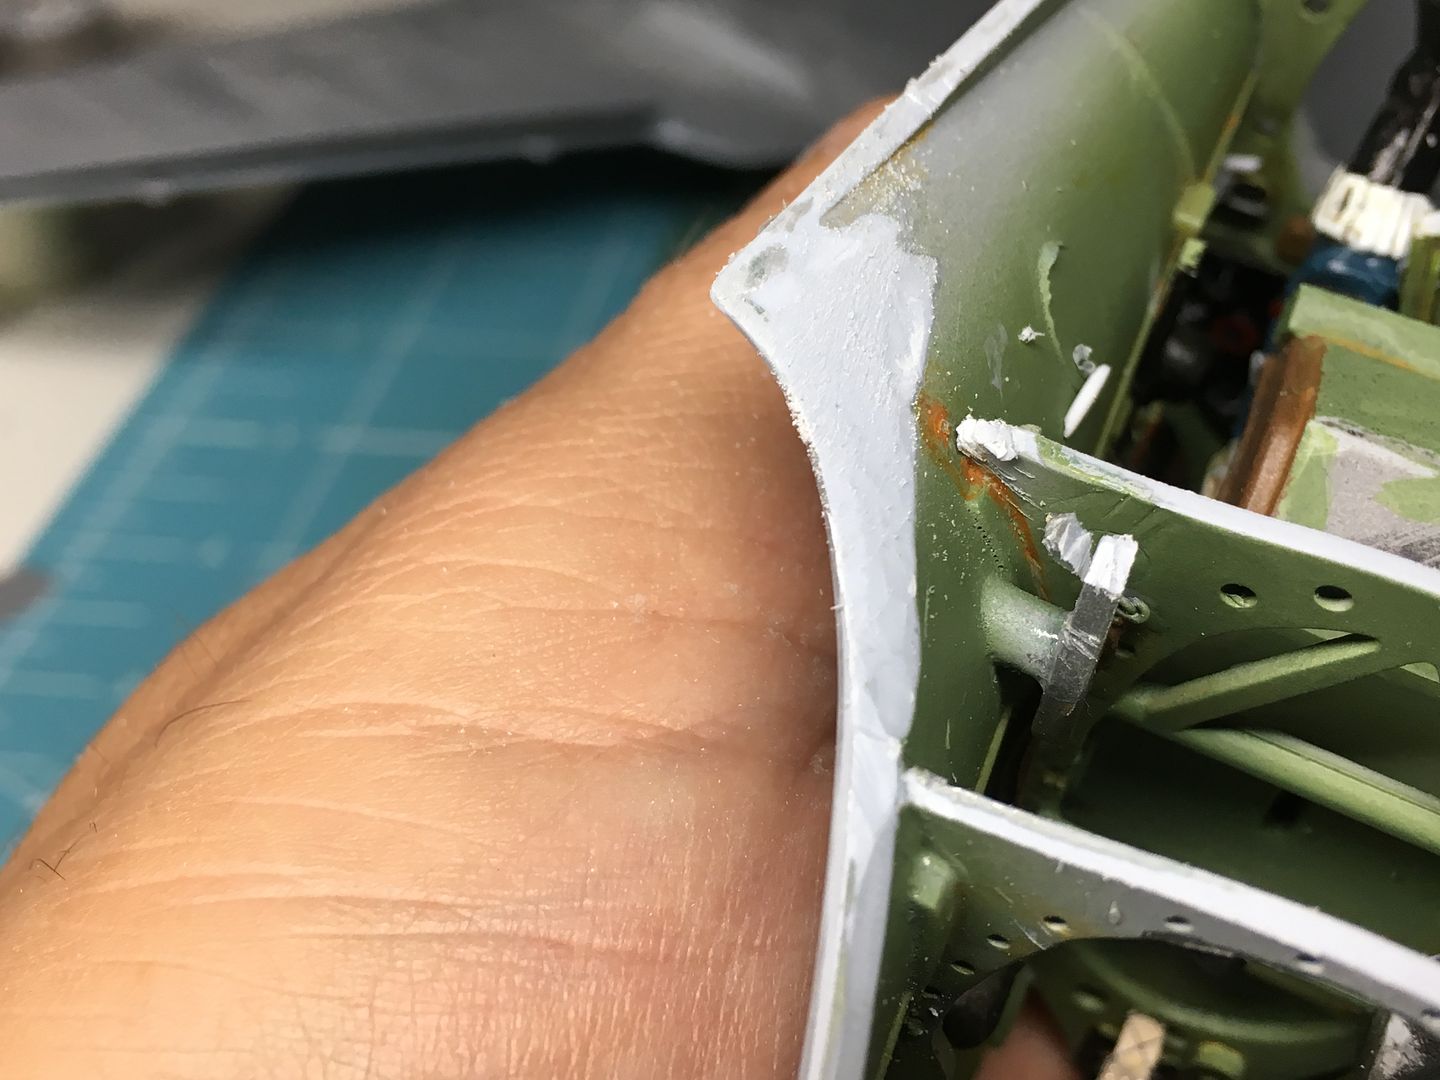
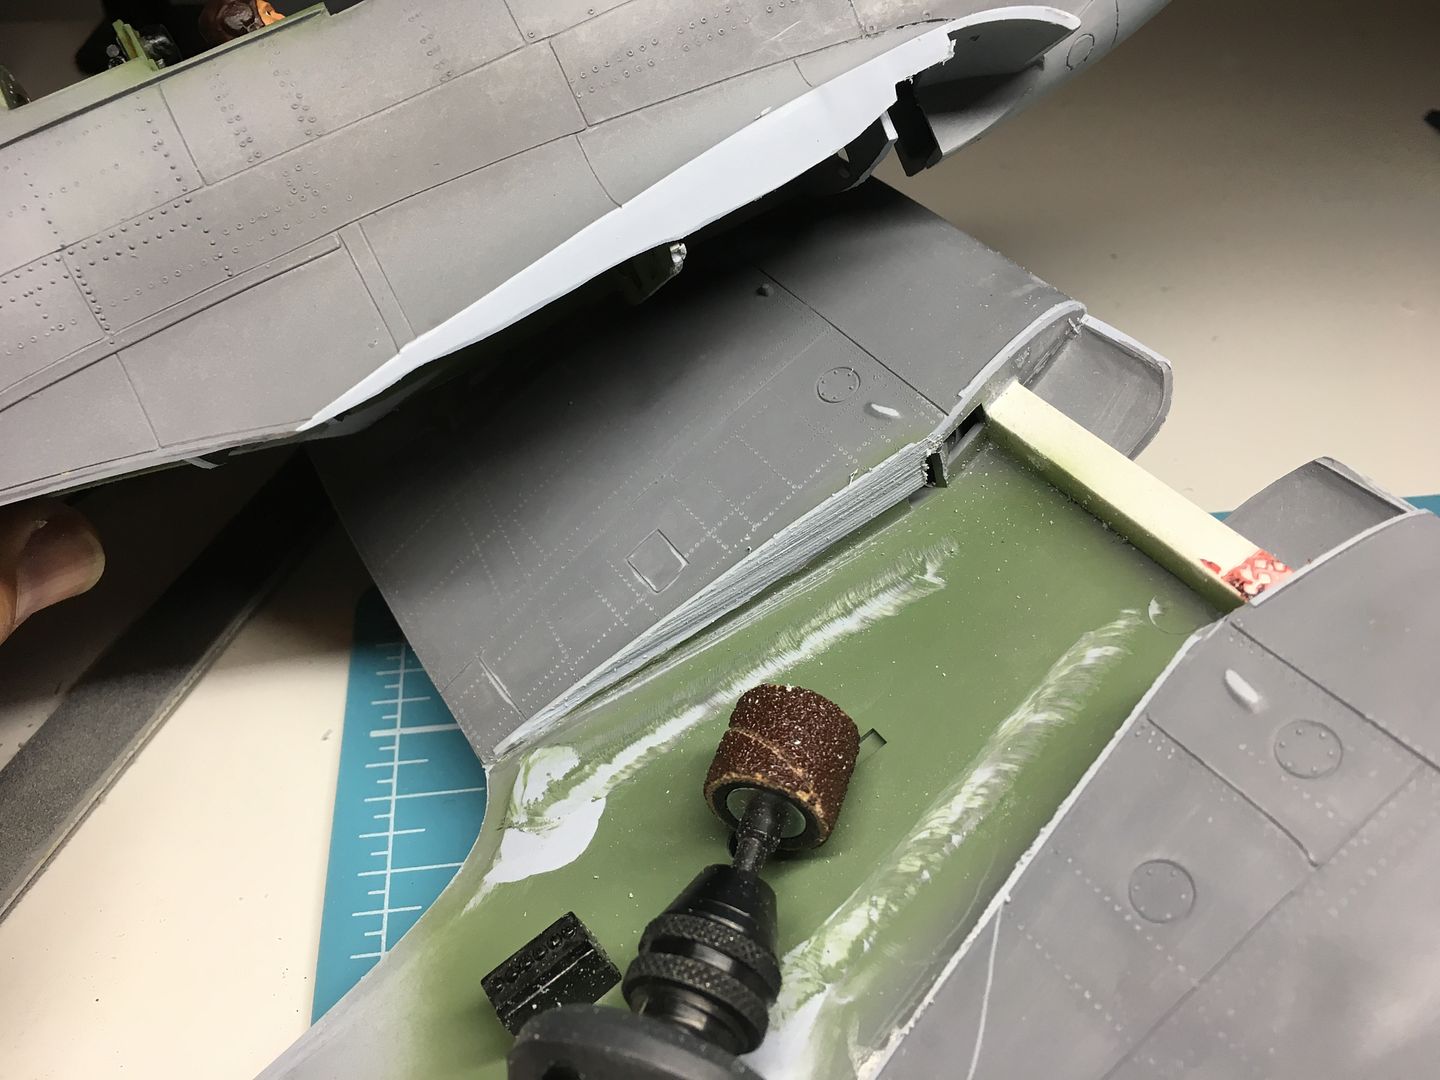
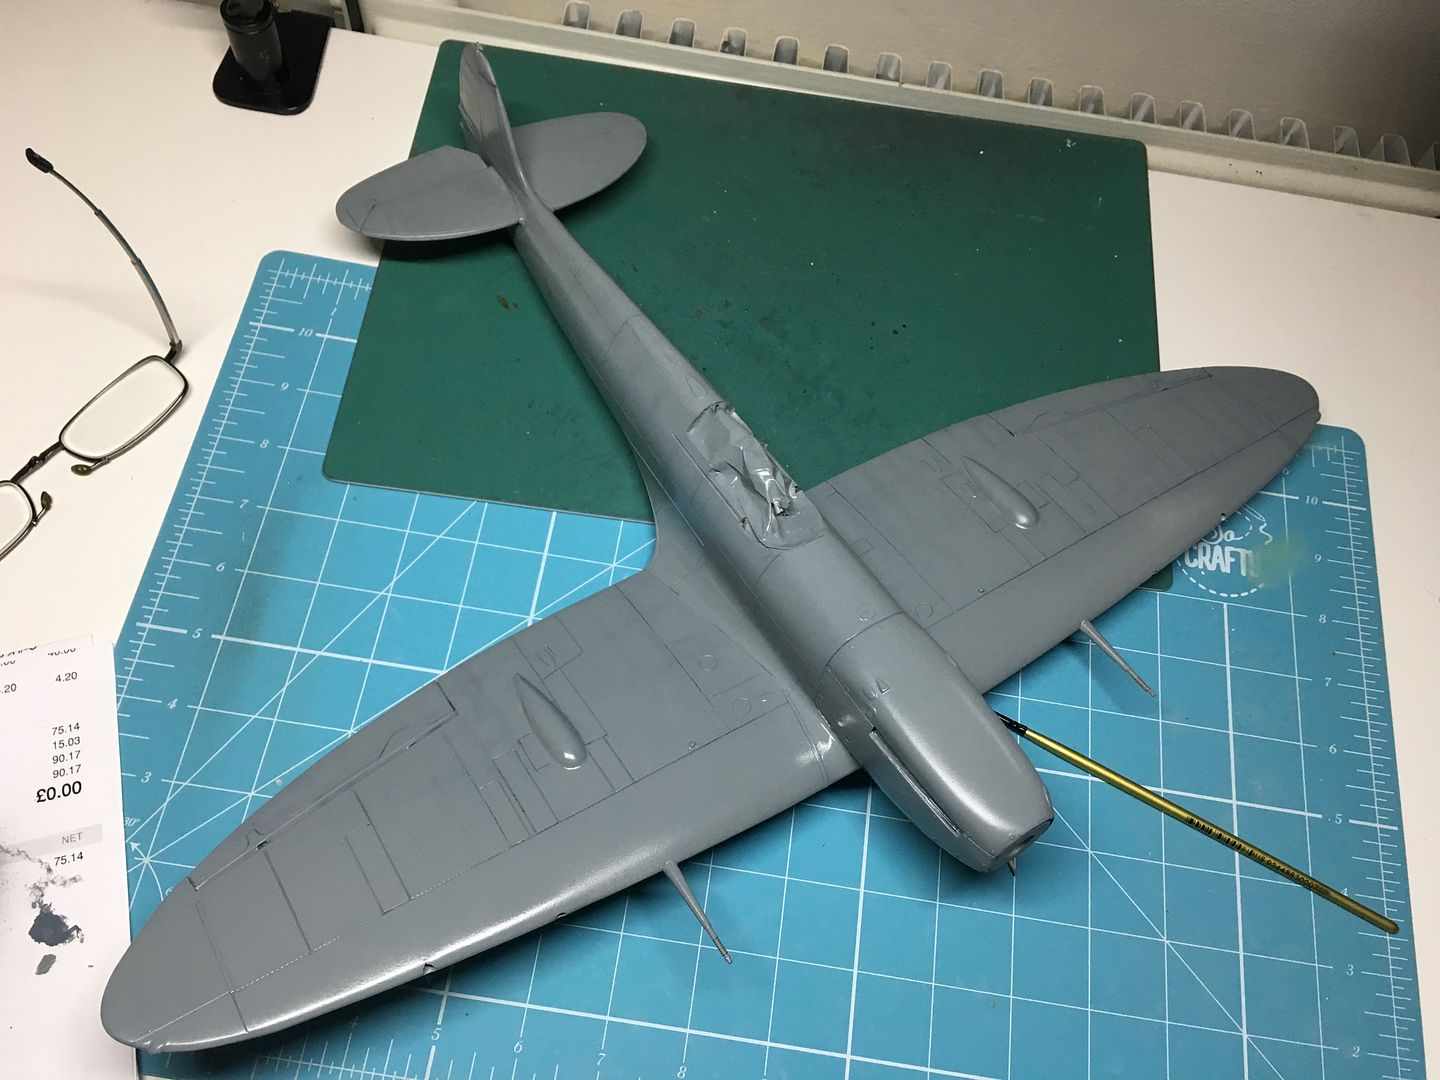
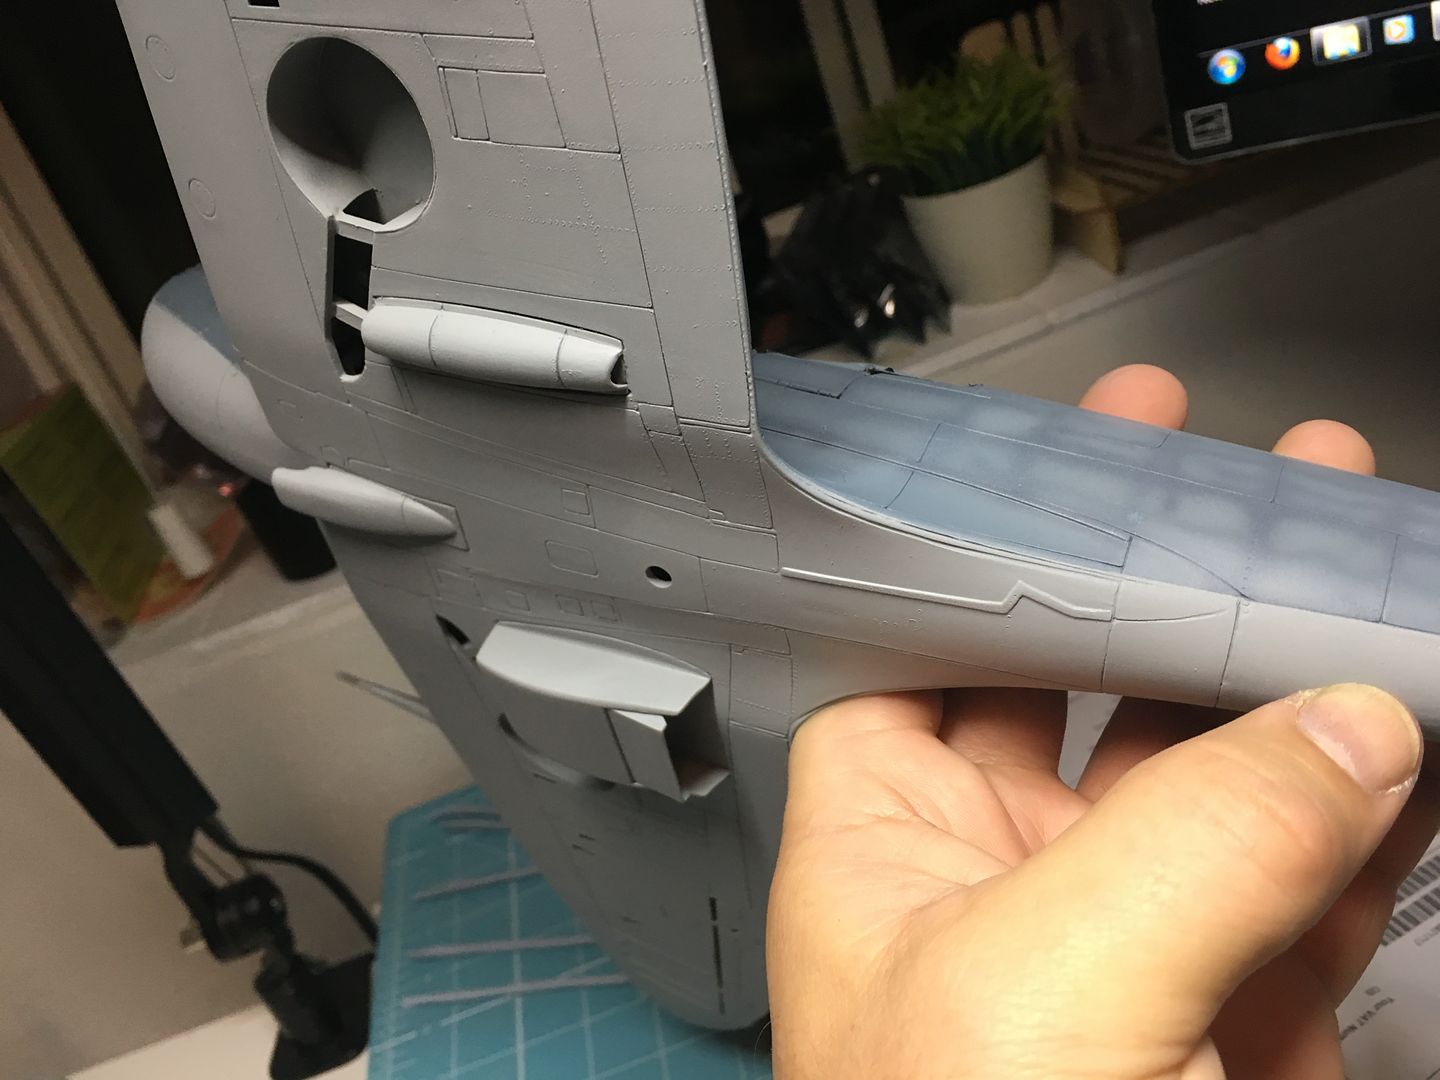
Fitting the fuselage to the wings required some....thinning! Lots of lumpy, thick tooling here from this old kit...
Lots of rigging to help parts line up and set where I wanted them to!
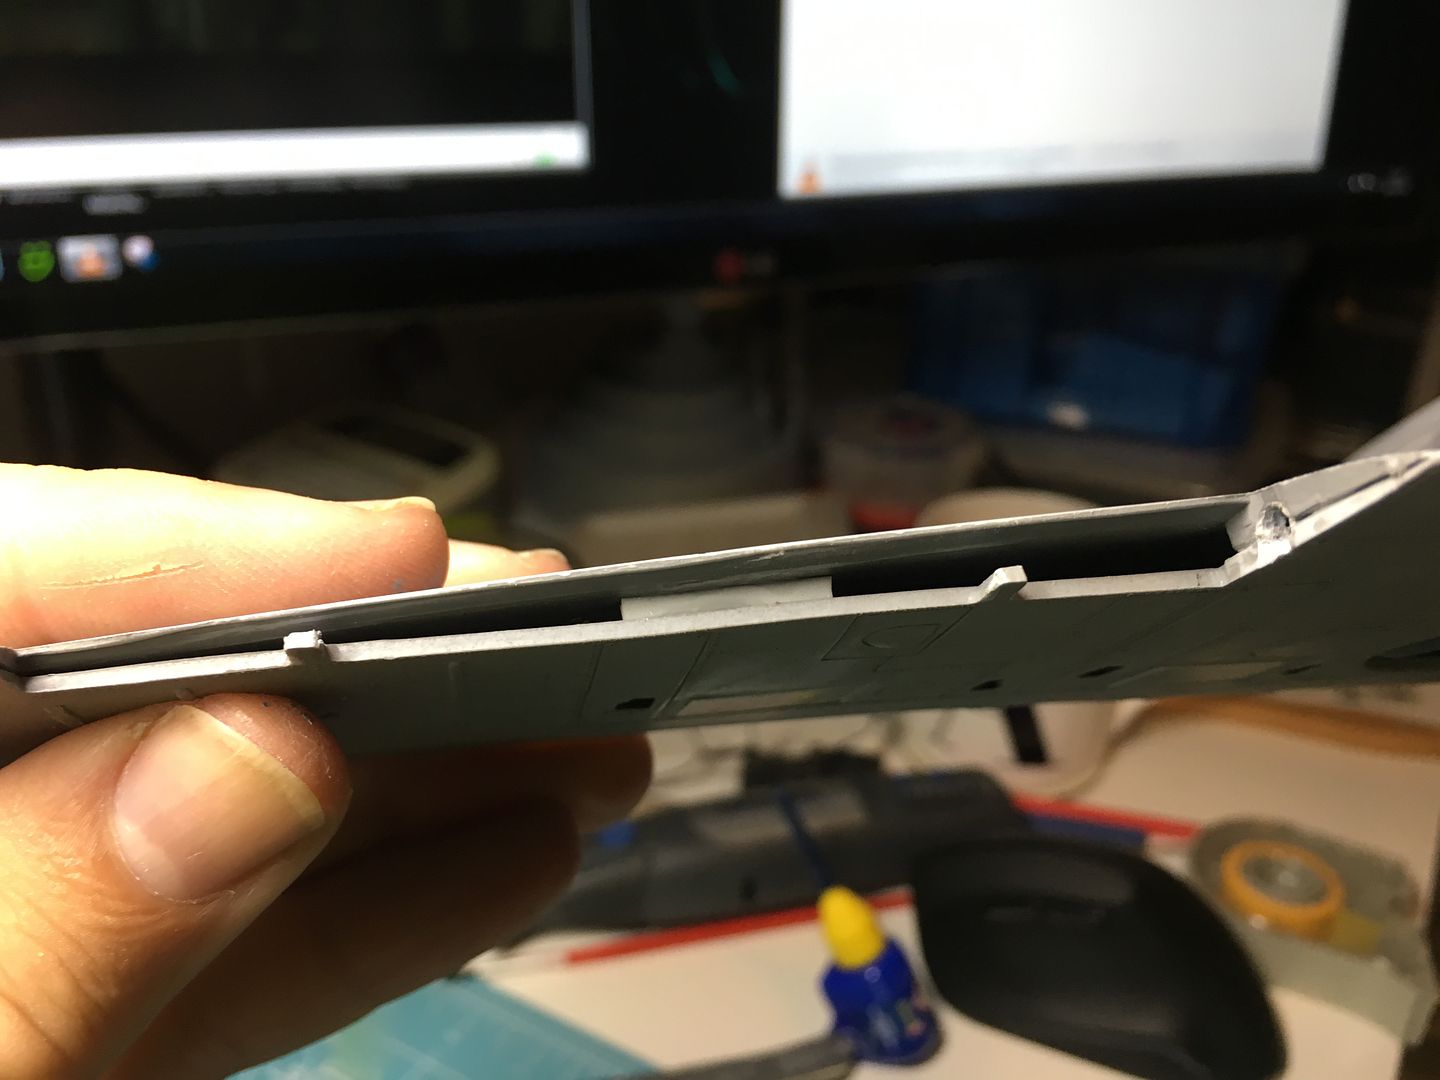
Gluing in spacers to hold the wing skins togther...
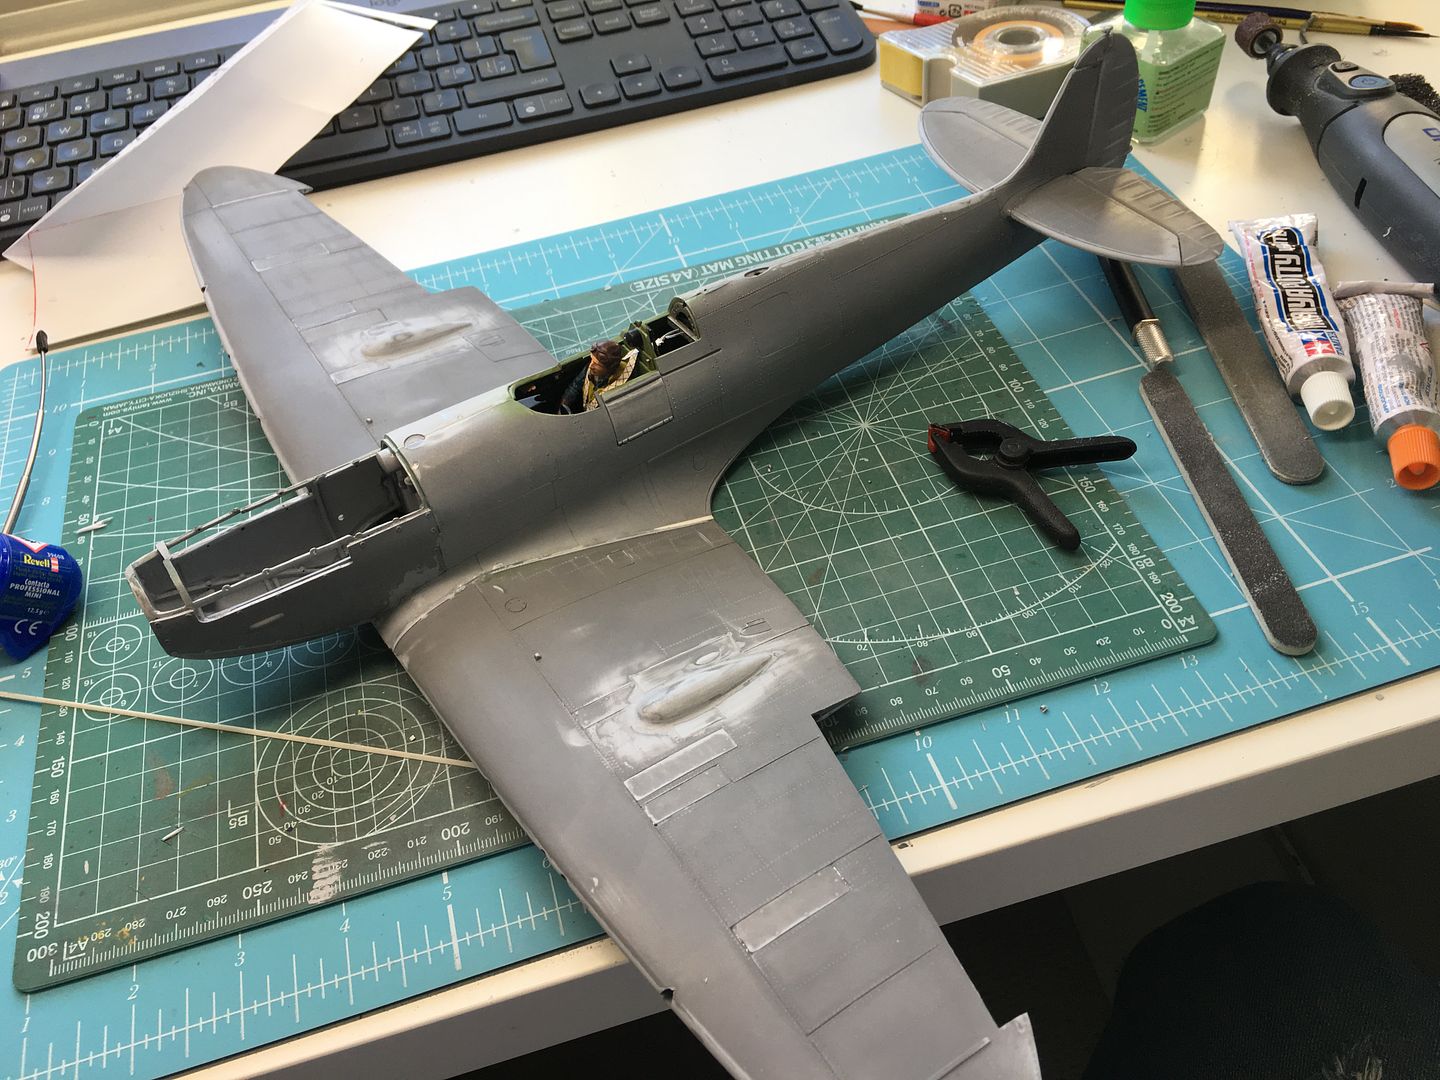
But starting to look like a plane now...

Let the filling, sanding and cursing begin.
Although I had fitted the undercarriage, the plane will be 'flying' - so don't need this...
I decided to cut the undercarriage out, so I could fix the wheel covers neatly, and glue the wheels in evenly, without being tied to the lazily moulded undercarriage struts etc. I also added the walls to the wheel bays...
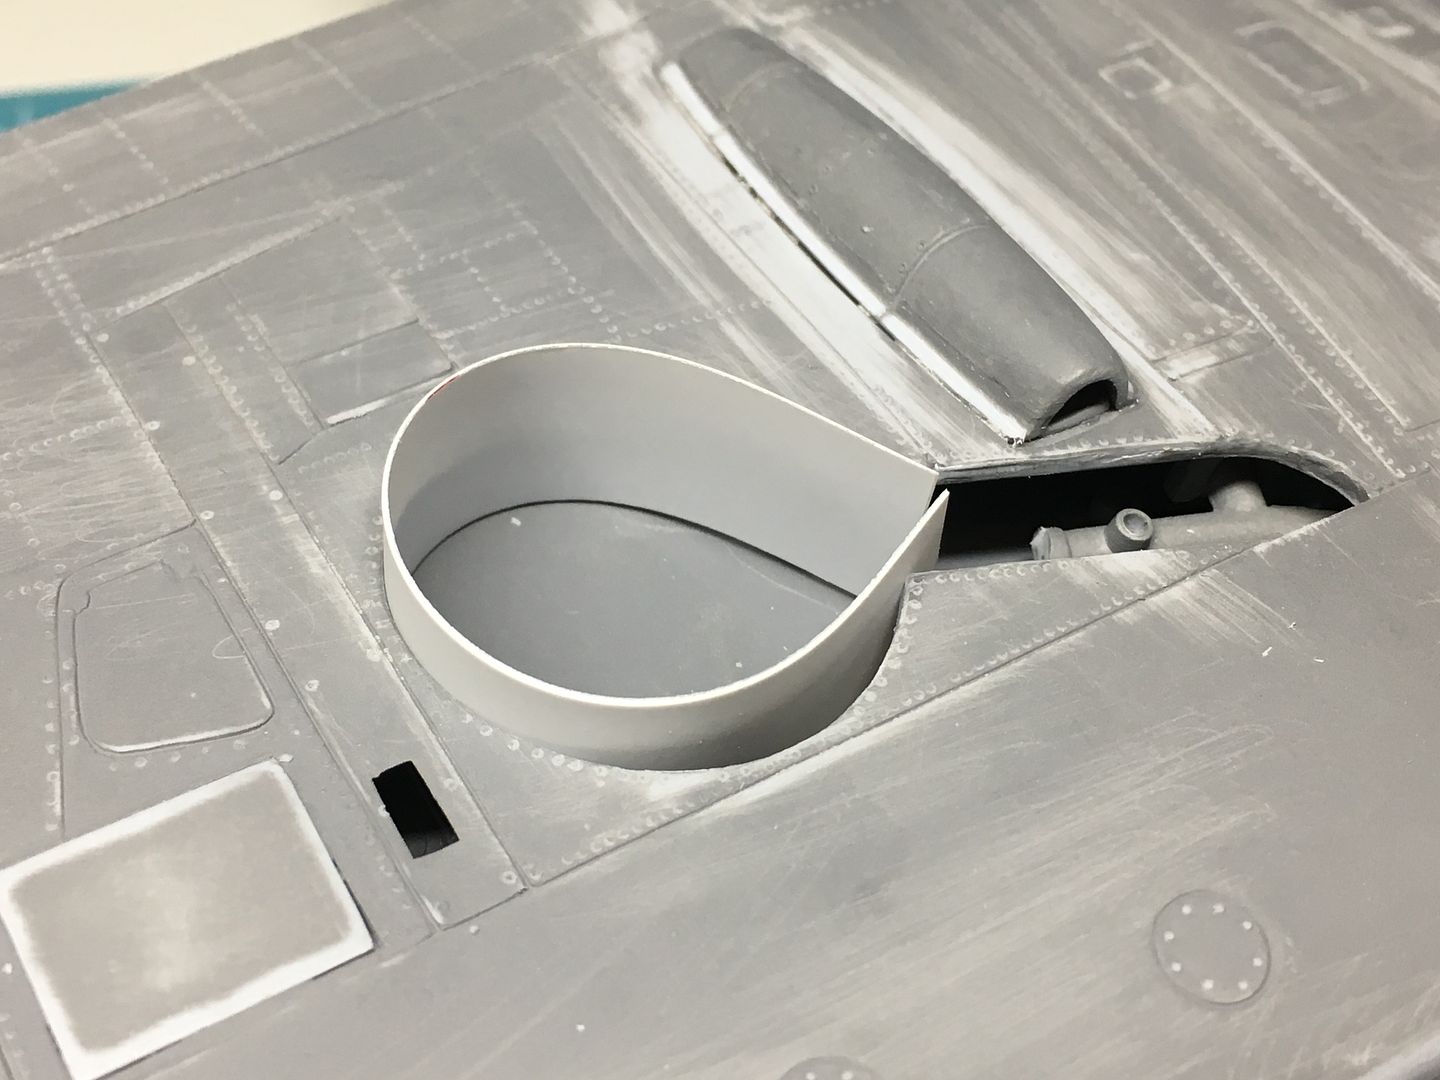
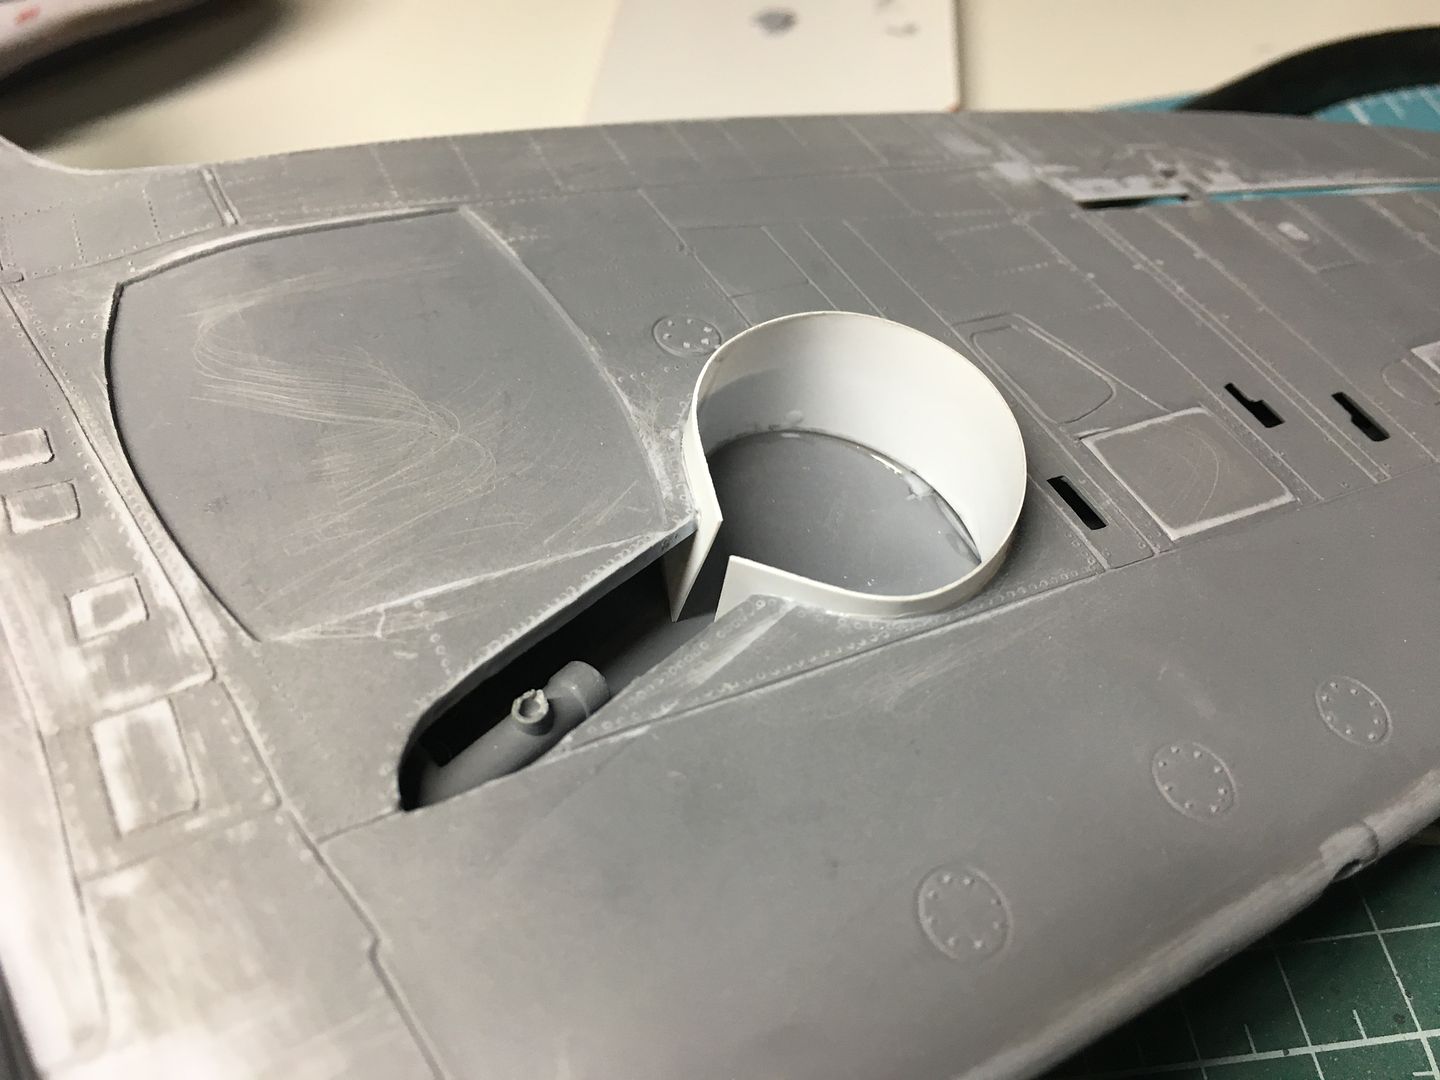
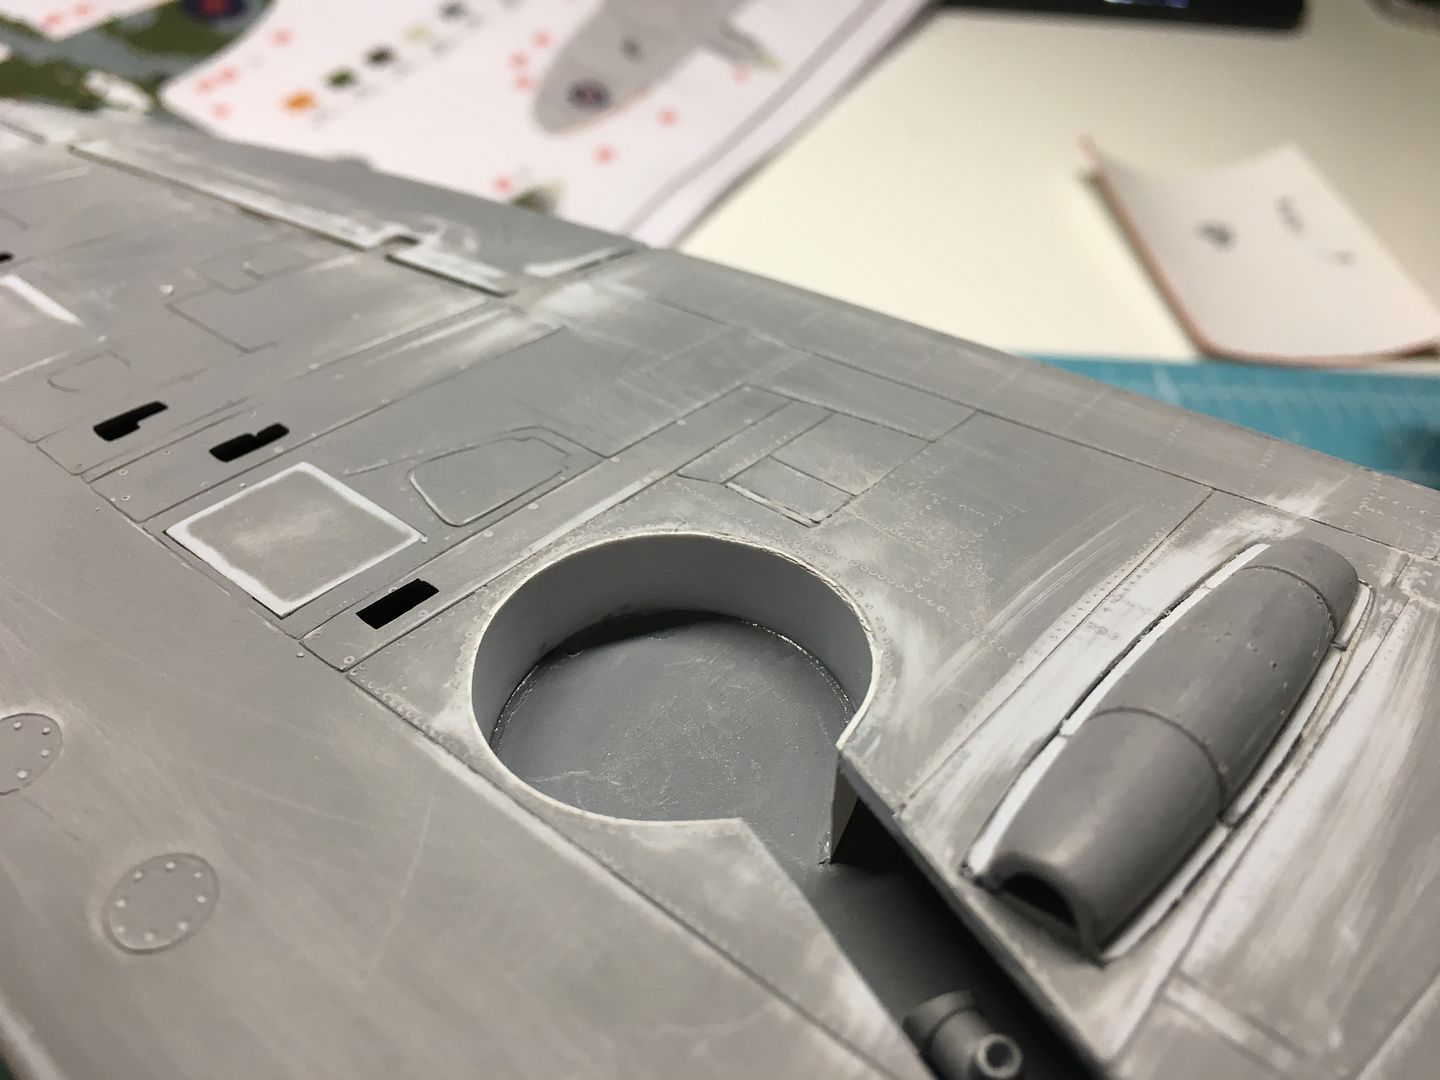

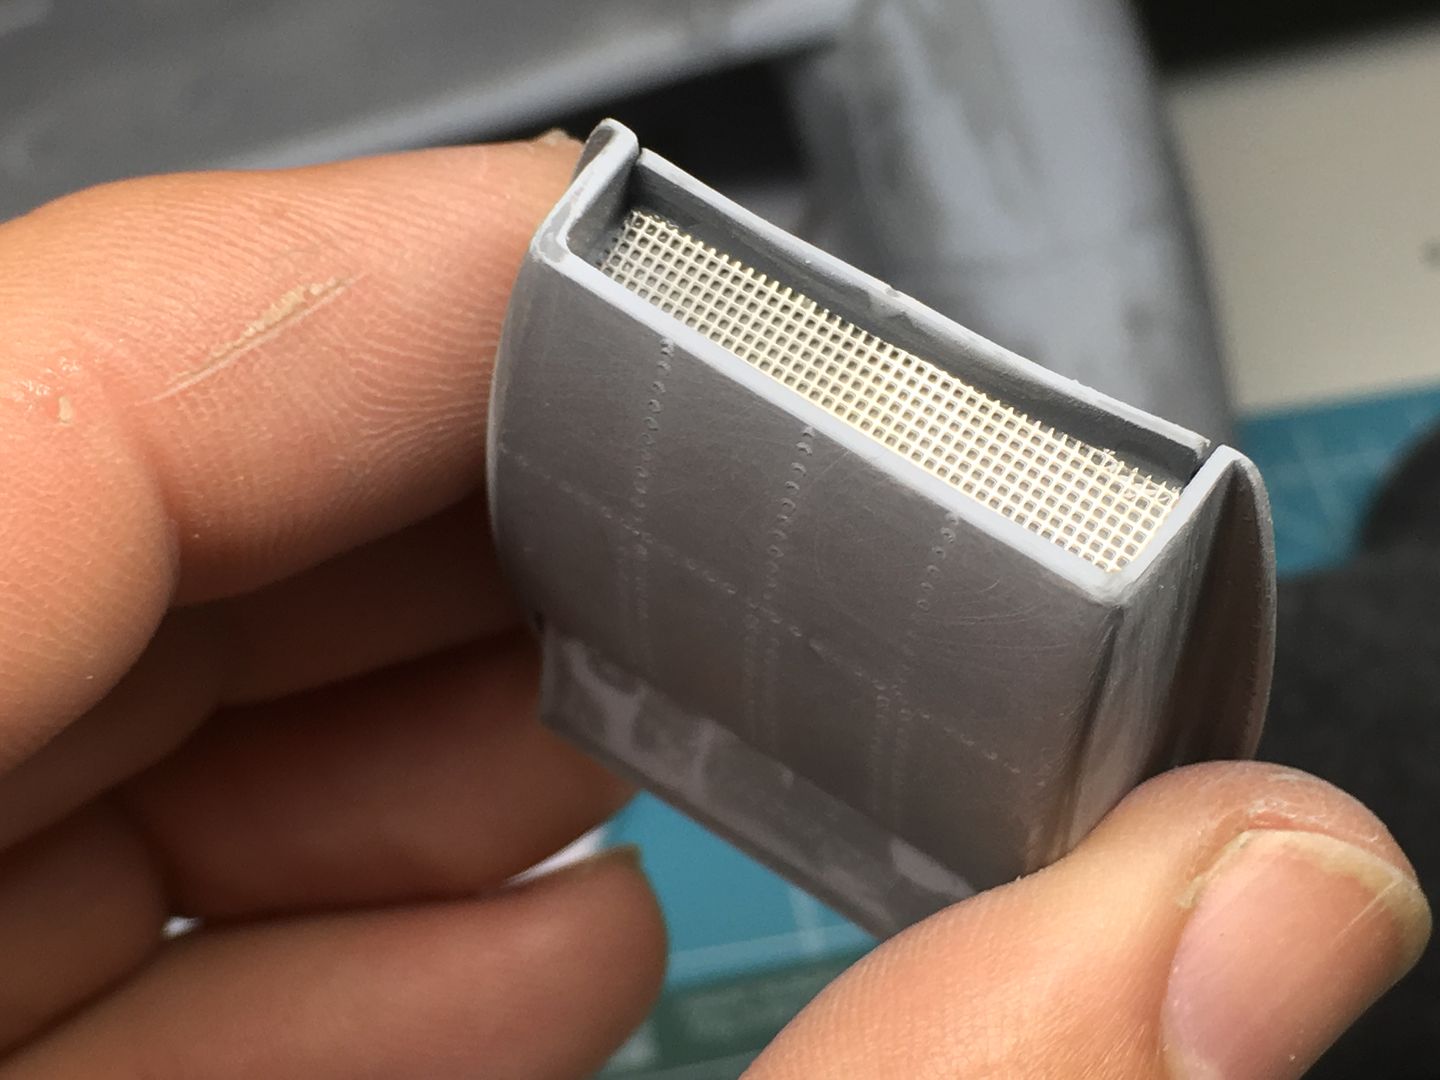
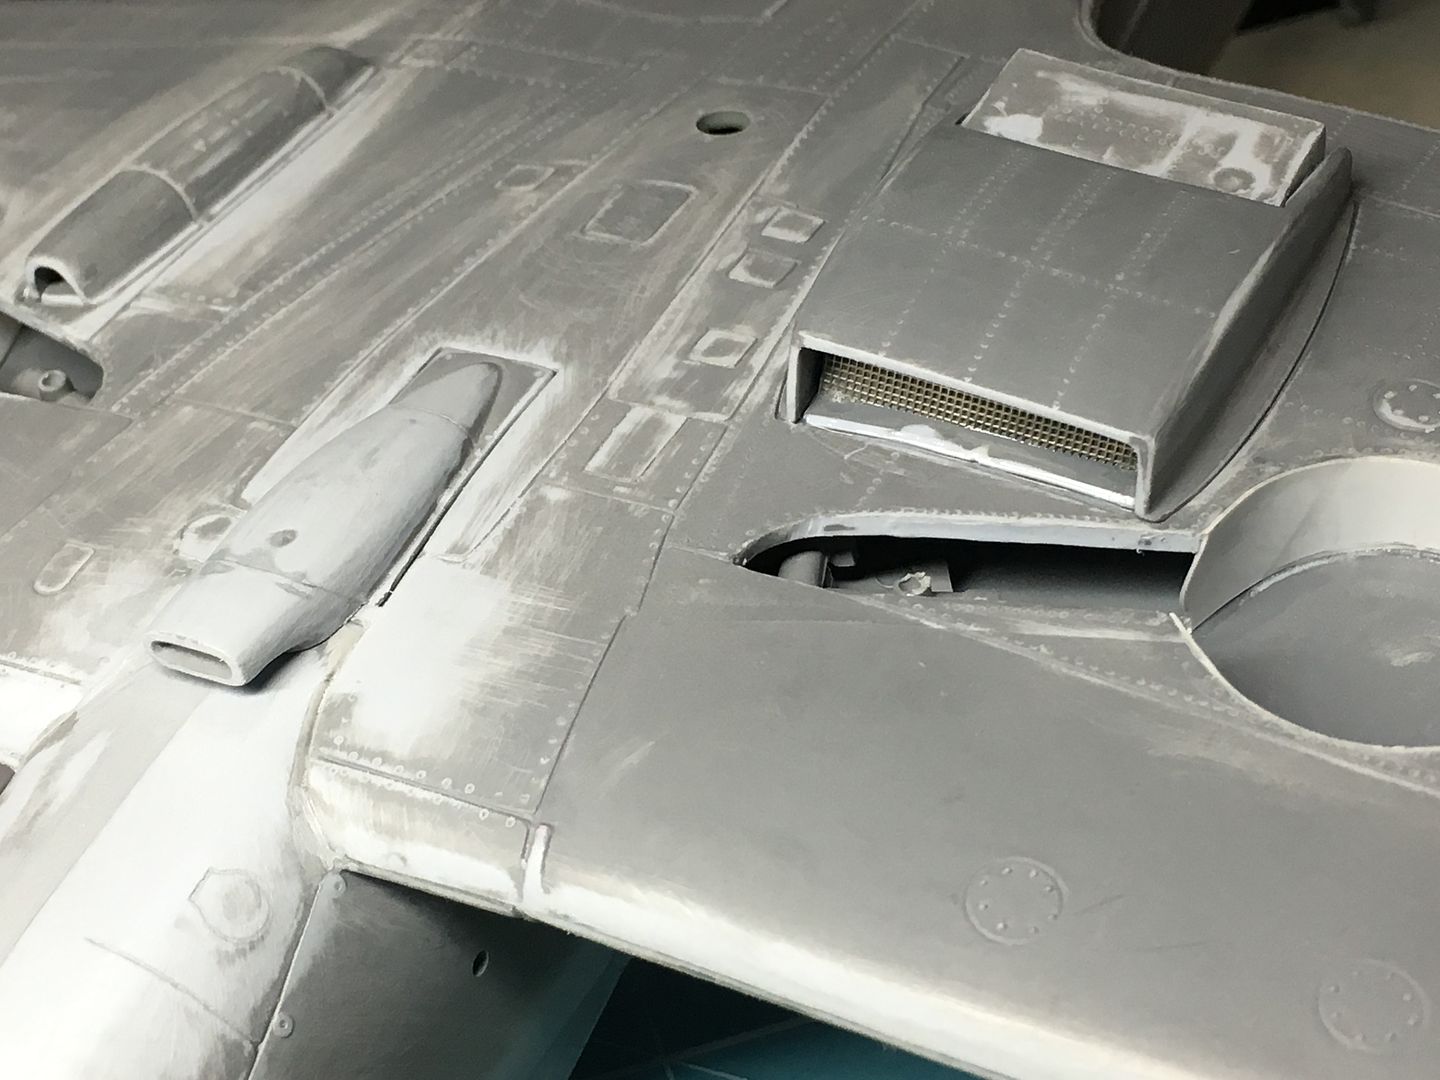
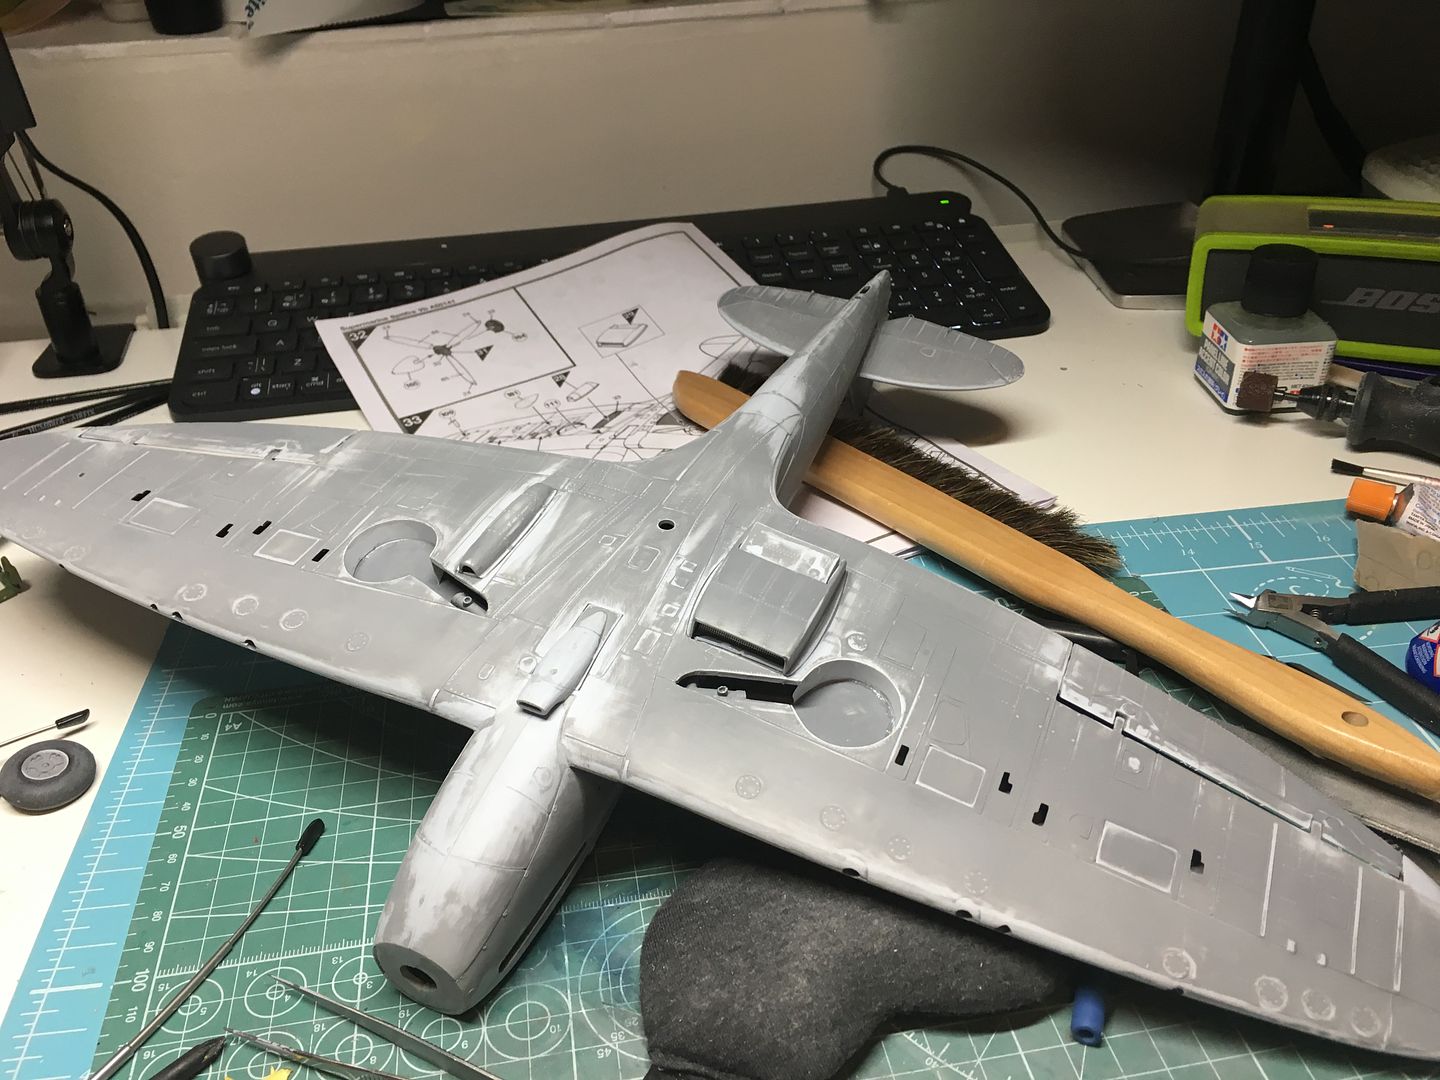
Not going to add huge detail, but did add some mesh to these visible rads...

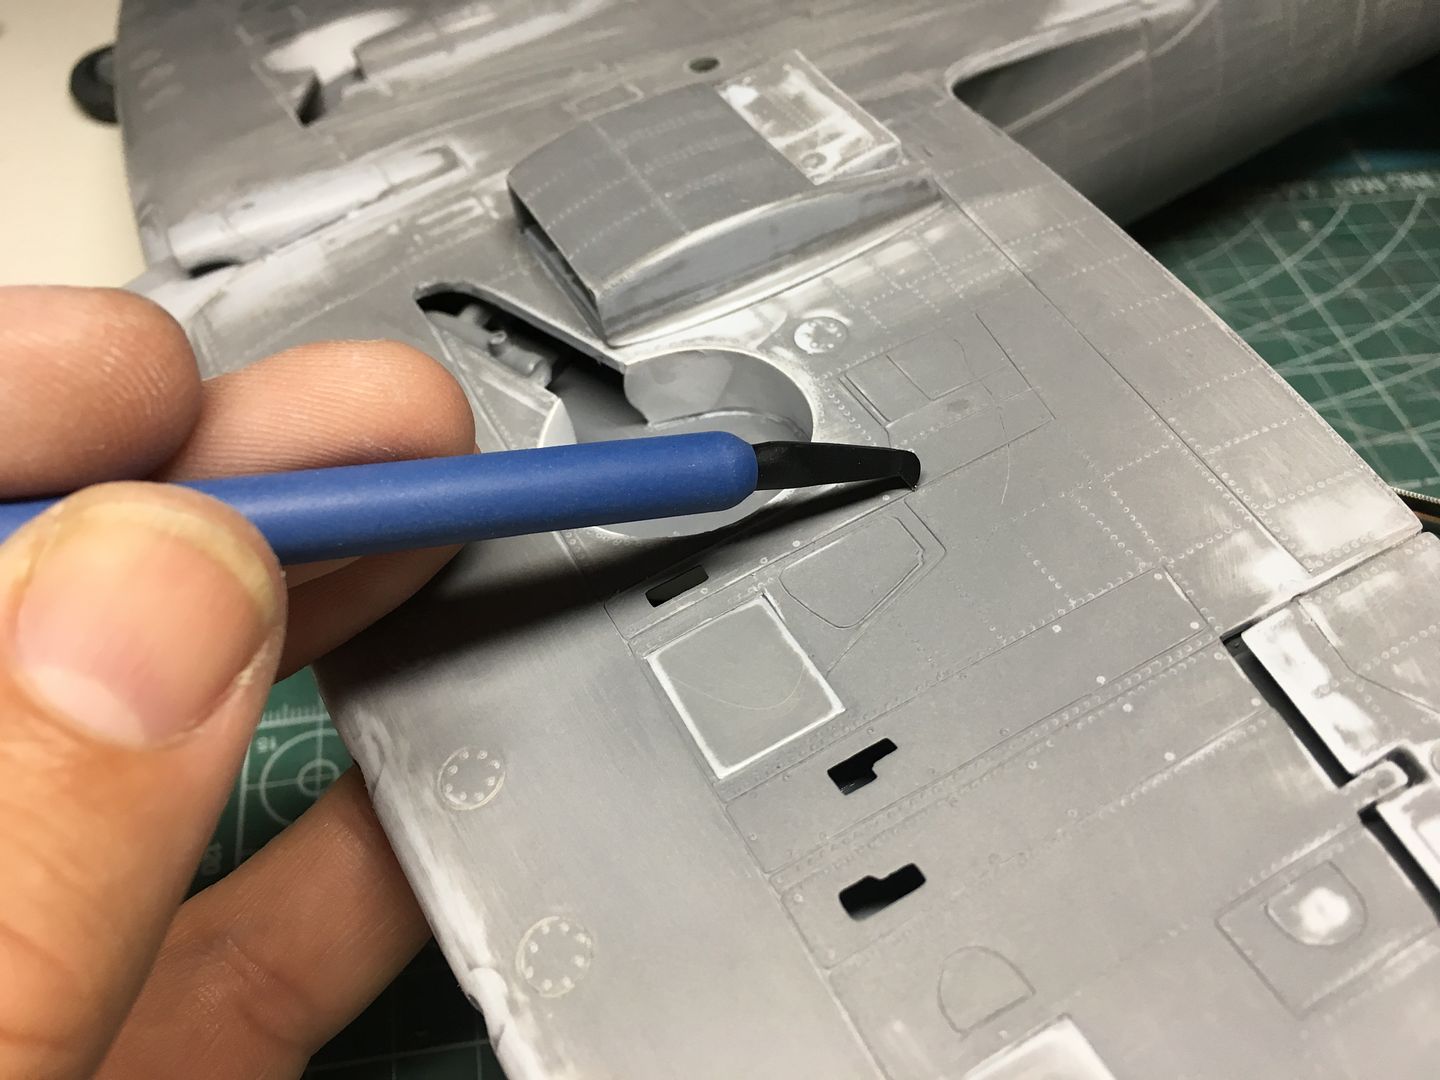
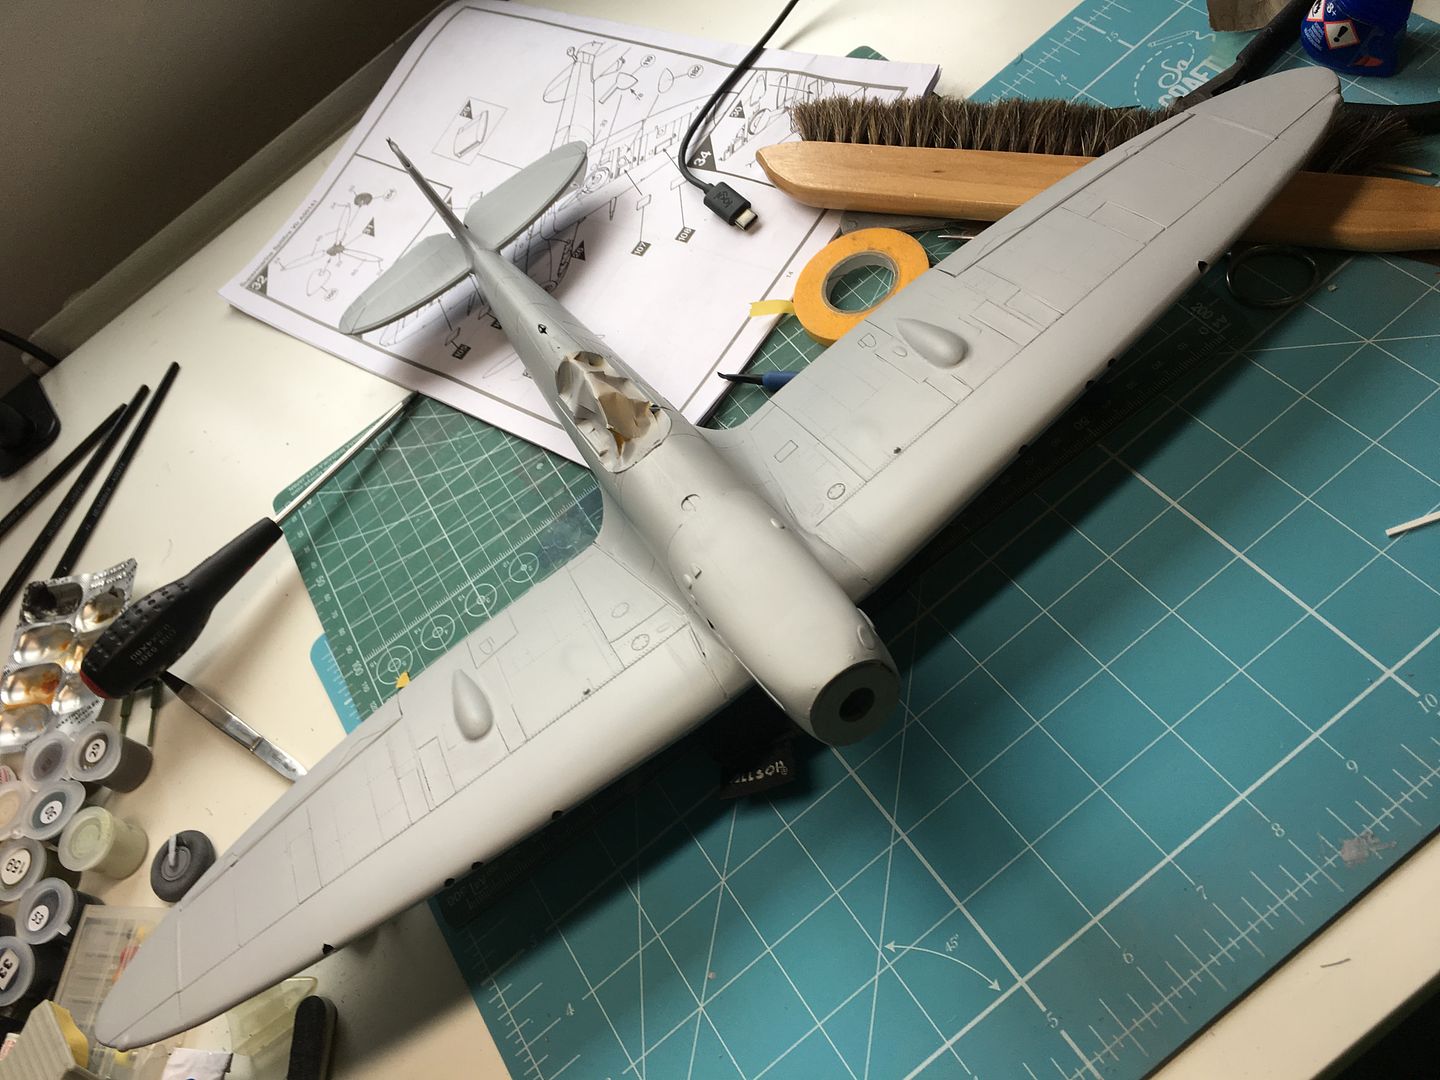
Now it is the new-skill-to-learn of re-scribing panel lines!
...and lots of sanding.
Added a missing strut, then covered Ginger.
...so I could get some filler-primer on.
and then start filling, sanding and re-scribing all over again!

I had already filed off the moulded in harness, glued these on top...I'll certainly add some wash etc to these, as they are far to clean and flat!
With that - I glued the two halves together...
I can still reach what I need to reach at final touch-up stage.
Fitting the fuselage to the wings required some....thinning! Lots of lumpy, thick tooling here from this old kit...
Lots of rigging to help parts line up and set where I wanted them to!
Gluing in spacers to hold the wing skins togther...
But starting to look like a plane now...
Let the filling, sanding and cursing begin.
Although I had fitted the undercarriage, the plane will be 'flying' - so don't need this...
I decided to cut the undercarriage out, so I could fix the wheel covers neatly, and glue the wheels in evenly, without being tied to the lazily moulded undercarriage struts etc. I also added the walls to the wheel bays...
Not going to add huge detail, but did add some mesh to these visible rads...
Now it is the new-skill-to-learn of re-scribing panel lines!
...and lots of sanding.
Added a missing strut, then covered Ginger.
...so I could get some filler-primer on.
and then start filling, sanding and re-scribing all over again!
In terms of number-of-parts, yes - very.
Having only really built (almost) a very new Tamiya kit (the 1/32nd Mossie) the 'fit' (or lack of) is a bit of a shock - BUT, by building a flying version, I am avoiding a lot of the difficult-to-fit bits, like engine, panels, undercarriage etc!
Having only really built (almost) a very new Tamiya kit (the 1/32nd Mossie) the 'fit' (or lack of) is a bit of a shock - BUT, by building a flying version, I am avoiding a lot of the difficult-to-fit bits, like engine, panels, undercarriage etc!
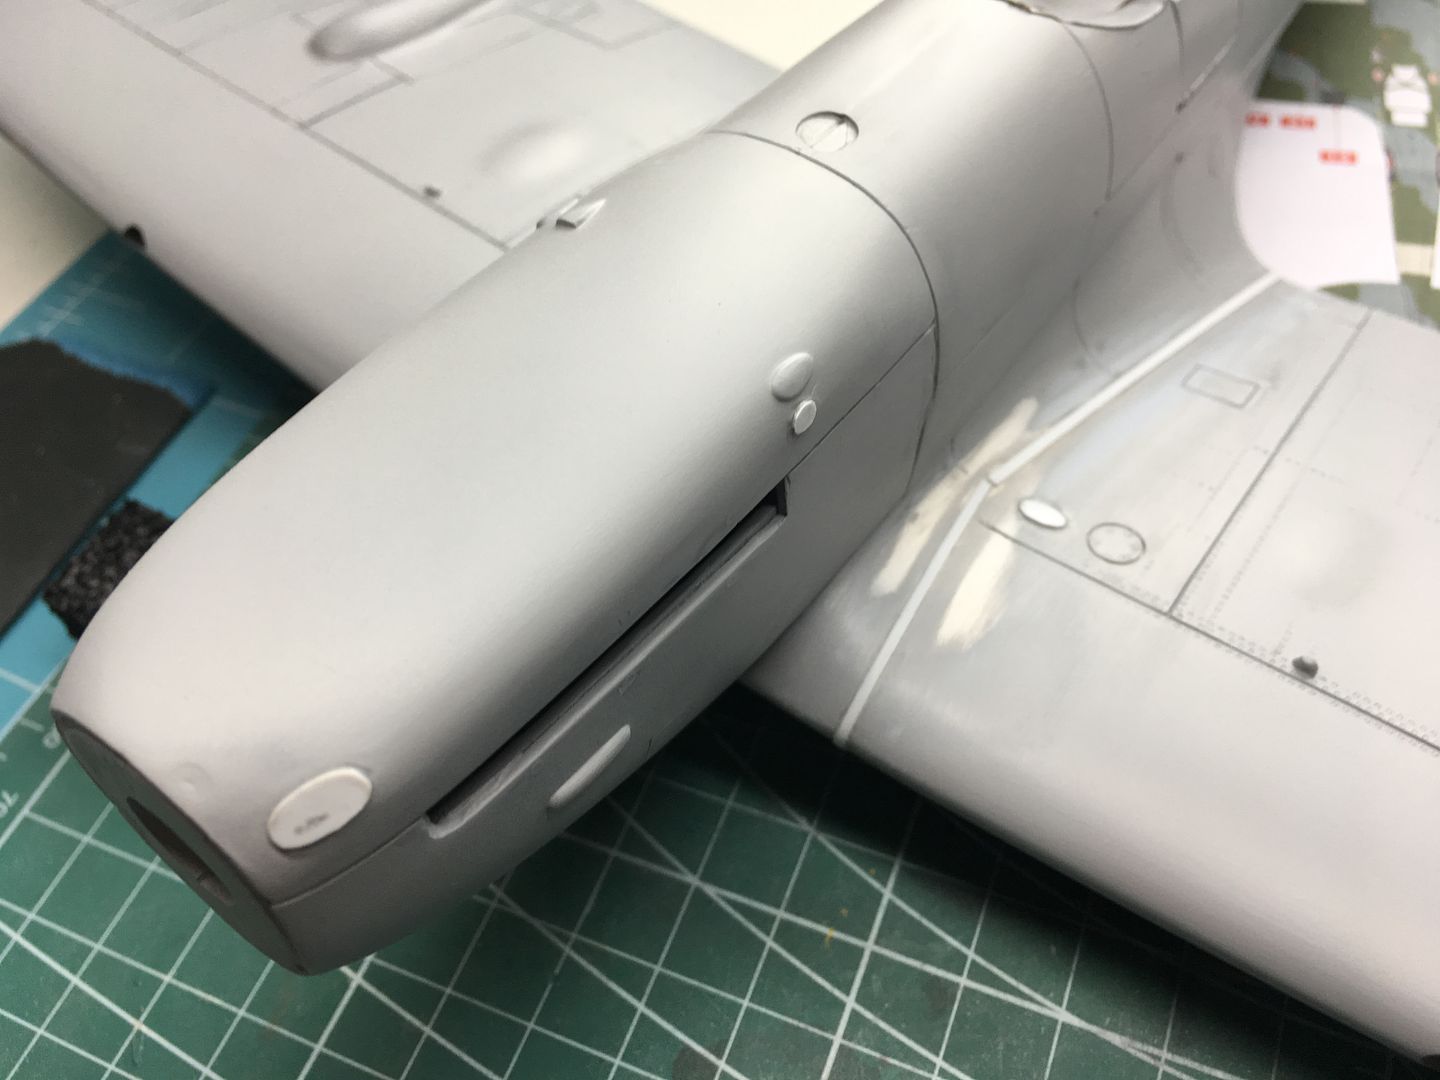
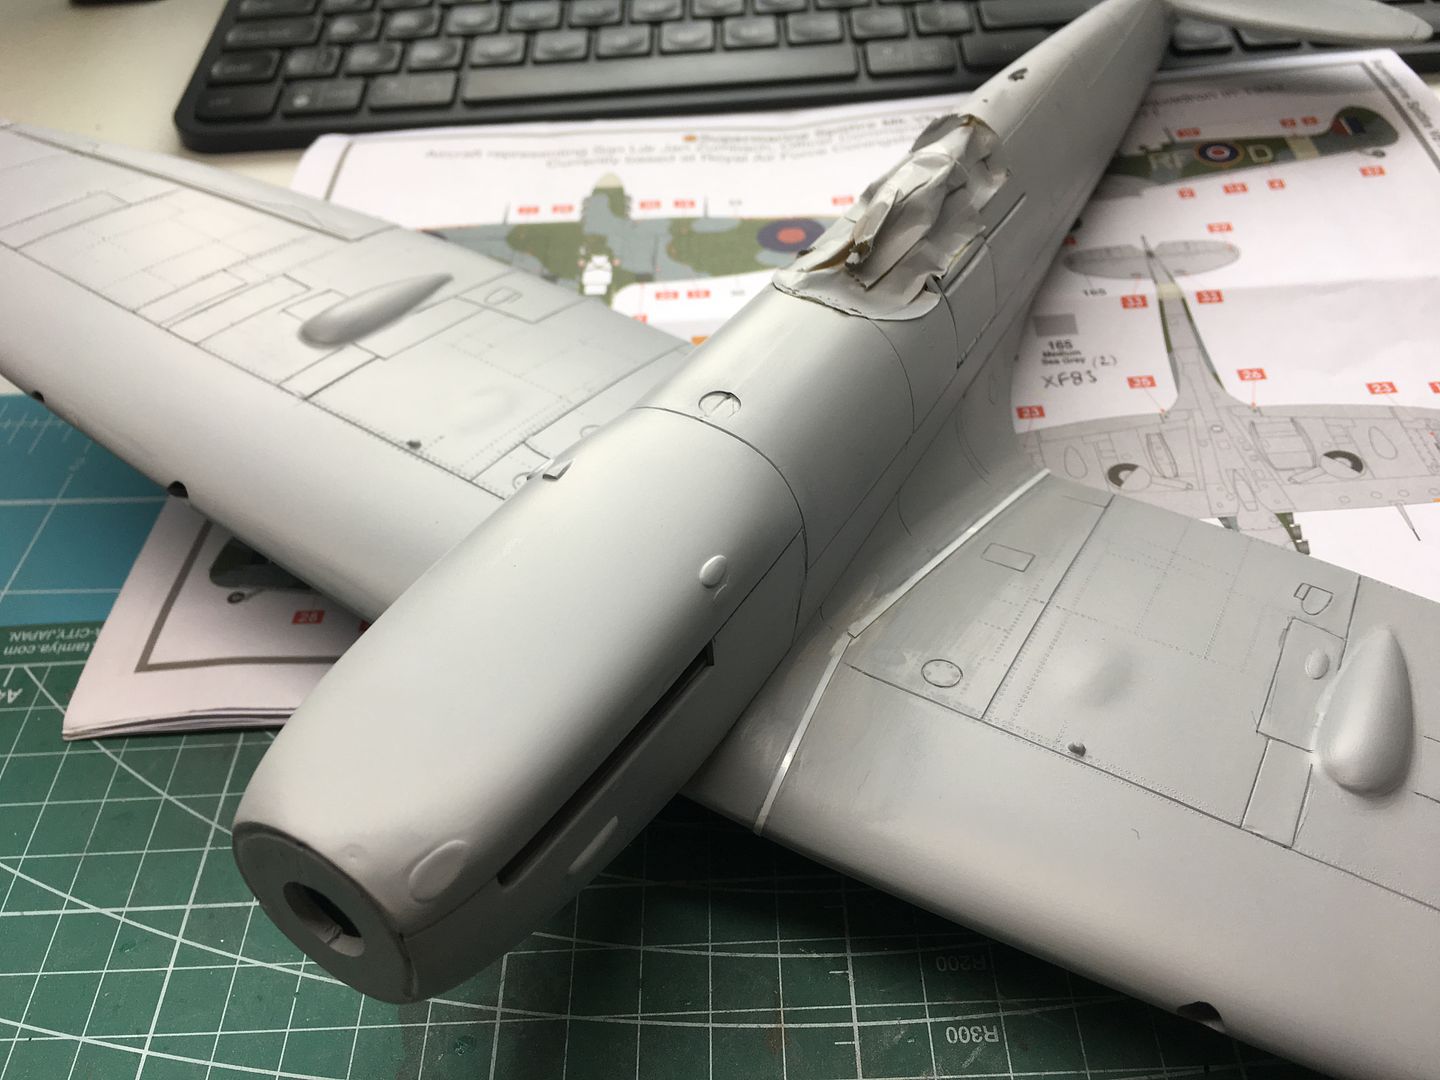
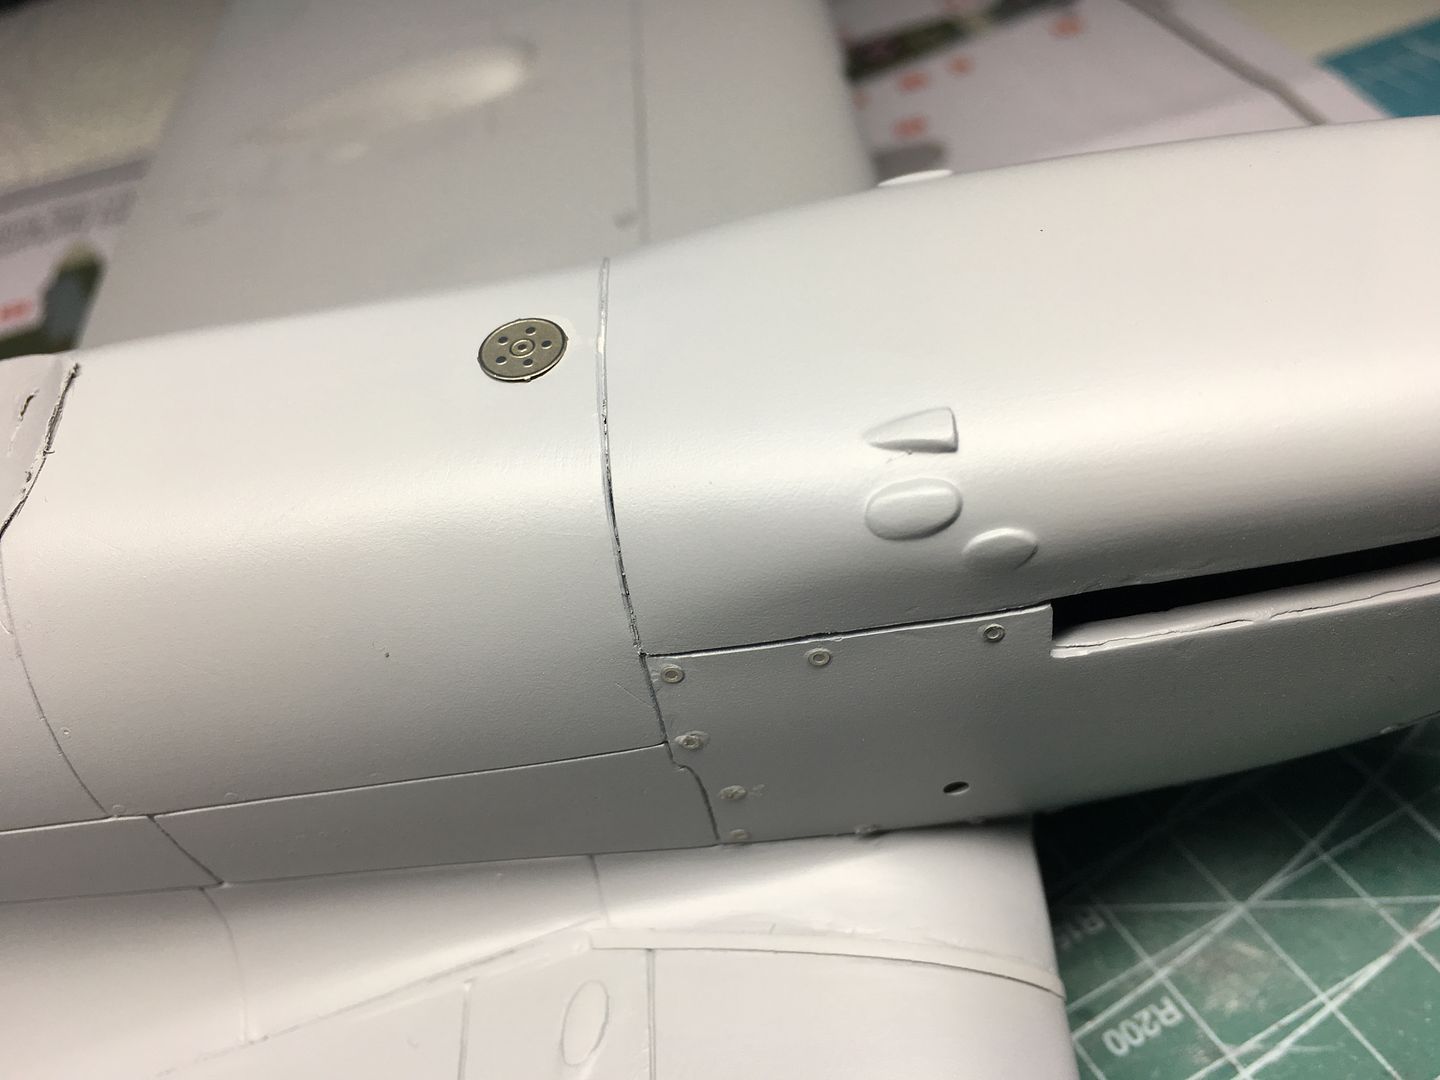
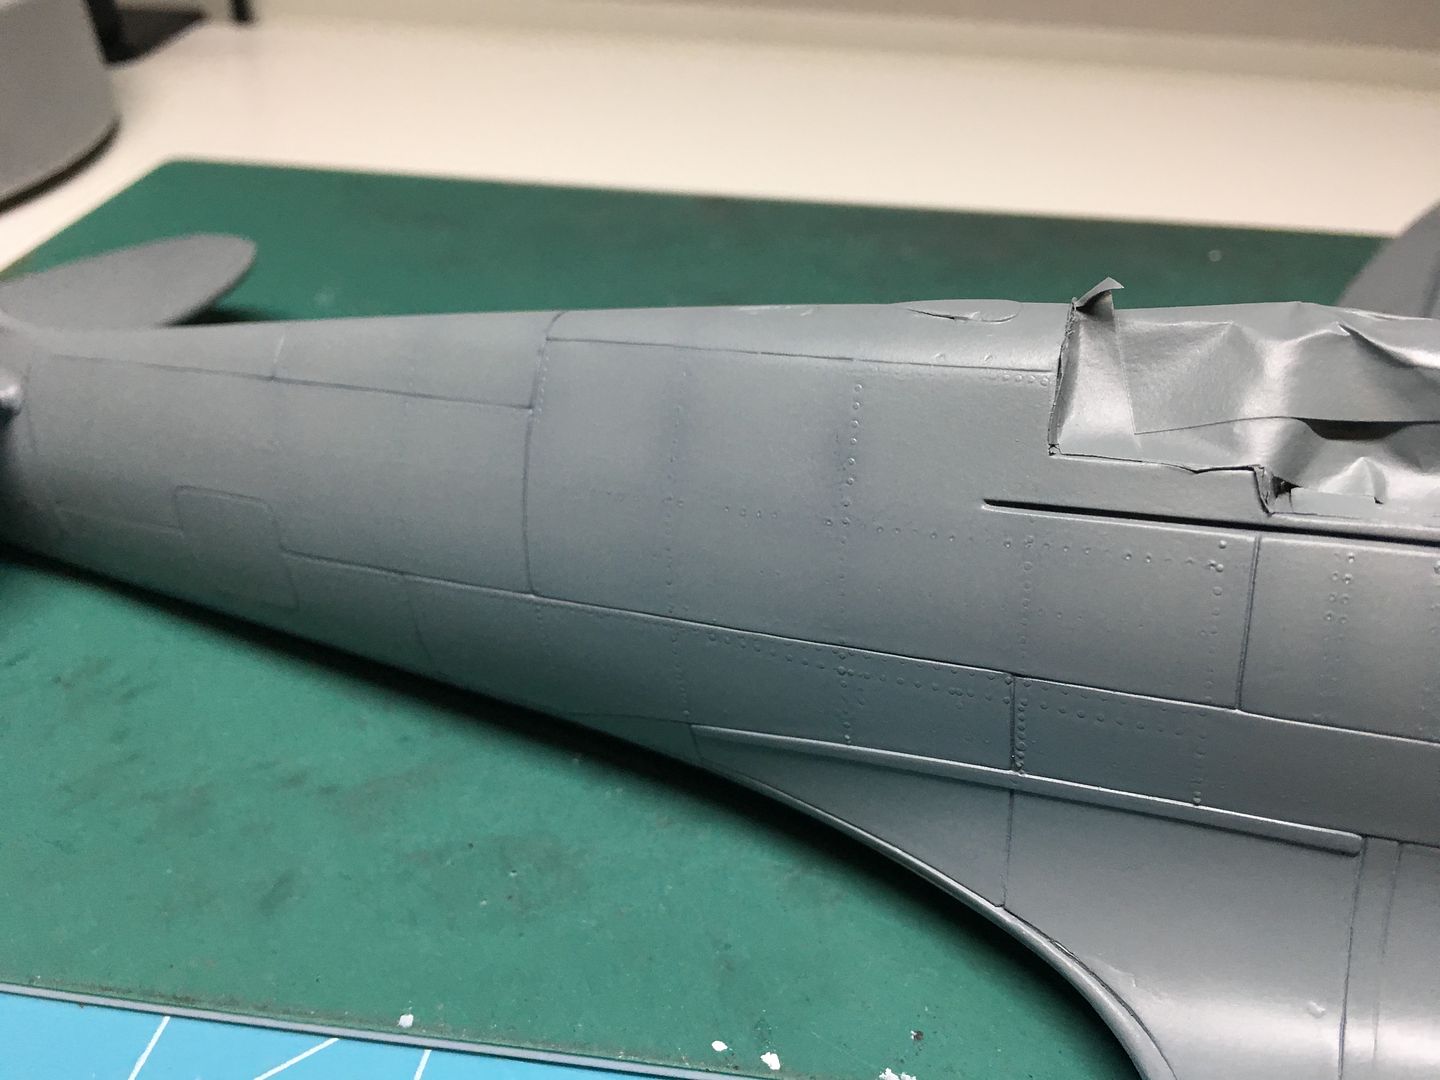
More filler - had to plug one of the pairs of gun holes, and the wing roots are a real pain on this model - each side is a different profile, and there are prominent ridges - that get sanded away as you try and fill gaps etc! Spent longer on this area than any other...

I ended up adding some very thin strips of plastic to re-define this wing root area...
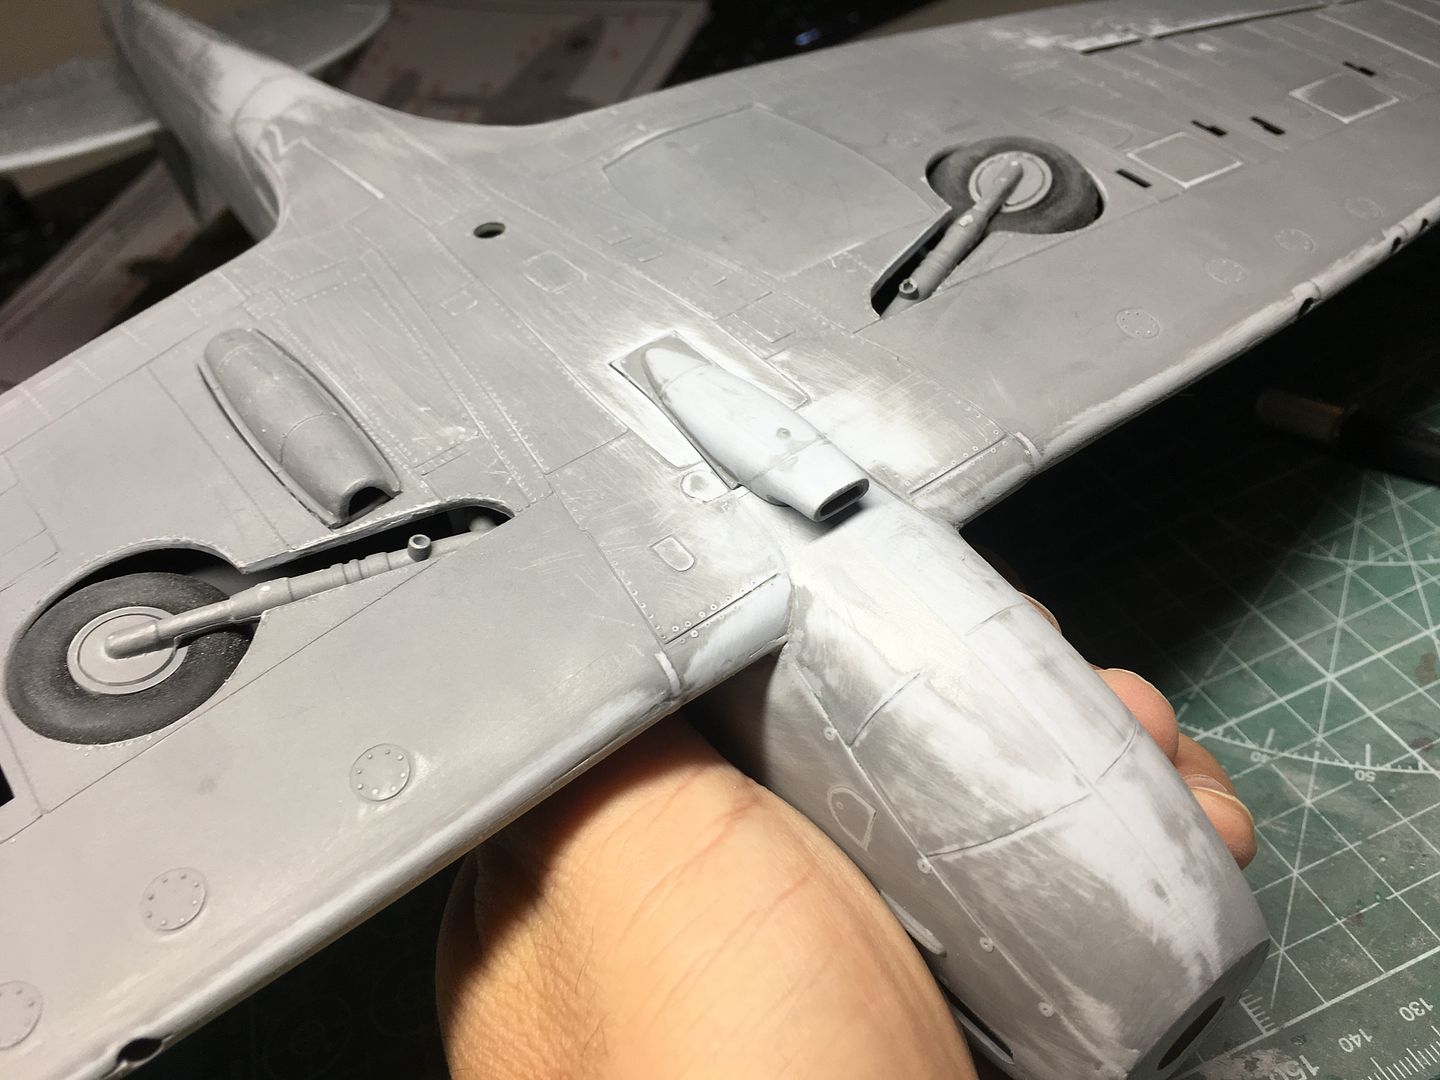
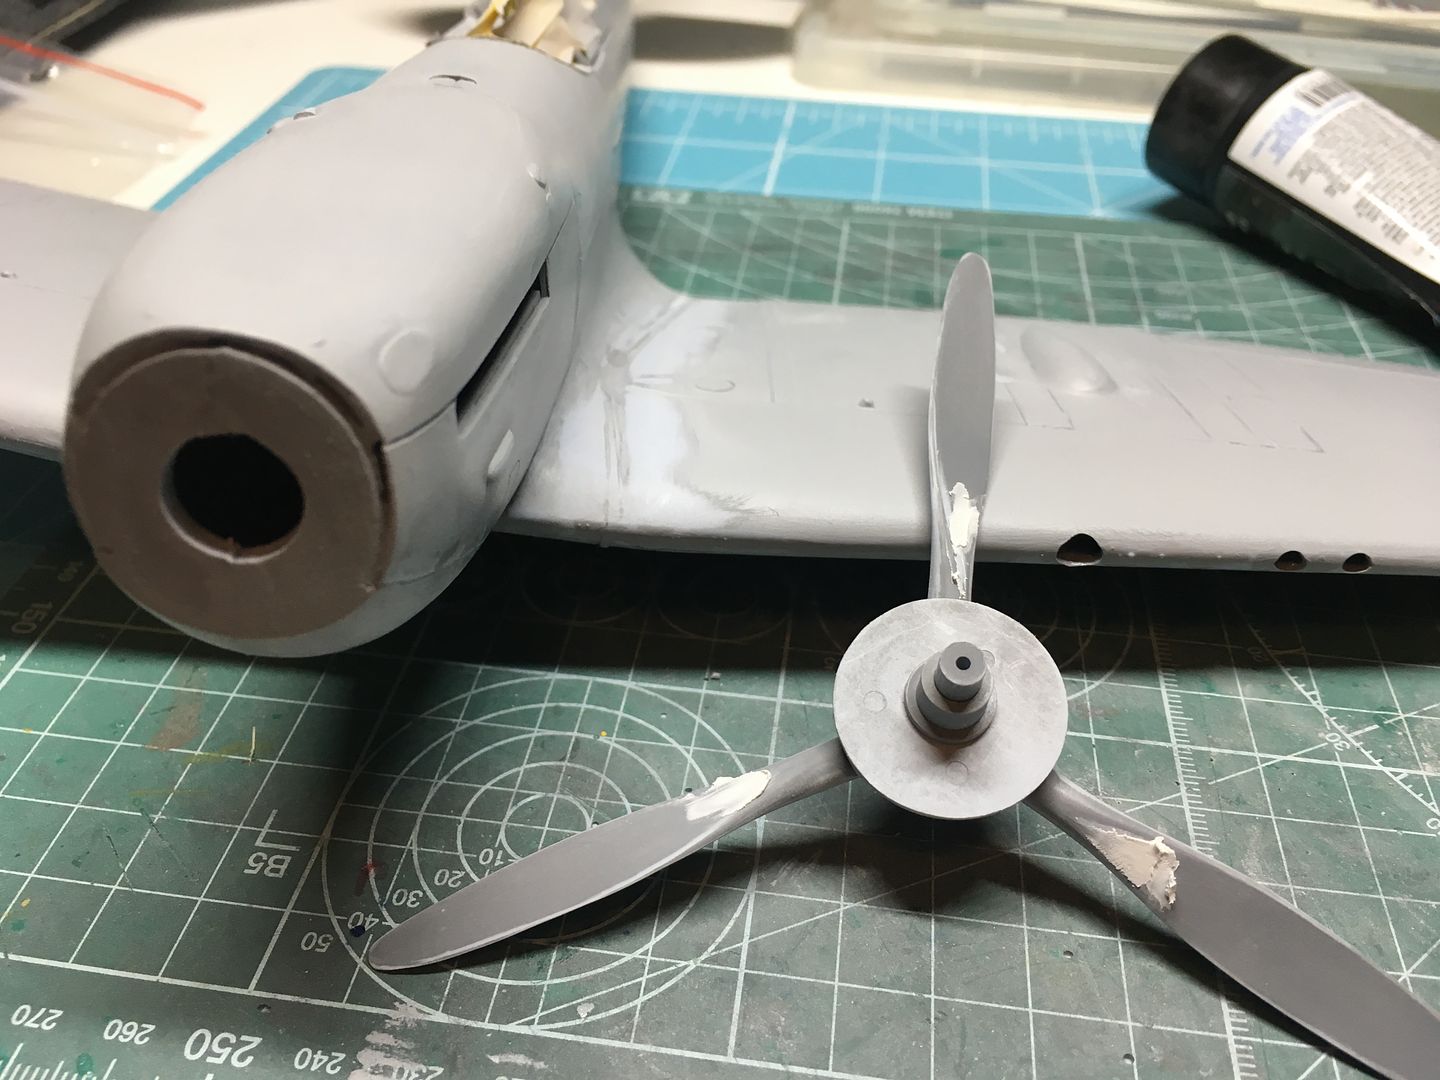
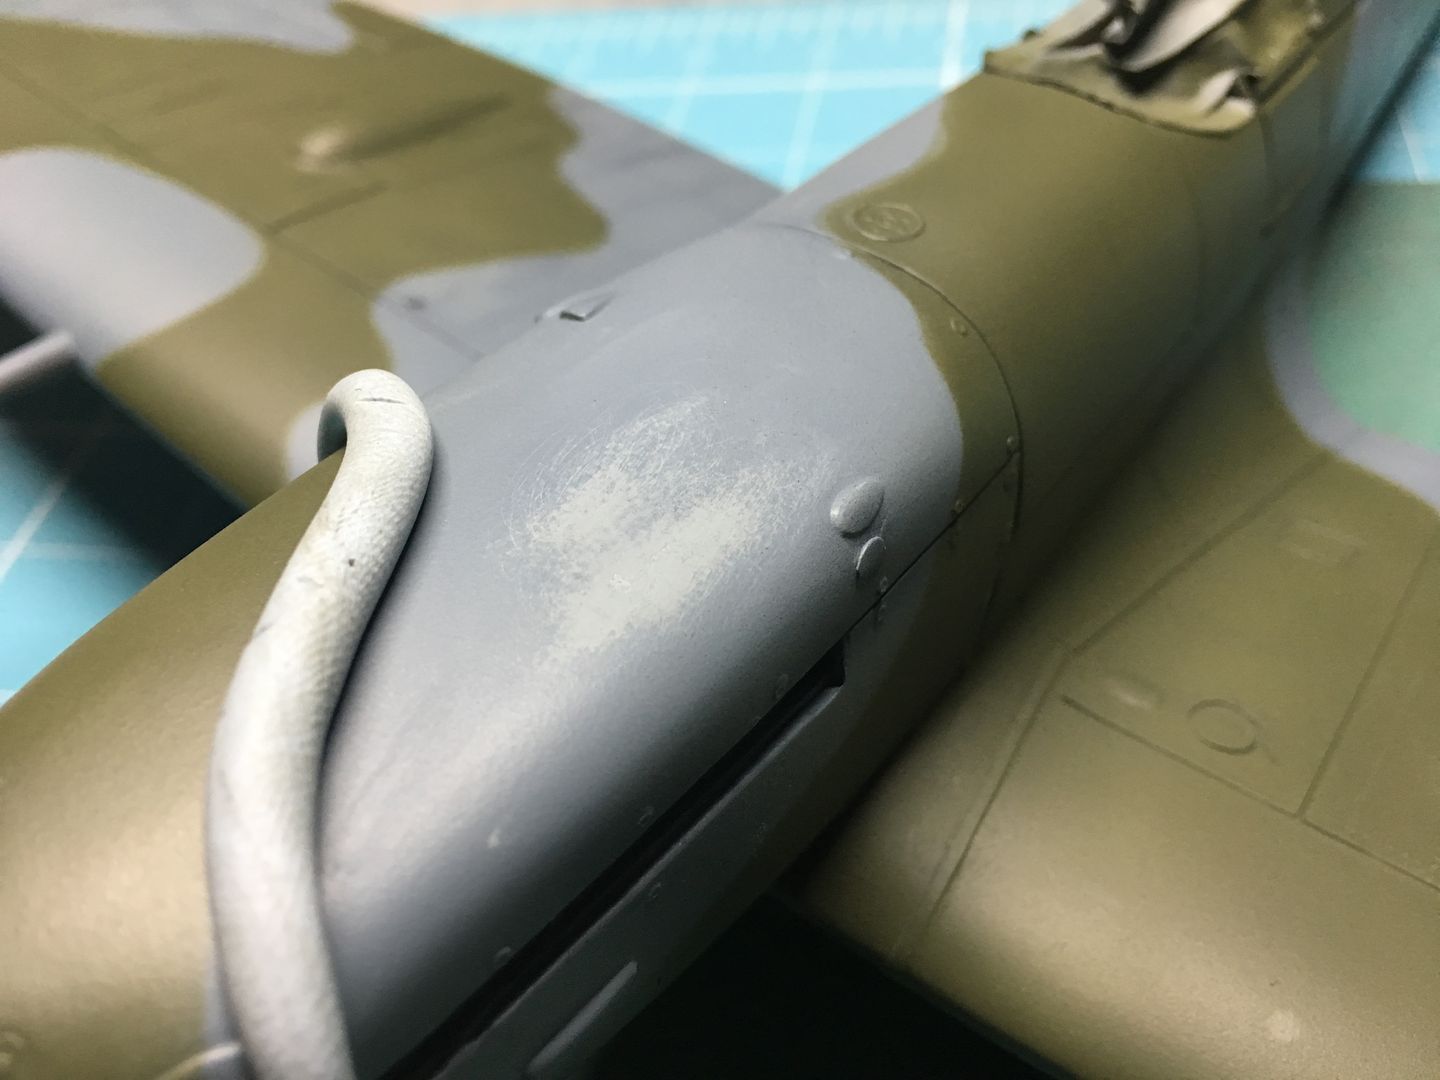
The engine panels had prominent fittings in the molding, some of which got sanded off during fitting. I decided to replace these - they are more flush on most models, but are a nice bit of detail on this one - I used PE 'washers' glued on to represent these - lower profile than the ones that had been moulded on - lots of them though!
I also used a generic PE 'pulley' to replace the crude detail of what I presume is an oil filler cap or similar, situated on top of the forward fuselage.
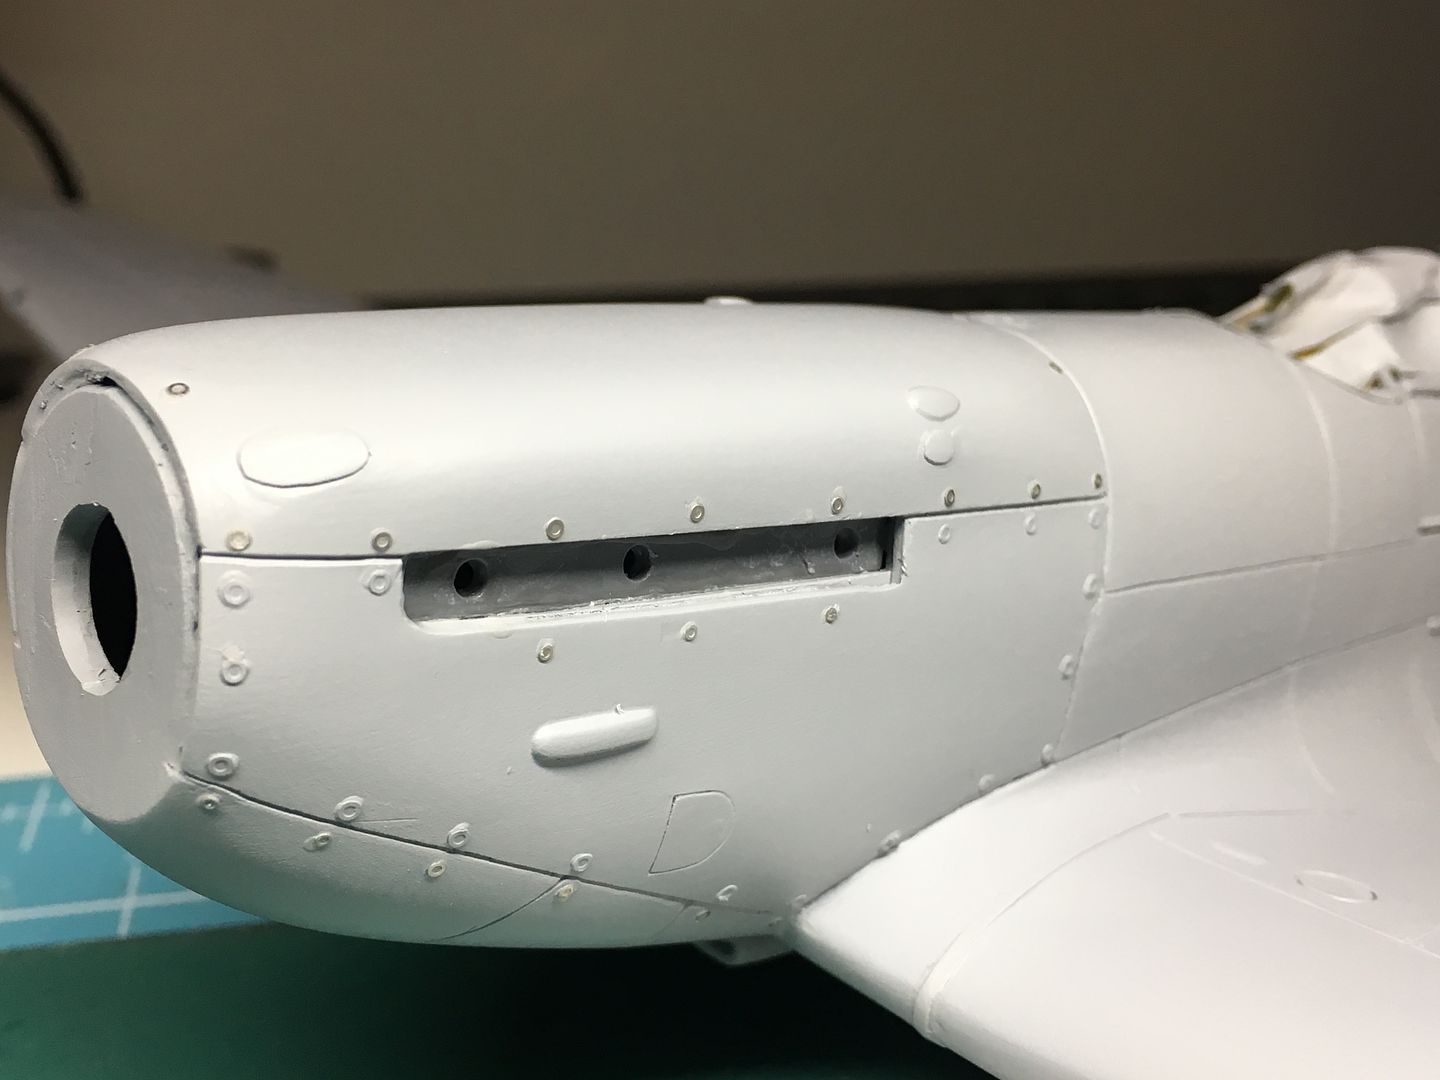
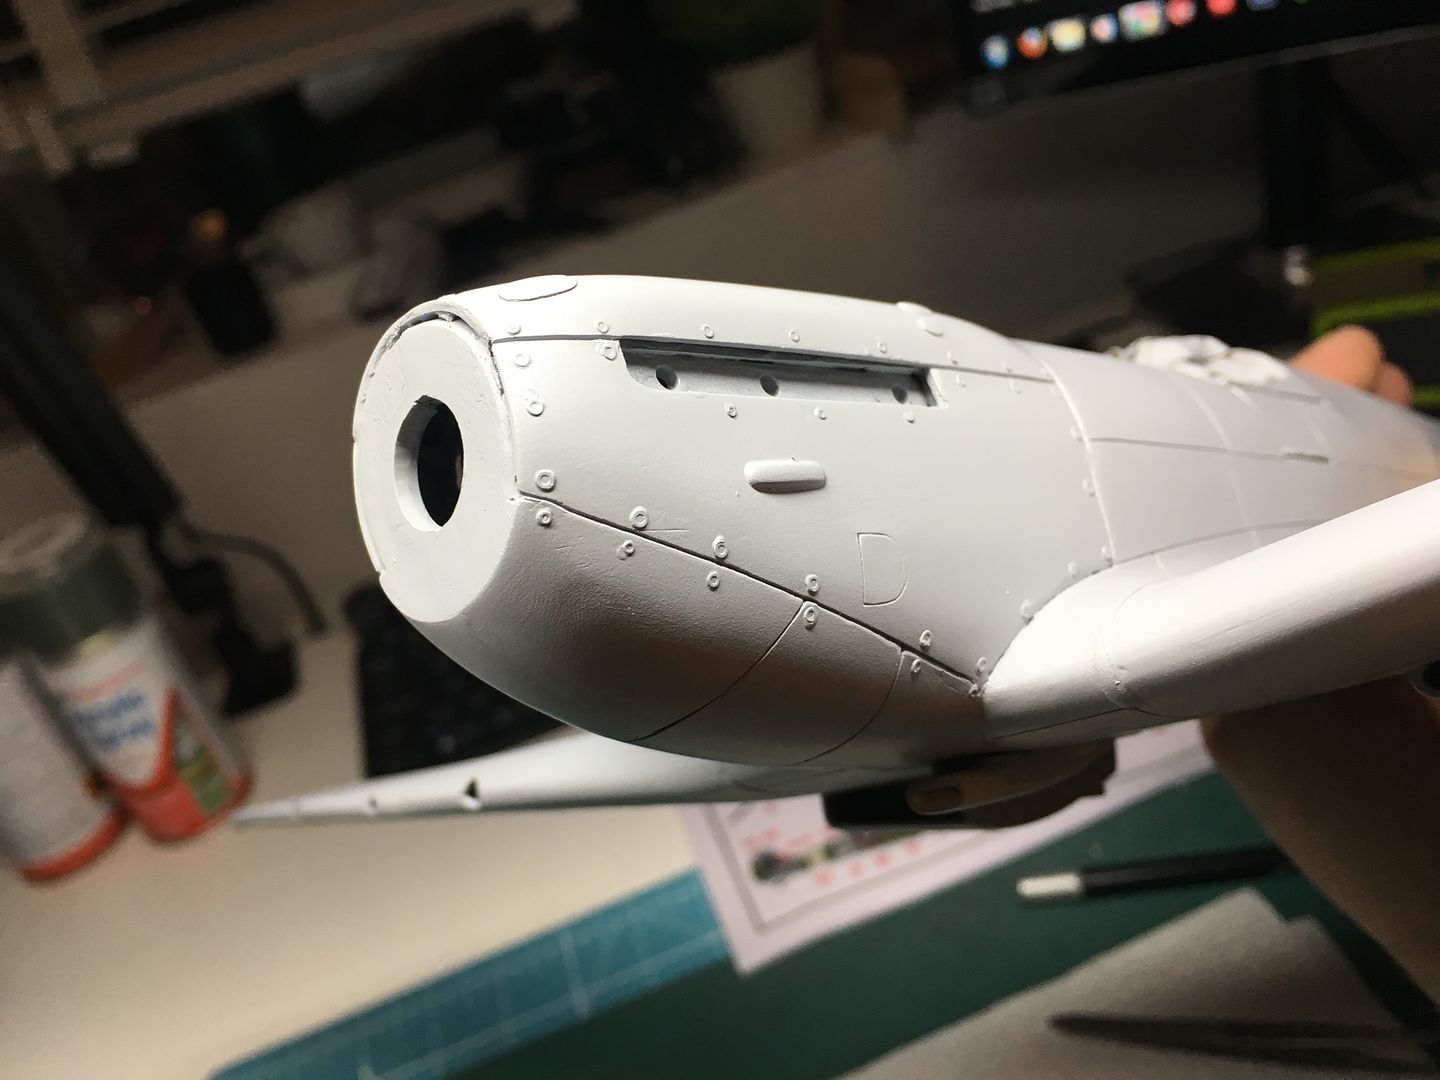

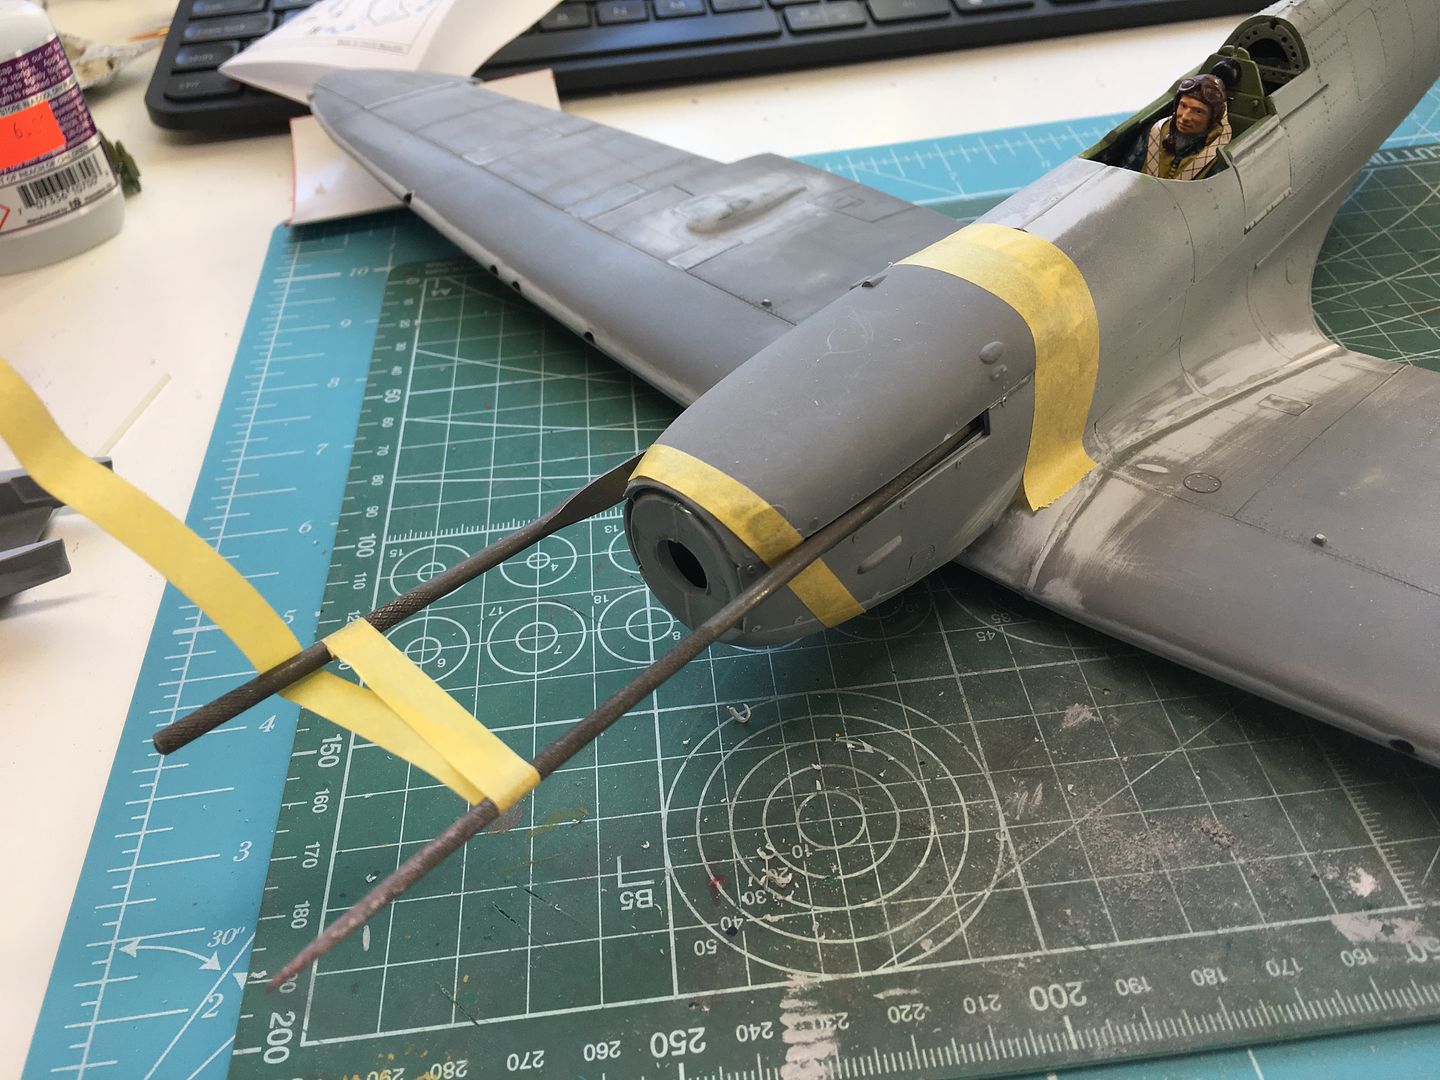
I added the very nice extra detail set of cannon...

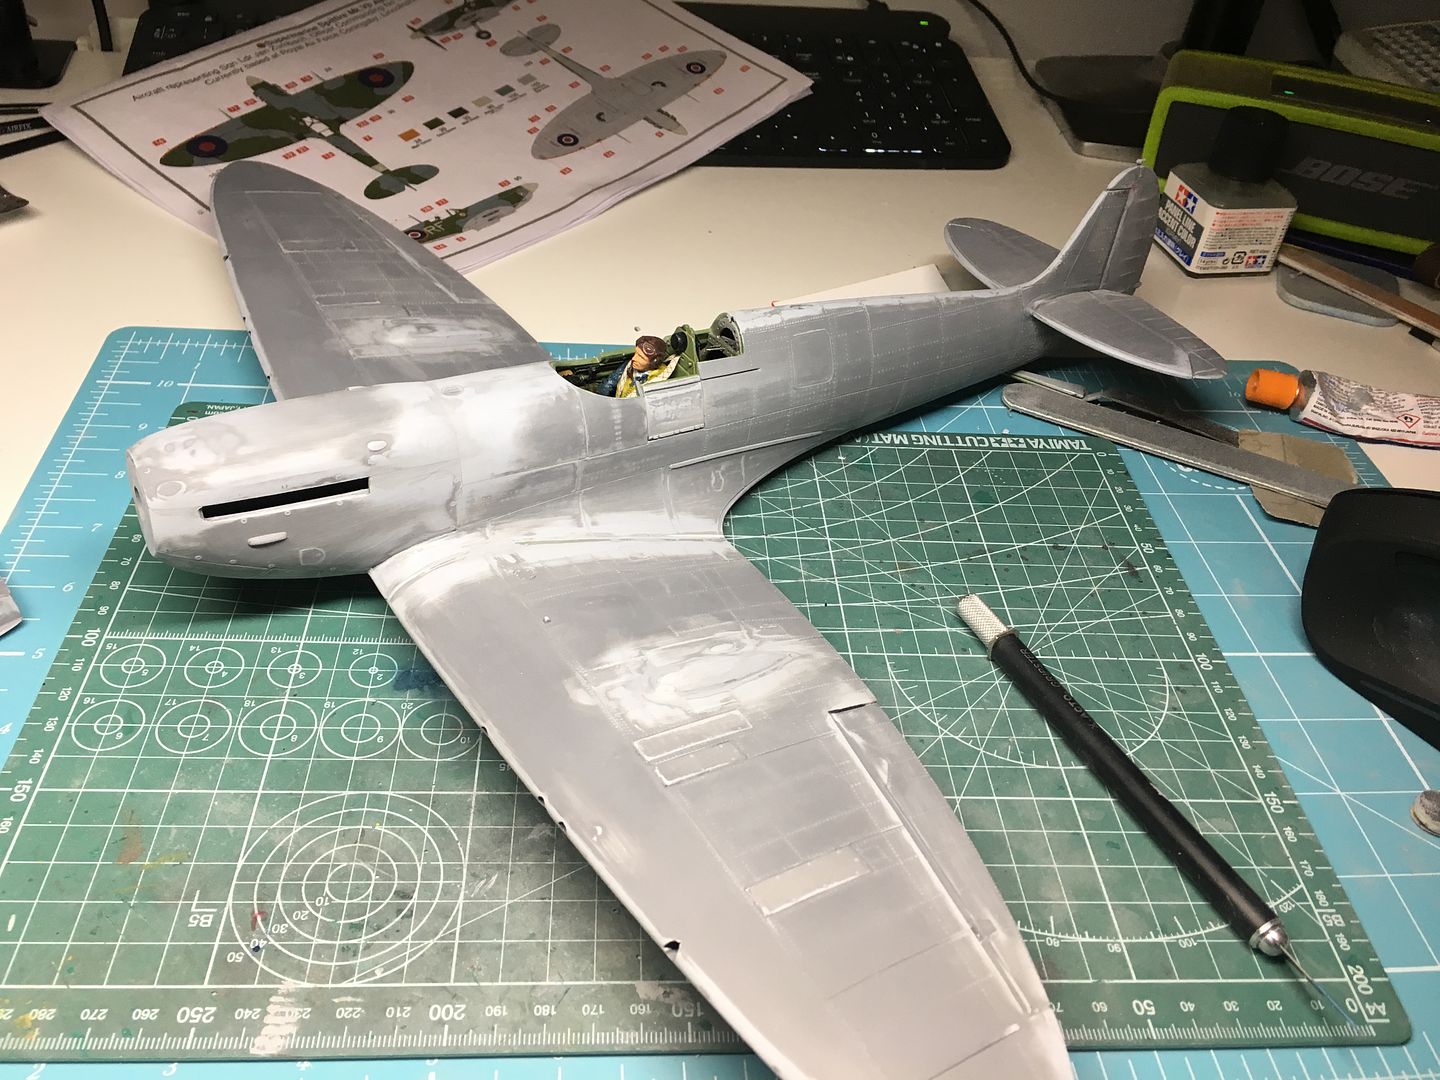
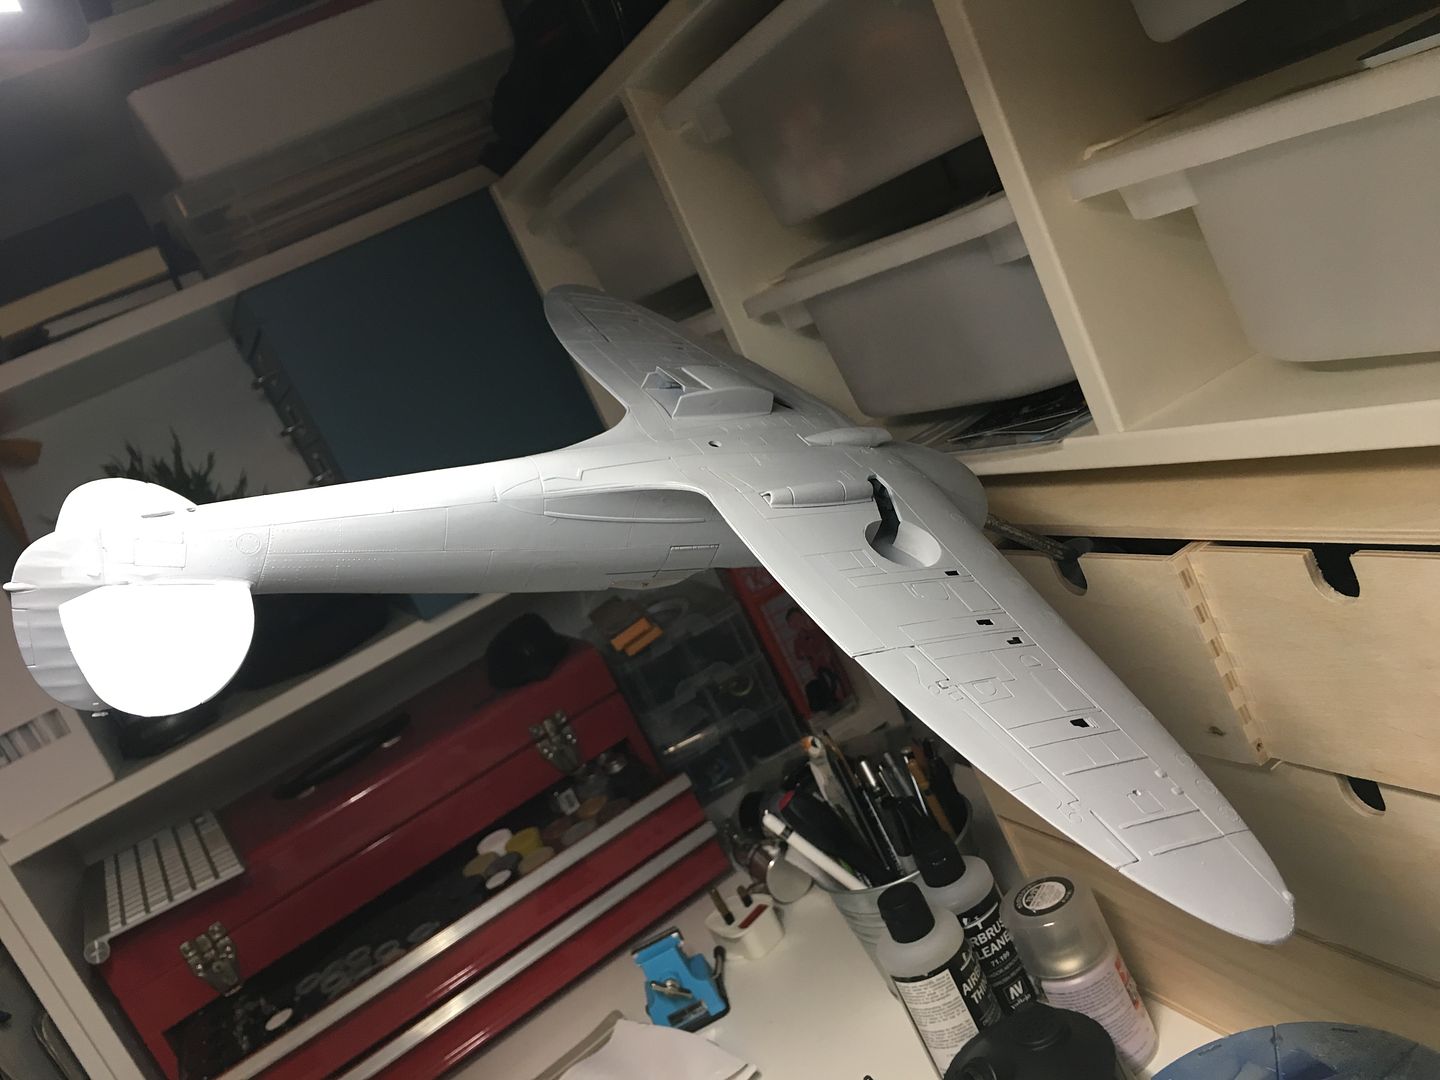
Now onto the painting.
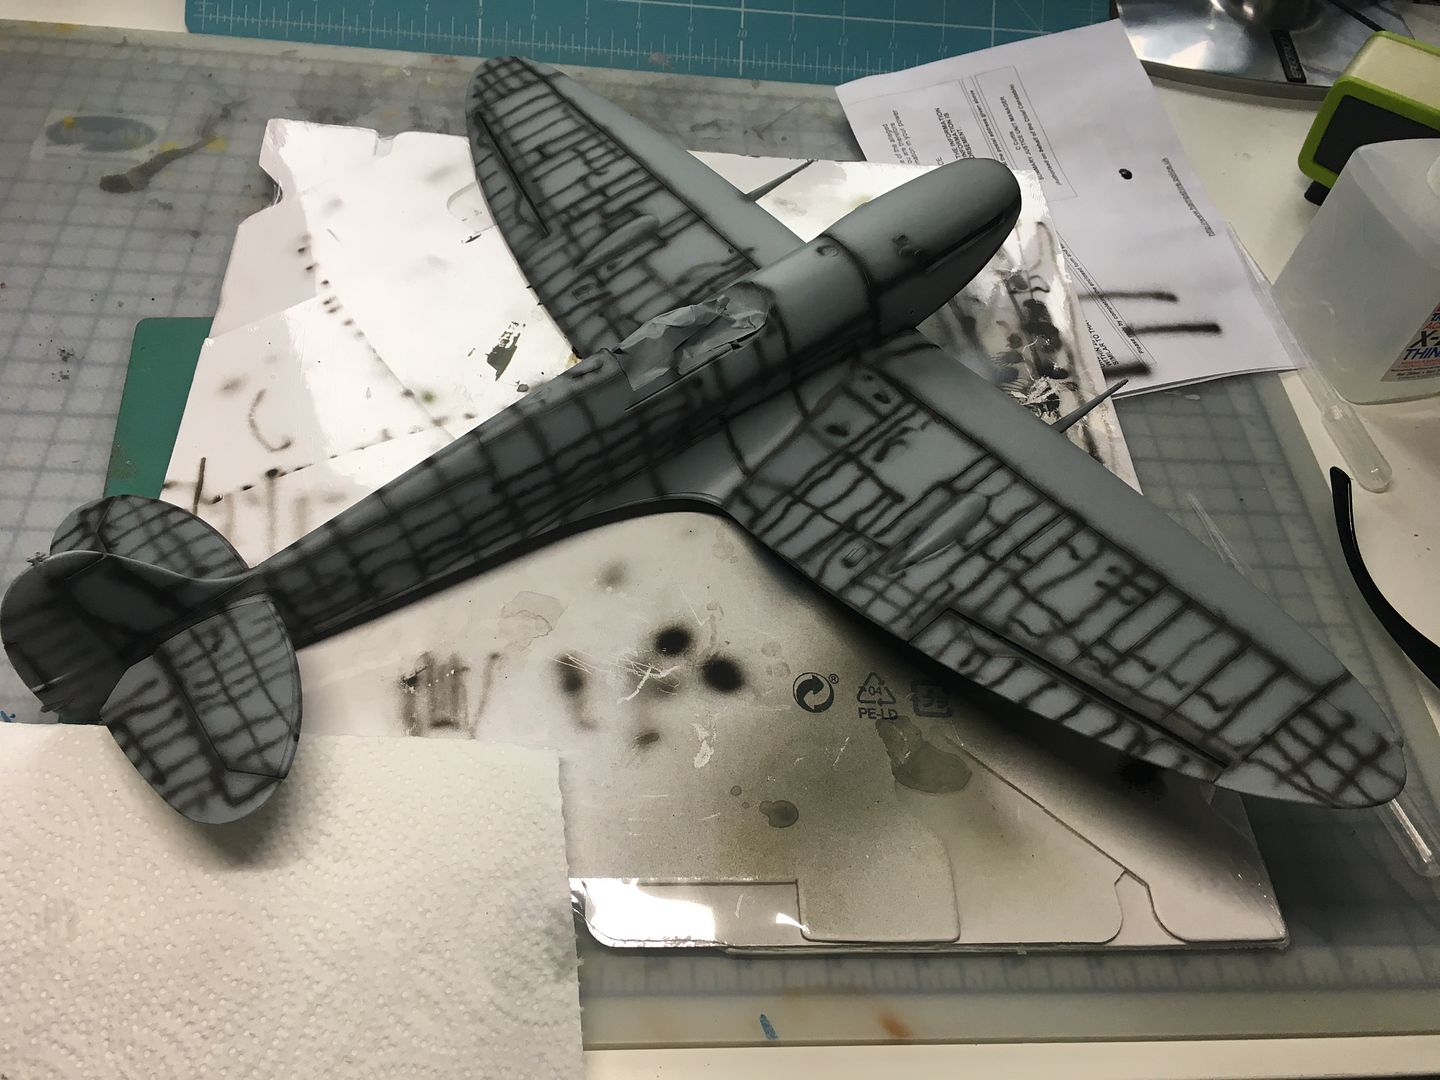
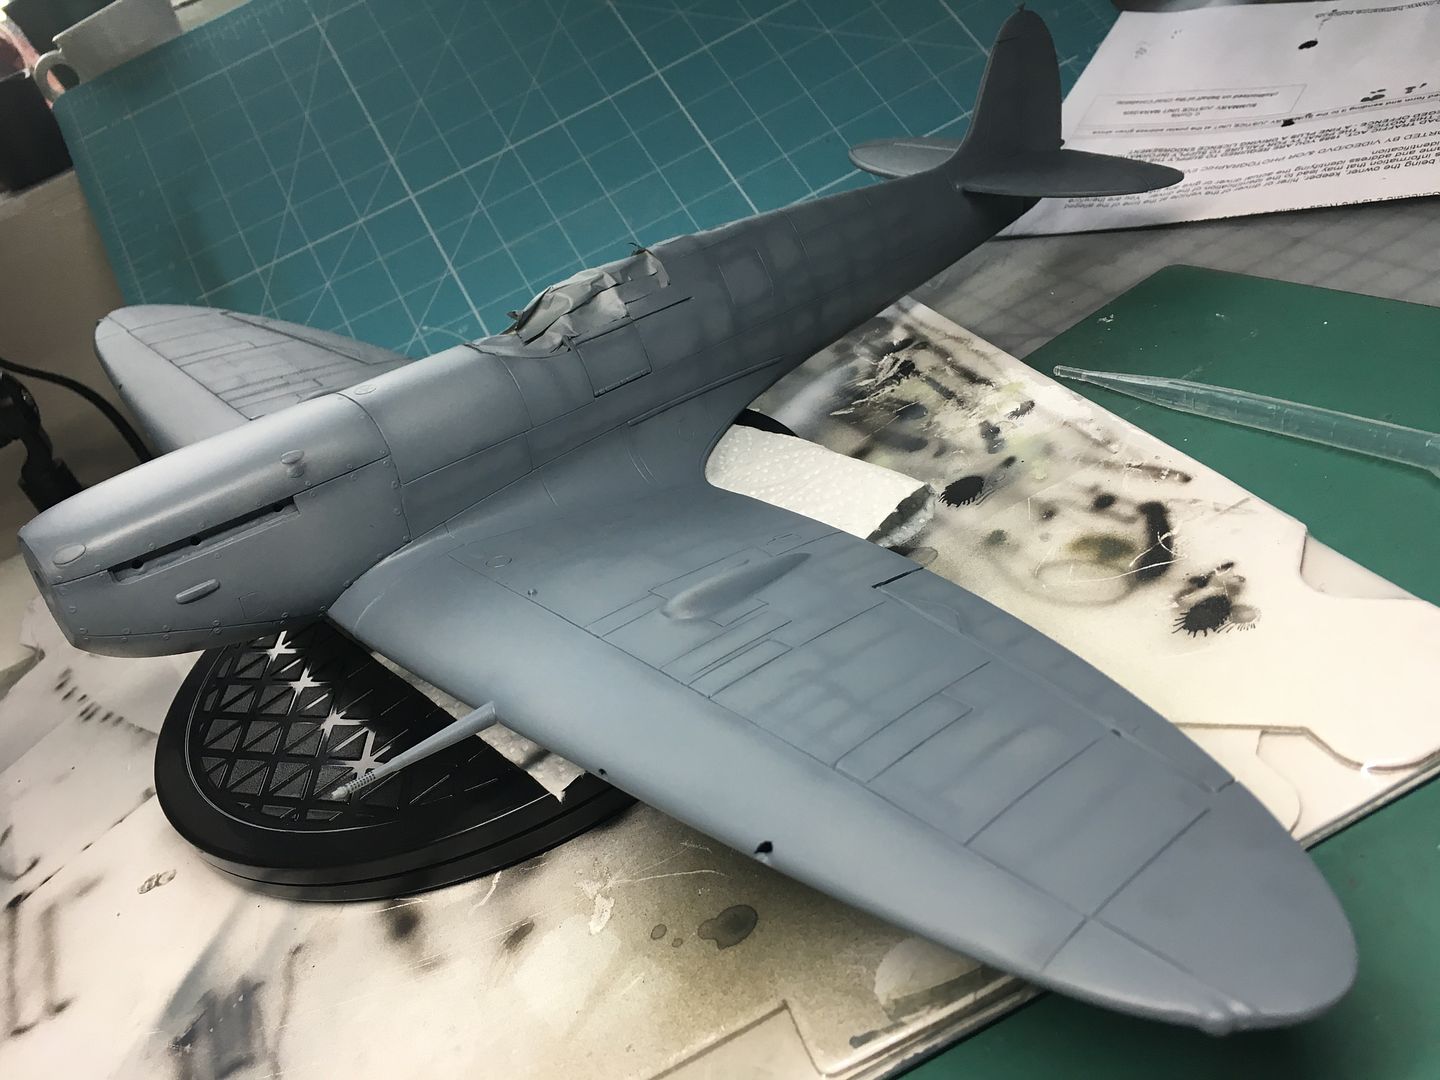
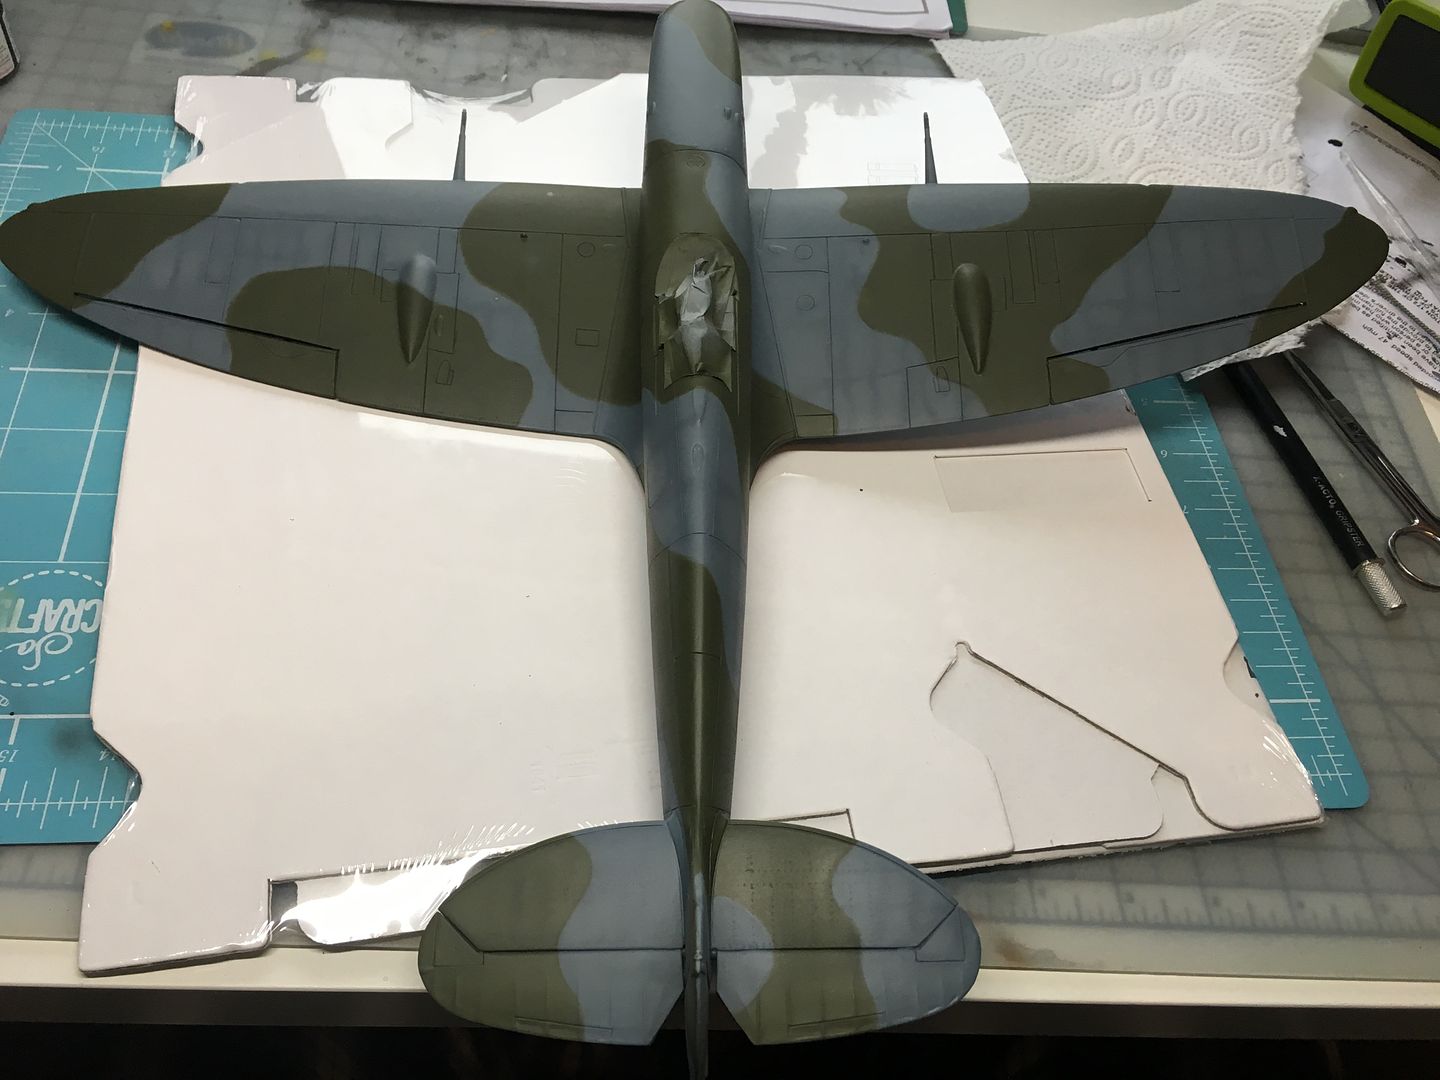
On the only other plane I have made, I used oils on the top surface to simulate panel profiles, panel gaps etc and shading - on this model I decided to try the method of airbrushing black shadows BEFORE the top coat. Took a while to get the airbrush set correctly (low) and to get the steady hand required to freehand the lines, but super-accuracy is not required here...
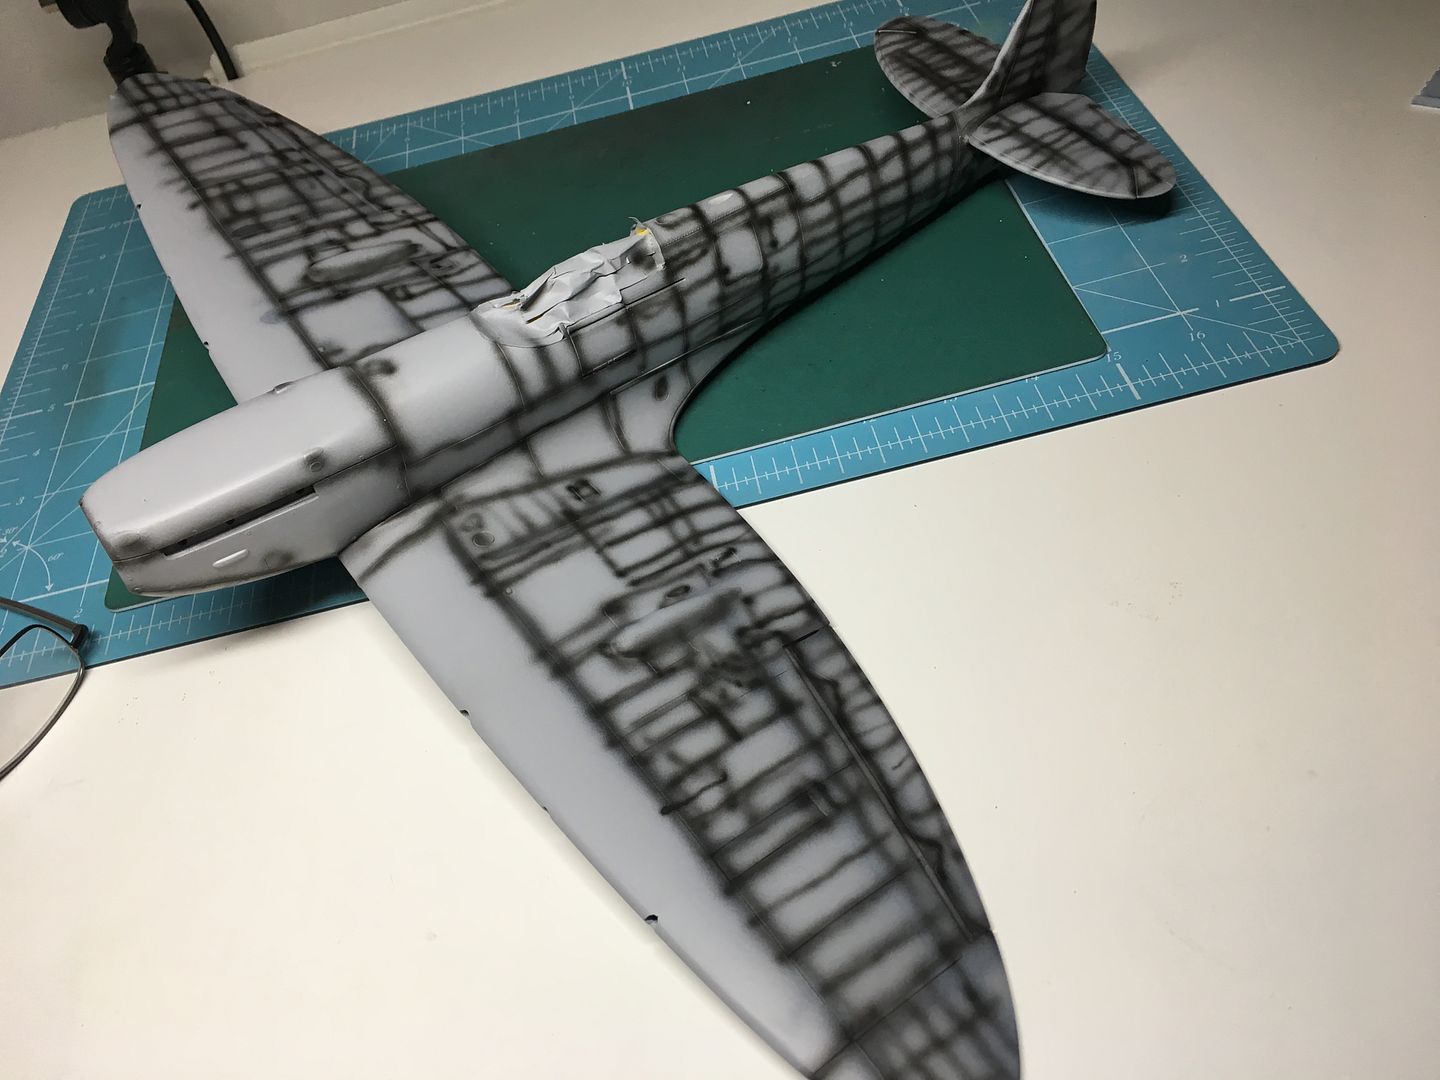
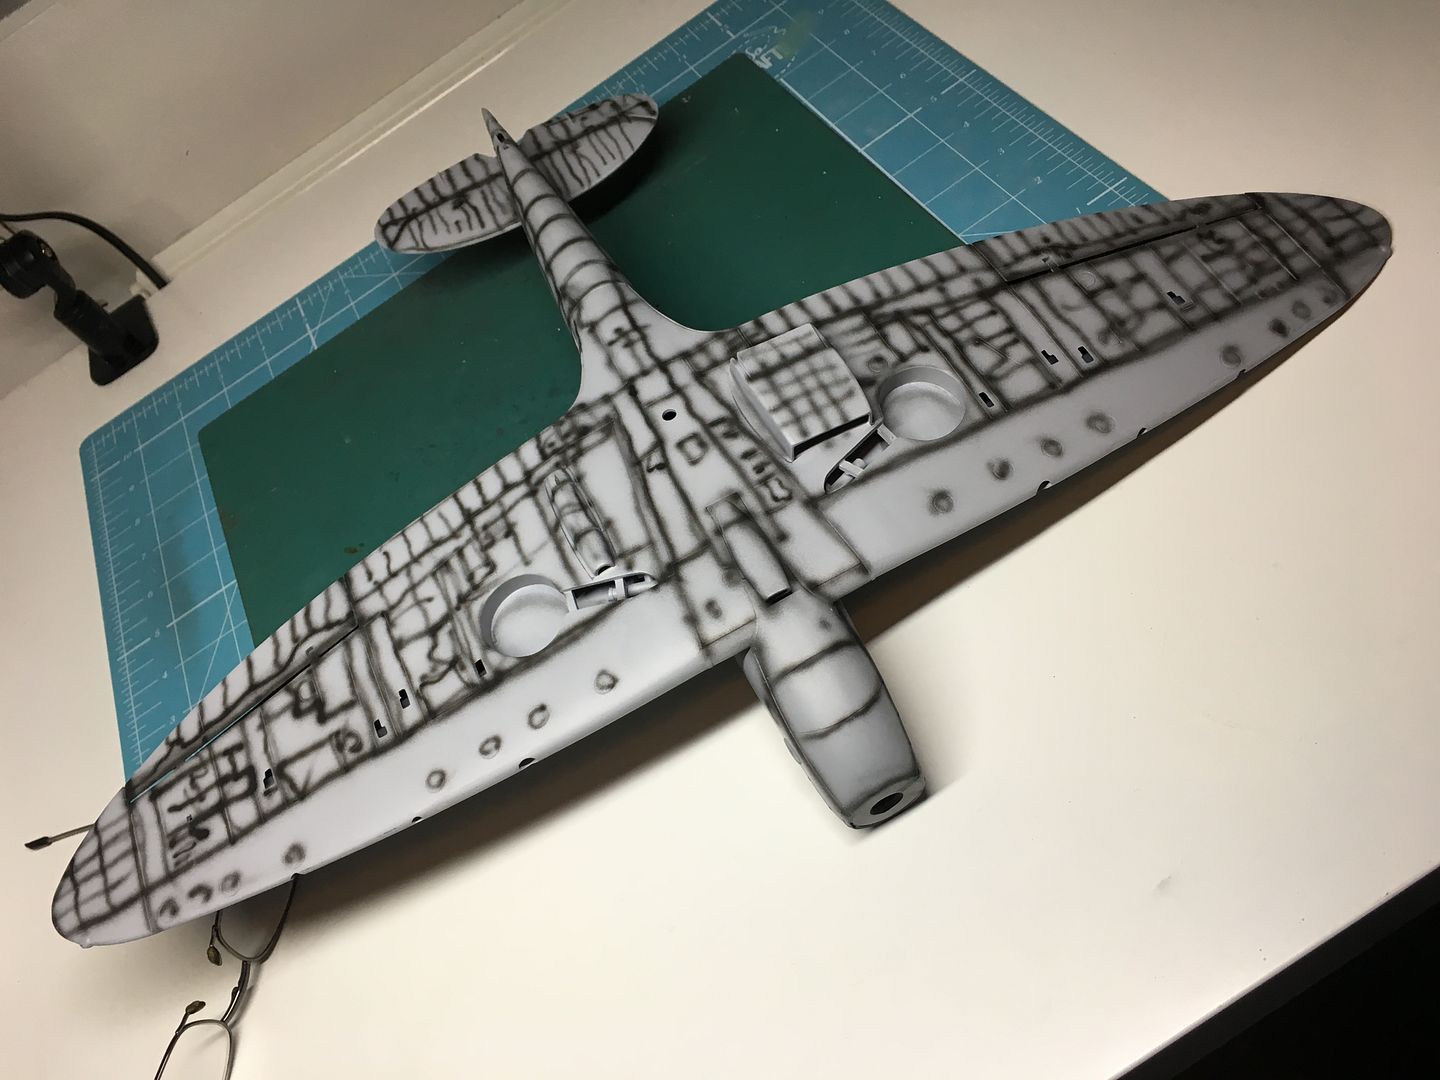
This had the desired effect...
HOWEVER - I was not happy with the colour. I had read that sometimes the proposed colour for this top surface of the Spitfire can be a little dark, so had tried a slightly lighter colour - but was still not happy - easy to respray another slightly darker colour on top - but I had to re-spray those pesky shadow lines again!
But happier with the colour...and with my first attempt at the shading.
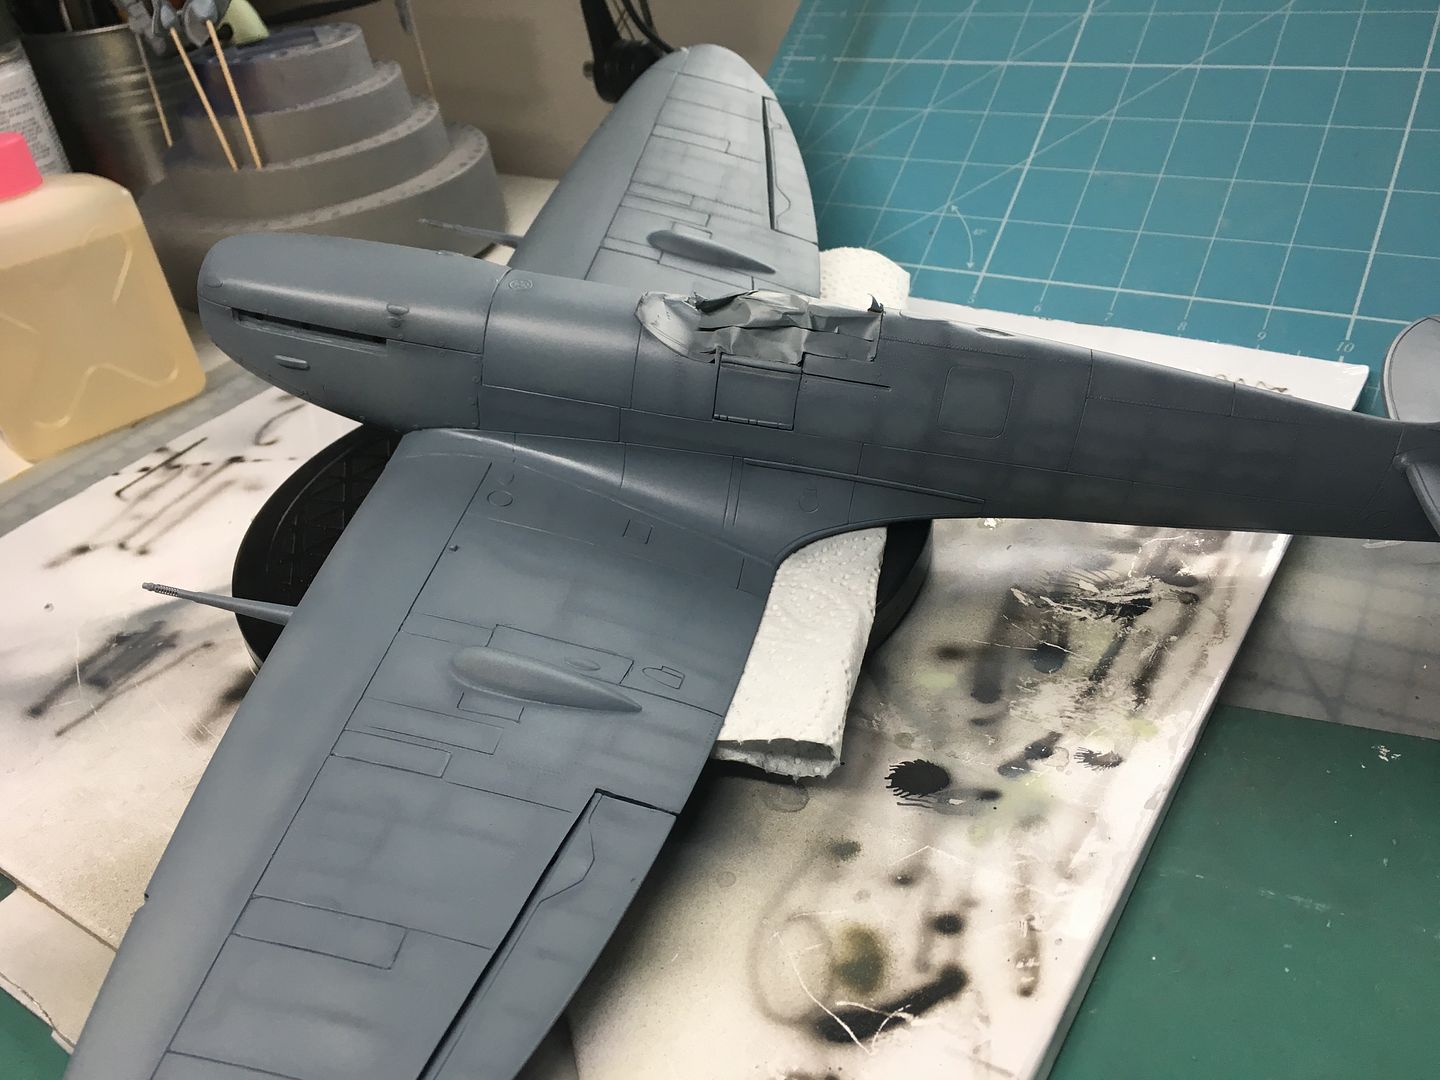
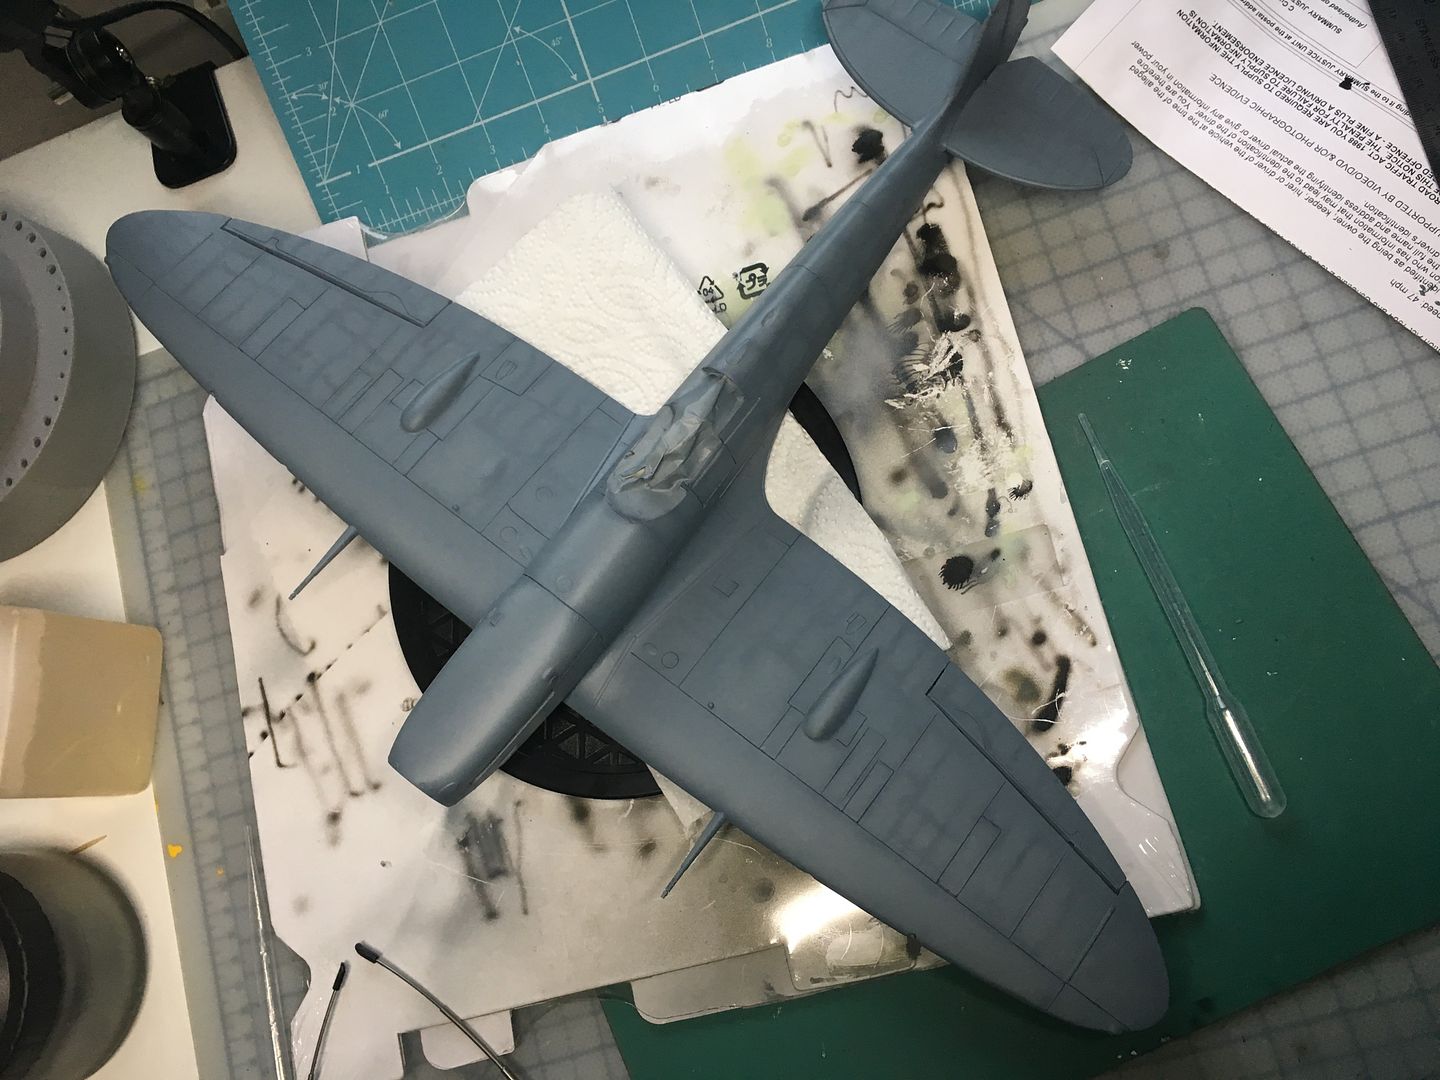
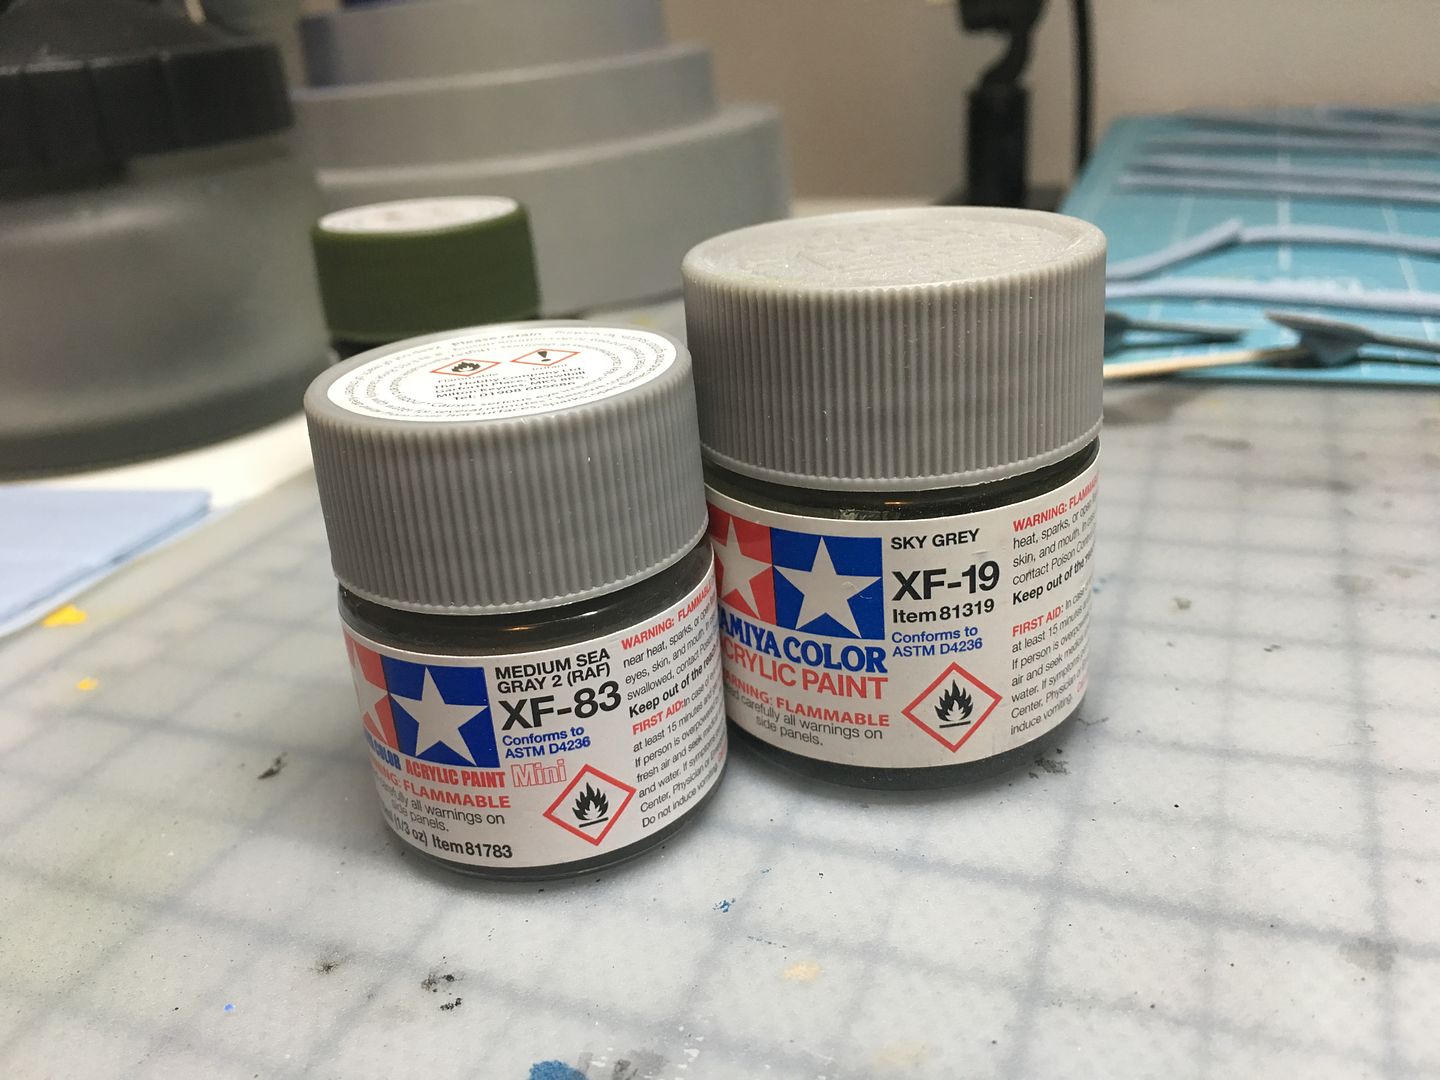
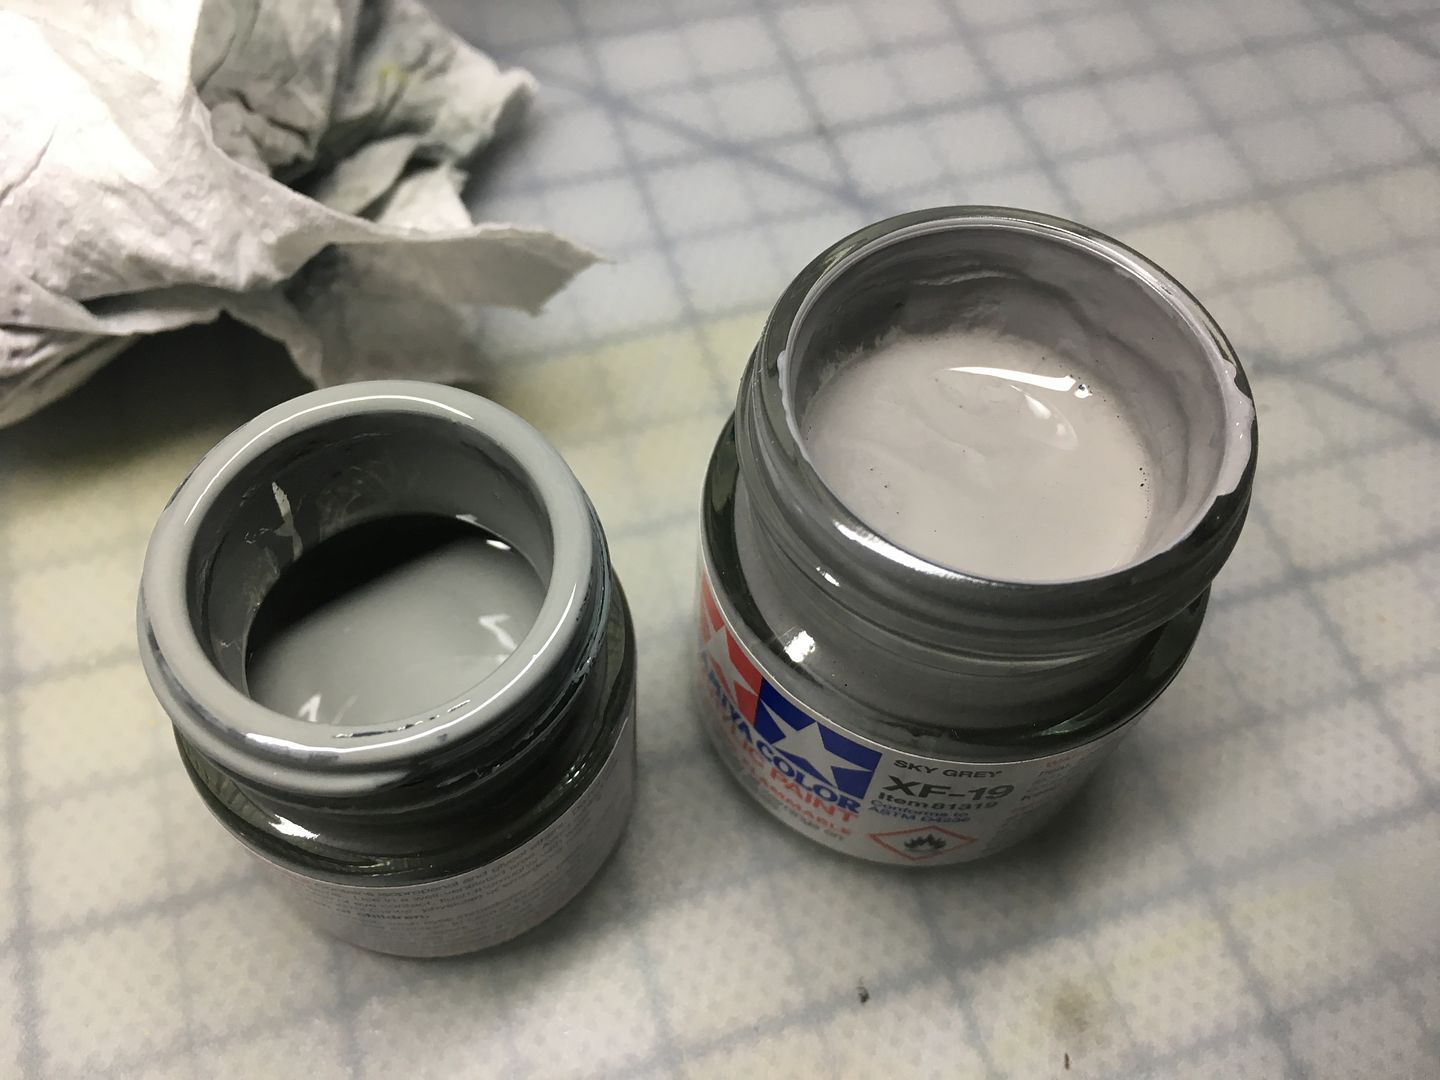
I then had a similar issue with the underside - the colour that was suggested seemed too close to the top grey, so I ended up doing this twice as well - the smaller XF-83 was suggested, but I ended up using XF-19 - very subtlely lighter - but I also know that when I use my oils later, it will make things slightly darker anyway...
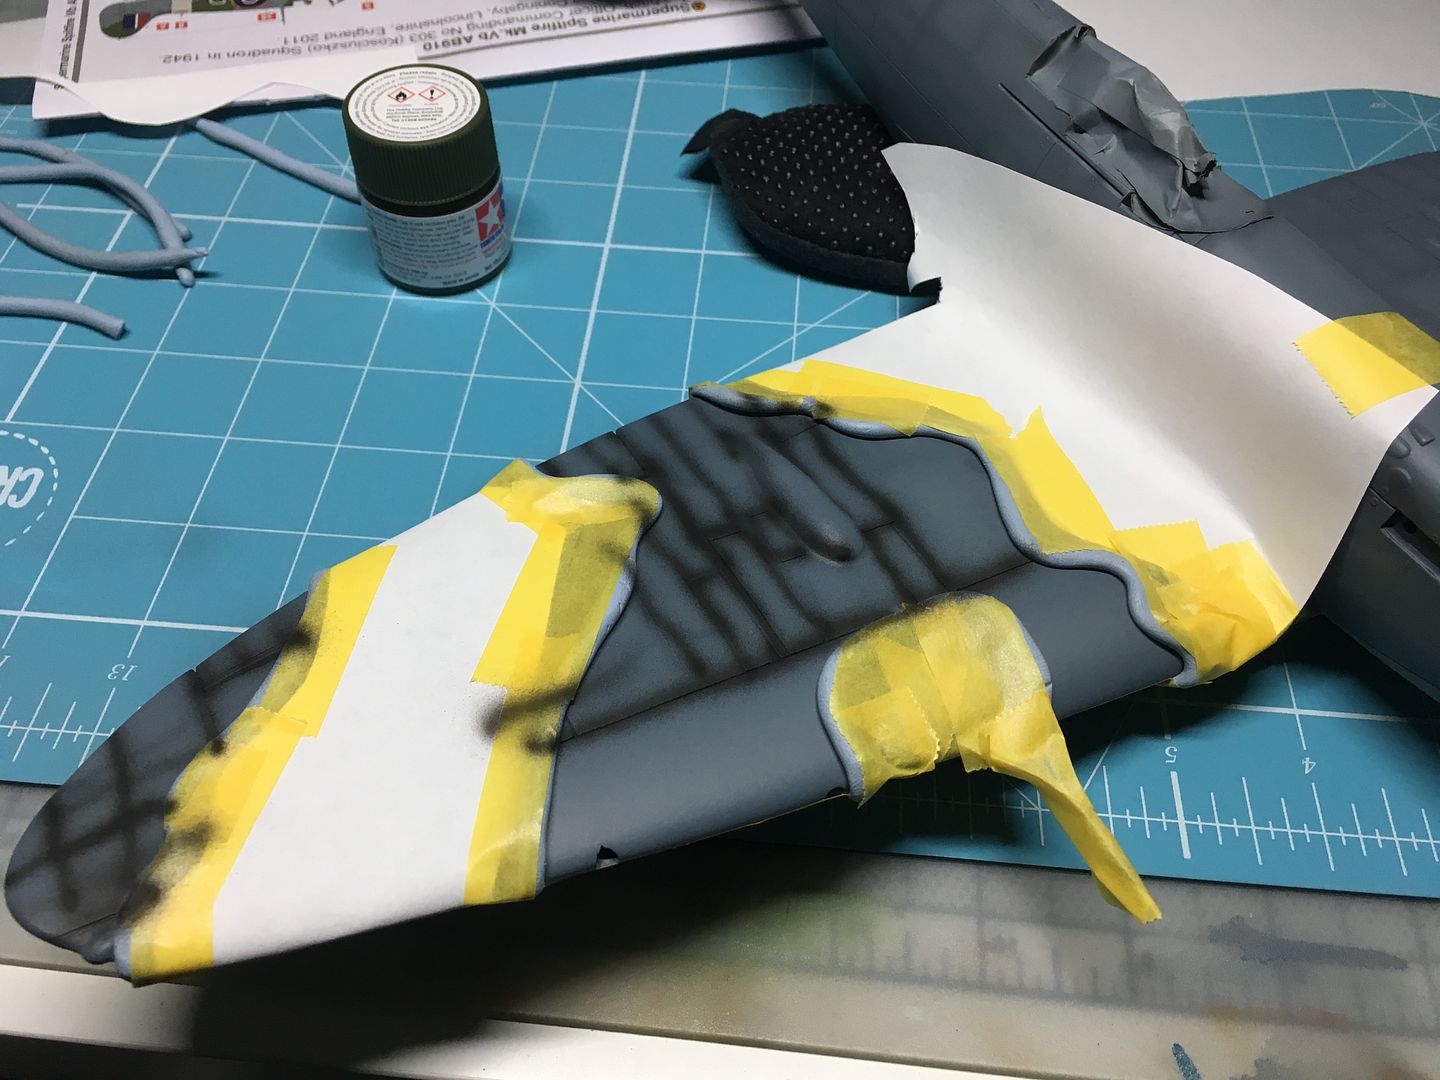
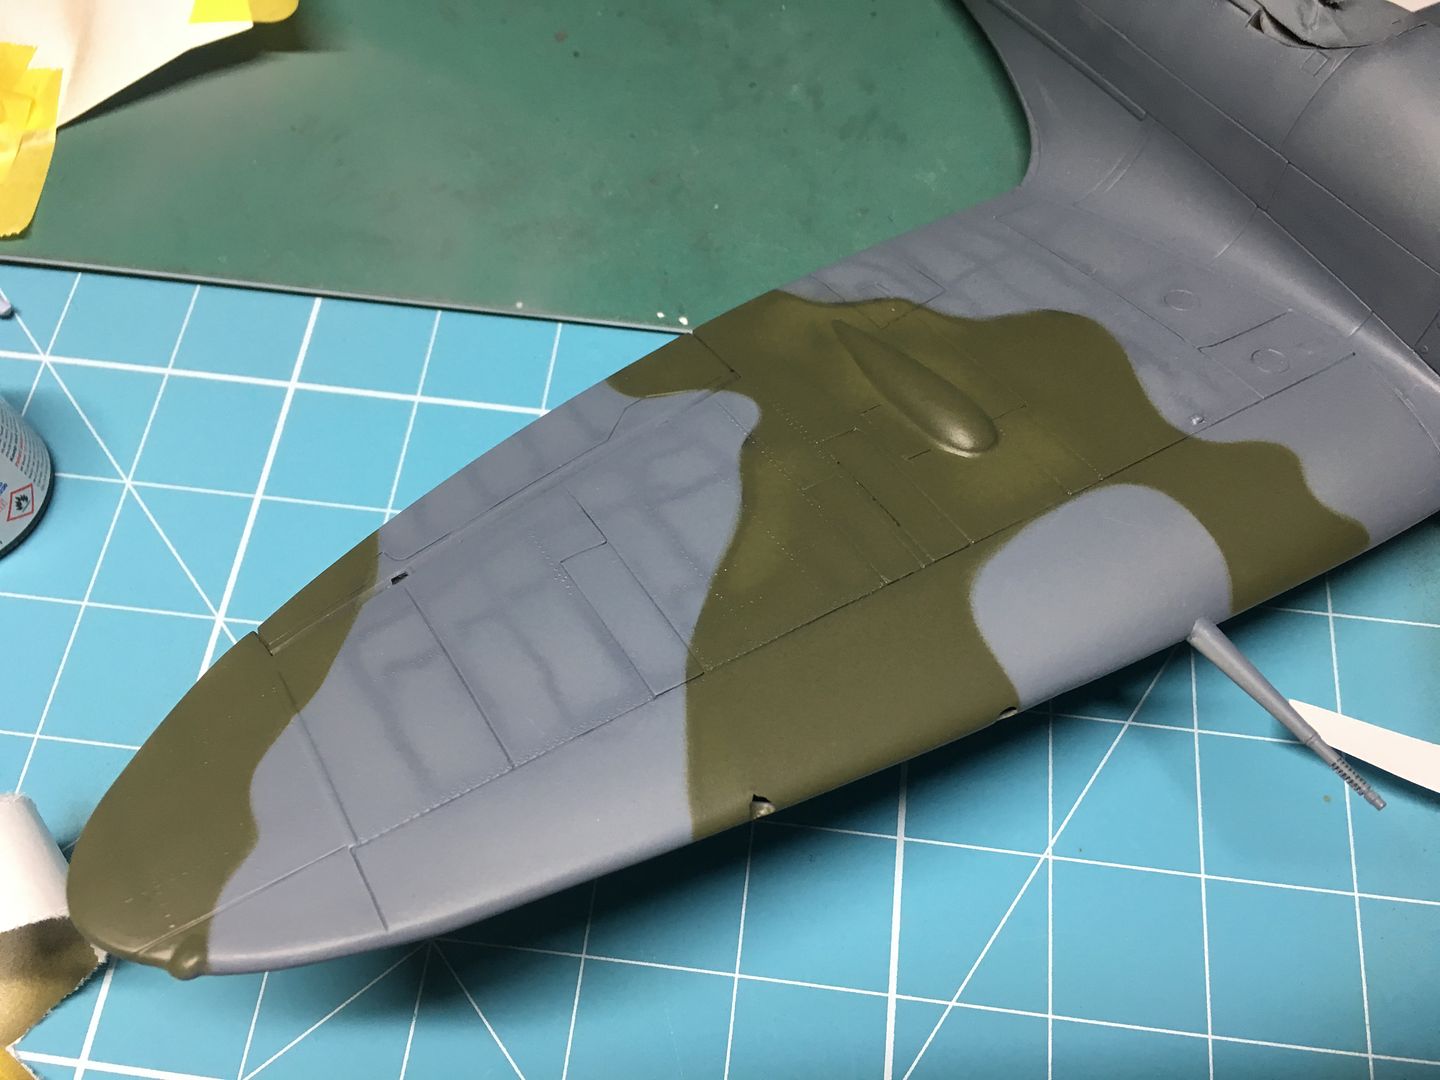
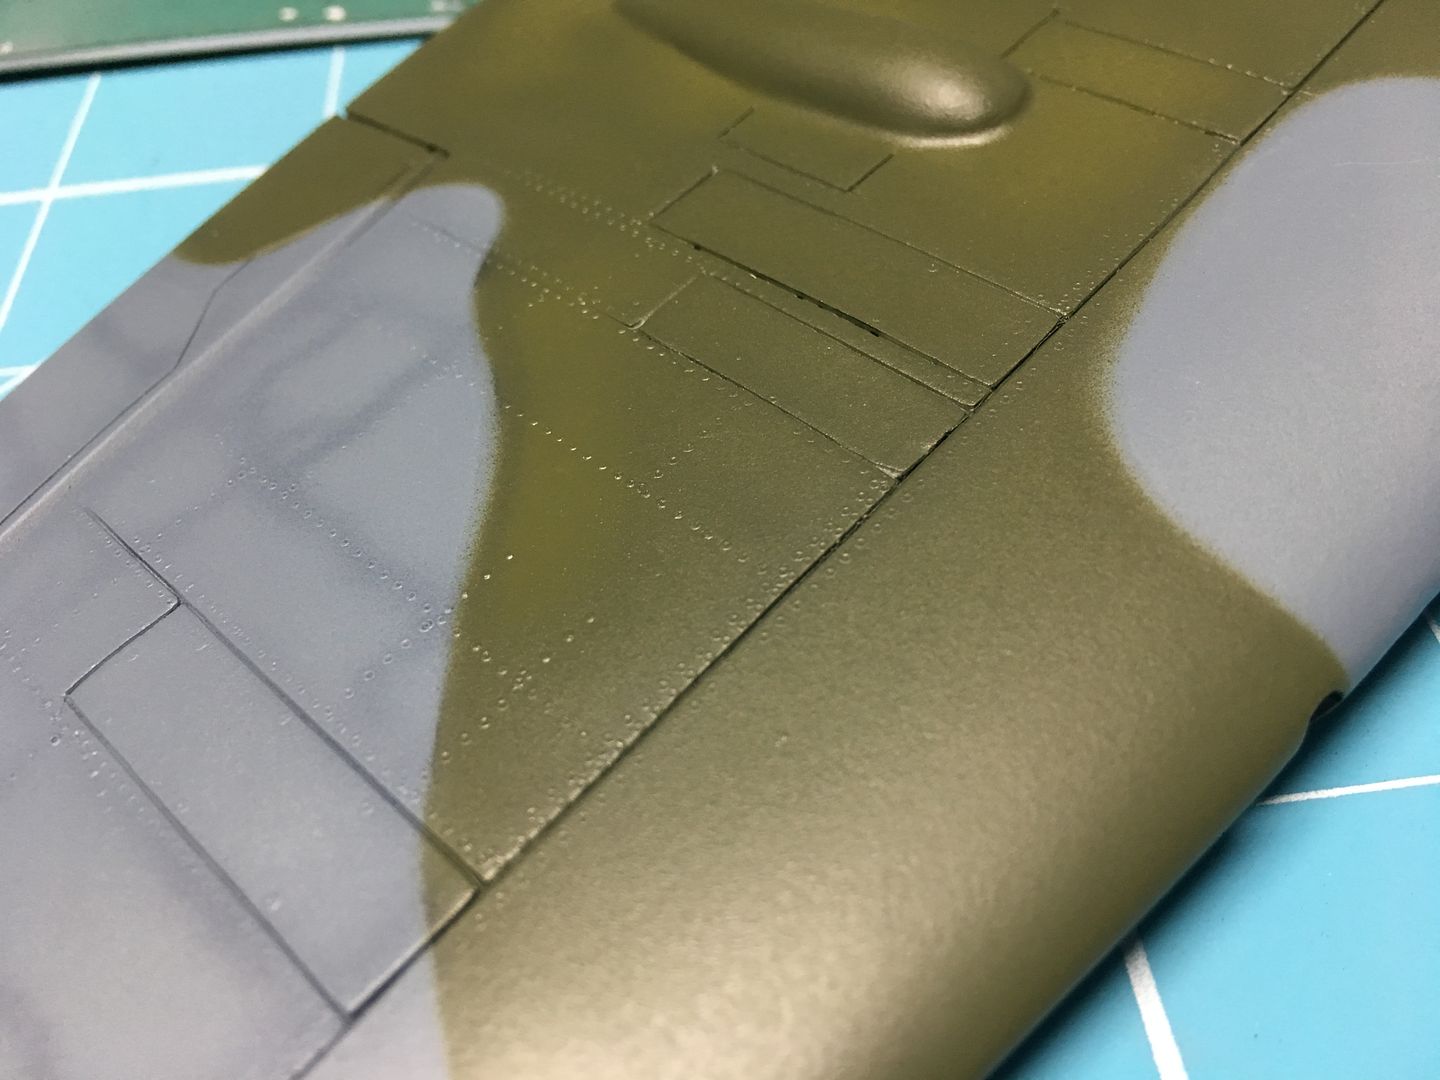
Finally it was the time for the Dark Green (RAF) - I used my Blutack method I used on the Mossie - I like the slightly soft edge it gives. Before spraying the green I had to re-apply those shade lines again, once masked.


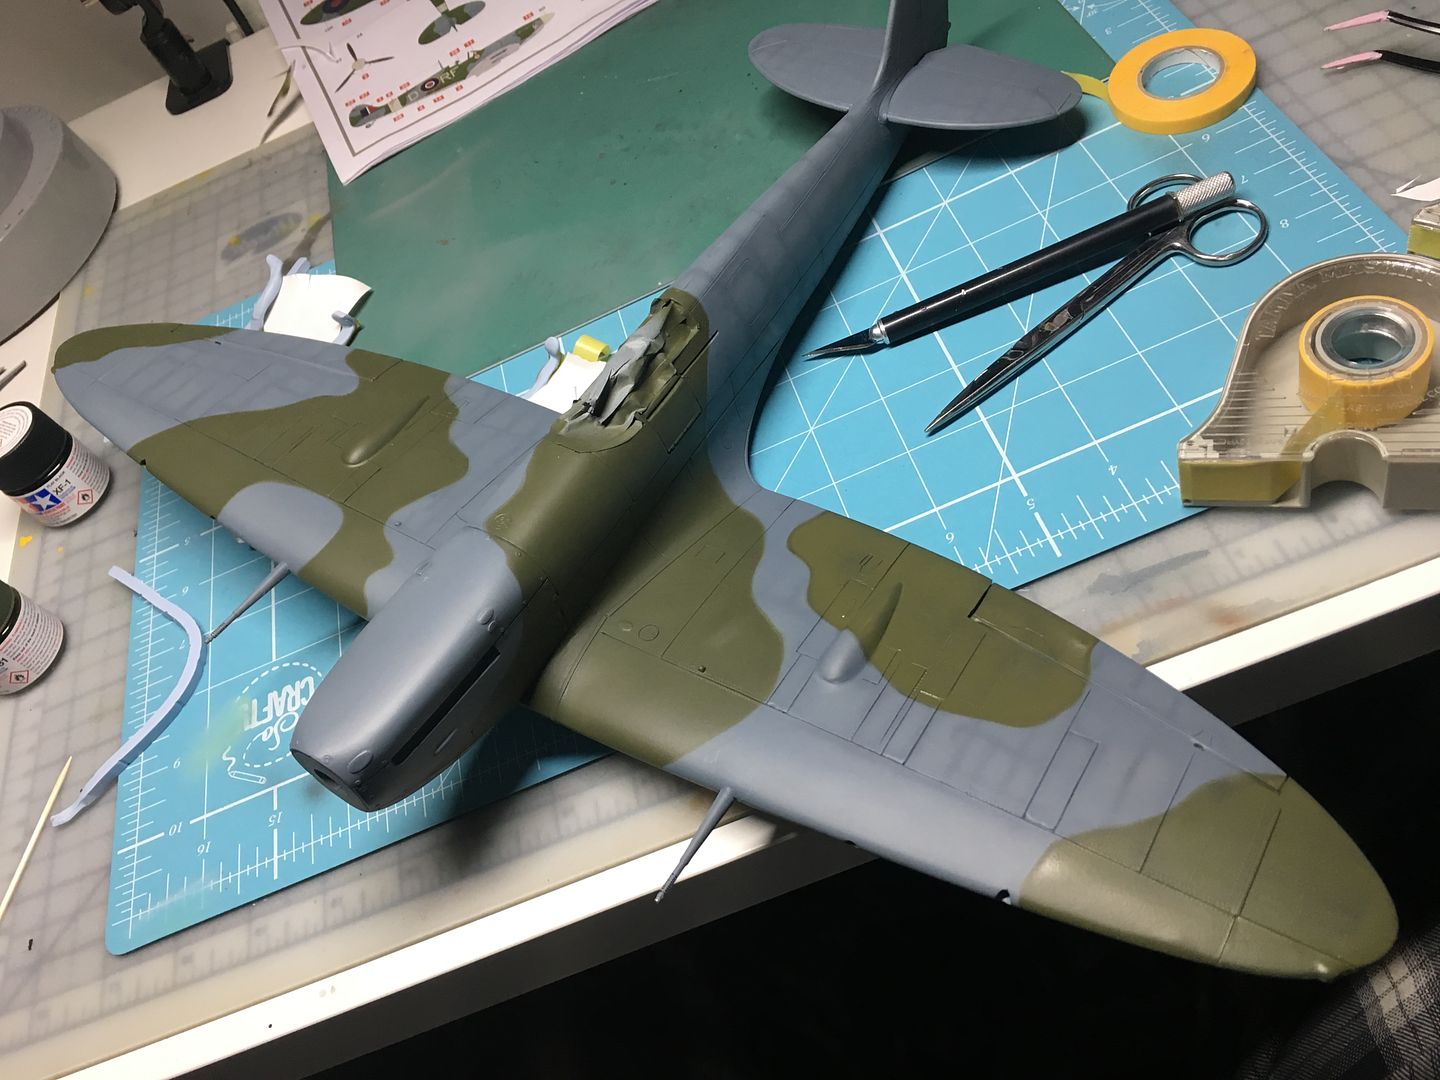

Pretty pleased with the final result...
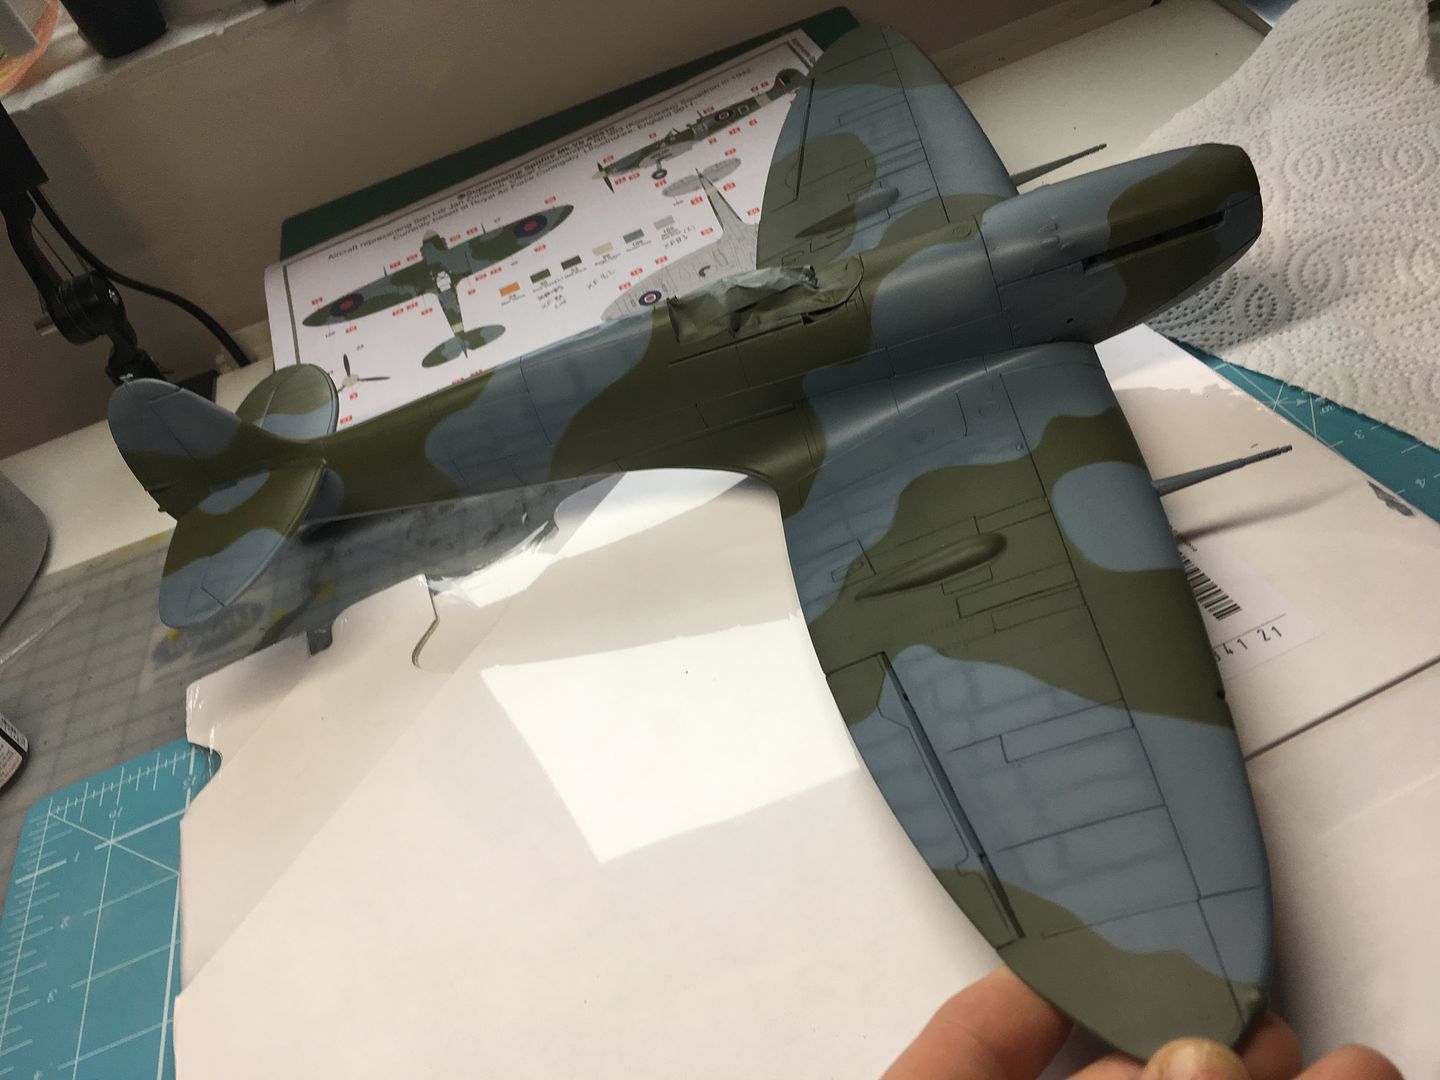
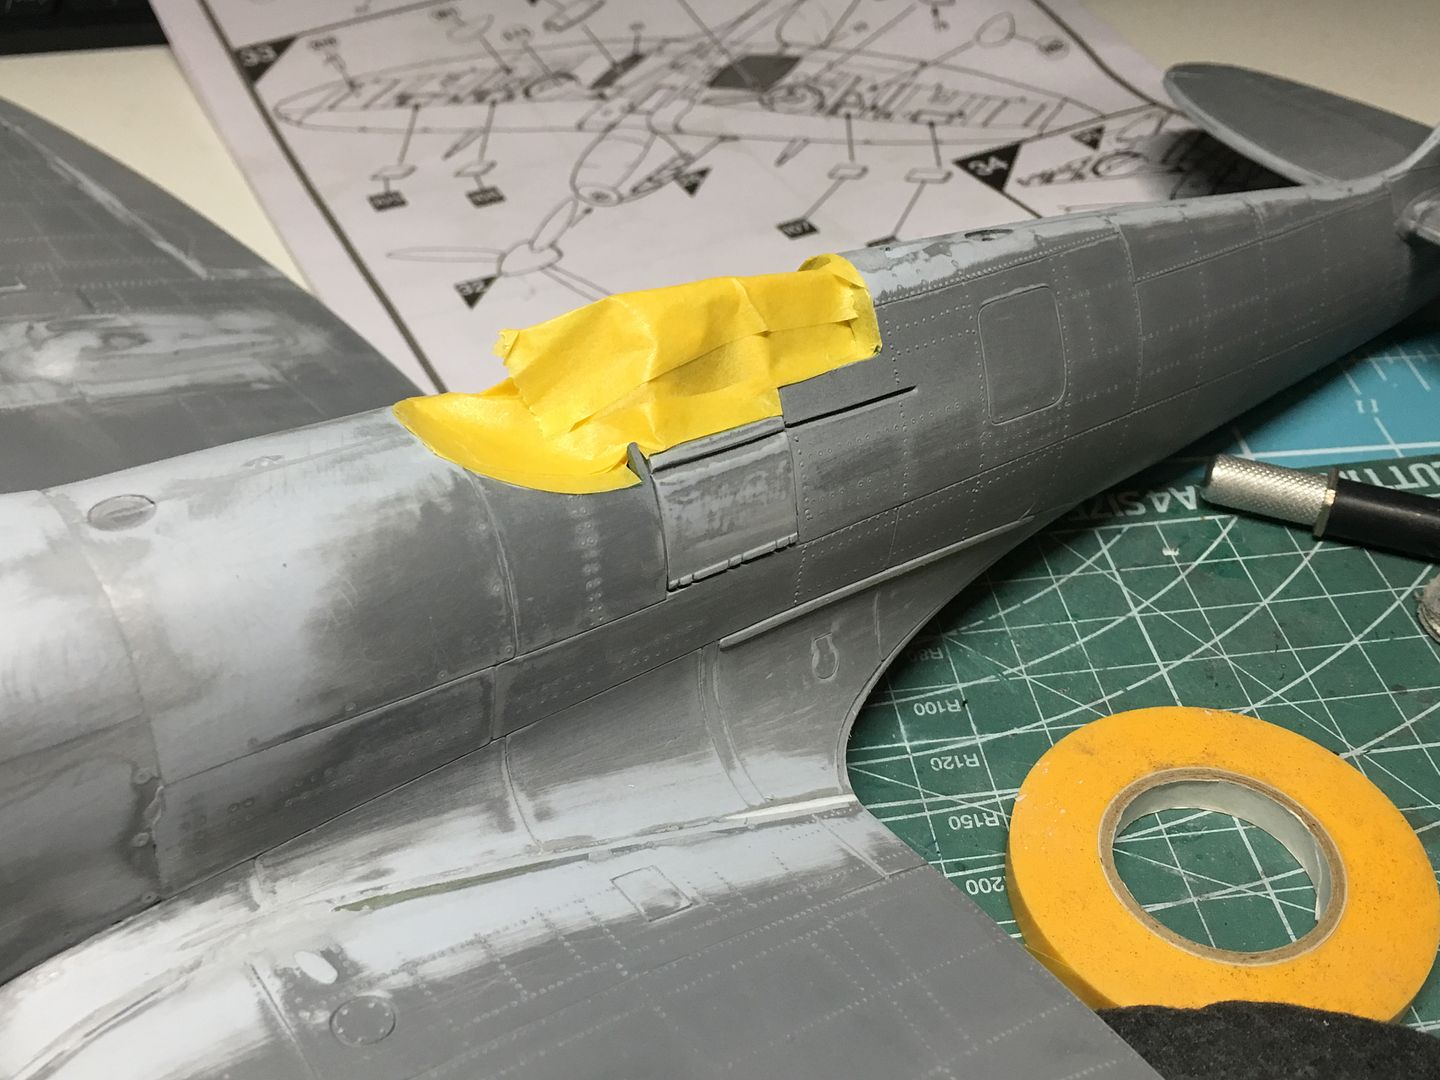
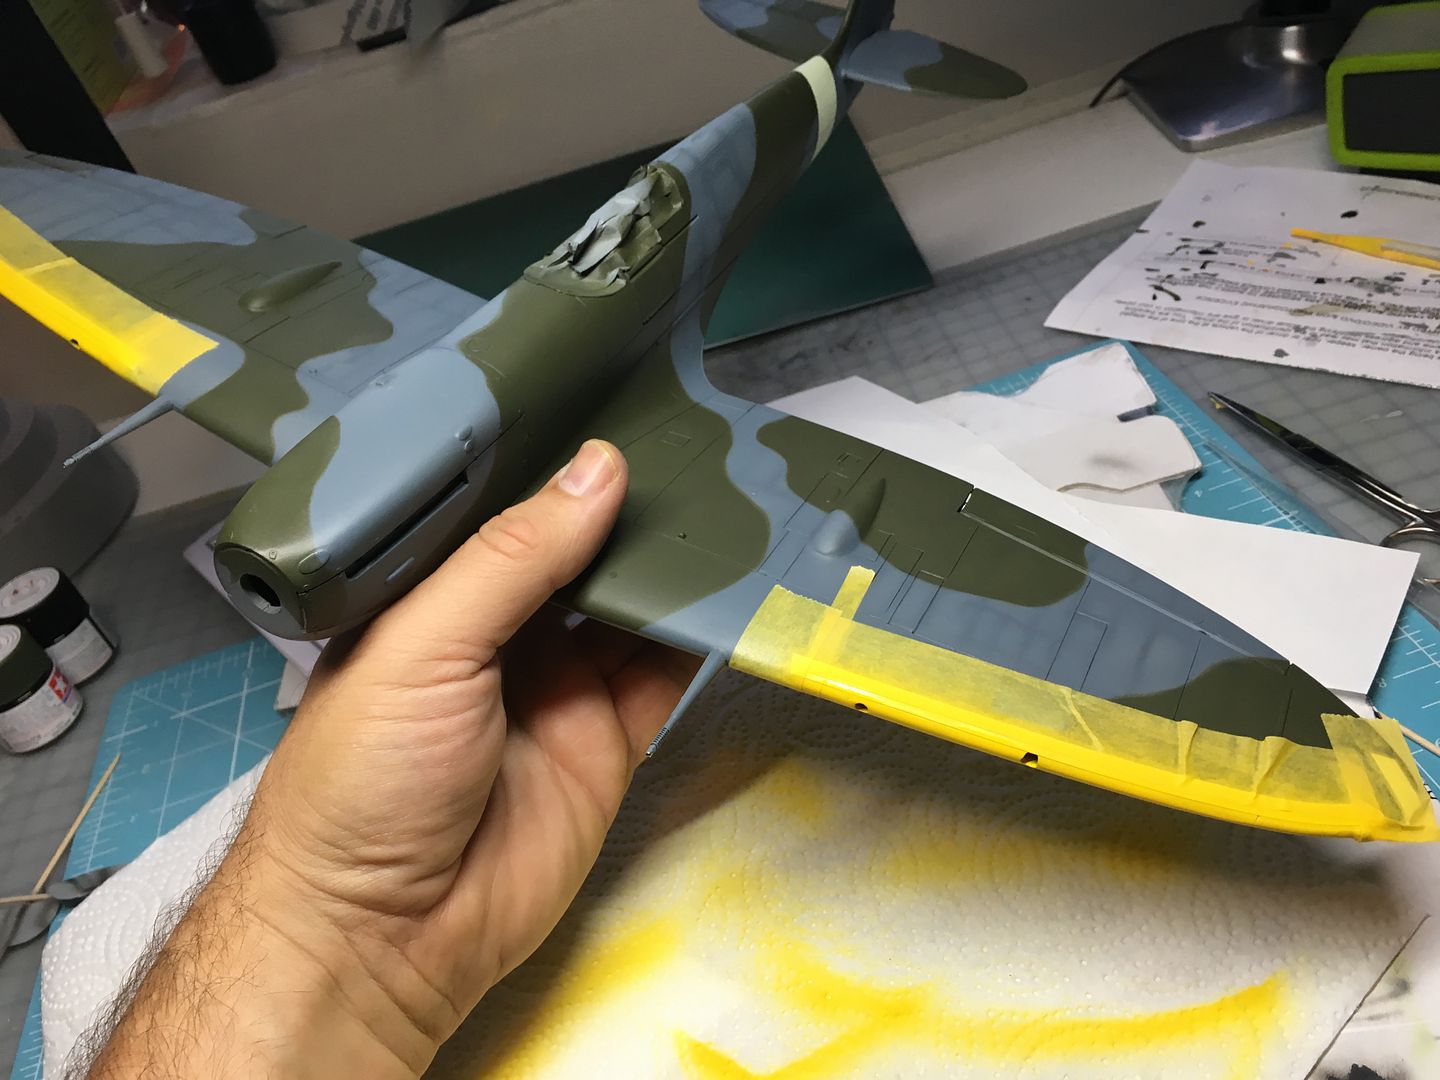
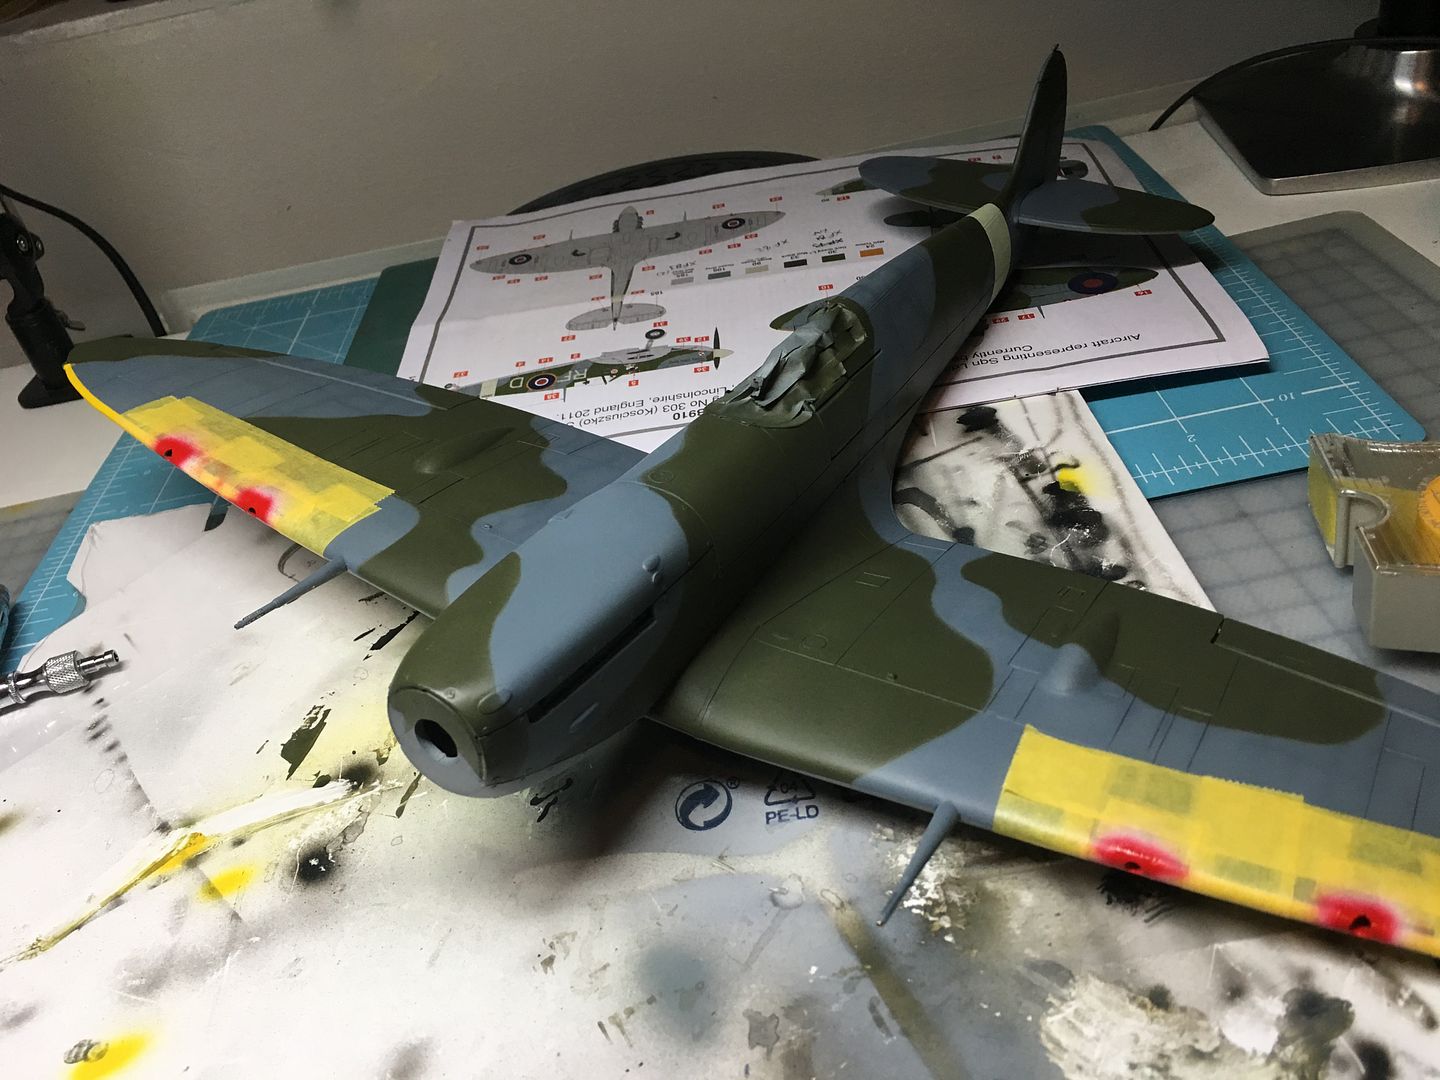
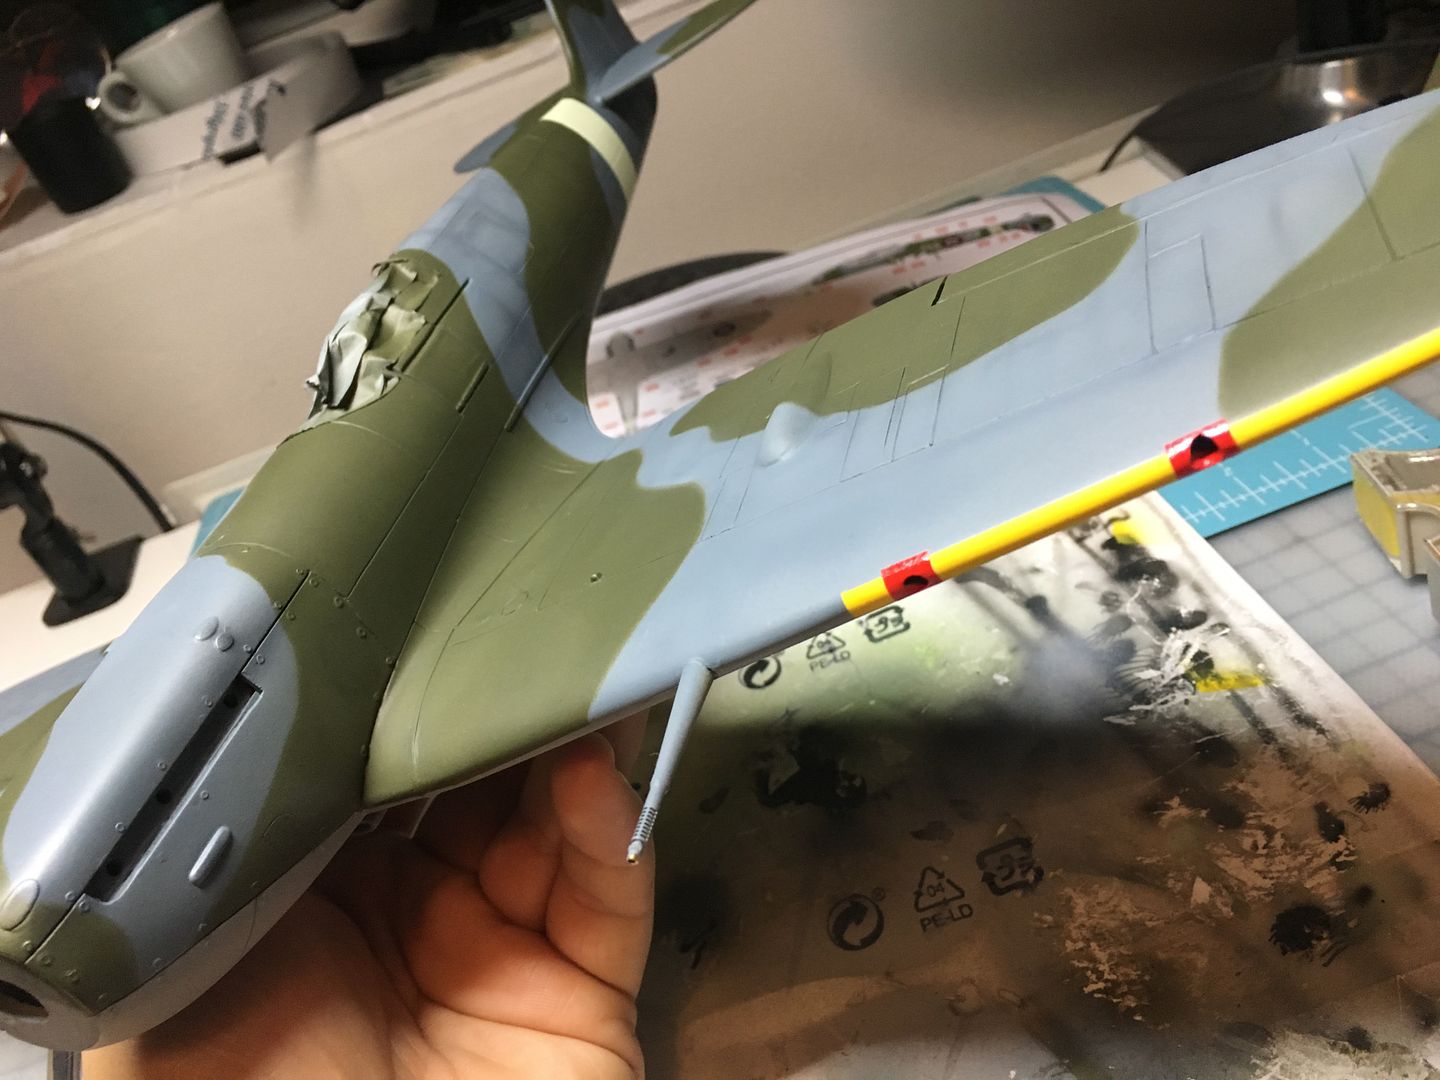
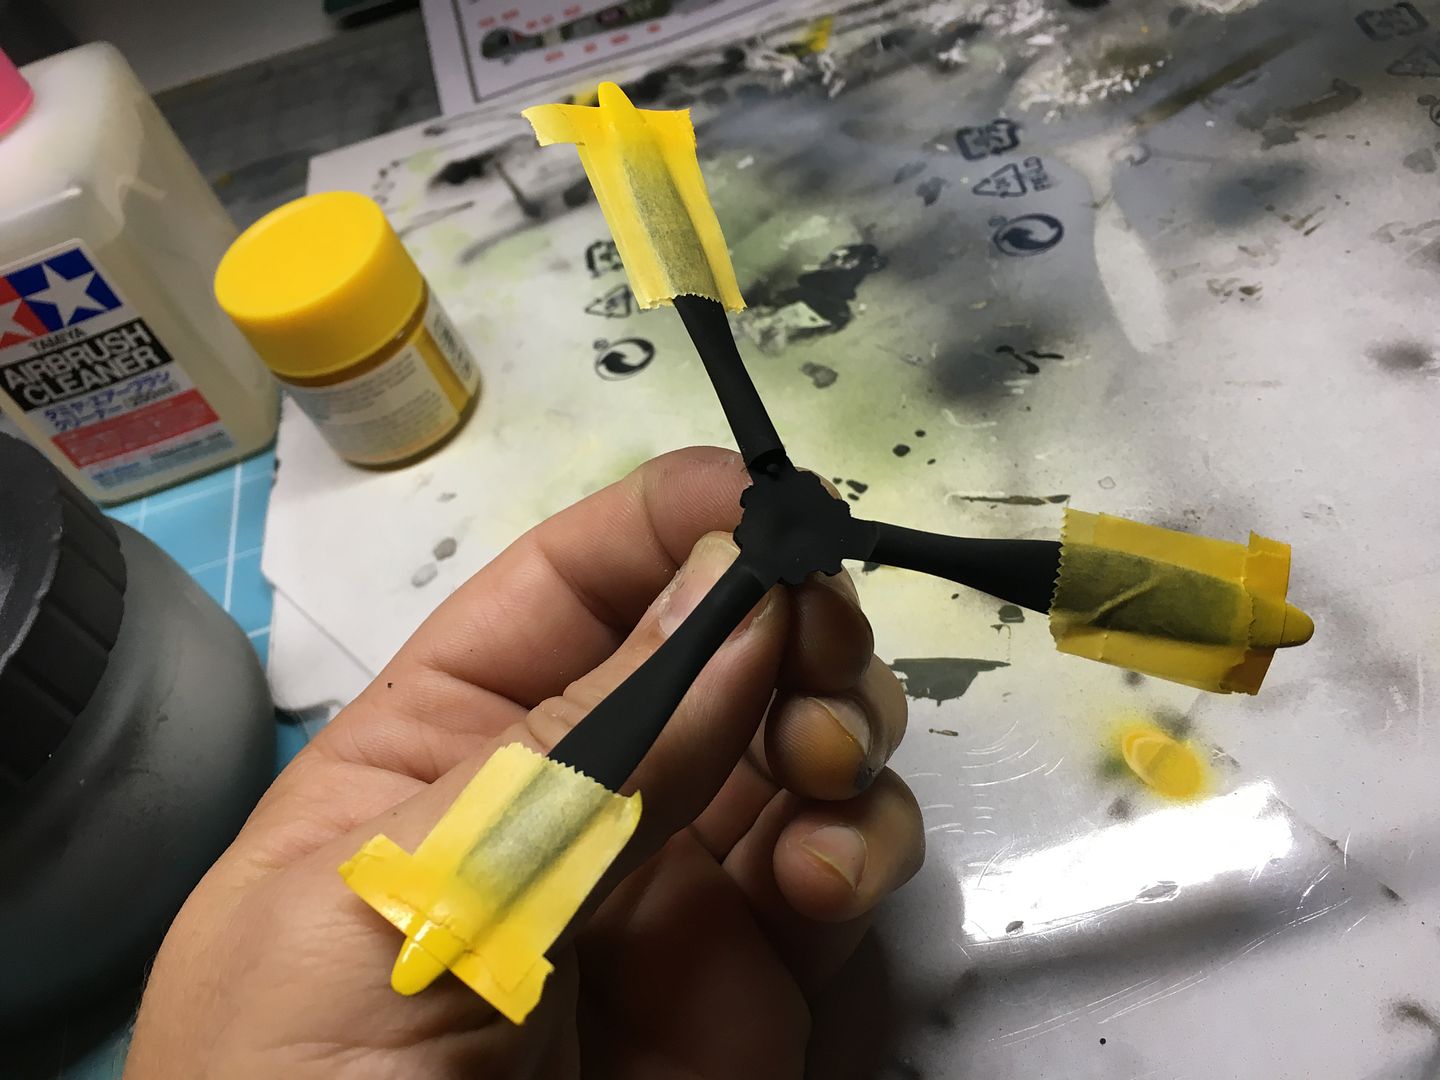
...and now some airbrushed details, such as stripe and yellow around the gun ports...
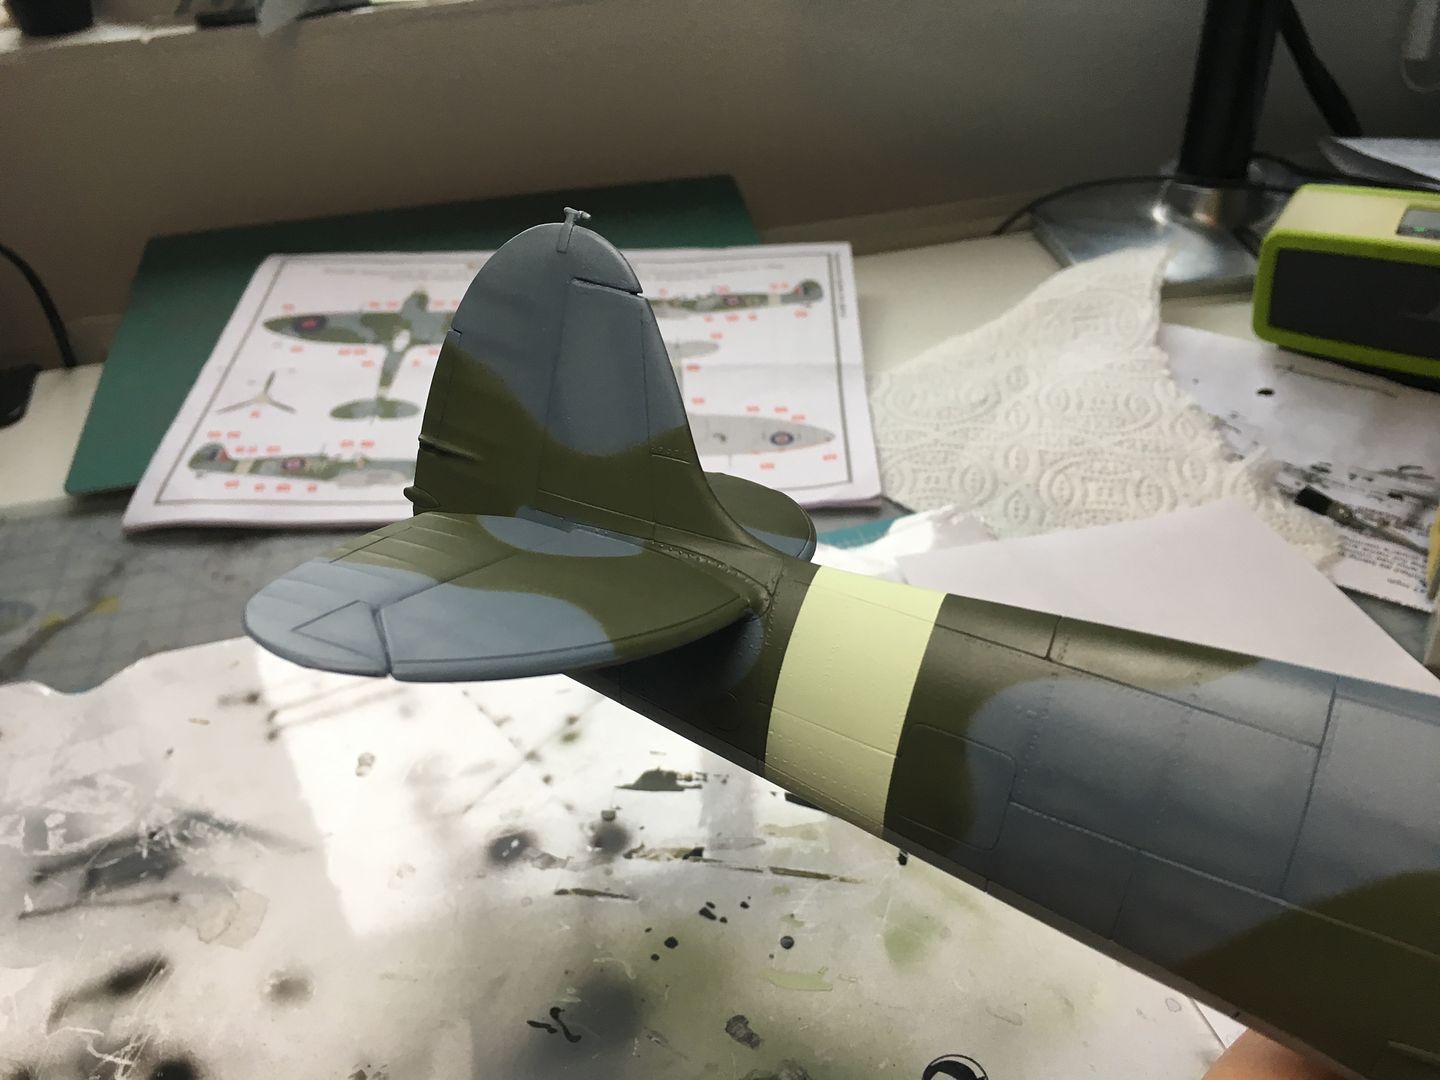

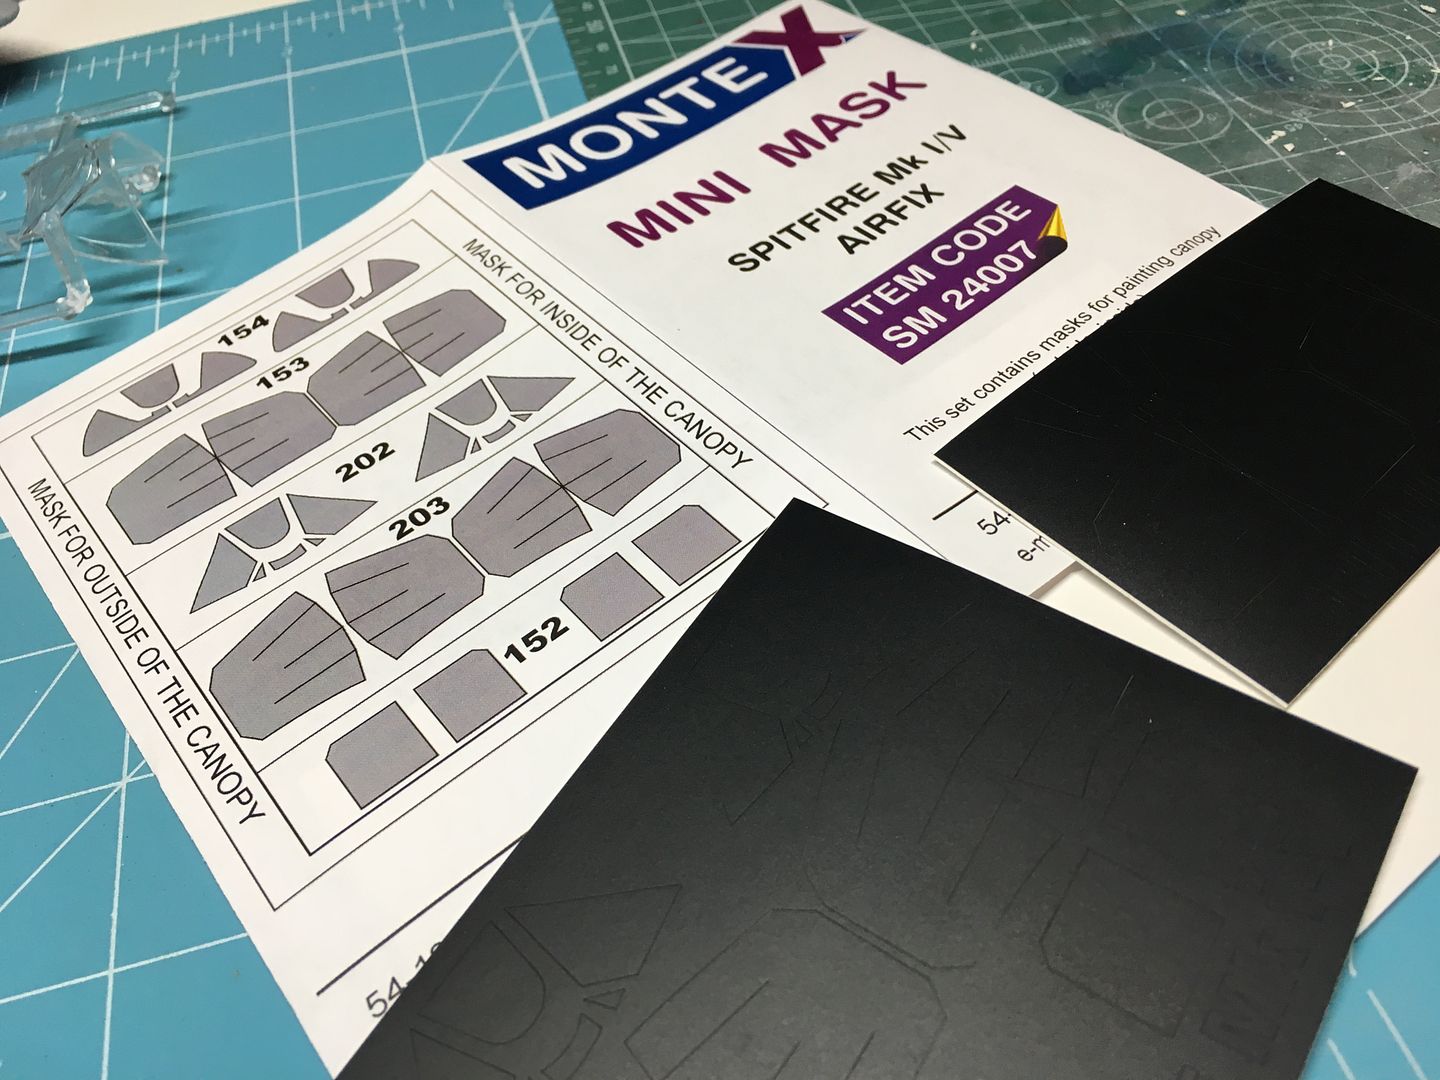
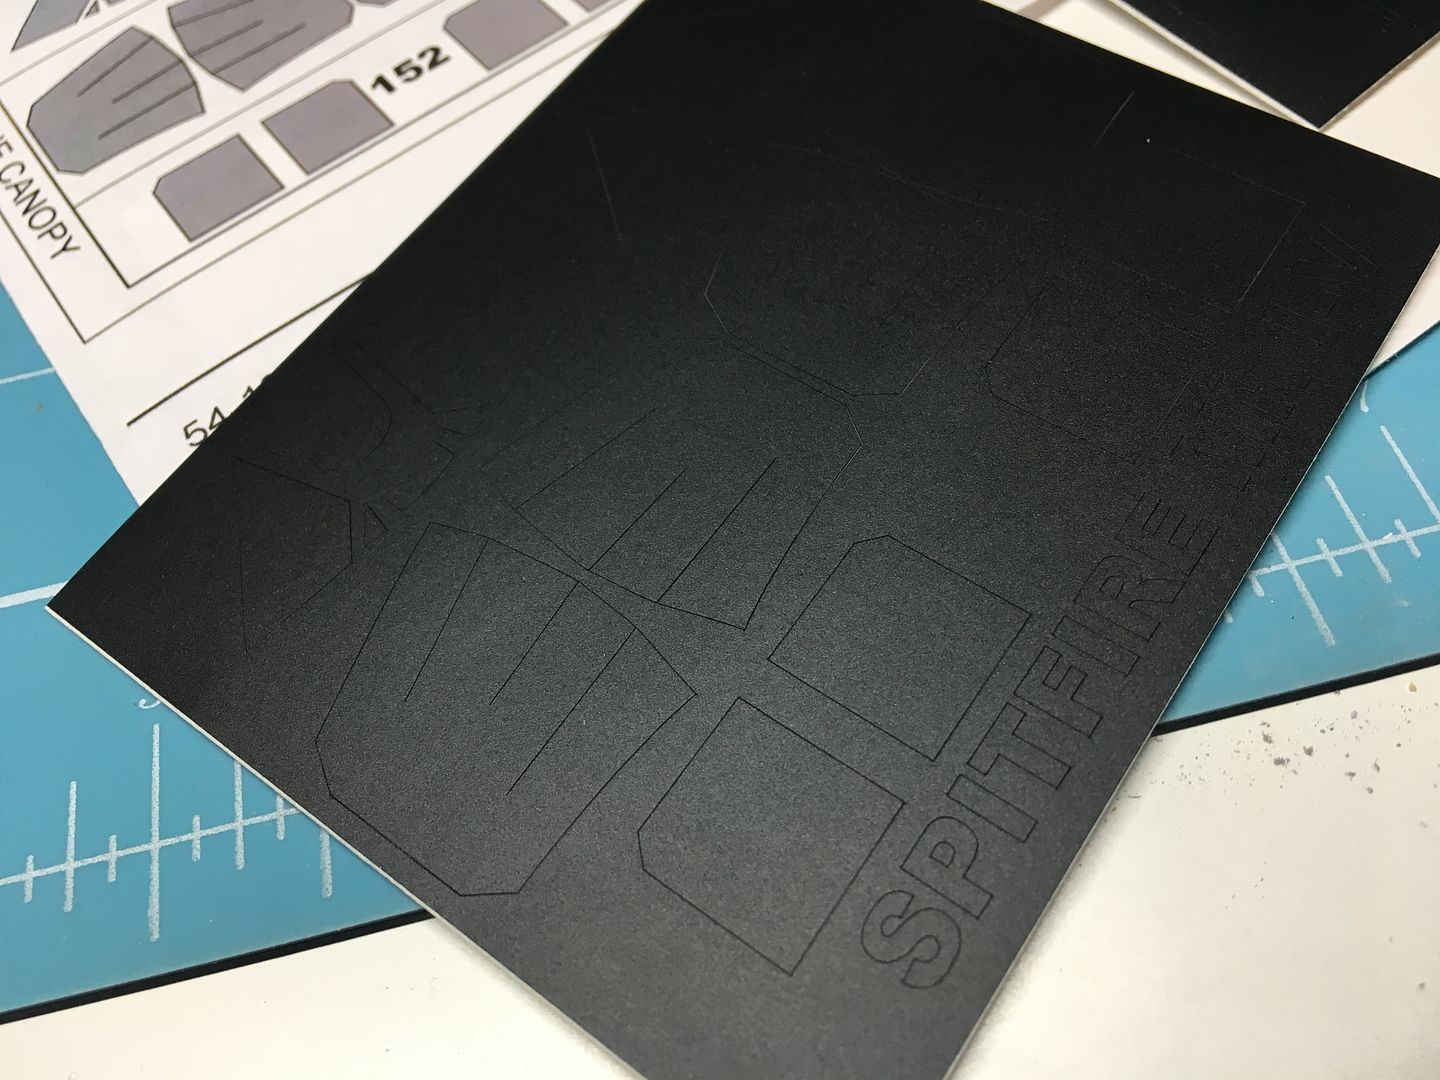
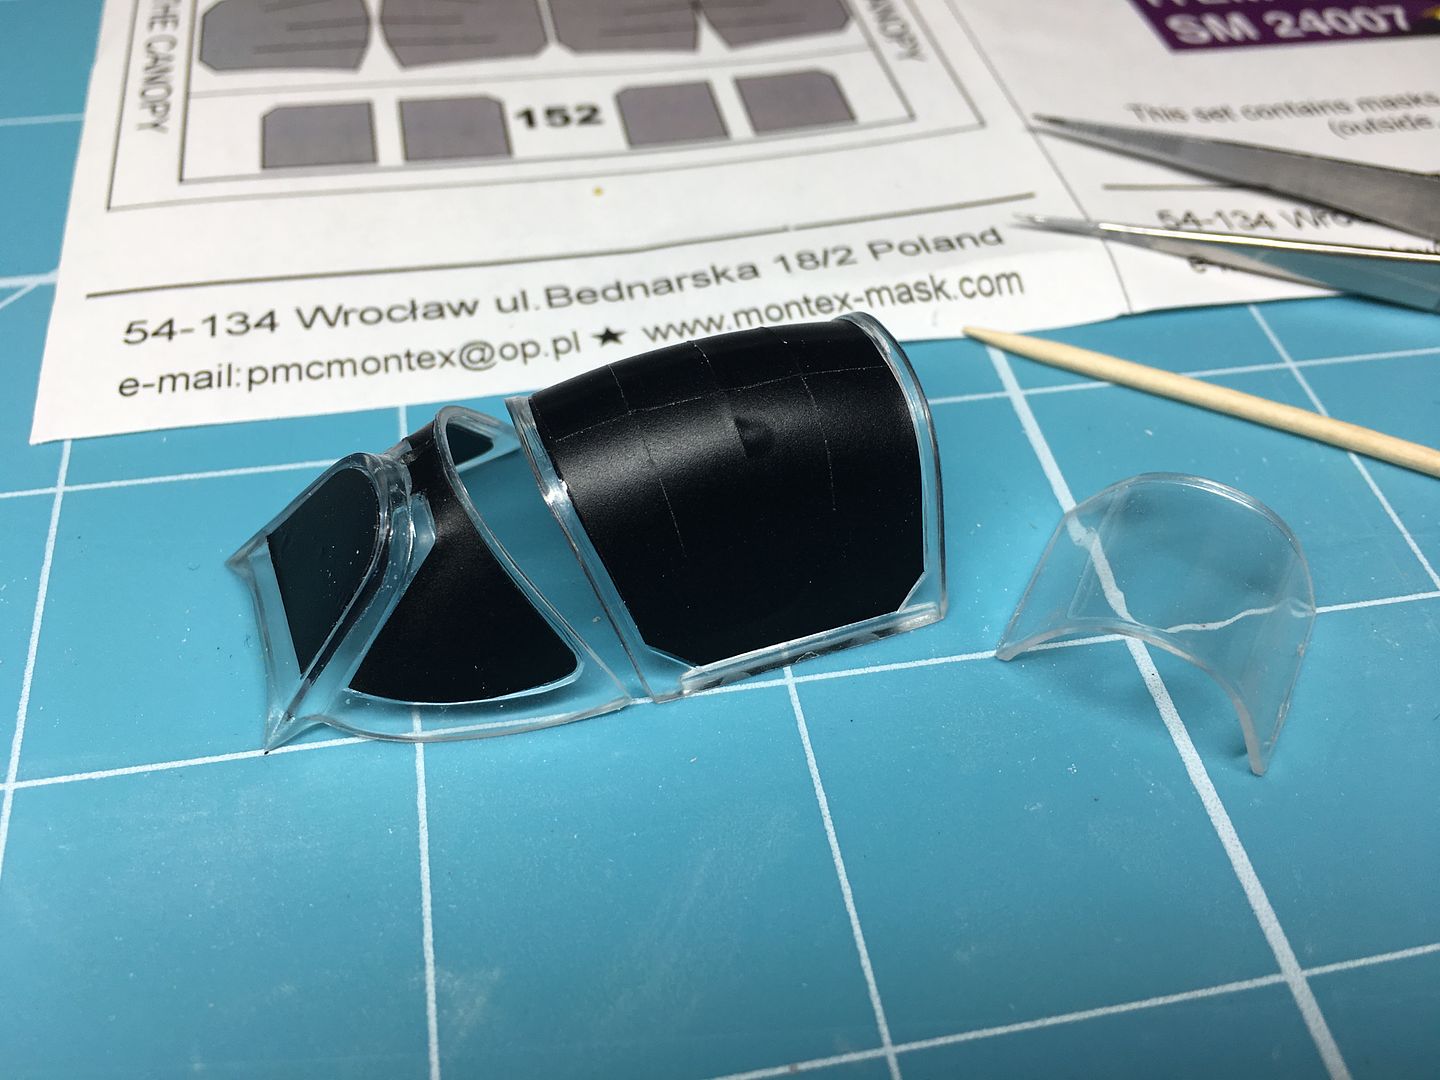
I had also completed the canopy sections - I had bought some after-market masks, which seemed to work ok. There were internal and external masks - I was going to spray the internal colour the same as the light green cockpit, but pictures suggest that the canopy framework itself was actually dark grey/black. As I had already sprayed the dark green, I left the internal like this...

So now onto the decals!
I ended up adding some very thin strips of plastic to re-define this wing root area...
The engine panels had prominent fittings in the molding, some of which got sanded off during fitting. I decided to replace these - they are more flush on most models, but are a nice bit of detail on this one - I used PE 'washers' glued on to represent these - lower profile than the ones that had been moulded on - lots of them though!
I also used a generic PE 'pulley' to replace the crude detail of what I presume is an oil filler cap or similar, situated on top of the forward fuselage.
I added the very nice extra detail set of cannon...
Now onto the painting.
On the only other plane I have made, I used oils on the top surface to simulate panel profiles, panel gaps etc and shading - on this model I decided to try the method of airbrushing black shadows BEFORE the top coat. Took a while to get the airbrush set correctly (low) and to get the steady hand required to freehand the lines, but super-accuracy is not required here...
This had the desired effect...
HOWEVER - I was not happy with the colour. I had read that sometimes the proposed colour for this top surface of the Spitfire can be a little dark, so had tried a slightly lighter colour - but was still not happy - easy to respray another slightly darker colour on top - but I had to re-spray those pesky shadow lines again!
But happier with the colour...and with my first attempt at the shading.
I then had a similar issue with the underside - the colour that was suggested seemed too close to the top grey, so I ended up doing this twice as well - the smaller XF-83 was suggested, but I ended up using XF-19 - very subtlely lighter - but I also know that when I use my oils later, it will make things slightly darker anyway...
Finally it was the time for the Dark Green (RAF) - I used my Blutack method I used on the Mossie - I like the slightly soft edge it gives. Before spraying the green I had to re-apply those shade lines again, once masked.
Pretty pleased with the final result...
...and now some airbrushed details, such as stripe and yellow around the gun ports...
I had also completed the canopy sections - I had bought some after-market masks, which seemed to work ok. There were internal and external masks - I was going to spray the internal colour the same as the light green cockpit, but pictures suggest that the canopy framework itself was actually dark grey/black. As I had already sprayed the dark green, I left the internal like this...
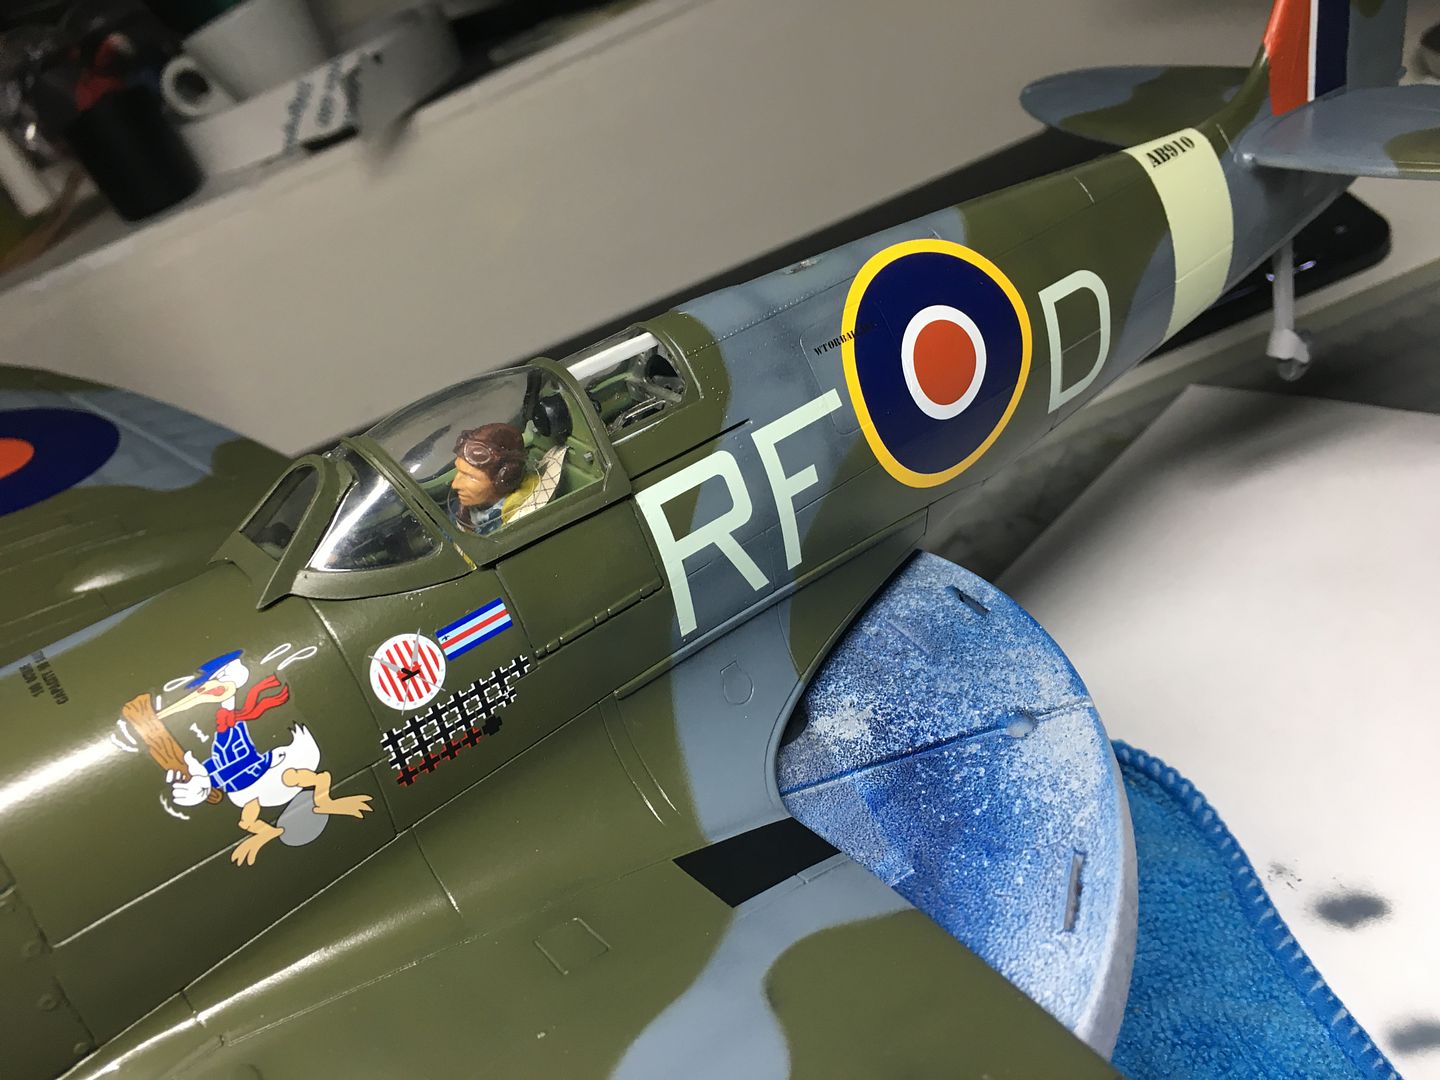
So now onto the decals!
The nerdier members of the parish may come along and correct me later.....
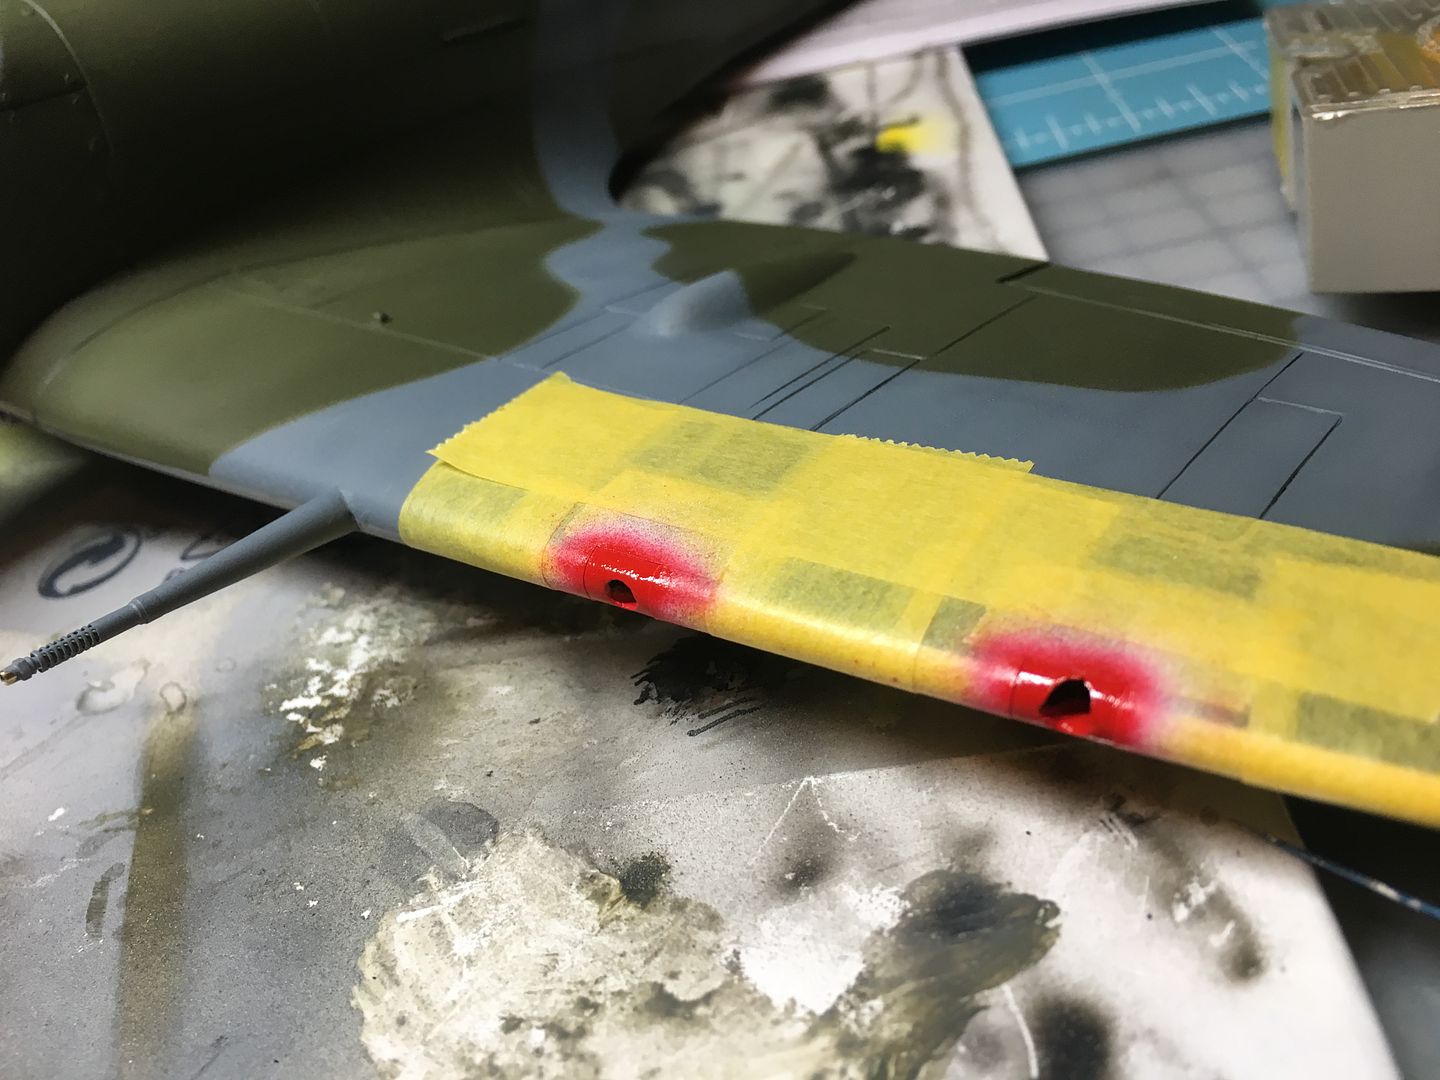
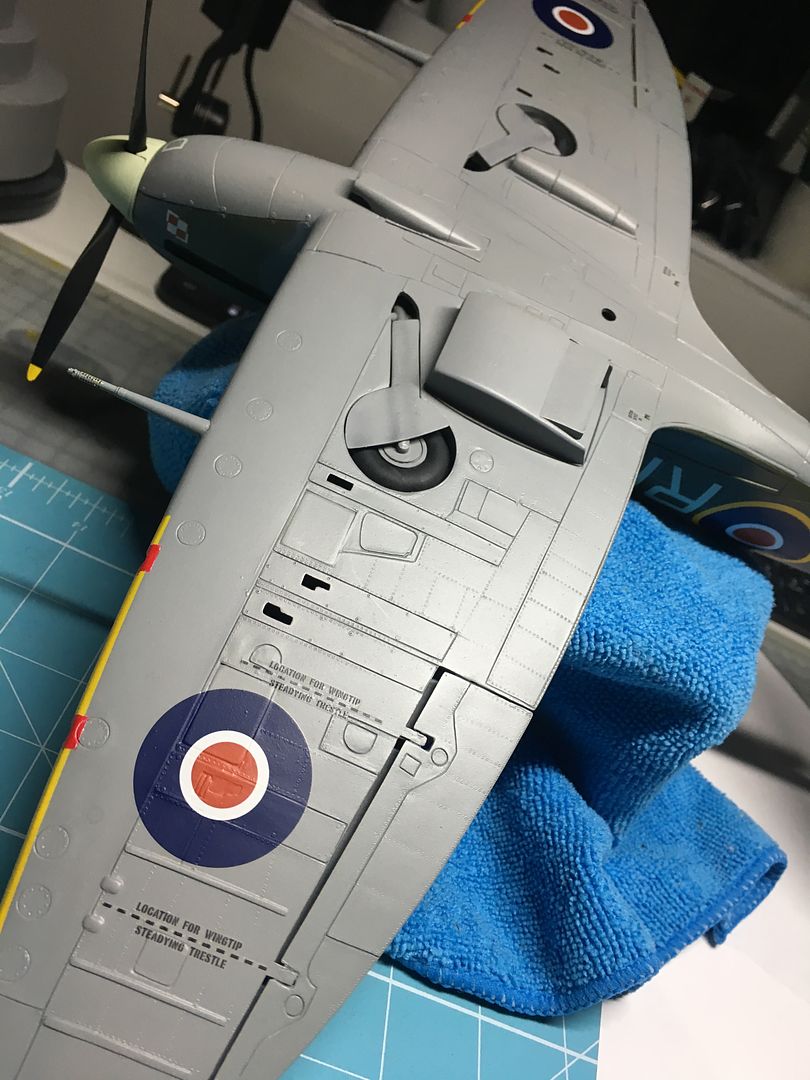
The red painted square around the gun ports wasn’t a red painted square at all. Instead, fabric was doped over the ports to improve the aerodynamics. After all, most flights didn’t result in the guns being fired. If they were fired, then of course the rounds simply went straight through the fabric. The ground personnel became well practiced in listening for the whistle that was generated by the holes post-combat. Perhaps you could more accurately portray this with microfibre lens cloth or similar, glued over the ports and painted? Holed or not as per your own choice....
The red painted square around the gun ports wasn’t a red painted square at all. Instead, fabric was doped over the ports to improve the aerodynamics. After all, most flights didn’t result in the guns being fired. If they were fired, then of course the rounds simply went straight through the fabric. The ground personnel became well practiced in listening for the whistle that was generated by the holes post-combat. Perhaps you could more accurately portray this with microfibre lens cloth or similar, glued over the ports and painted? Holed or not as per your own choice....
4321go said:
The nerdier members of the parish may come along and correct me later.....
The red painted square around the gun ports wasn’t a red painted square at all. Instead, fabric was doped over the ports to improve the aerodynamics. After all, most flights didn’t result in the guns being fired. If they were fired, then of course the rounds simply went straight through the fabric. The ground personnel became well practiced in listening for the whistle that was generated by the holes post-combat. Perhaps you could more accurately portray this with microfibre lens cloth or similar, glued over the ports and painted? Holed or not as per your own choice....
I use spare red decal paper cut from an old roundel applied over the hole. If you use microsol it forms dimples over the port holes and looks very much like real fabric.The red painted square around the gun ports wasn’t a red painted square at all. Instead, fabric was doped over the ports to improve the aerodynamics. After all, most flights didn’t result in the guns being fired. If they were fired, then of course the rounds simply went straight through the fabric. The ground personnel became well practiced in listening for the whistle that was generated by the holes post-combat. Perhaps you could more accurately portray this with microfibre lens cloth or similar, glued over the ports and painted? Holed or not as per your own choice....
Yep - I know exactly what you mean - you can often see the frayed fabric in films etc - sounds like a nice bit of detail to add - particularly at this larger scale...
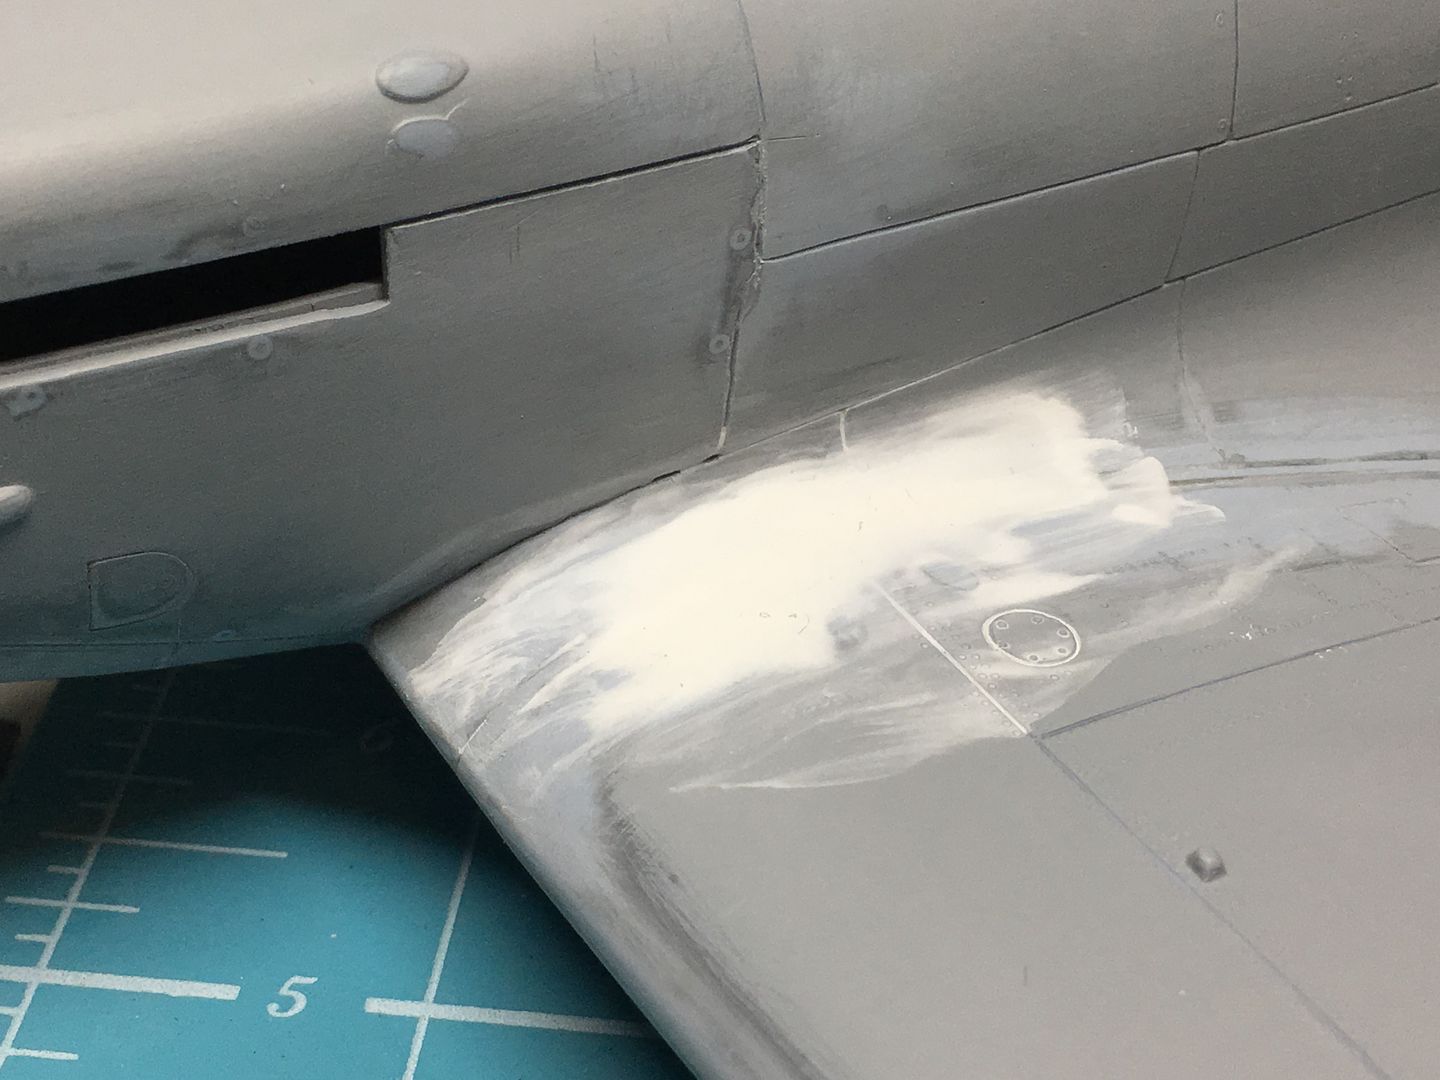
Had a minor potential disaster (and got away with it) where I had been using Tamiya airbrush cleaner (from Belgium!) and had a bit on a piece of kitchen roll, which I then rested the model on - luckily it was only on a one-colour section - so a quick gentle re-spray of the area worked - few!! I obviously had not learnt my lesson - when I was making the Brabham BT52 I managed to wipe the freshly dried blue Zero paint with a similar rag, and cause much more damage - perils of working on a small, temporary space -
arrrgh!!


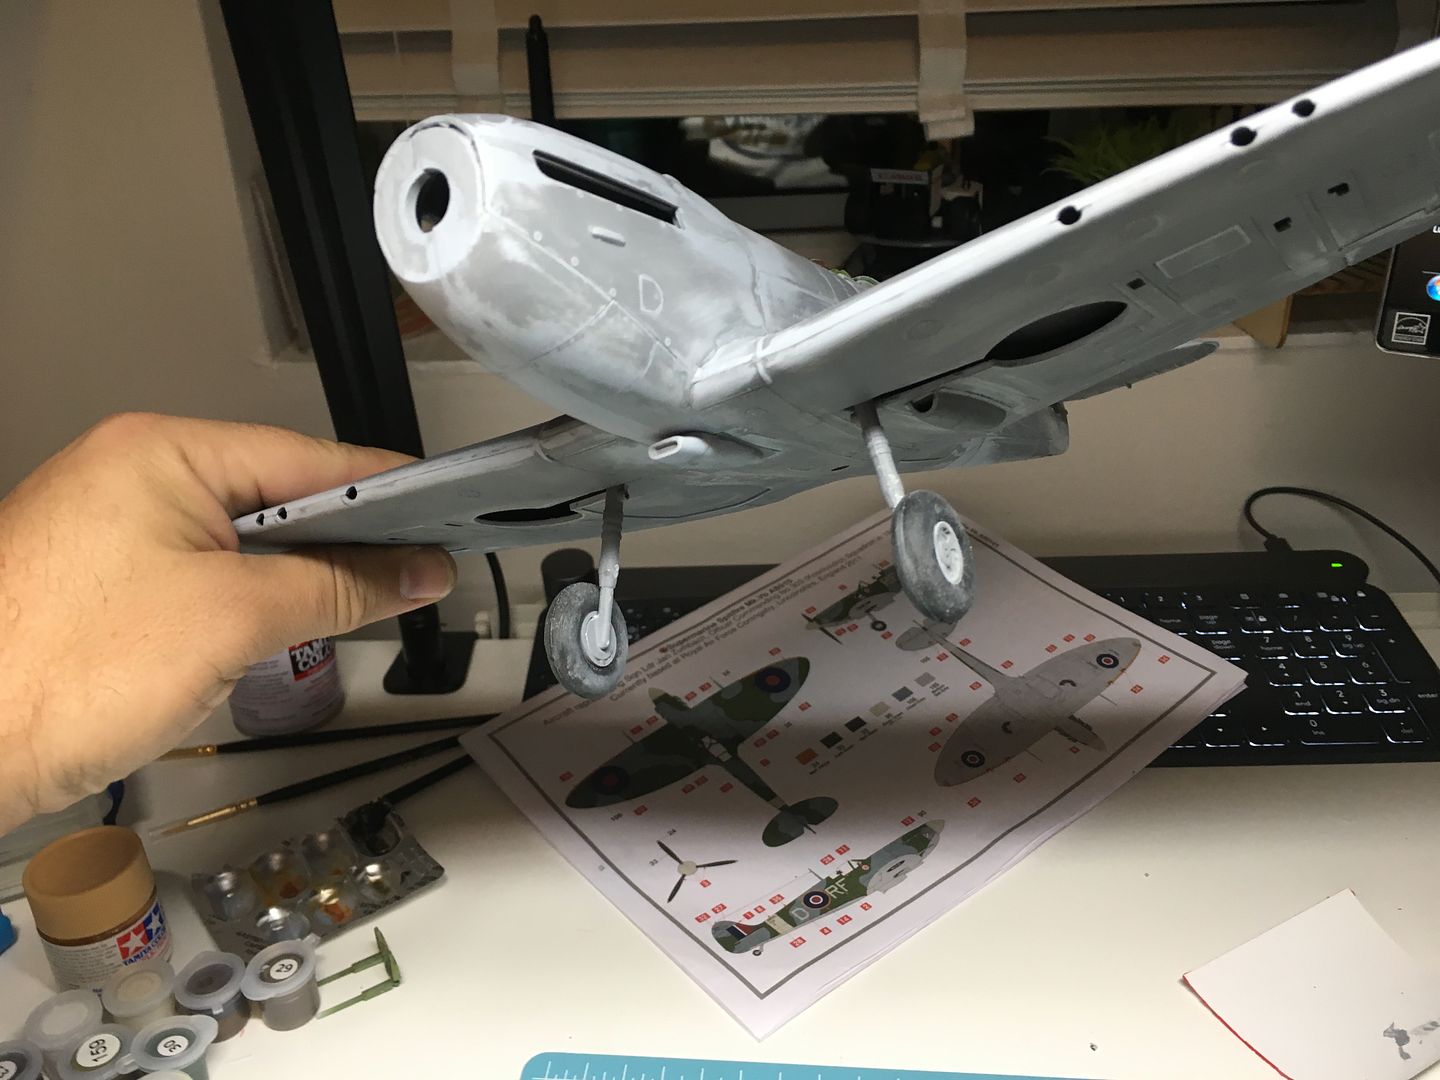
Ginger had survived all the manhandling...

...and the canopy is going to fit!
...so on to the decals. Really comes alive now - I had sprayed a semi-gloss clear to protect the paint and help the decals, so everything looks very shiny right now...

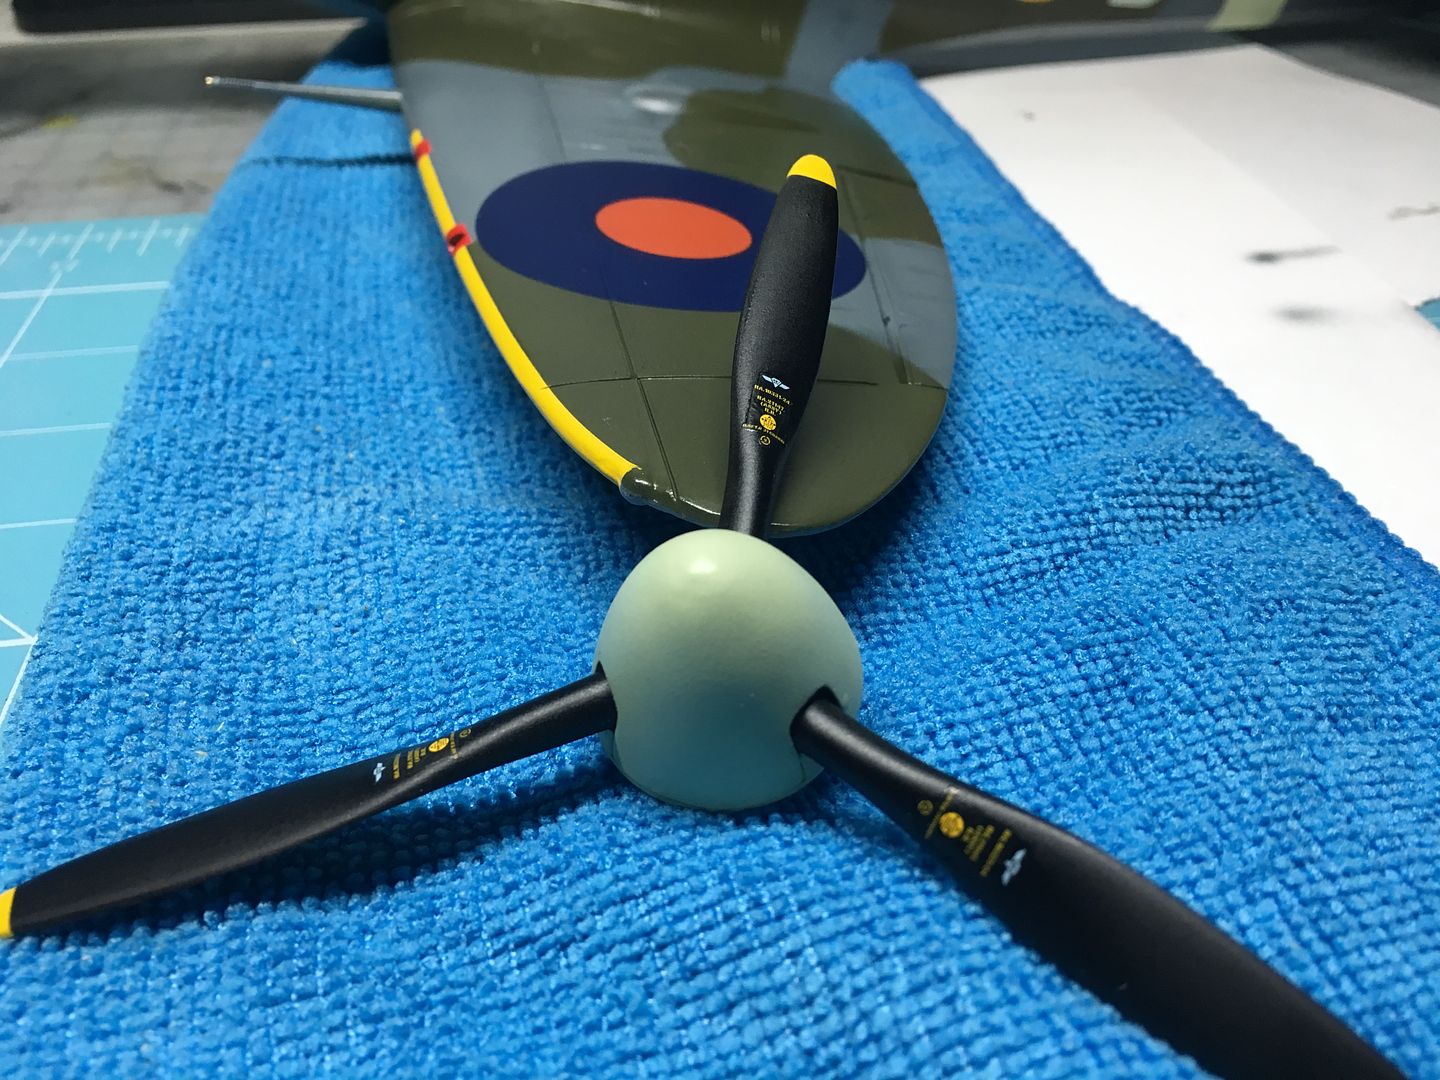
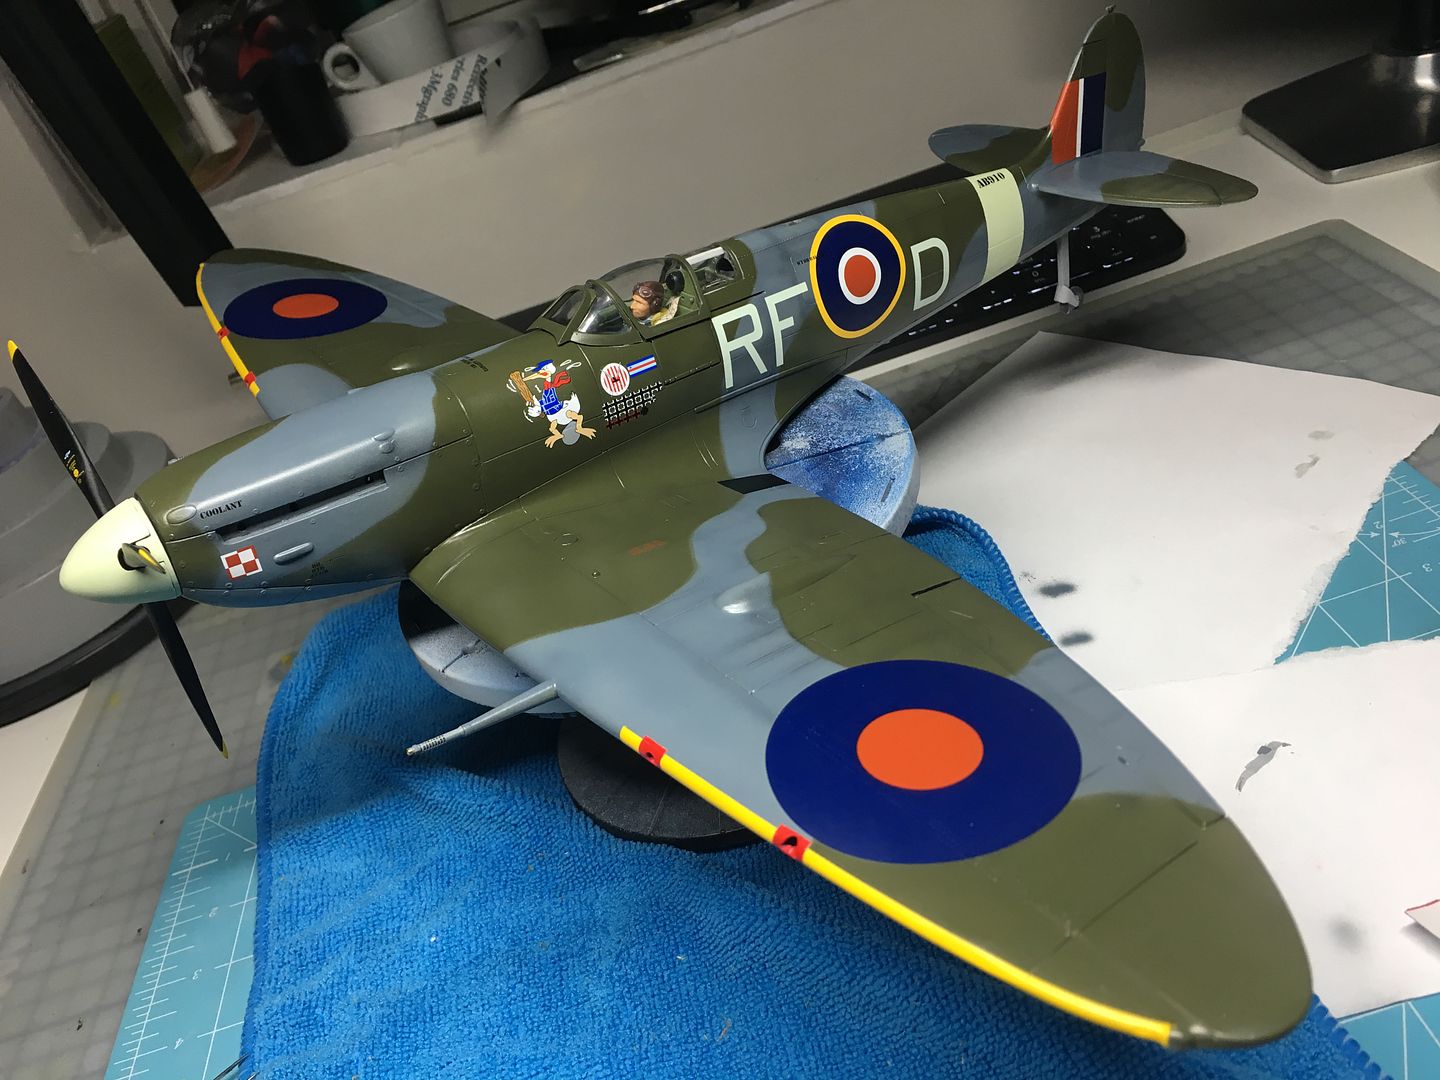
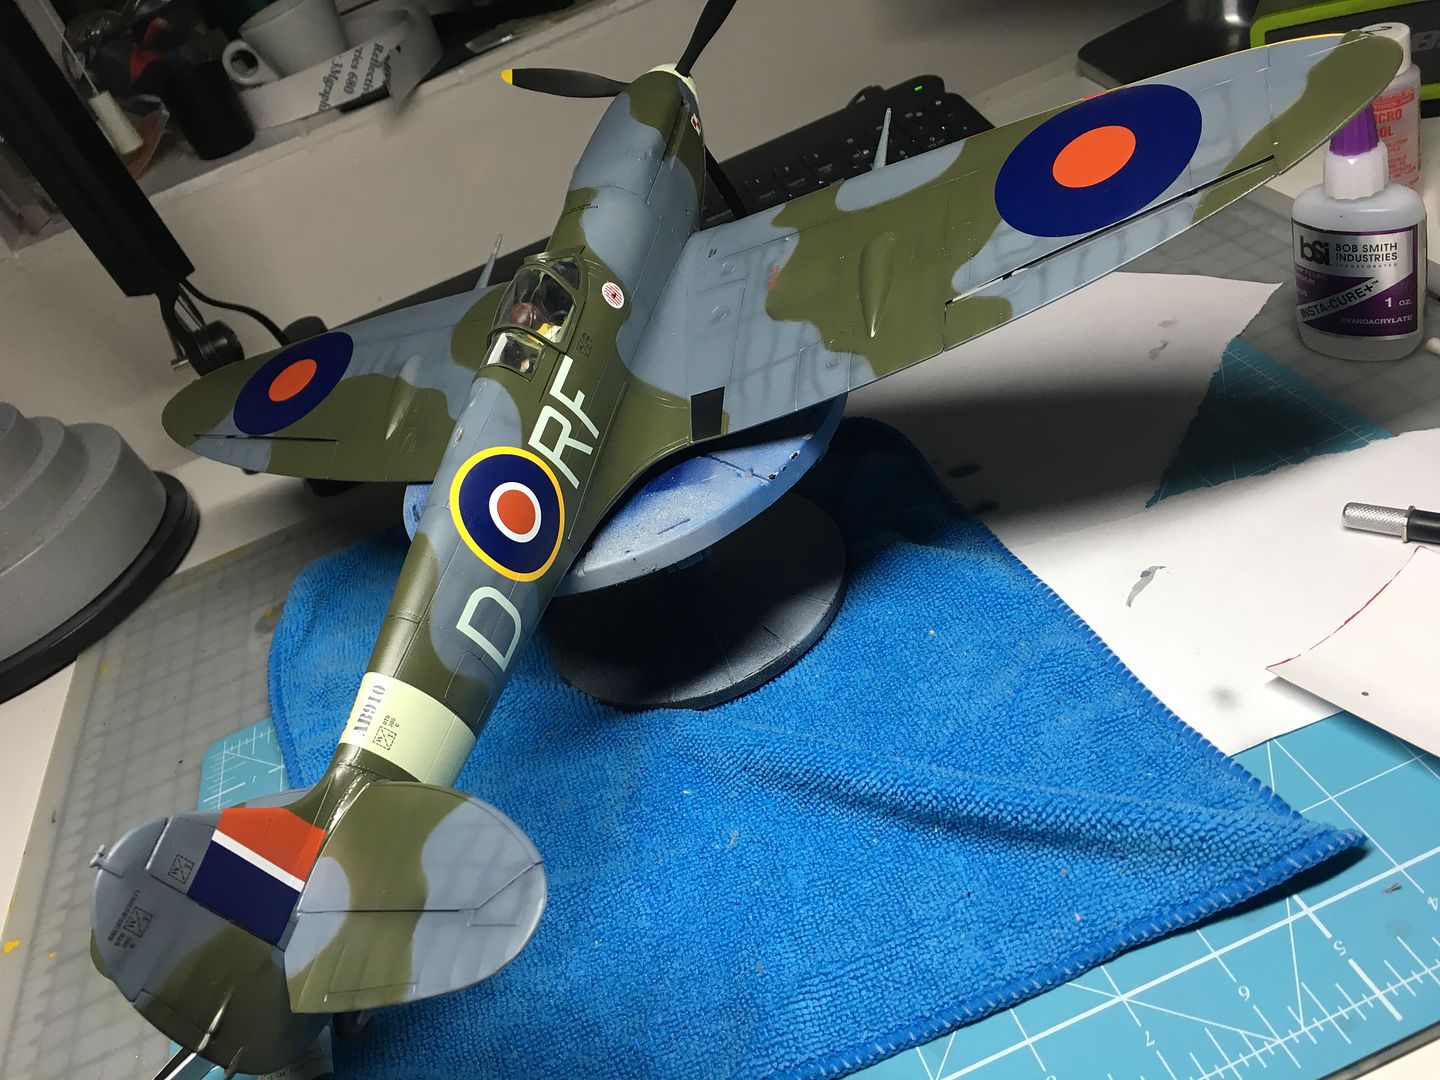
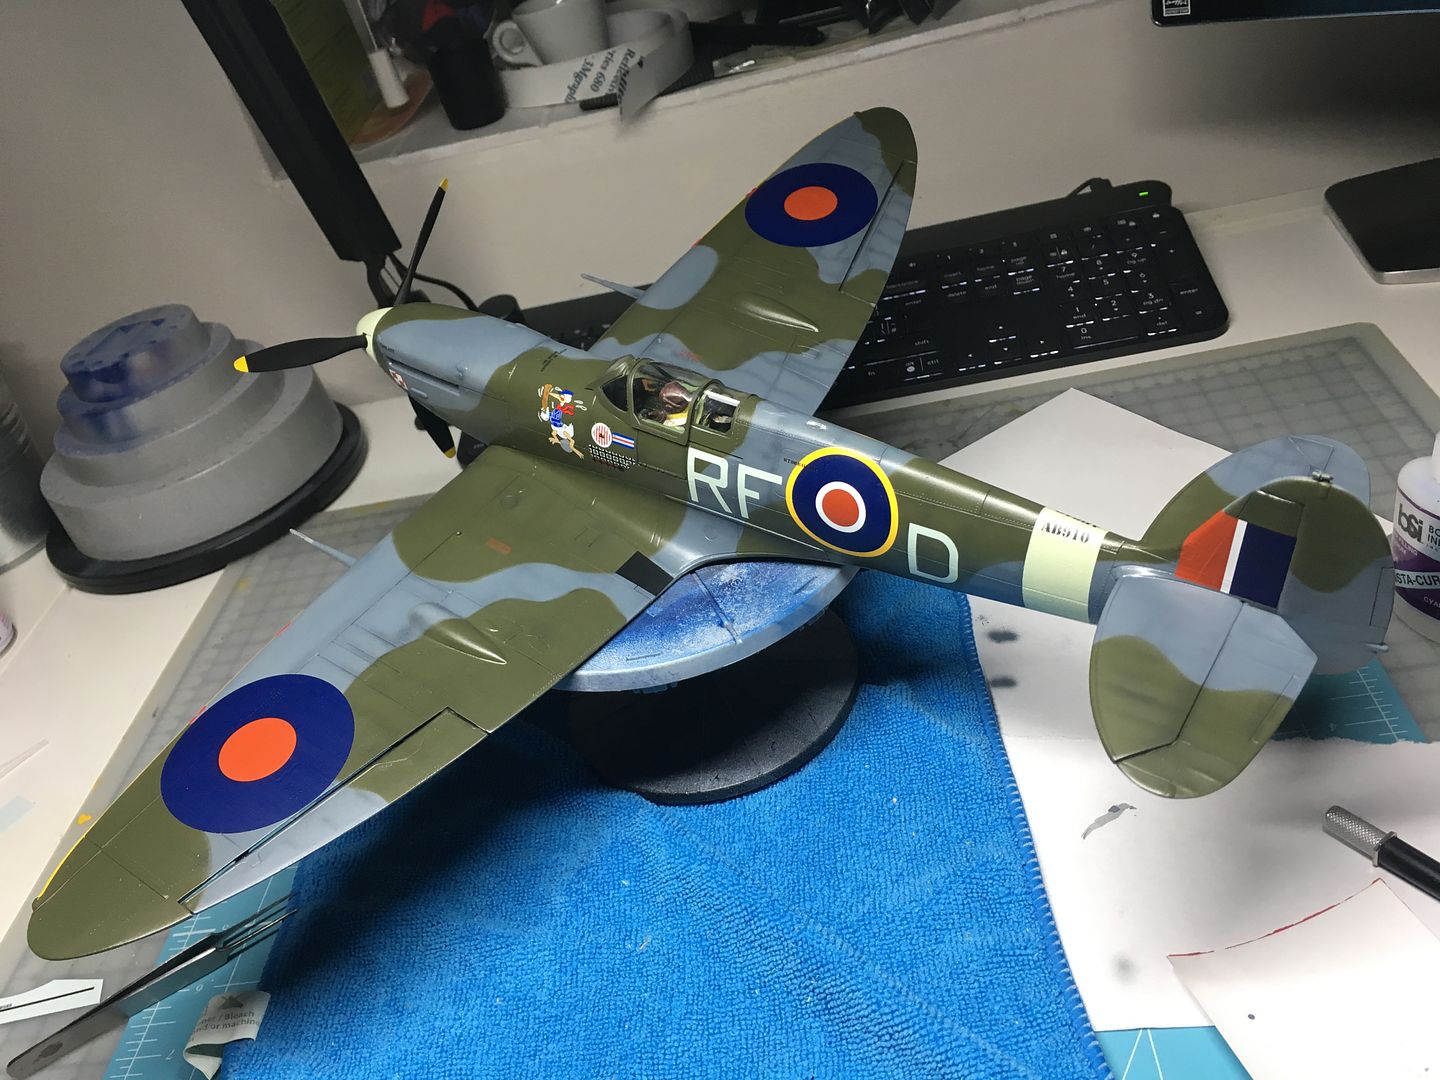

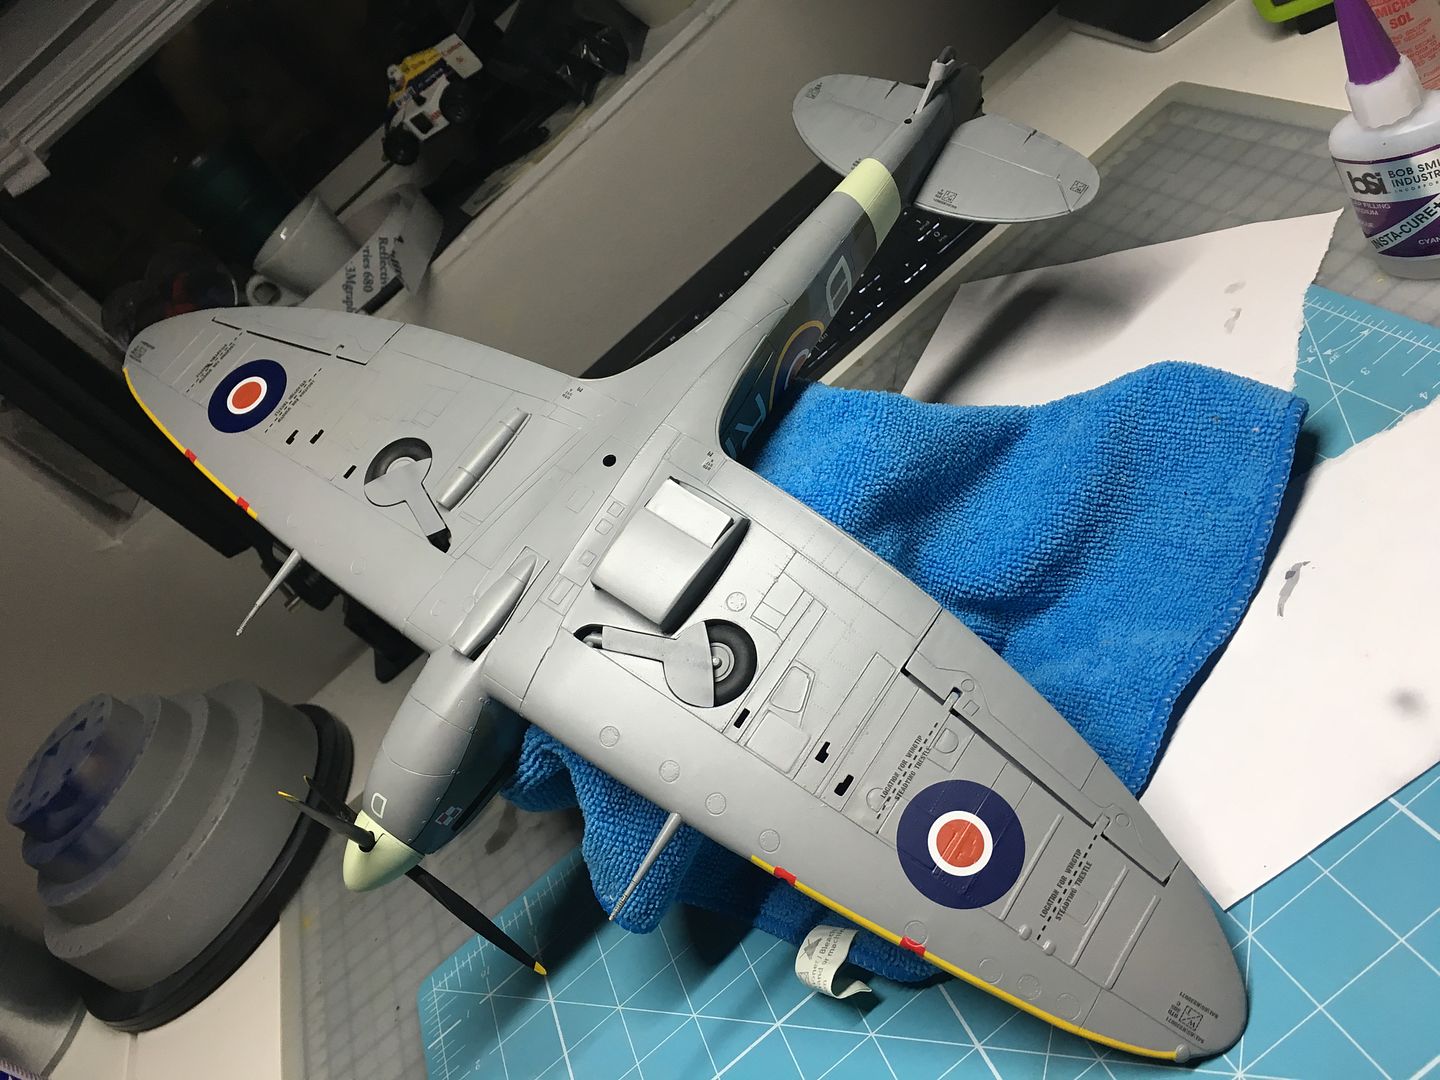
So, now onto the hard bit - adding a bit of weathering and detail!
Quick question for Spitfire nerds - rear wheel - up or down? You see both in pictures....

Had a minor potential disaster (and got away with it) where I had been using Tamiya airbrush cleaner (from Belgium!) and had a bit on a piece of kitchen roll, which I then rested the model on - luckily it was only on a one-colour section - so a quick gentle re-spray of the area worked - few!! I obviously had not learnt my lesson - when I was making the Brabham BT52 I managed to wipe the freshly dried blue Zero paint with a similar rag, and cause much more damage - perils of working on a small, temporary space -
arrrgh!!
Ginger had survived all the manhandling...
...and the canopy is going to fit!
...so on to the decals. Really comes alive now - I had sprayed a semi-gloss clear to protect the paint and help the decals, so everything looks very shiny right now...
So, now onto the hard bit - adding a bit of weathering and detail!
Quick question for Spitfire nerds - rear wheel - up or down? You see both in pictures....
Gassing Station | Scale Models | Top of Page | What's New | My Stuff