GB: Academy : DR_GN
Discussion


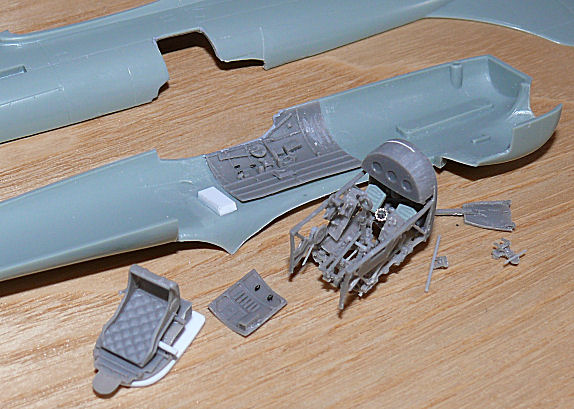
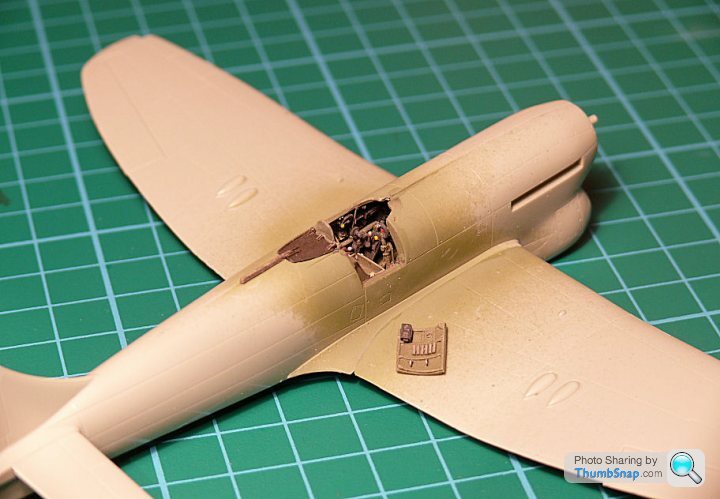
Slow progress. I think the cockpit areas are just about ready to paint now though. I've had to severely butcher the spaceframe to fit, and many of the smaller details such as the gunsight and compass mounts were so fragile that they disintegrated just by touching them. I replaced these with stretched sprue. Same with the smaller switches and levers: thin sprue cyanoed in place and a blob of PVA to represent knobs looks far better than the detail kit stuff.
I think they tried too hard with this detail kit. The cockpit sides are good, as is the spaceframe, but there is much more detail than can be seen (let alone assembled) and much of this over-complication leads to the impossible fit within the fuselage. Totally unnecessary and totally s t design (I may have mentioned that before).
Also added some plasticard features to the cockpit area so that I can finally assemble it more accurately.
Finally, cut out the rear deck of the canopy so that the resin part can be fitted flush.
I think they tried too hard with this detail kit. The cockpit sides are good, as is the spaceframe, but there is much more detail than can be seen (let alone assembled) and much of this over-complication leads to the impossible fit within the fuselage. Totally unnecessary and totally s
t design (I may have mentioned that before).Also added some plasticard features to the cockpit area so that I can finally assemble it more accurately.
Finally, cut out the rear deck of the canopy so that the resin part can be fitted flush.


Yertis said:
Awe-inspiring, really, considering how small it all is.
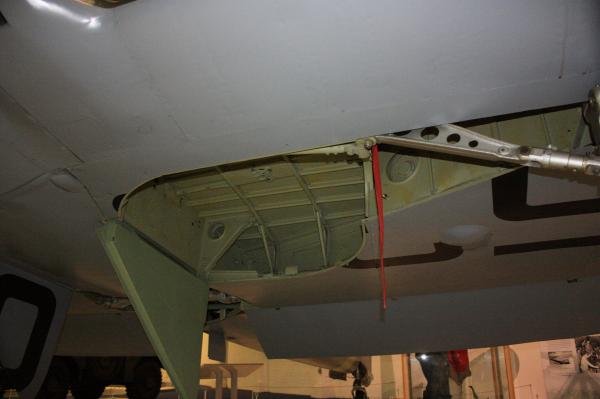
Are we sure the inner parts of the undercarriage doors are a/c grey/green?
It looks OK, but I've got the old problem of varnish: the matt varnish leaves a white residue if it's too thin, or too thick. You can see it in the creases of the seat cushion. Will have to try to resolve it somehow.Are we sure the inner parts of the undercarriage doors are a/c grey/green?
The u/c doors were apparently either silver or interior green. The instructions say silver, but I don't like the look of that, so I went for green. Simple as that really!
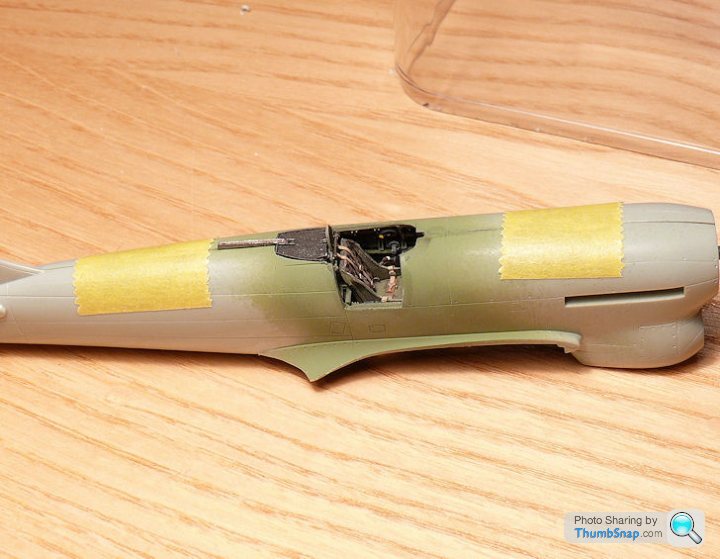
Surprising how much detail is seen when assembled - in fact everything except the rear of where the instrument panel will fit is clearly visible:


Cheers Perdu,
I'm not doing another 1:72 either (by choice - apart form the Walrus). 1:32 or 1:48 has got to be the way forward.
RE. wheel well colour, from what little research I've done, they were either silver, green or grey. I'm using the Hendon one as justification (even though it's a II):
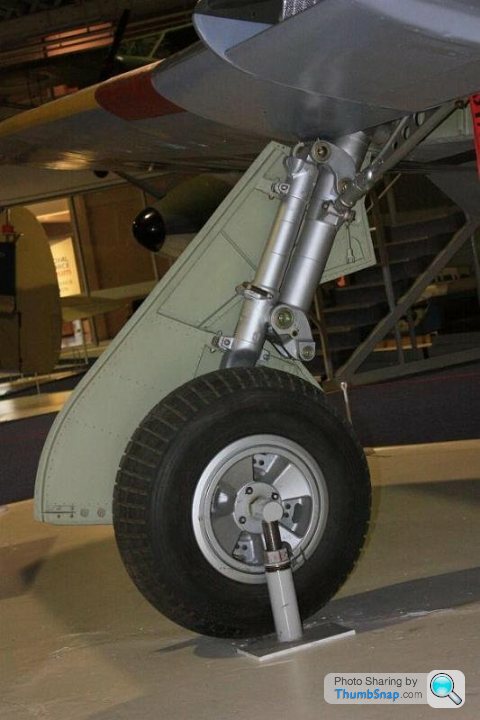
Definitely interior green with silver legs. I just like the contrast that's all.
I'm not doing another 1:72 either (by choice - apart form the Walrus). 1:32 or 1:48 has got to be the way forward.
RE. wheel well colour, from what little research I've done, they were either silver, green or grey. I'm using the Hendon one as justification (even though it's a II):
Definitely interior green with silver legs. I just like the contrast that's all.
perdu said:
Is that main leg painted Sky type S? Looks far lighter than cockpit Grey green in the picture.
I hope to redo my favourite 72 sqn Wessex although not superdetailed (simply "detailed") if I don't get busted on an eBay bid and there will also be the folded danglingly flapped Walrus, then onto the massive scaled biggies
[OK 1/48 isnt that massive but a man has to do...]
Seeing the wheel wells in green, I agree there's plenty of scope with a contrast like yours
I really must drag meself down Hendon Way soon, it's been a frightening number of years...
Wow, Sky? might be. I'm looking at redoing the wells anyway 'cos I'm not happy with the pale residue stuff. Then again, it might even have turned out to be the right colour now!I hope to redo my favourite 72 sqn Wessex although not superdetailed (simply "detailed") if I don't get busted on an eBay bid and there will also be the folded danglingly flapped Walrus, then onto the massive scaled biggies
[OK 1/48 isnt that massive but a man has to do...]
Seeing the wheel wells in green, I agree there's plenty of scope with a contrast like yours
I really must drag meself down Hendon Way soon, it's been a frightening number of years...
I'm notoriously crap at colours. In fact now the weathering is finished, it looks more dark green than sky or cockpit green! Trouble is, how do you know what initial colour to paint, when subsequent operations darken or lighten it to some degree?
All I can say is that in-service, a combination of leaking hydraulic fluid, oil, mud and brake dust made my wheel wells very dirty!
Perdu - I resprayed the tractor a bit darker, and it now looks almost black! I'll lighten it with some french blue, but then - right or wrong - that will be the final finish!
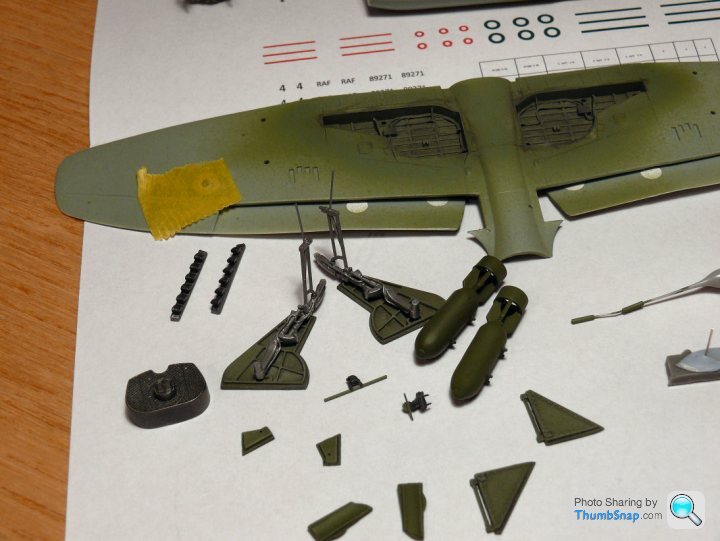
BTW does anyone know if the Tempest had visible anhedral on the inner wing panels? Mine does. I think it might need a bit of sanding of the wing joints.
All I can say is that in-service, a combination of leaking hydraulic fluid, oil, mud and brake dust made my wheel wells very dirty!
Perdu - I resprayed the tractor a bit darker, and it now looks almost black! I'll lighten it with some french blue, but then - right or wrong - that will be the final finish!
BTW does anyone know if the Tempest had visible anhedral on the inner wing panels? Mine does. I think it might need a bit of sanding of the wing joints.
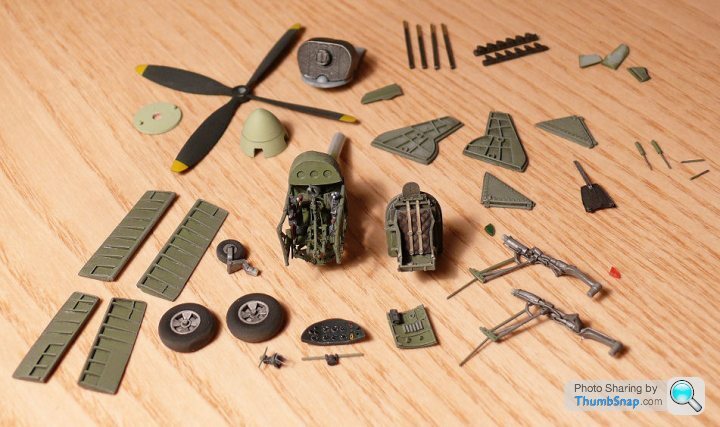
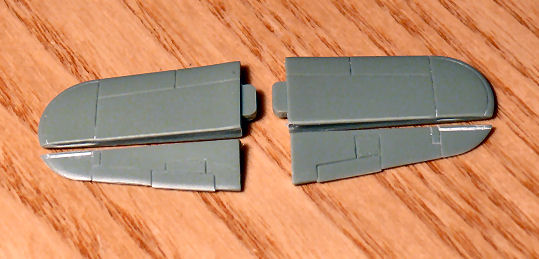
With the exception of two tiny u/c door stays, I think all the components are now more or less finished and ready for assembly:
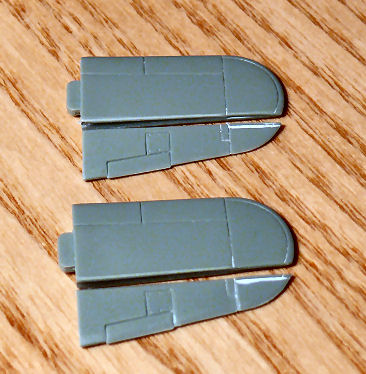
Interested to note that both elevators are identical, i.e. asymmetric when fitted to the aircraft:
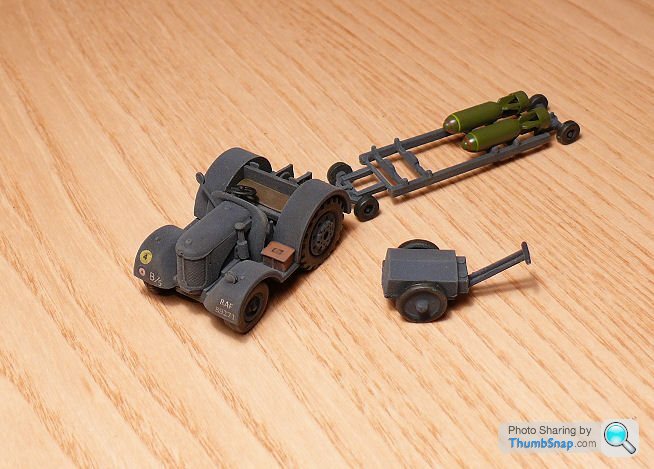
With the help of some more excellent decals from RedFirecracker, the RAF tractor is now finished. Perhaps it's had one repair and repaint too many since I first built it, but it'll do. Hopefully the colour is acceptable to Perdu!
Interested to note that both elevators are identical, i.e. asymmetric when fitted to the aircraft:
With the help of some more excellent decals from RedFirecracker, the RAF tractor is now finished. Perhaps it's had one repair and repaint too many since I first built it, but it'll do. Hopefully the colour is acceptable to Perdu!
72twink said:
If it's any help I'm using Tamiya for all my flat coats, Clear, with Flat Base and Tamiya thinners - I never measure any of it just throw it all together and never had any problems other than it maybe not being quite flat enough - which I resolve with more flat base.
I'm getting to grips with XDFF now. The key seems to be to thin it in a separate container about 3:1 before spraying. It takes ages for the thinners to mix, and I think I was getting just the thinners being sprayed, or just neat varnish when I did my usual trick of thinning within the airbrush reservoir!The_Jackal said:
Did you apply some kind of dust to the wheels? Was that just a browny type pastel brushed over the perimeter?
Yep, Tamiya Pastels. There was a grey one applied overall to highlight the raised details, then brown around the tyres and mudguards. It's all sealed with XDFF varnish, then the tyres, steering wheel and seat brush painted with Klear to give those bits a bit of a sheen.Perdu,
As the previous poster said: Tripod and self timer. I use a normal tungsten Anglepoise lamp for light. Daylight is best, but there isn't any at the moment!
Light varnish? Yup, but I've only just eliminated getting a lightening effect! It looked terrible on the '109 and had to be re-coated with Klear before getting it better at second attempt.

perdu said:
I see what you mean about the instrument panel, it should be a little towards the back but I expect this is to allow the substructure that carries the reflector sight to sit just in front of it. I'm just making up that part for the Tiffie today I hope (plans - mice - men - etcetera!)
I think it will all pull together when closed up
Still looks good
far busier than mine but I have to draw a line, with my present eyesight restrictions
Didn't realise I have become as blindasabat
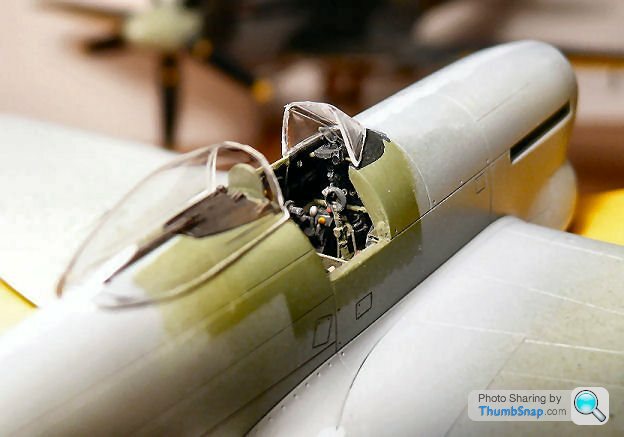
Having looked a bit further, what makes it seem bad is the fact that the area underneath the windscreen is pretty much solid on the Academy kit. It should actually be completely cut away so that the front of the cockpit opening is defined by the lower edges of the windscreen:I think it will all pull together when closed up
Still looks good
far busier than mine but I have to draw a line, with my present eyesight restrictions
Didn't realise I have become as blindasabat
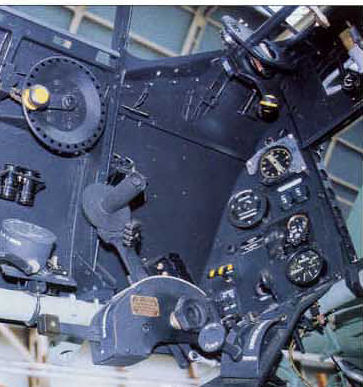
The instrument panel is then obviously much more visible because it's not hidden underneath a cover. I did this tonight, and it looks better. Probably still a couple of mm out, but it'll have to do: nothing much to be done considering how the detail kit fits together.
BTW the Tempest II and Typhoon are different in this area.
perdu said:
Almost the first thing I noticed when I started on the Typhoon was that lack of an instrument coaming in the front end, so I cut away the Frog plastic to be clear under the windscreen.
It makes a huge difference in practise!
Sorry
I ought to have mentioned it to all you guys on the GB, it is similar on both machines but the Typhoon has a more noticable tubular structure where "ordinary airyplanes" have dash coaming
The whole point of making notes is to help others after all.
...I think there are only about 5 people actually building one!It makes a huge difference in practise!
Sorry
I ought to have mentioned it to all you guys on the GB, it is similar on both machines but the Typhoon has a more noticable tubular structure where "ordinary airyplanes" have dash coaming
The whole point of making notes is to help others after all.
perdu said:
Almost the first thing I noticed when I started on the Typhoon was that lack of an instrument coaming in the front end, so I cut away the Frog plastic to be clear under the windscreen.
It makes a huge difference in practise!
Sorry
I ought to have mentioned it to all you guys on the GB, it is similar on both machines but the Typhoon has a more noticable tubular structure where "ordinary airyplanes" have dash coaming
The whole point of making notes is to help others after all.
I think what I'll do is cut the blind flying rectangle off the Resin Art panel, detail it a bit and then glue it over the existing, too far back panel. This will move it forward a bit, and also make the Academy panel more realistic.It makes a huge difference in practise!
Sorry
I ought to have mentioned it to all you guys on the GB, it is similar on both machines but the Typhoon has a more noticable tubular structure where "ordinary airyplanes" have dash coaming
The whole point of making notes is to help others after all.
Hope everything OK with Perdu! A&E is the worst place to wait. And it usually is a wait.
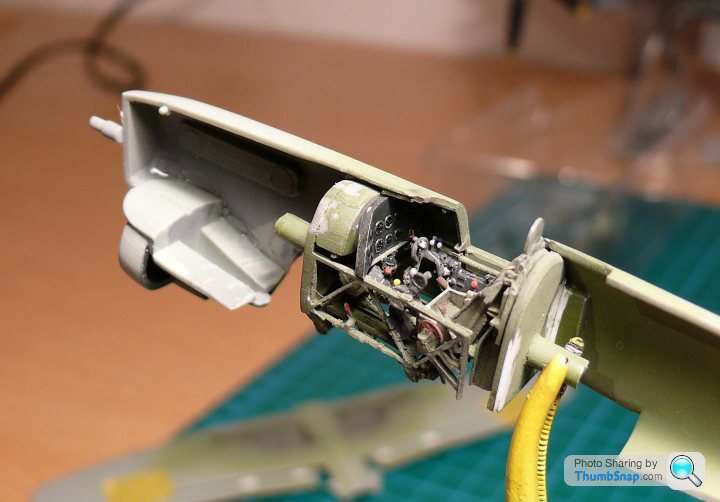
So I cut the central instrument panel out of the Resin Art set and glued it onto my already fitted one to move it back a bit (retaining the angled side pieces of the original) I also used 6 of RedFirecrackers excellent instrument decals to make it even more noticable! In conjunction with the opened up instrument panel cover, It all looks much better now. Control column is posed forward (nearly touching the compass!) because the elevators will be drooped.
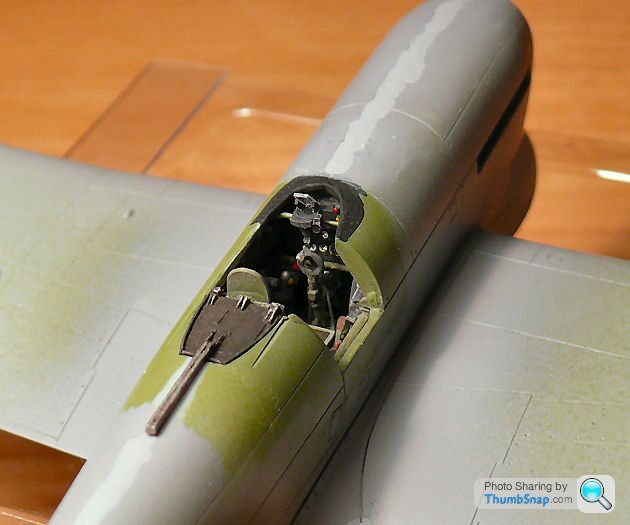
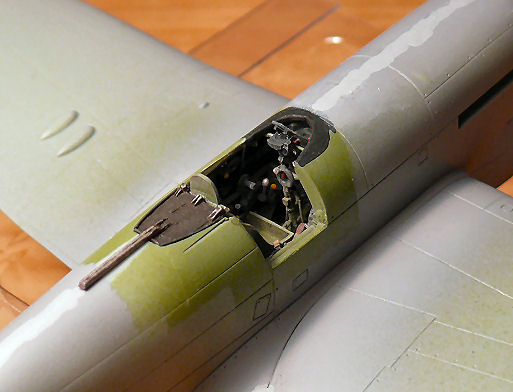
I've decided to use the Resin Art acetate canopy becasue it gives less distortion, and looks good with a coat of Klear:
Next job, final sanding and rescribing. Then paint, weathering and finished. Learning a lot from this one, which is good.
So I cut the central instrument panel out of the Resin Art set and glued it onto my already fitted one to move it back a bit (retaining the angled side pieces of the original) I also used 6 of RedFirecrackers excellent instrument decals to make it even more noticable! In conjunction with the opened up instrument panel cover, It all looks much better now. Control column is posed forward (nearly touching the compass!) because the elevators will be drooped.
I've decided to use the Resin Art acetate canopy becasue it gives less distortion, and looks good with a coat of Klear:
Next job, final sanding and rescribing. Then paint, weathering and finished. Learning a lot from this one, which is good.
Edited by dr_gn on Saturday 19th February 00:12
Gokartmozart said:
Really nice work.
FYI
Posted this is BTP
http://www.pistonheads.co.uk/xforums/topic.asp?h=0...
I know it's off topic but your thread is the most active and would gain the most exposure, there is a nice colour shot of a Walrus in the collection.
Thanks for posting those they are a great find. The Walrus is even in the 3 tone camo I wanted to model!FYI
Posted this is BTP
http://www.pistonheads.co.uk/xforums/topic.asp?h=0...
I know it's off topic but your thread is the most active and would gain the most exposure, there is a nice colour shot of a Walrus in the collection.
Some good illustrations of weathering in amongst those too. Someone was asking about the validity of pre-shading panel lines, there's a desert camo Spitfire in there that shows it up quite well.
Cheers
Gassing Station | Scale Models | Top of Page | What's New | My Stuff