Tameo 1:43 Ferrari 156/85
Discussion


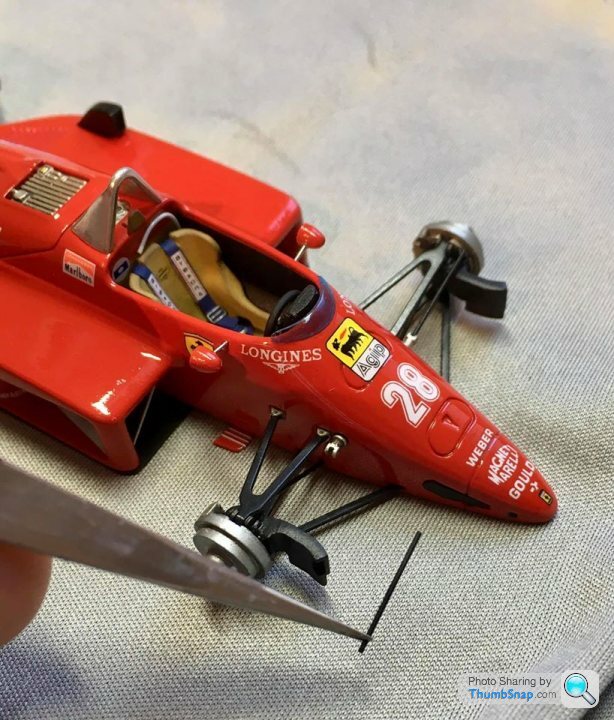
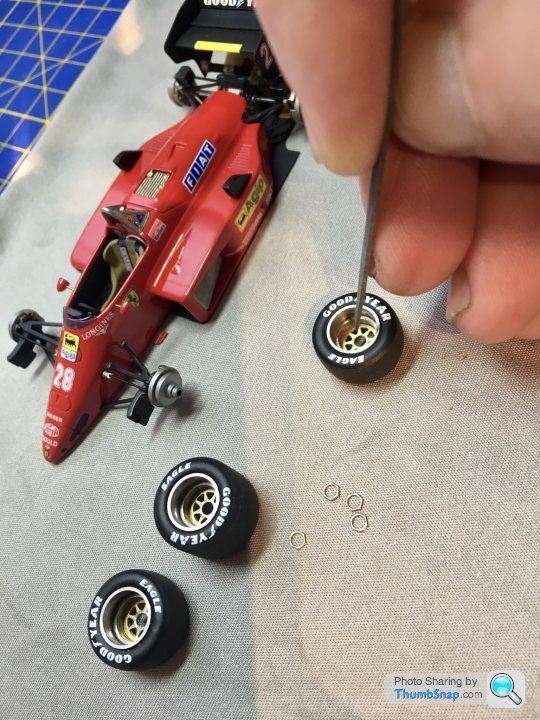
Test fitted the wheels again This morning, and the front right was about 2mm out. No idea how or why that could be remotely possible.
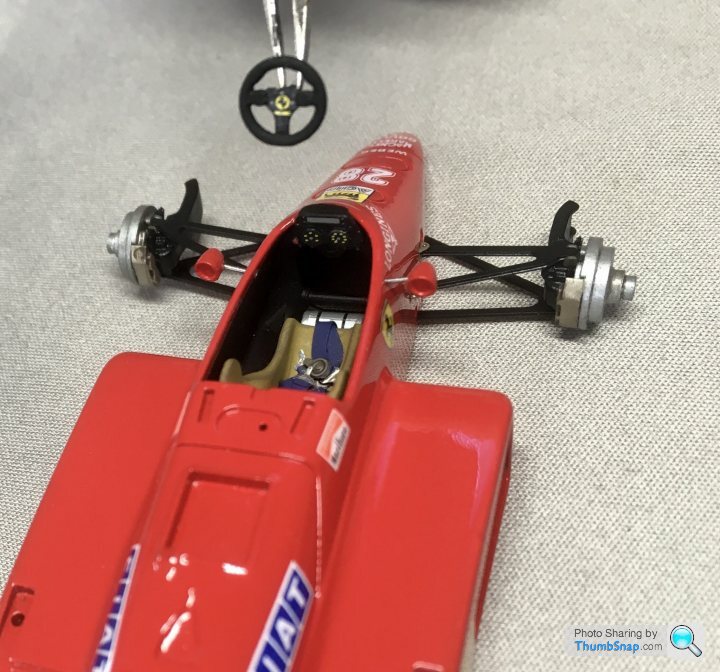
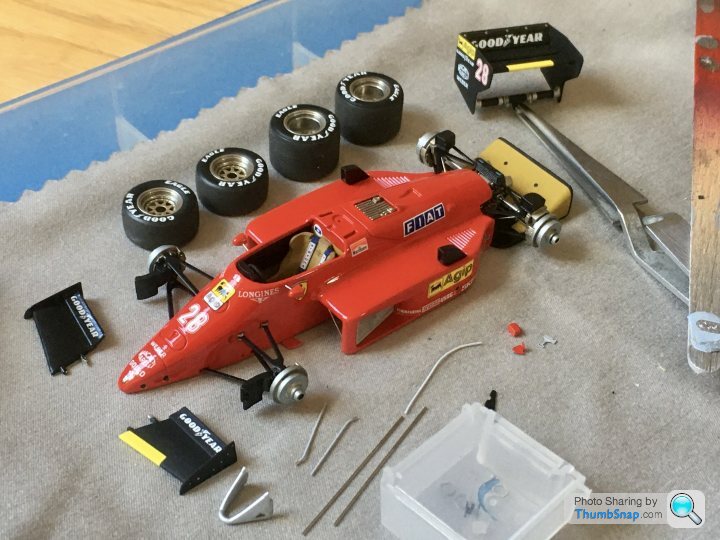
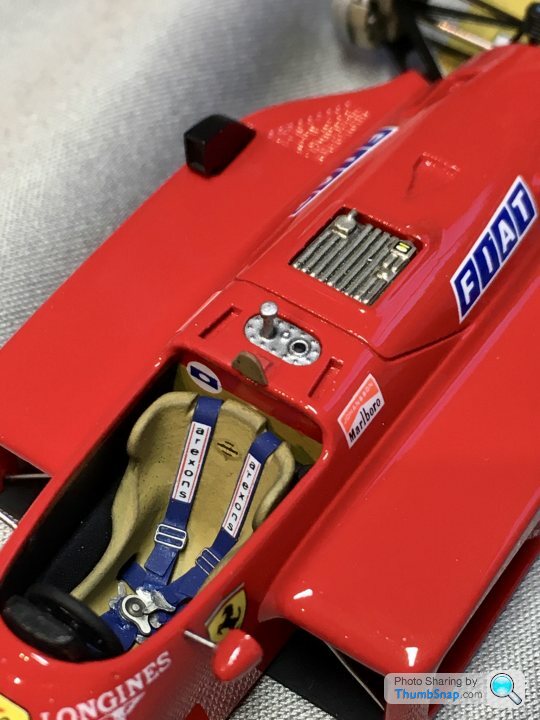
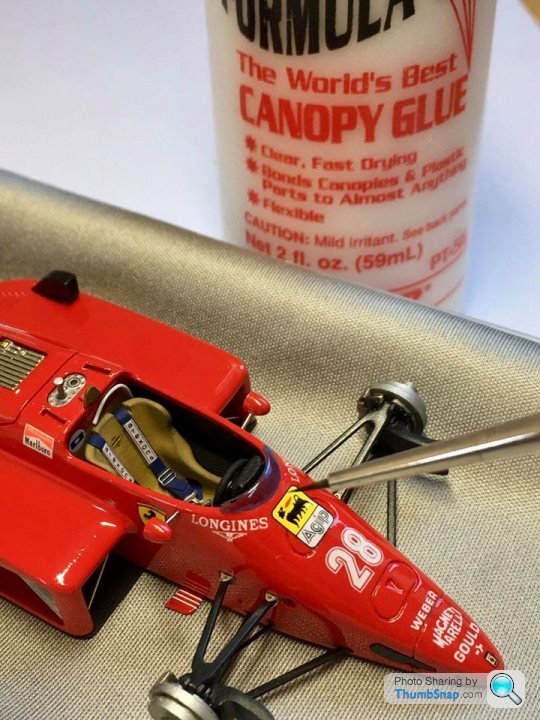
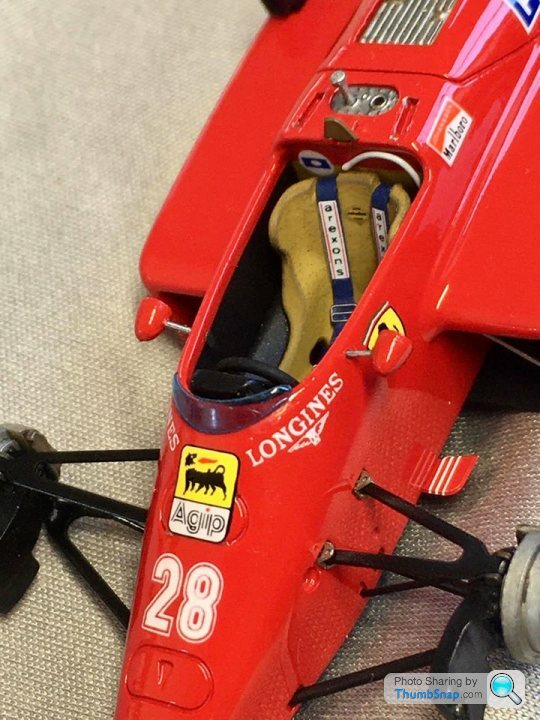
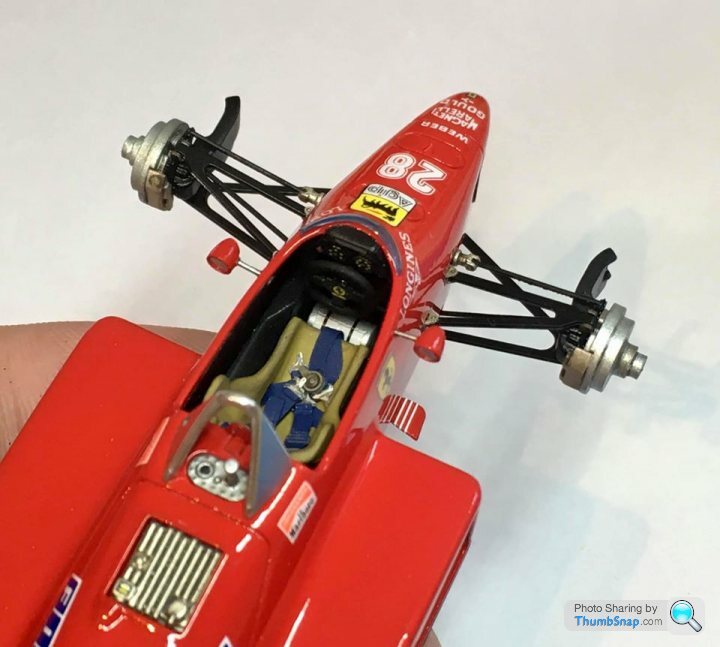
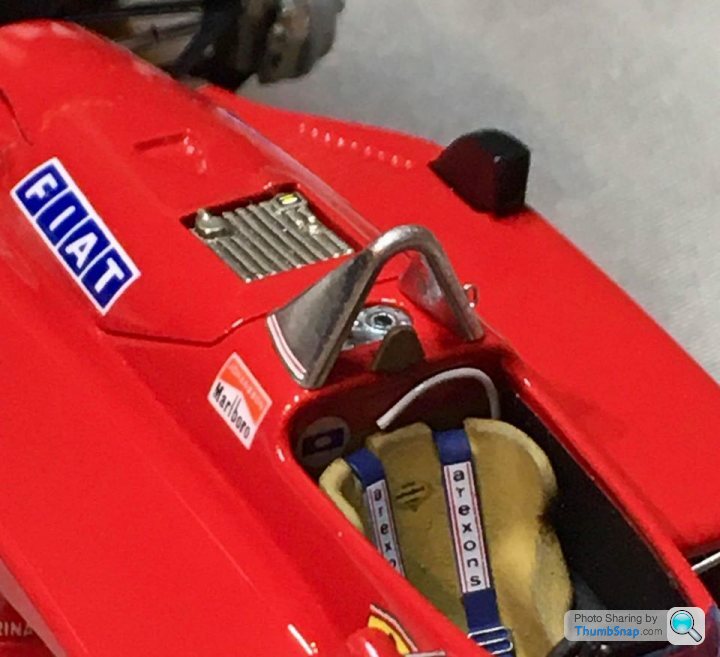
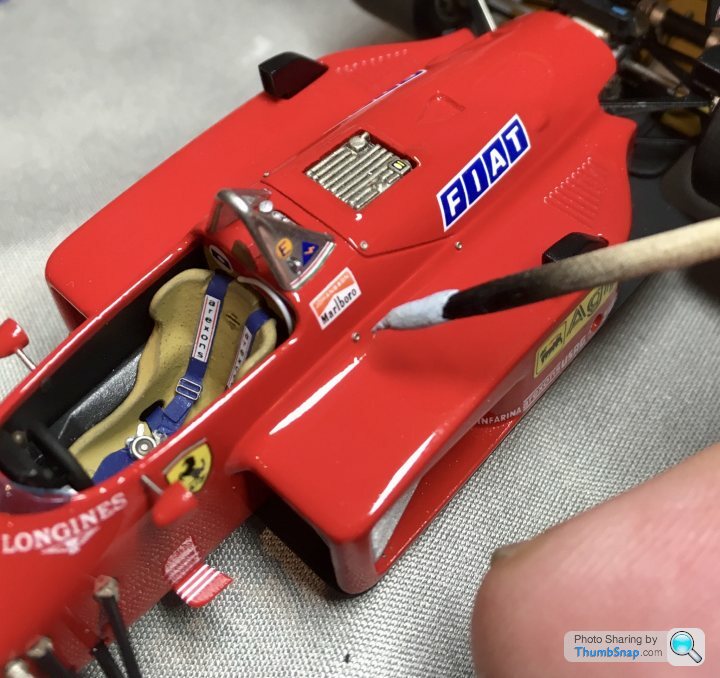
Anyway, body finally fitted, along with mirrors, mirror glass (kitchen foil discs), mirror hole covers (paper discs), mirror shadow plates, cockpit floor, steering wheel, turbo intakes, ECU, radiators and intake stays.

Anyway, body finally fitted, along with mirrors, mirror glass (kitchen foil discs), mirror hole covers (paper discs), mirror shadow plates, cockpit floor, steering wheel, turbo intakes, ECU, radiators and intake stays.

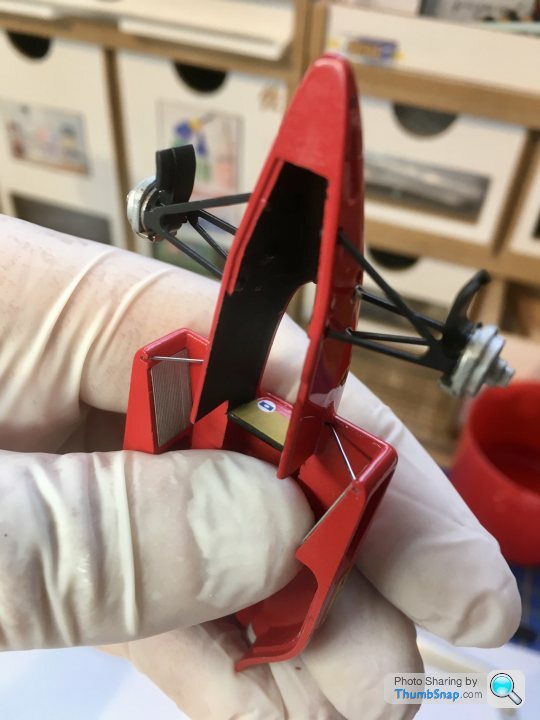
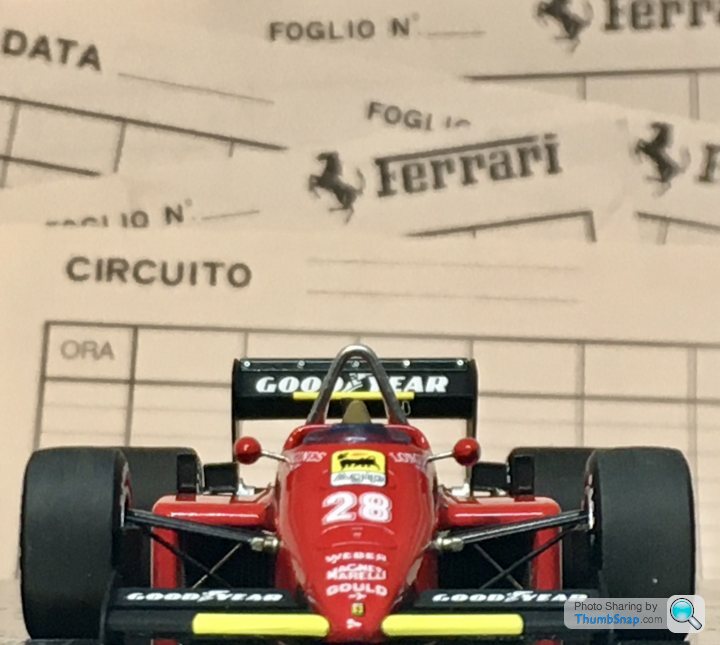
Front suspension pull-rods and wing inserts fitted, and the driver’s medical air pipe. There can’t be much more to do; things keep appearing out of the box that I’d forgotten about...

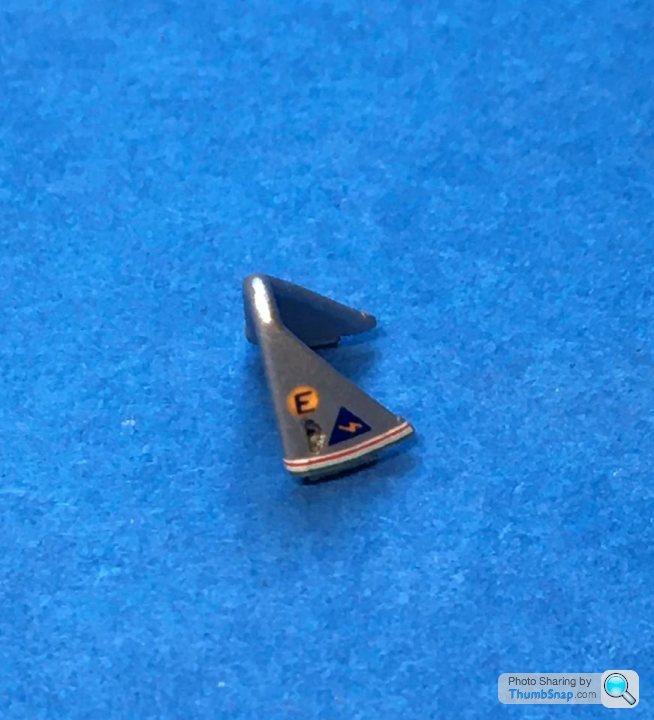
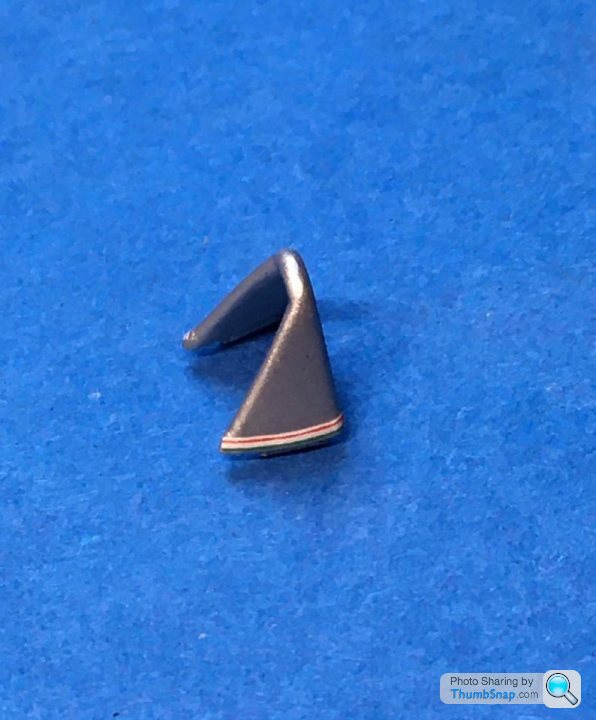
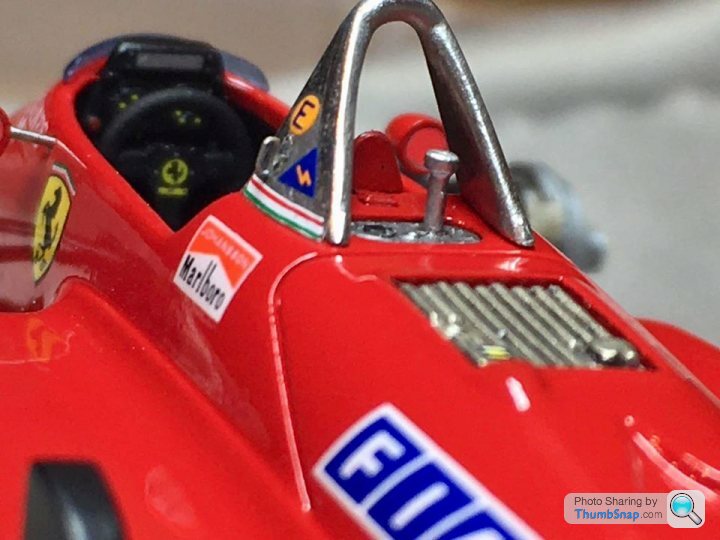
Vac-formed windscreen fitted with PVA. Finished the roll hoop, but I’m not very happy with it - the Italian stripes along the bottom are printed too short, and lengthening them with spare decal didn’t really work. I’ll strip it and start again. Might try polishing the metal rather than painting it next time.
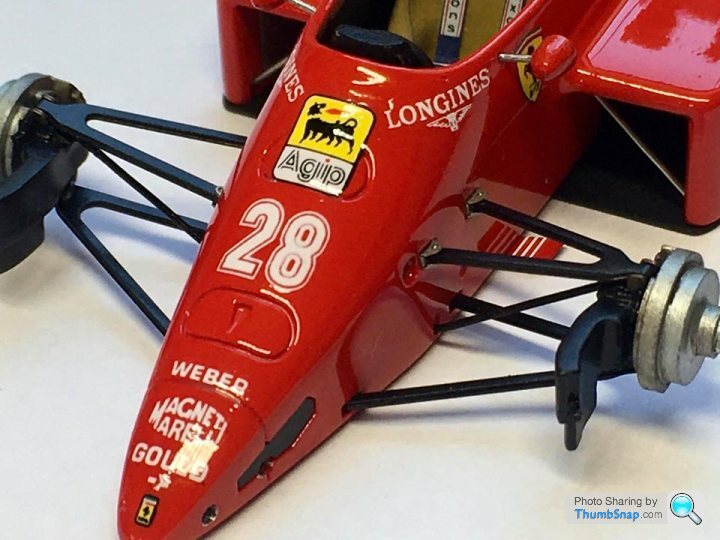
Steering rack outer joints fitted (slightly out of scale I think, but I’ll let it go this time), and track rods installed.
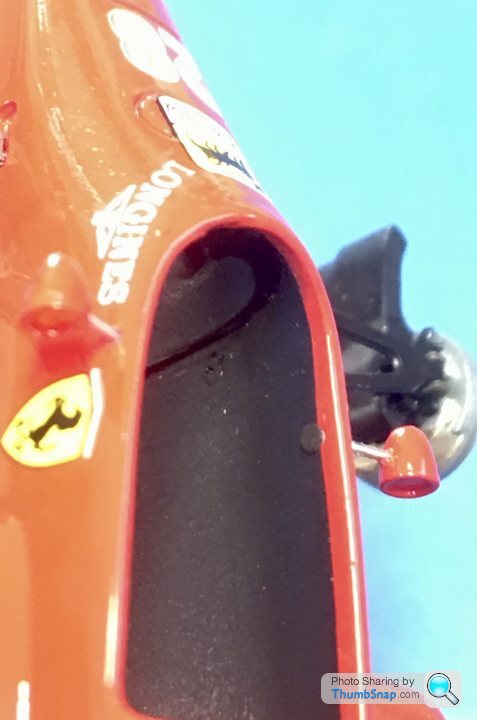
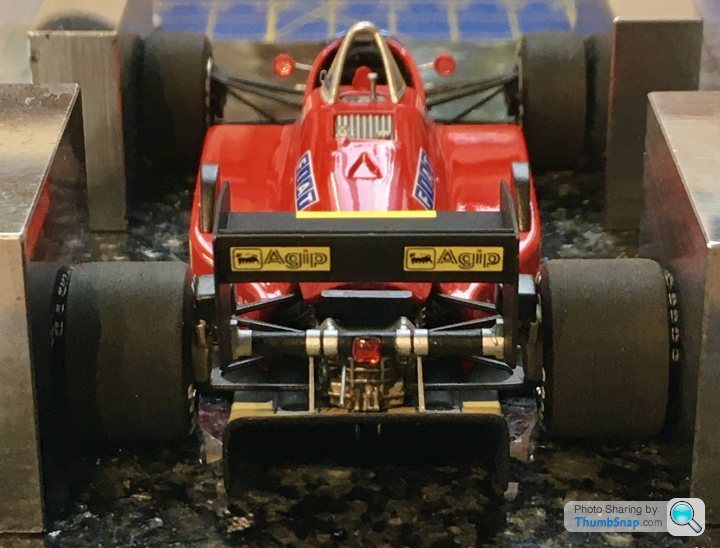
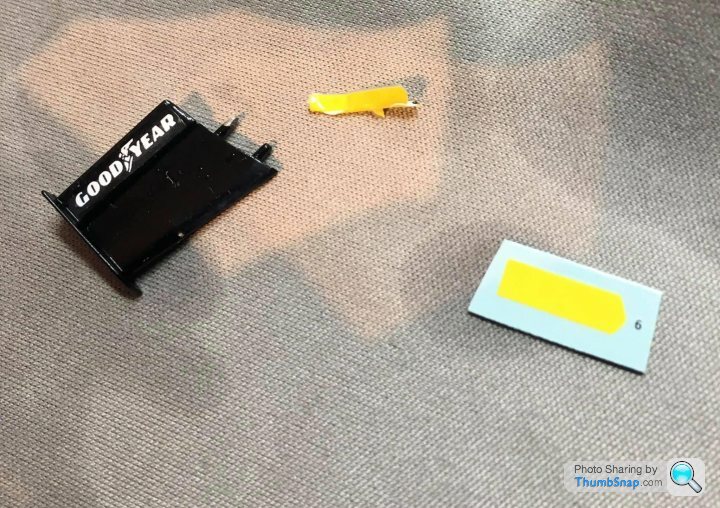
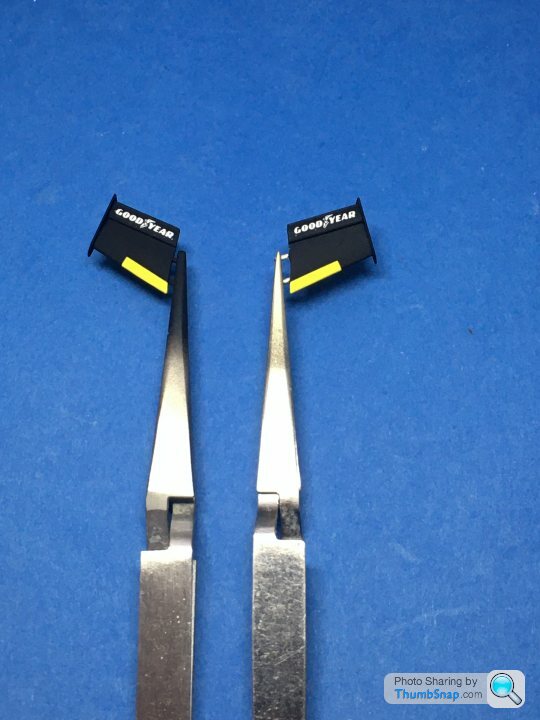
The roll hoop looks better polished than painted. Fitted the decals the best I could, and added the fire extinguisher hook loop. Also fitted the rear jack bracket, and made some covers for the diffuser stay holes.

z
Vac-formed windscreen fitted with PVA. Finished the roll hoop, but I’m not very happy with it - the Italian stripes along the bottom are printed too short, and lengthening them with spare decal didn’t really work. I’ll strip it and start again. Might try polishing the metal rather than painting it next time.
Steering rack outer joints fitted (slightly out of scale I think, but I’ll let it go this time), and track rods installed.
The roll hoop looks better polished than painted. Fitted the decals the best I could, and added the fire extinguisher hook loop. Also fitted the rear jack bracket, and made some covers for the diffuser stay holes.
z
robemcdonald said:
I’d be happy with that at 1/20. You continue to amaze me.
Thanks very much! To be honest it is a pretty incredible kit for 1:43 - and it's not even one of the more highly detailed ones. I think HenryK's are the higher end versions. Night and day better than the last ones I built in the '80's.
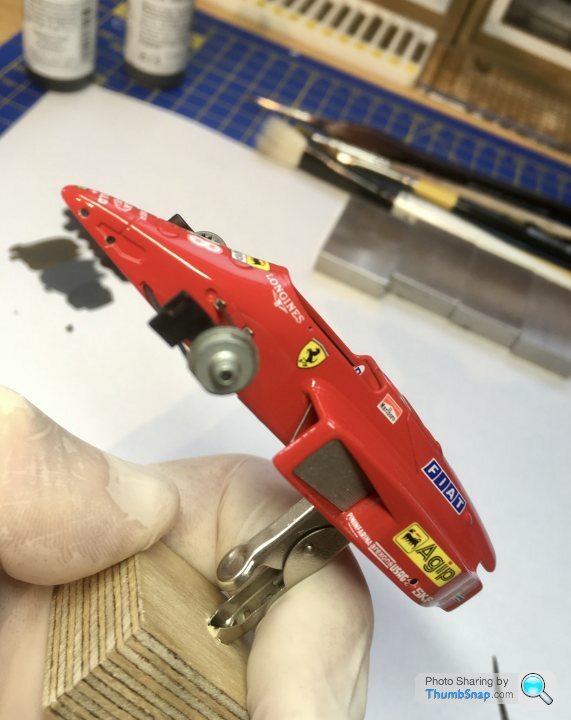
Wheel fitting. Going to leave it a few hours for the Araldite to set. If it’s wrong this time I’ll go back to making paper ships...
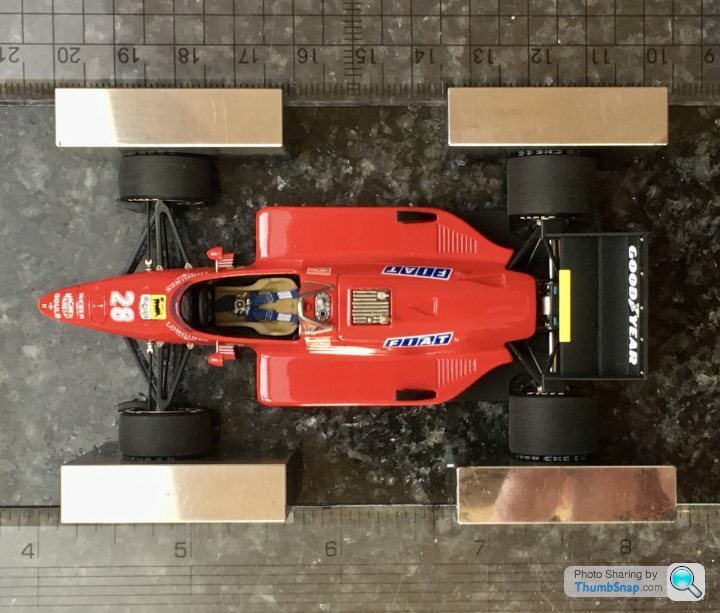
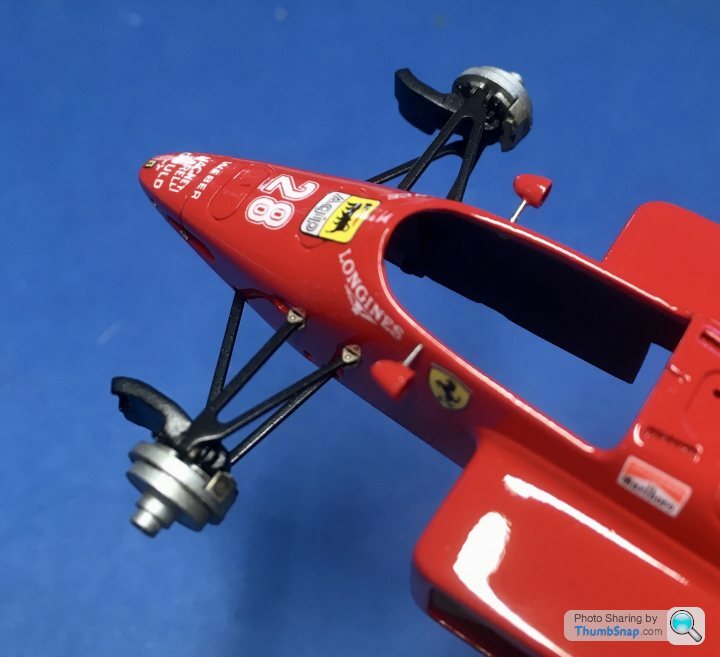
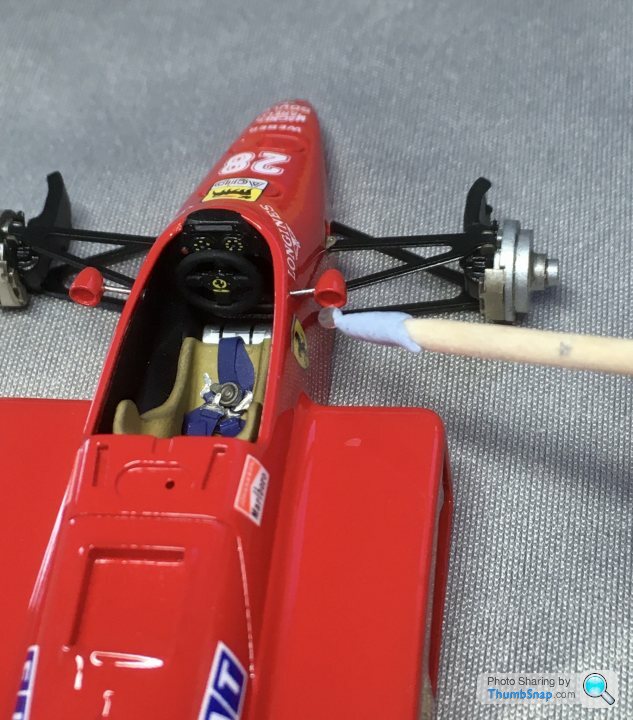
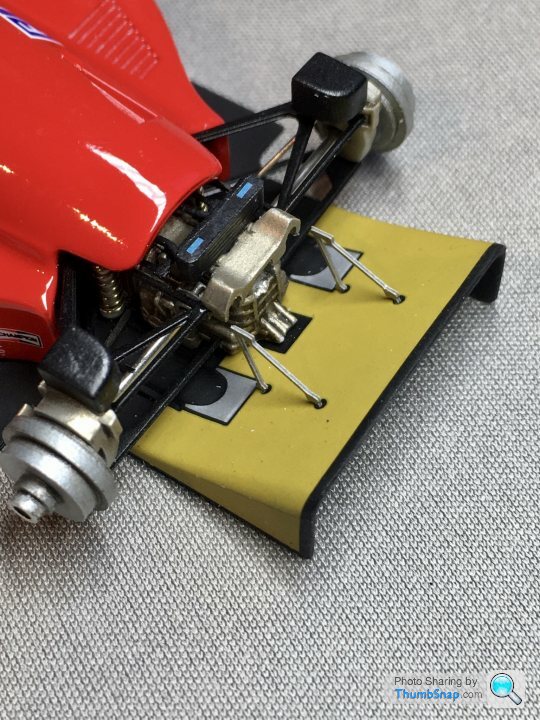
I thought this plate was to take the self-weight of the model off the suspension arms, but they are actually very strong and easily up to the job. I think it’s intended to be used only if you’re screwing the model to a base. I might use it just to locate the car on its base, to stop it accidentally getting knocked off:

I thought this plate was to take the self-weight of the model off the suspension arms, but they are actually very strong and easily up to the job. I think it’s intended to be used only if you’re screwing the model to a base. I might use it just to locate the car on its base, to stop it accidentally getting knocked off:
Im wondering if the issue with the wheels is that by the time you have glued the 4th wheel on, the 1st wheel is already curing before youve had a chance to place the model down to set it up. Ive left my wheels loose on the 500 i built, set down, adjusted and left alone to display.Also allows for any rework in the future. Hope this helps.
Thanks Henry. Last time, luckily, there was no glue - it was just a test fit to get the suspension right. It was so far out though, I think the wheel hub was sitting on the wrong part of its stepped hub.
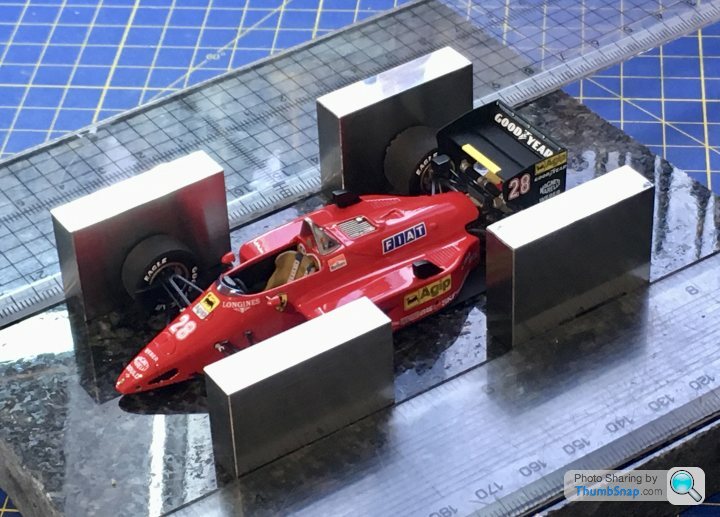
This time I’ve corrected the suspension and put Araldite Rapid on the hubs. It gives about 5 minutes working time, so I was able to check (as best I could) before putting the setting blocks in place.
Fingers crossed!
This time I’ve corrected the suspension and put Araldite Rapid on the hubs. It gives about 5 minutes working time, so I was able to check (as best I could) before putting the setting blocks in place.
Fingers crossed!

henryk001 said:
Yes i bow to your skills and level of detail added to your model. Tried putting bowing smilies on but it doesnt work for some reason?
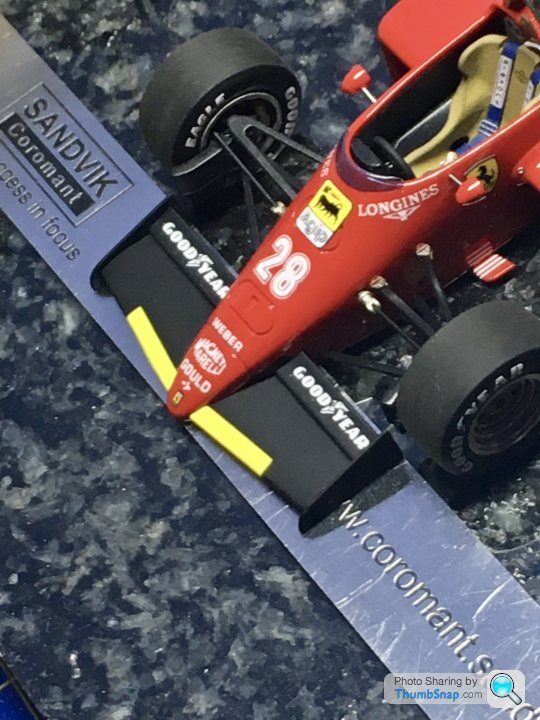
Thanks Henry - no additional detail apart from the foil mirrors substituting silver decals, black decal strip at the back of the diffuser, and the rivets. The rivets were spare (I hope they're spare!) from the MP4/6.Still waiting for the replacement decals from Tameo, then I can say I've started and finished a model this year (the same model that is!).
dr_gn said:
I’ve tried to resist, but I think I’ll be making a start soon....definitely an OOB build though.
dr_gn said:
Thanks Henry - no additional detail apart from the foil mirrors substituting silver decals, black decal strip at the back of the diffuser, and the rivets. The rivets were spare (I hope they're spare!) from the MP4/6.
OK near enough OOB 

Gassing Station | Scale Models | Top of Page | What's New | My Stuff