Airfix 1:72 Hawker Hurricane Mk.1 (fabric wing)
Discussion


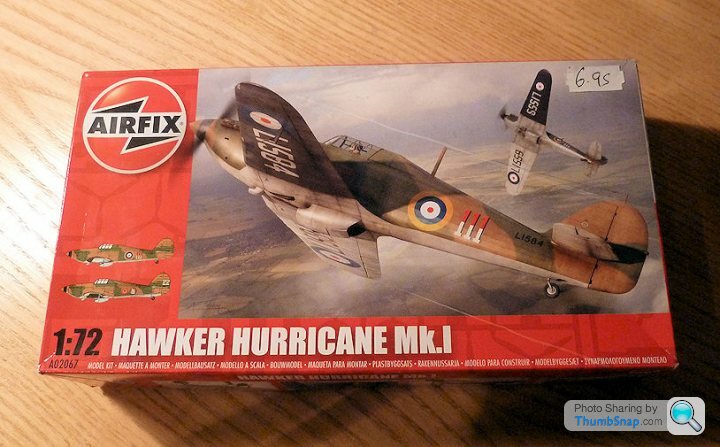
Continuing the assumption that the more models I start, the more I finish, I started this Mk.1 Hurricane I bought from Duxford last weekend. It seemed cheap enough at £6.95:
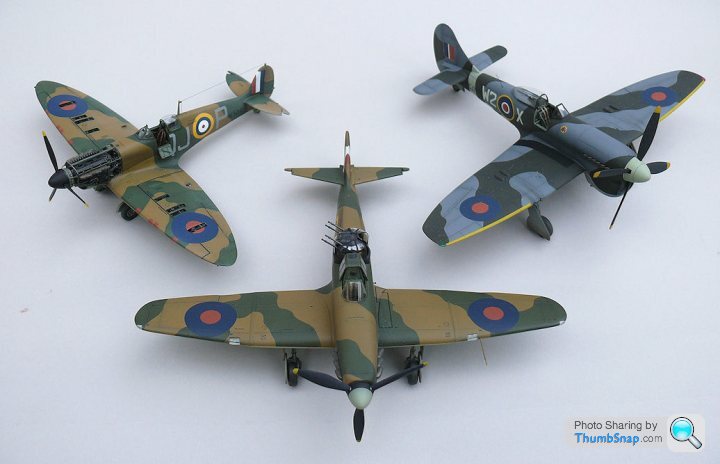
I wanted a Hurricane to complete my triumvirate of early WW2 RAF monoplanes, having previously completed the Spitfire and Defiant:
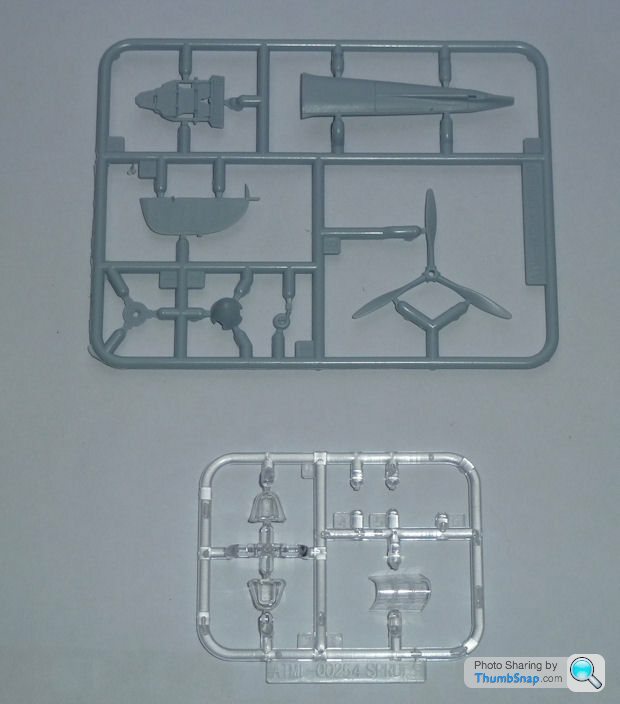
Plenty of good detail in the kit, with options for two or three bladed props, and the associated ventral panels, rudders and windscreens etc. Plastic is the familiar Airfix soft grey type, with a slight texture; probably evidence of a somewhat abbreviated spark erosion finishing process used on the moulds:
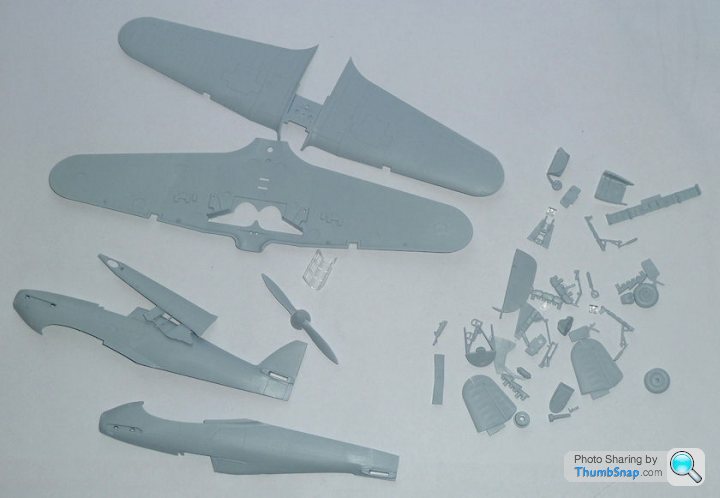
As usual for new-tool Airfix, panel lines are stuck at 1980's standards, but one of the reasons I bought the kit was that it was the fabric wing version, plus the rear fuselage was fabric, so, as with their new tool Gladiator and Tiger Moth, there aren't too many lines to spoil the model:

The wingtips don't seem to match up, and the trailing edges are a tad thick, but again no real issue for me.
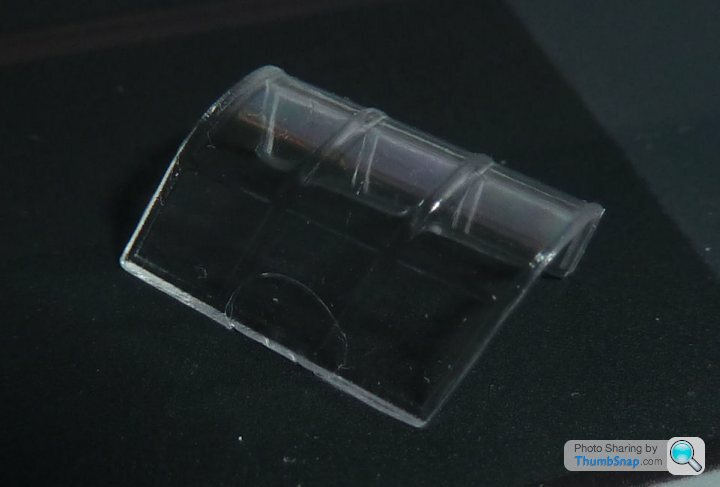
The canopy is nice and thin, but mine has a noticable moulding flaw:
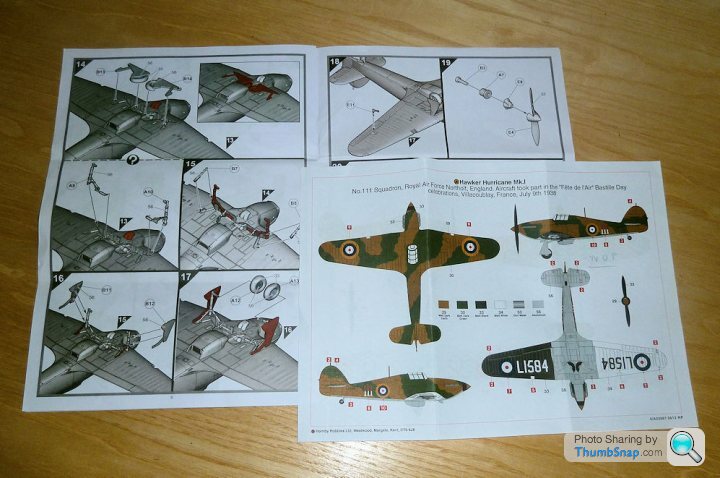
Instructions are the new shaded type, with red bits indicating previous assemblies. Not very clear, a retrograde step IMO compared with the simple line drawings of recent issues. Doesn't bother me at all, but it might be an issue for beginners:
Detail painting instructions are also very confusing, this is the cockpit:
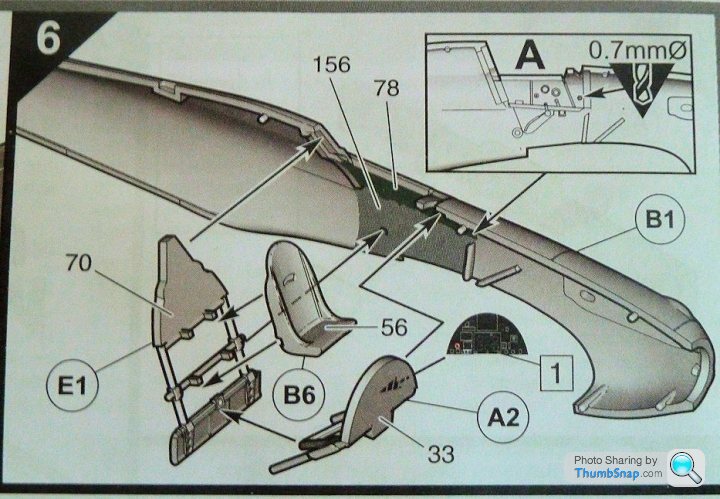
Bizzarre combination of green, grey, black, silver and brick red, none of which are defined with respect to the detail painting of each part. Again, it doesn't bother me becasue I do my own research (a few people of Britmodeller seem to have an idea of what it's supposed to mean), but pretty much impossible to deciper for a beginner.
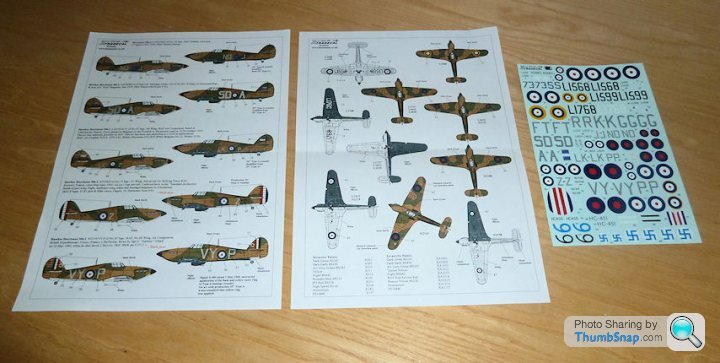
I bought the Hanants decal set becasue I wanted something different form the kit options:
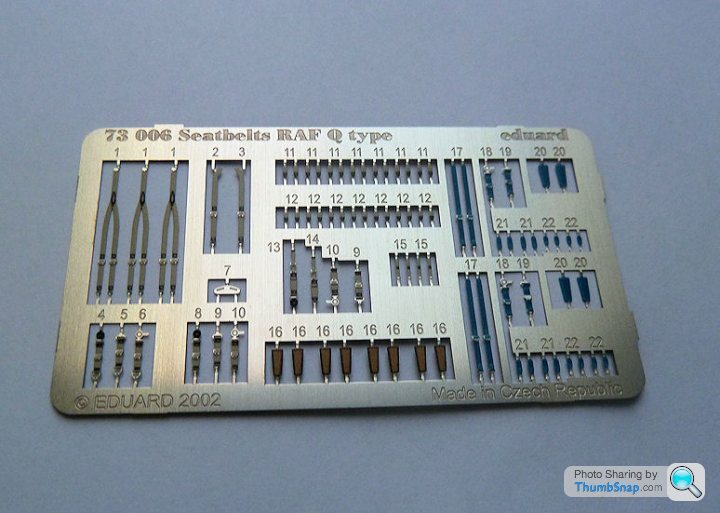
...and I'll be adding Eduard pre-colured belts to the cockpit, which will look fine with the canopy closed.
Apart from maybe some brake lines and a bead sight it will be a quick oob build...assuming Airfix send me a decent replacement canopy.
I wanted a Hurricane to complete my triumvirate of early WW2 RAF monoplanes, having previously completed the Spitfire and Defiant:
Plenty of good detail in the kit, with options for two or three bladed props, and the associated ventral panels, rudders and windscreens etc. Plastic is the familiar Airfix soft grey type, with a slight texture; probably evidence of a somewhat abbreviated spark erosion finishing process used on the moulds:
As usual for new-tool Airfix, panel lines are stuck at 1980's standards, but one of the reasons I bought the kit was that it was the fabric wing version, plus the rear fuselage was fabric, so, as with their new tool Gladiator and Tiger Moth, there aren't too many lines to spoil the model:
The wingtips don't seem to match up, and the trailing edges are a tad thick, but again no real issue for me.
The canopy is nice and thin, but mine has a noticable moulding flaw:
Instructions are the new shaded type, with red bits indicating previous assemblies. Not very clear, a retrograde step IMO compared with the simple line drawings of recent issues. Doesn't bother me at all, but it might be an issue for beginners:
Detail painting instructions are also very confusing, this is the cockpit:
Bizzarre combination of green, grey, black, silver and brick red, none of which are defined with respect to the detail painting of each part. Again, it doesn't bother me becasue I do my own research (a few people of Britmodeller seem to have an idea of what it's supposed to mean), but pretty much impossible to deciper for a beginner.
I bought the Hanants decal set becasue I wanted something different form the kit options:
...and I'll be adding Eduard pre-colured belts to the cockpit, which will look fine with the canopy closed.
Apart from maybe some brake lines and a bead sight it will be a quick oob build...assuming Airfix send me a decent replacement canopy.
MonkeySpanker said:
Not having bought an Airfix kit in umpteen years, this seems a mixed bag at updating. Not keen on the 'CAD' instructions (personal preference)& the cockpit paint instructions make even less sense than some Tamiya kits with their occasional odd paint mix combos. Shame about the canopy, from other posts (1/24 Typhoon etc) this seems to be a common problem.
I'll still look forward to the end results though, I do like a good Hurri
The new tool Airfix are really very good in terms of design, number of parts, detail for the scale, decals etc., but IMO there is no doubt that for whatever reason (probably cost) they are let down by production details. Having experienced the Airfix spares service previously, I'm sure they'll sort the canopy. This one will look fine I think.I'll still look forward to the end results though, I do like a good Hurri
Back from Salt Lake with renewed modelling vigor (and antother 3 wives), so made some progress with the Hurricane.
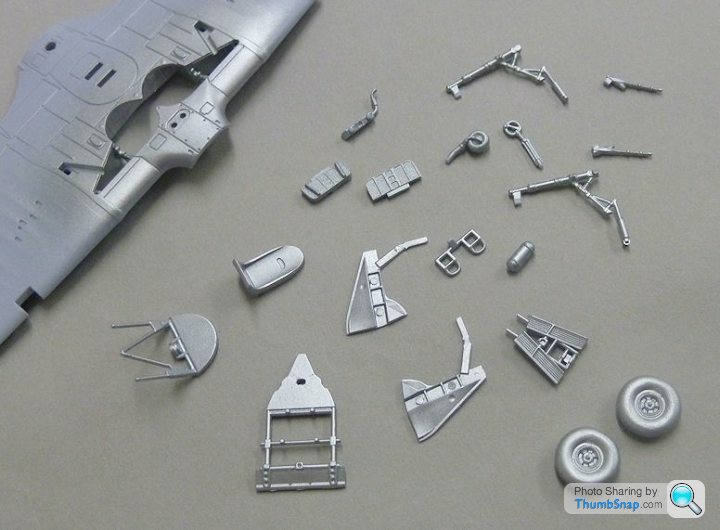
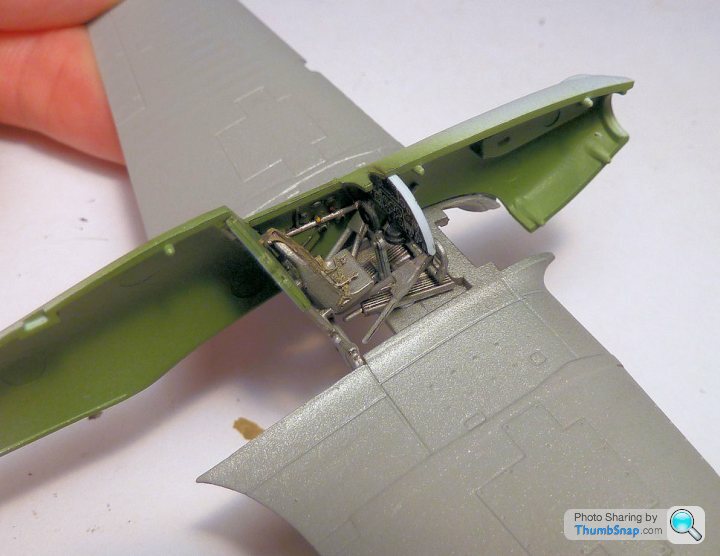
The wheel wells and legs are well detailled, they only really need some hydraulic lines to finish them off:
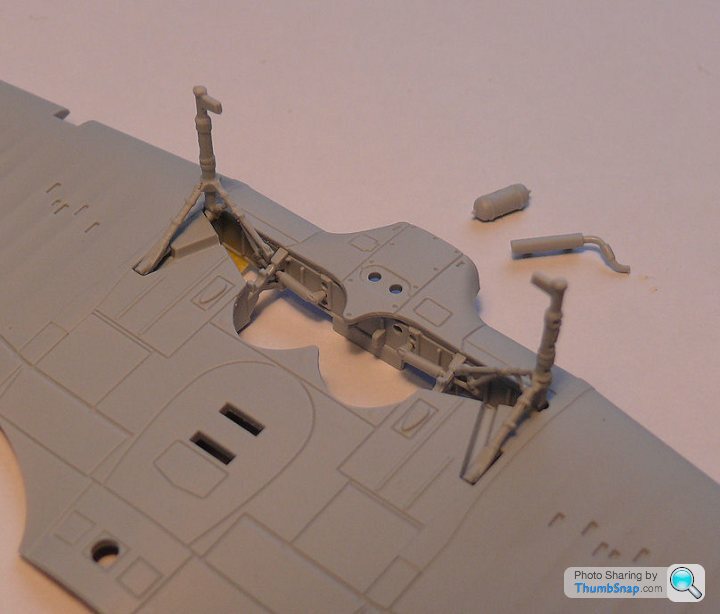
The walls of the bay are a bit d.i.y in terms of fit, and the intermediate pieces needed some fettling:
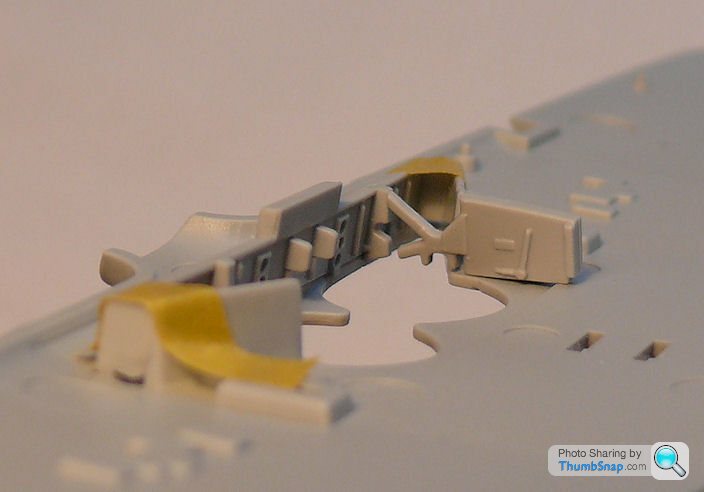
And there are some unsightly ejector pin marks which need filling since they are visible on the roof of the well:
As mentioned, wing trailing edge thickness isn't really acceptable either; an issue common to many new tool Airfix kits. I'm guessing it's another production compromise made on cost grounds. I guess I can thin them a bit, but it's a pain, and a risky process that shouldn't be necessary on a modern kit. Not really a biggie, but the corrections required are quickly adding up...:

The wheel wells and legs are well detailled, they only really need some hydraulic lines to finish them off:
The walls of the bay are a bit d.i.y in terms of fit, and the intermediate pieces needed some fettling:
And there are some unsightly ejector pin marks which need filling since they are visible on the roof of the well:
As mentioned, wing trailing edge thickness isn't really acceptable either; an issue common to many new tool Airfix kits. I'm guessing it's another production compromise made on cost grounds. I guess I can thin them a bit, but it's a pain, and a risky process that shouldn't be necessary on a modern kit. Not really a biggie, but the corrections required are quickly adding up...:
Edited by dr_gn on Sunday 28th September 22:16
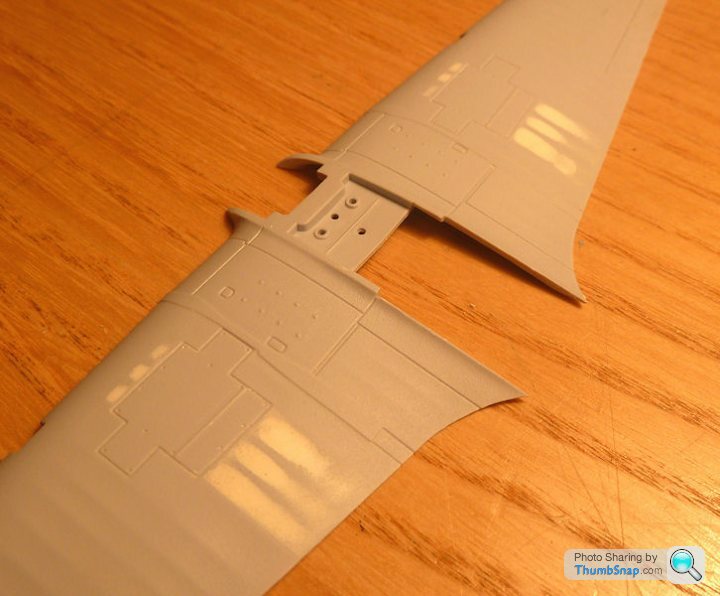
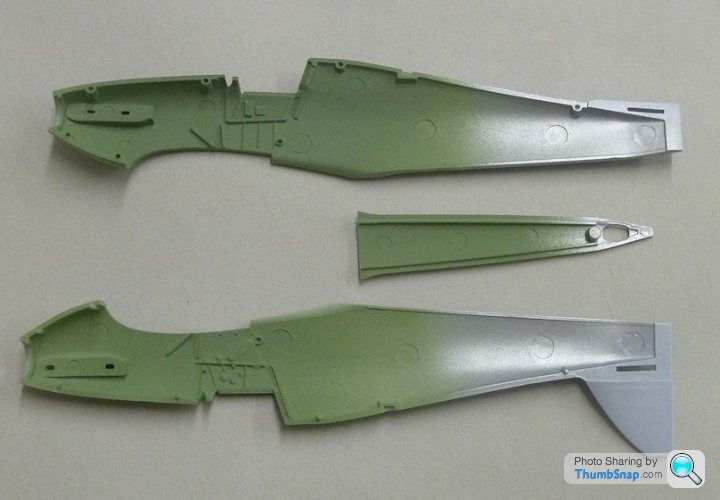
Test fitting the wing halves now the glue is set reveals a significant step casued by the front vertical panel being distorted (no doubt due to the soft plastic):
I've correctd that by sanding the location slot in the upper wing. That stil leaves the wingtip mismatch:
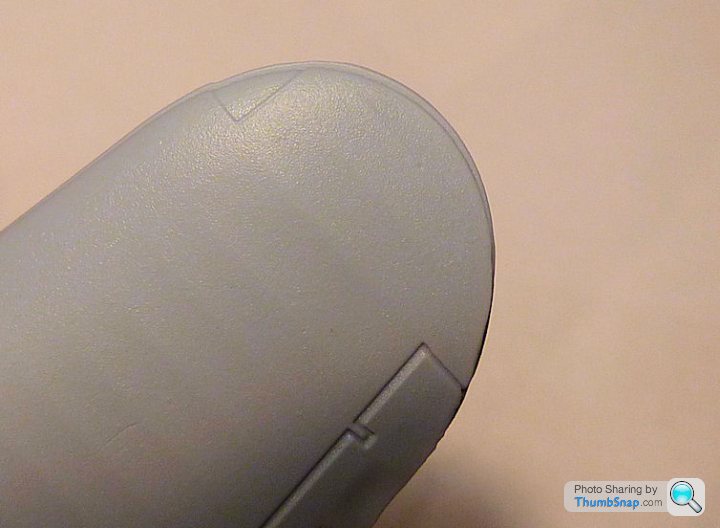
Hmmm, something will have to be done about that tip light too.
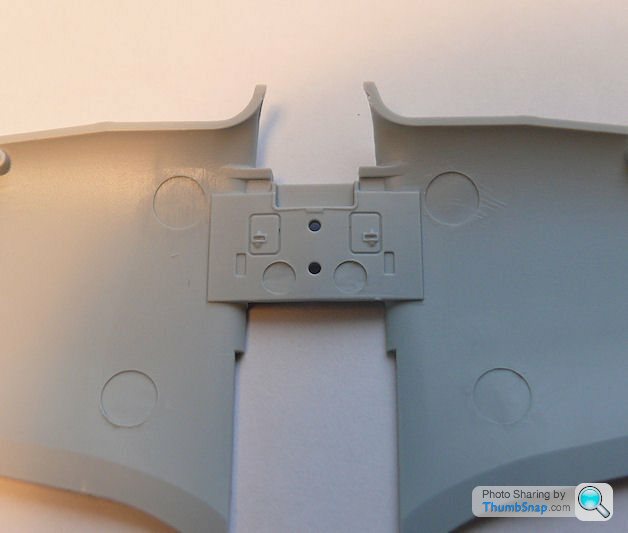
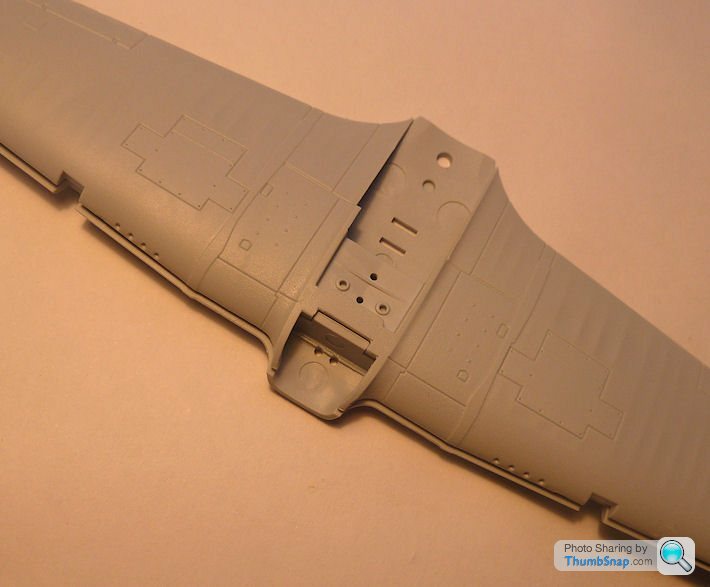
Someone on one of my BM threads mentioned that the wing was incorrect in that it shuoldn't be fabric
in front of or behind the gun access panels, due to the armourers needing a strong surface to kneel on. Initially I didn't believe that this could be correct, since the big deal of the Airfix MK.1 is the wing detail being fabric (it is in fact incorrect). Here are the areas in question:
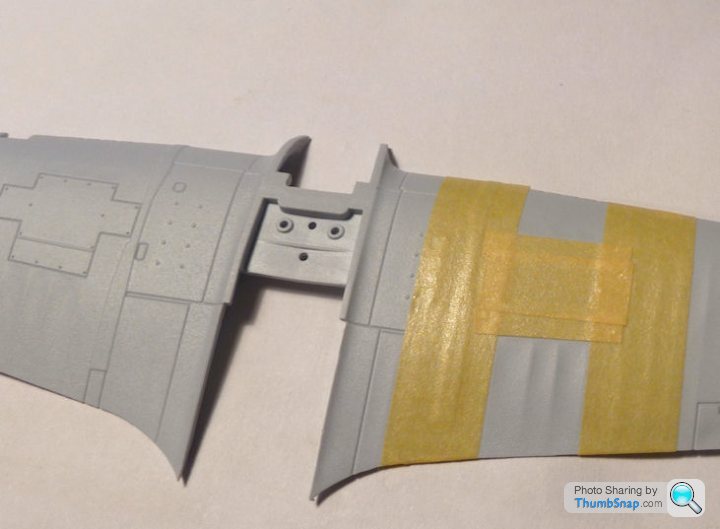
Here are some of the scallops that need filling, and the boundary will need scribing to represent the panel edge:

I'm now debating whether to correct it or leave it. There is the risk of ruining the wing when correcting it, but if I leave it, it'll niggle me to death. Then again this was supposed to be a quick OOB build. I think I'll leave this one for a while and get on with the Tornado.
I've correctd that by sanding the location slot in the upper wing. That stil leaves the wingtip mismatch:
Hmmm, something will have to be done about that tip light too.
Someone on one of my BM threads mentioned that the wing was incorrect in that it shuoldn't be fabric
in front of or behind the gun access panels, due to the armourers needing a strong surface to kneel on. Initially I didn't believe that this could be correct, since the big deal of the Airfix MK.1 is the wing detail being fabric (it is in fact incorrect). Here are the areas in question:
Here are some of the scallops that need filling, and the boundary will need scribing to represent the panel edge:
I'm now debating whether to correct it or leave it. There is the risk of ruining the wing when correcting it, but if I leave it, it'll niggle me to death. Then again this was supposed to be a quick OOB build. I think I'll leave this one for a while and get on with the Tornado.

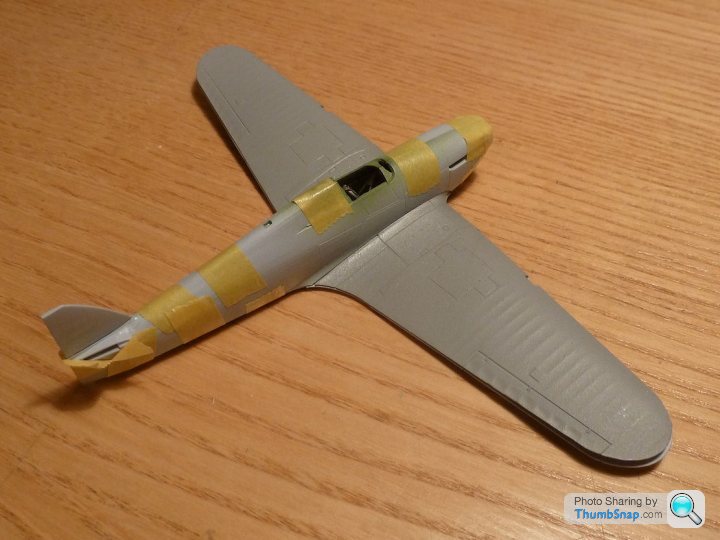
Made a start on correcting the wings, a couple of fabric bays still to do:
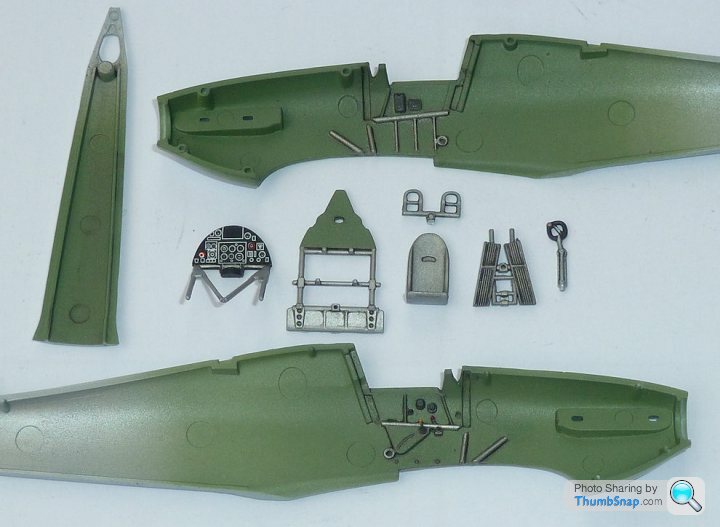
And started painting a few components:
Still got to pick out the cockpit framing in silver on the fuselage sides:
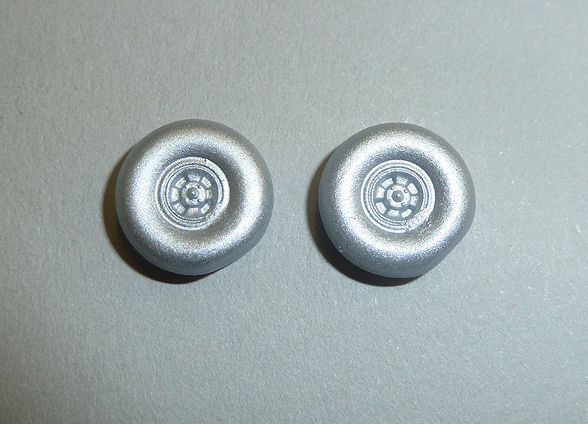
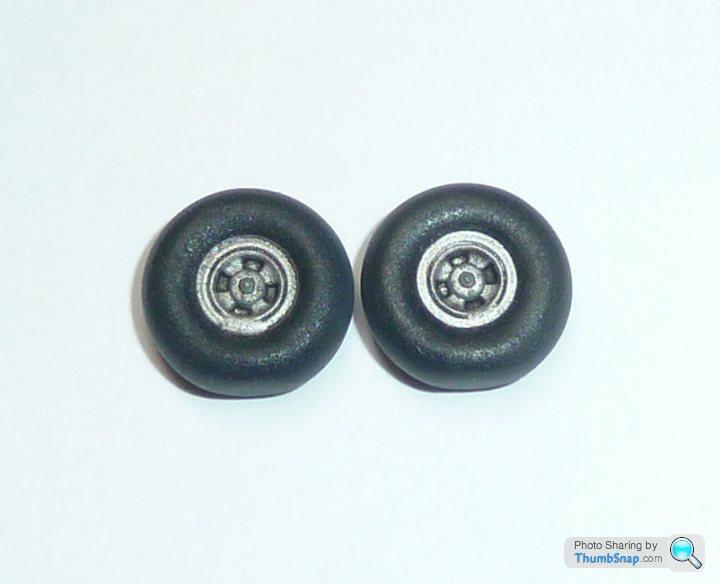
There appears to be a moulding flaw on both the wheels, plus they are the wrong type - should have 5 spokes. I really didn't want to mess about with aftermarket stuff with this one, but I might have to ditch the wheels and get some resin ones:
At least the propeller went together with only a small amount of filler:

And started painting a few components:
Still got to pick out the cockpit framing in silver on the fuselage sides:
There appears to be a moulding flaw on both the wheels, plus they are the wrong type - should have 5 spokes. I really didn't want to mess about with aftermarket stuff with this one, but I might have to ditch the wheels and get some resin ones:
At least the propeller went together with only a small amount of filler:
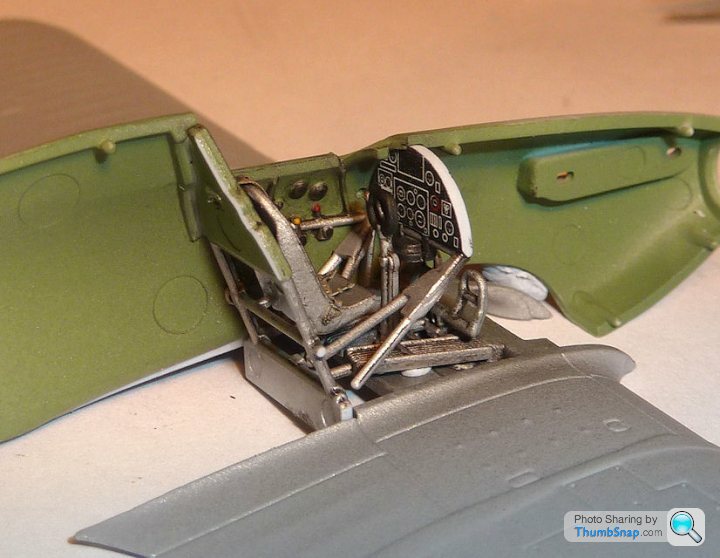
Cockpit is detail painted and ready for assembly. Just needs some belts and maybe a gunsight making:
And the u/c and radiator parts:
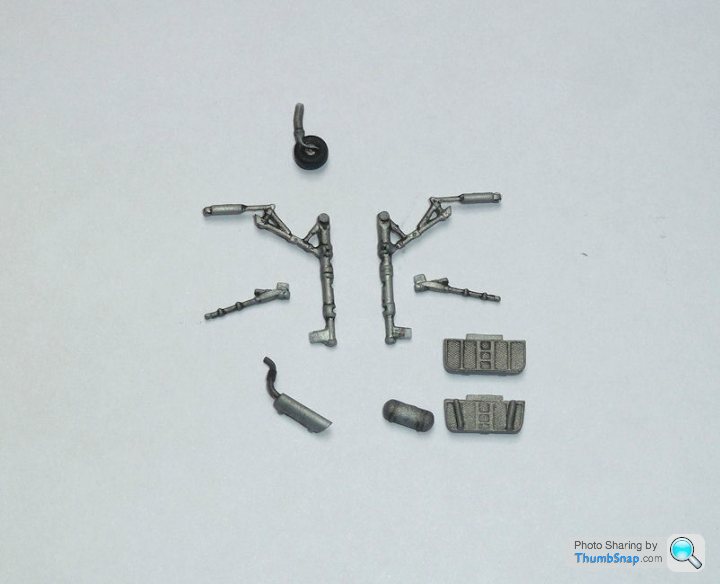
I painted the wheels, but the hubs are a mess, so they will need aftermarket ones - assuming the model justifies the hassle when complete. I'd love to know how these parts got signed off for production:
And the u/c and radiator parts:
I painted the wheels, but the hubs are a mess, so they will need aftermarket ones - assuming the model justifies the hassle when complete. I'd love to know how these parts got signed off for production:
Eric Mc said:
If you place a real 1/72 Hurricane or Spitfire wheel on the image on my screen, I estimate it would take 20 real wheels to cover the image of each individual wheel. Obviously, the image size will vary depending on the screen in use.
So every image of every "real wheel" is automatically scaled to the same size on your screen, whether it's on a distant image of a parked aircraft, or a close up from a walkaround? That's amazing, what version of windows has that function?CanAm said:
dr_gn said:
So every image of every "real wheel" is automatically scaled to the same size on your screen, whether it's on a distant image of a parked aircraft, or a close up from a walkaround? That's amazing, what version of windows has that function?
I agree with Eric. On my screen the wheel is approx 4" in diameter, so as he says any fault that we may not see too clearly on the model wheel, is blown up out of all proportion. (well, exactly in proportion; but you know what I mean) Following the logic that it's irrelevant because it's a small part doesn't really work, especially at 1:72 scale. Look at it another way and each of the flaws is about twice the size of a wheel spoke, so why not save a bit more money on production and omit them altogether if they're not noticable?
 those wheels are big!
 RichB said:
dr_gn said:
...but the relative size of the errors is identical...
Can hardly see them, mind you I love the way the tyres are flattened where the weight of the aircraft sat. 
RichB said:
It seems you failed to realise I was joshing with you. Sorry... 
No problem, In the best tradition of PH, I was just continuing the disproportionate and unecessarily elaborate justification of my initial point without really bothering to read what people were saying...carry on 72twink said:
Ambient light, iPad 2 - pinch zoomed til each wheel was 85mm ........ Can you re-scribe the rim detail with a circle template?
(Just thinking of momentum)
For a component like that it really needs to be spot-on. I considered hot melt glueing them to my lathe chuck and turning the blobs away and rescribing the ridge, but even after all that, assuming it looked OK the number of spokes would still be wrong.(Just thinking of momentum)
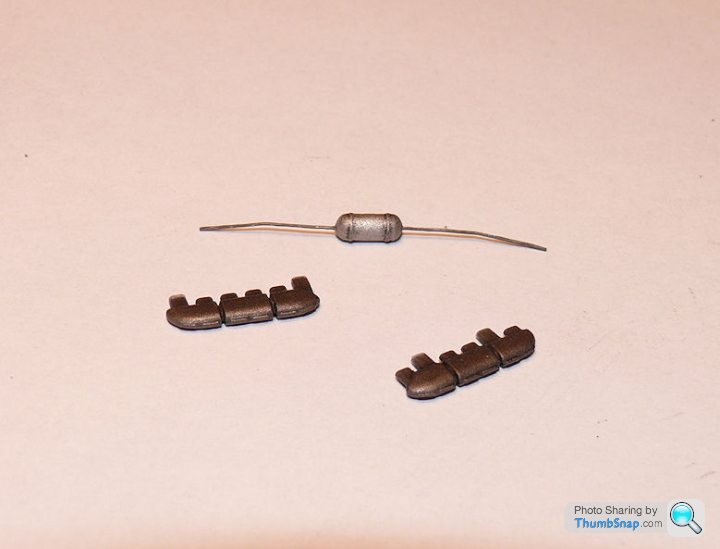
Added some lead wire lines to the air bottle in the u/c bay, and painted the early type exhausts:
I can't figure out why you'd want to fit the ventral signalling lamp lens before painting, as required by the design of the kit. I modified it by cutting the lens from its flange and making the fuselage hole into a pocket by adding a plastic disc. This way after final painting I can dot the inside of the hole silver, paint the lens clear red and install with pva. Far easier to paint and assemble and will give a perfect demarcation without masking. It ain't rocket science Mr. Airfix...
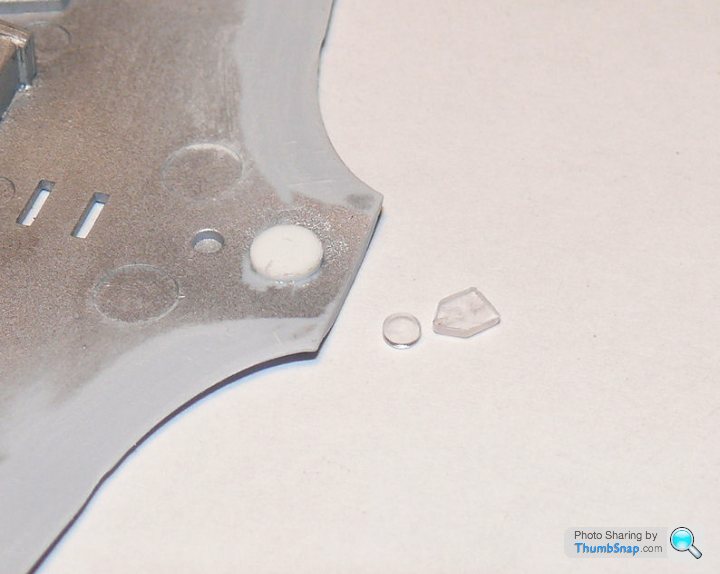
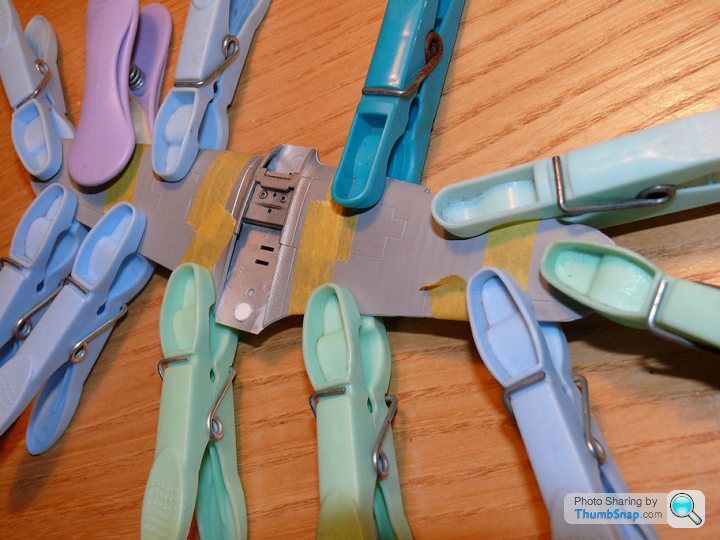
You can see where I've tried in vain to make the wing trailing edges a decent thickness by scraping and filing. And so back to the assembly wings. The fit is...interesting:
I can't figure out why you'd want to fit the ventral signalling lamp lens before painting, as required by the design of the kit. I modified it by cutting the lens from its flange and making the fuselage hole into a pocket by adding a plastic disc. This way after final painting I can dot the inside of the hole silver, paint the lens clear red and install with pva. Far easier to paint and assemble and will give a perfect demarcation without masking. It ain't rocket science Mr. Airfix...
You can see where I've tried in vain to make the wing trailing edges a decent thickness by scraping and filing. And so back to the assembly wings. The fit is...interesting:
Gassing Station | Scale Models | Top of Page | What's New | My Stuff