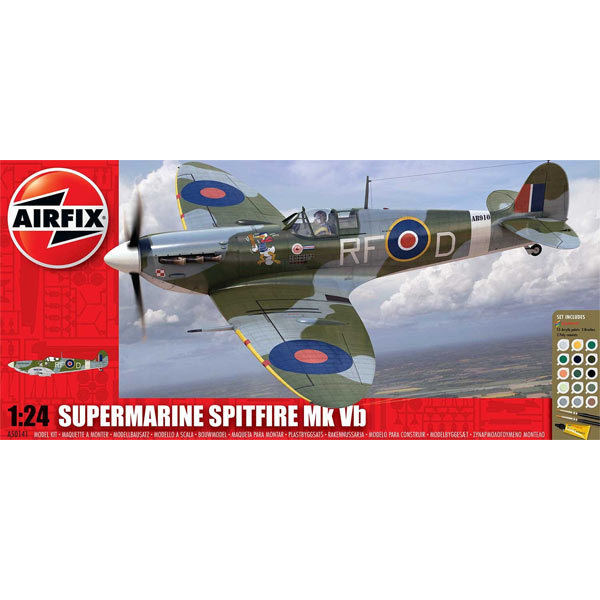
Airfix 1/24 Spitfire Mk VB
Discussion


Right - for my 2nd military plane, I'm building this large scale kit for a friend. Pretty sure this was bought as part of a group buy via good 'ol Blatchat (7 Club)
I've not finished the Mossie yet, but need something new to get me back into it all....
From what I have read, these old big Airfix kits can be a bit hit and miss in terms of fit etc - certainly not quite the same as the new Tamiya stuff, that is for sure! But a lovely subject.
The kit had been very slightly started, with a few parts of the cockpit assembled and painted. I've undone this work, so I can paint again with new paint and so keep colour consistency.
It also means I can add a bit more detail - despite my plan to build totally OOB, I can't help myself.
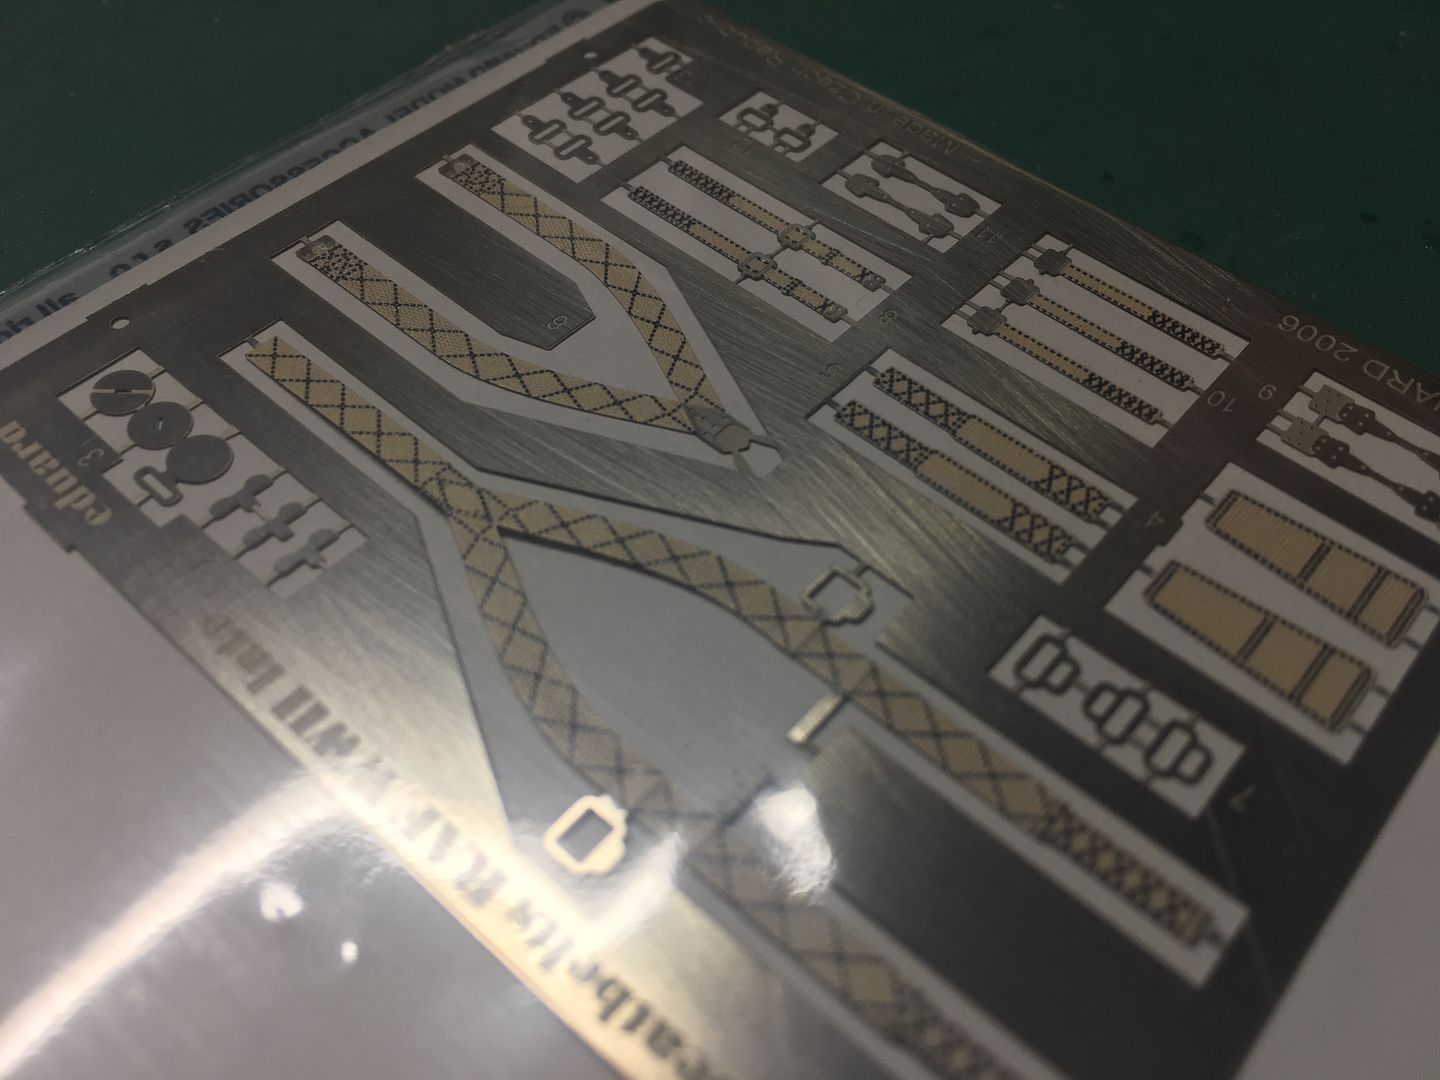
I've ordered the Eduard seatbelts, Master 20mm cannons and some masks for spraying the cockpit
I'm going to scratch build some cockpit internals - but not go mad - hopefully.
Researching forums on this subject, there are a huge number of opinions, variations etc etc - I'm going for a nice kit - if the radio headset is not correct for a particular month in the 40's, I'm ok with that
That said, I do want to get the big stuff accurate....
So here goes...
I've not finished the Mossie yet, but need something new to get me back into it all....
From what I have read, these old big Airfix kits can be a bit hit and miss in terms of fit etc - certainly not quite the same as the new Tamiya stuff, that is for sure! But a lovely subject.
The kit had been very slightly started, with a few parts of the cockpit assembled and painted. I've undone this work, so I can paint again with new paint and so keep colour consistency.
It also means I can add a bit more detail - despite my plan to build totally OOB, I can't help myself.
I've ordered the Eduard seatbelts, Master 20mm cannons and some masks for spraying the cockpit
I'm going to scratch build some cockpit internals - but not go mad - hopefully.
Researching forums on this subject, there are a huge number of opinions, variations etc etc - I'm going for a nice kit - if the radio headset is not correct for a particular month in the 40's, I'm ok with that
That said, I do want to get the big stuff accurate....
So here goes...
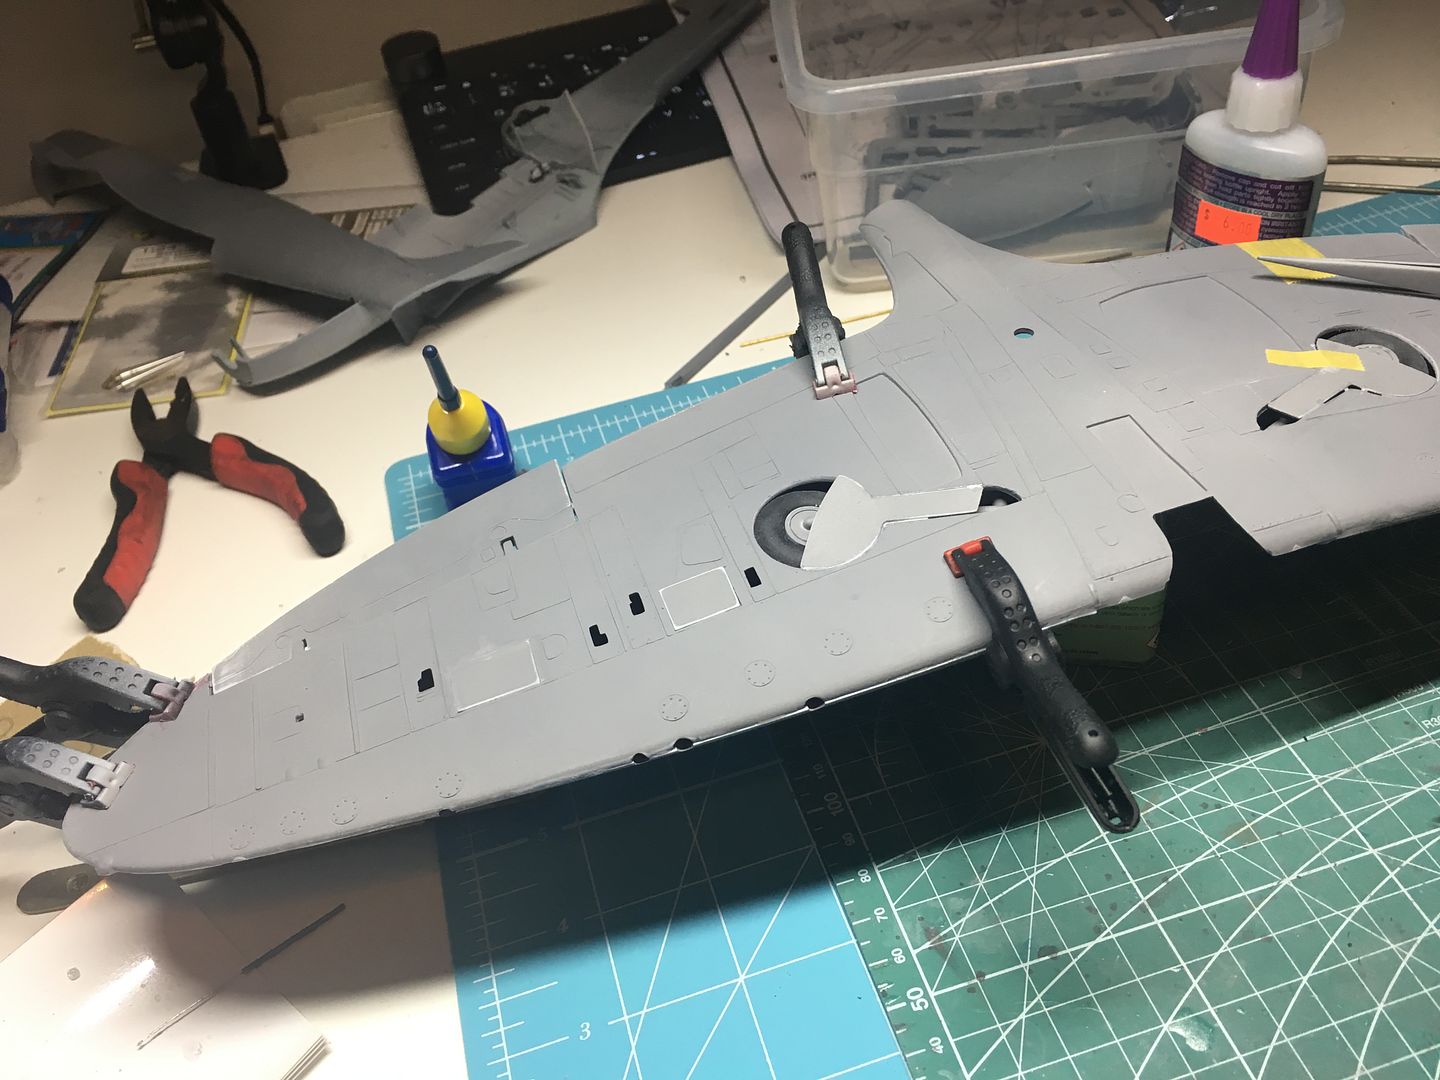
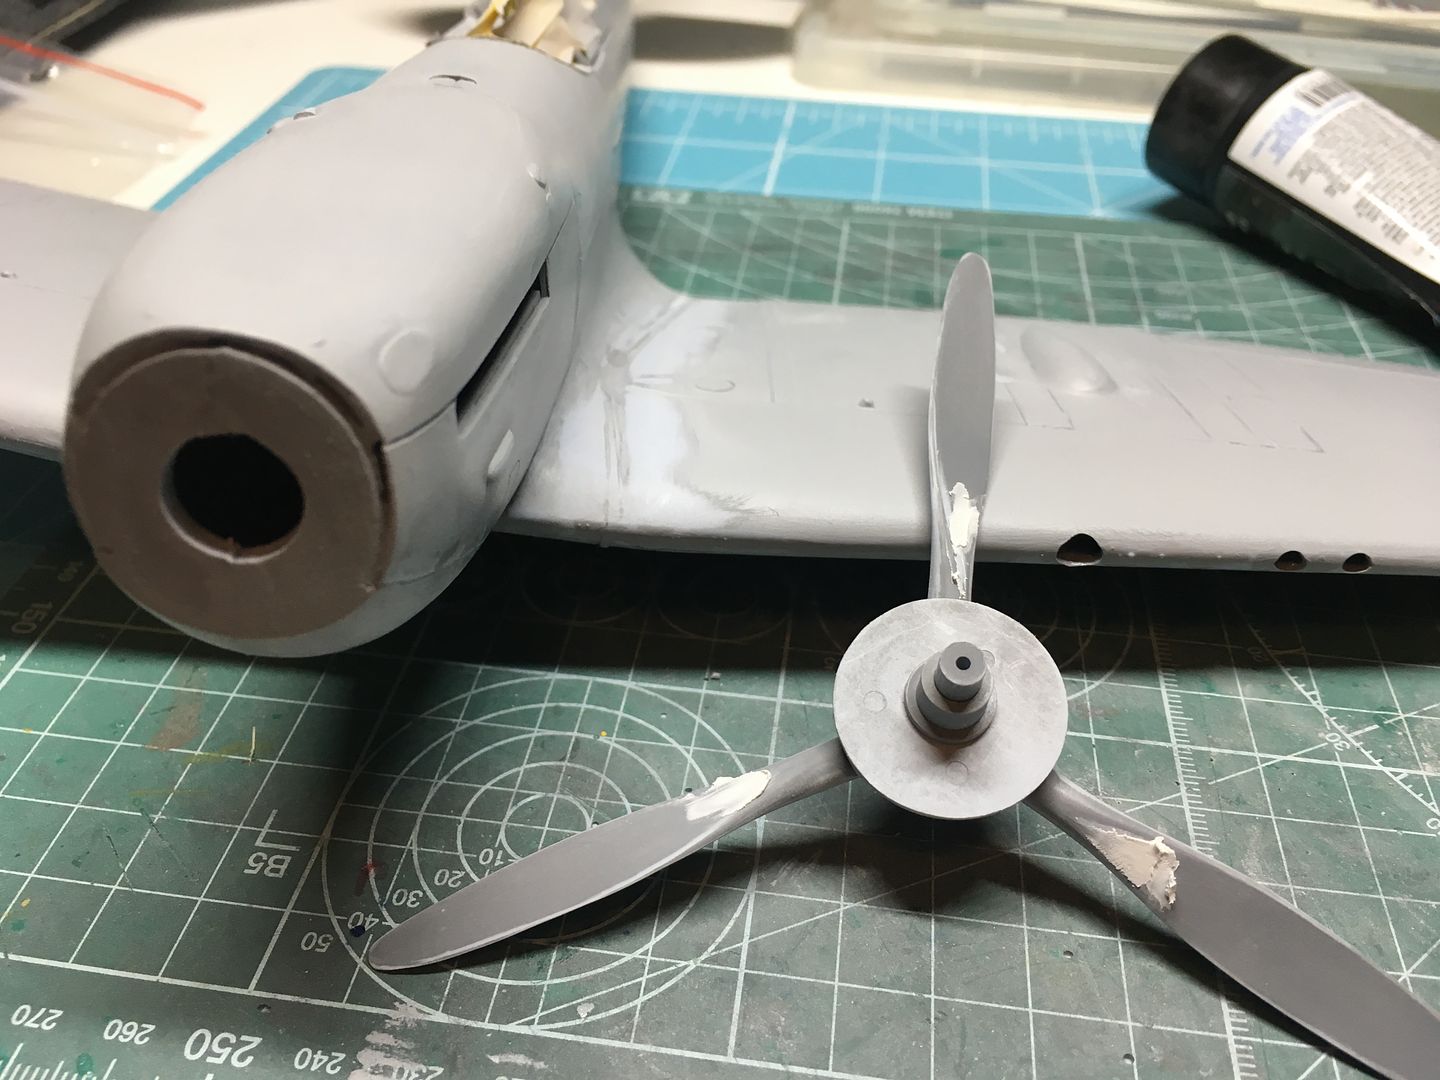
I've read about the wing-droop! I'll add some wire in there...
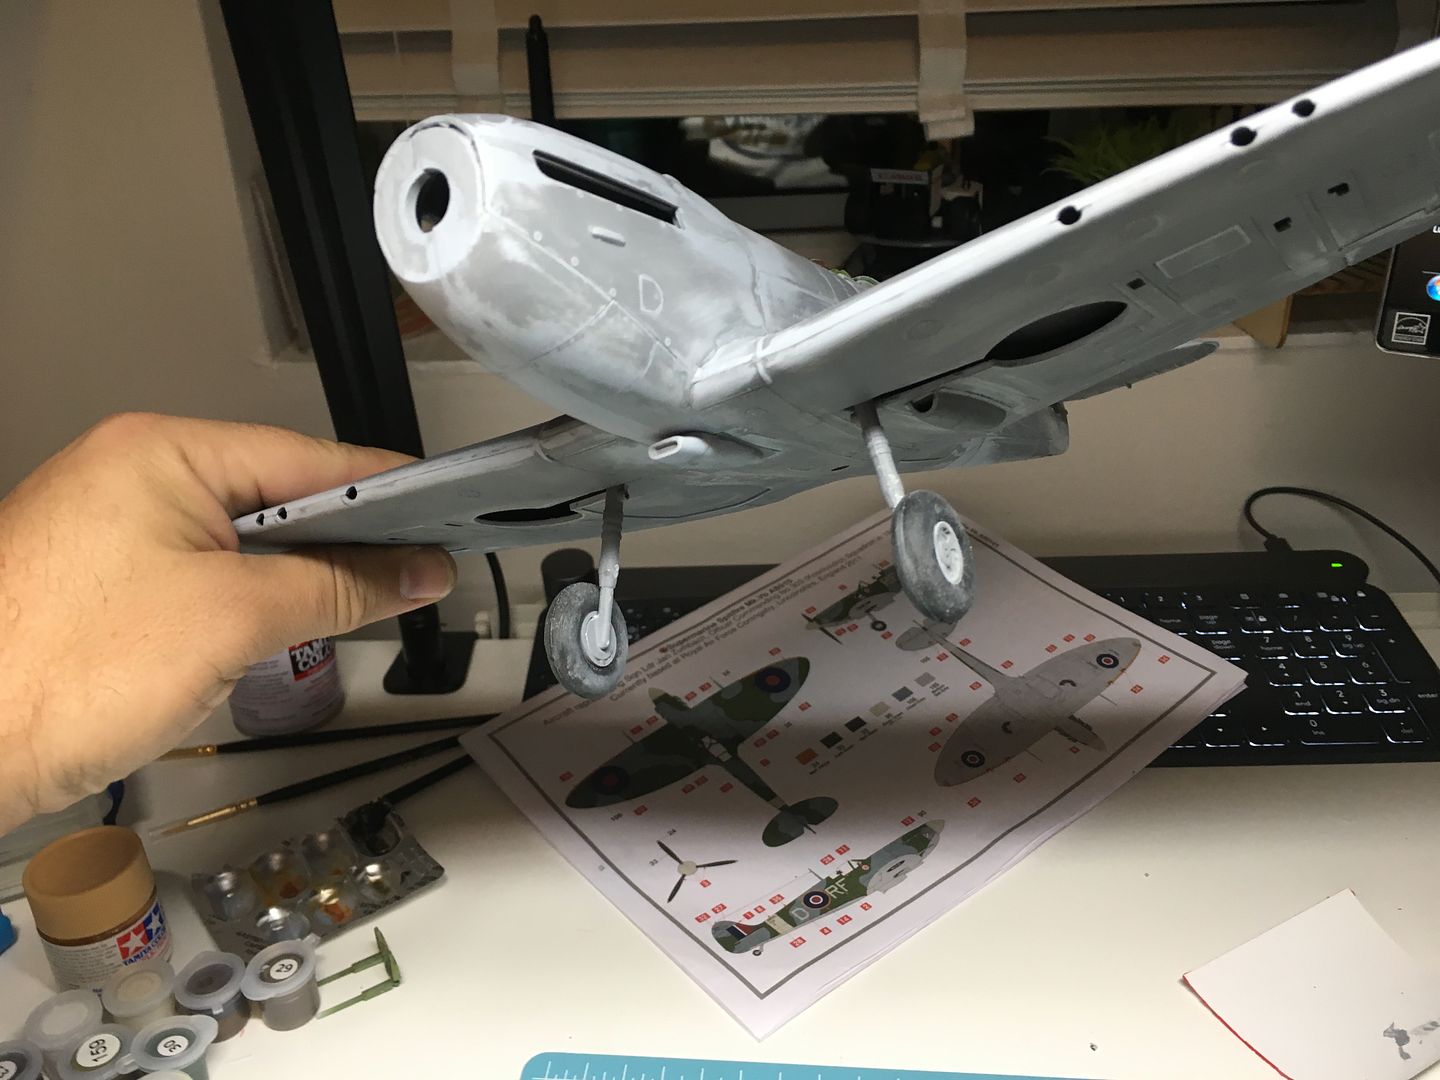
Mark wants 'wheels up' - this means I don't have to worry about some of the extra detail around the undercarriage, or even the engine - so I have at least a chance of making all the front panels fit...
Sadly, it also means I have to paint the pilot - something I have just started to do on the Mossie crew, and very much a new skill to learn....pilot will also hide some of the extra cockpit detail I was going to add - but that is not a bad thing - be good to actually finish this one!
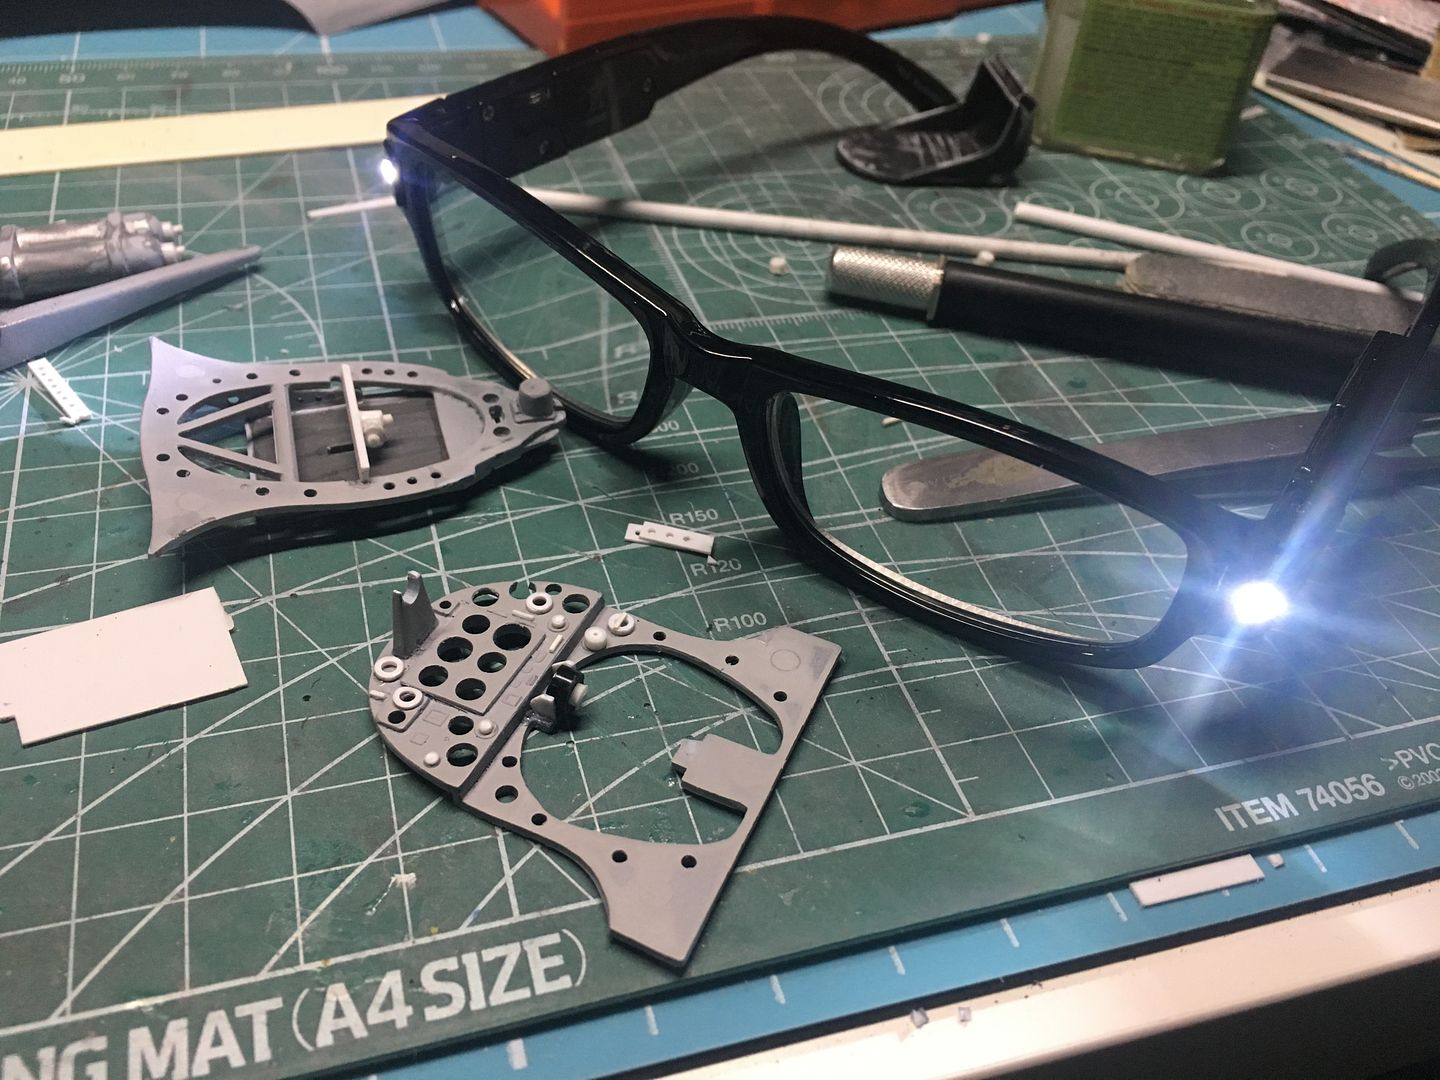
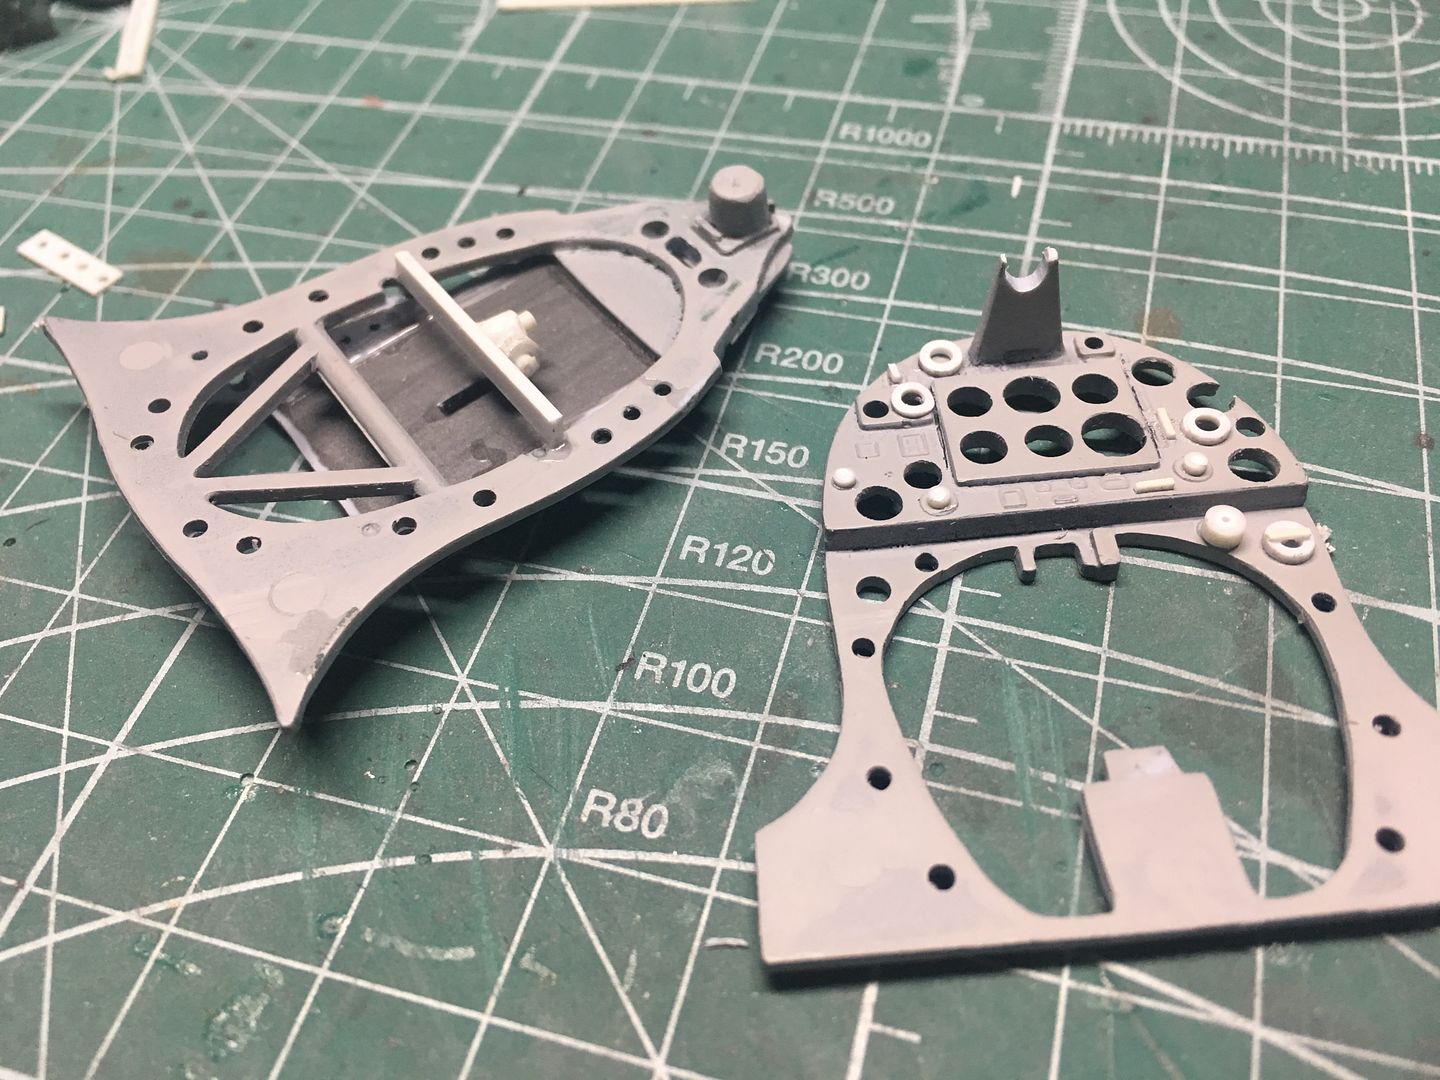
So the first job was to dismantle the very small amount of assembly, just to make it easier to tweak. I didn't take many pictures at this point, but it was only really a little bit of cockpit area stuff. I primed over the green paint, just to make it easier to see what was going on...
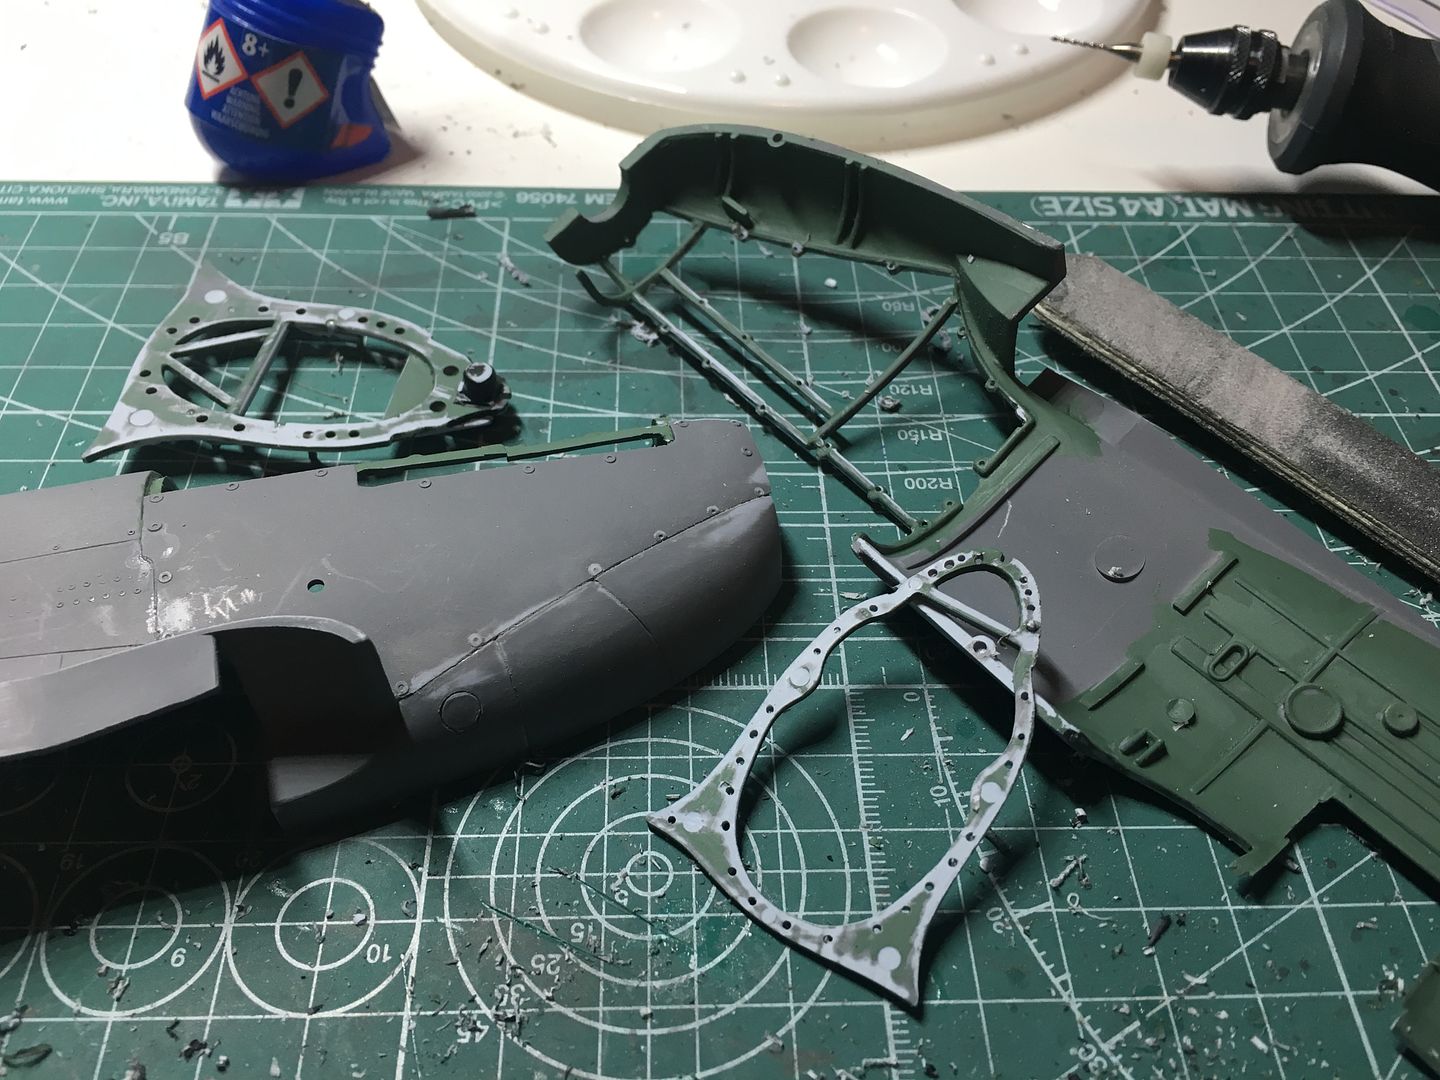
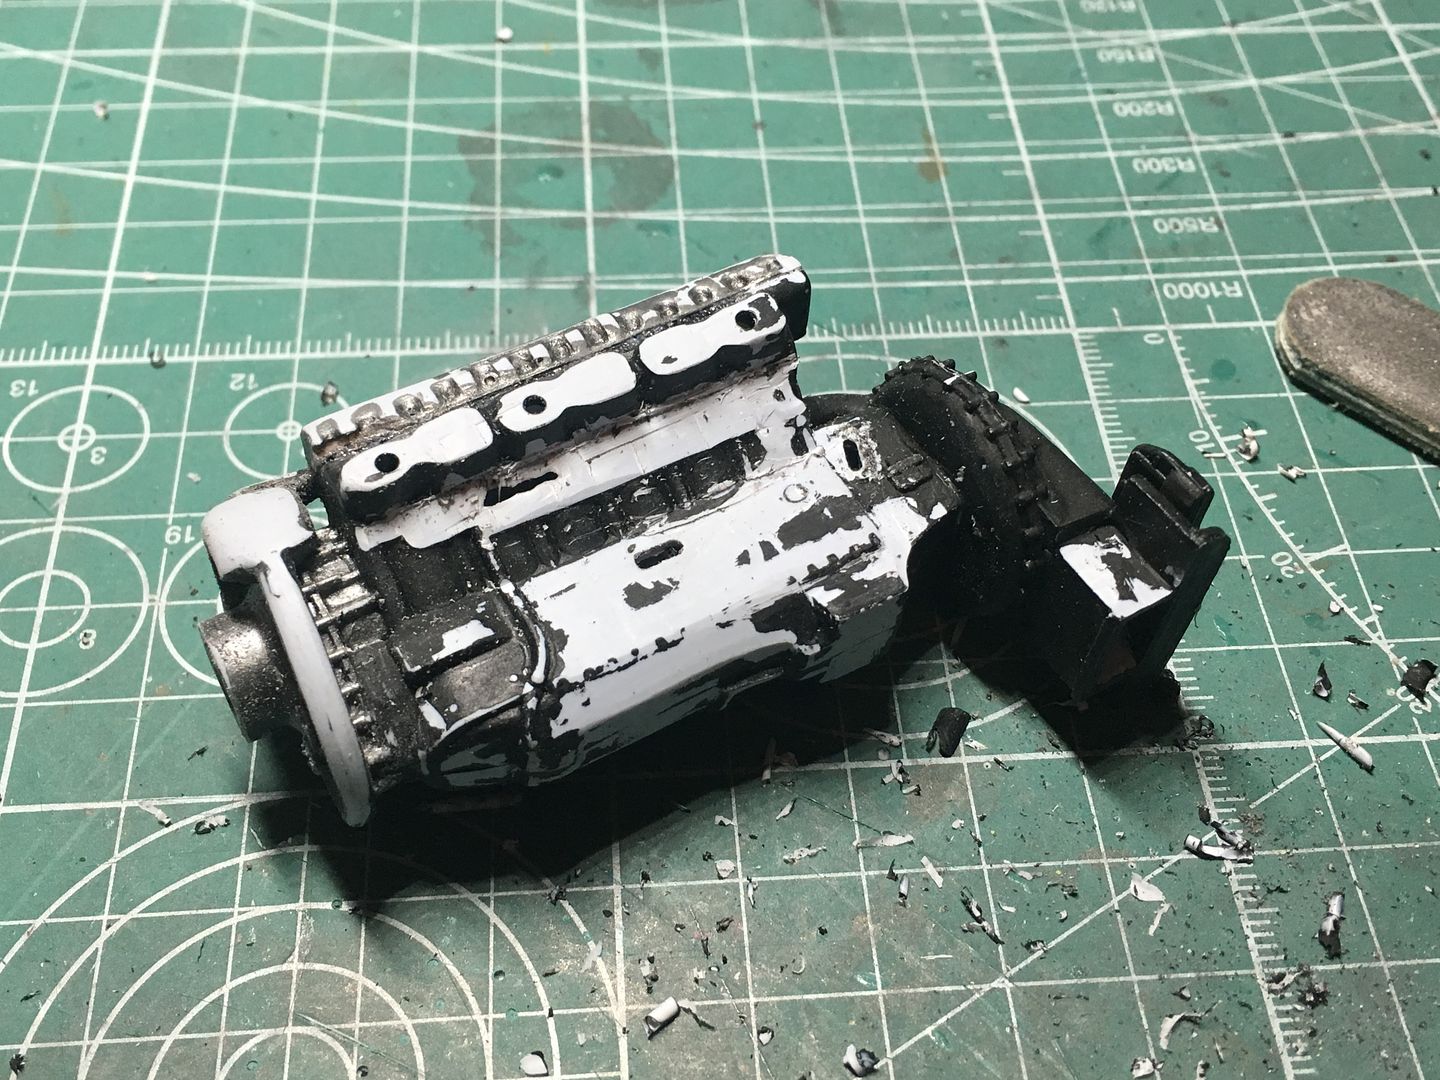
At this point I was going to work on the engine, so I had stripped this to work on as well - I was just going to show one side panel open - the panel fit is so bad, I was going to glue the other side shut! Now the plane is 'in flight' I can miss this step out...

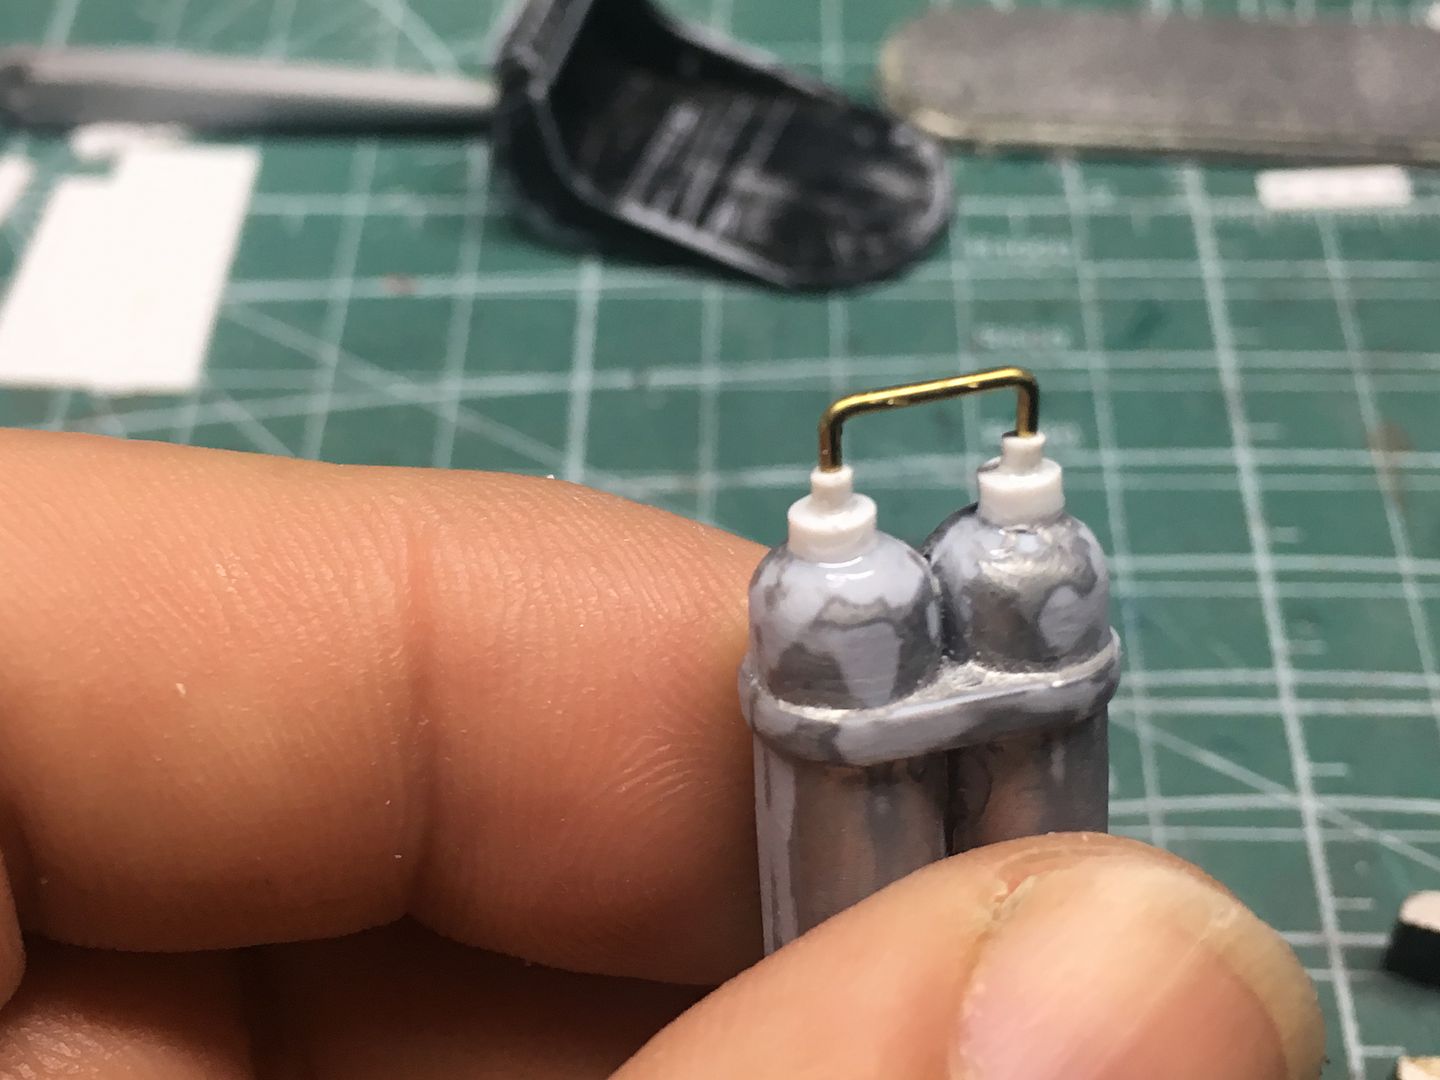
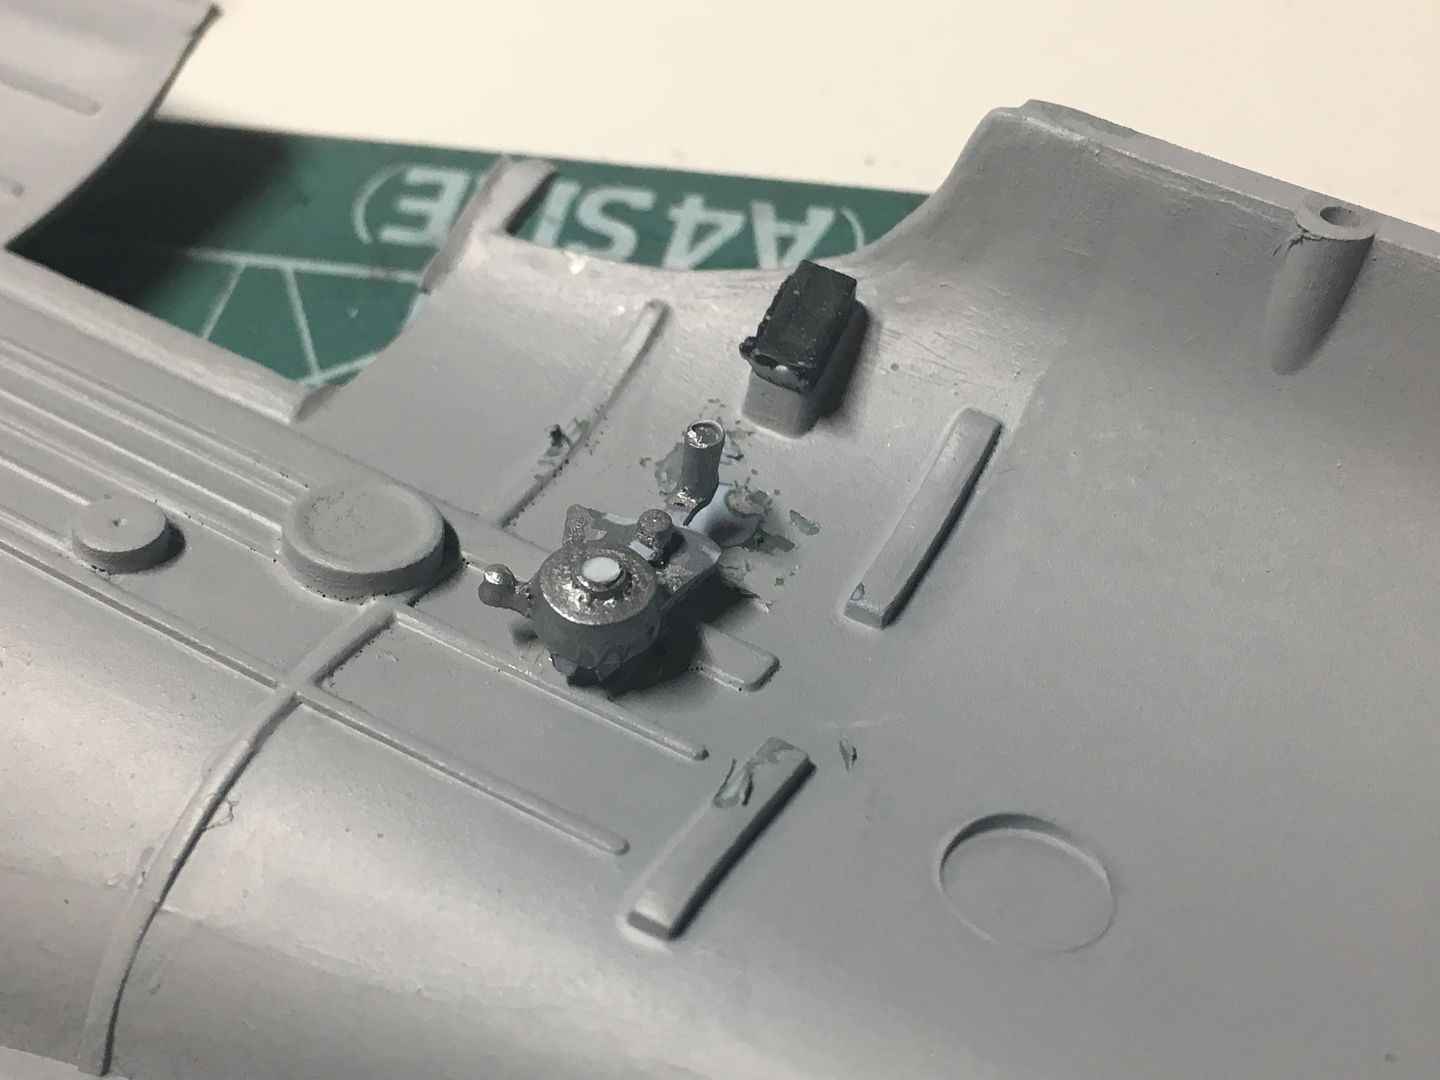
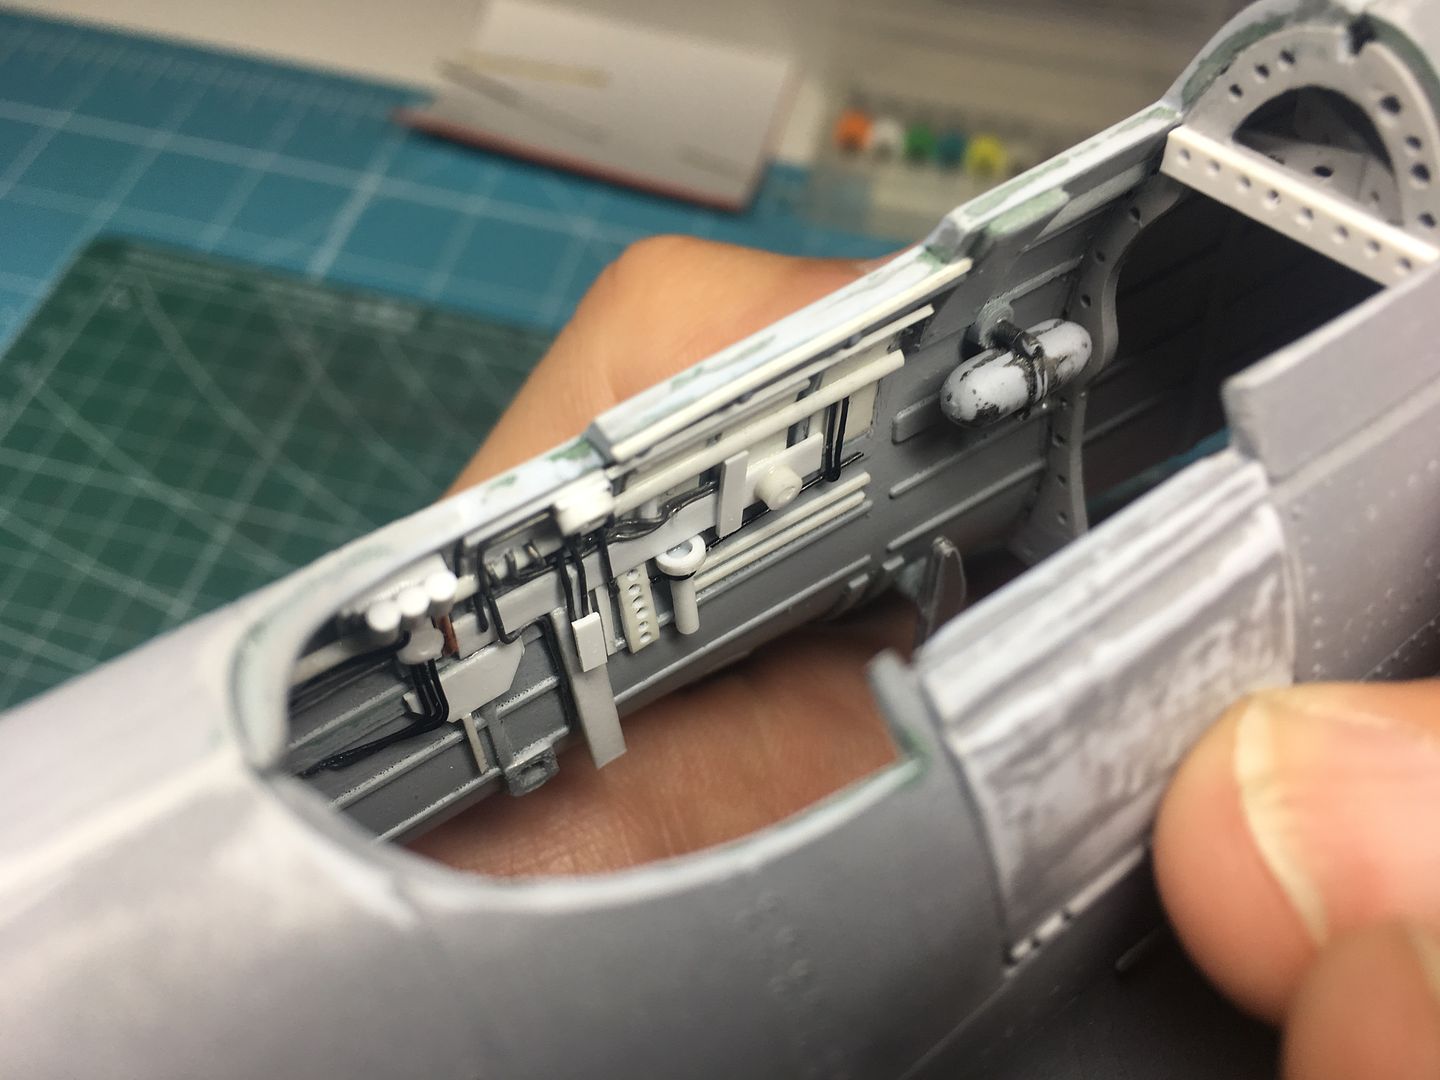
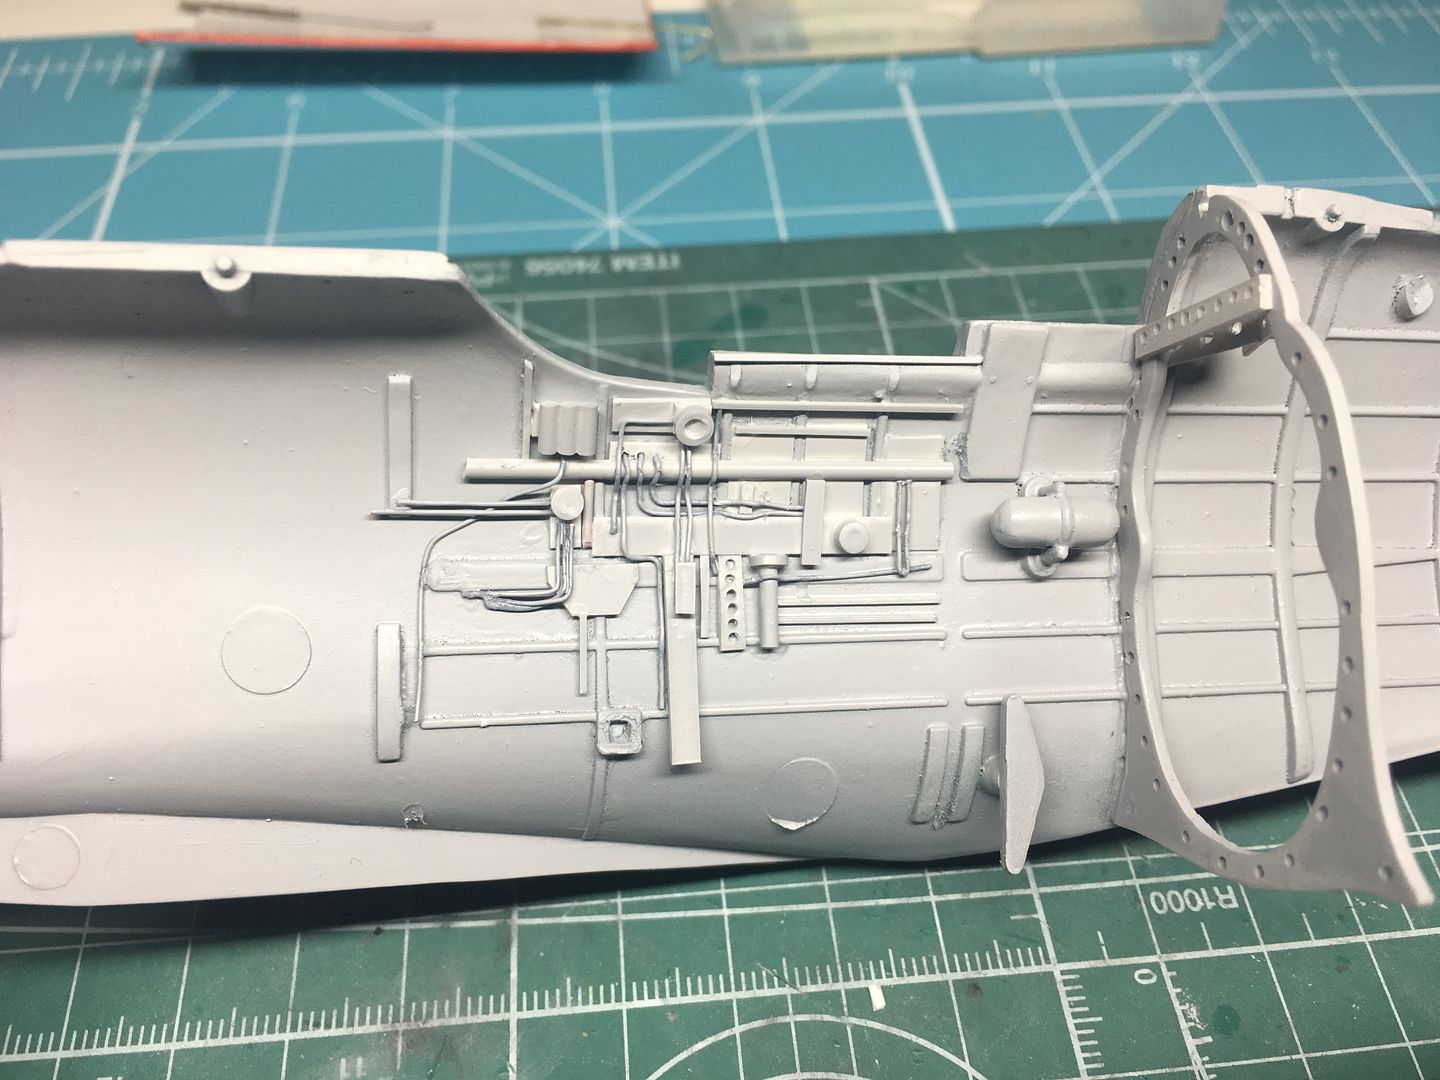
I took the very small amount of 'detail' in the kit and improved it a little - as now much of it would be properly hidden I did not do too much of this - at this point!
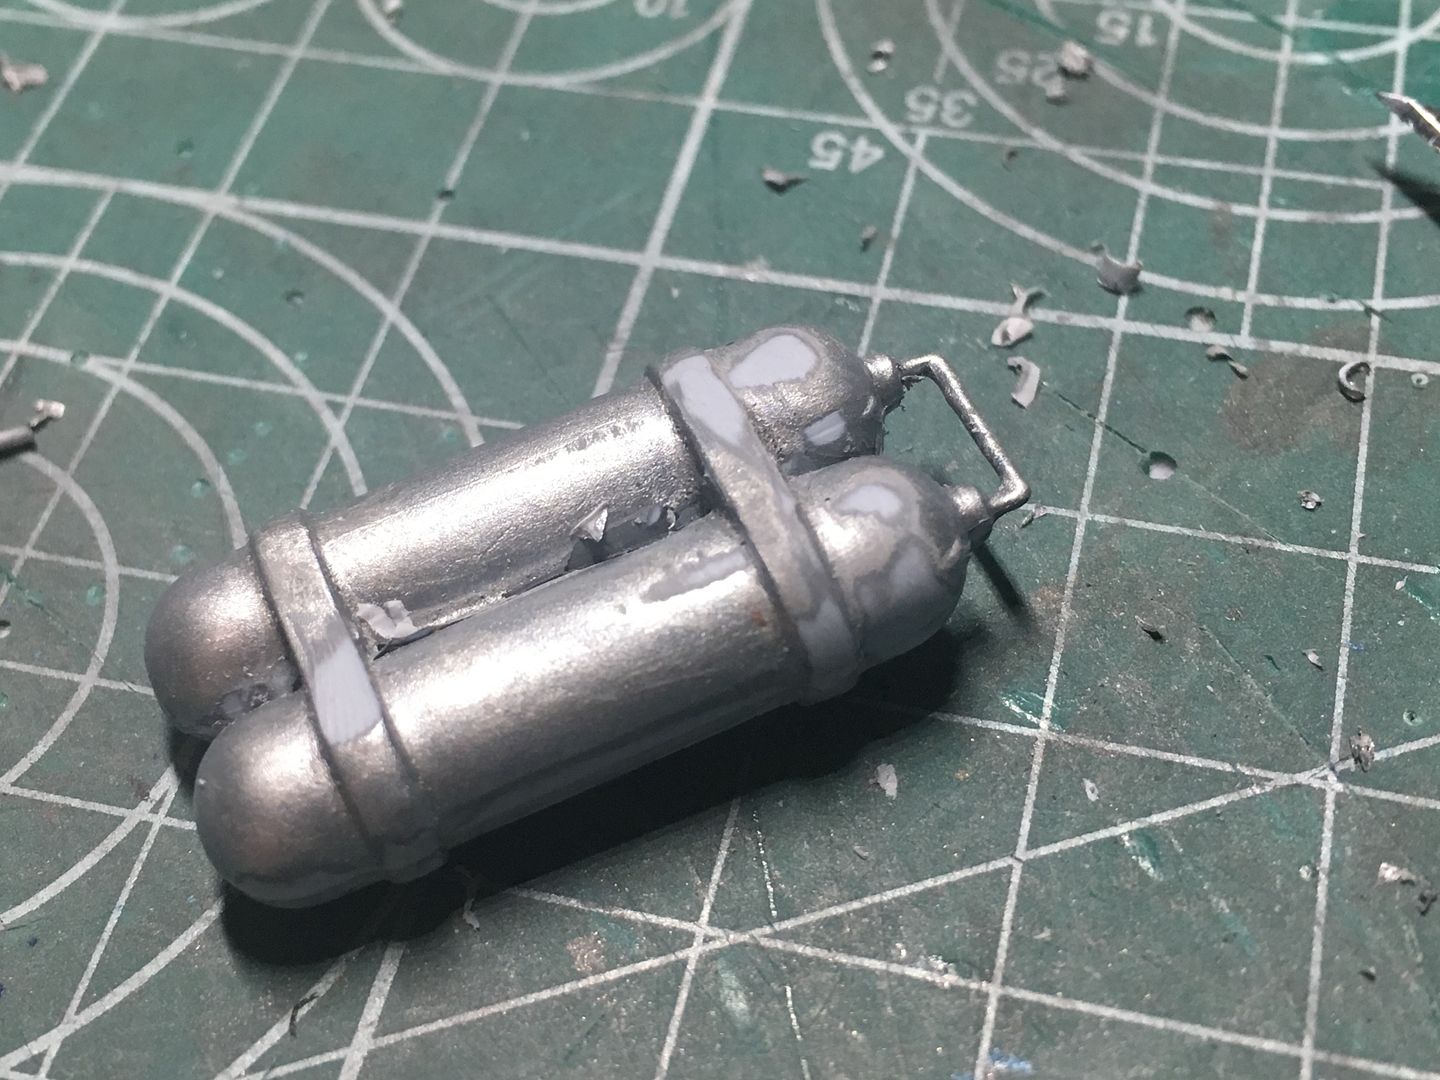
....I cut the end off and replaced with wire - if this had been visible (it wont be) I would have rebuilt in its entirety - but I want to actually finish this model!
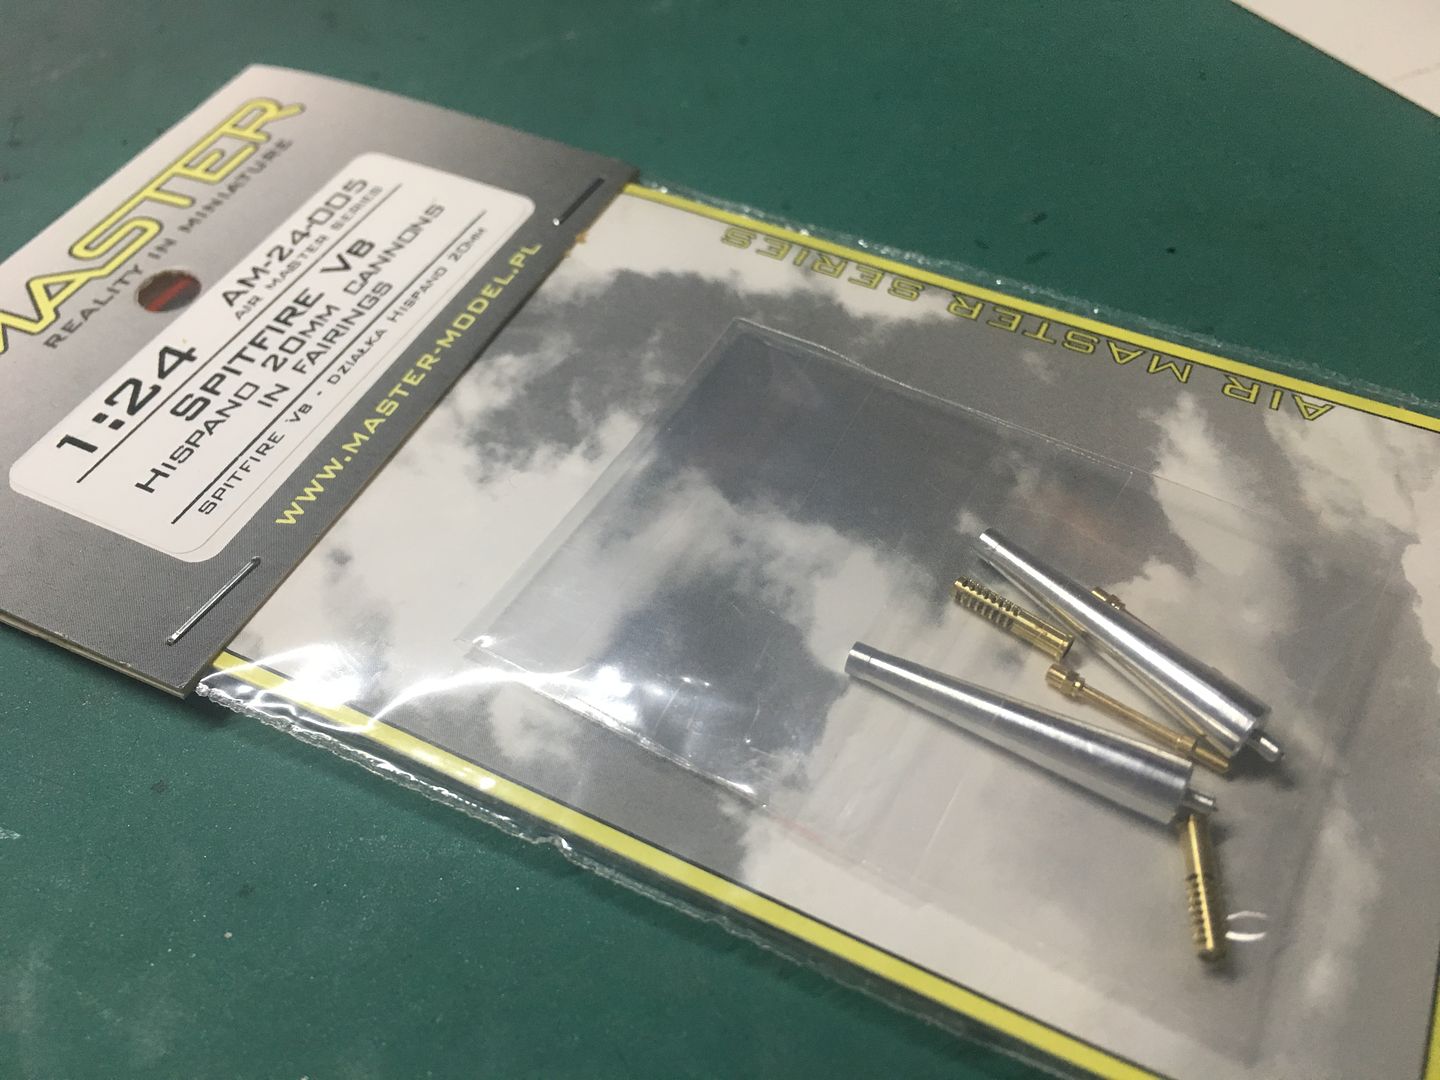
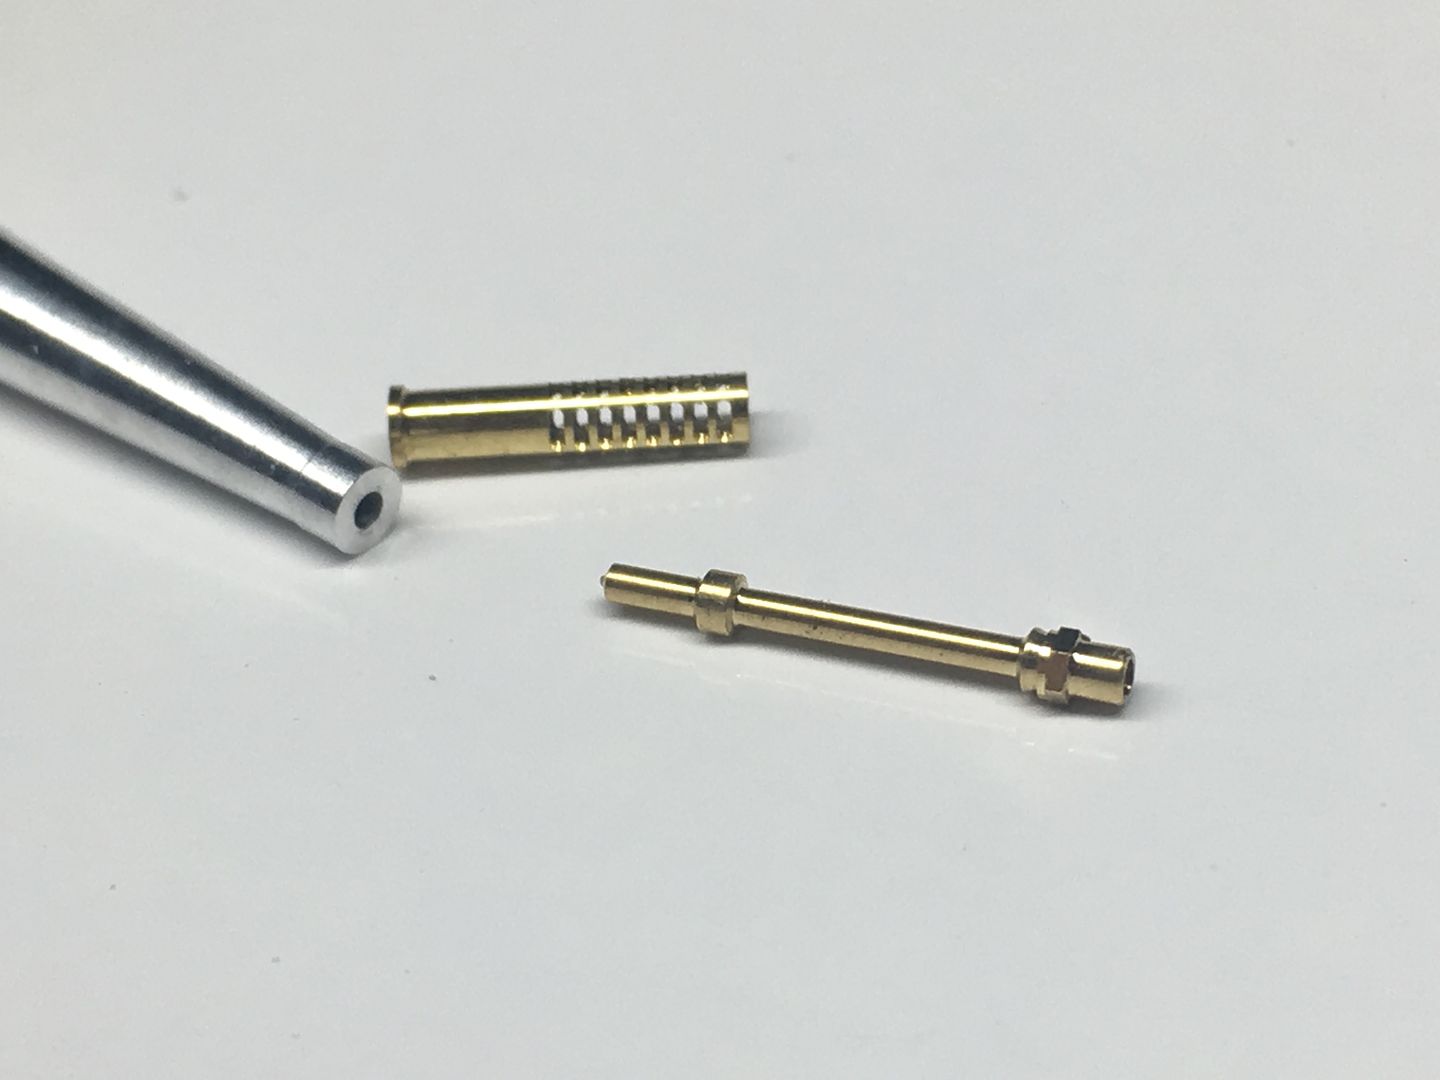
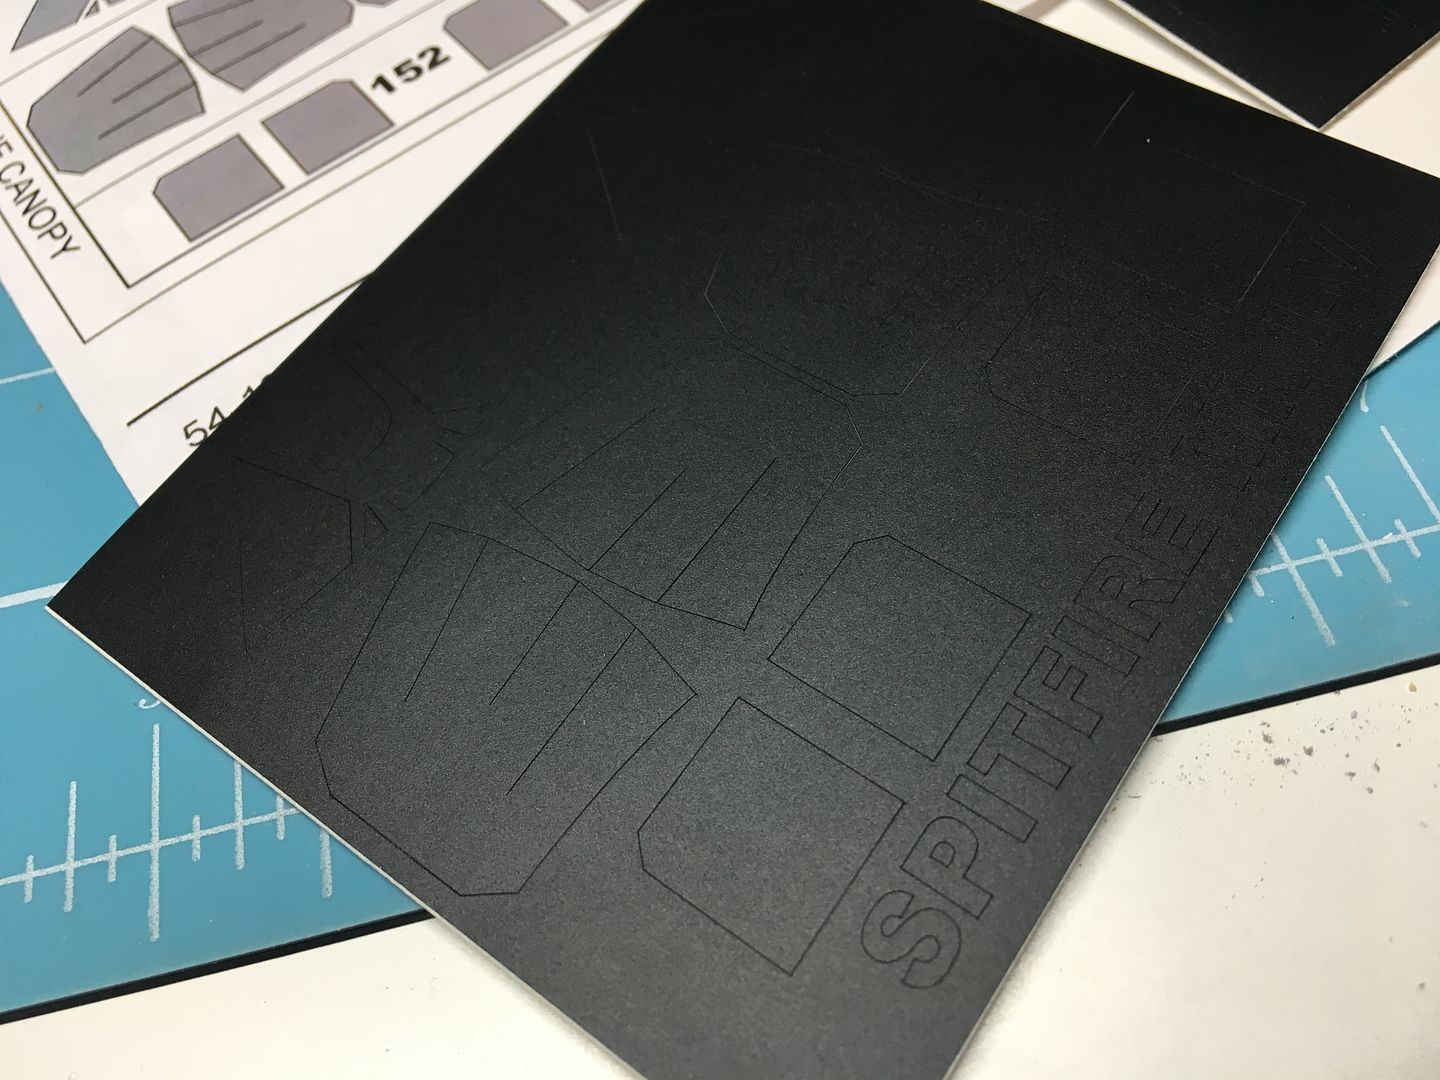
I had bought a few detail parts...cannons (nice) seatbelts (now not needed, or at least not all of the parts) and cockpit canopy masks...
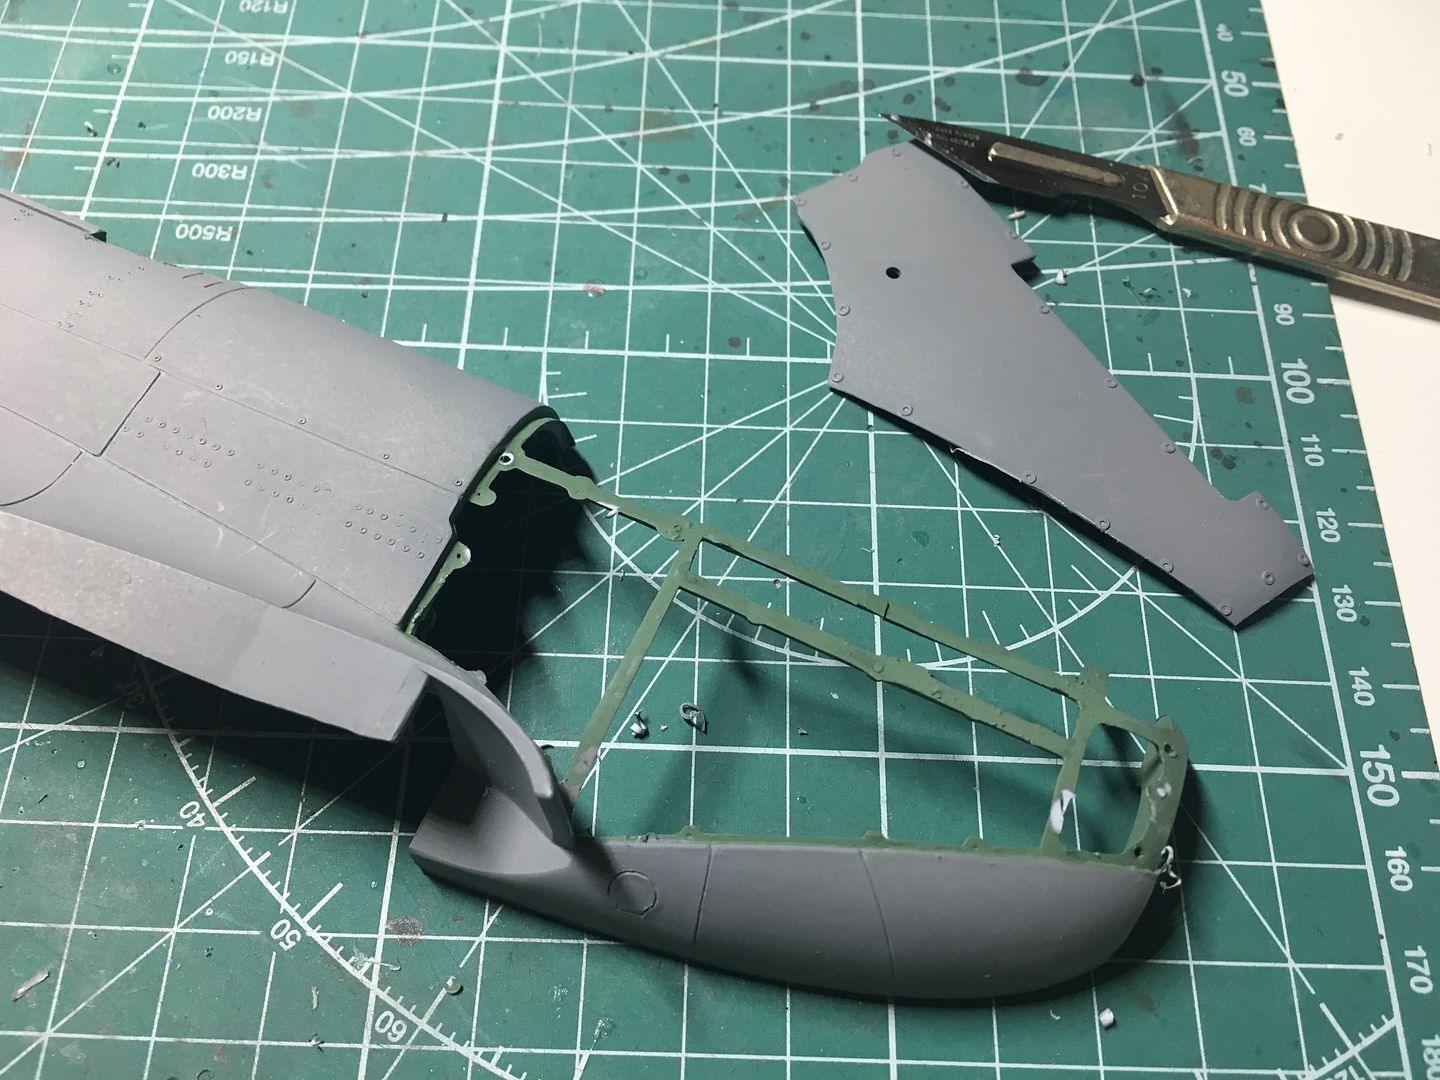
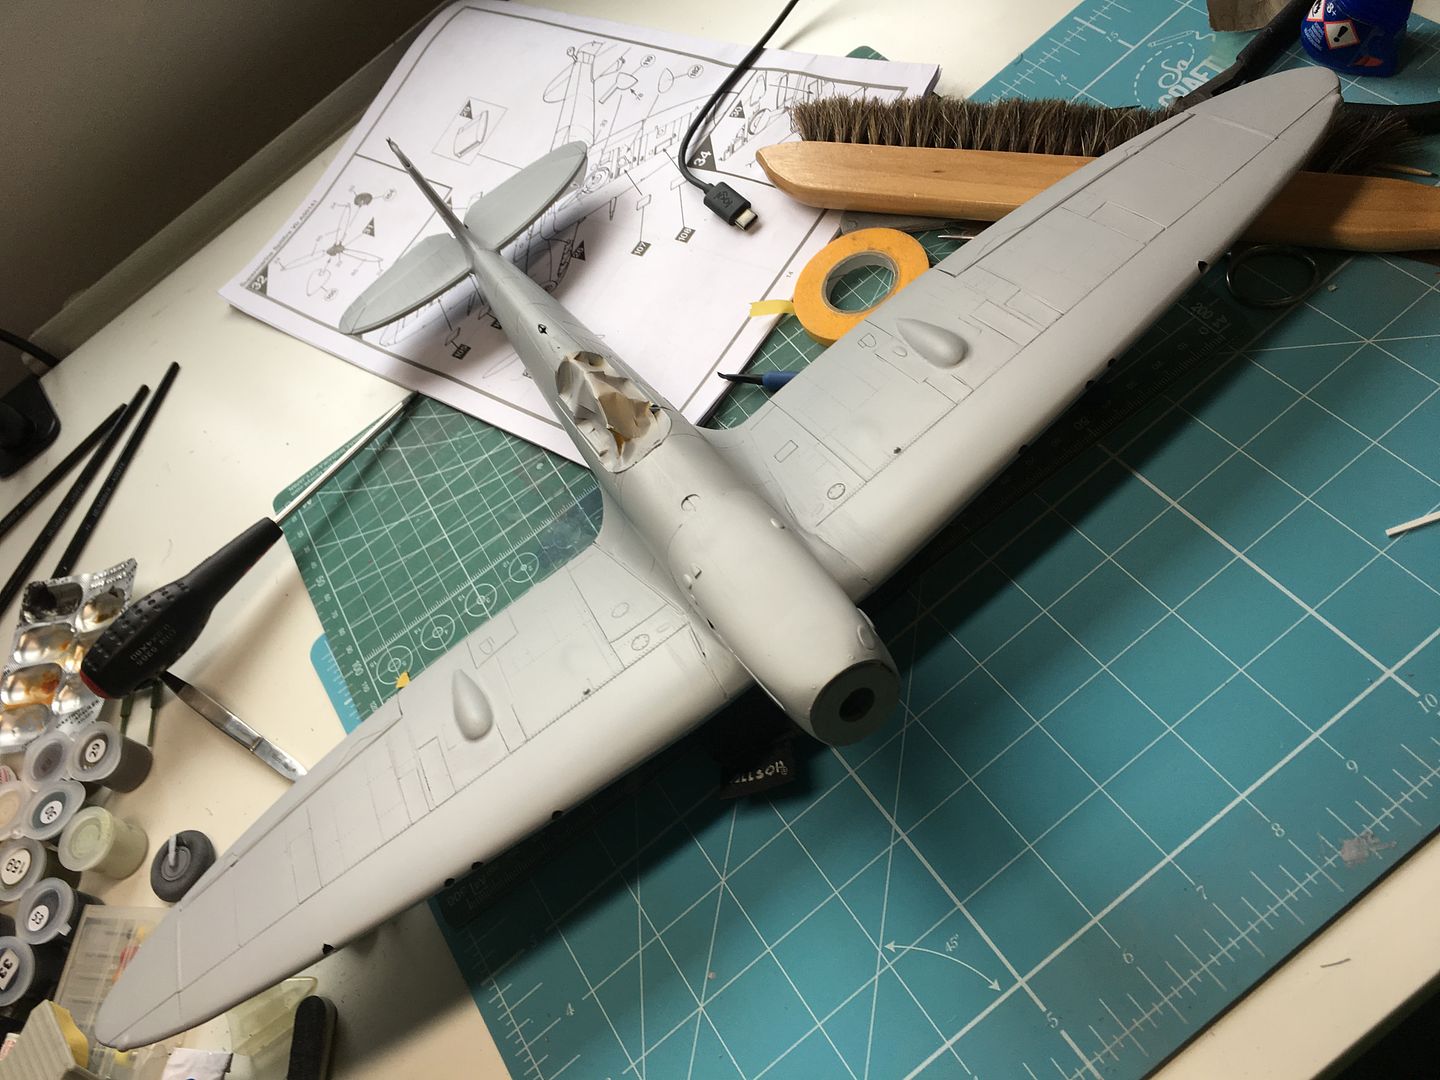
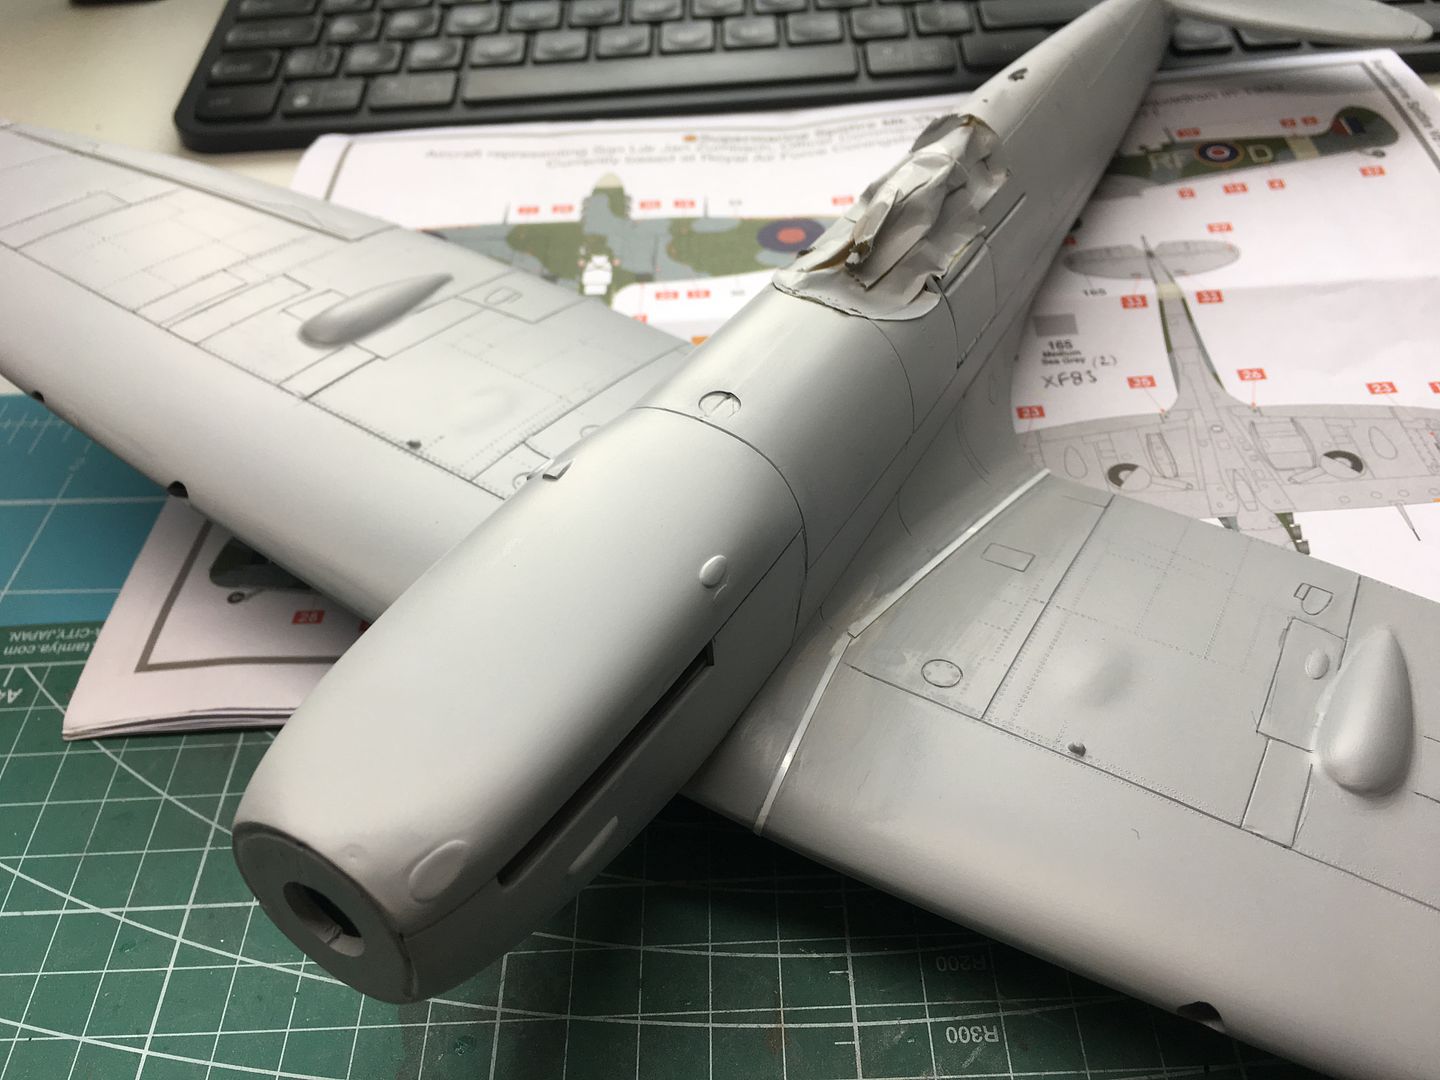
I started to assemble the 'big' bits, knowing that the real work was going to be the filling, sanding and finishing - this is not a complicated kit to assemble in terms of part numbers of complexity...
Nothing glued here obviously...
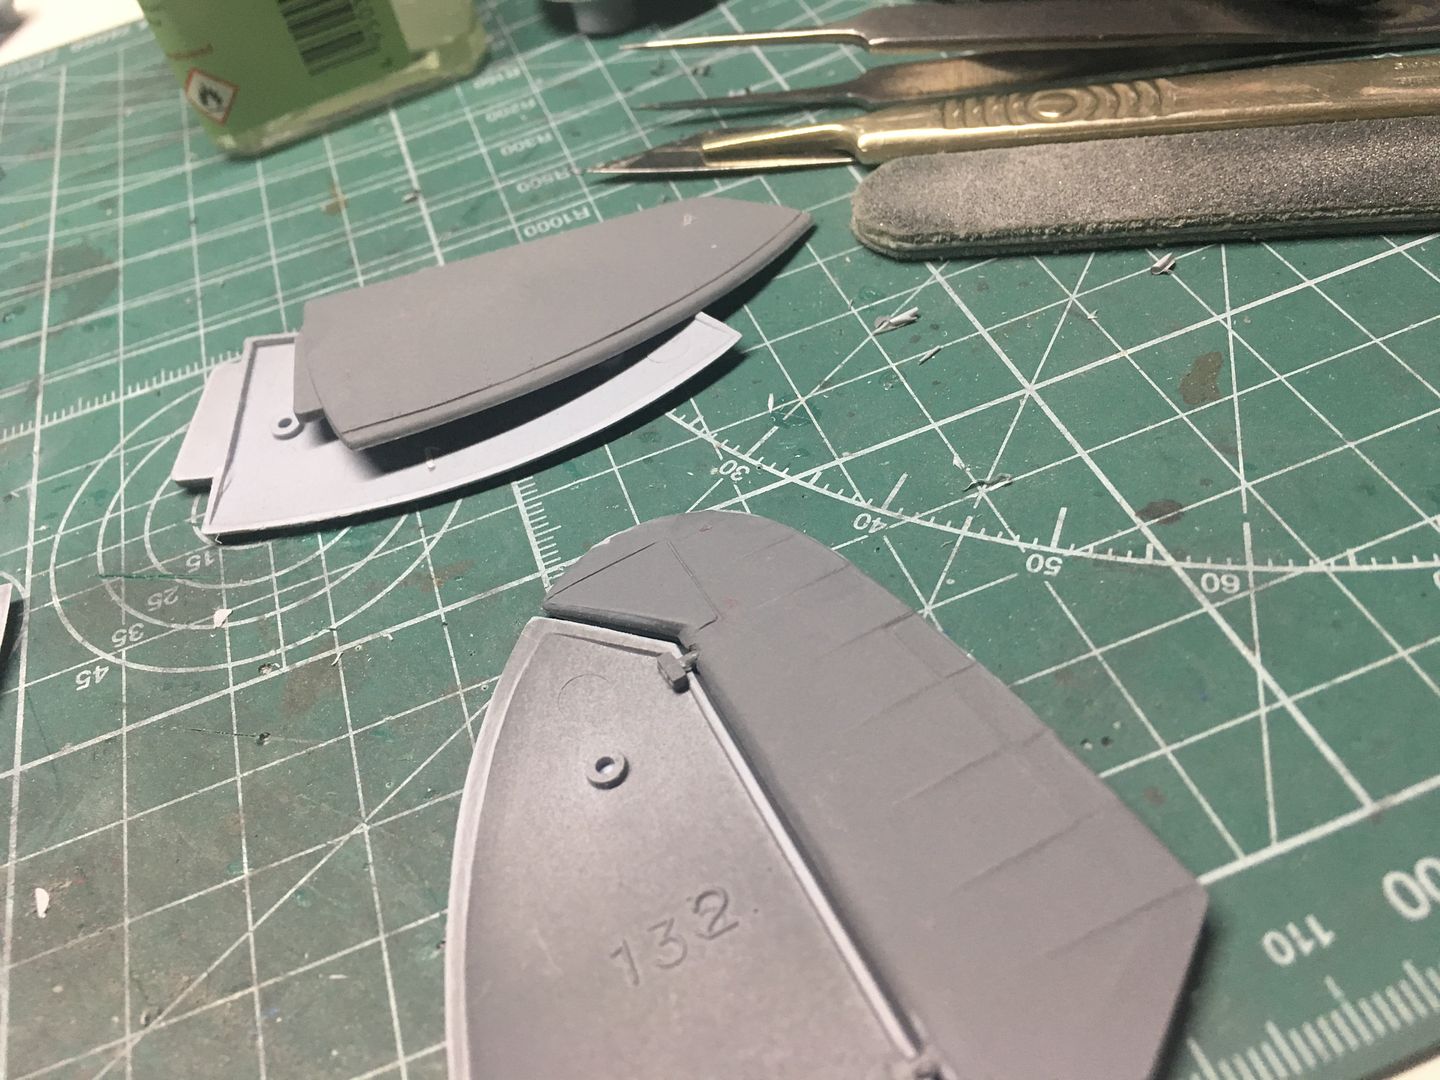
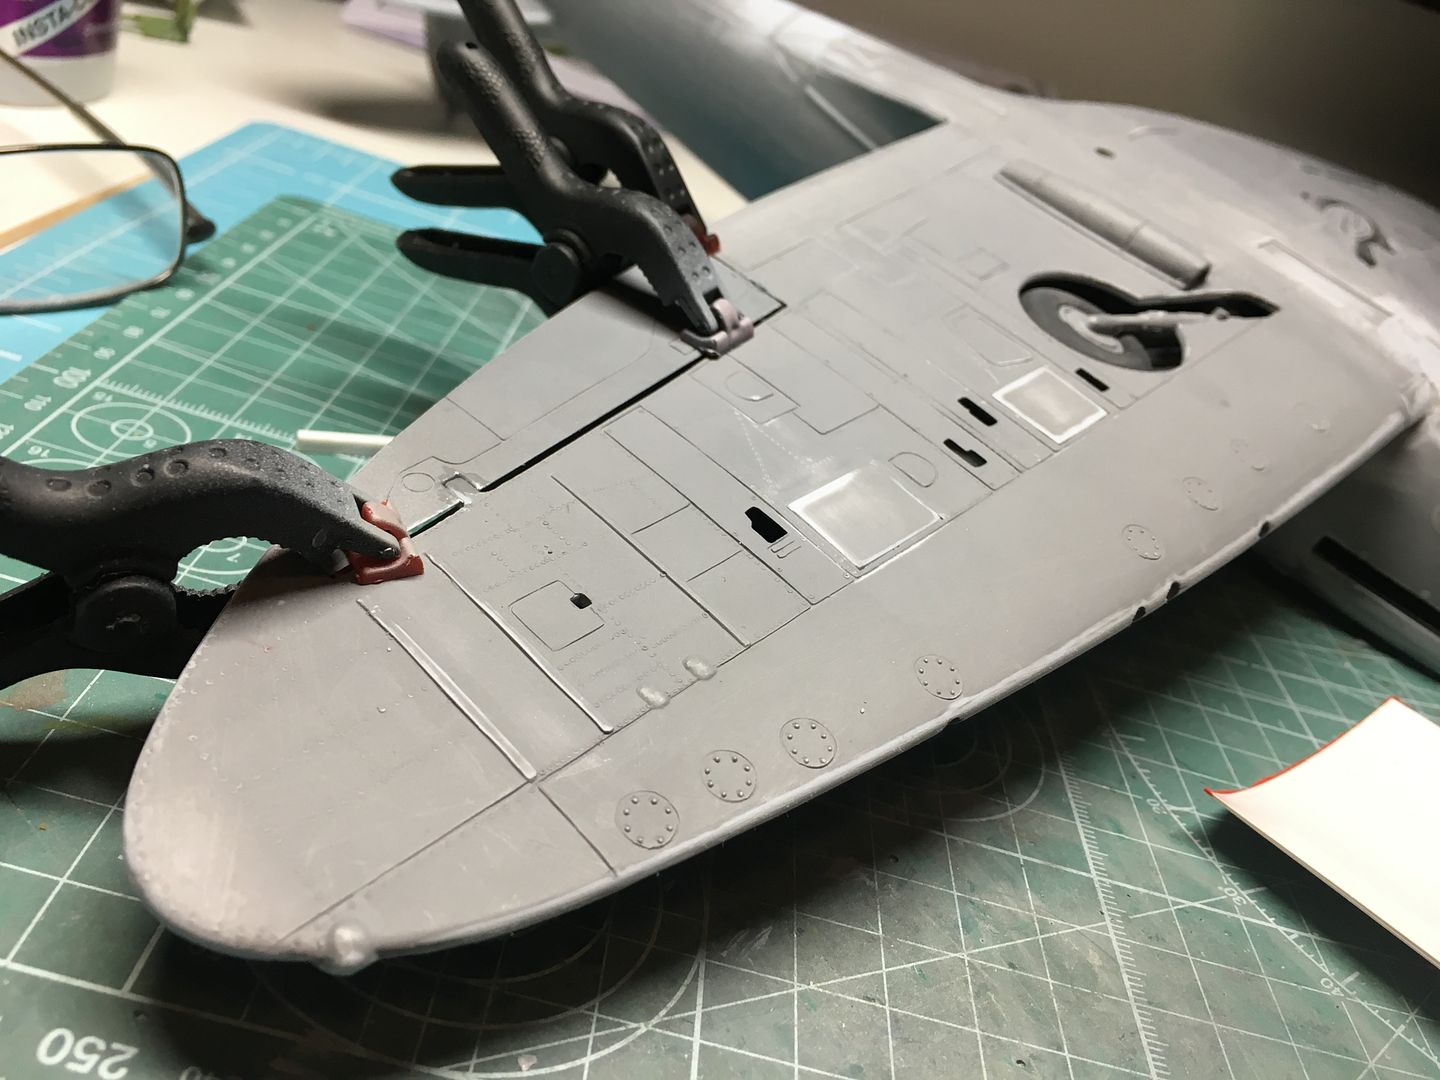
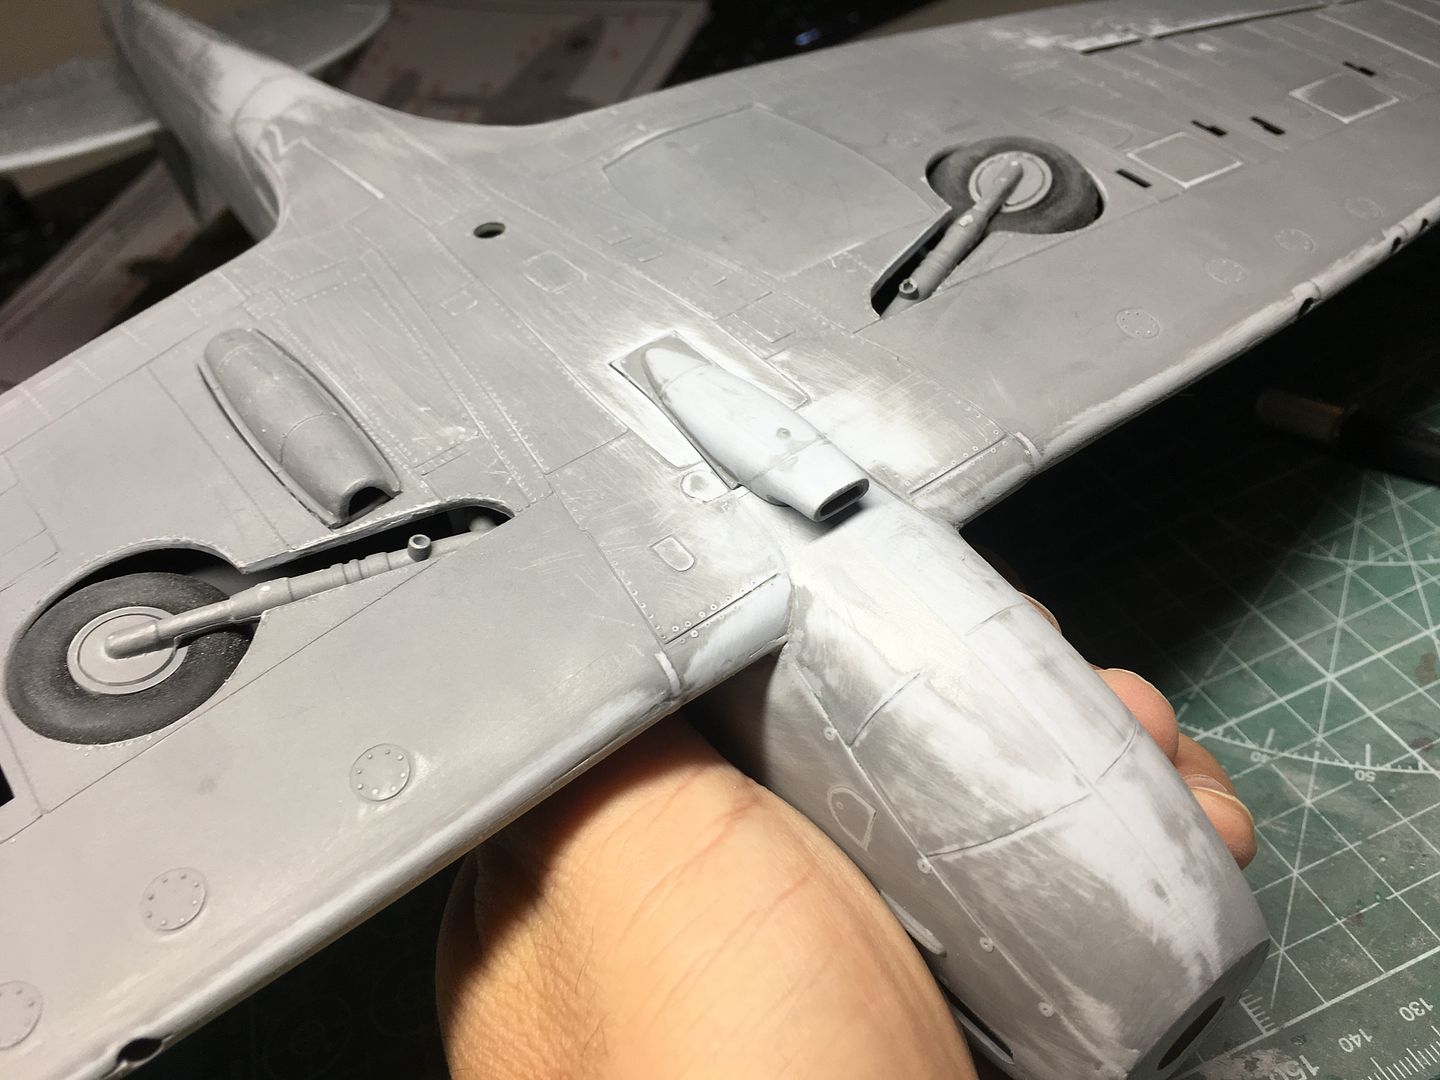
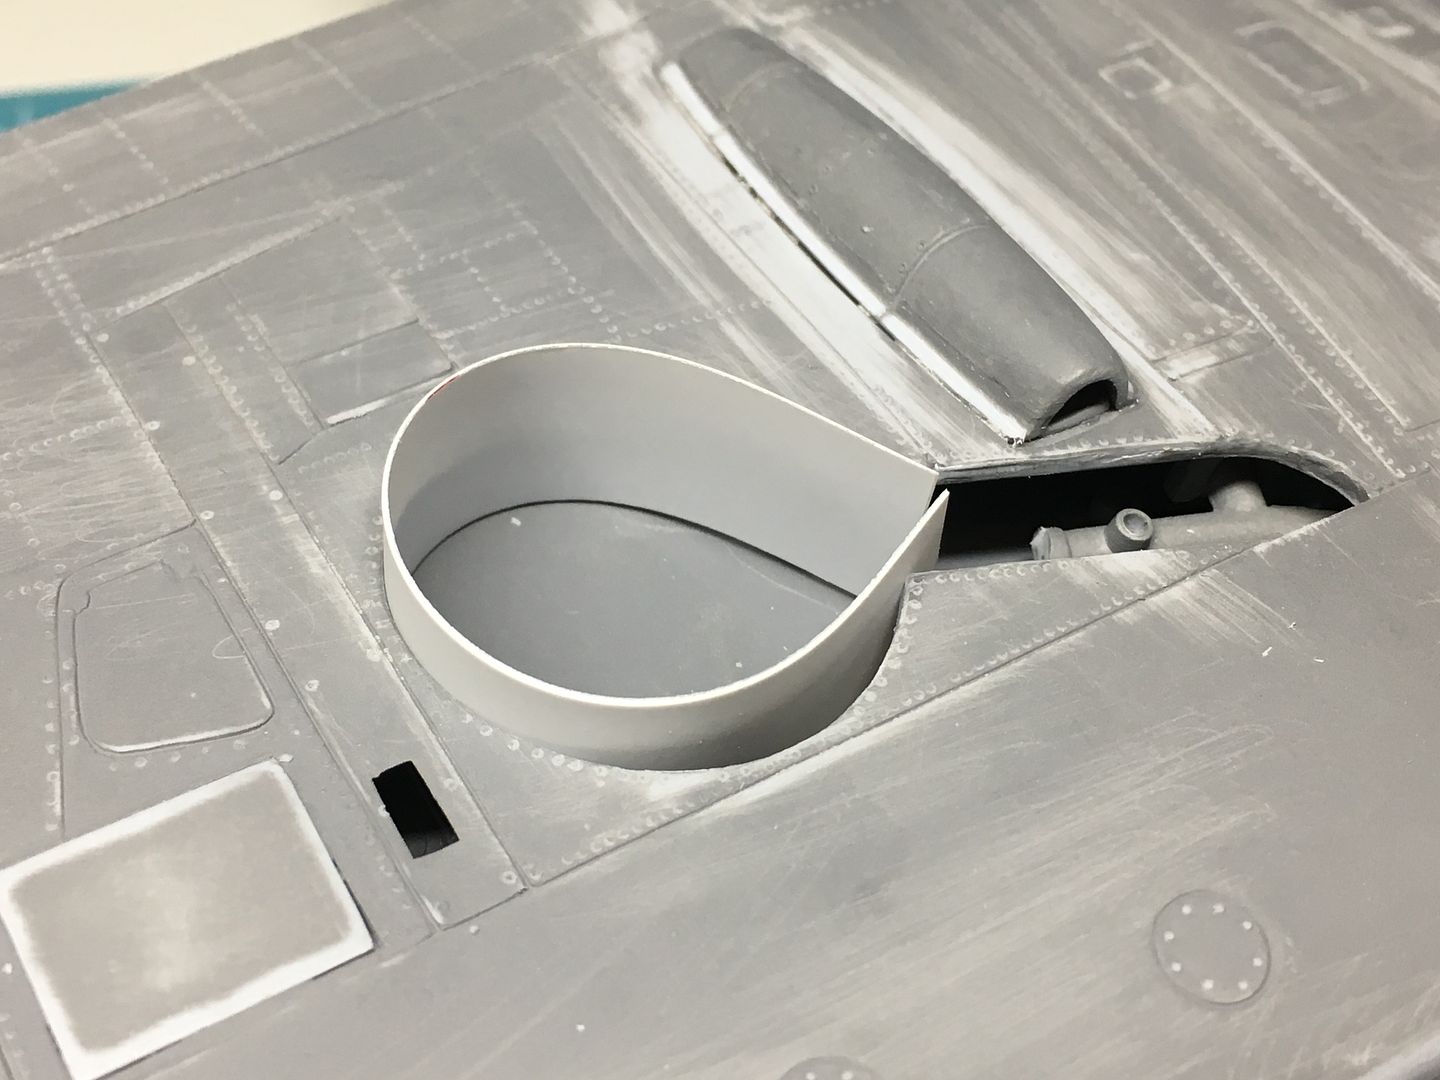
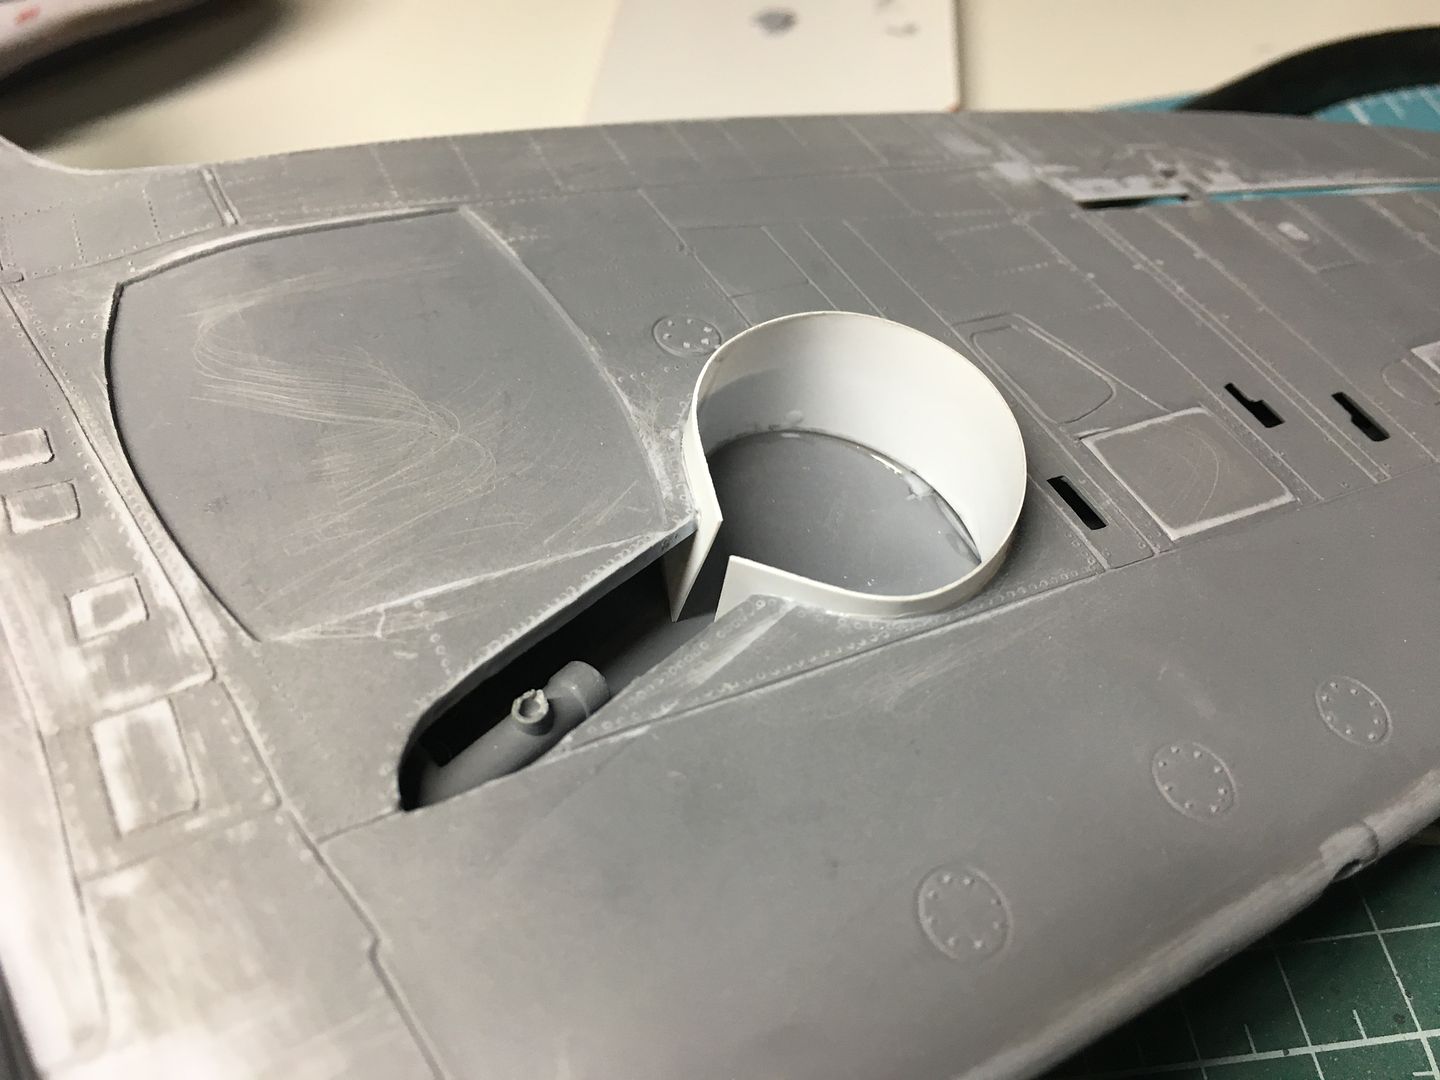
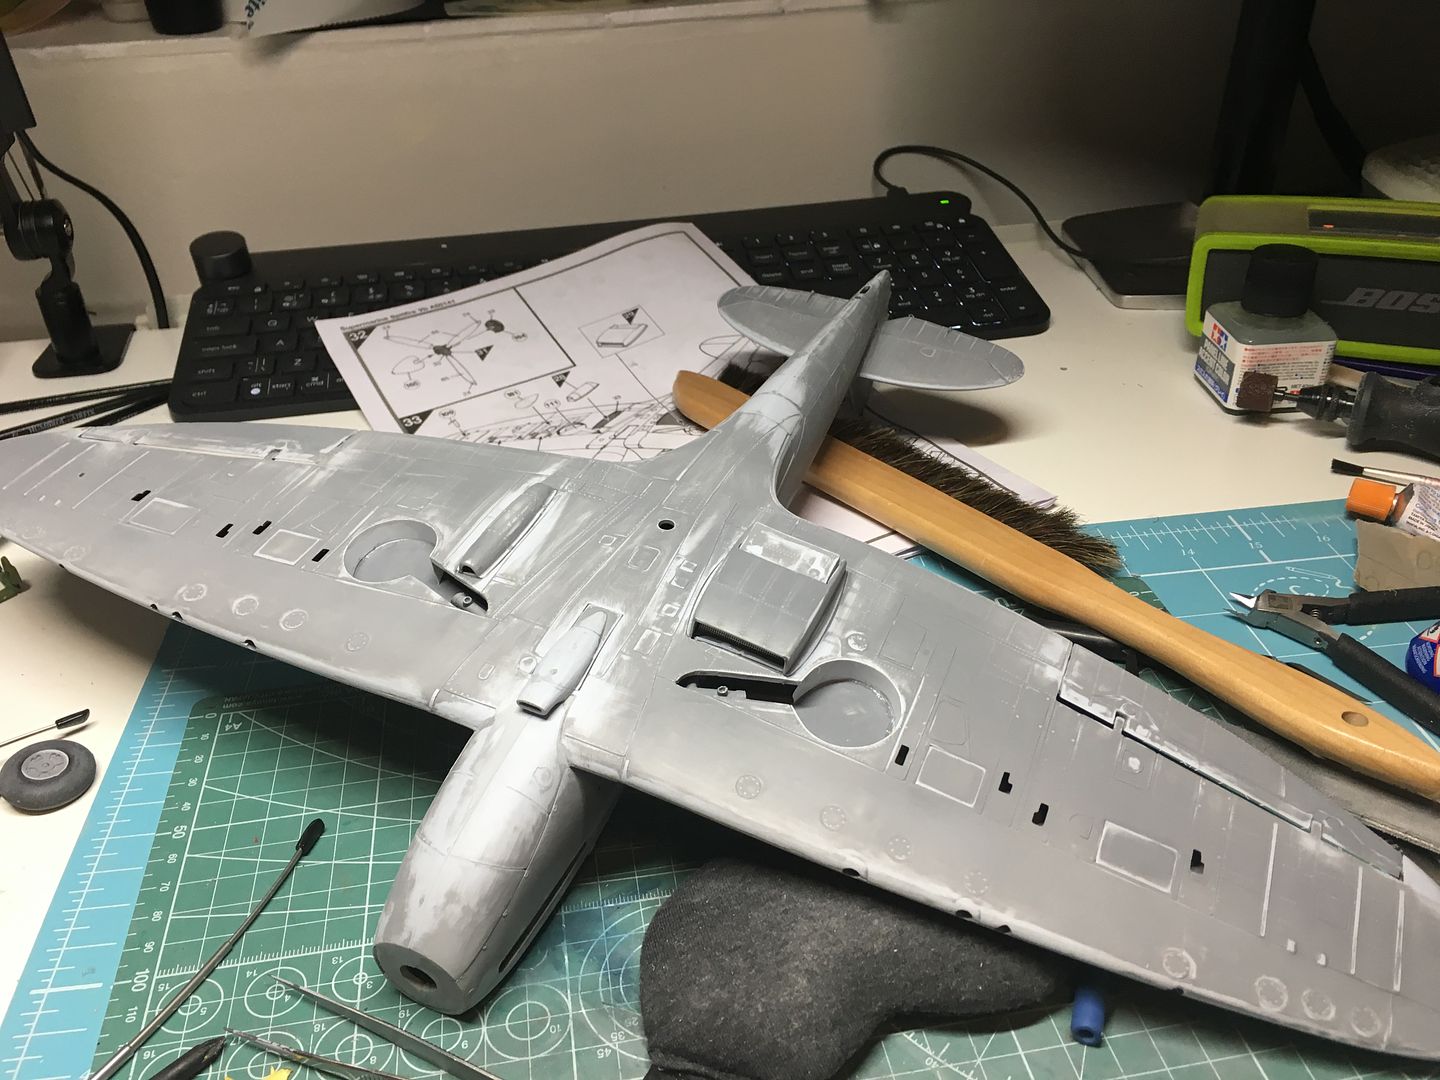
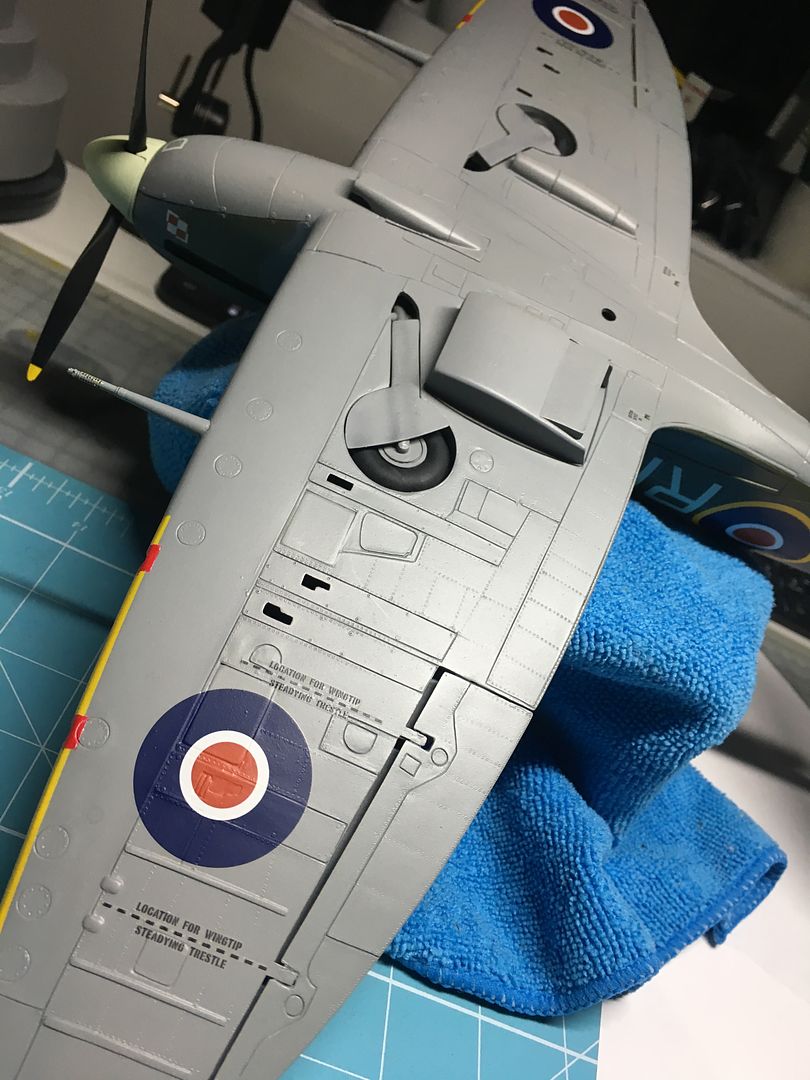
The wings have lots of panels to fit - used to show the guns inside the wing if required...they went in ok - with some fettling obviously...


In order to get the panels to fit over the engine, I had to cut away the back to thin them...

Could be fairly crude as unseen...
I glued a crossmember in the wing root to fix the oft-mentioned drooping wing, after joining the wing parts....

I had fixed the undercarrige in place - I'll fit the cover panels later....
That really was it for the big stuff - could now turn my attention to the cockpit area...
At this point I was going to work on the engine, so I had stripped this to work on as well - I was just going to show one side panel open - the panel fit is so bad, I was going to glue the other side shut! Now the plane is 'in flight' I can miss this step out...
I took the very small amount of 'detail' in the kit and improved it a little - as now much of it would be properly hidden I did not do too much of this - at this point!
....I cut the end off and replaced with wire - if this had been visible (it wont be) I would have rebuilt in its entirety - but I want to actually finish this model!
I had bought a few detail parts...cannons (nice) seatbelts (now not needed, or at least not all of the parts) and cockpit canopy masks...
I started to assemble the 'big' bits, knowing that the real work was going to be the filling, sanding and finishing - this is not a complicated kit to assemble in terms of part numbers of complexity...
Nothing glued here obviously...
The wings have lots of panels to fit - used to show the guns inside the wing if required...they went in ok - with some fettling obviously...
In order to get the panels to fit over the engine, I had to cut away the back to thin them...
Could be fairly crude as unseen...
I glued a crossmember in the wing root to fix the oft-mentioned drooping wing, after joining the wing parts....
I had fixed the undercarrige in place - I'll fit the cover panels later....
That really was it for the big stuff - could now turn my attention to the cockpit area...
CanAm said:
Caterhamnut loves deadlines, and the whistling noise they make as they go flying past. 
yeah - fair enough - but you know, life....Trying to change that now. Have the gear (still no idea) and tech is moving on so I can create some things...really want to get a 3D printer - but a resin one - so I can make some things like seats, wheels etc...
Anyway - onwards....
So after my first fleeting trip to Telford, I'm back and cracking on...I'd done the next bit on Thursday, but had not posted....
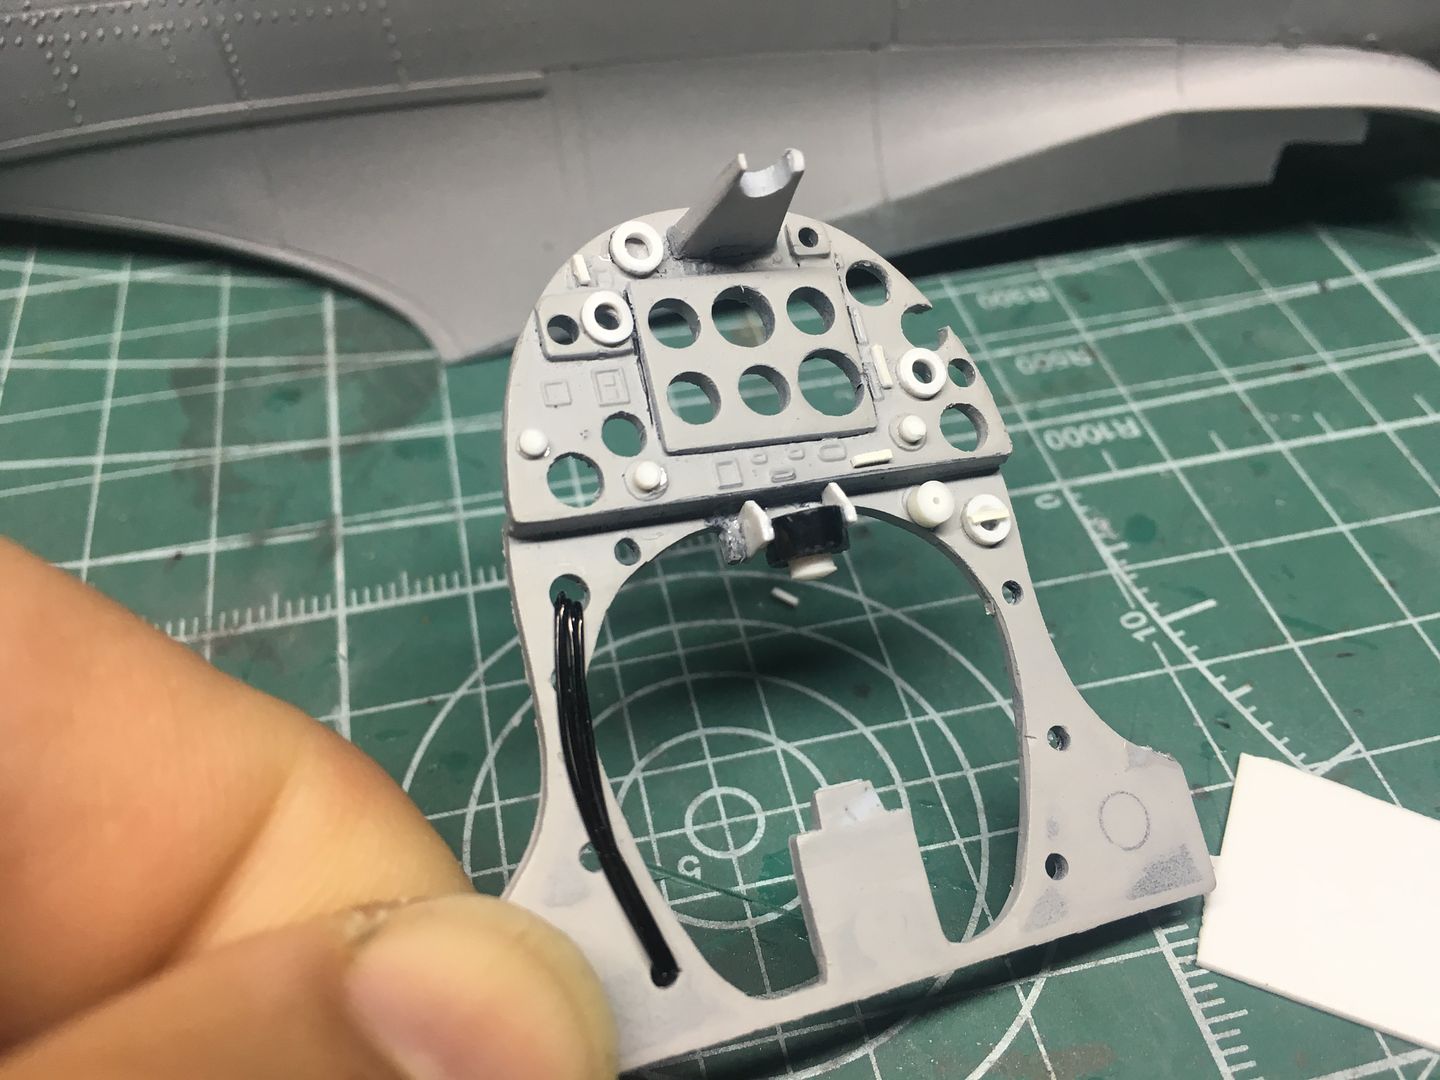
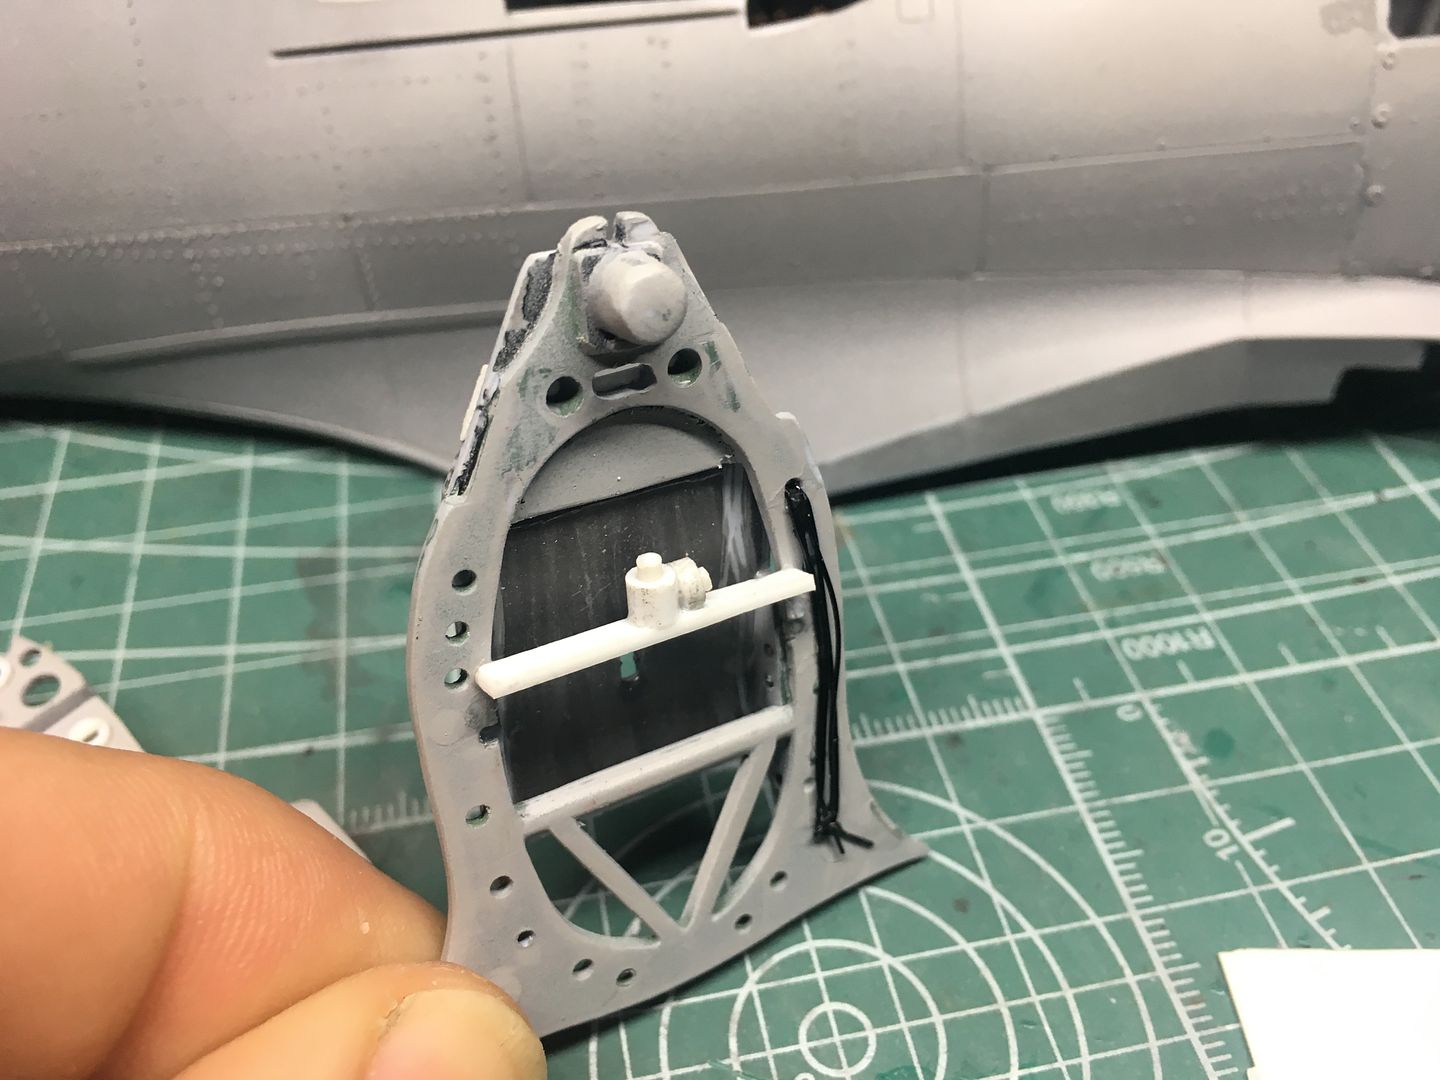
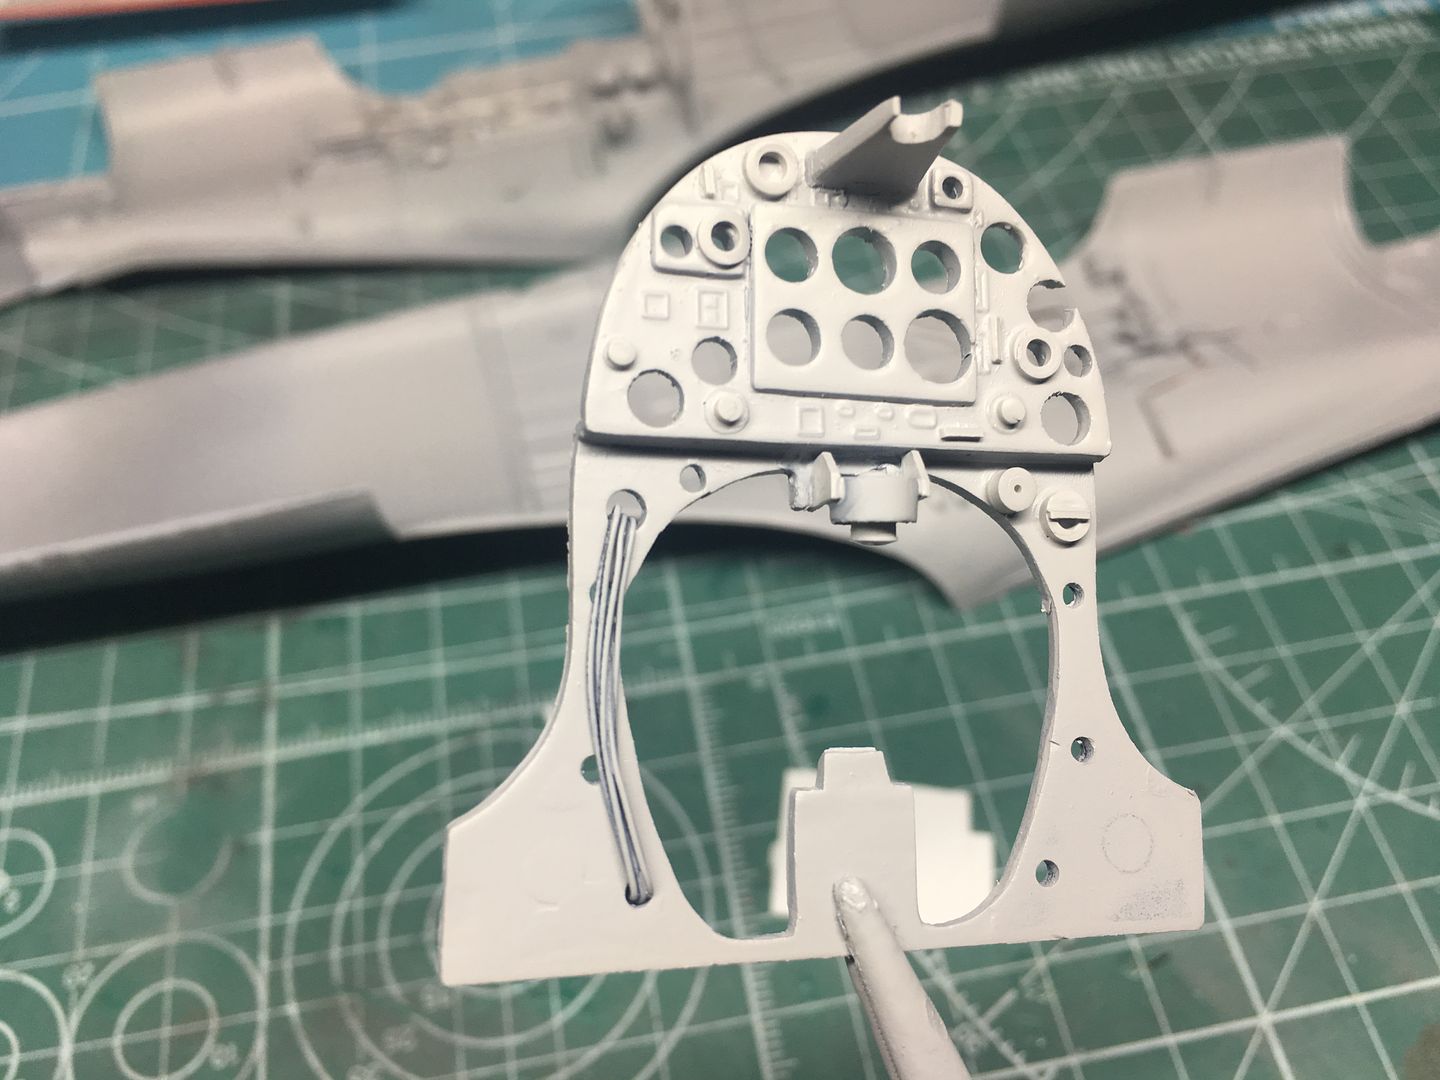
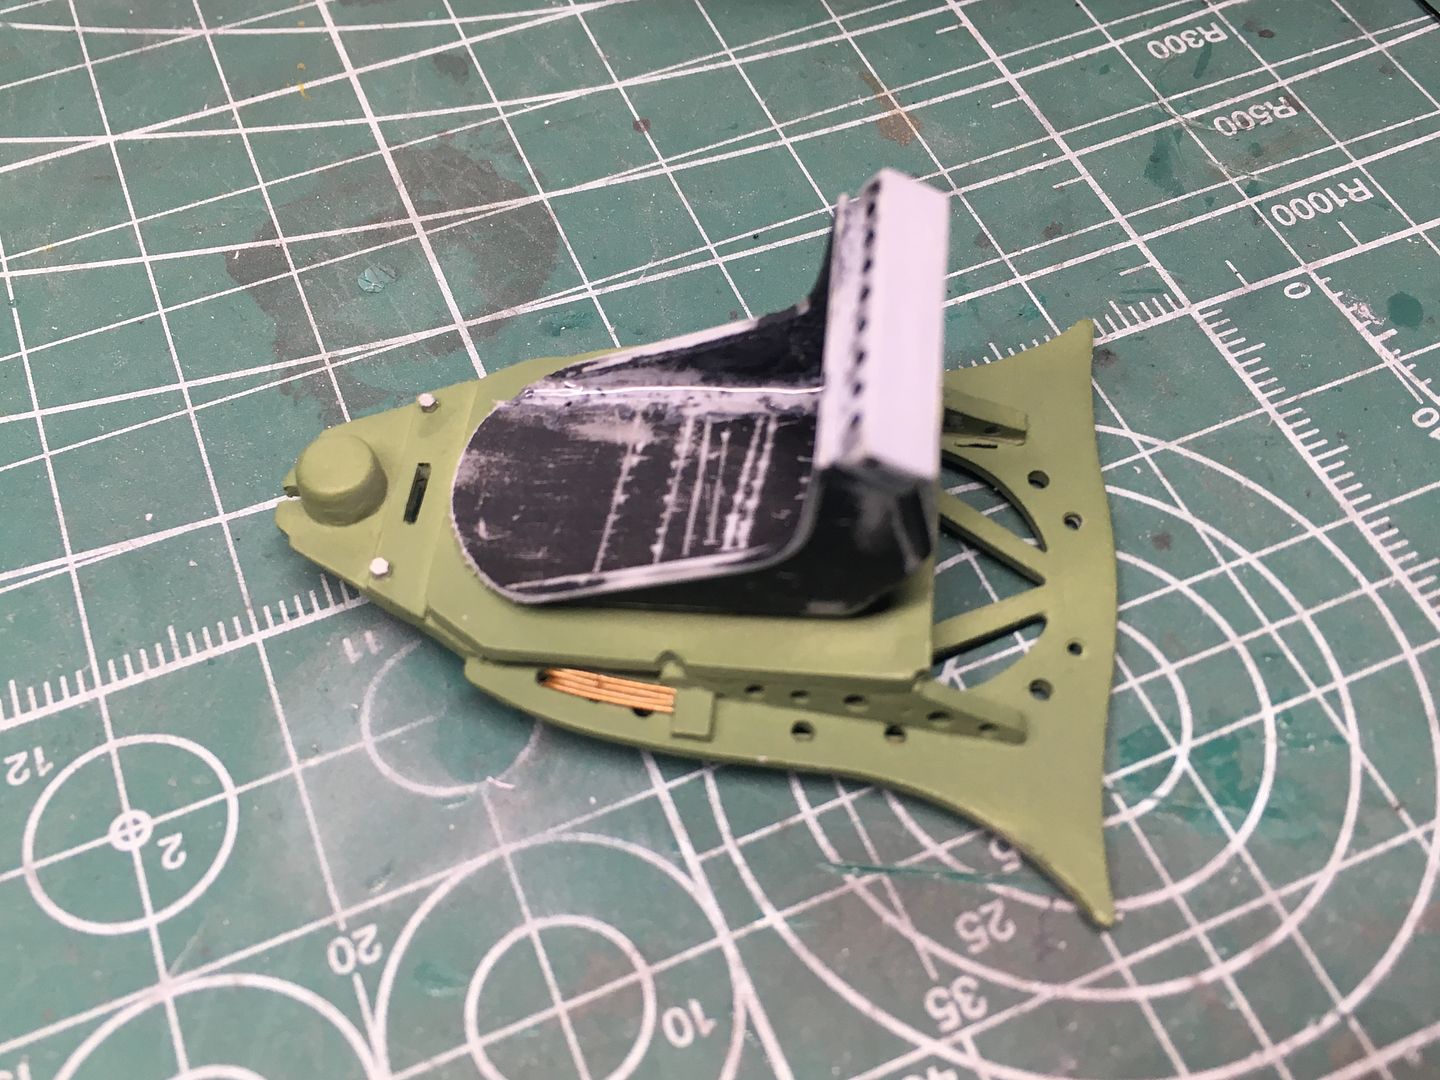
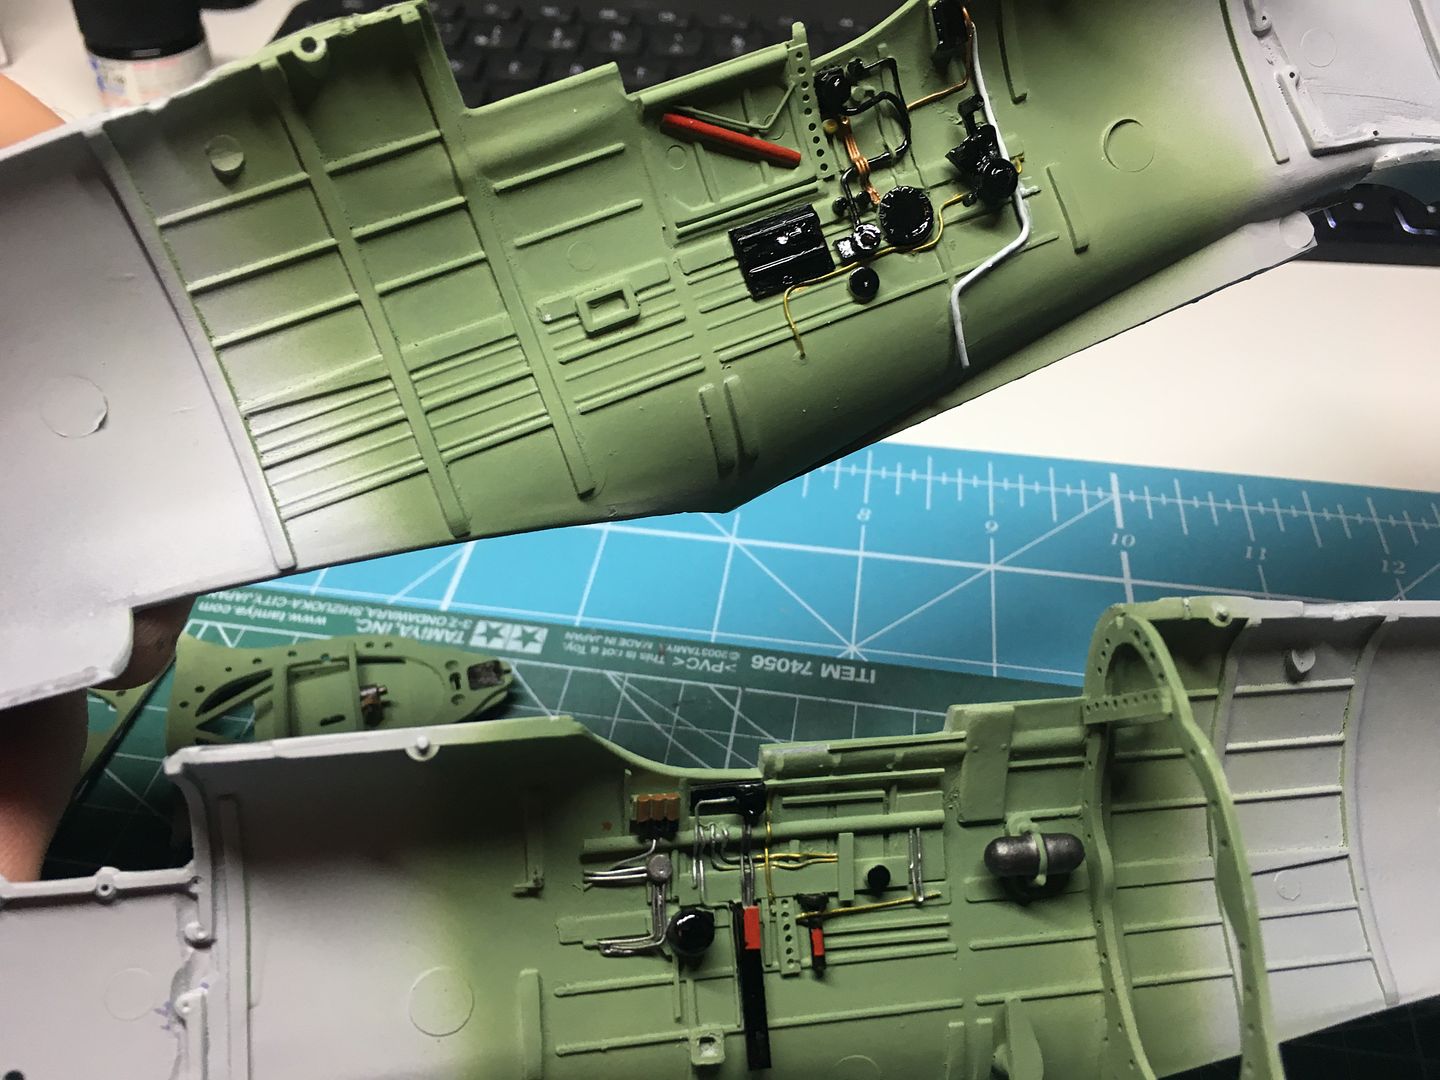
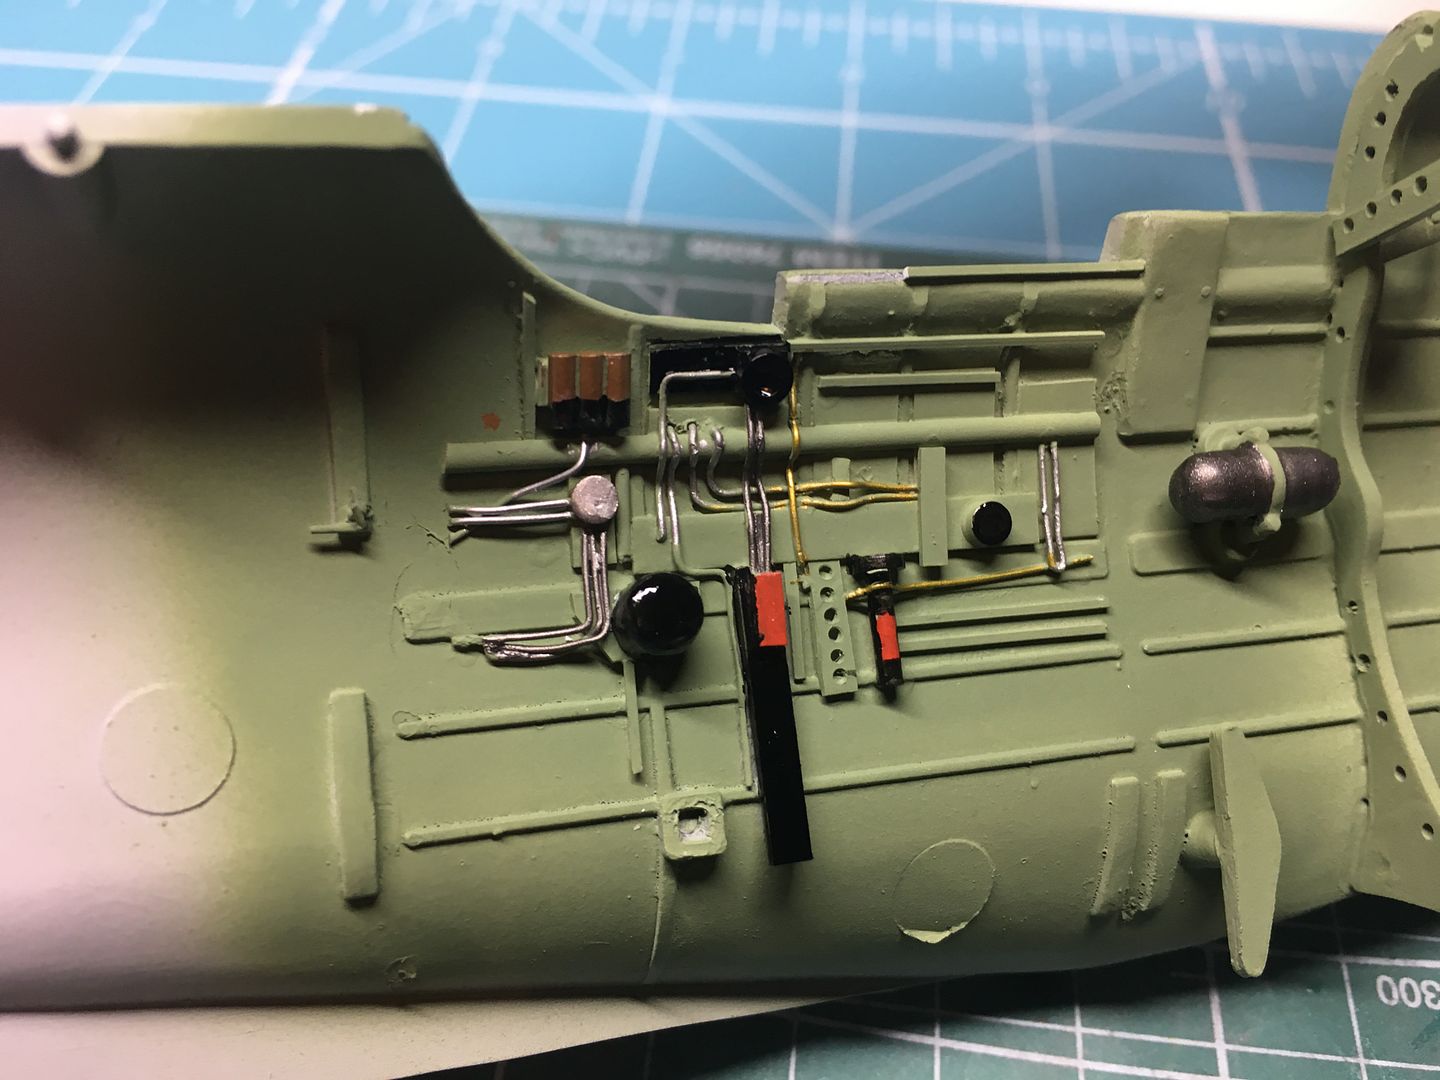
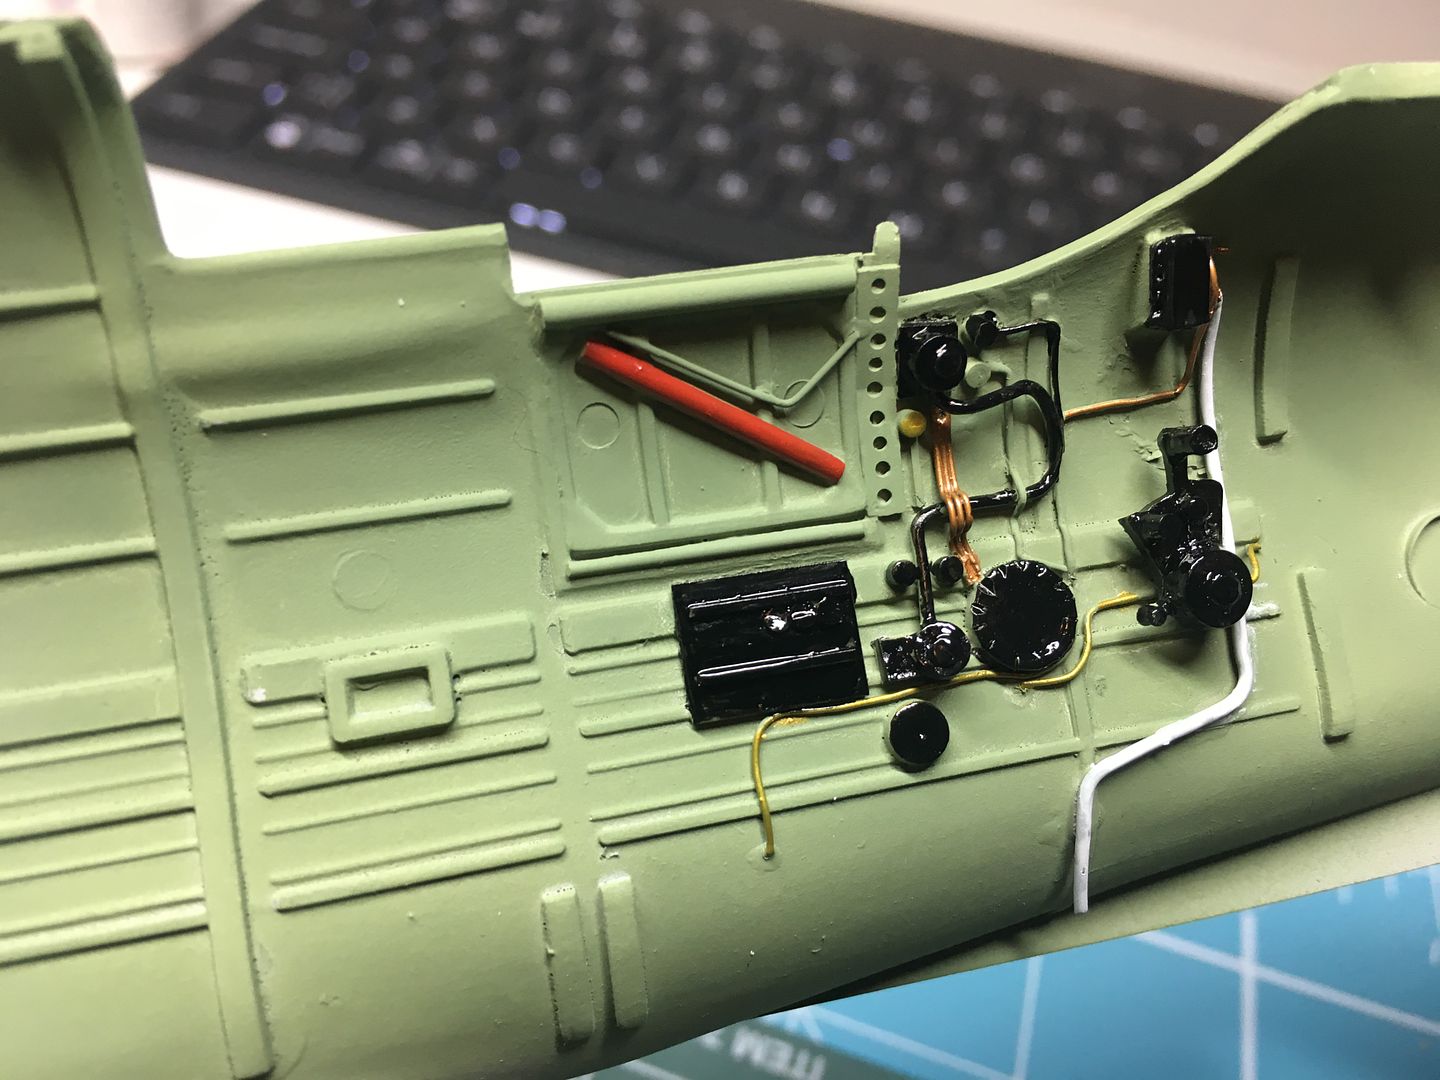
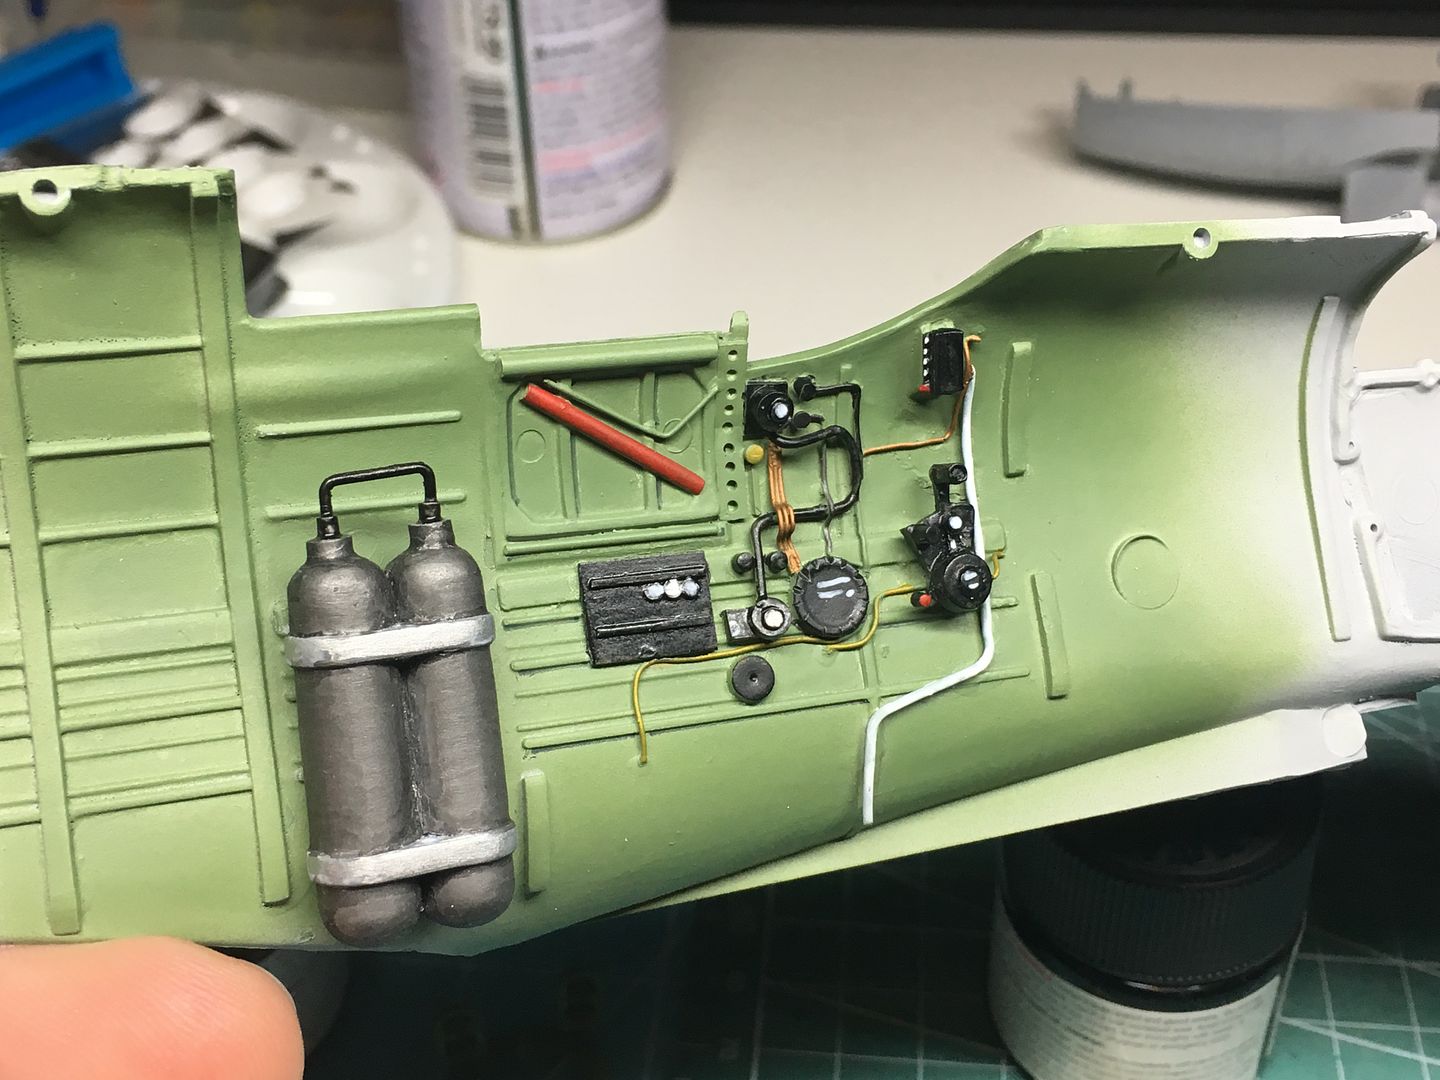
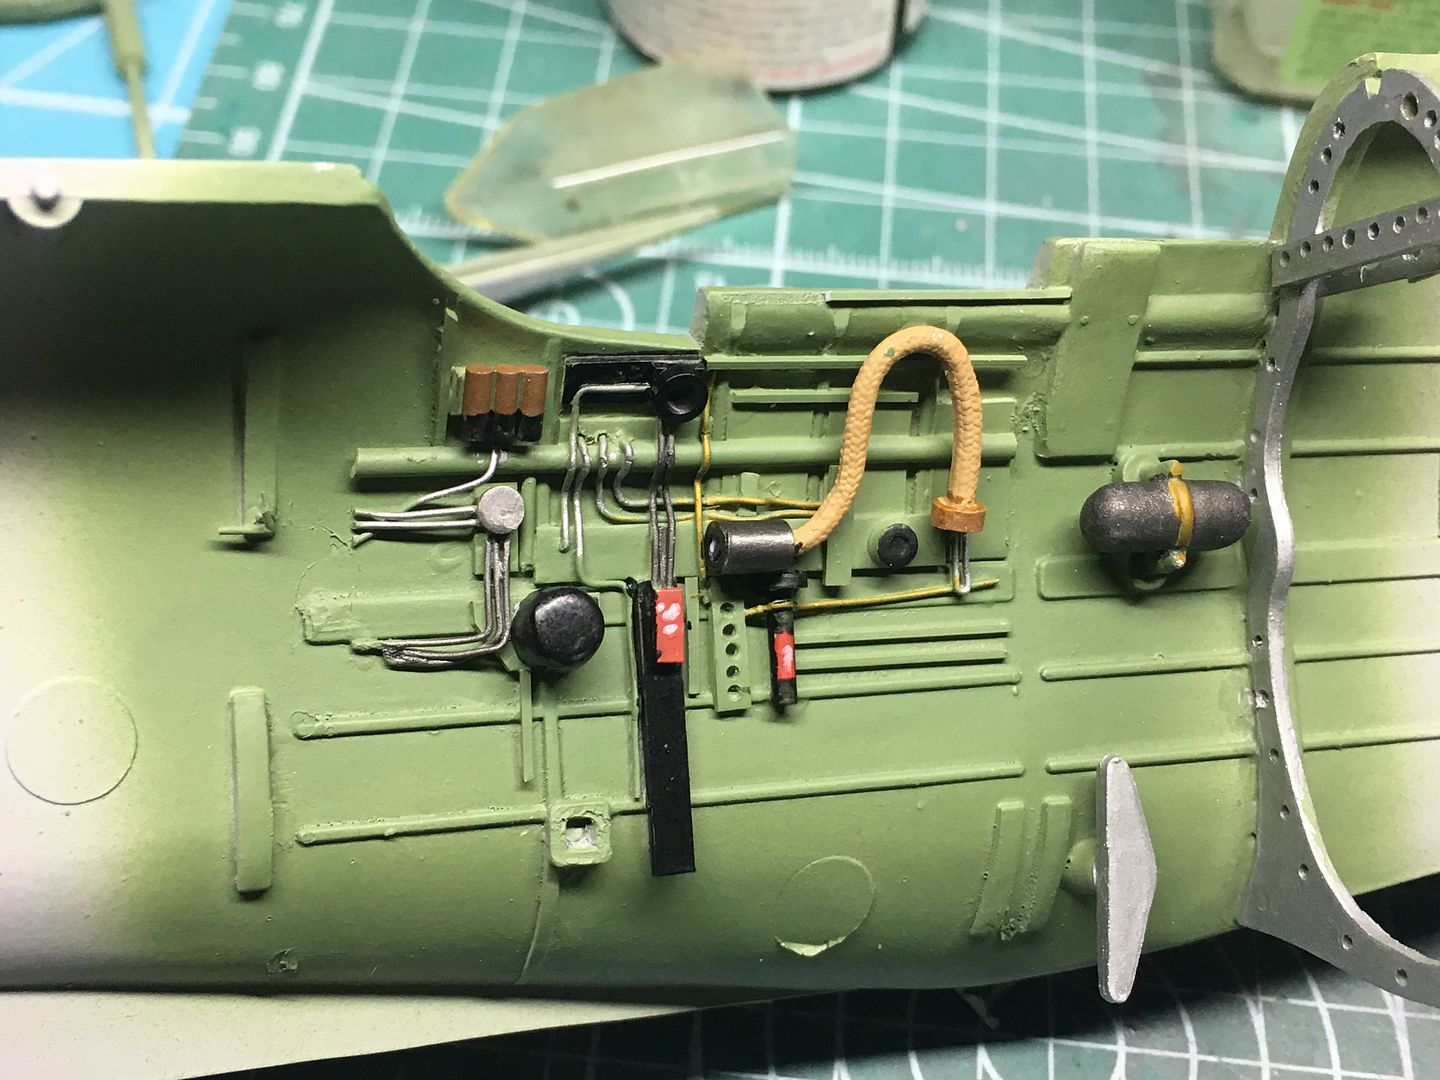
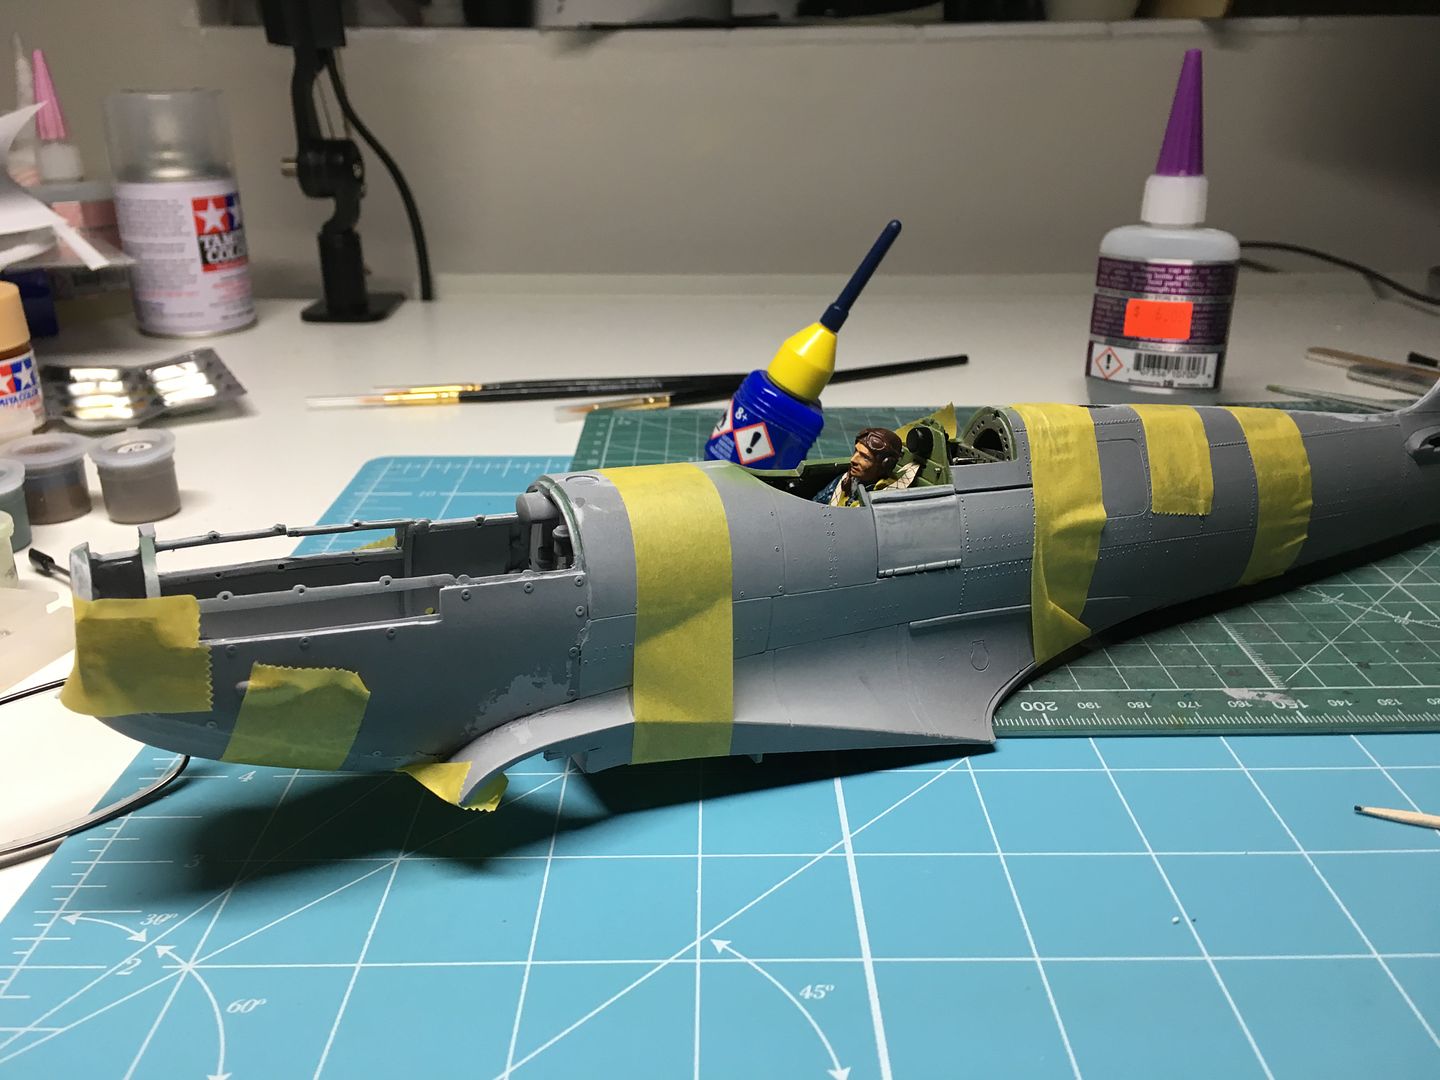
I was going to add some detail to the cockpit - only really what might be visible through the canopy - but the pilot hides almost everything anyway - still wanted to add details to the fuselage skins - I scratch built some bits to add to the - 5 - parts in the kit
Again - not going to perfect accuracy - just an idea of stuff going on....
Level of kit detail:
Started to add bits and bobs...
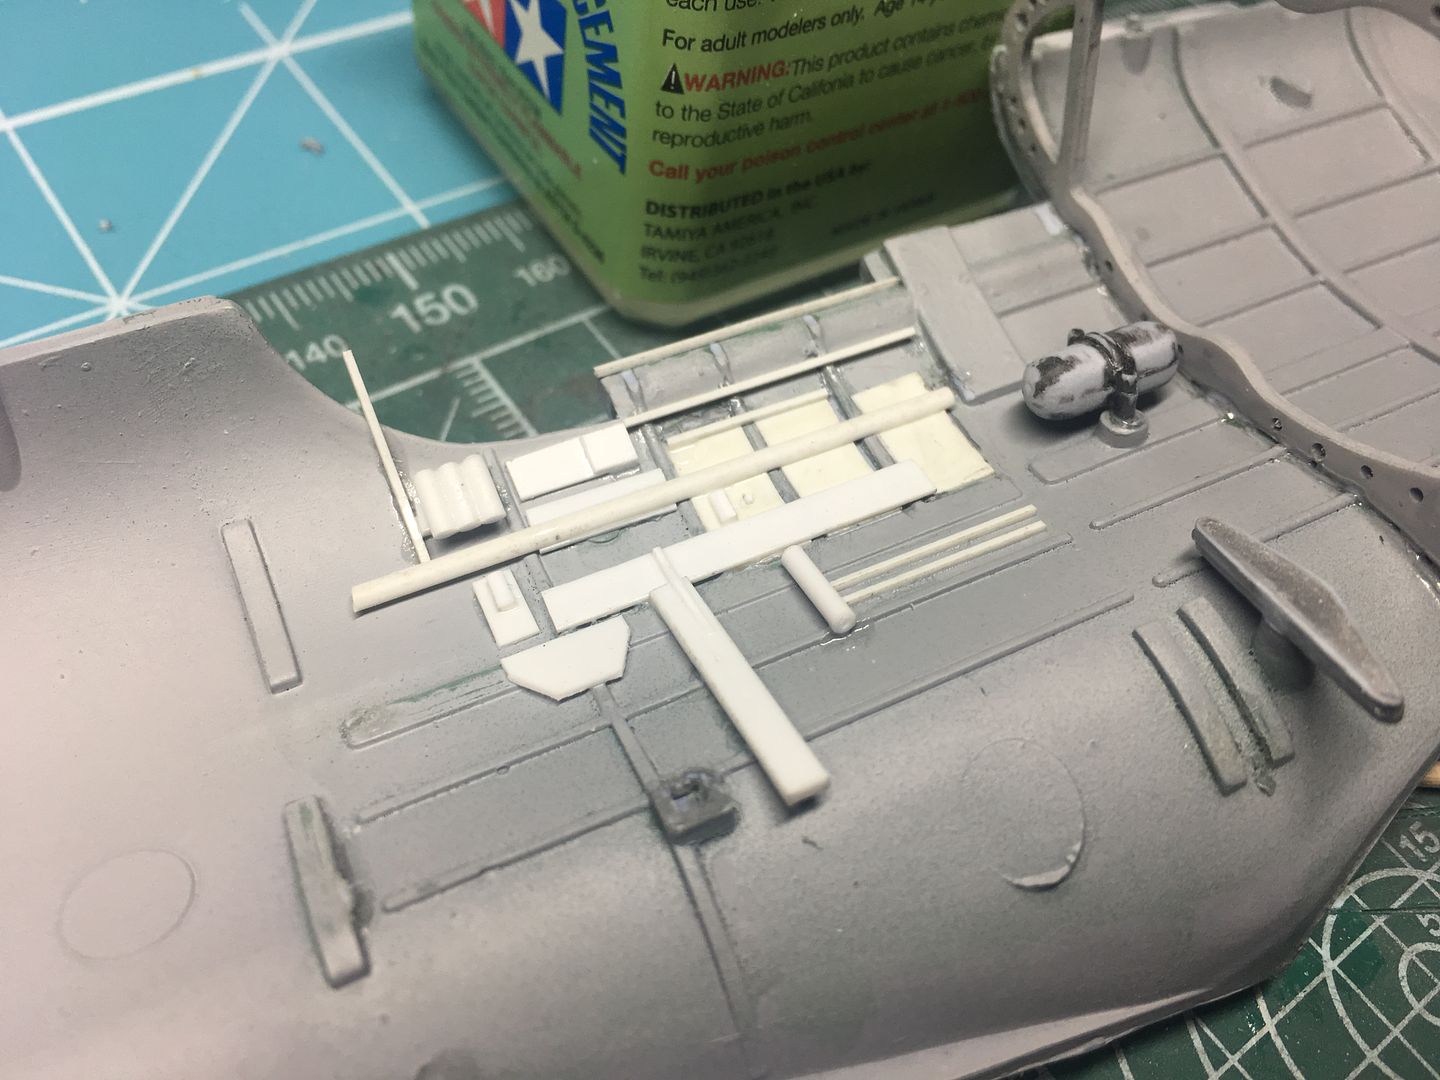


What you might actually be able to see!!


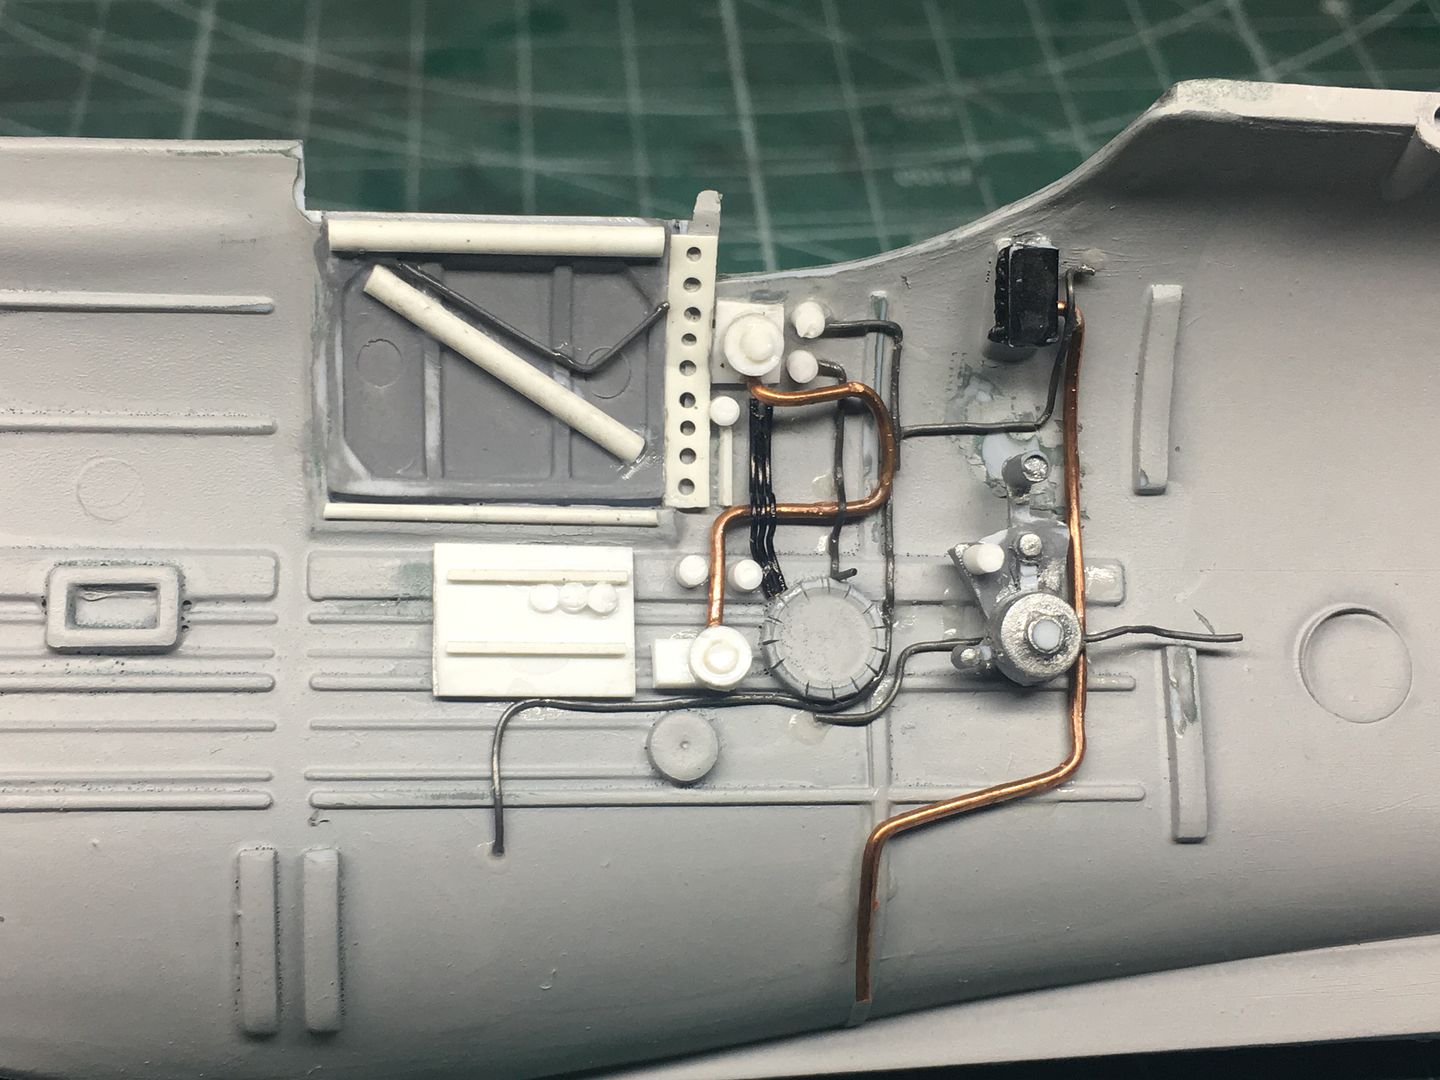
Also added detail to the bulkheads:
Lidl purchase!! £3 ish
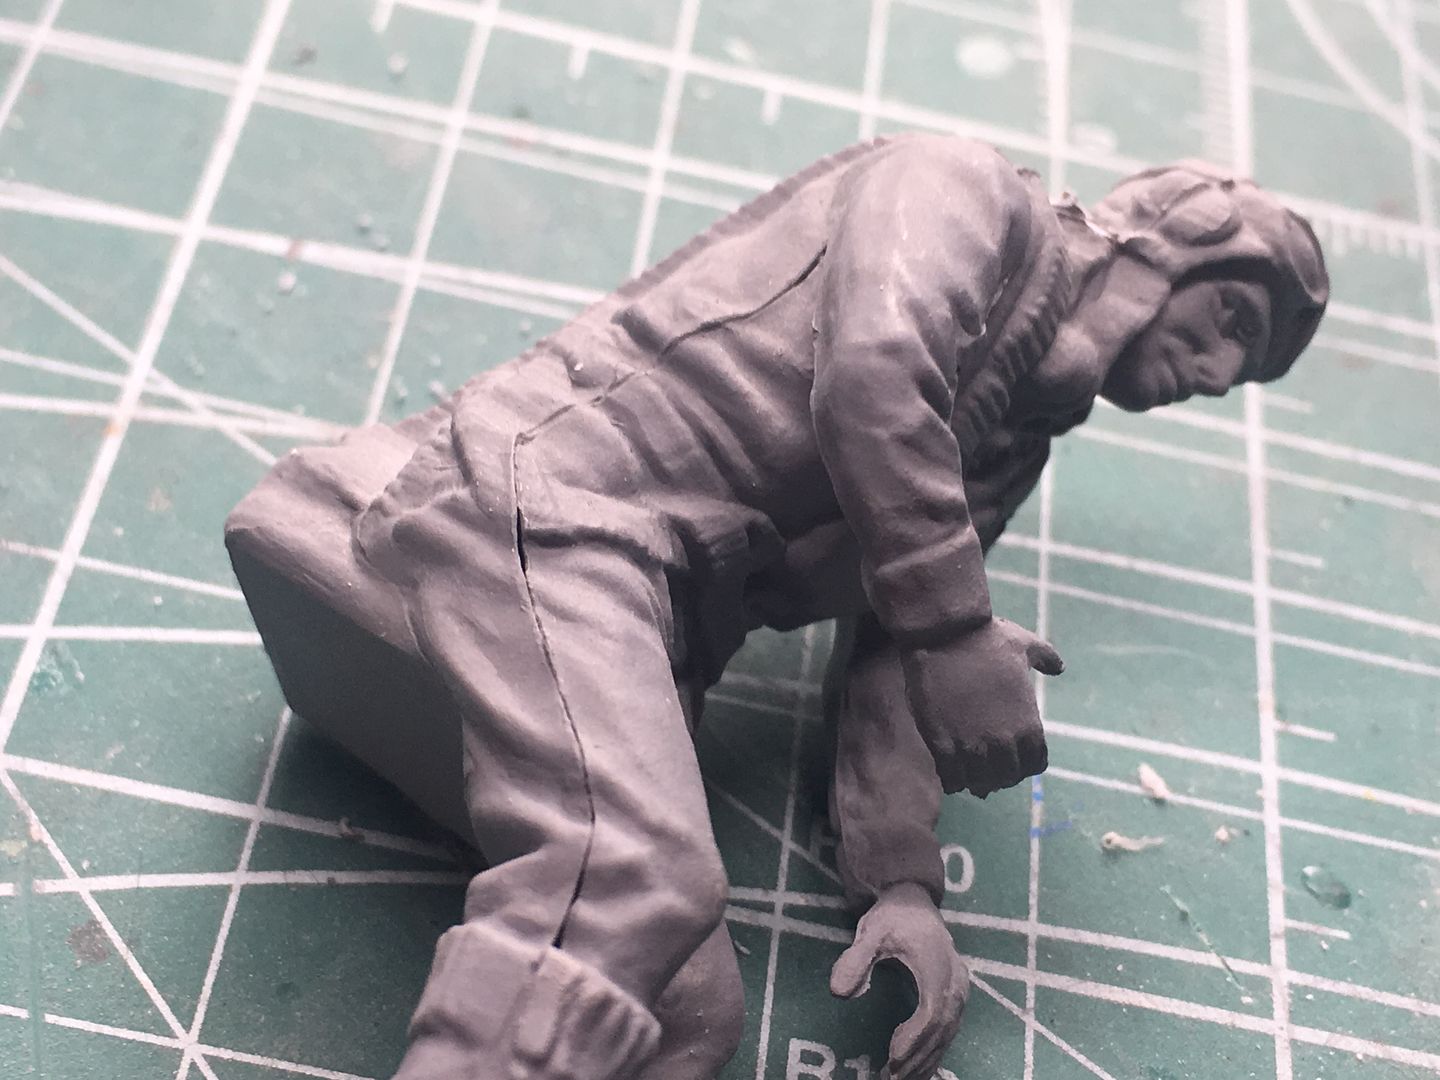
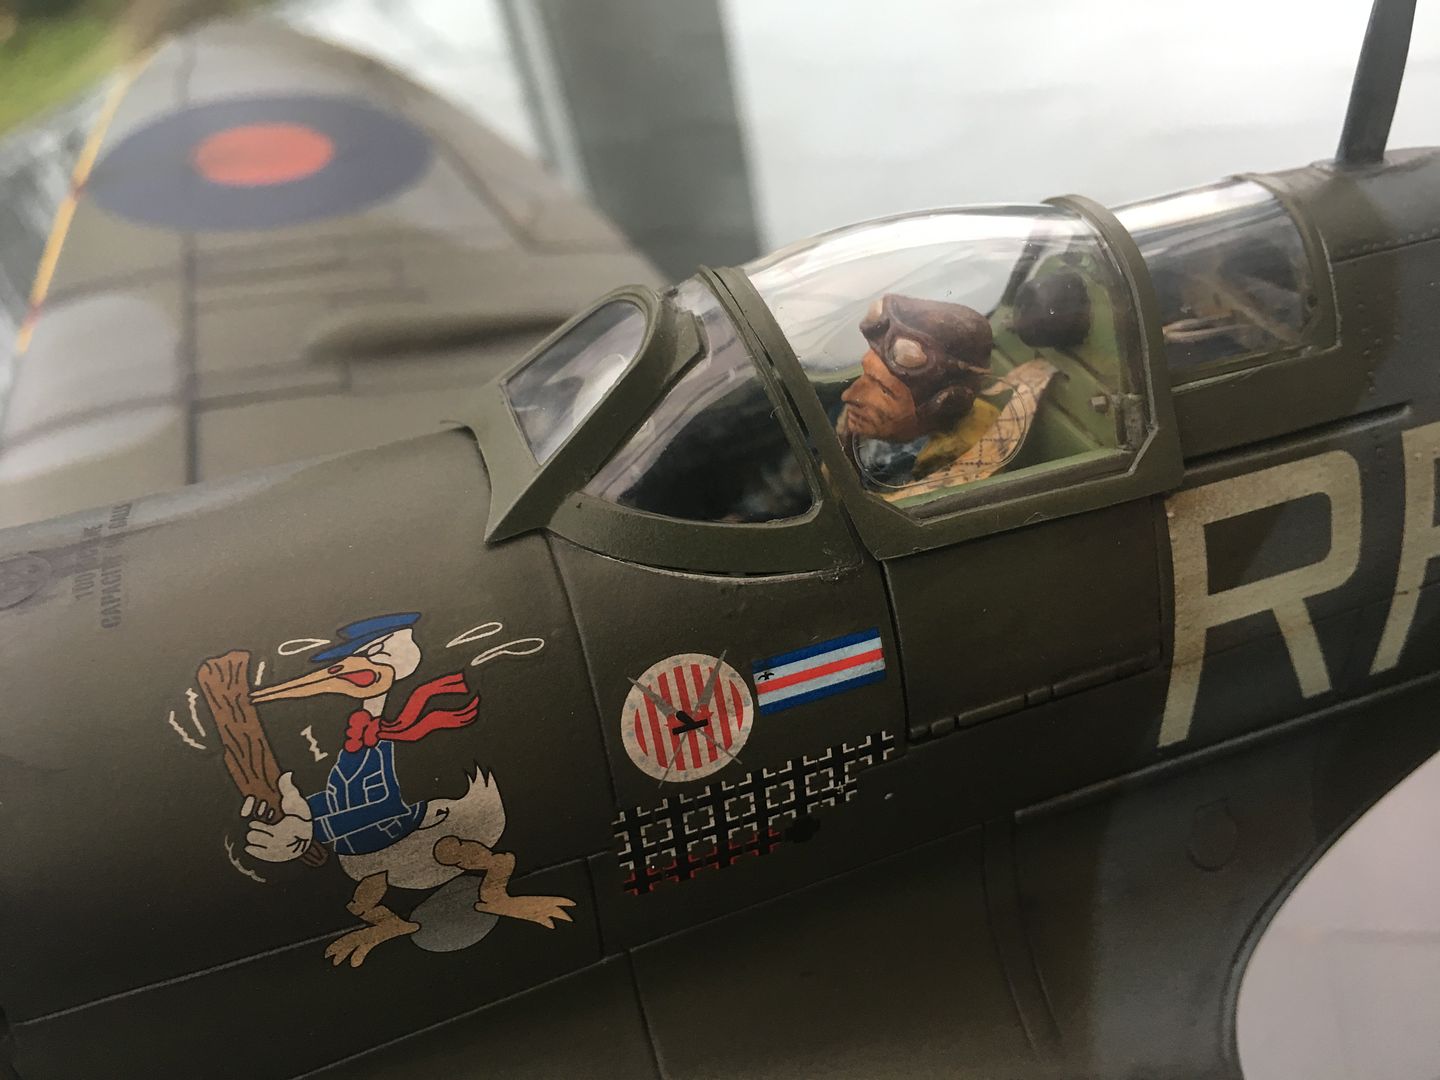
Also have to work on this chap - very much a beginner on figure painting, so this will be interesting - also working on the 1/32nd Mossie crew at the same time...
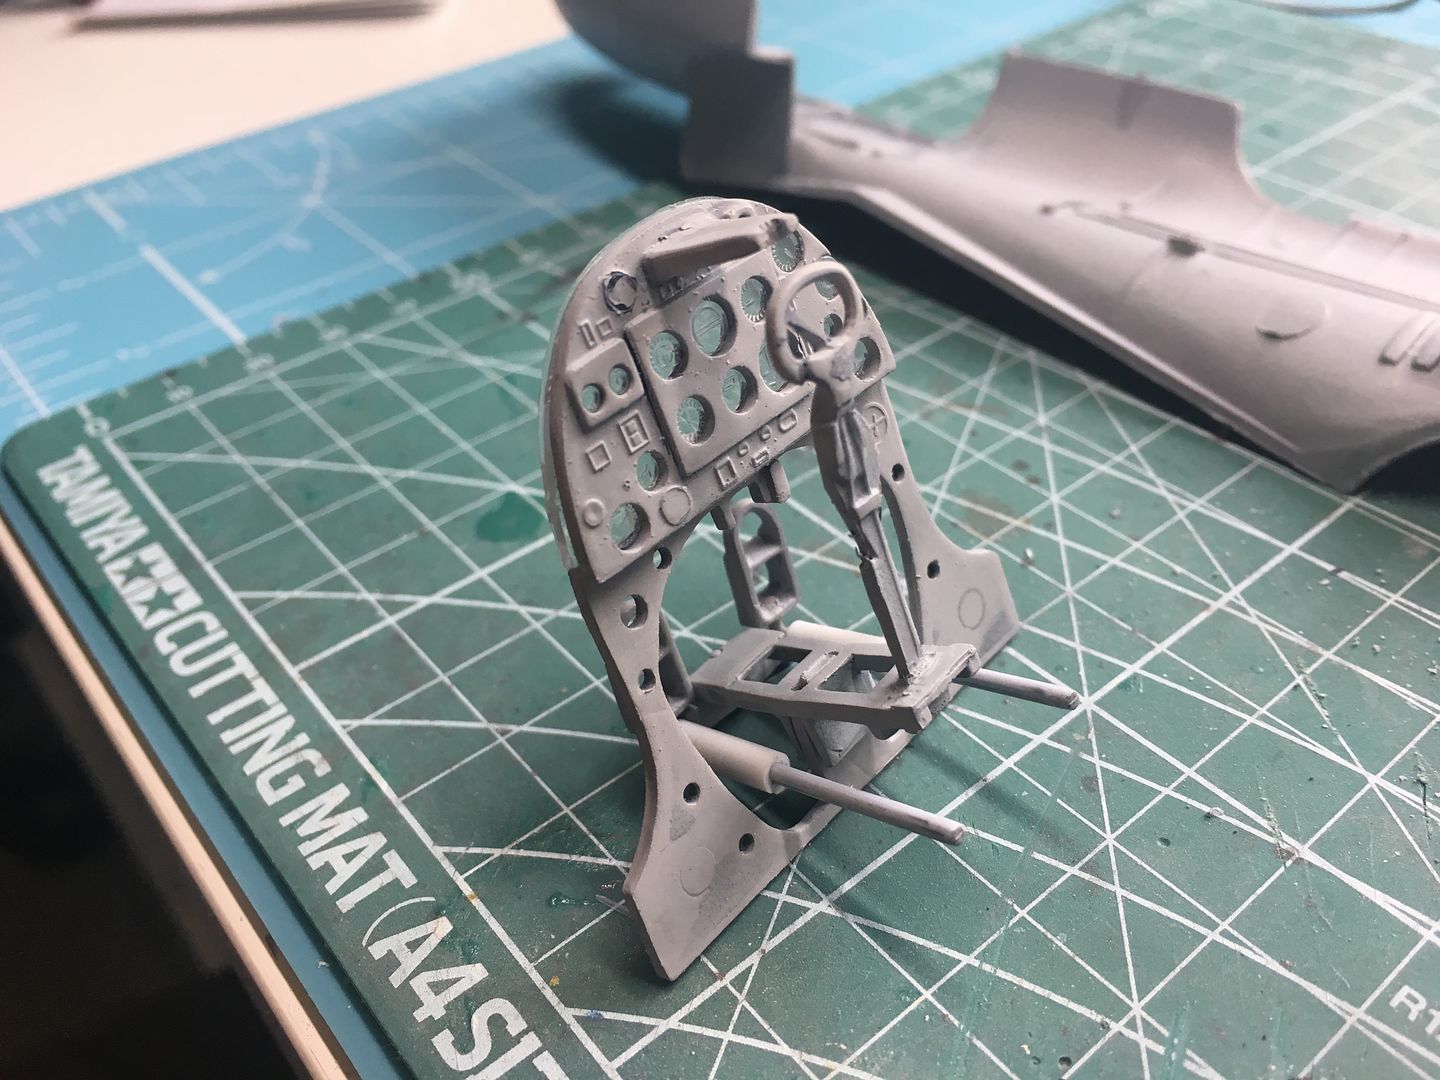
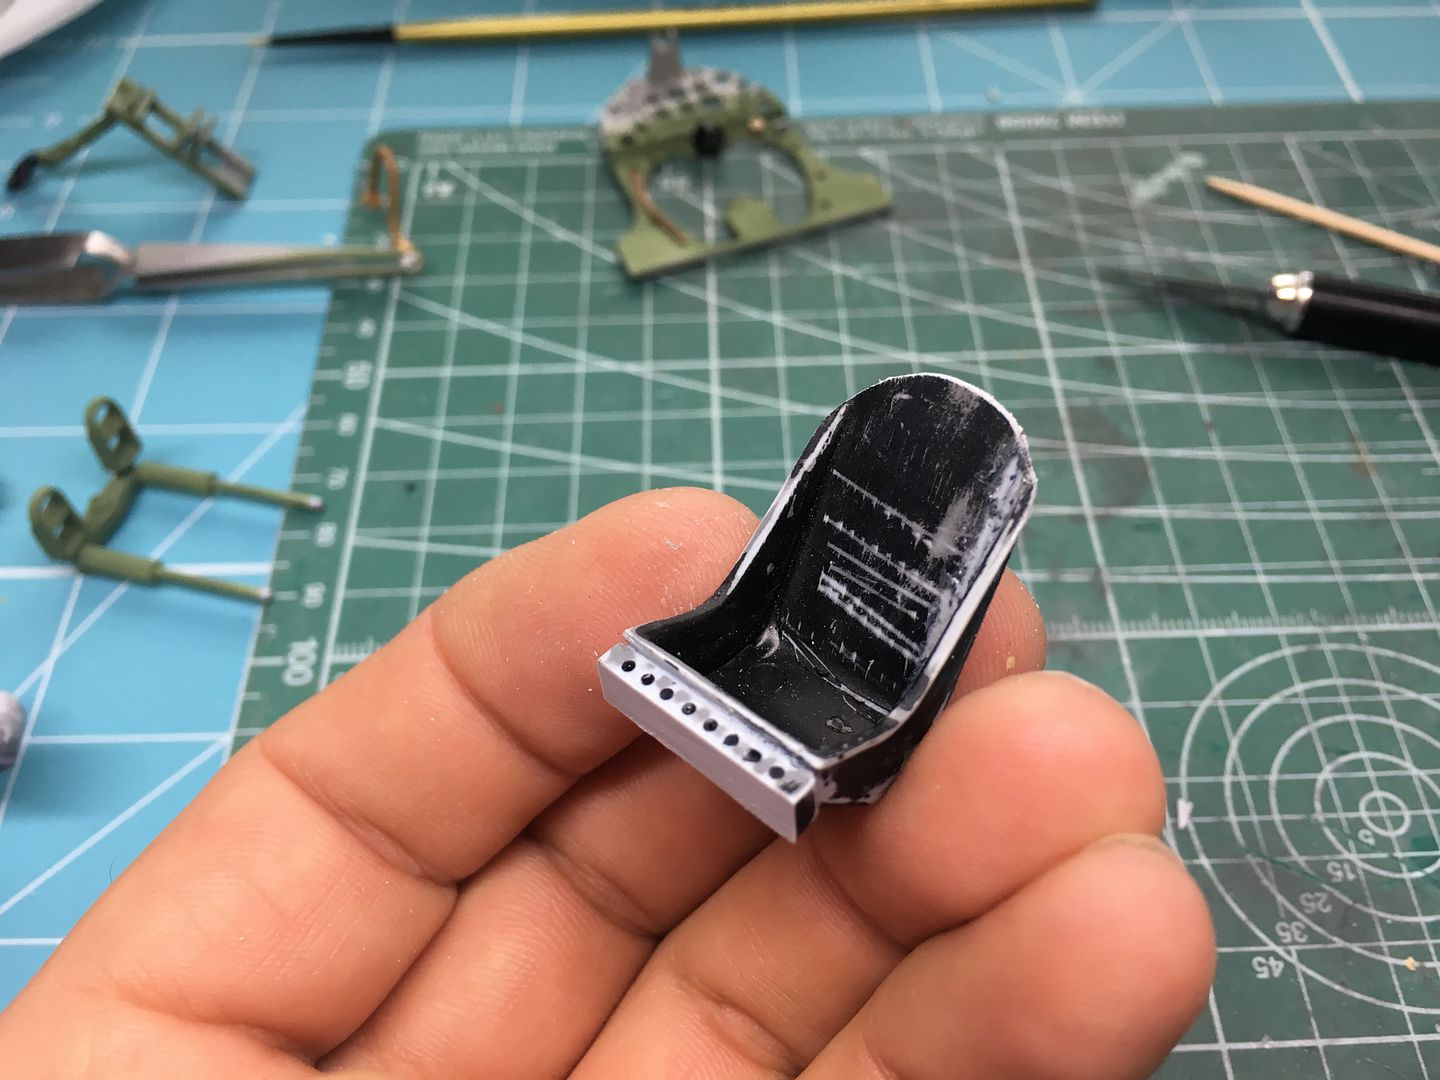
Info on another build suggests this seat is too large...

Certainly old Ginger is a bit small when in the seat - may require a re-build...
Right - time to get some colour on tonight (cockpit, that is)
I was going to add some detail to the cockpit - only really what might be visible through the canopy - but the pilot hides almost everything anyway - still wanted to add details to the fuselage skins - I scratch built some bits to add to the - 5 - parts in the kit
Again - not going to perfect accuracy - just an idea of stuff going on....
Level of kit detail:
Started to add bits and bobs...
What you might actually be able to see!!
Also added detail to the bulkheads:
Lidl purchase!! £3 ish
Also have to work on this chap - very much a beginner on figure painting, so this will be interesting - also working on the 1/32nd Mossie crew at the same time...
Info on another build suggests this seat is too large...
Certainly old Ginger is a bit small when in the seat - may require a re-build...
Right - time to get some colour on tonight (cockpit, that is)
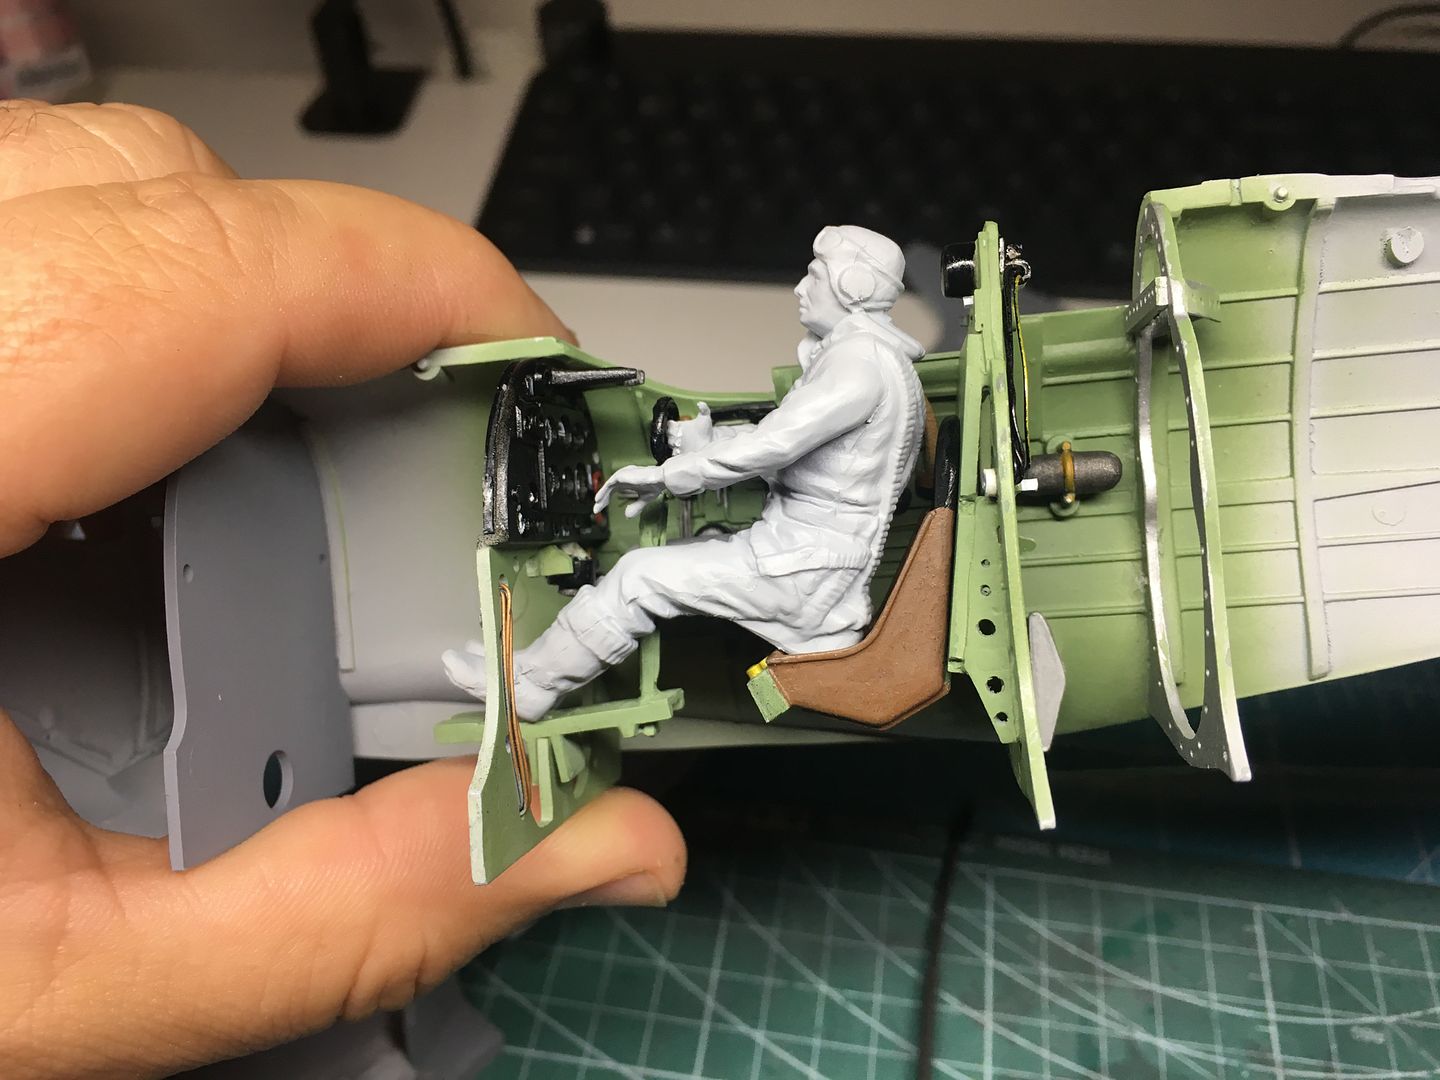
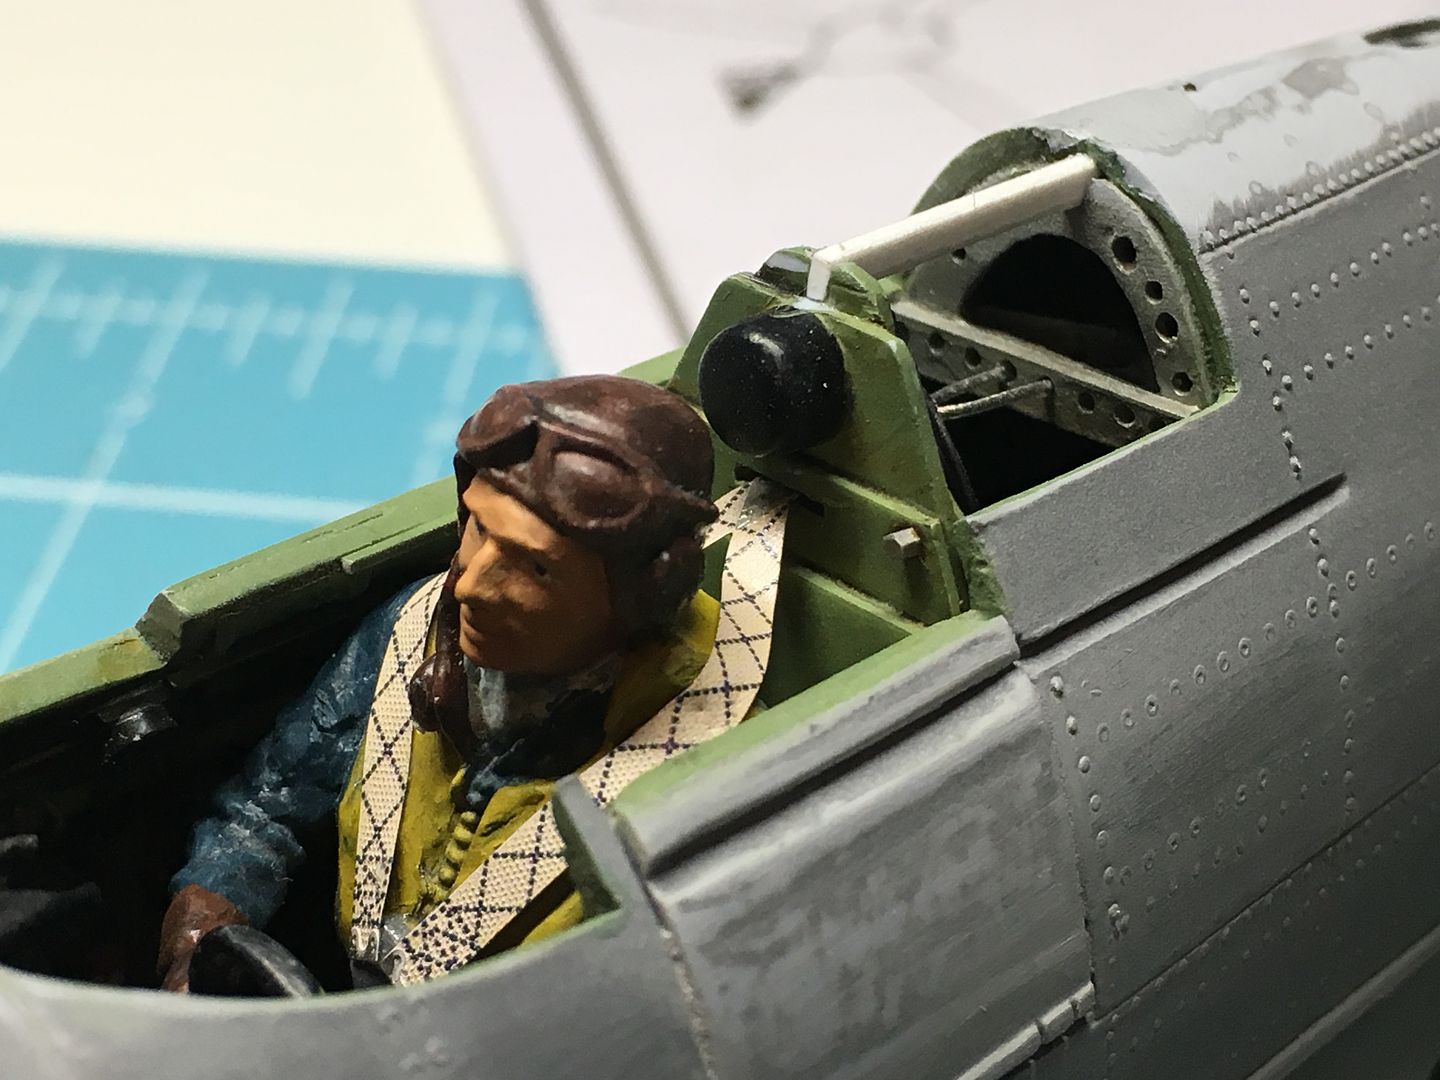
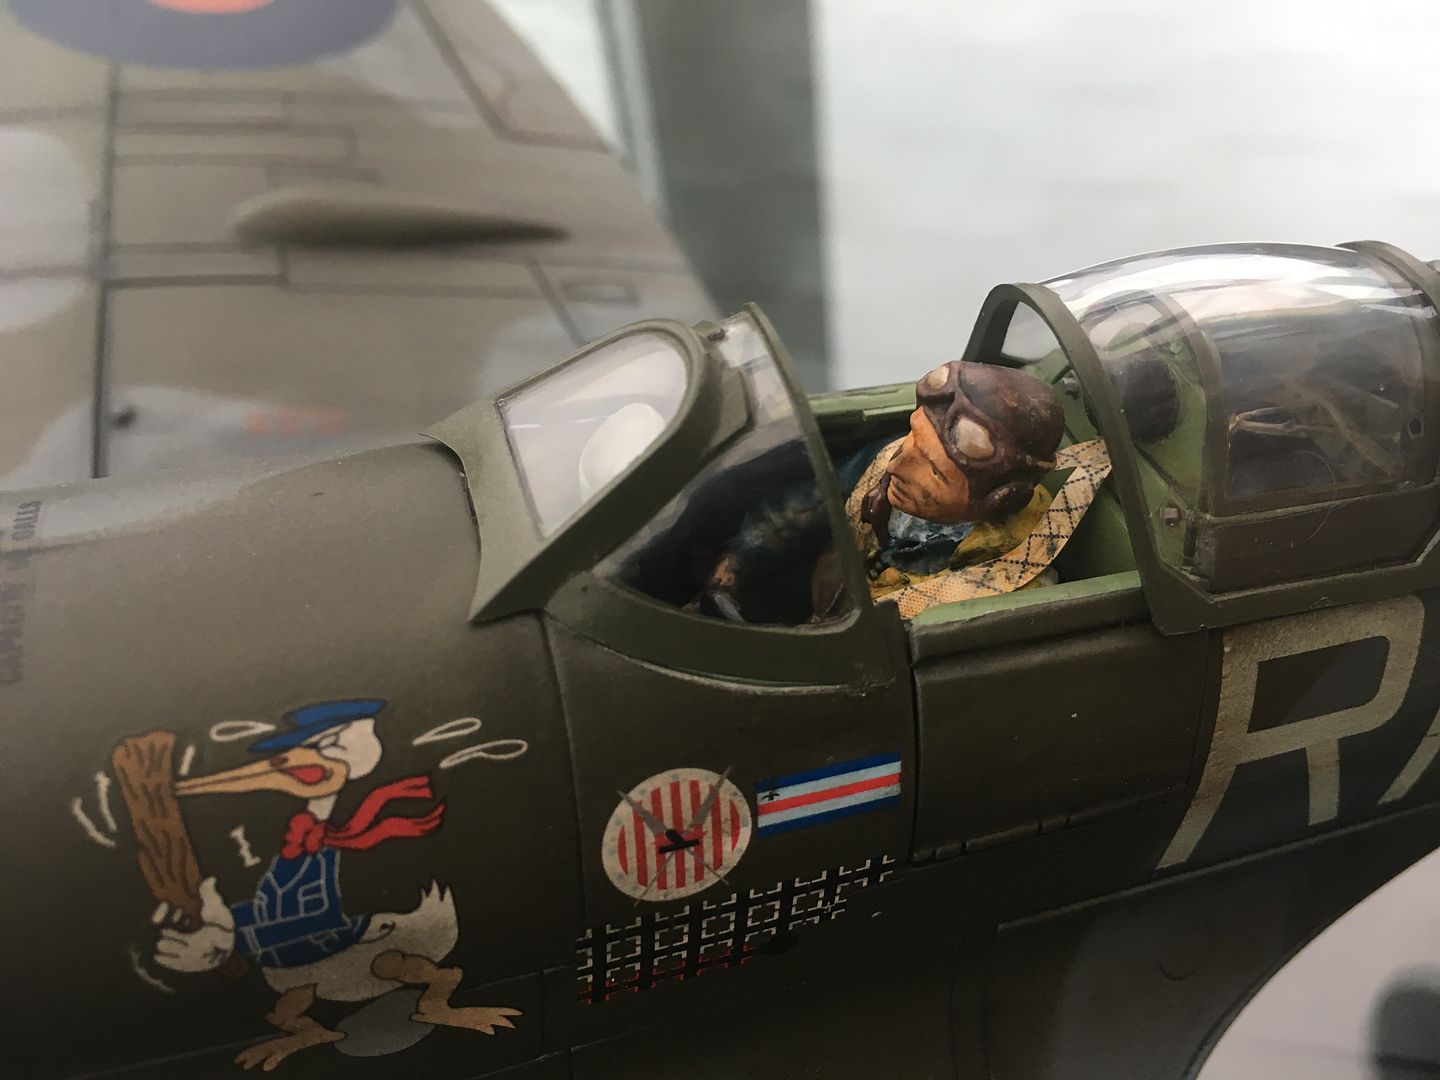
Hi Alan - yes, I have seen the parachute attached to the Pilot as a 'seat cushion' on the Mossie as well...this Airfix pilot also has the 'cushion' as well - I had seen on another build thread how the Airscale pilots seat is a much smaller size than the Airfix one, in all dimensions - as the pilot rattles around in the Airfix seat, I might fabricate the smaller size - assuming the scale is better of course....
Right - shrank the chair!

Pretty crude - but as I said, won't be seen AT ALL - and i want to finish this model!

I've added a bit of 'padding' - (and obviously painted too early!)
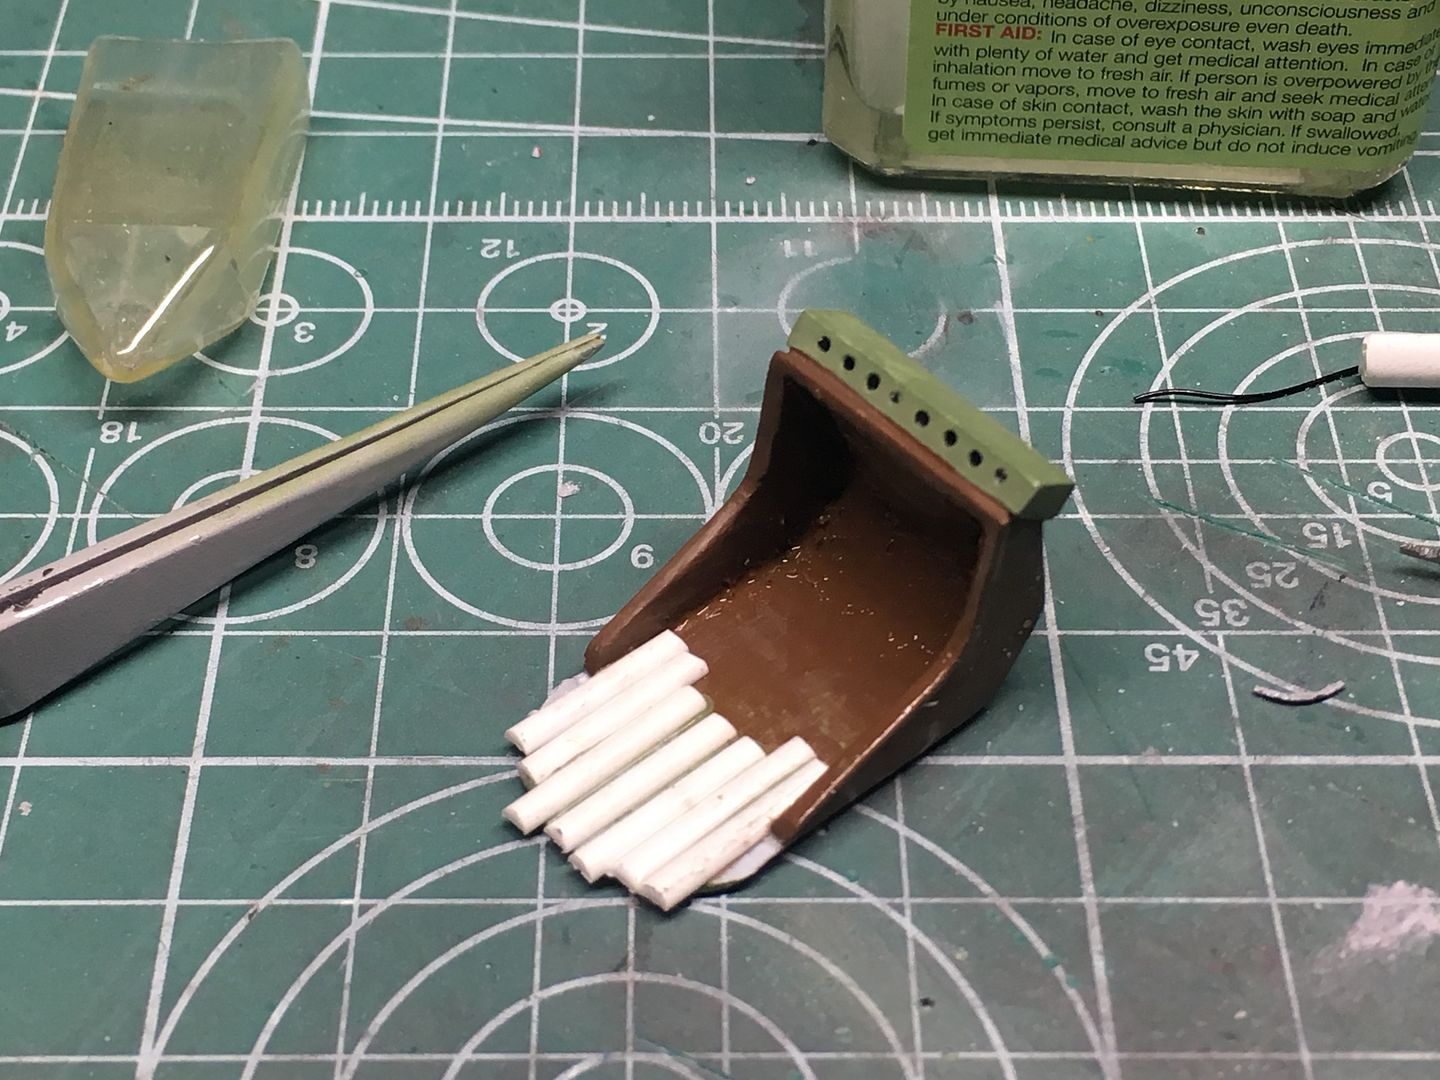
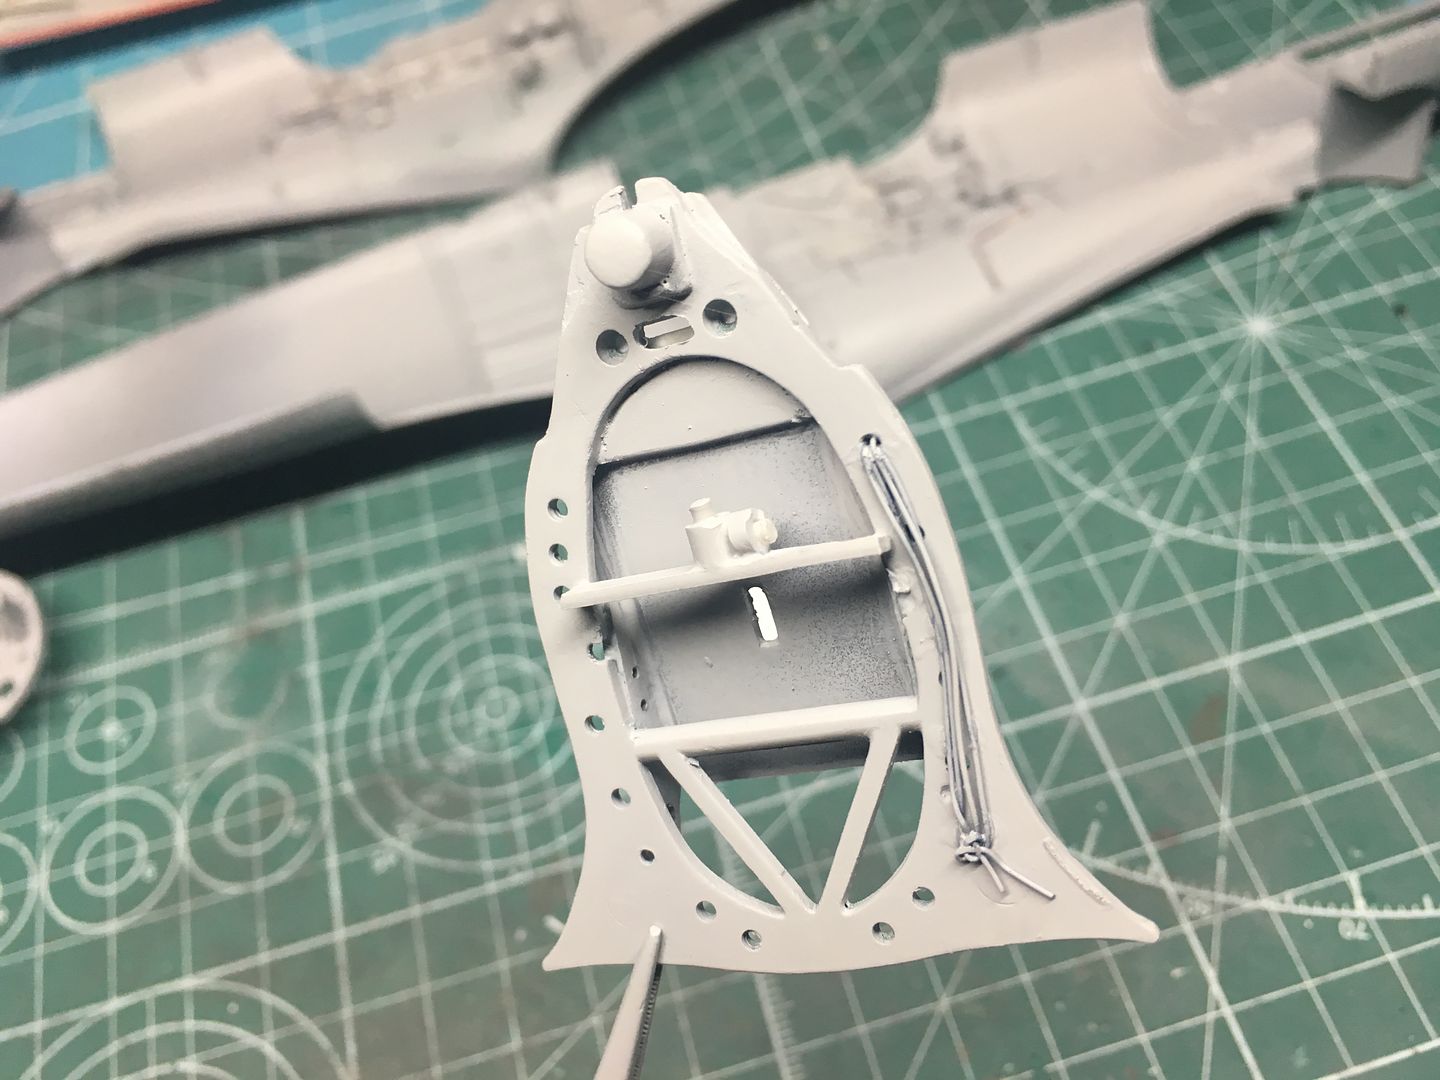
The filler inside is where the pilot part goes -
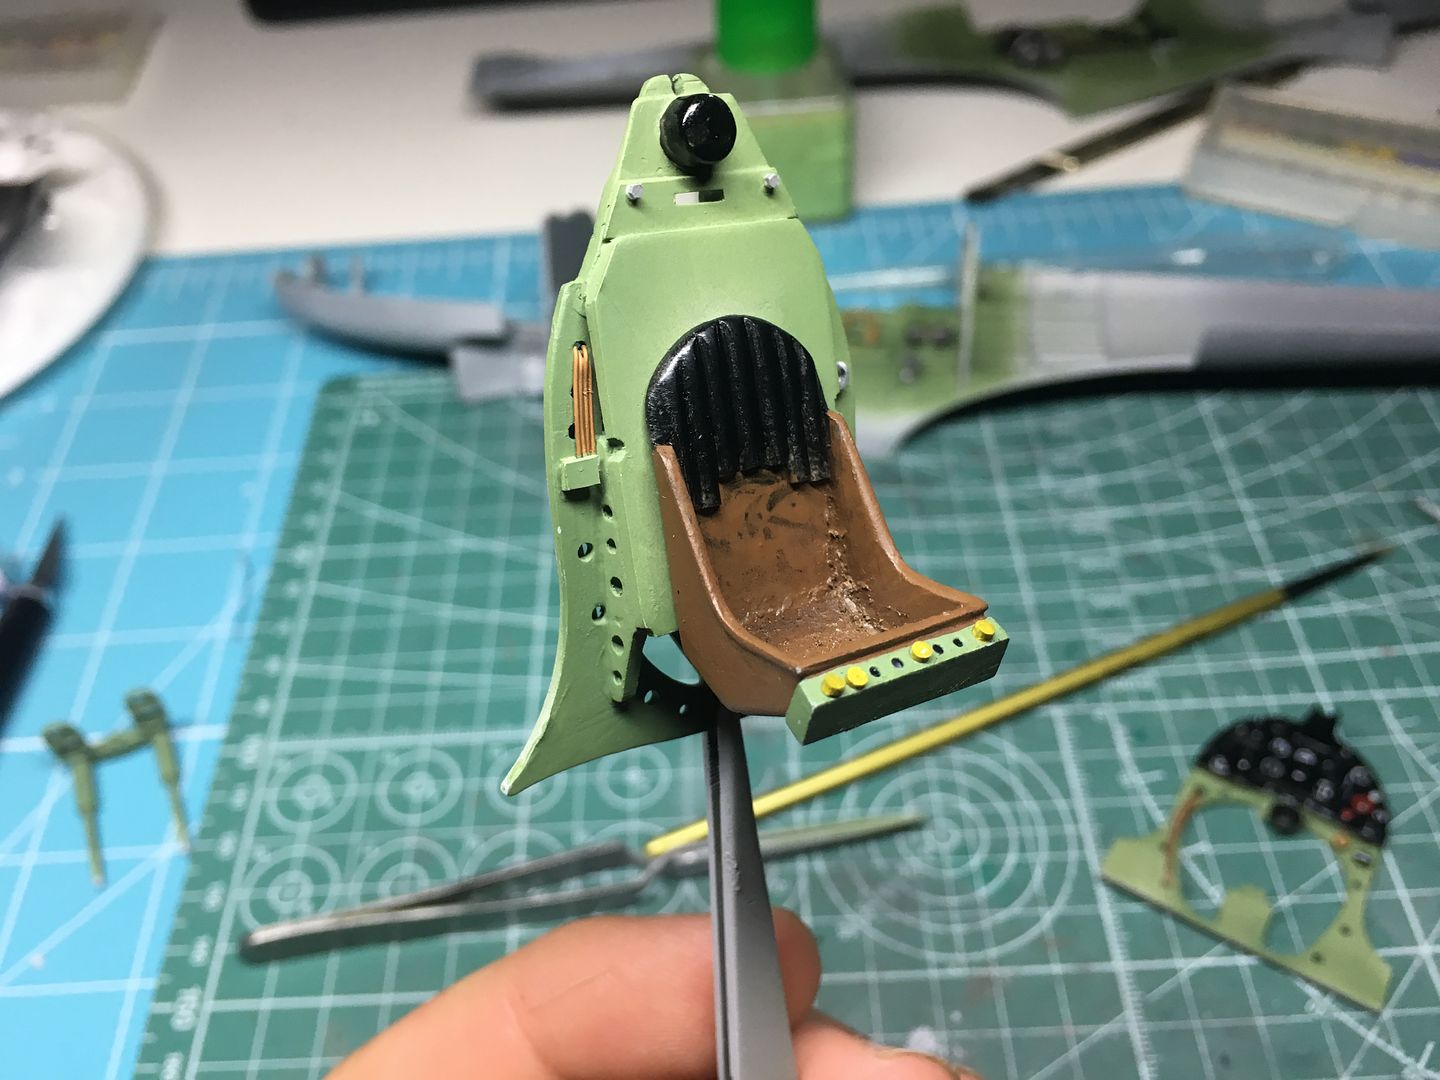
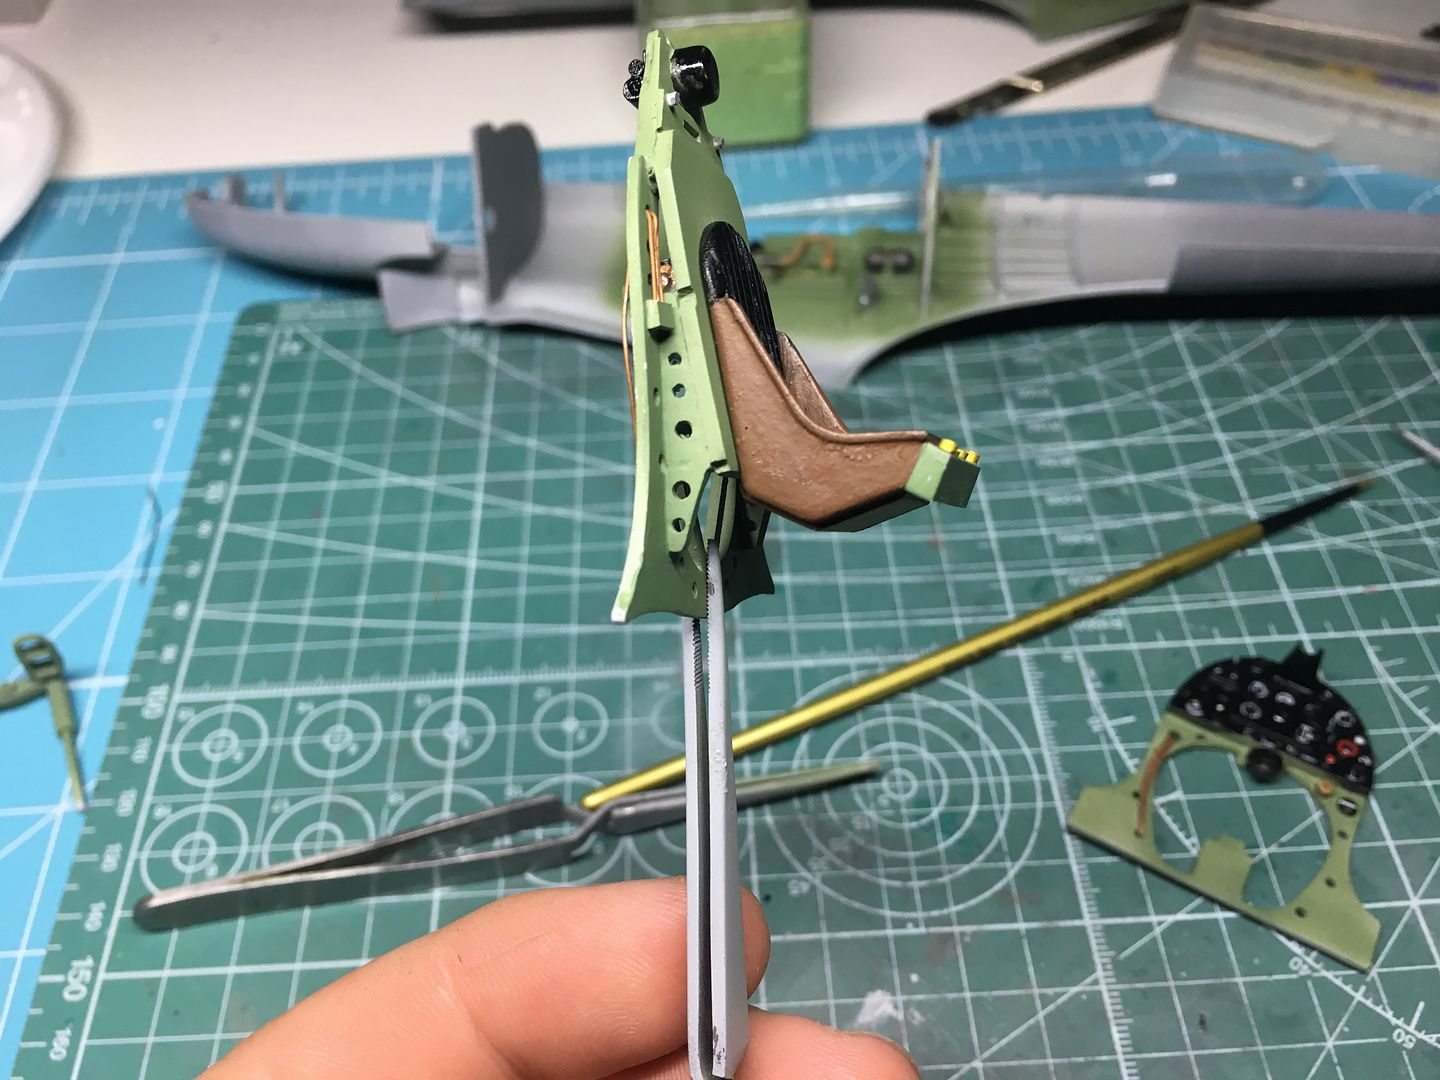
I painted my 'fake' cockpit details....

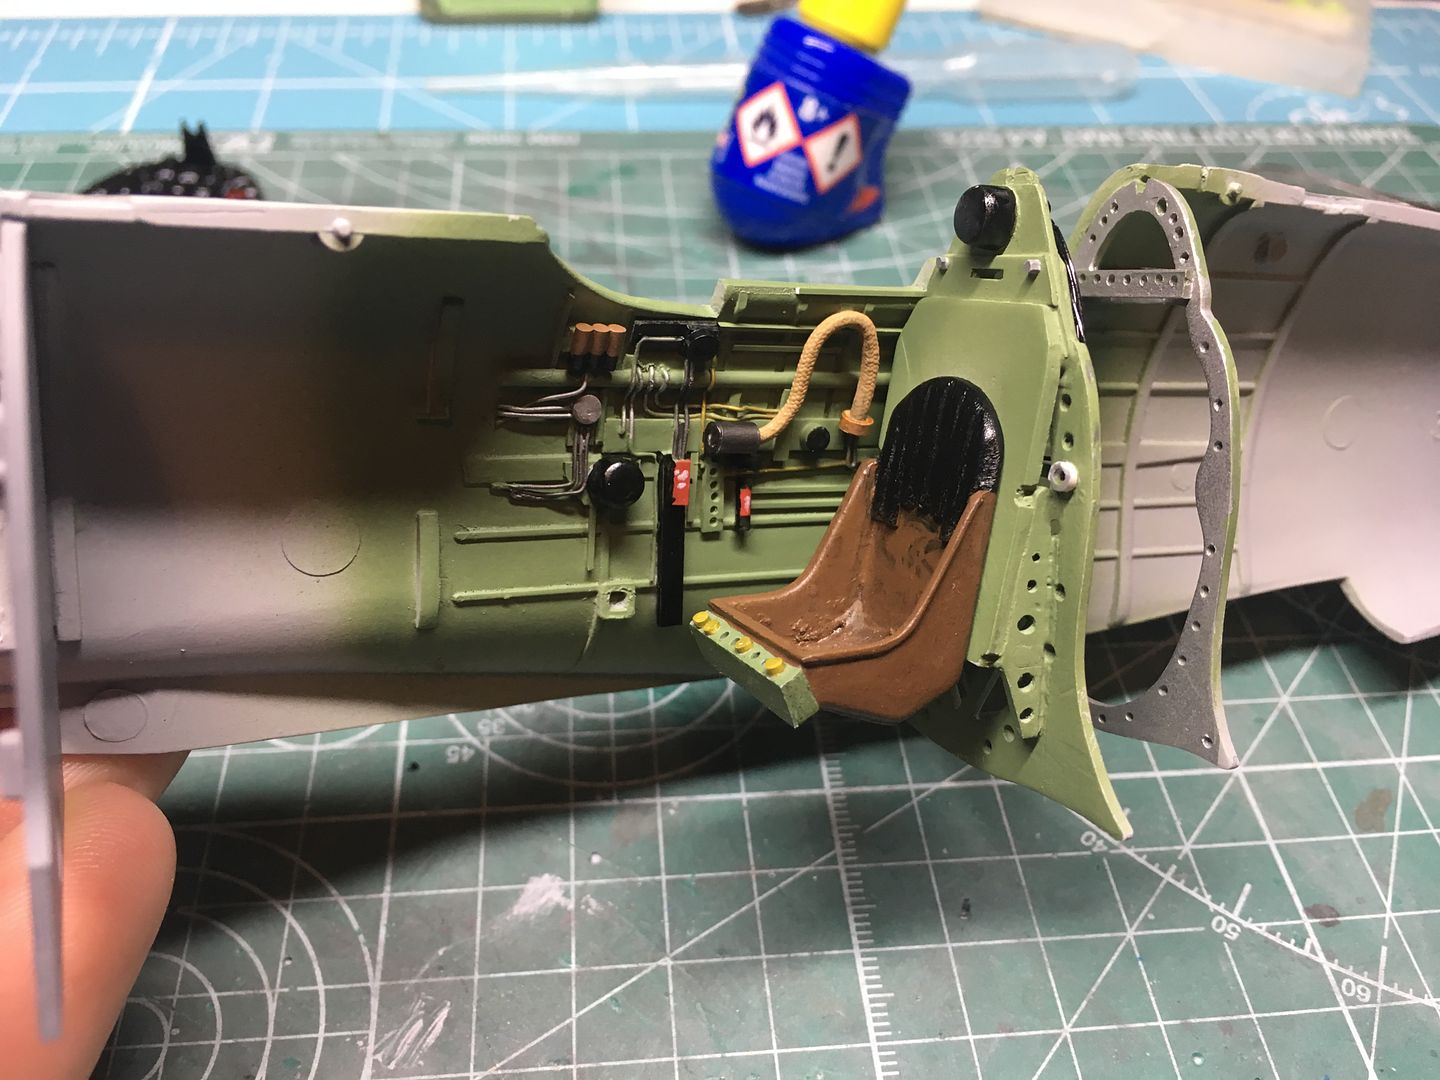
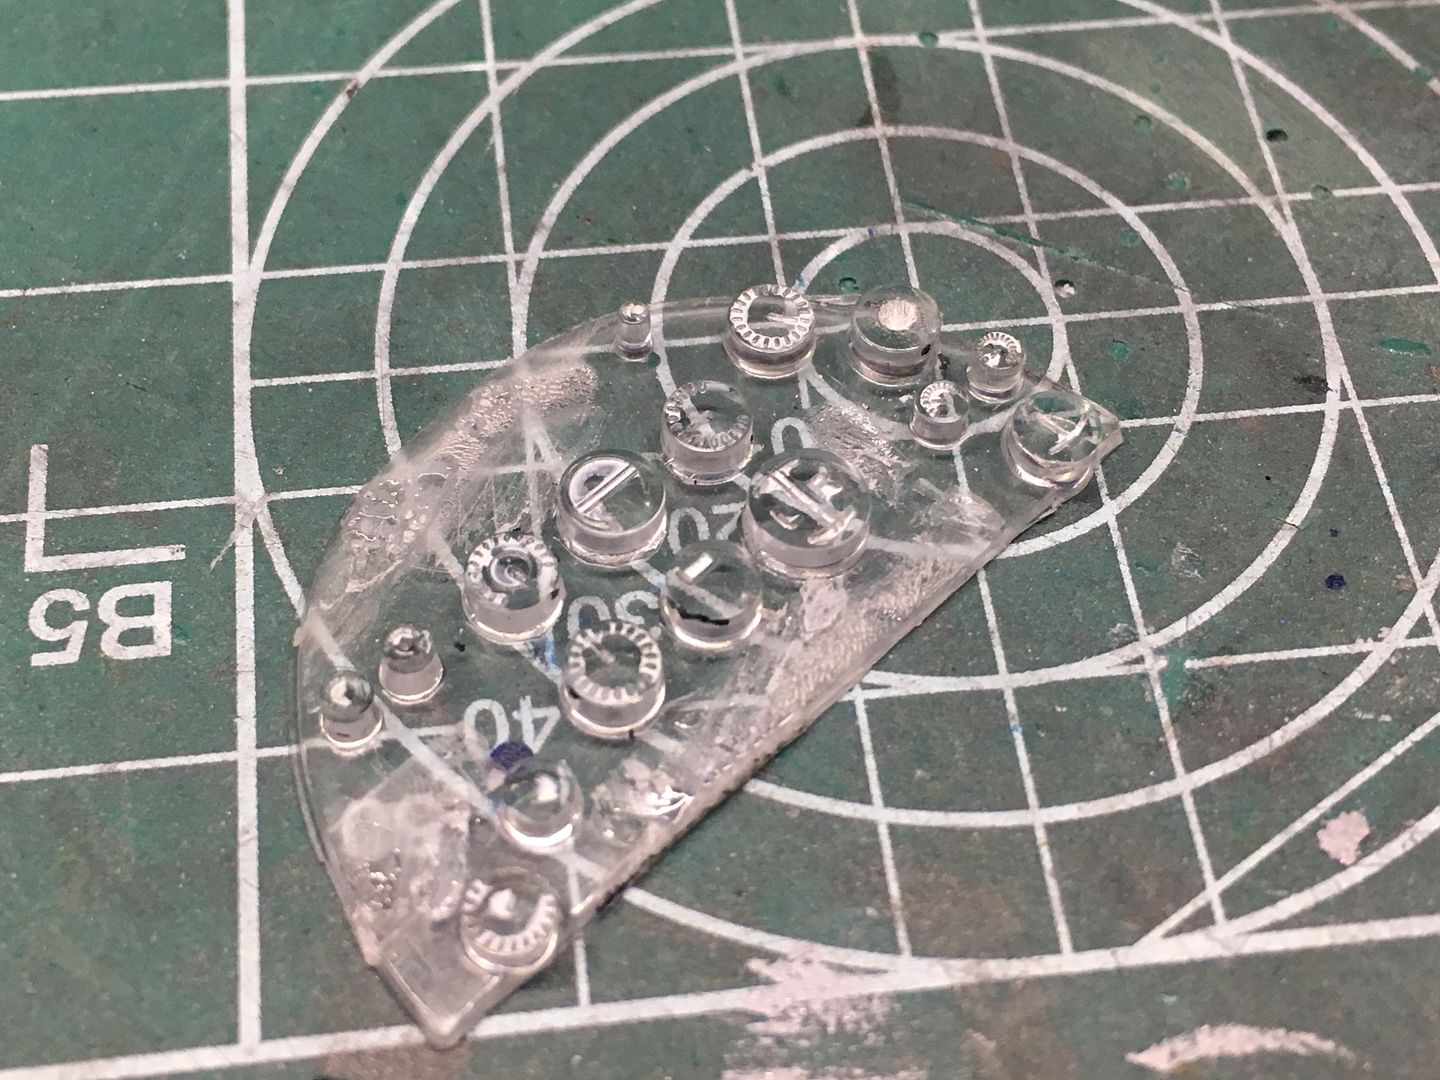
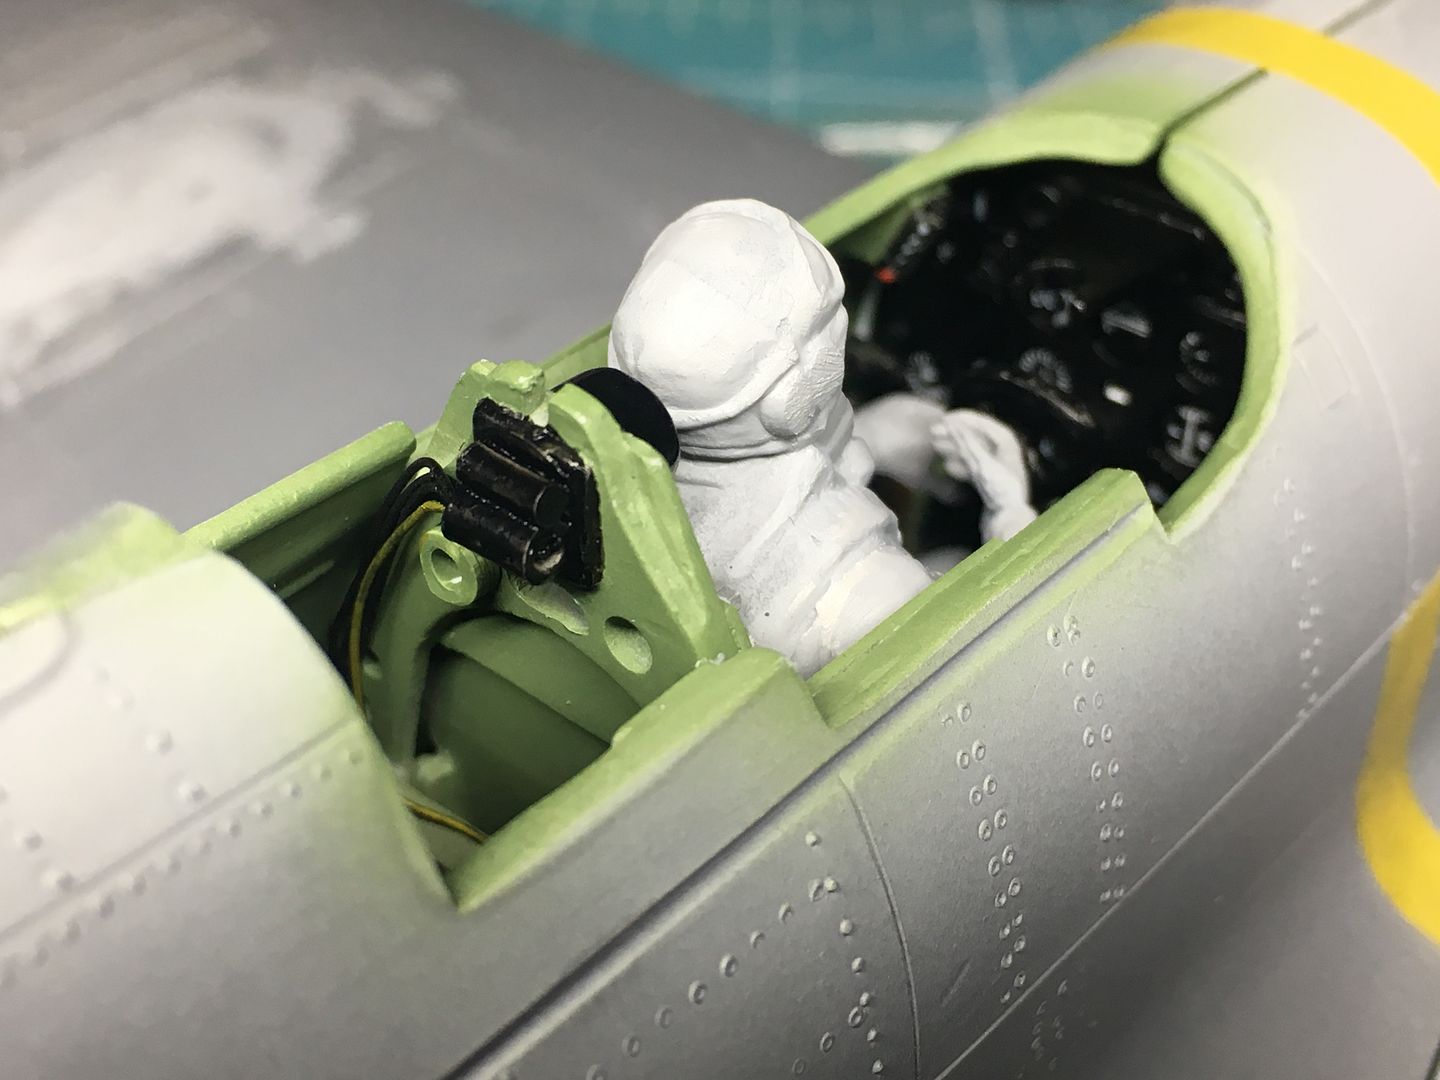
...and painted the instrument panel - I managed to get some white onto the clear parts, which have the dials cast in - when assembled with a black background, these actually look ok! (no decals)
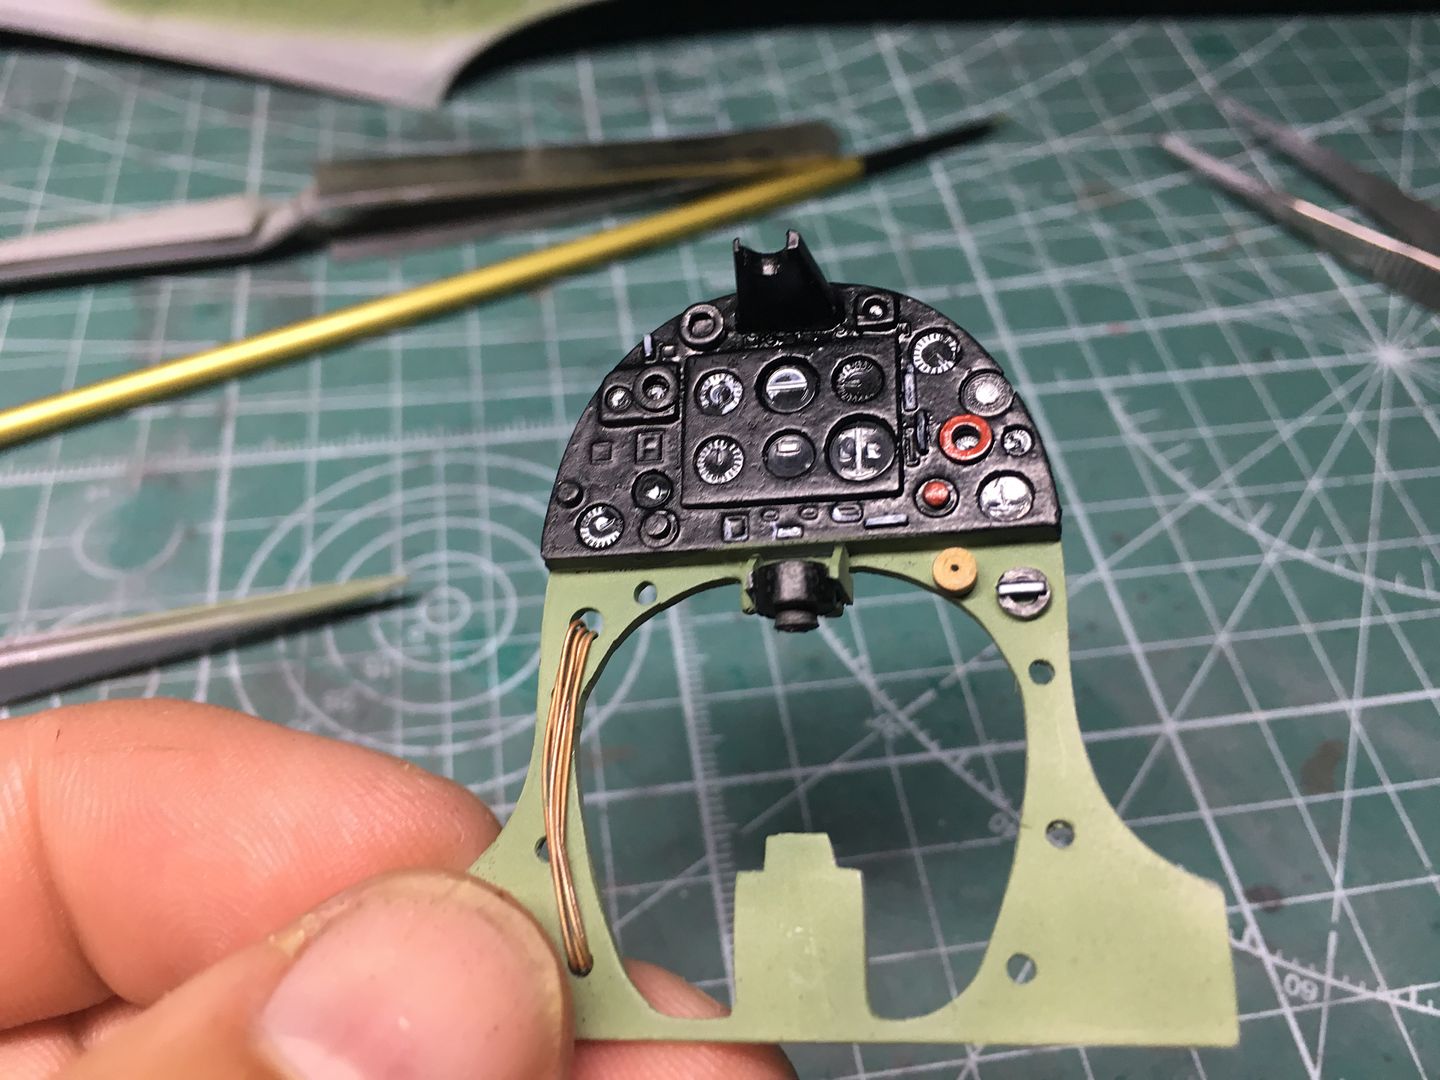
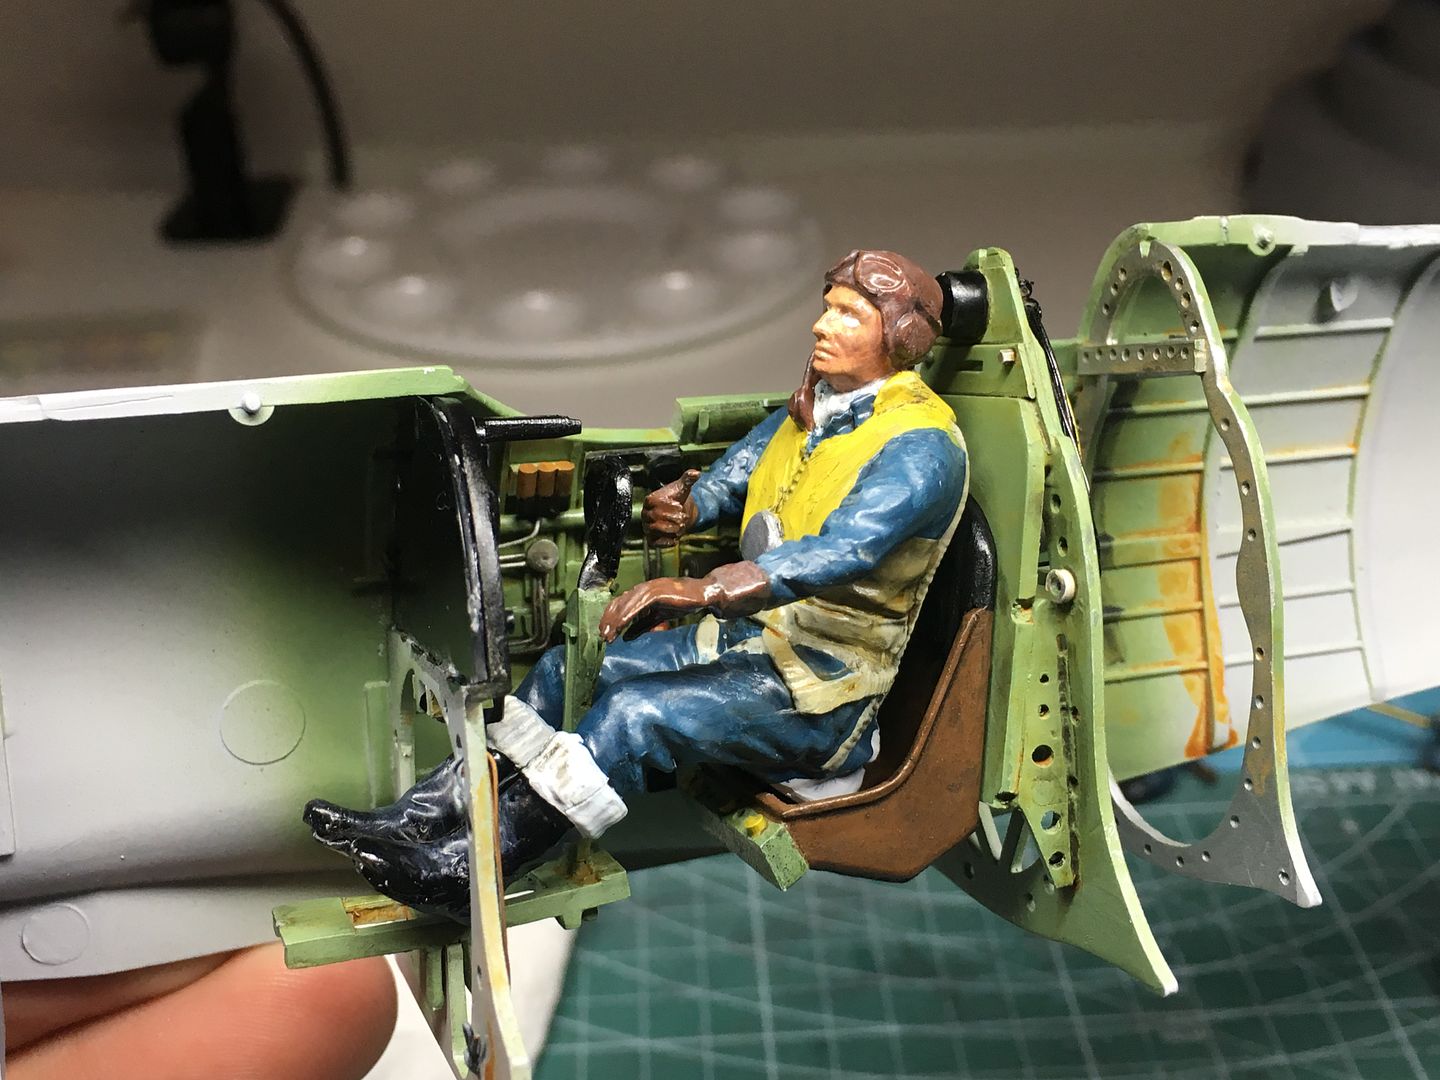
A test fit shows how little of any of this you will actually be able to see!!
Especially with Ginger in position!
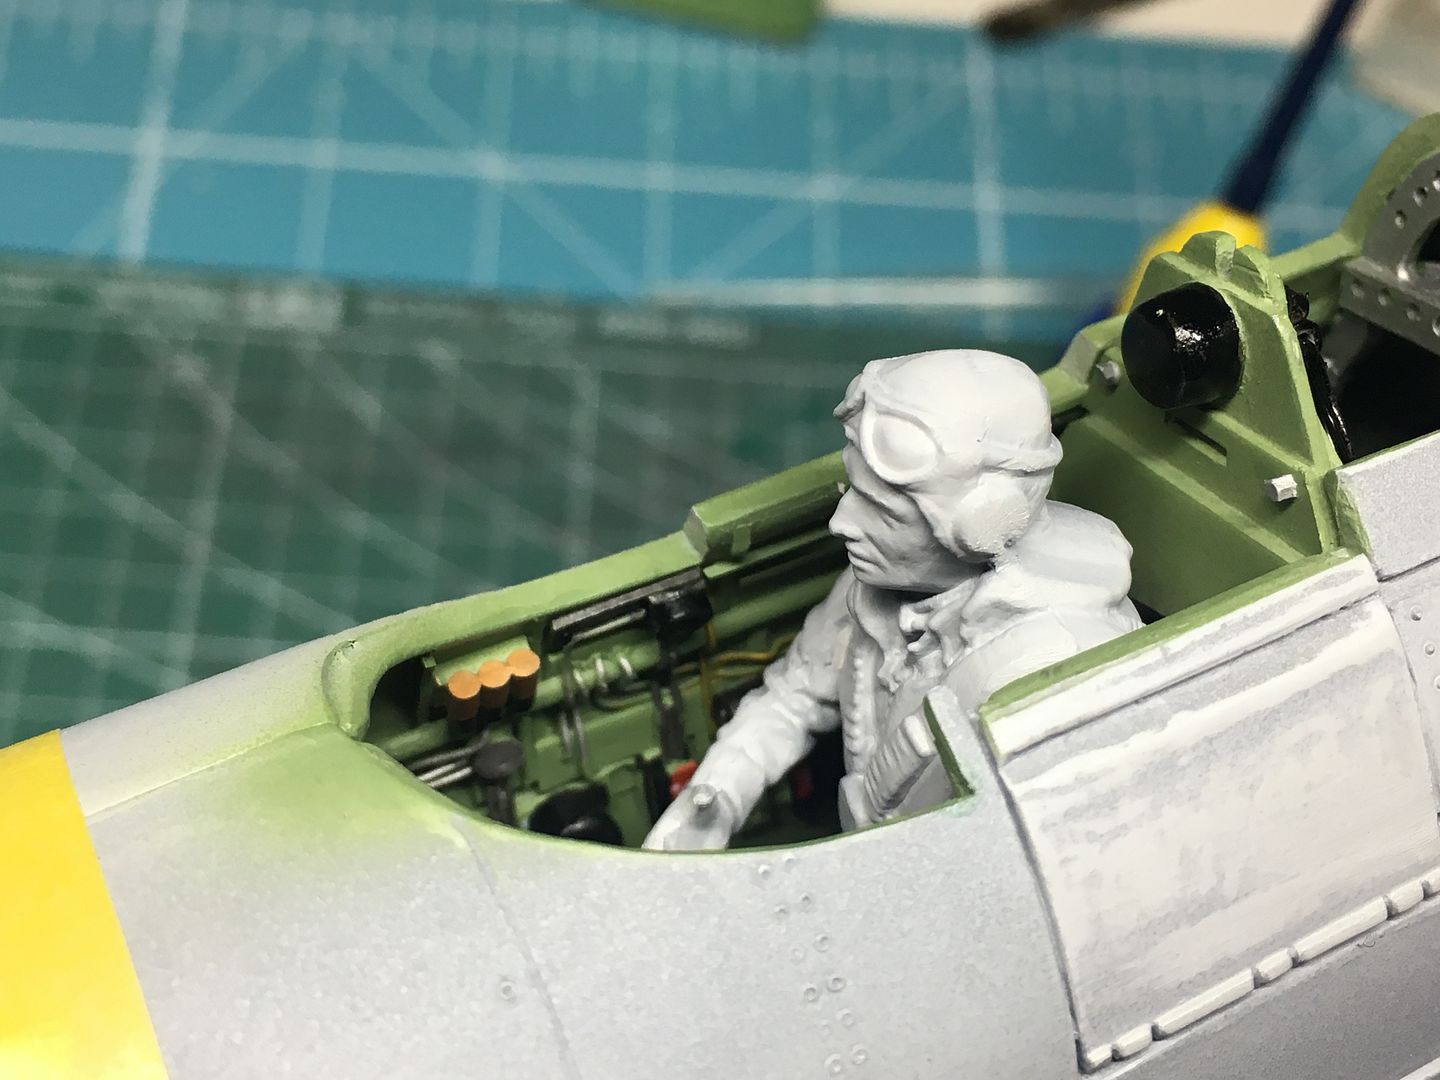
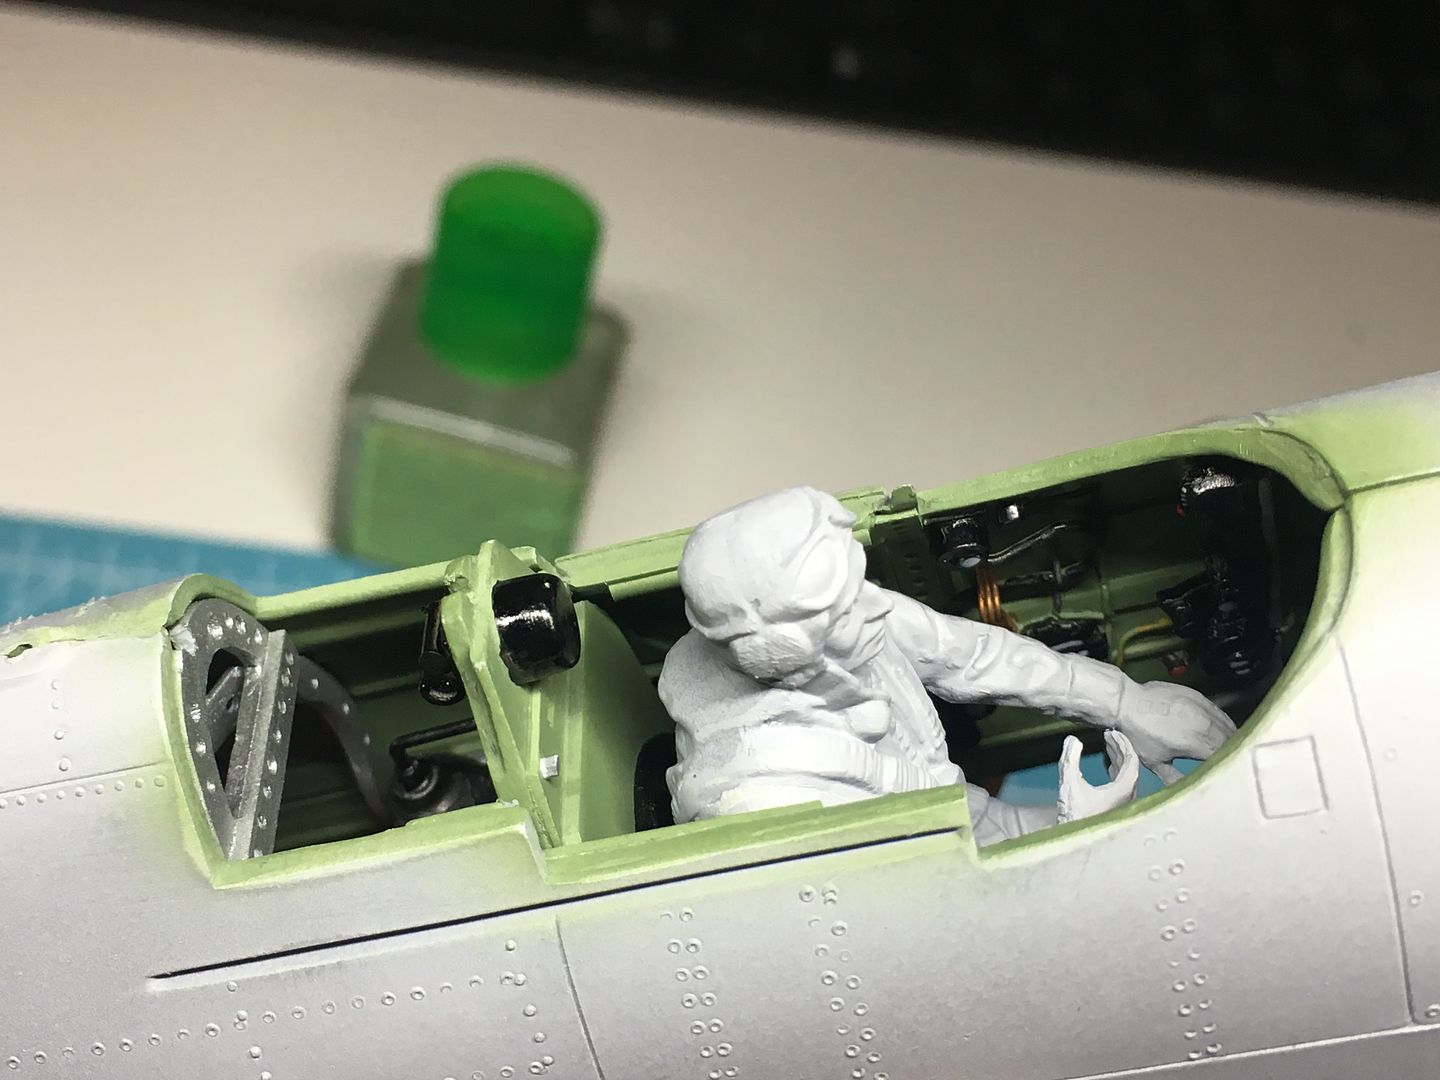
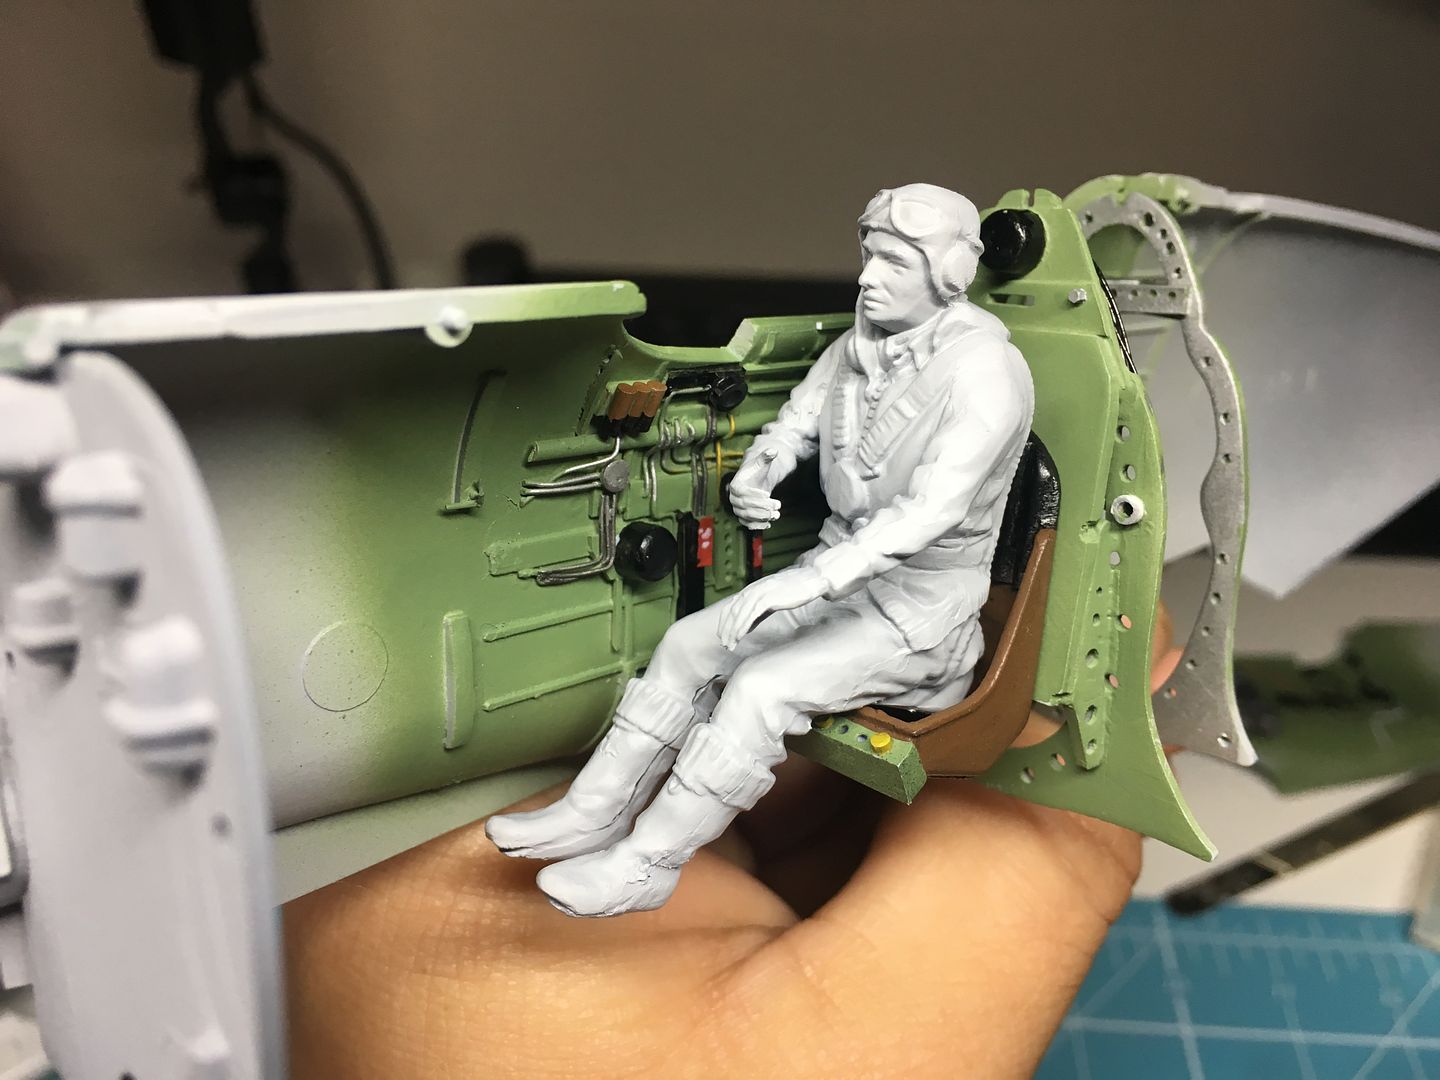
Going to have to cheat Gingers physical appearance a bit to make him hold everything properly...
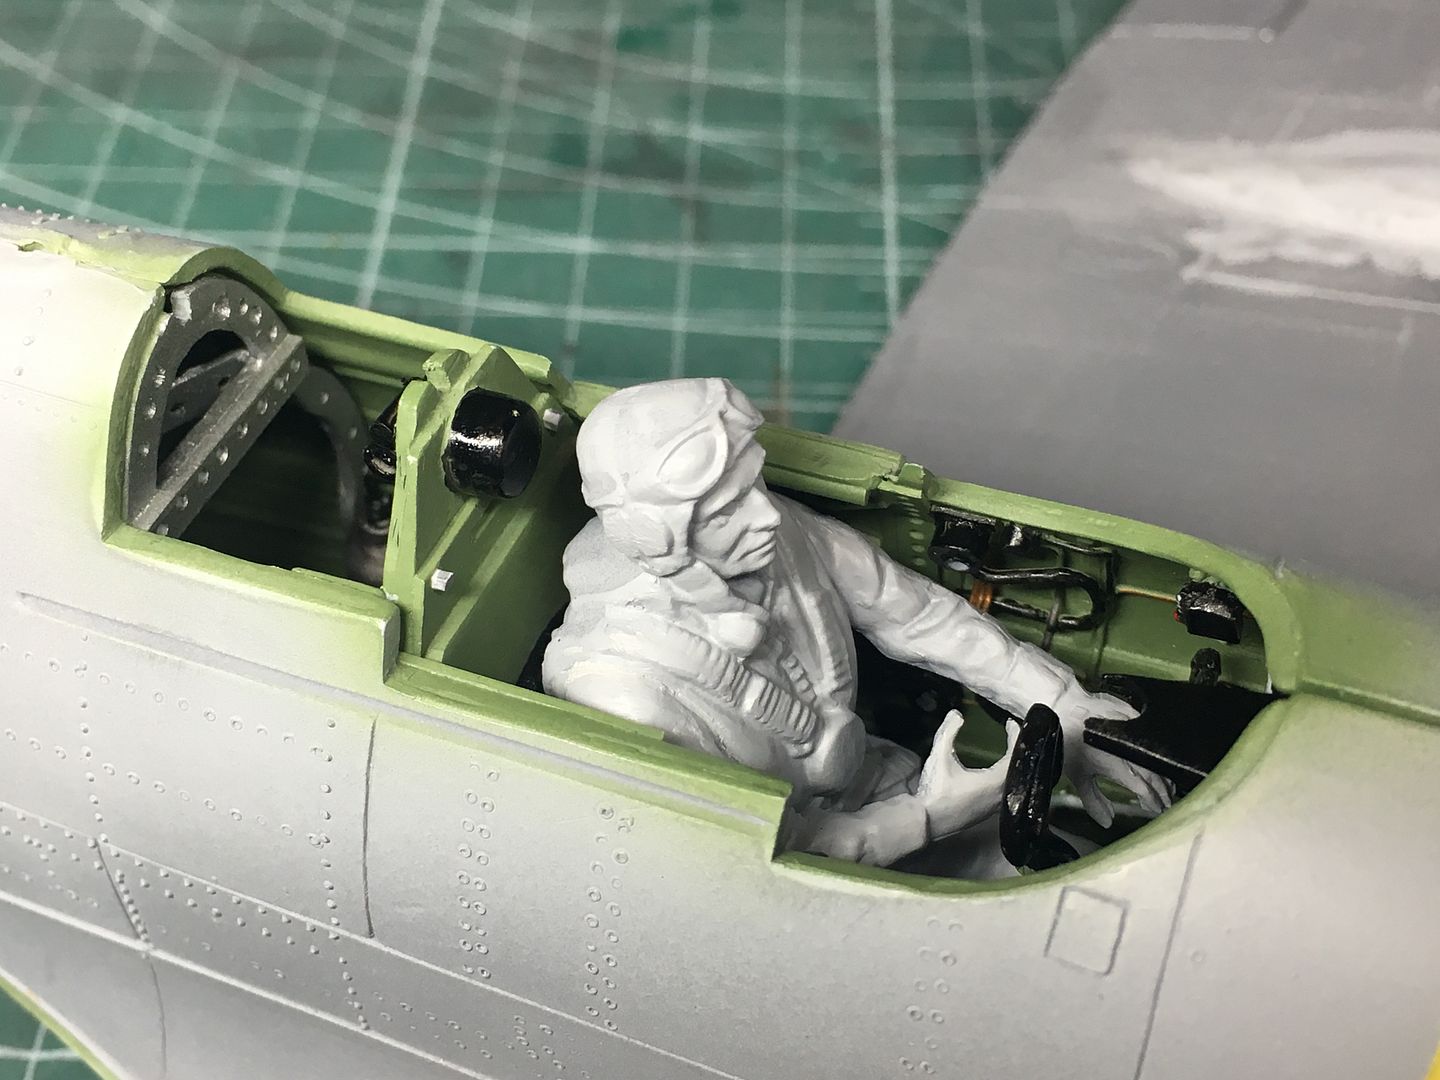
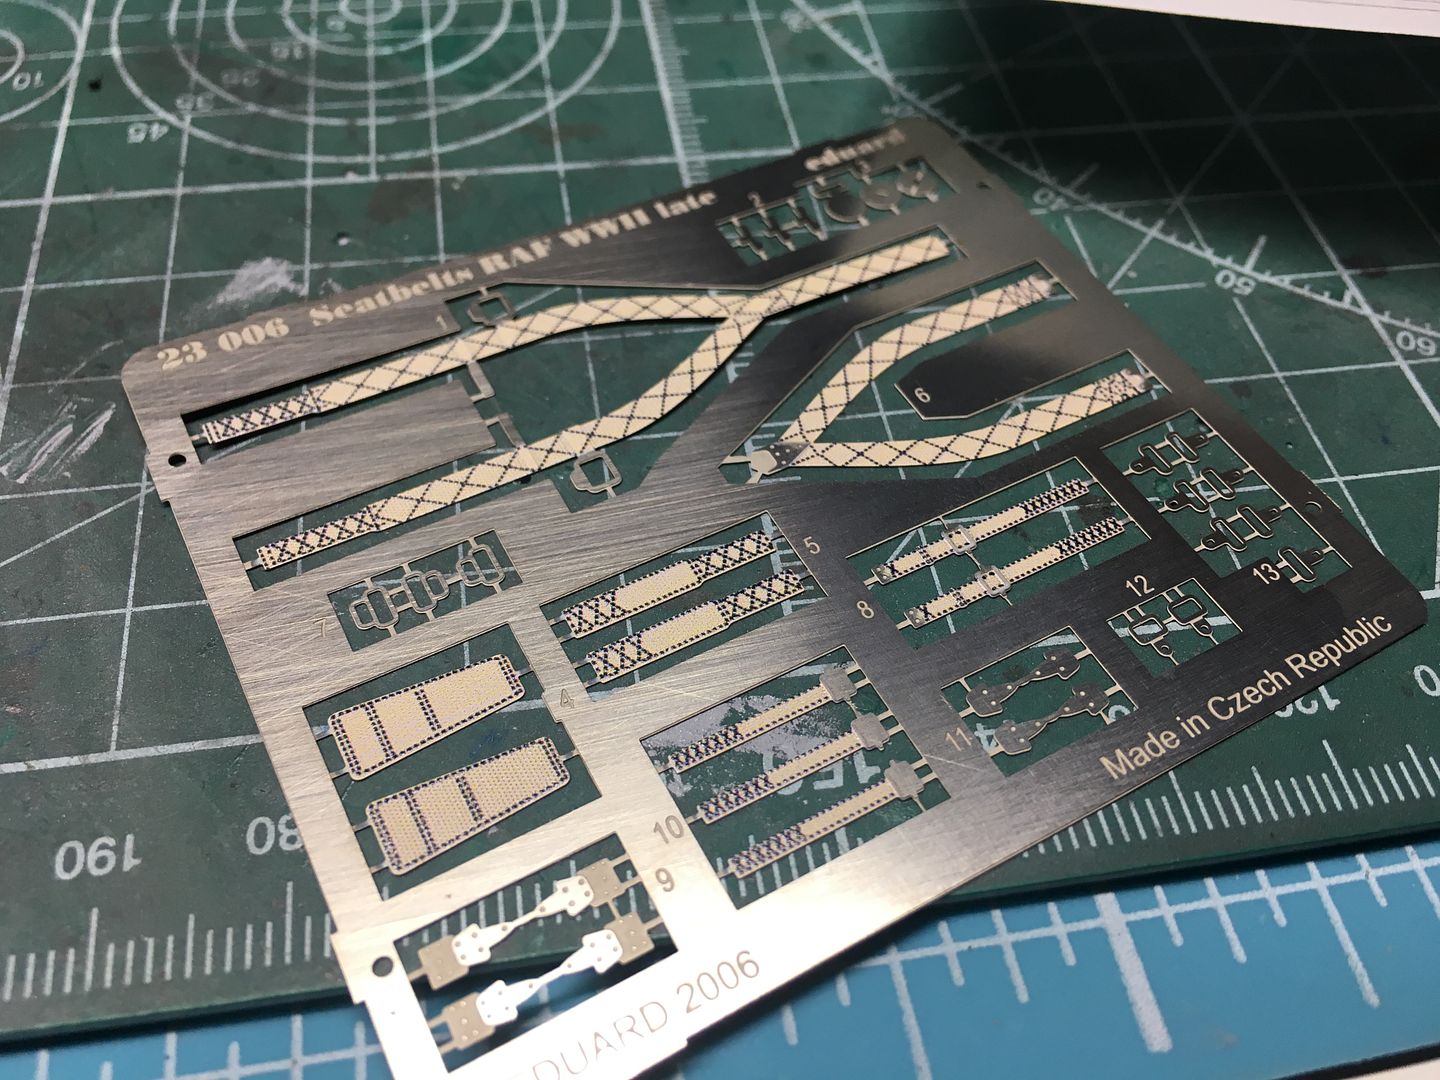
I've also started removing his molded-in harness so I can use the Eduard detail parts I bought - at least the top straps that thread through the bulkhead to attach behind the seat...

Pretty crude - but as I said, won't be seen AT ALL - and i want to finish this model!
I've added a bit of 'padding' - (and obviously painted too early!)
The filler inside is where the pilot part goes -
I painted my 'fake' cockpit details....
...and painted the instrument panel - I managed to get some white onto the clear parts, which have the dials cast in - when assembled with a black background, these actually look ok! (no decals)
A test fit shows how little of any of this you will actually be able to see!!
Especially with Ginger in position!
Going to have to cheat Gingers physical appearance a bit to make him hold everything properly...
I've also started removing his molded-in harness so I can use the Eduard detail parts I bought - at least the top straps that thread through the bulkhead to attach behind the seat...

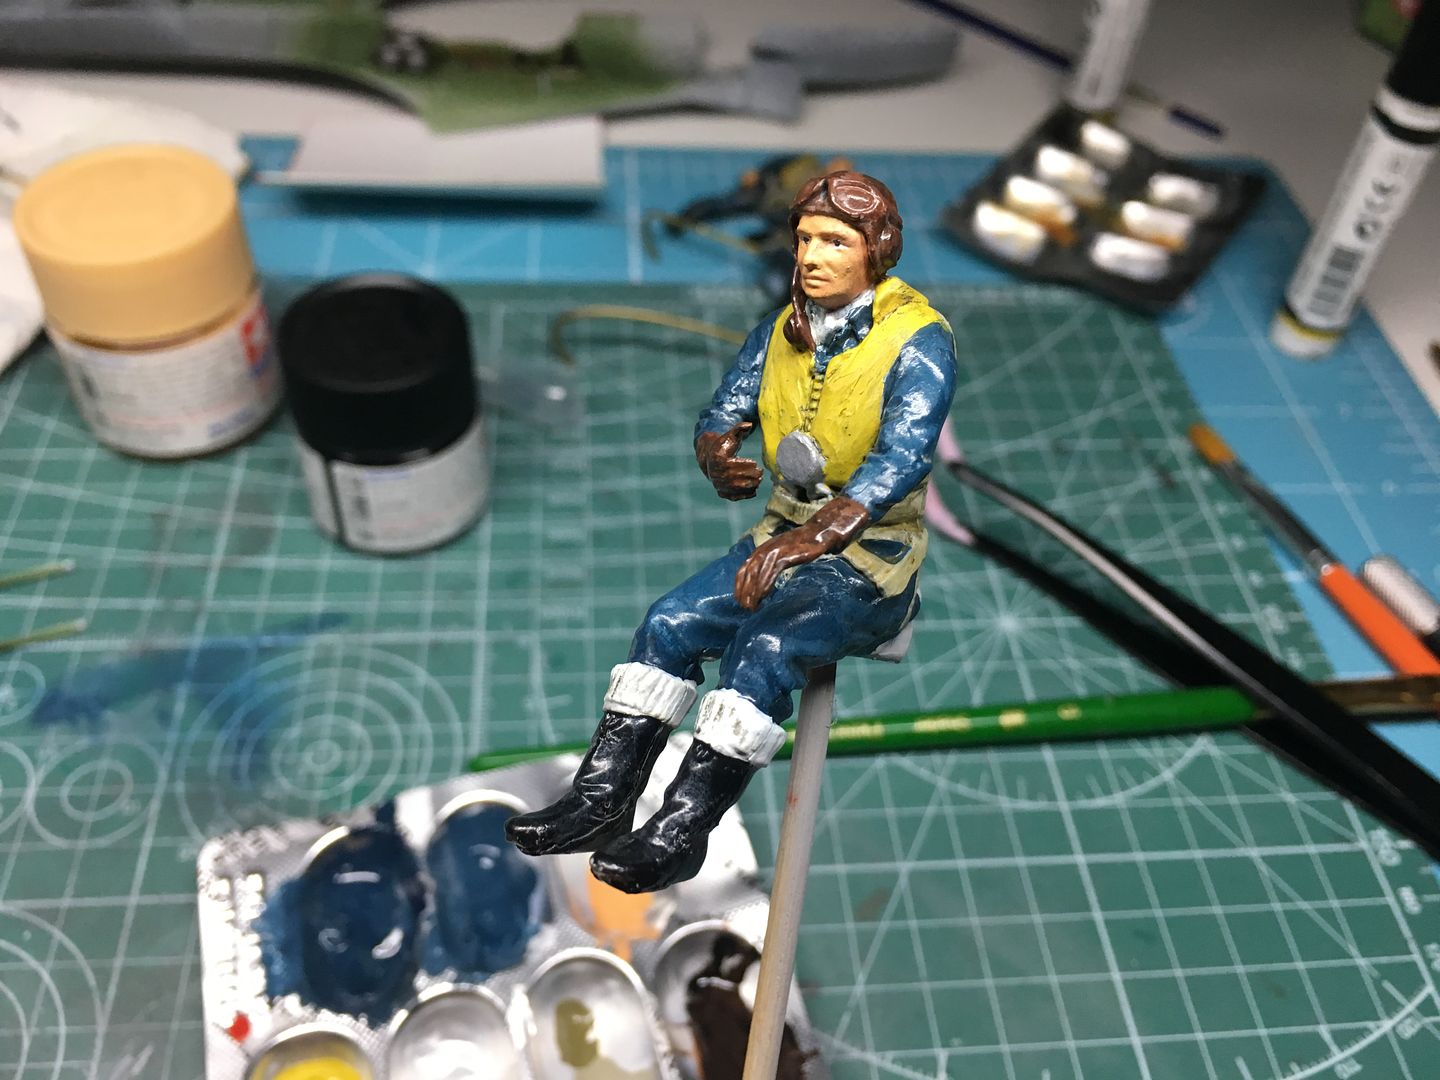
Here are my attempts at the figure painting!!
This is obviously a new skill to learn - I'll show some of the Mossie crew here as well for comparison, as I have done them at the same time - not finished yet.

Amazing the difference in size from 1/32nd to 1/24!
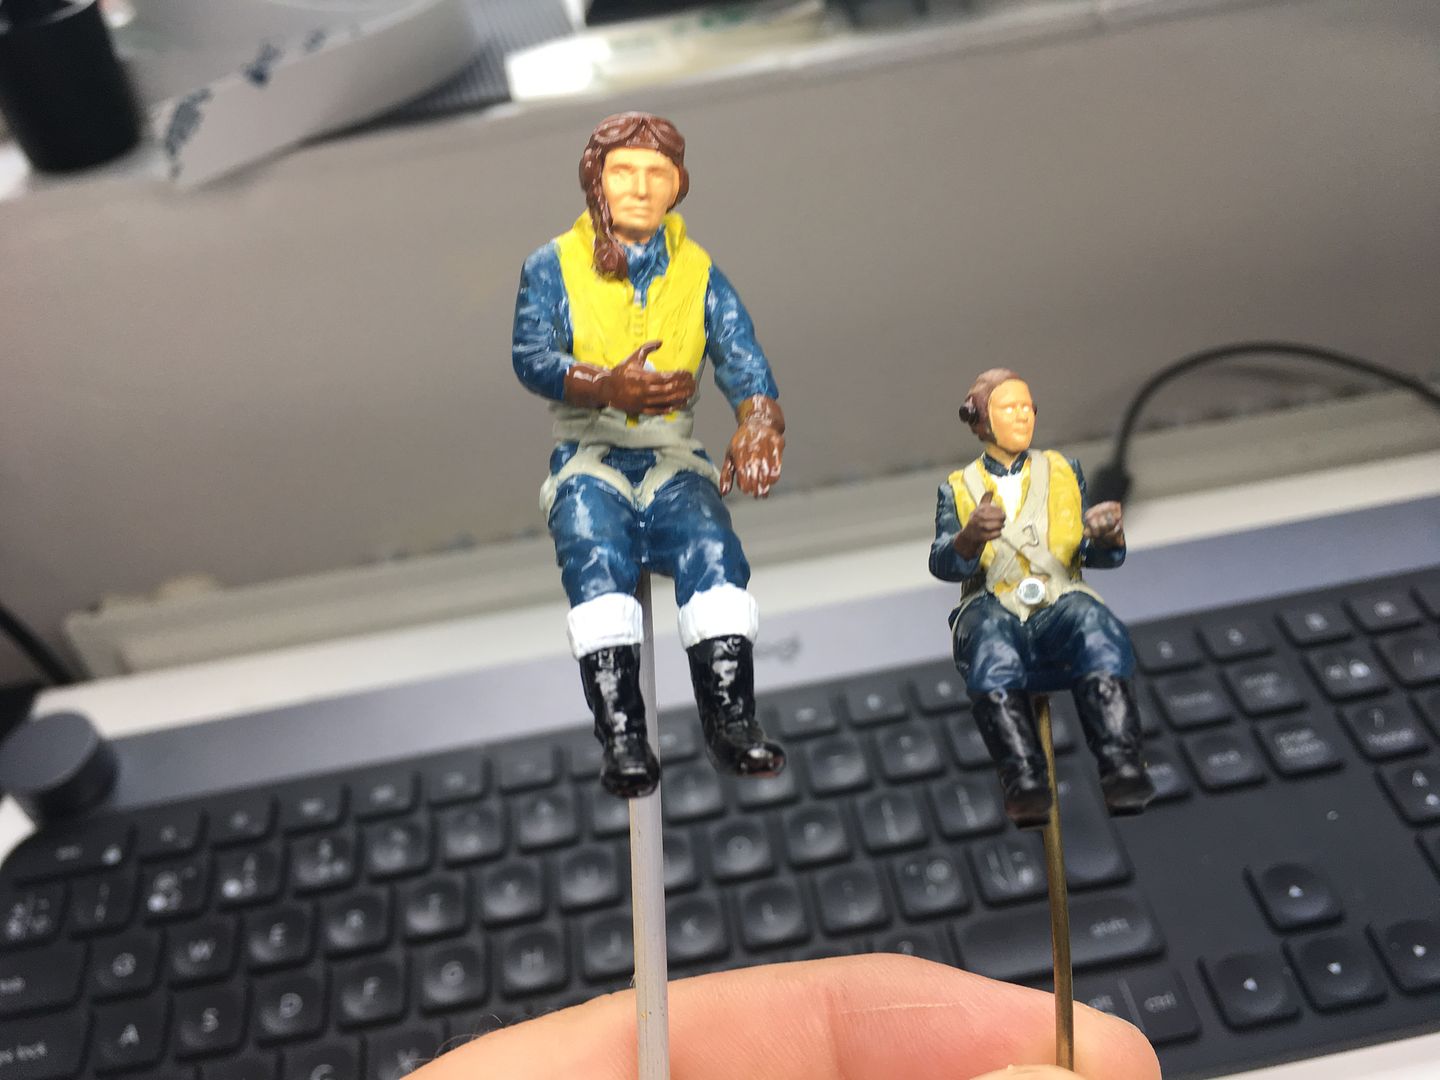
1/32nd

Test fit:

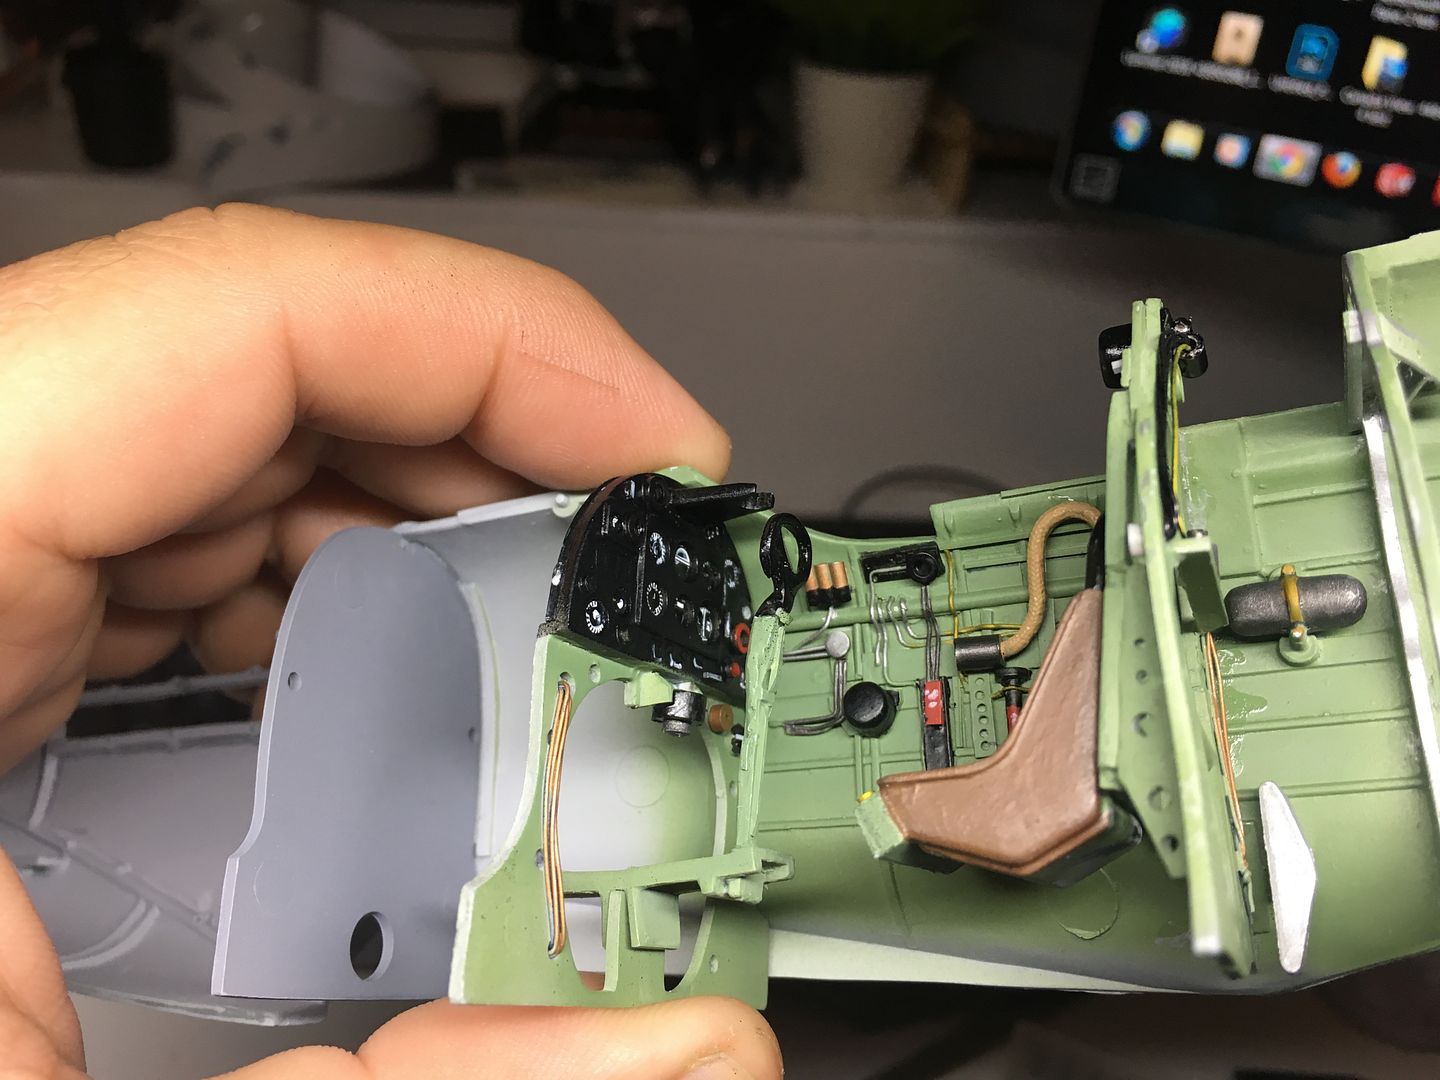
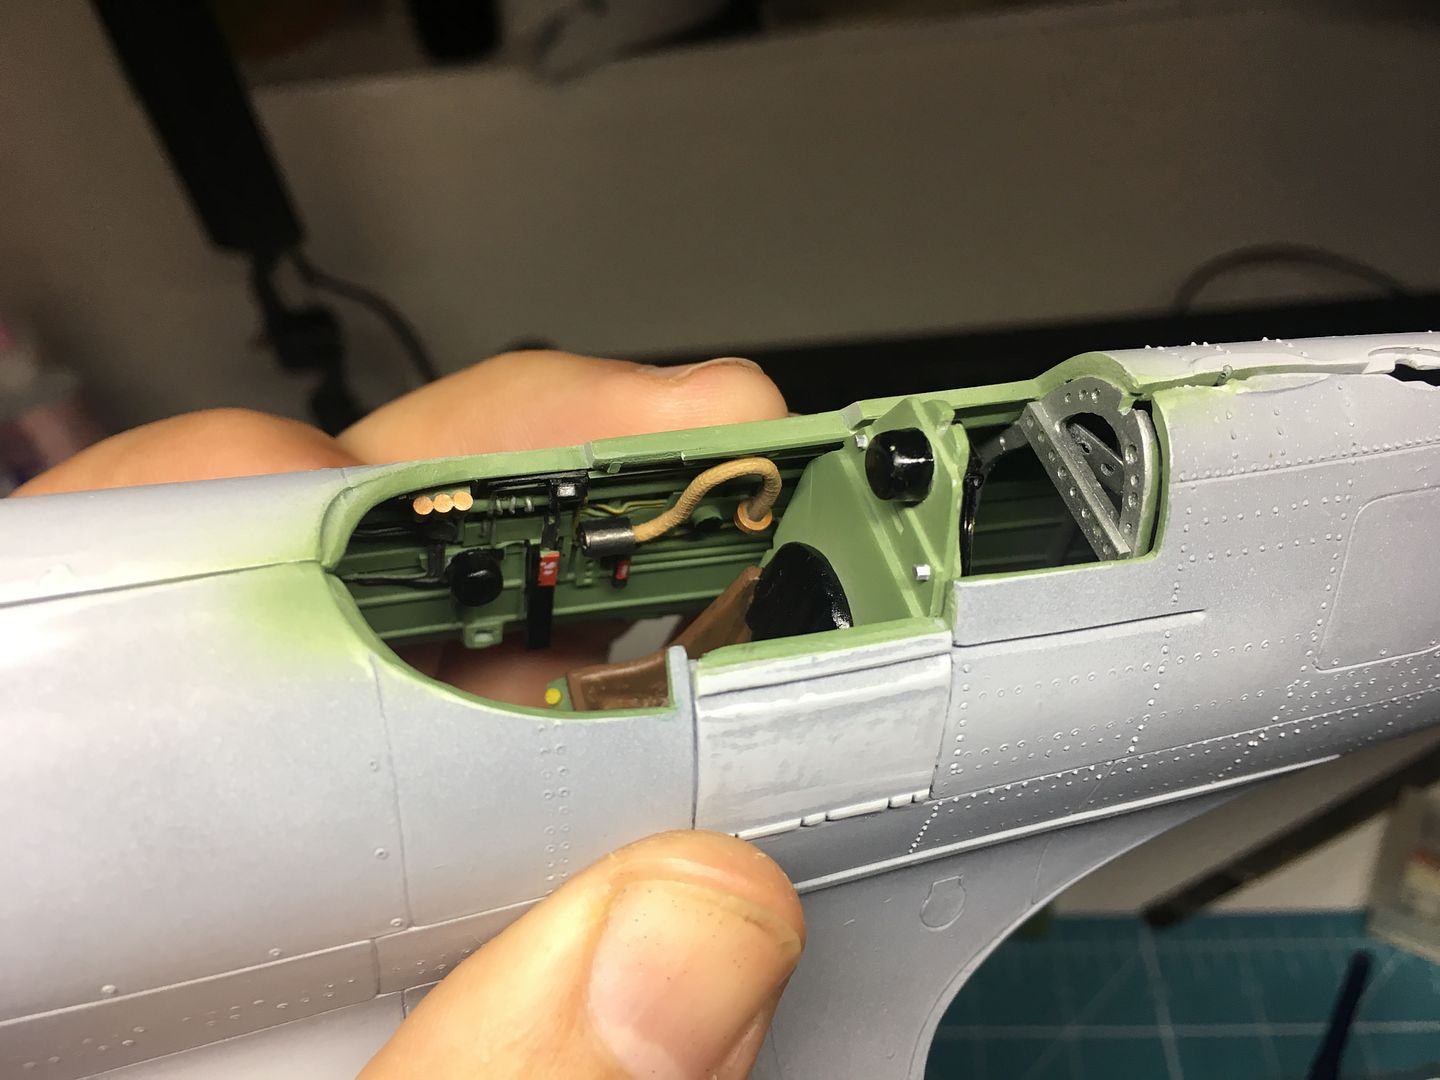
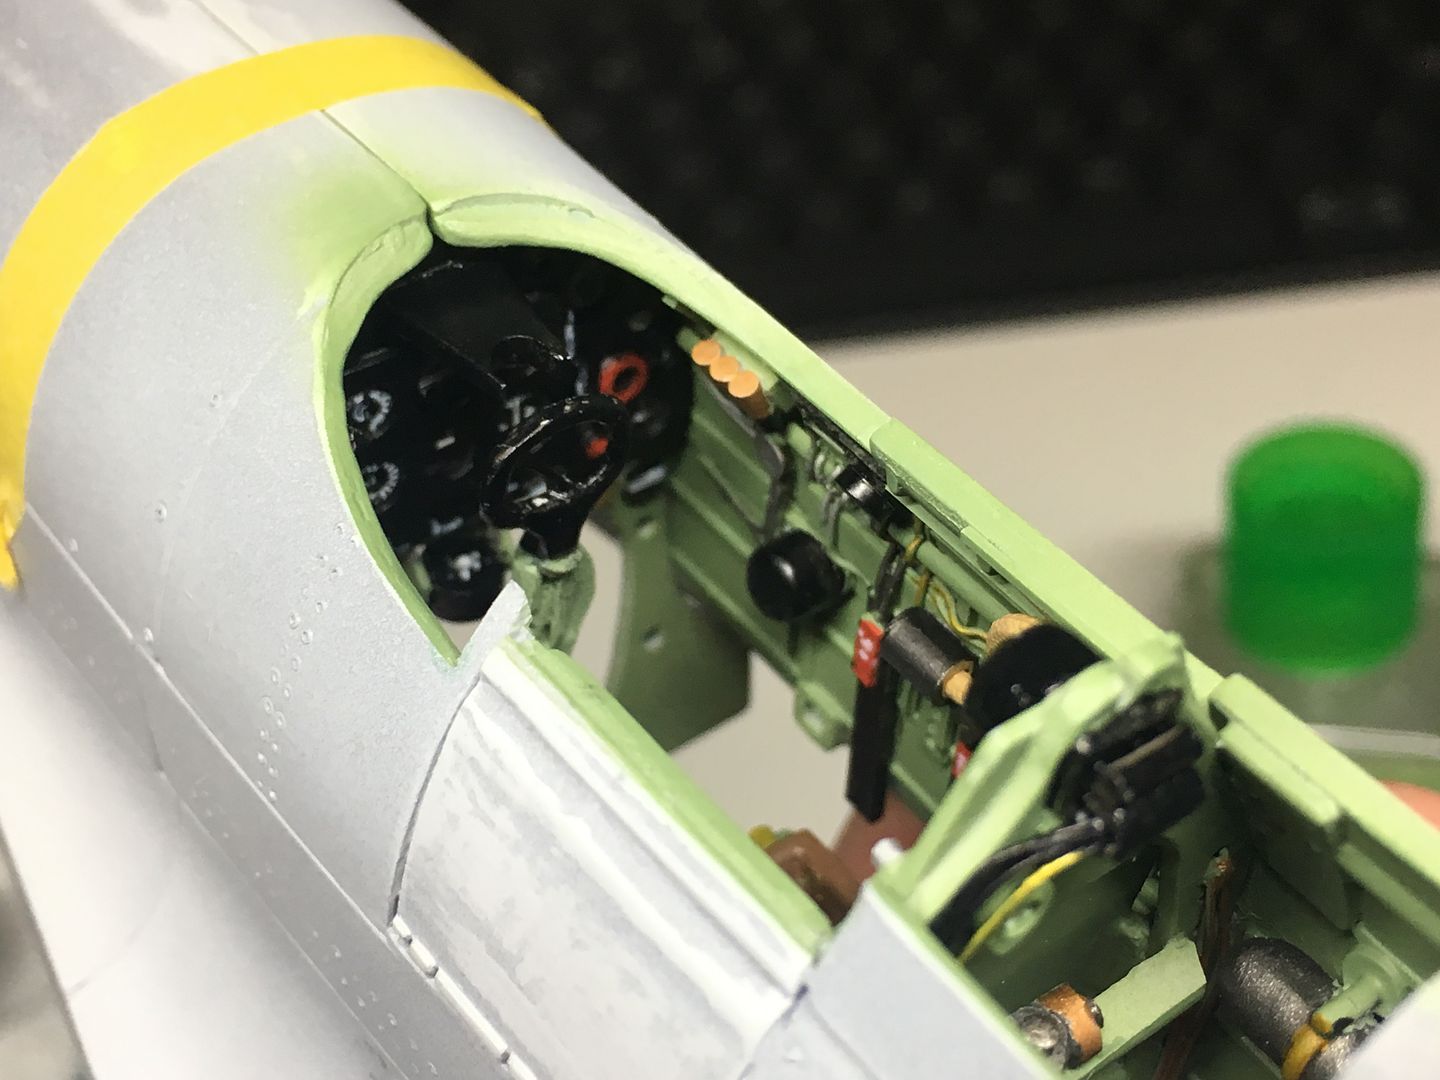
I also applied some basic washes to the interior of the cockpit...


This is obviously a new skill to learn - I'll show some of the Mossie crew here as well for comparison, as I have done them at the same time - not finished yet.
Amazing the difference in size from 1/32nd to 1/24!
1/32nd
Test fit:
I also applied some basic washes to the interior of the cockpit...
I'd bought the Eduard harness set before I knew I was going to have Ginger in place, but still wanted to use at least some of it! Added the linkage I had seen in various source pics...


I had already filed off the moulded in harness, glued these on top...I'll certainly add some wash etc to these, as they are far to clean and flat!
With that - I glued the two halves together...
I can still reach what I need to reach at final touch-up stage.

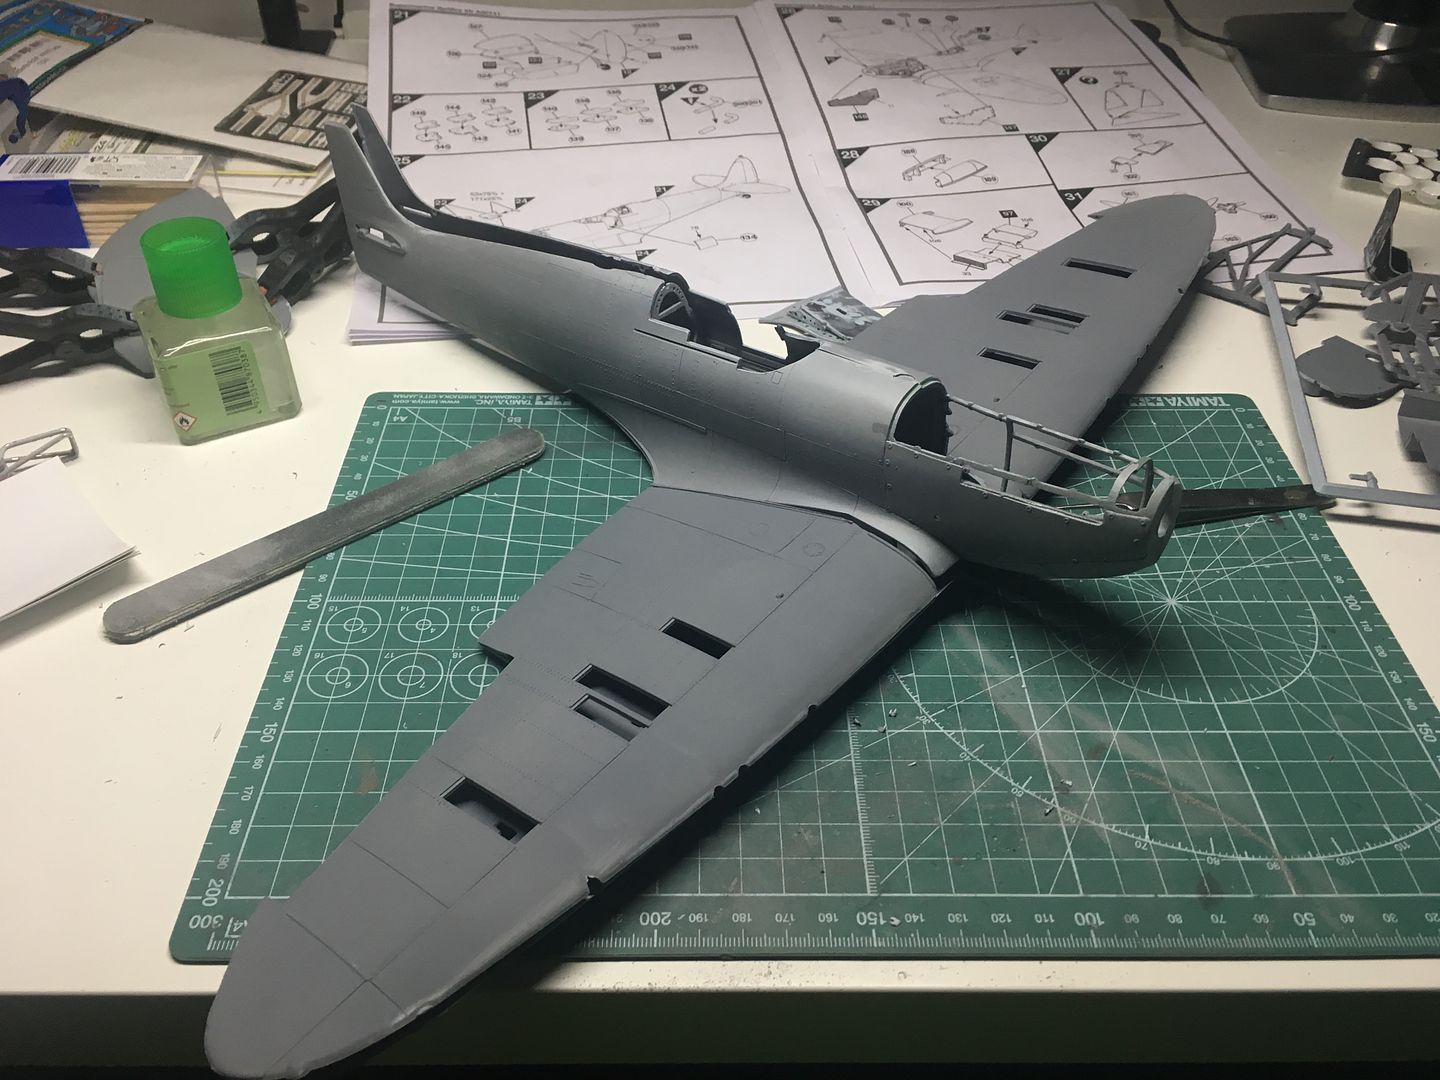
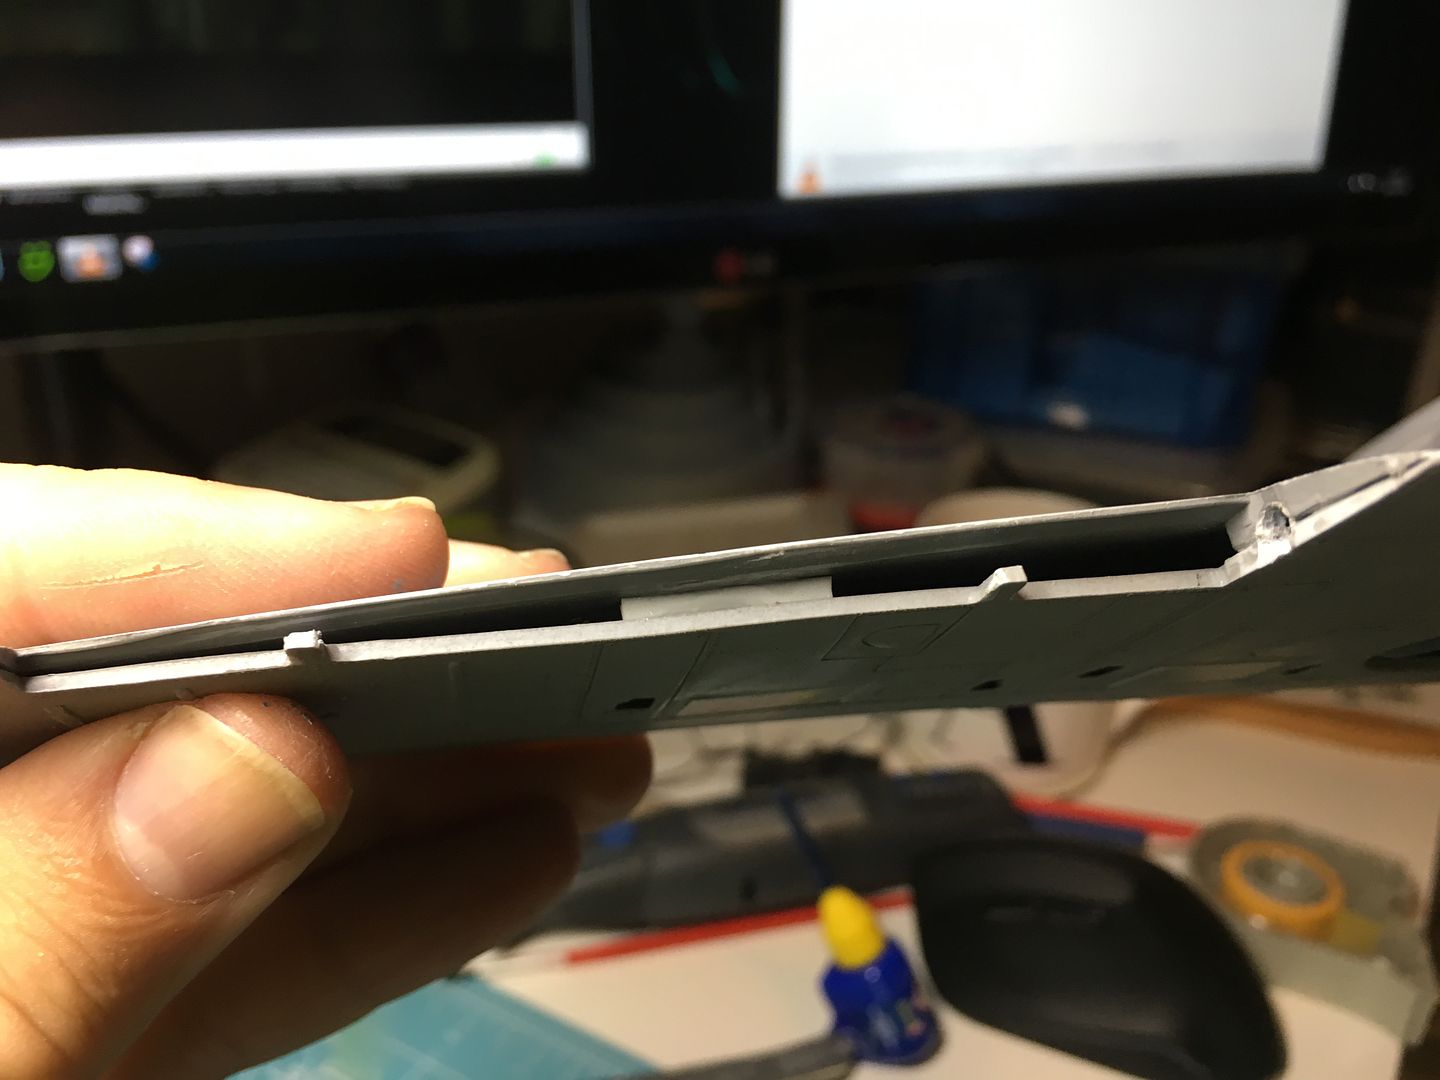
Fitting the fuselage to the wings required some....thinning! Lots of lumpy, thick tooling here from this old kit...
Lots of rigging to help parts line up and set where I wanted them to!
Gluing in spacers to hold the wing skins togther...
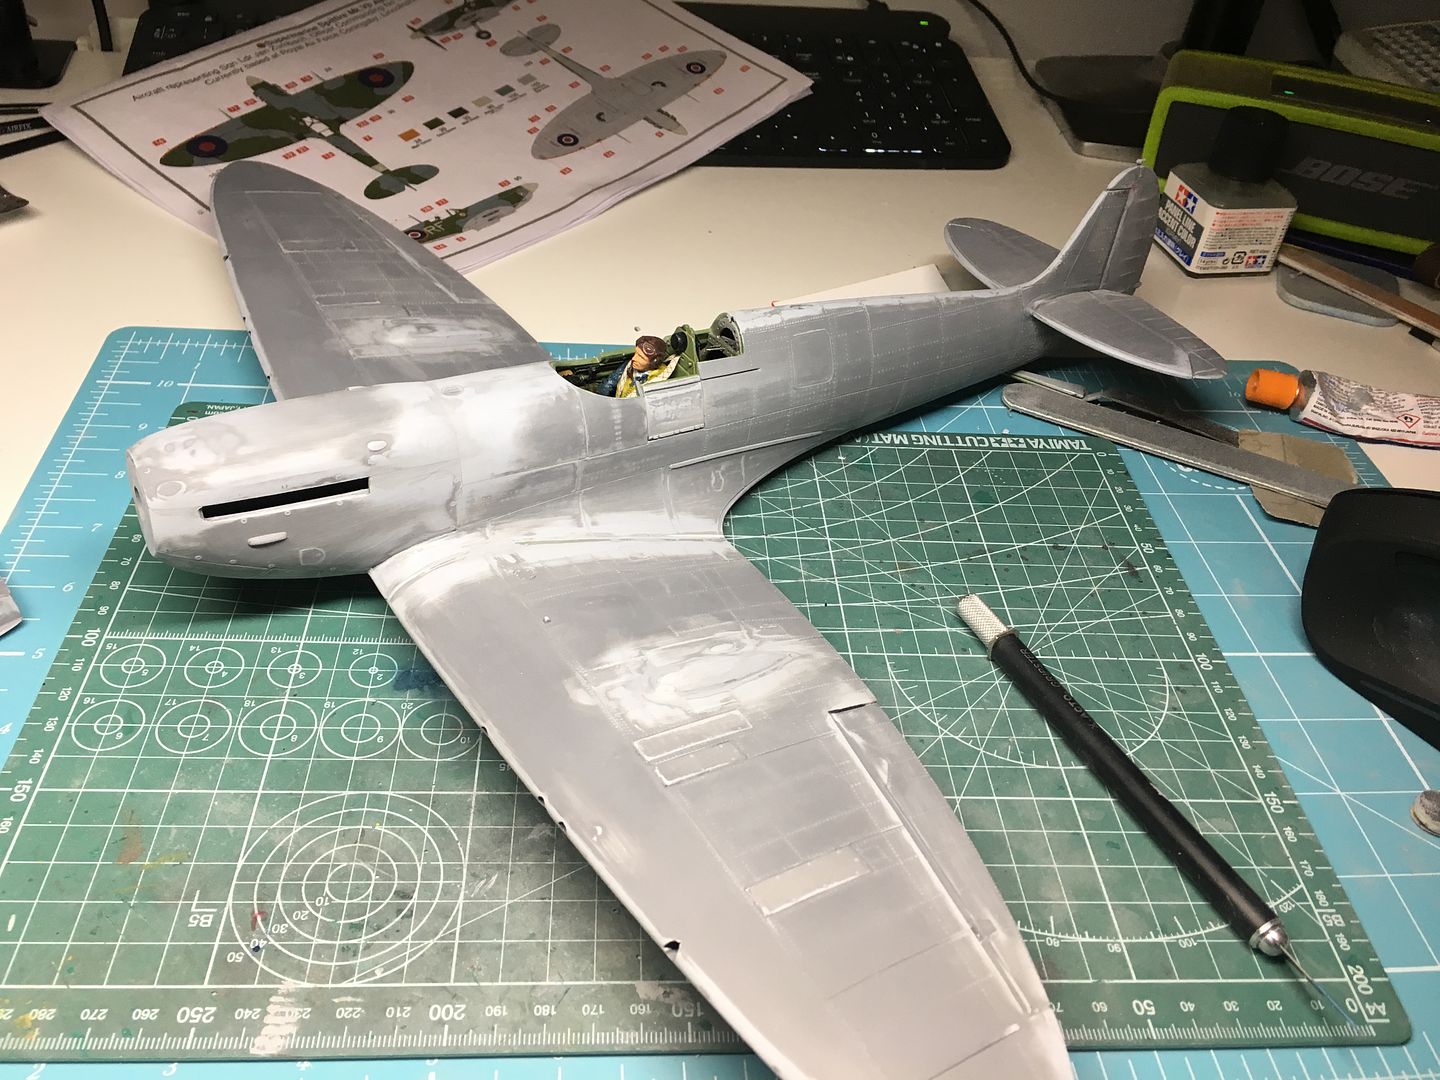
But starting to look like a plane now...

Let the filling, sanding and cursing begin.
Although I had fitted the undercarriage, the plane will be 'flying' - so don't need this...
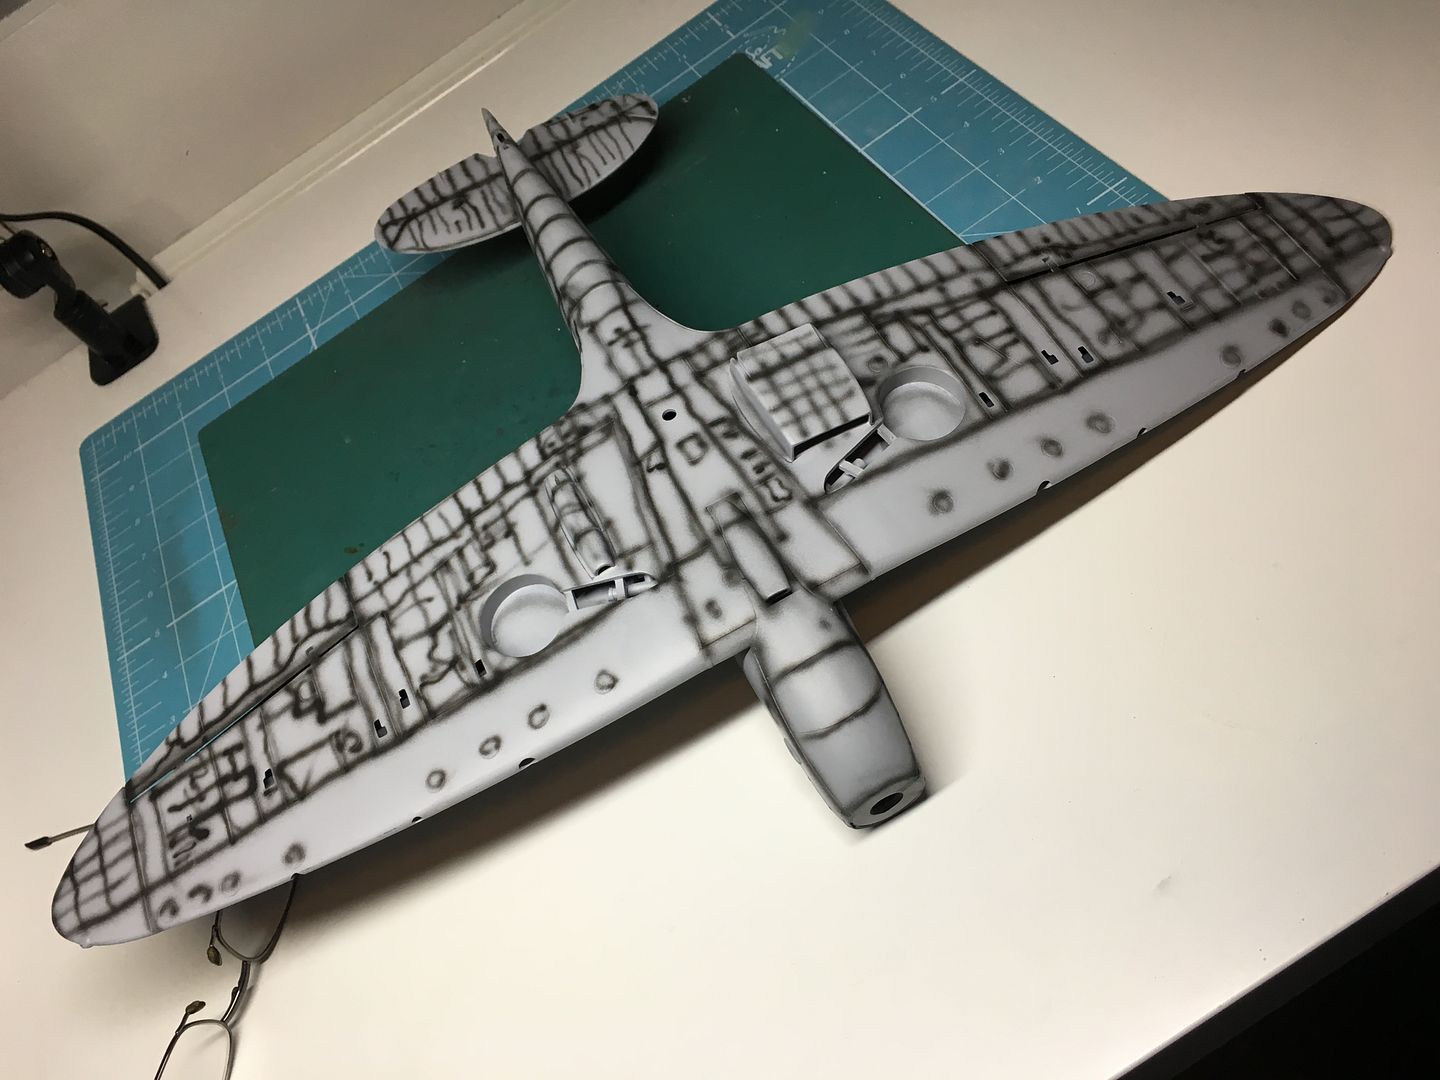
I decided to cut the undercarriage out, so I could fix the wheel covers neatly, and glue the wheels in evenly, without being tied to the lazily moulded undercarriage struts etc. I also added the walls to the wheel bays...
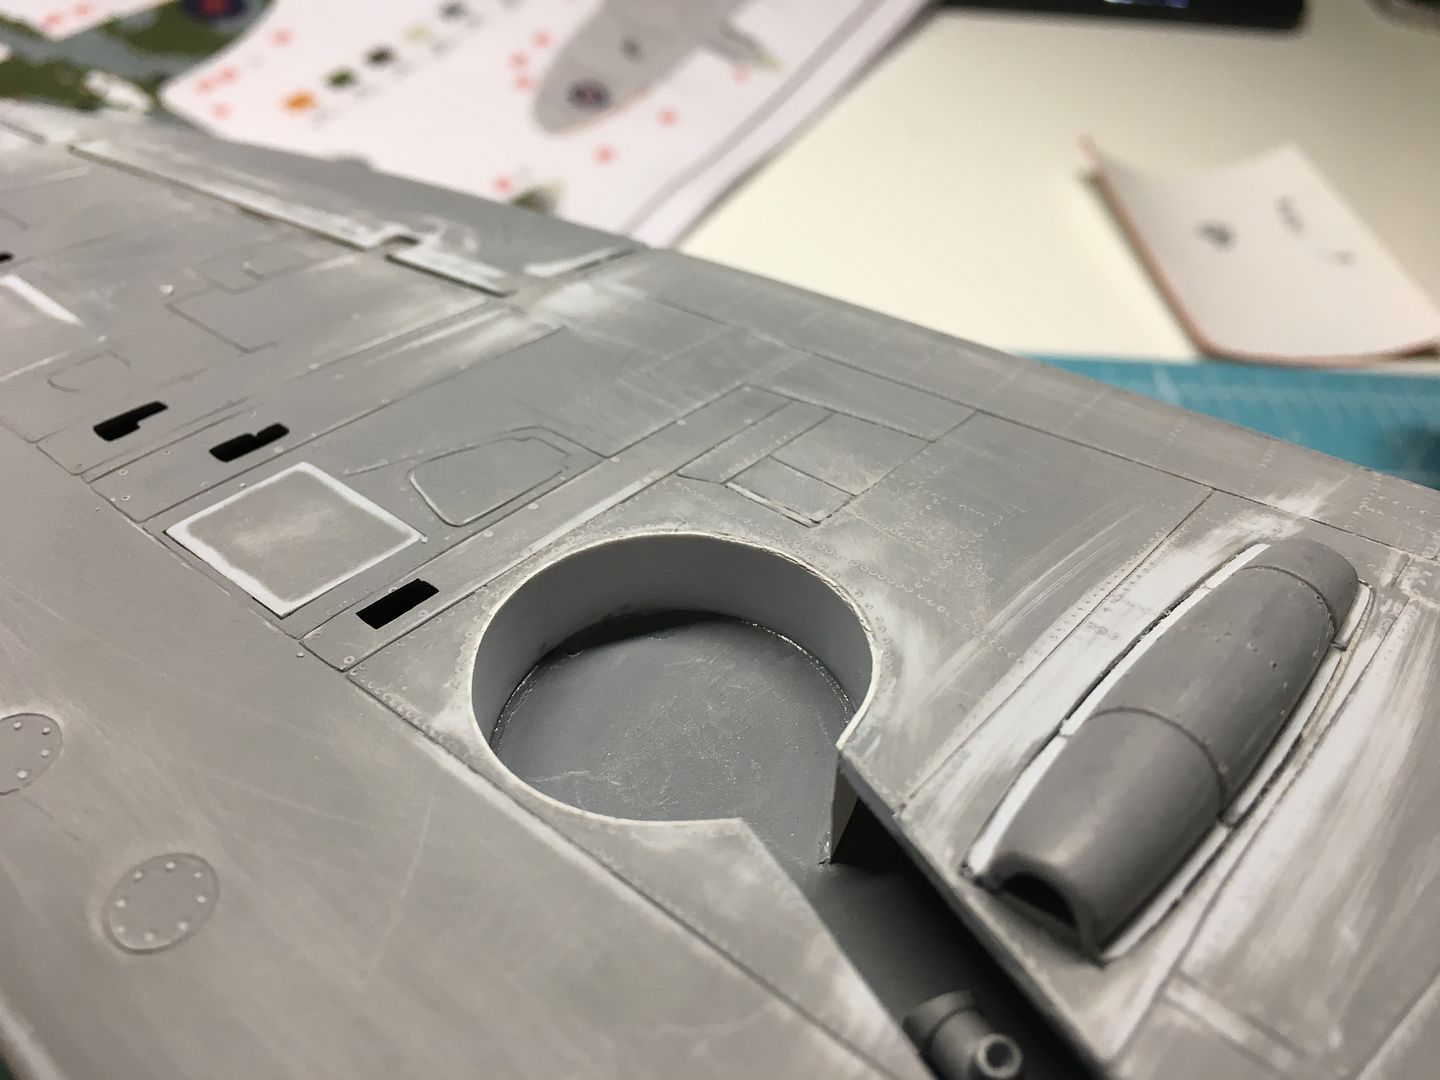

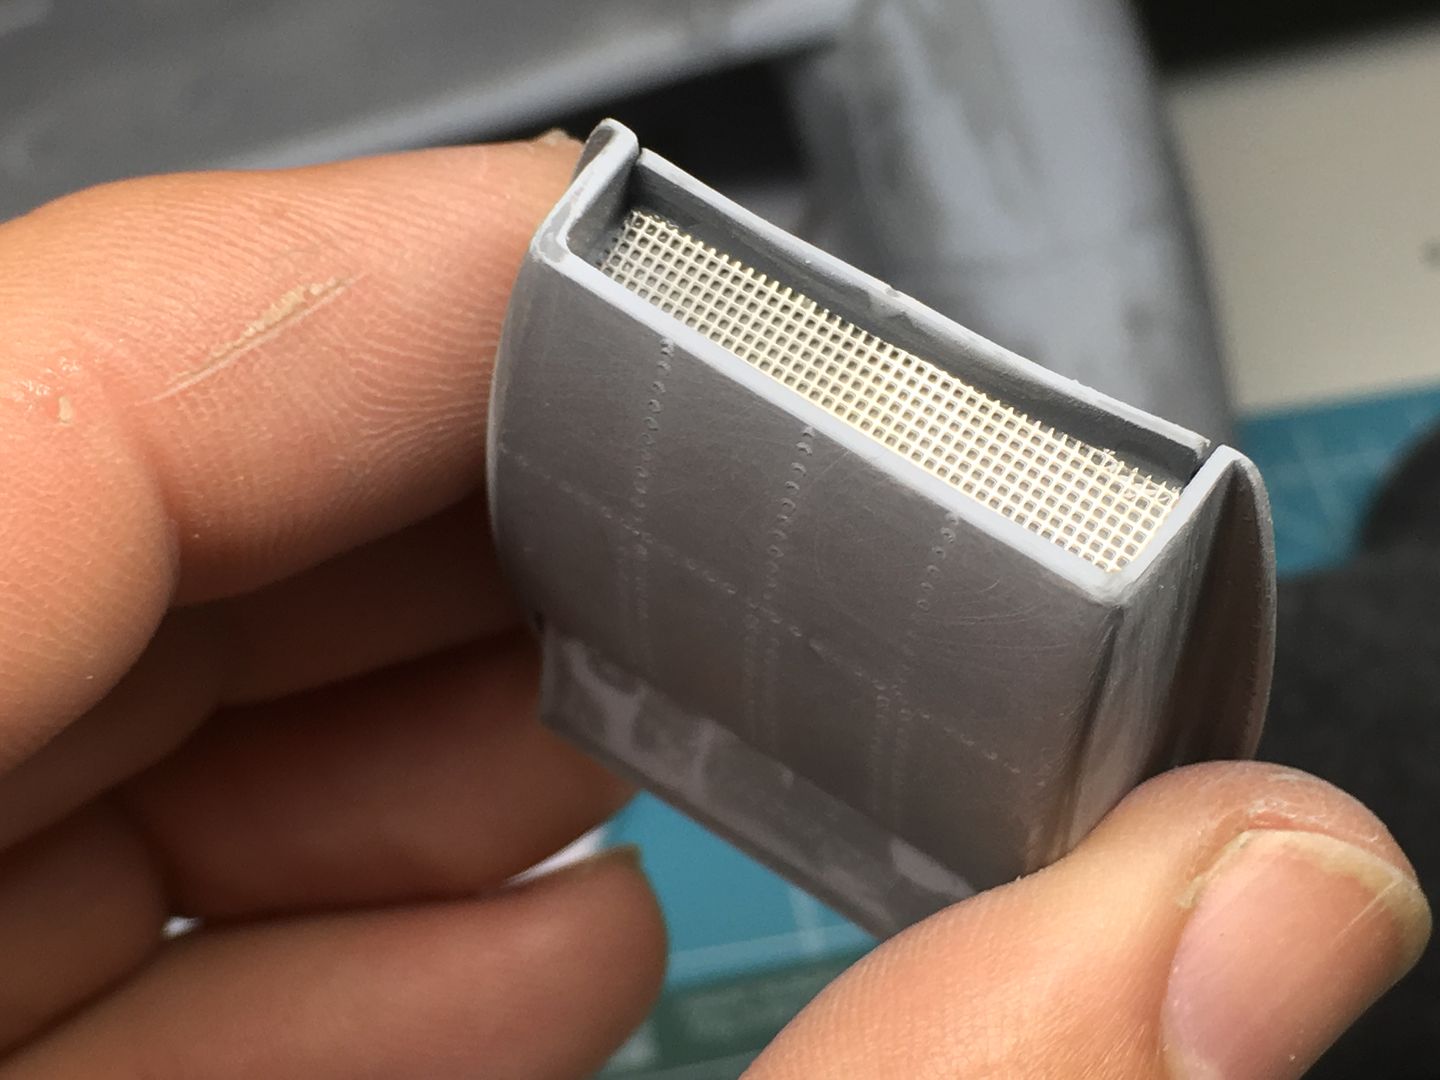
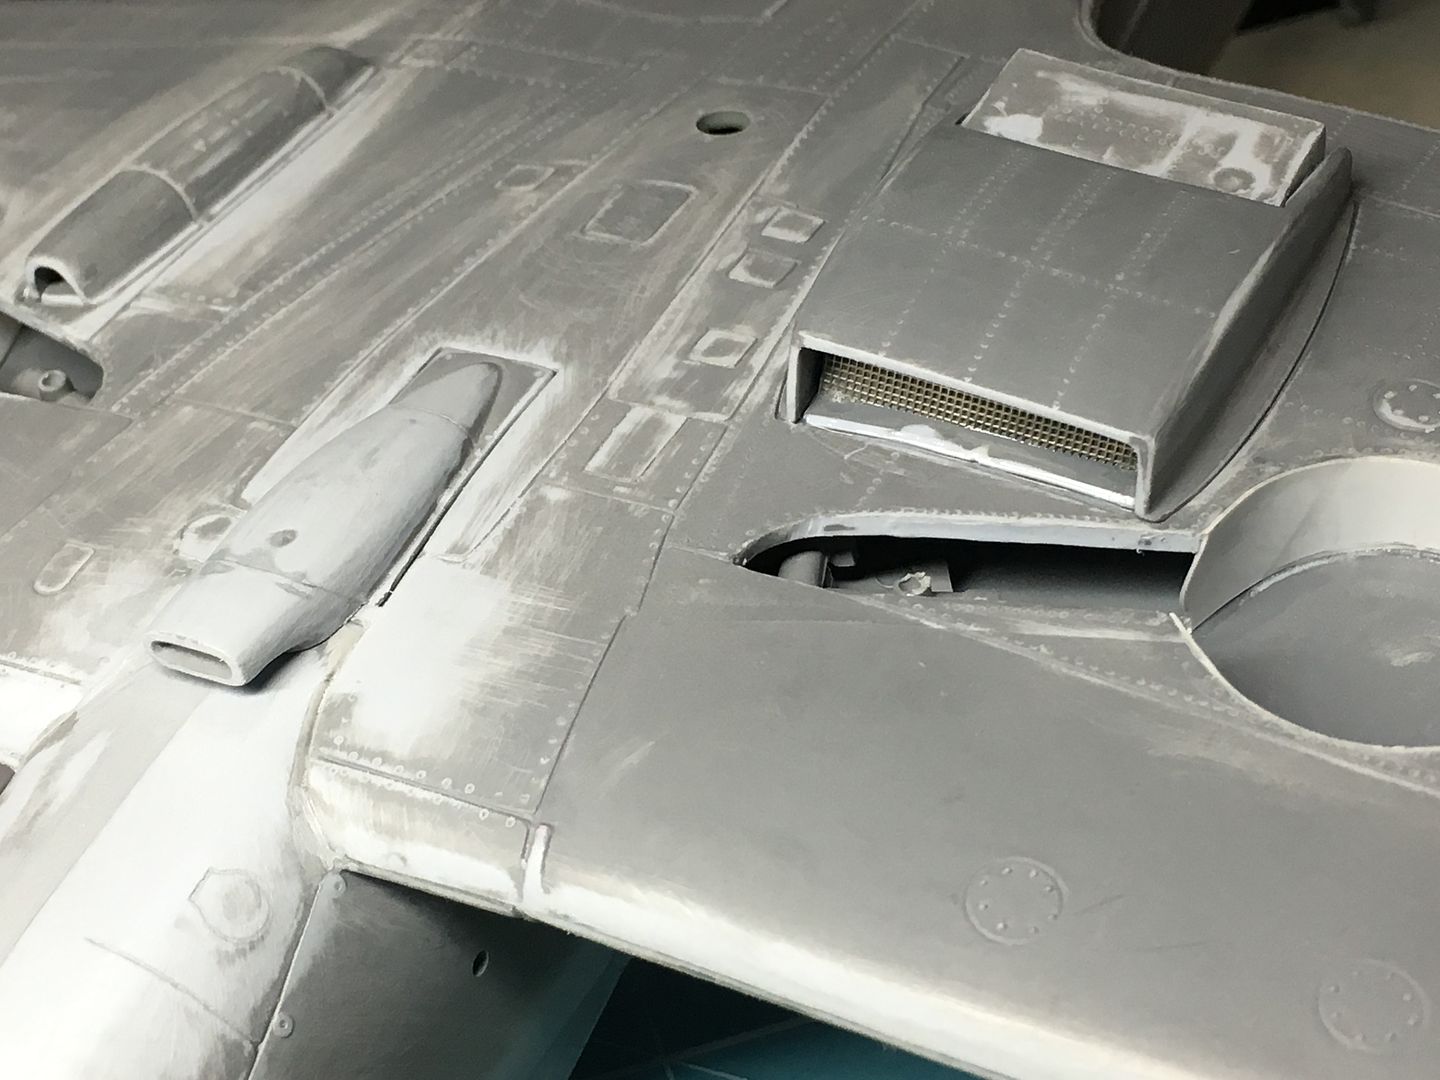
Not going to add huge detail, but did add some mesh to these visible rads...

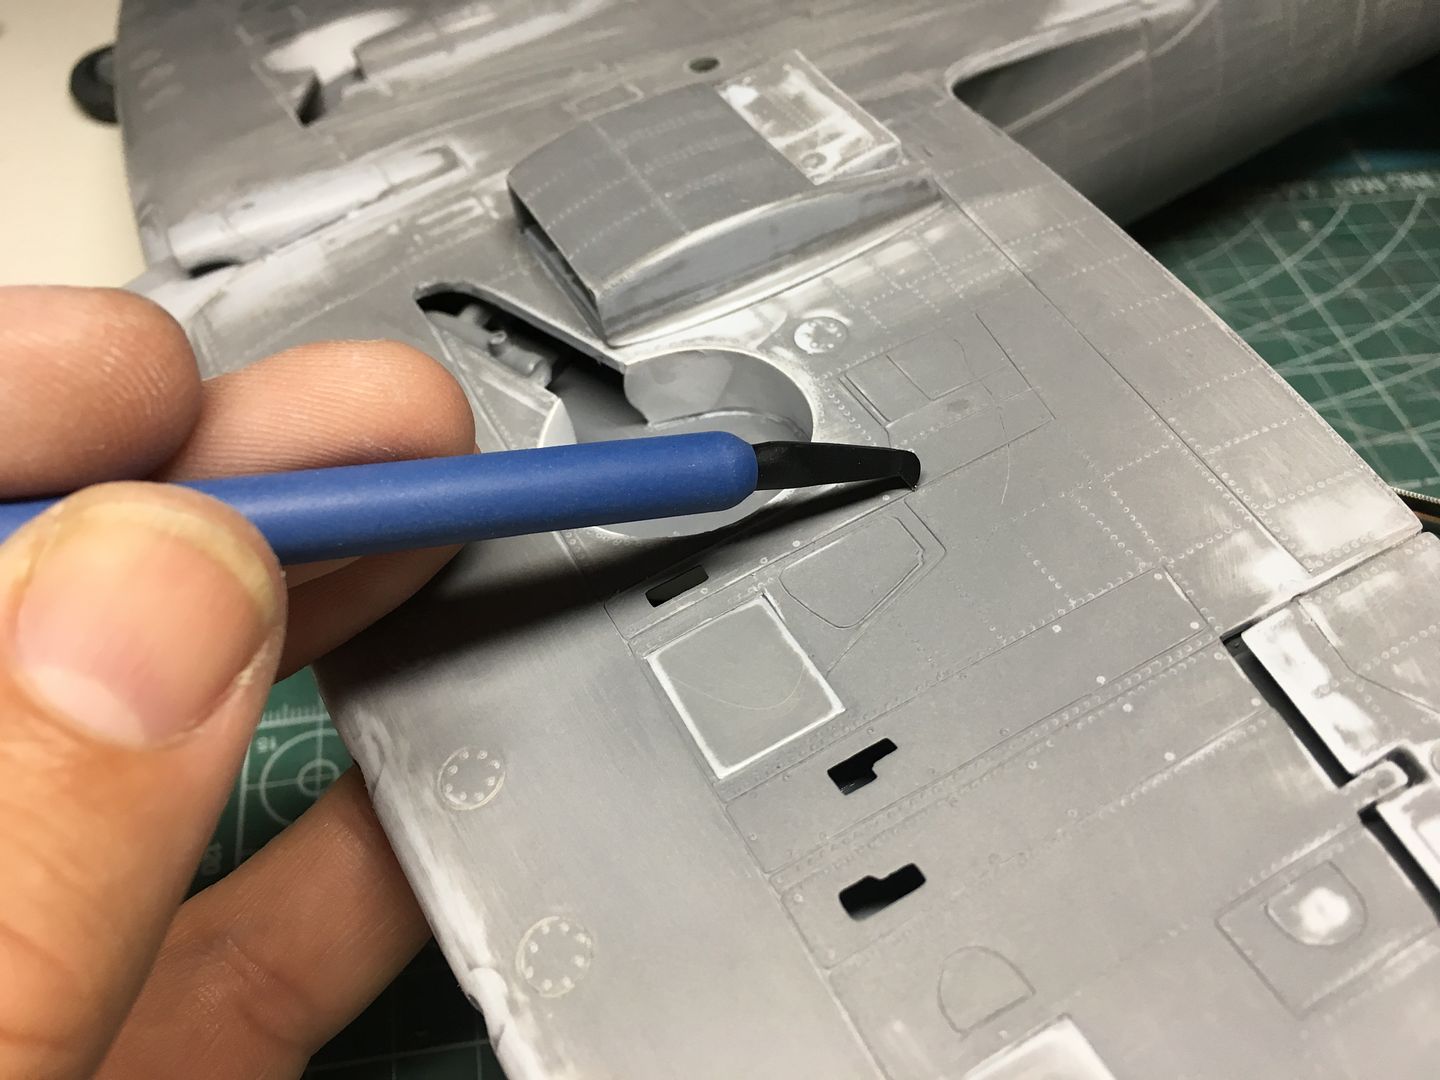
Now it is the new-skill-to-learn of re-scribing panel lines!
...and lots of sanding.
Added a missing strut, then covered Ginger.
...so I could get some filler-primer on.
and then start filling, sanding and re-scribing all over again!

I had already filed off the moulded in harness, glued these on top...I'll certainly add some wash etc to these, as they are far to clean and flat!
With that - I glued the two halves together...
I can still reach what I need to reach at final touch-up stage.
Fitting the fuselage to the wings required some....thinning! Lots of lumpy, thick tooling here from this old kit...
Lots of rigging to help parts line up and set where I wanted them to!
Gluing in spacers to hold the wing skins togther...
But starting to look like a plane now...
Let the filling, sanding and cursing begin.
Although I had fitted the undercarriage, the plane will be 'flying' - so don't need this...
I decided to cut the undercarriage out, so I could fix the wheel covers neatly, and glue the wheels in evenly, without being tied to the lazily moulded undercarriage struts etc. I also added the walls to the wheel bays...
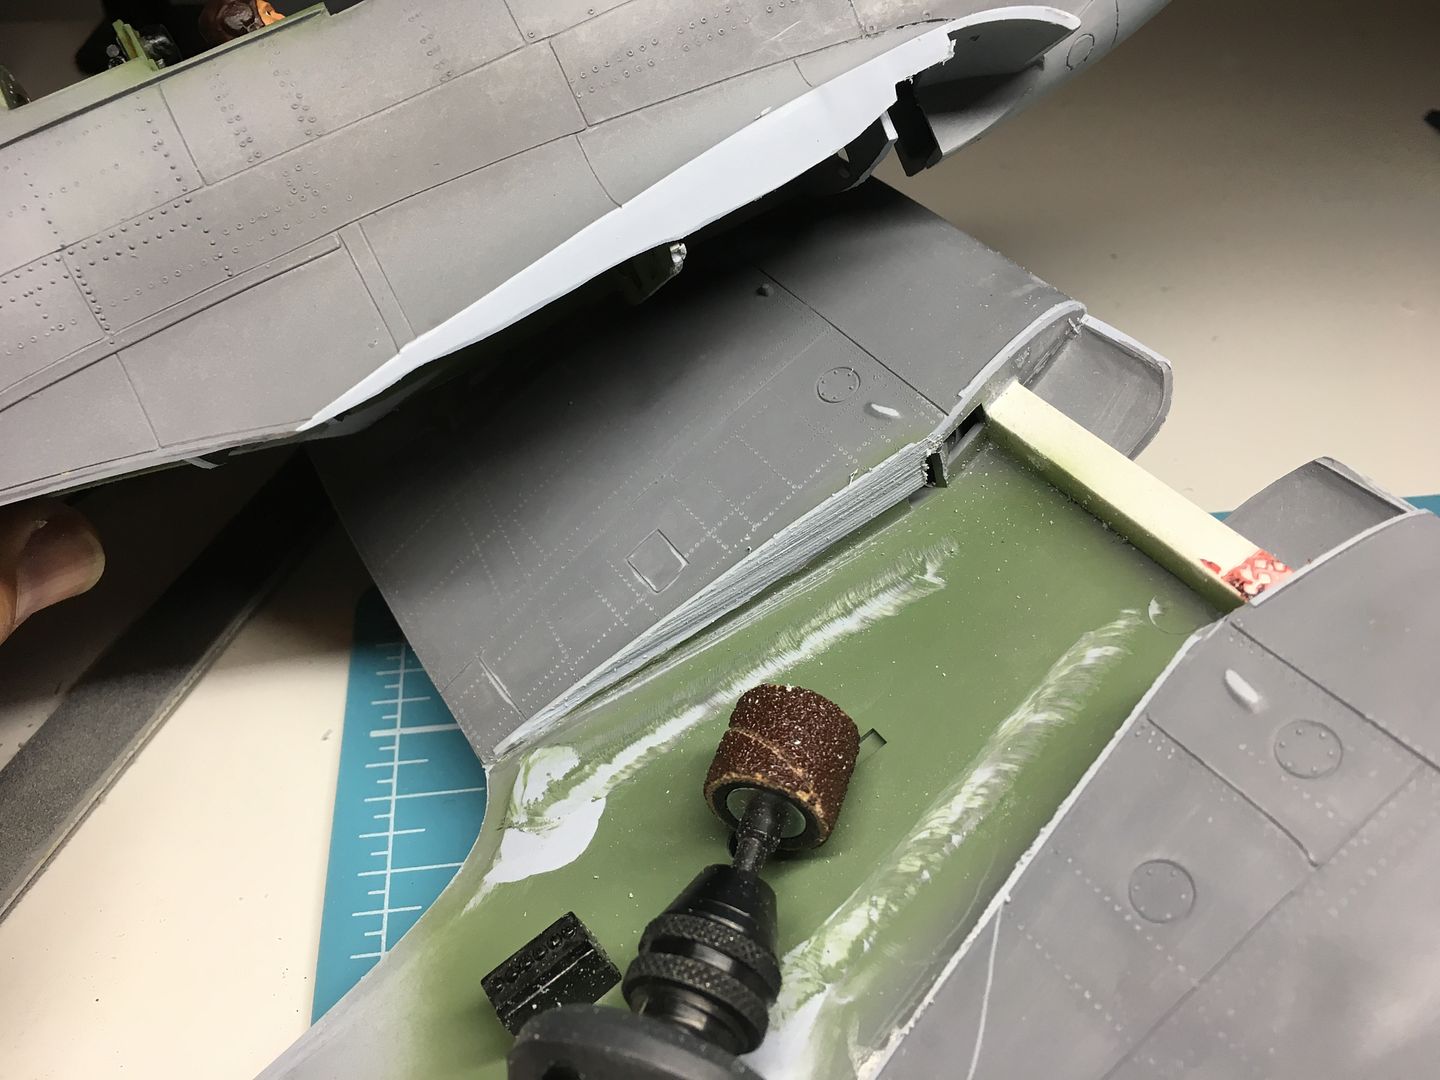
Not going to add huge detail, but did add some mesh to these visible rads...
Now it is the new-skill-to-learn of re-scribing panel lines!
...and lots of sanding.
Added a missing strut, then covered Ginger.
...so I could get some filler-primer on.
and then start filling, sanding and re-scribing all over again!
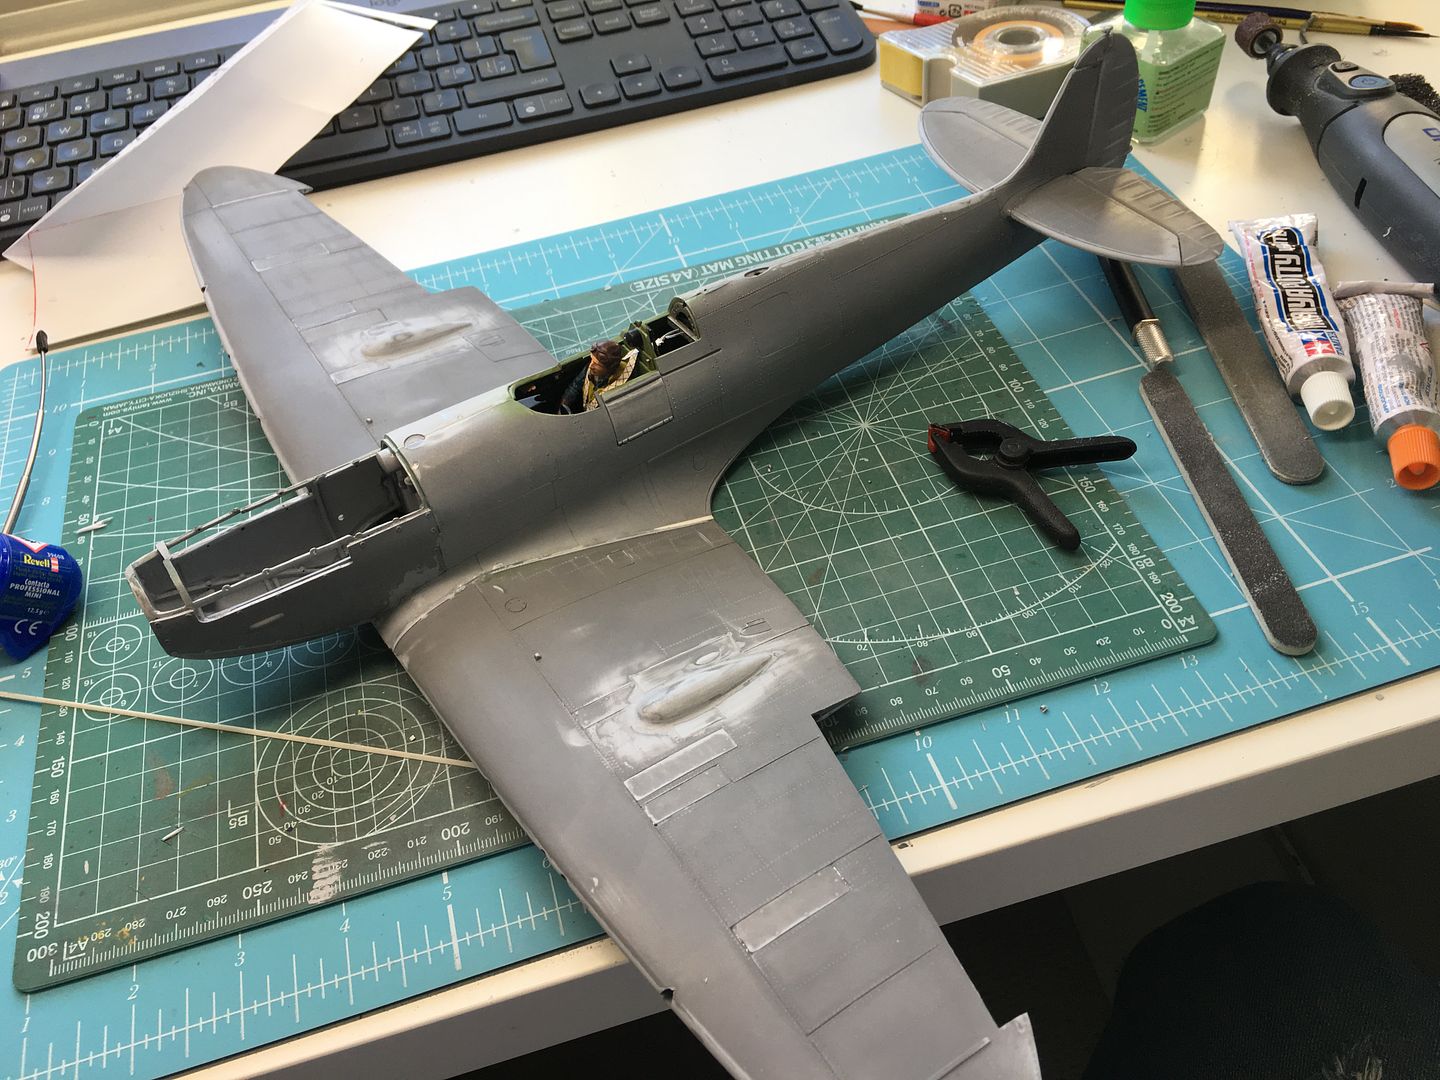
In terms of number-of-parts, yes - very.
Having only really built (almost) a very new Tamiya kit (the 1/32nd Mossie) the 'fit' (or lack of) is a bit of a shock - BUT, by building a flying version, I am avoiding a lot of the difficult-to-fit bits, like engine, panels, undercarriage etc!
Having only really built (almost) a very new Tamiya kit (the 1/32nd Mossie) the 'fit' (or lack of) is a bit of a shock - BUT, by building a flying version, I am avoiding a lot of the difficult-to-fit bits, like engine, panels, undercarriage etc!
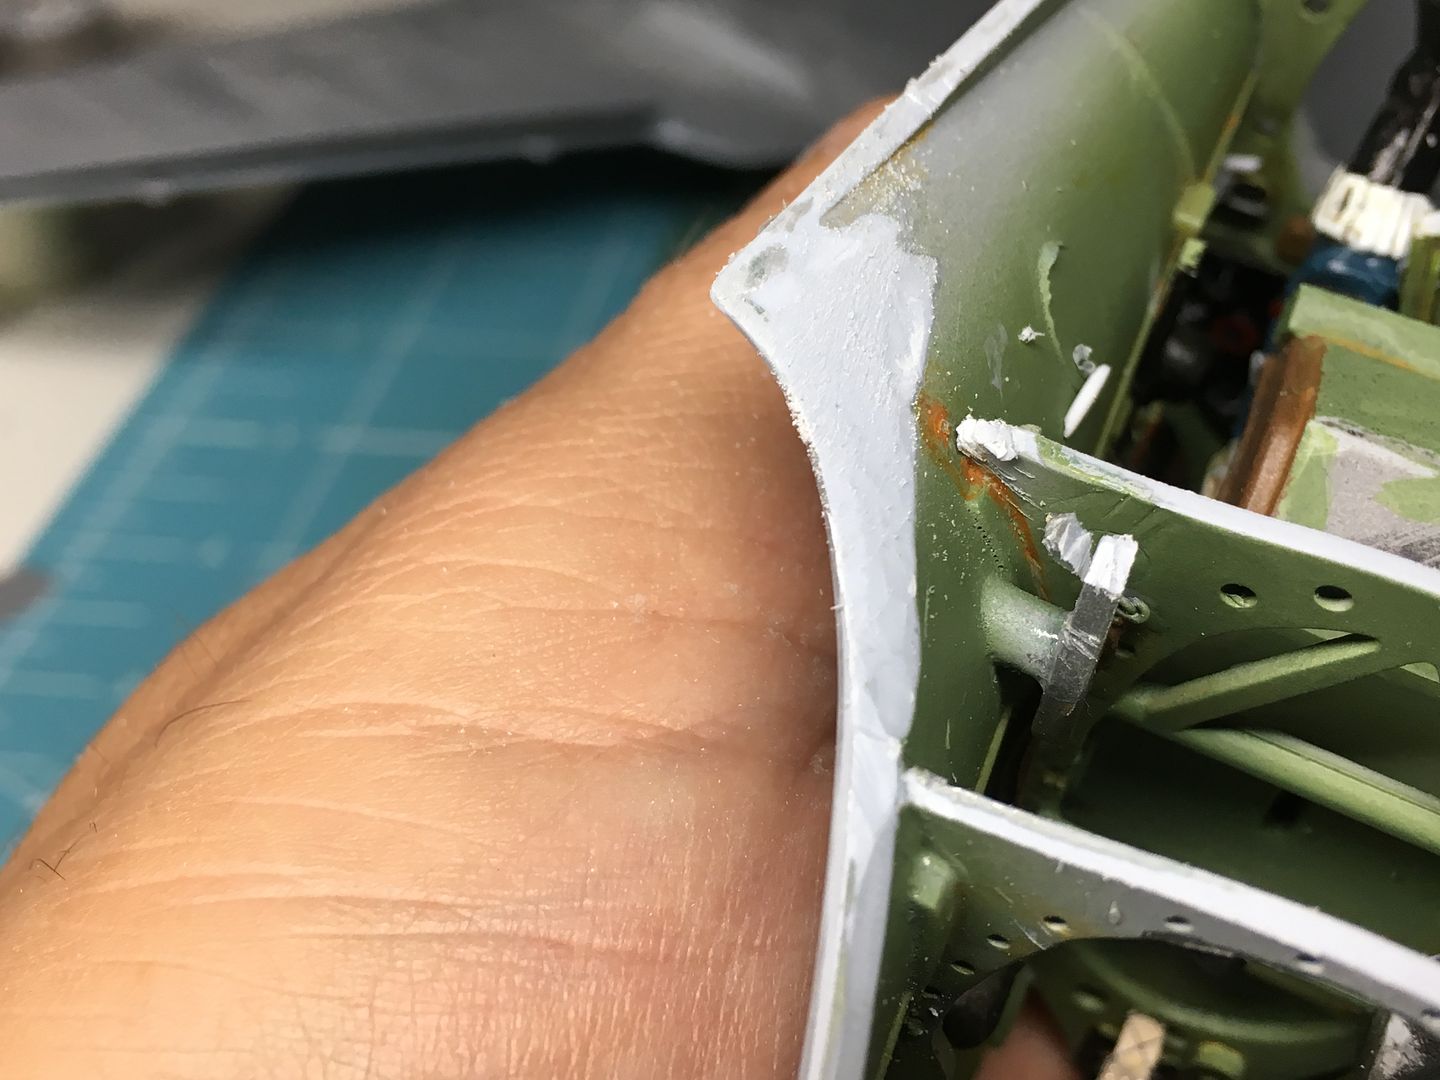
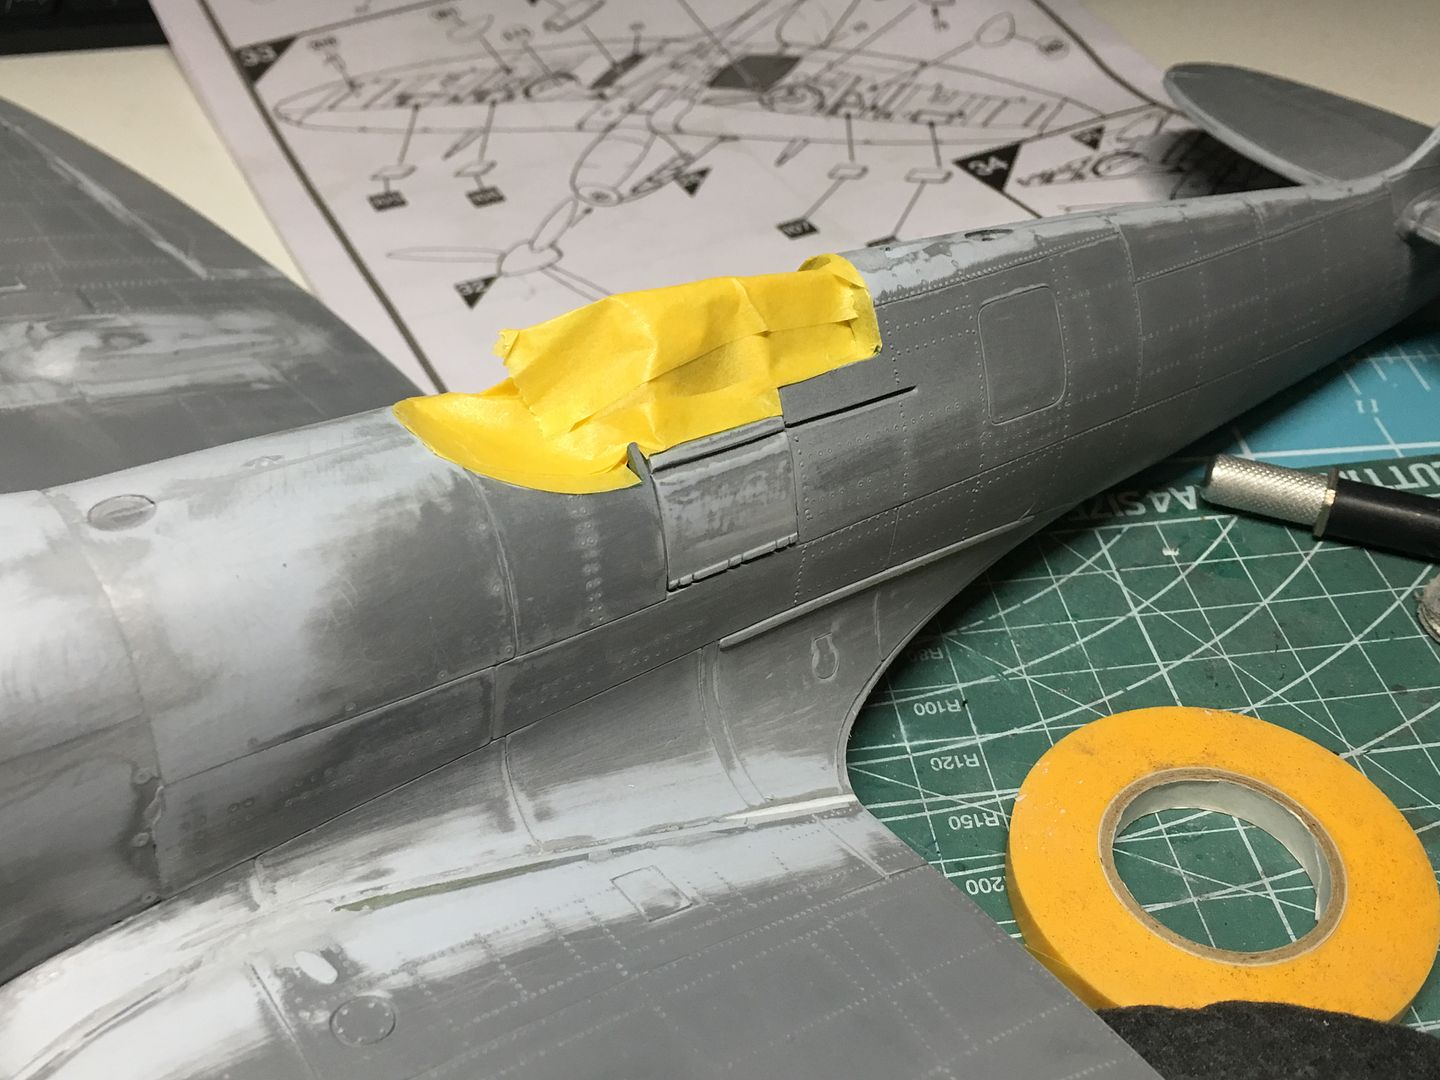
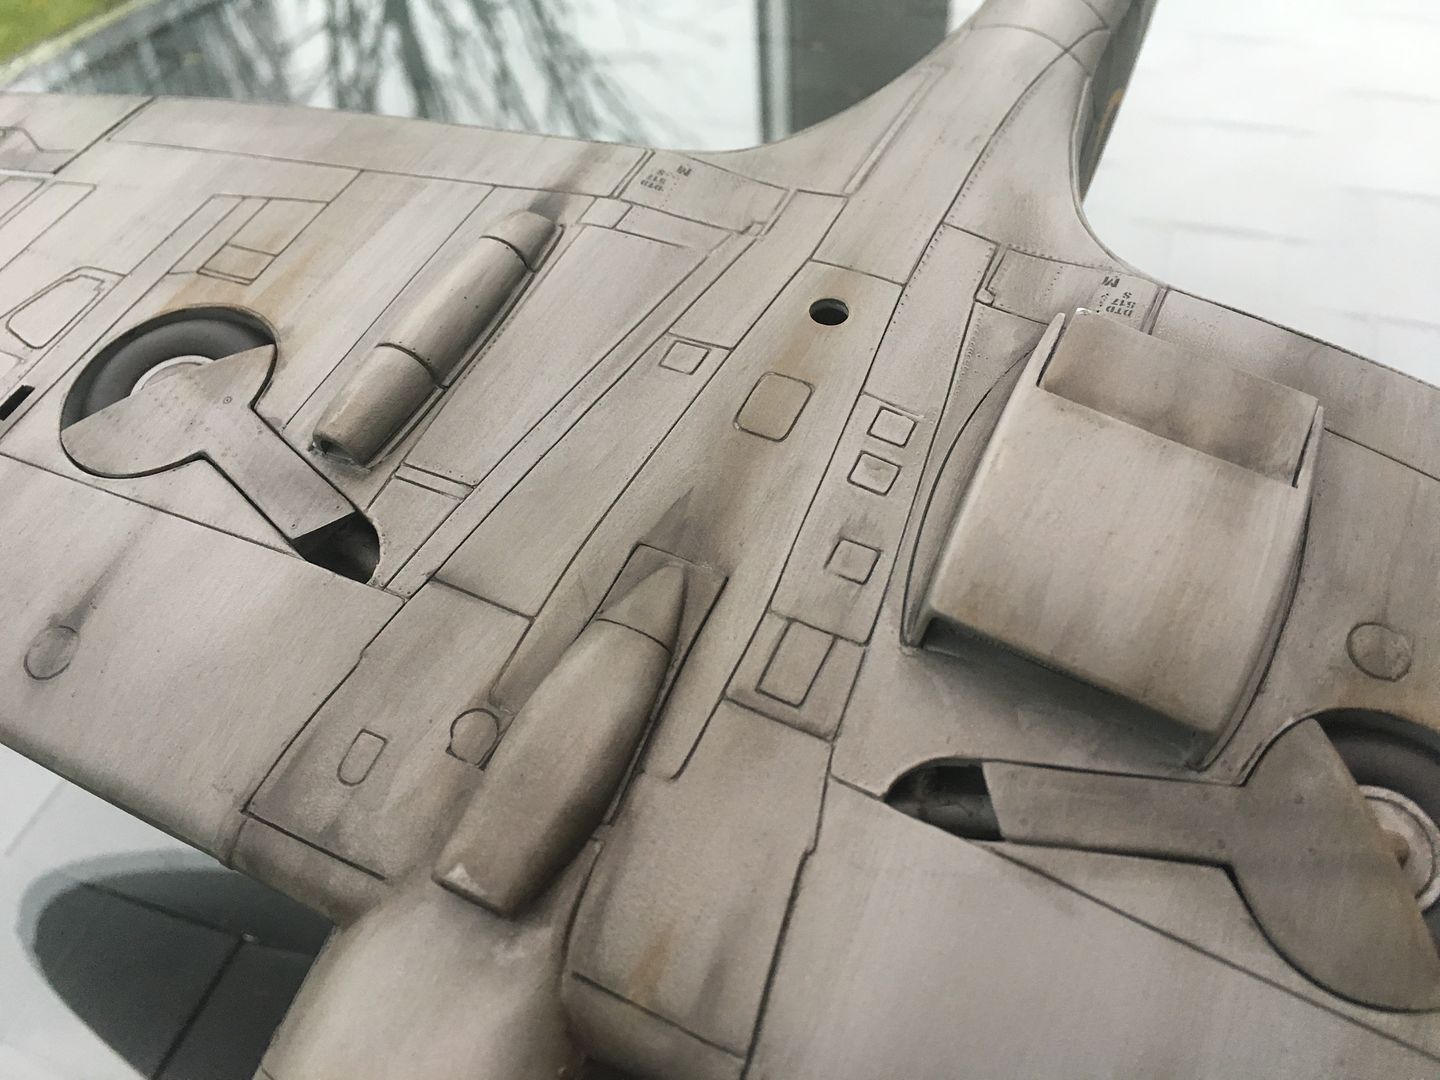
More filler - had to plug one of the pairs of gun holes, and the wing roots are a real pain on this model - each side is a different profile, and there are prominent ridges - that get sanded away as you try and fill gaps etc! Spent longer on this area than any other...

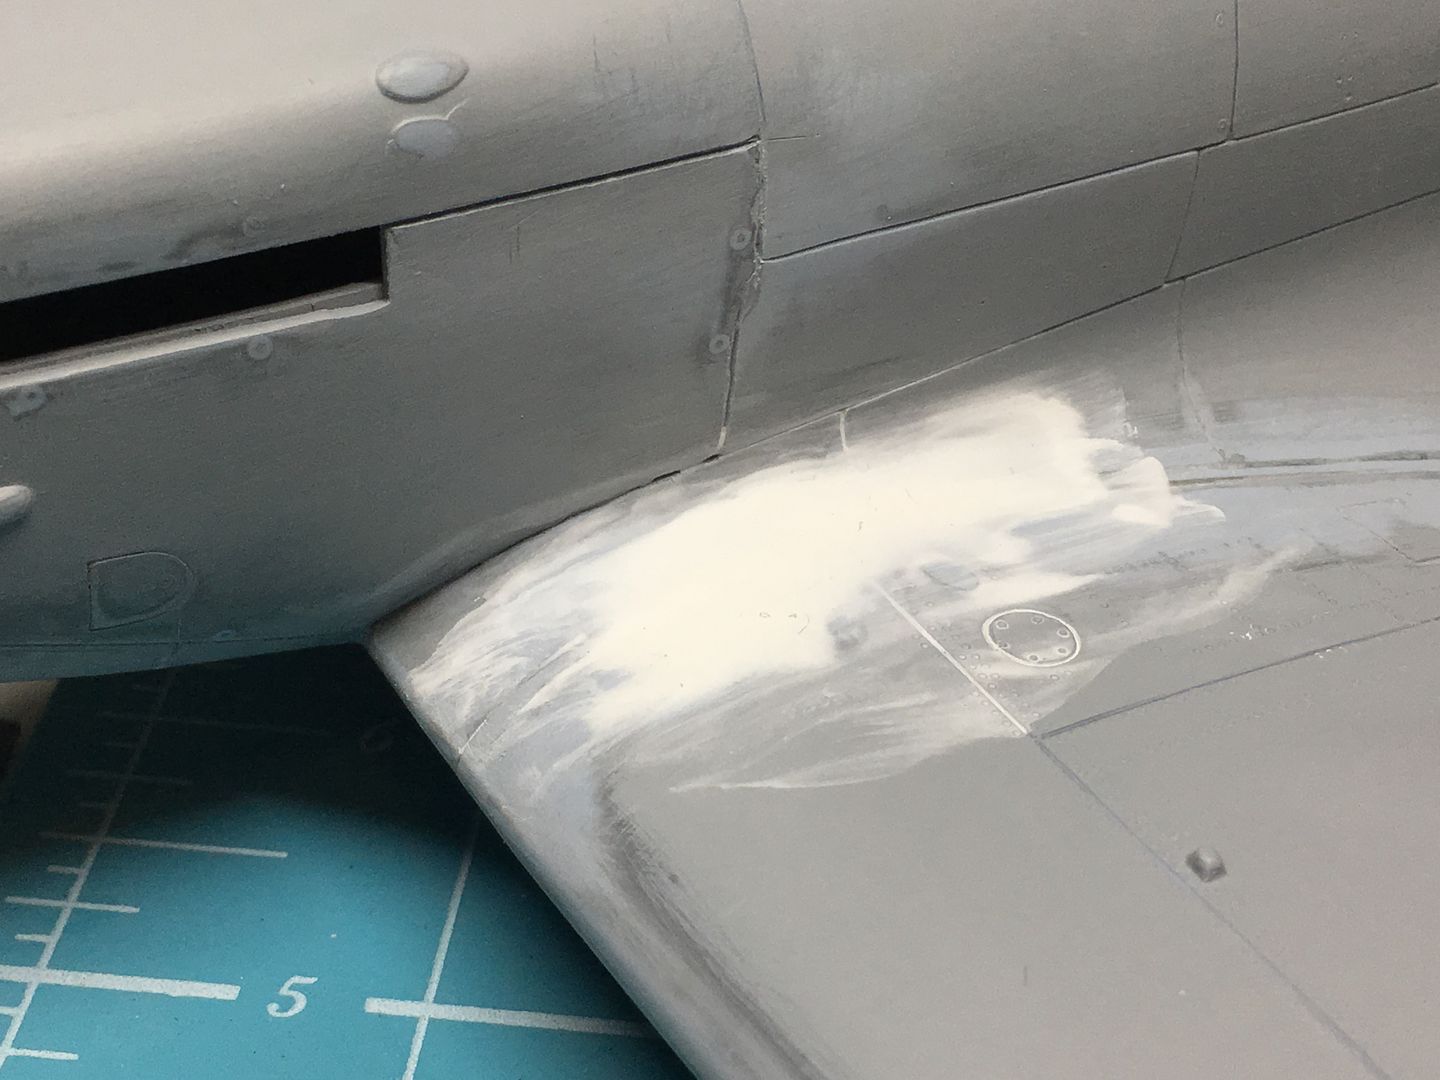
I ended up adding some very thin strips of plastic to re-define this wing root area...
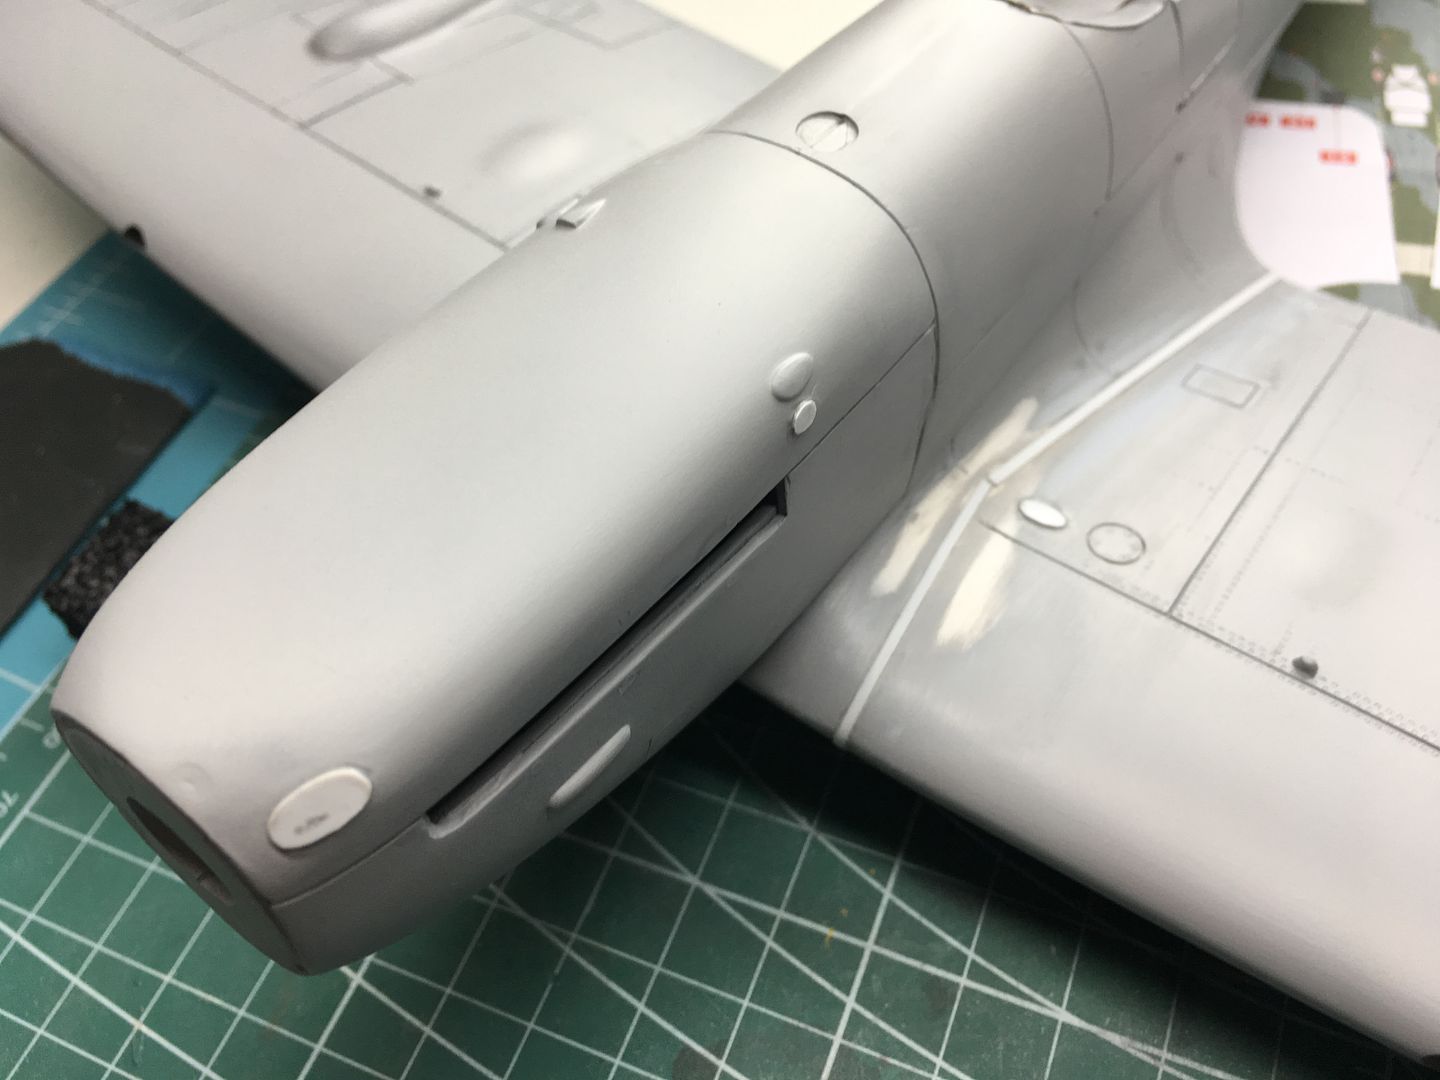
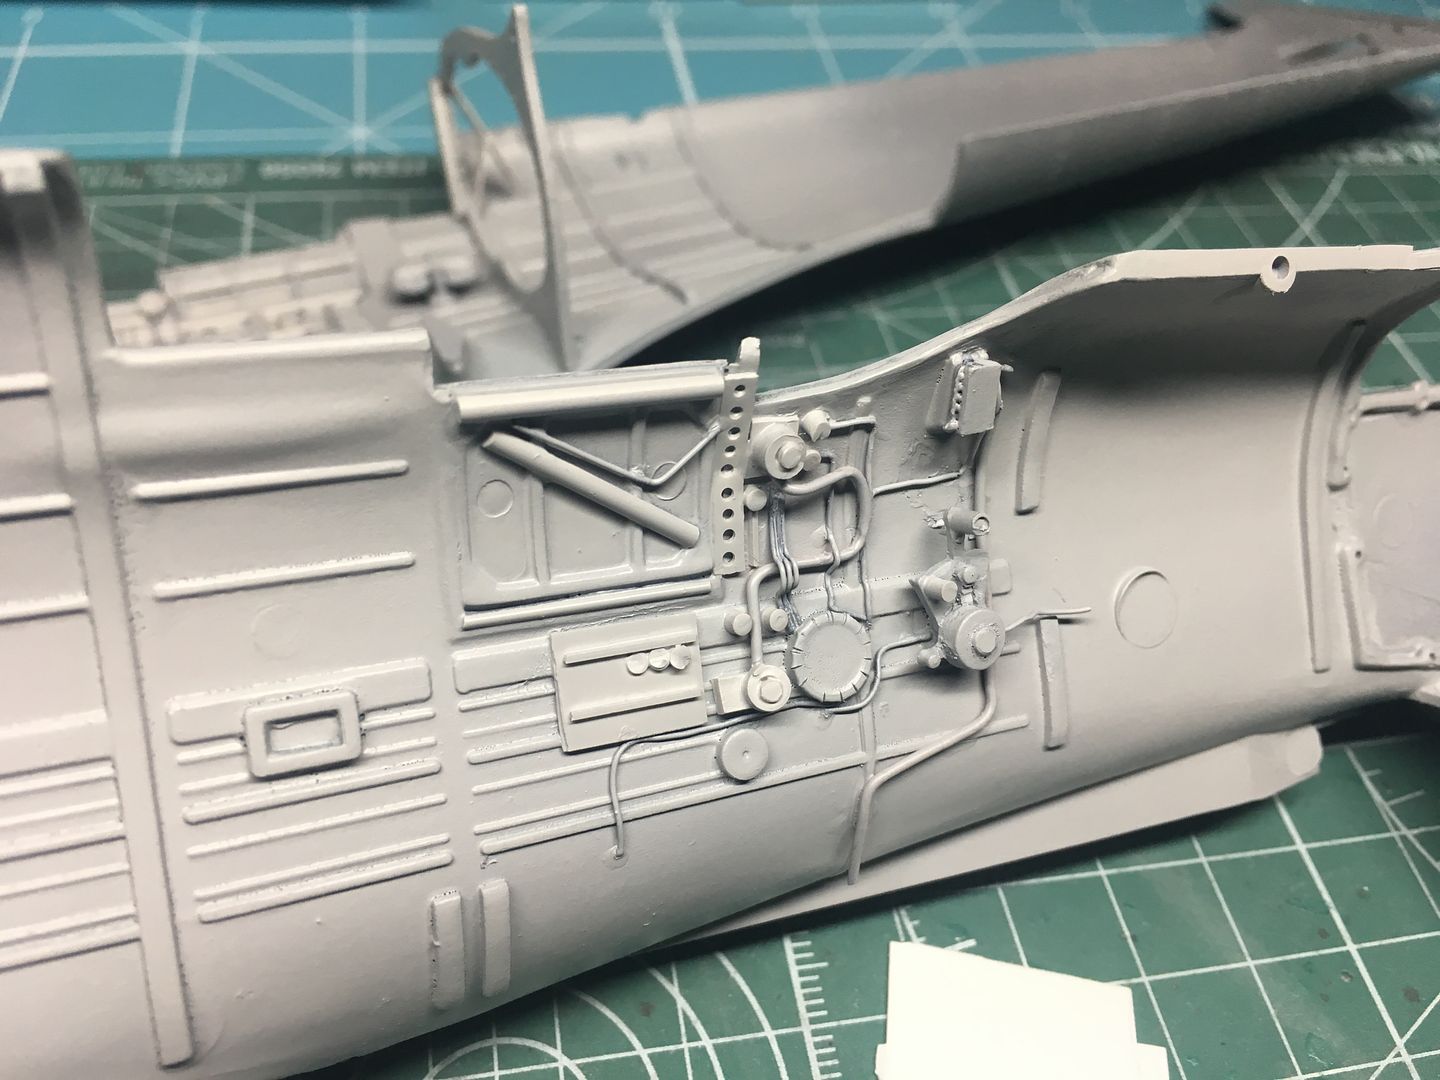
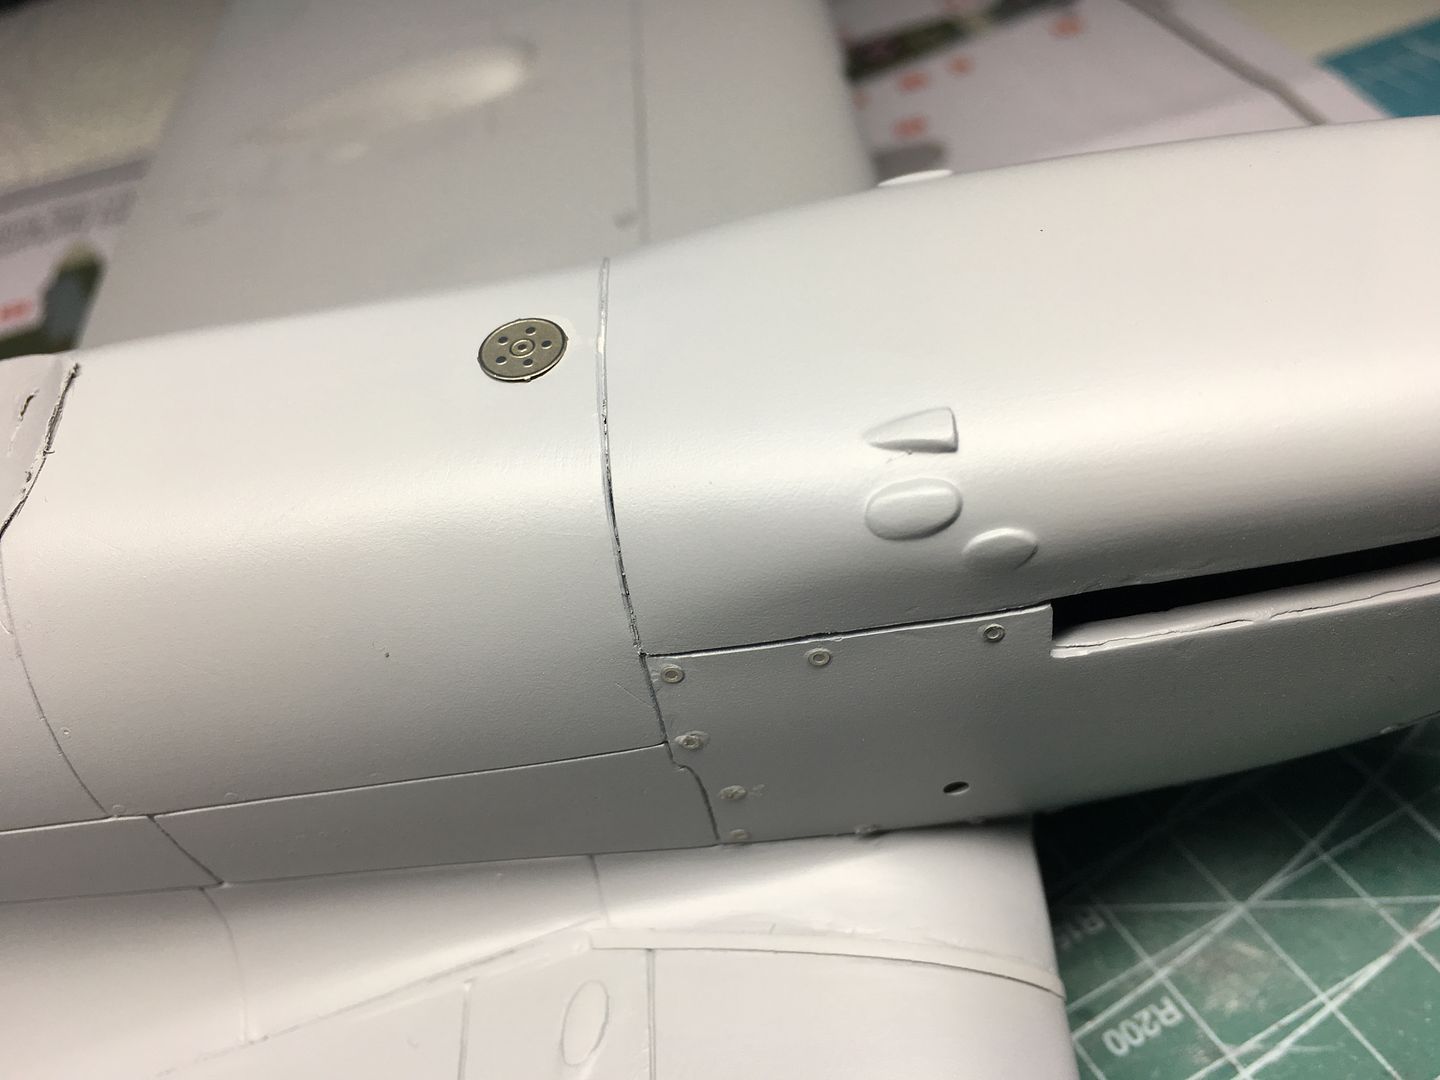
The engine panels had prominent fittings in the molding, some of which got sanded off during fitting. I decided to replace these - they are more flush on most models, but are a nice bit of detail on this one - I used PE 'washers' glued on to represent these - lower profile than the ones that had been moulded on - lots of them though!
I also used a generic PE 'pulley' to replace the crude detail of what I presume is an oil filler cap or similar, situated on top of the forward fuselage.
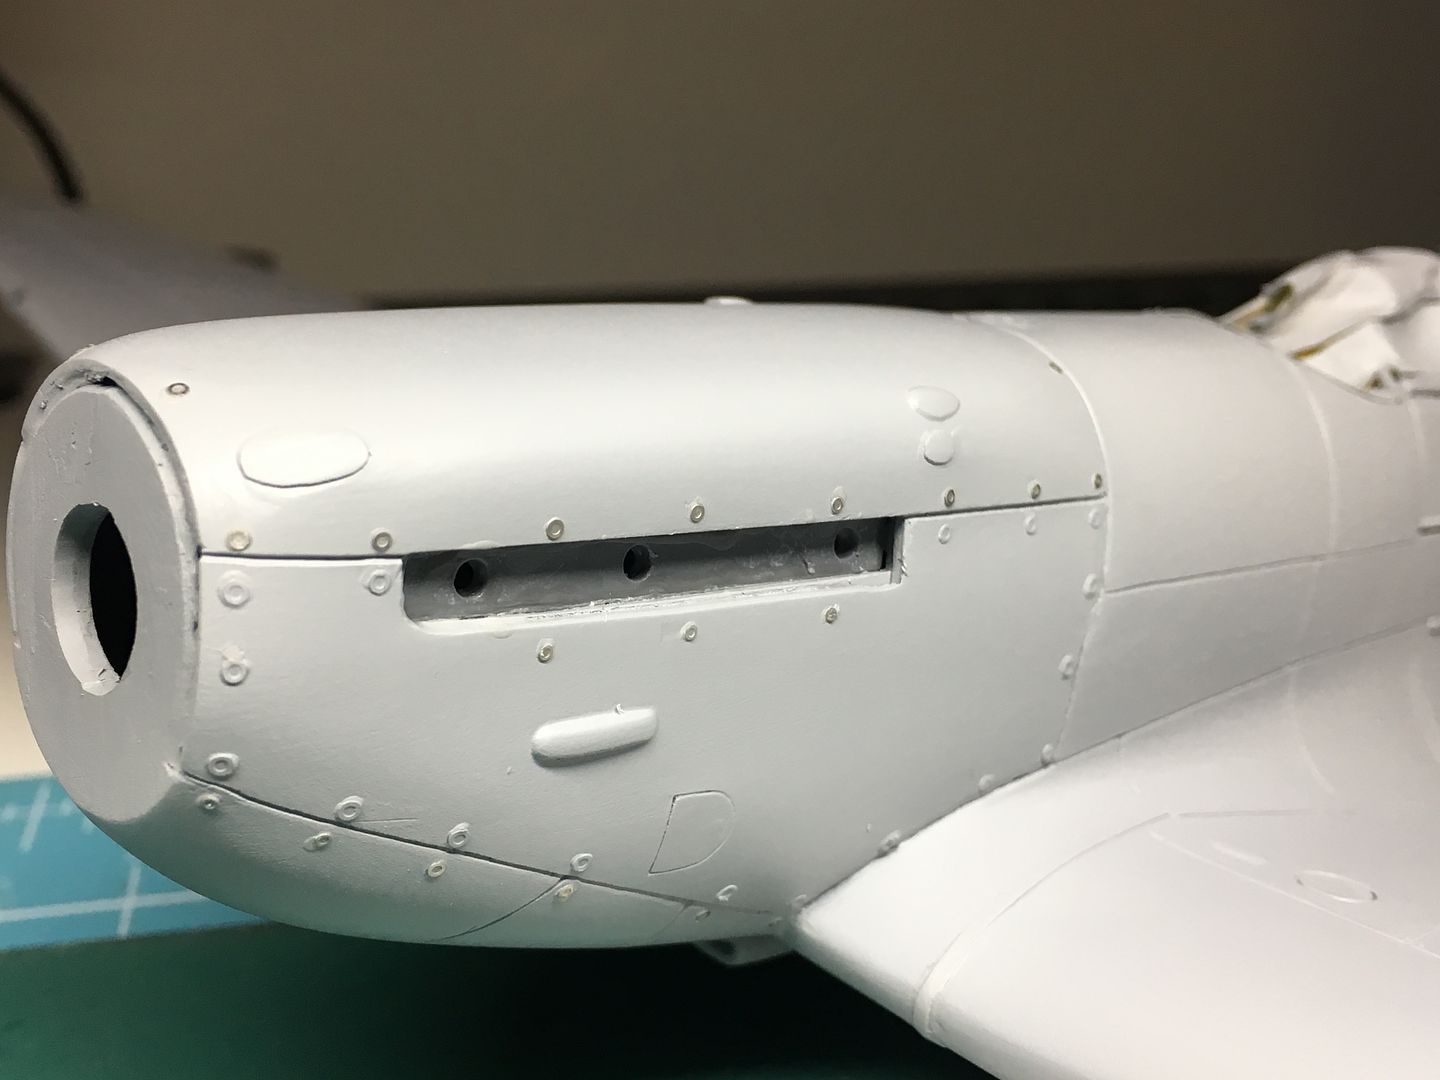
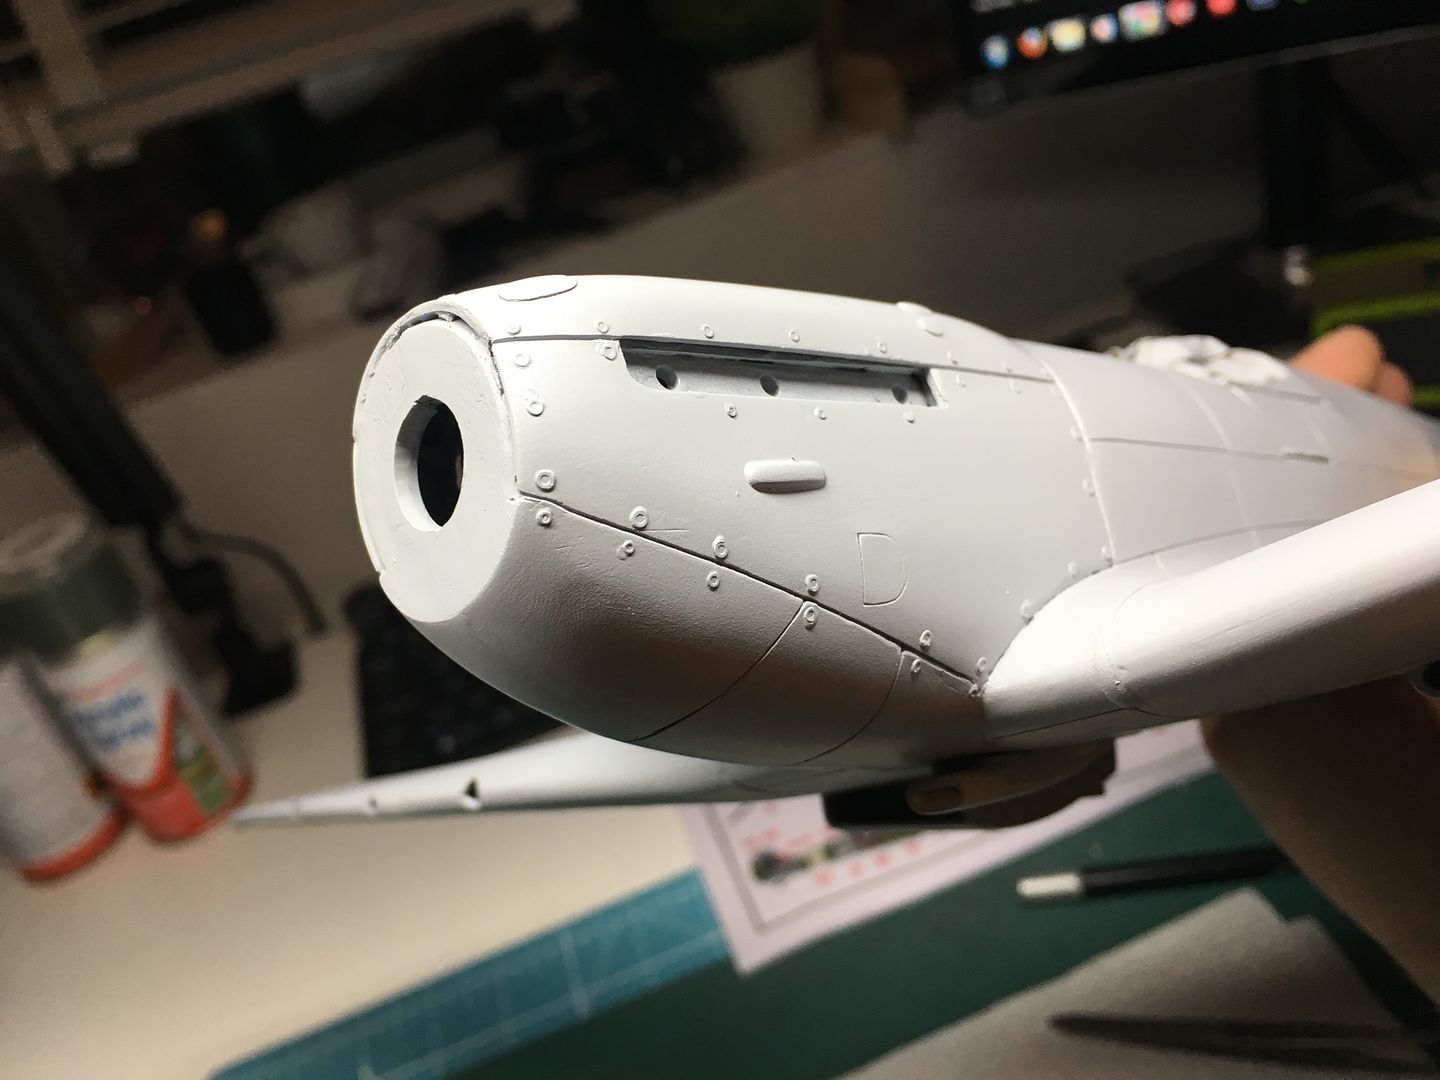

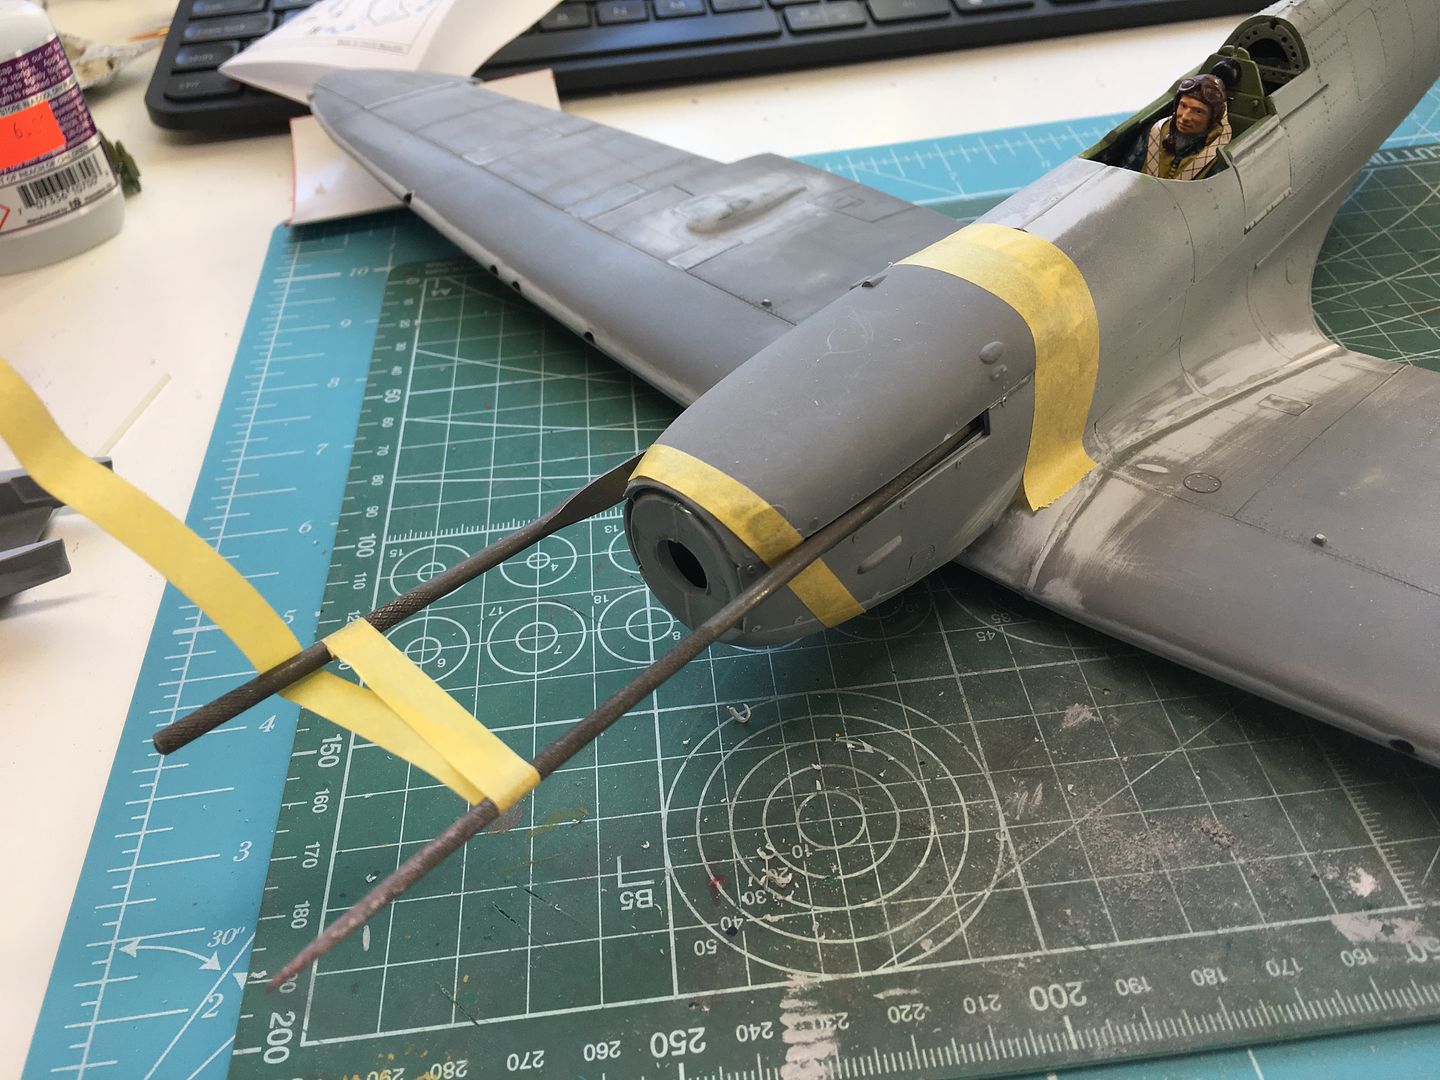
I added the very nice extra detail set of cannon...

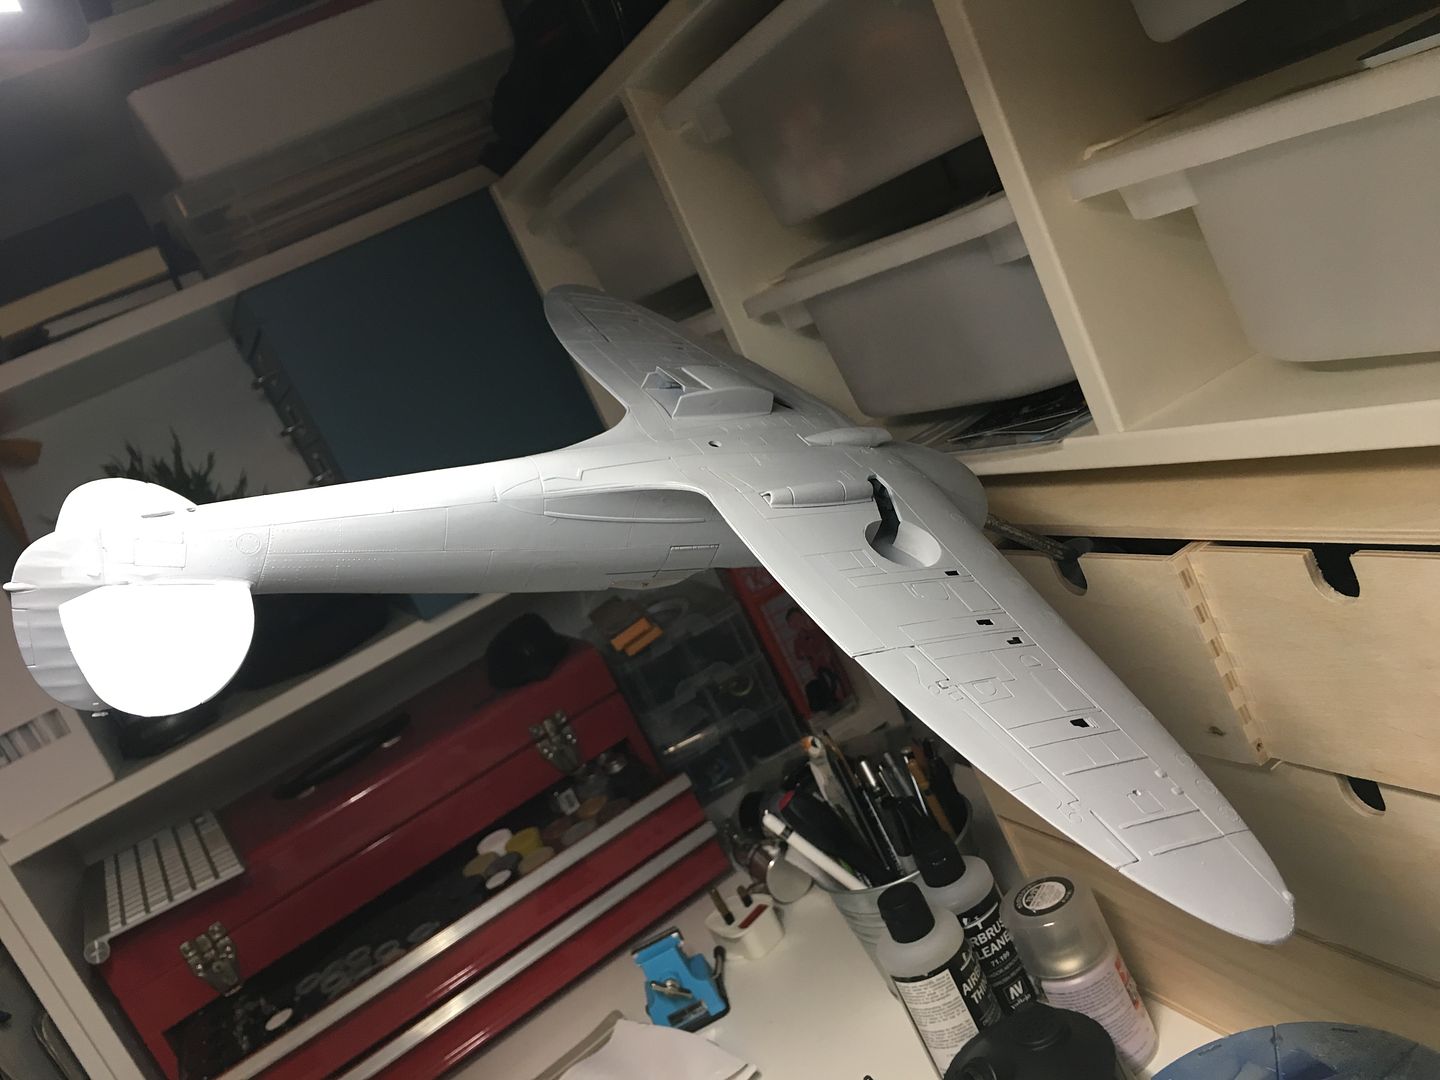
Now onto the painting.
On the only other plane I have made, I used oils on the top surface to simulate panel profiles, panel gaps etc and shading - on this model I decided to try the method of airbrushing black shadows BEFORE the top coat. Took a while to get the airbrush set correctly (low) and to get the steady hand required to freehand the lines, but super-accuracy is not required here...
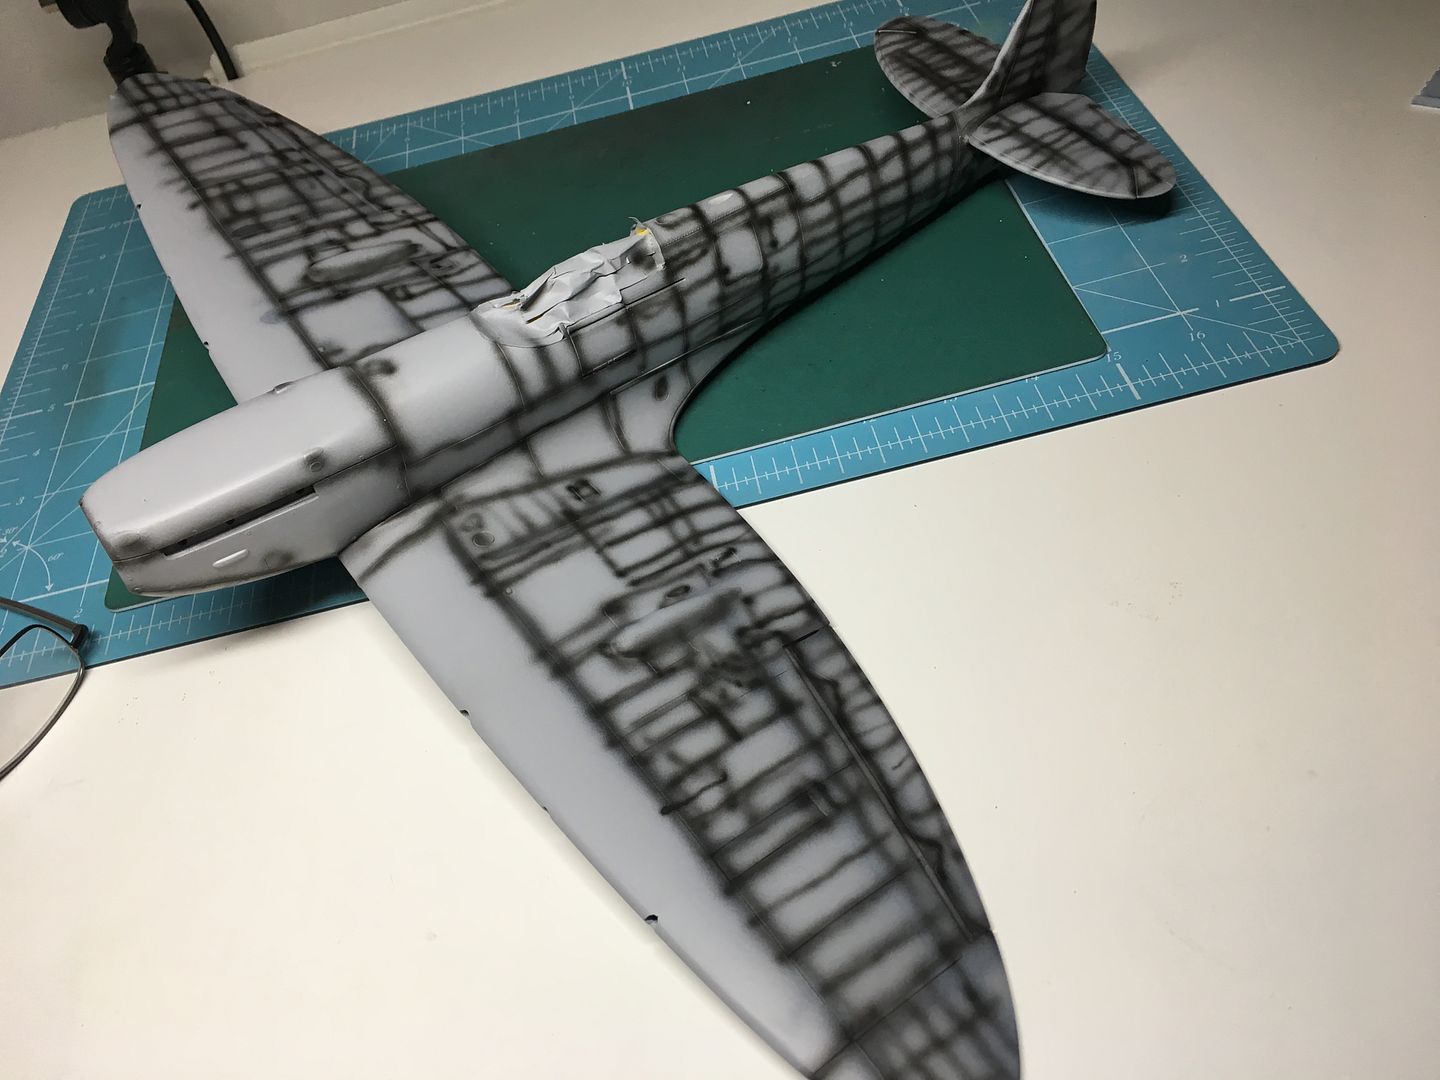
This had the desired effect...
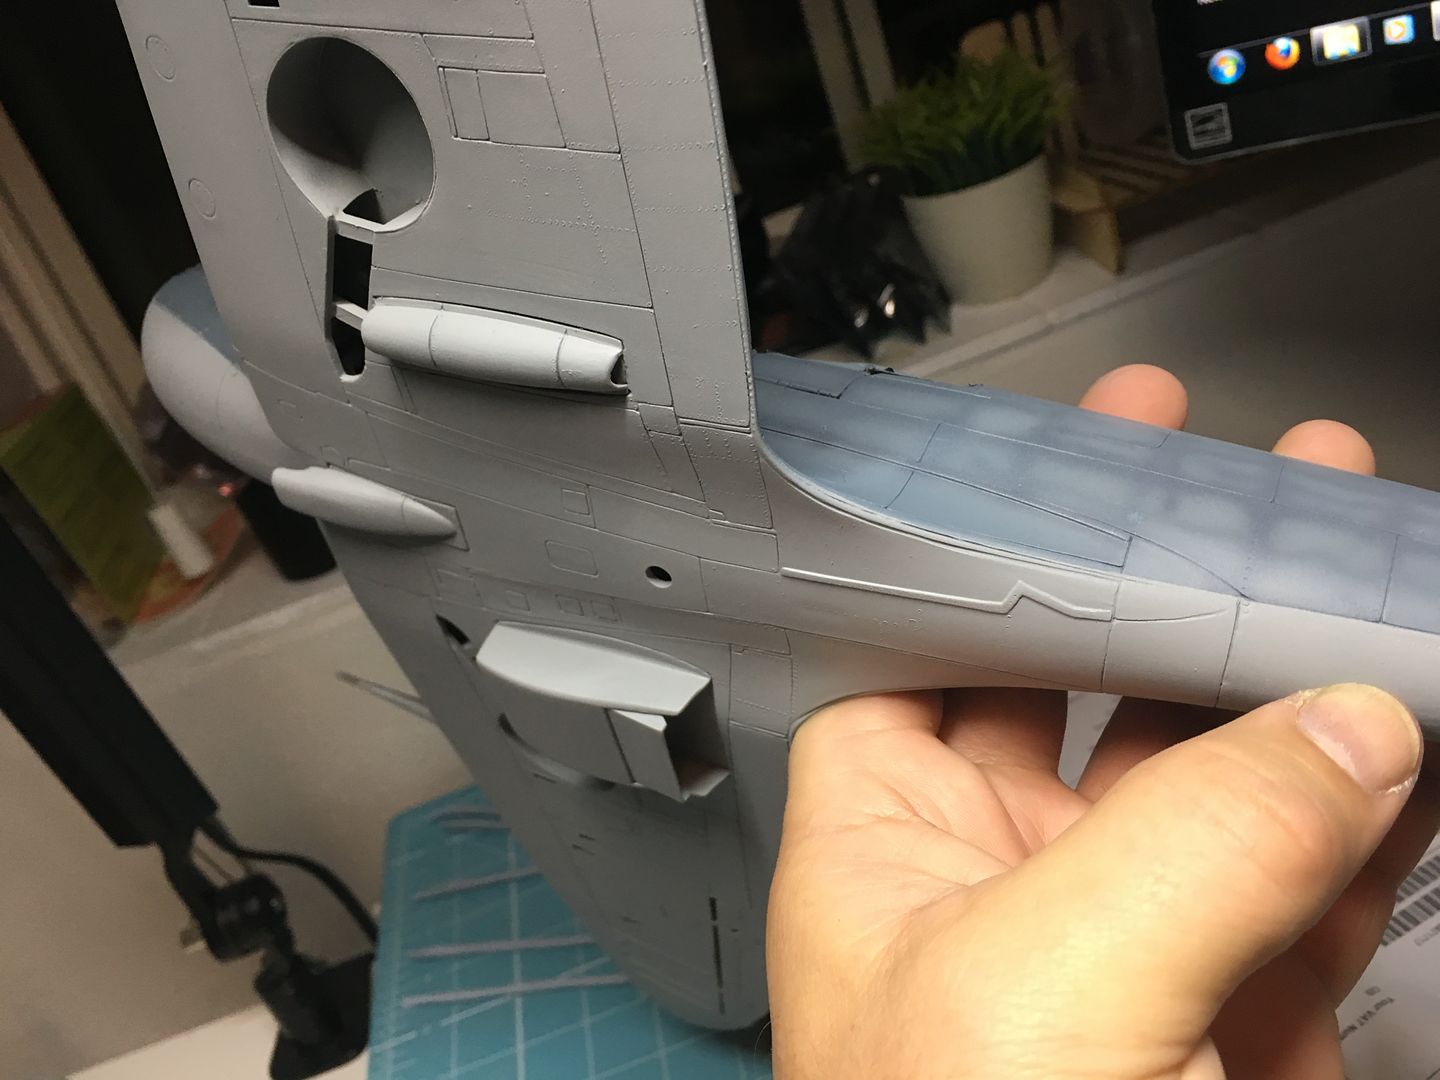
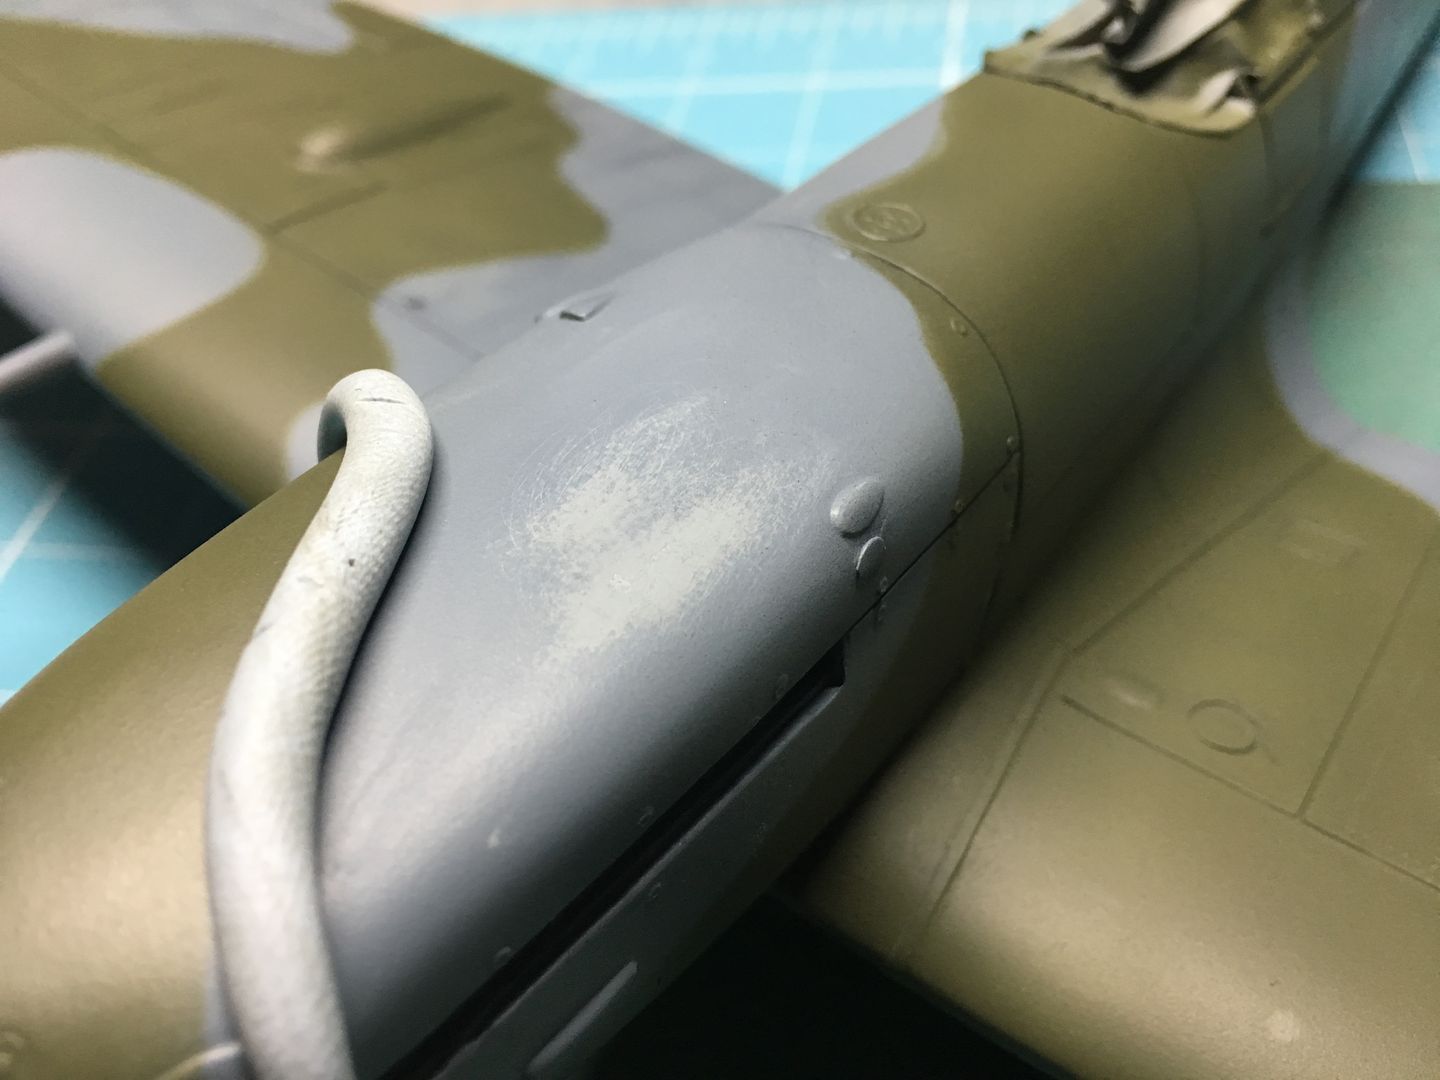
HOWEVER - I was not happy with the colour. I had read that sometimes the proposed colour for this top surface of the Spitfire can be a little dark, so had tried a slightly lighter colour - but was still not happy - easy to respray another slightly darker colour on top - but I had to re-spray those pesky shadow lines again!
But happier with the colour...and with my first attempt at the shading.
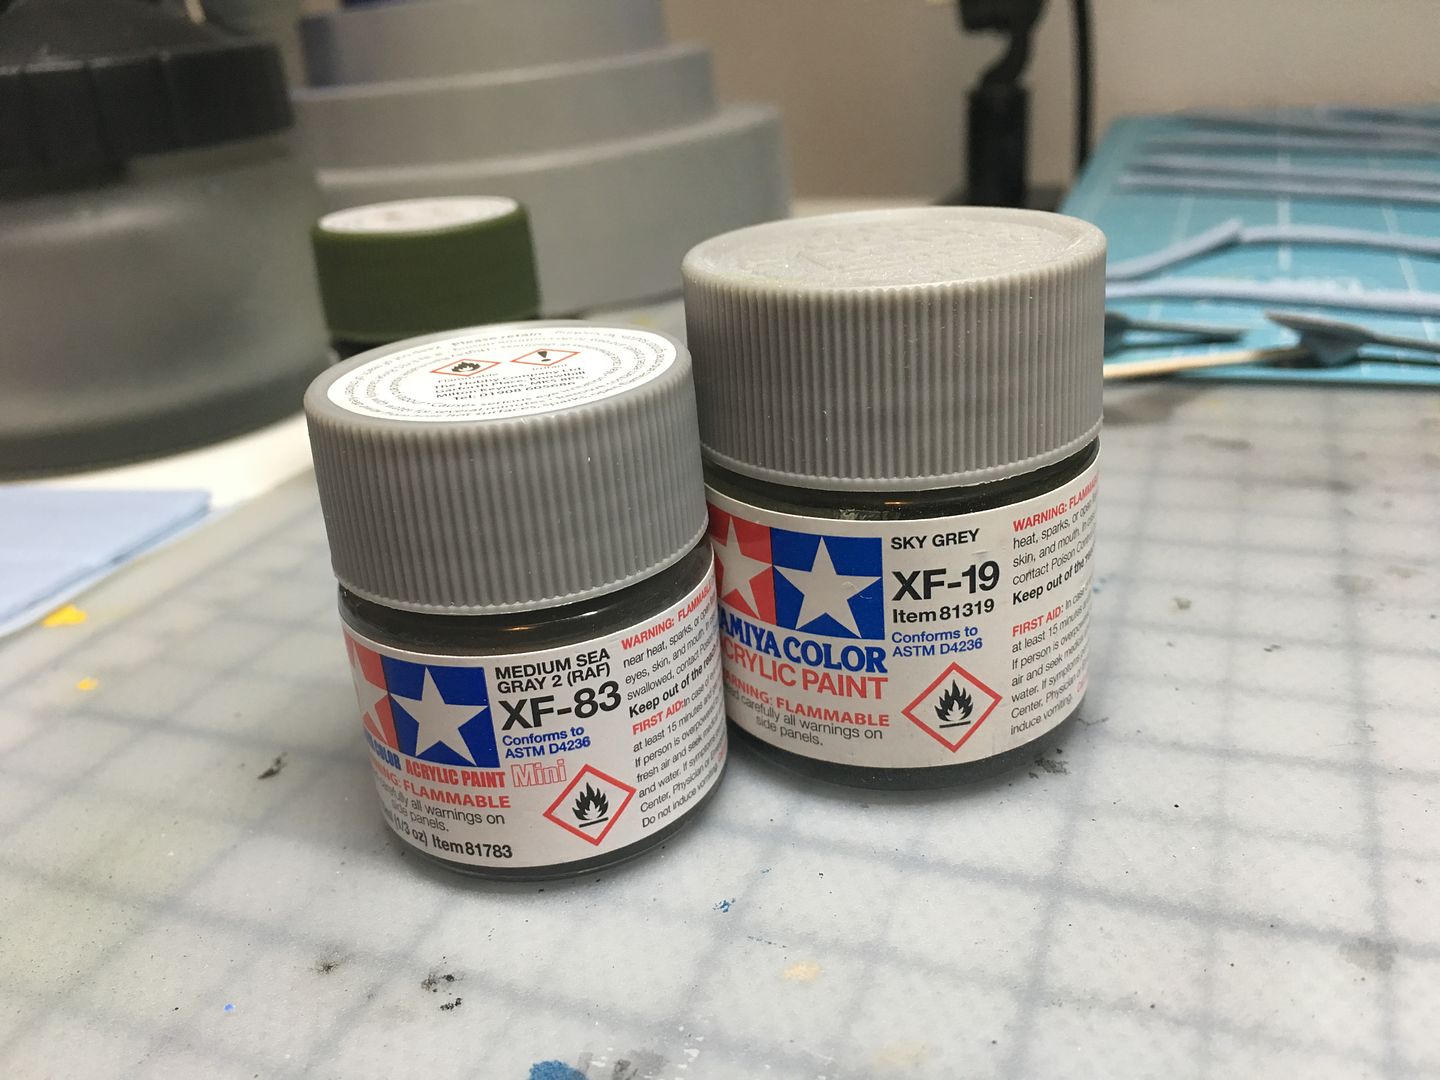
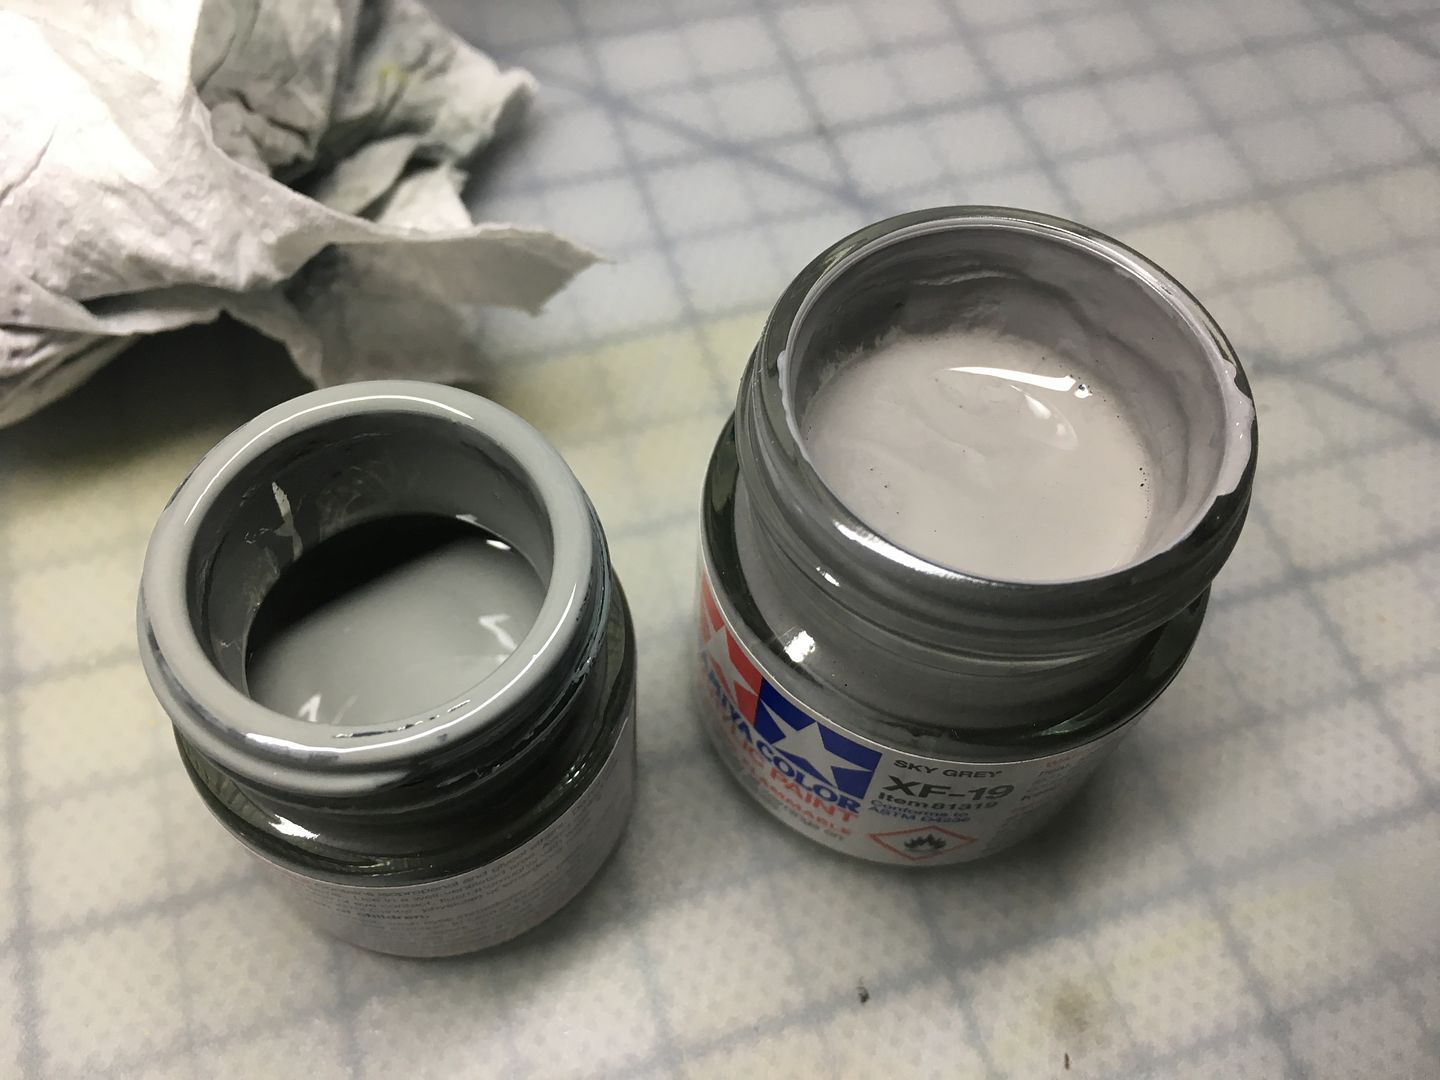
I then had a similar issue with the underside - the colour that was suggested seemed too close to the top grey, so I ended up doing this twice as well - the smaller XF-83 was suggested, but I ended up using XF-19 - very subtlely lighter - but I also know that when I use my oils later, it will make things slightly darker anyway...
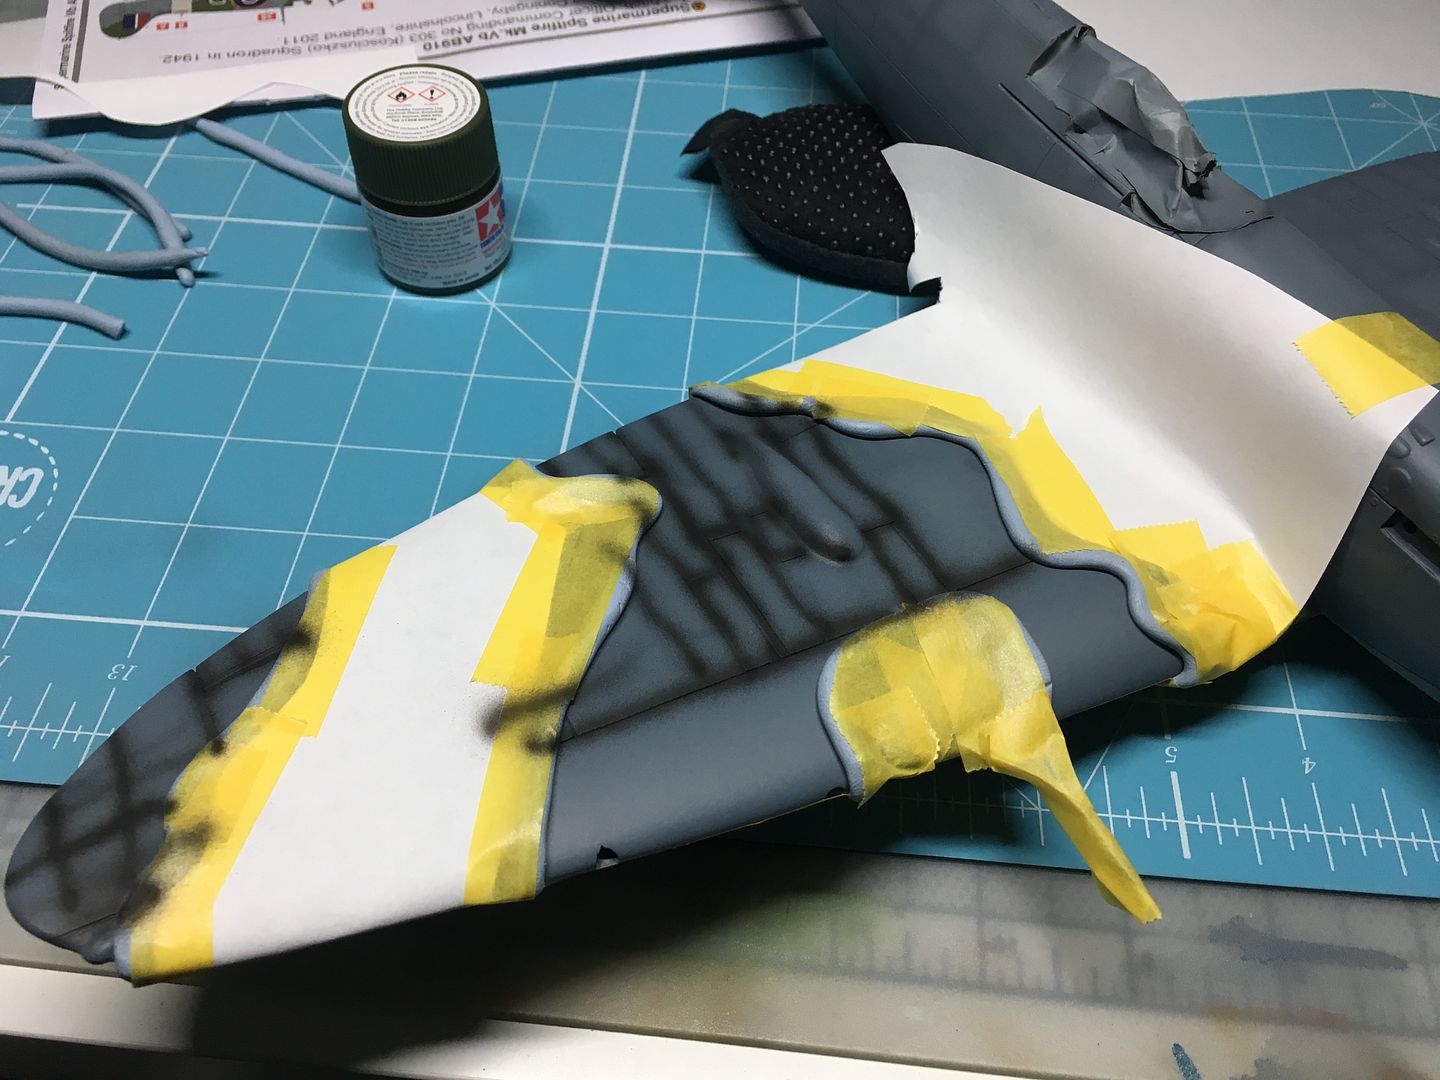
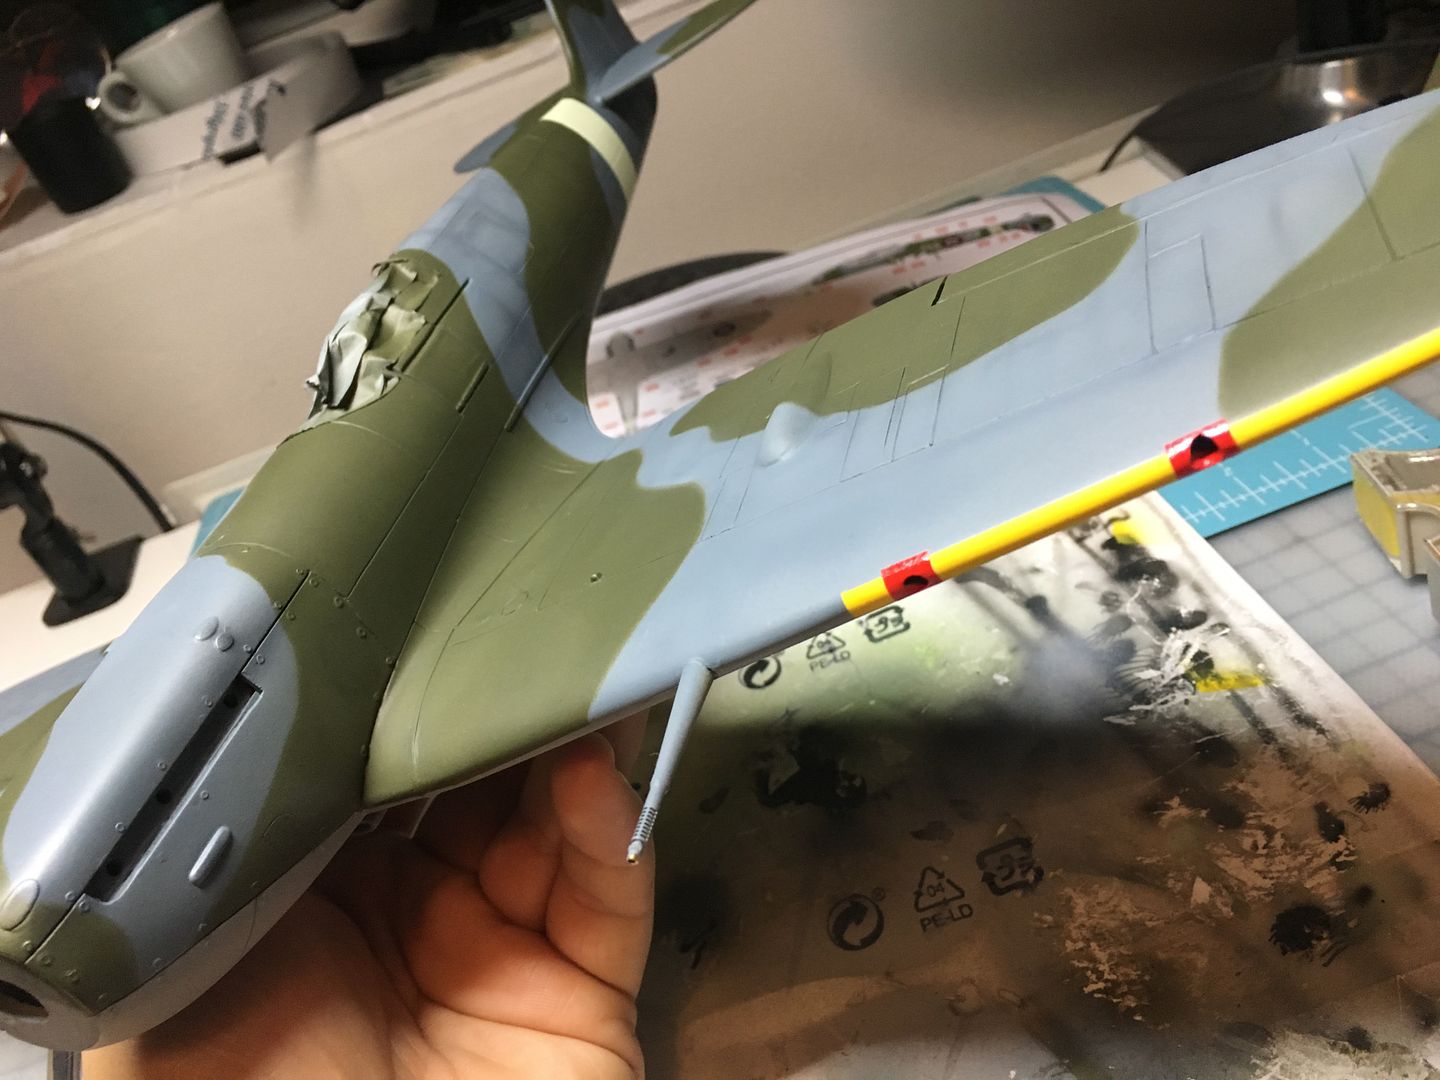
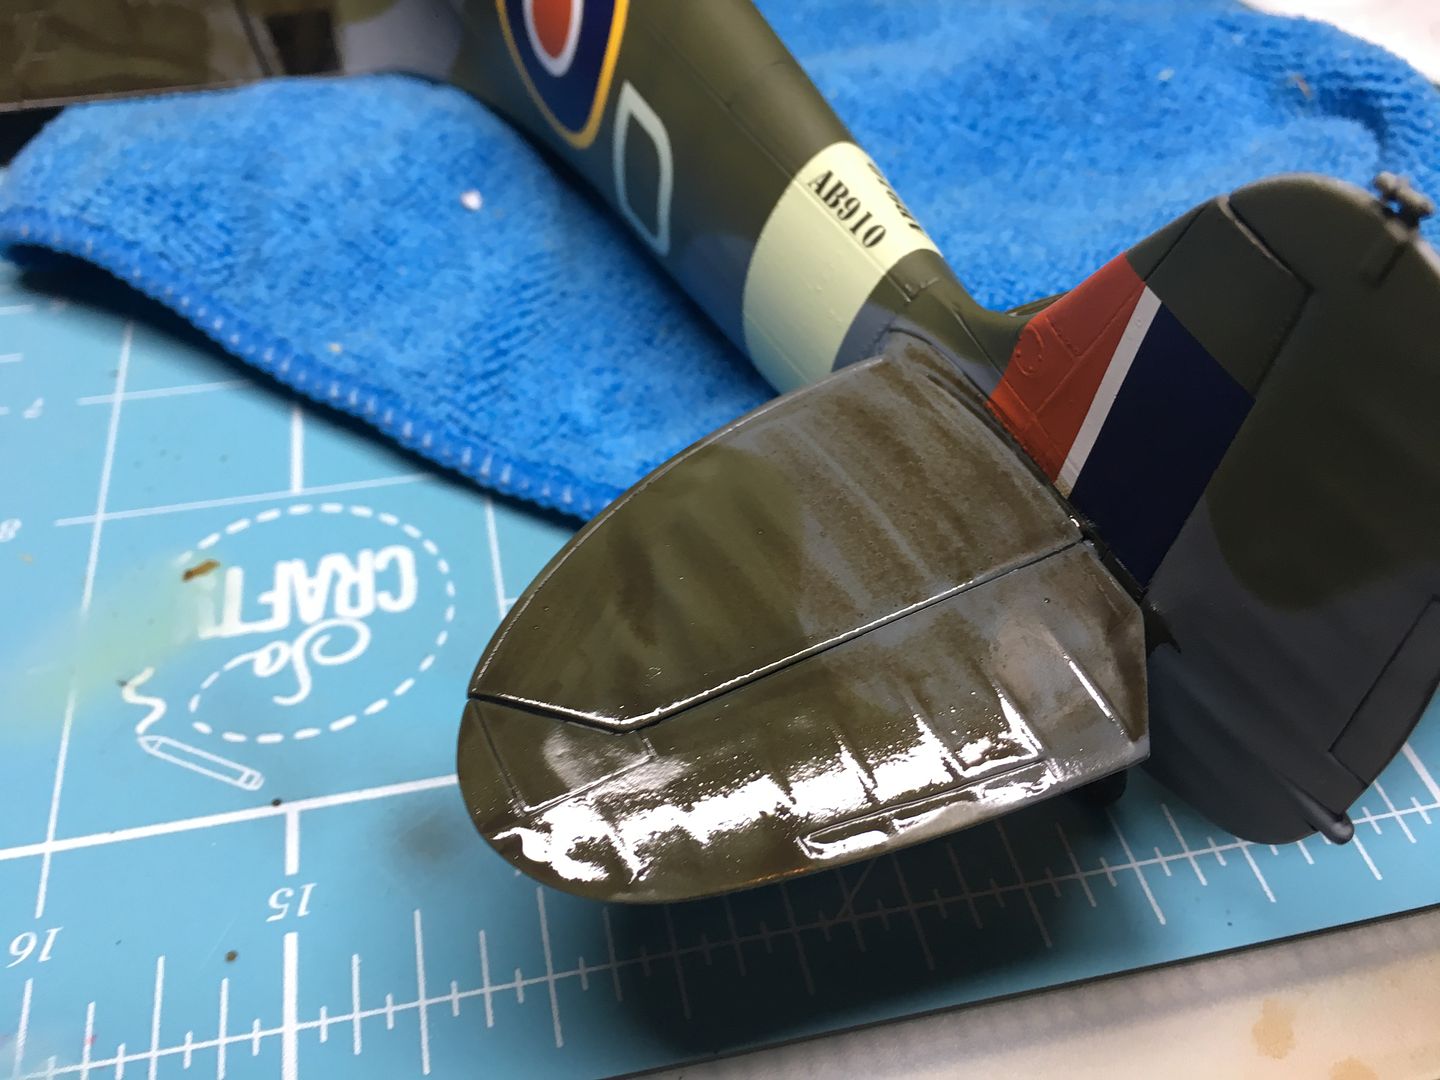
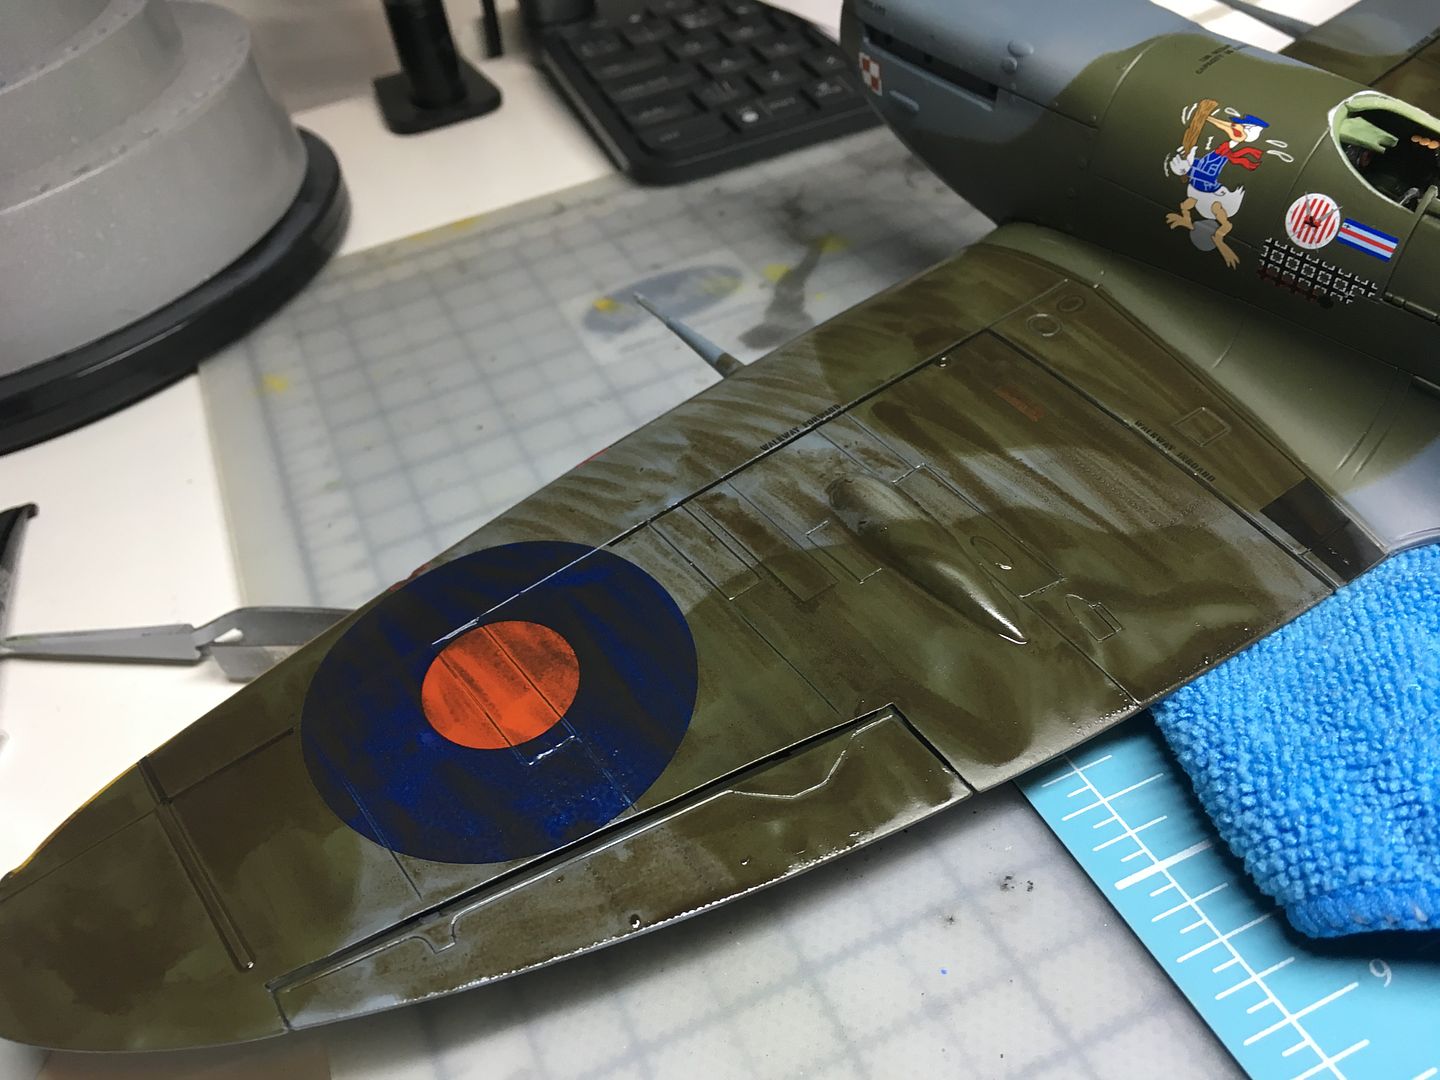
Finally it was the time for the Dark Green (RAF) - I used my Blutack method I used on the Mossie - I like the slightly soft edge it gives. Before spraying the green I had to re-apply those shade lines again, once masked.

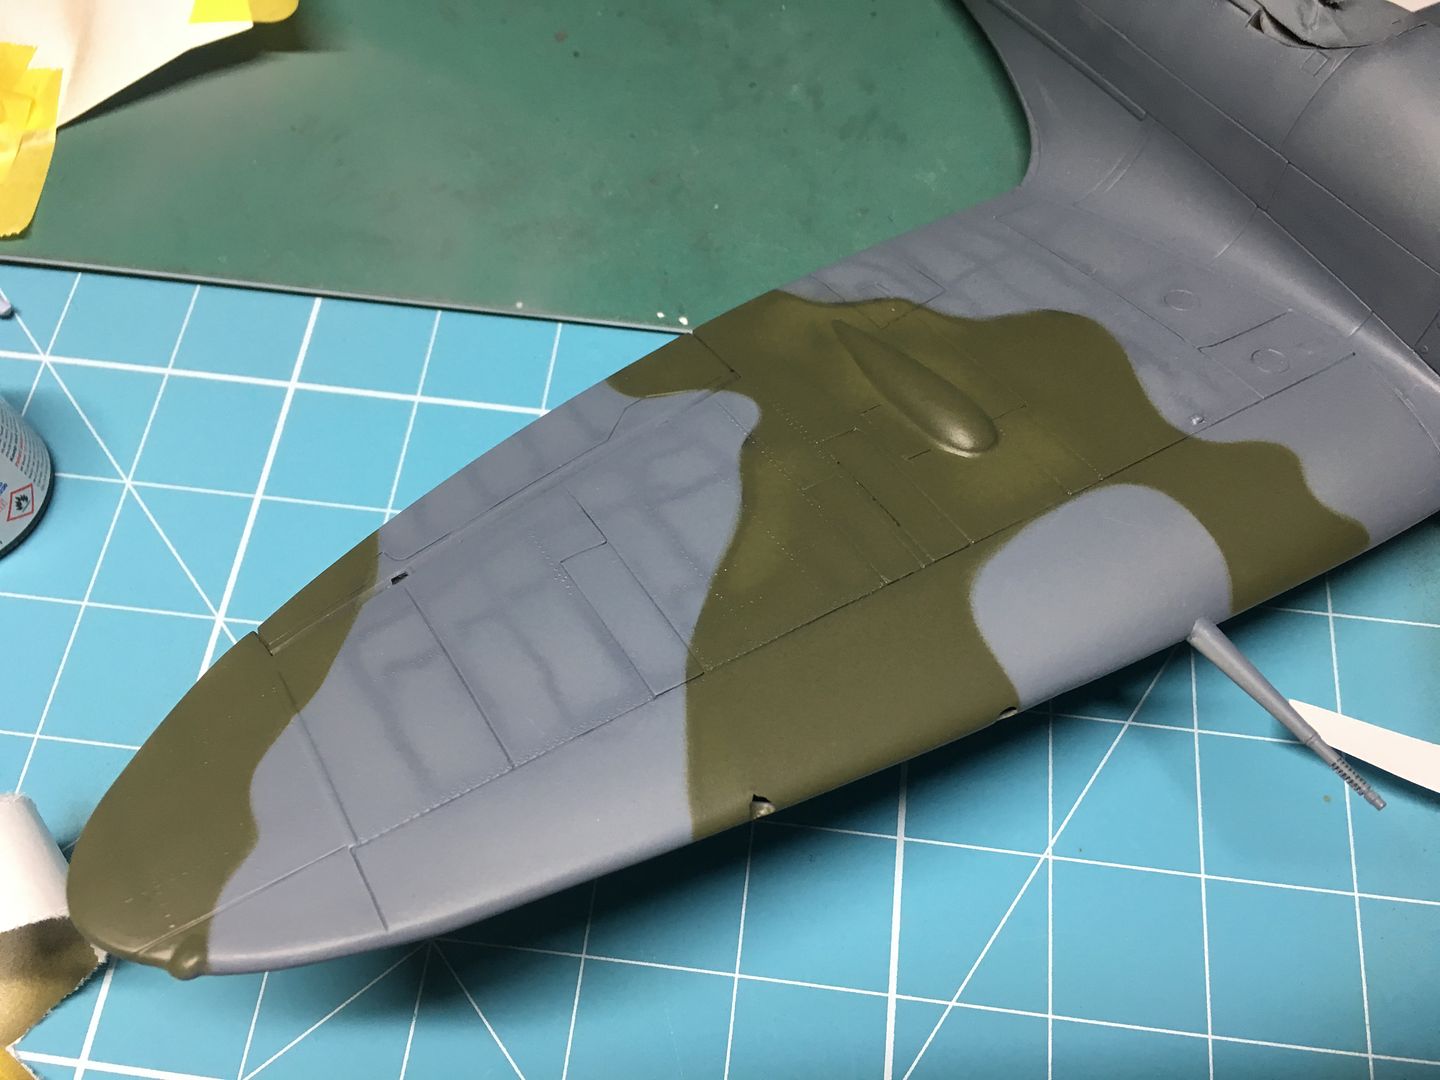
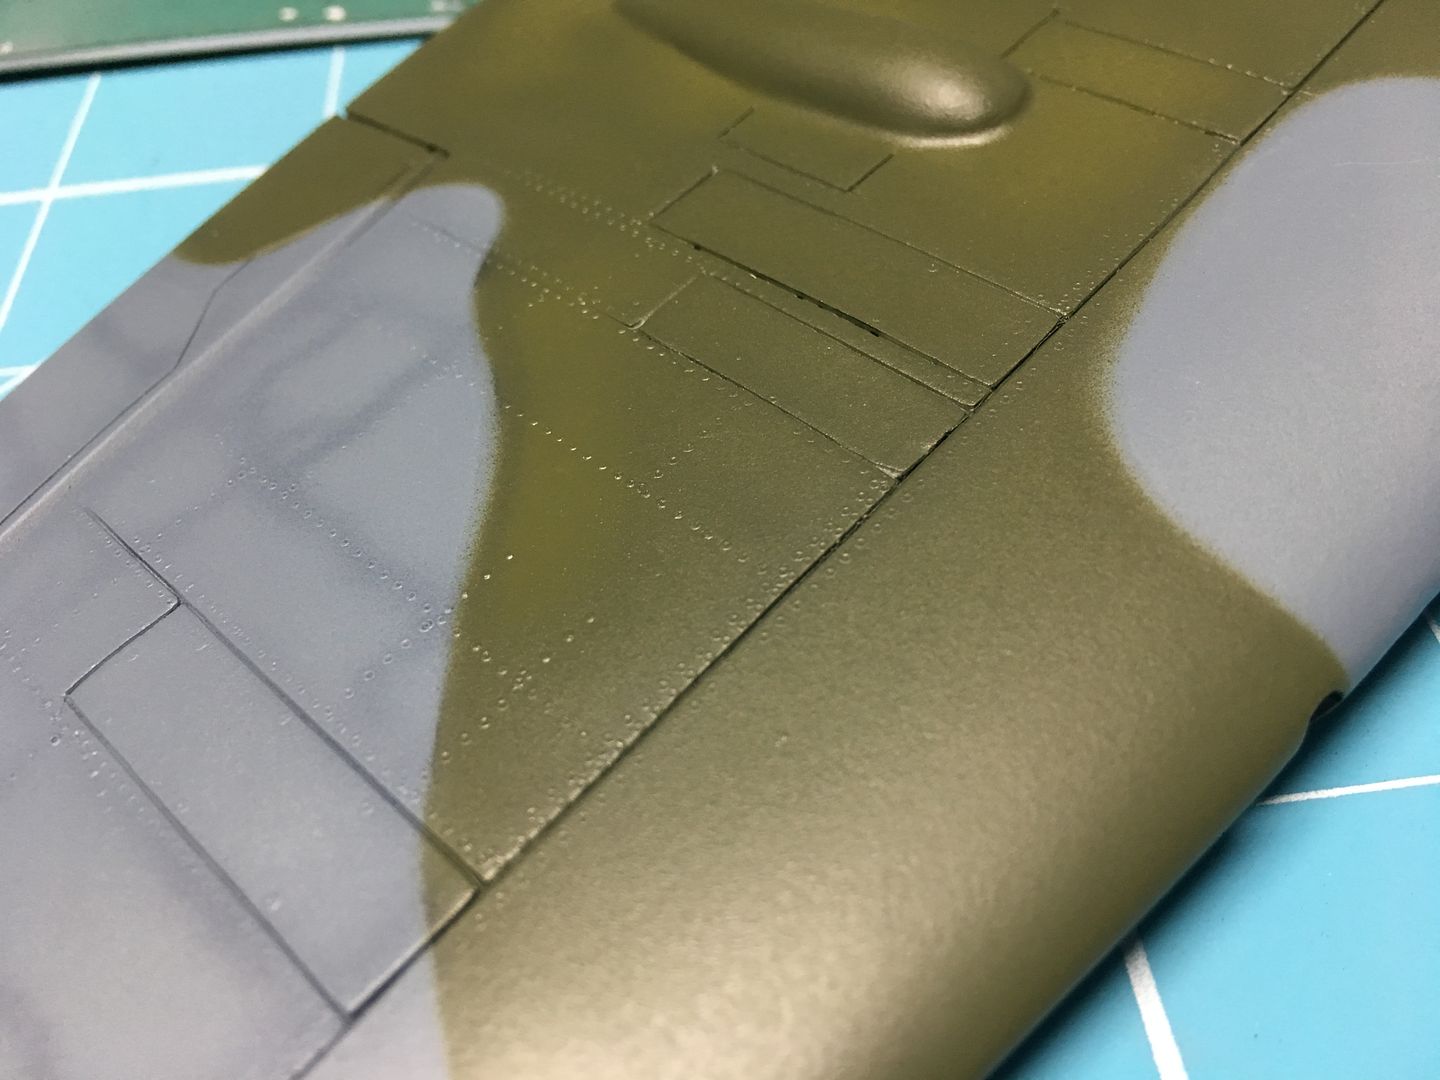

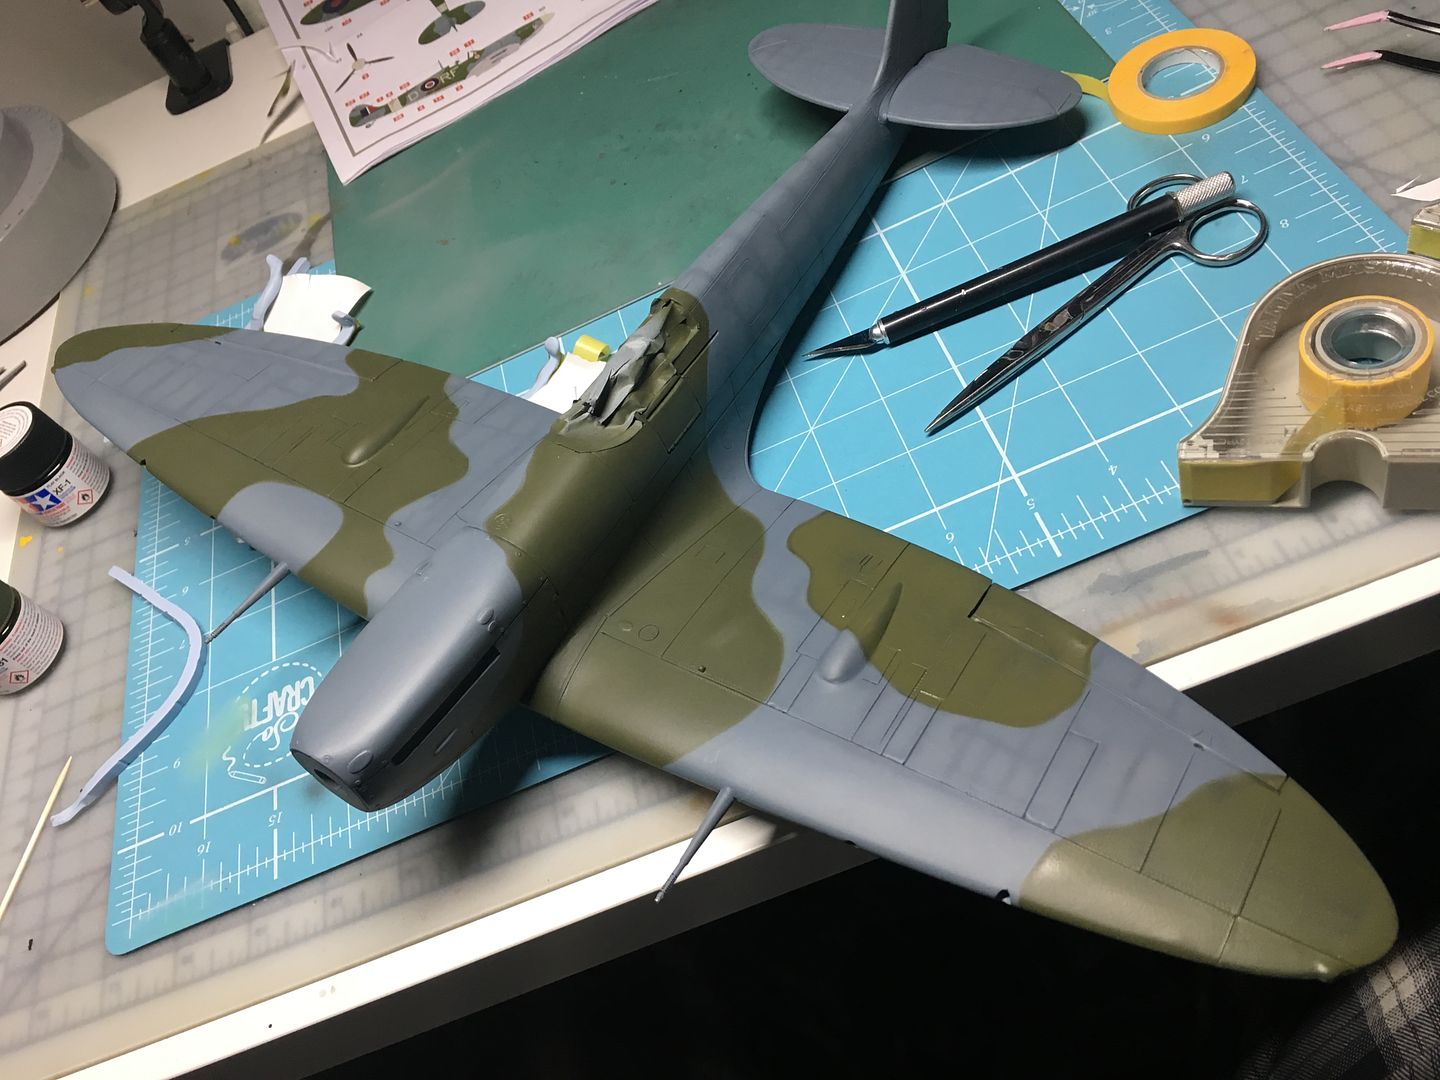

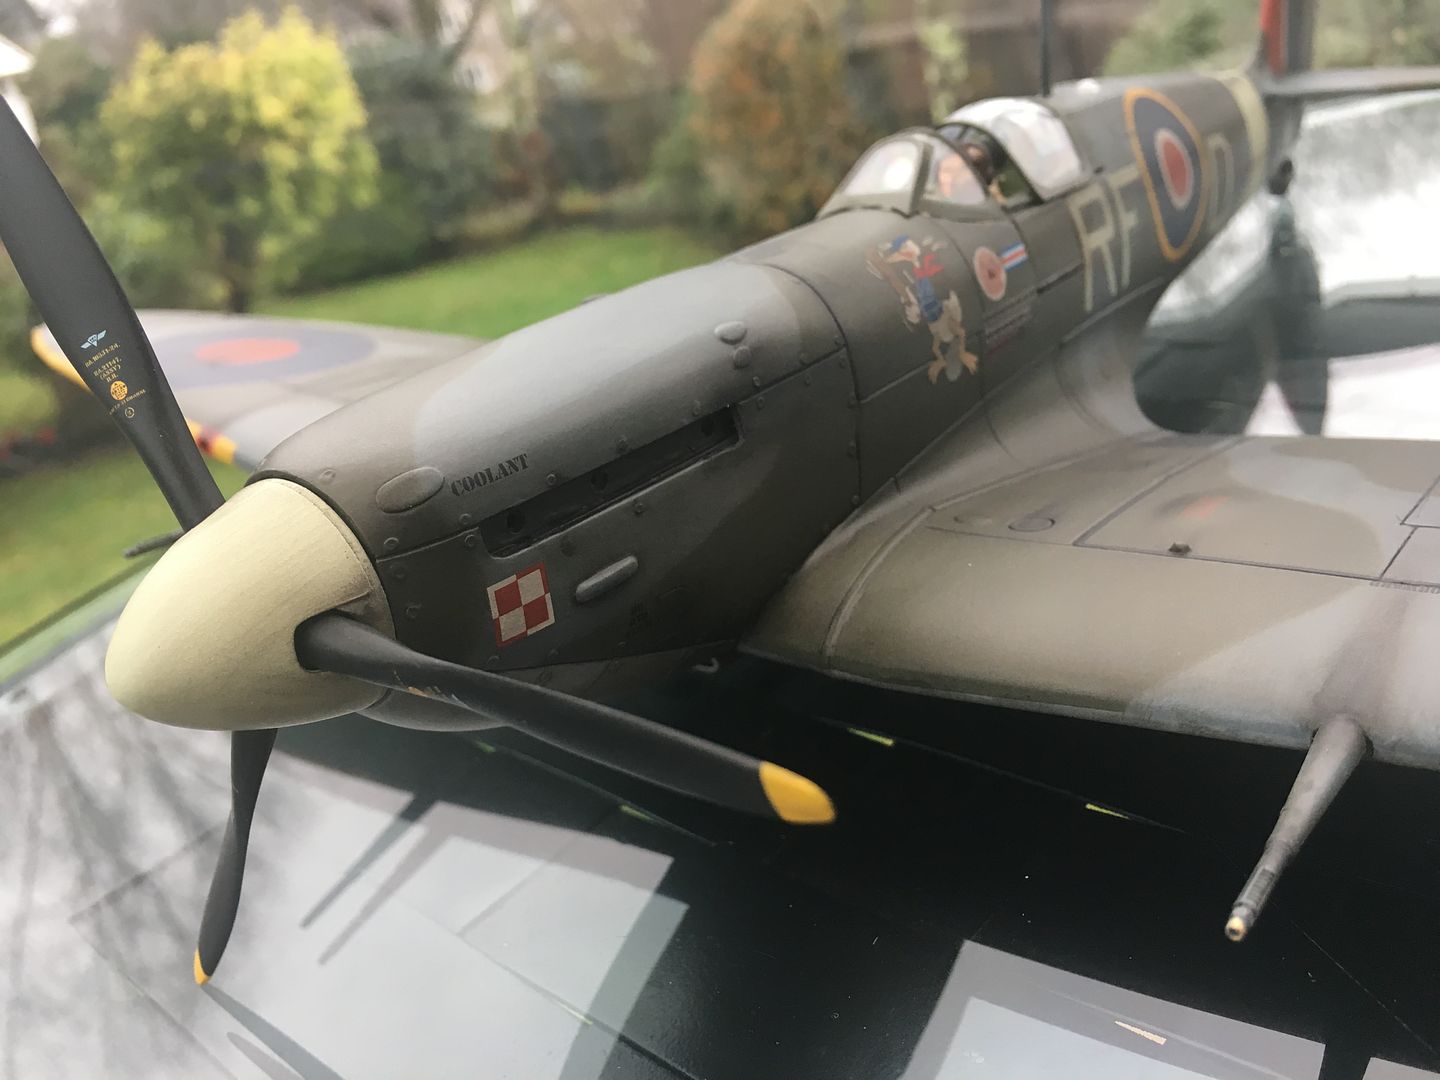
Pretty pleased with the final result...
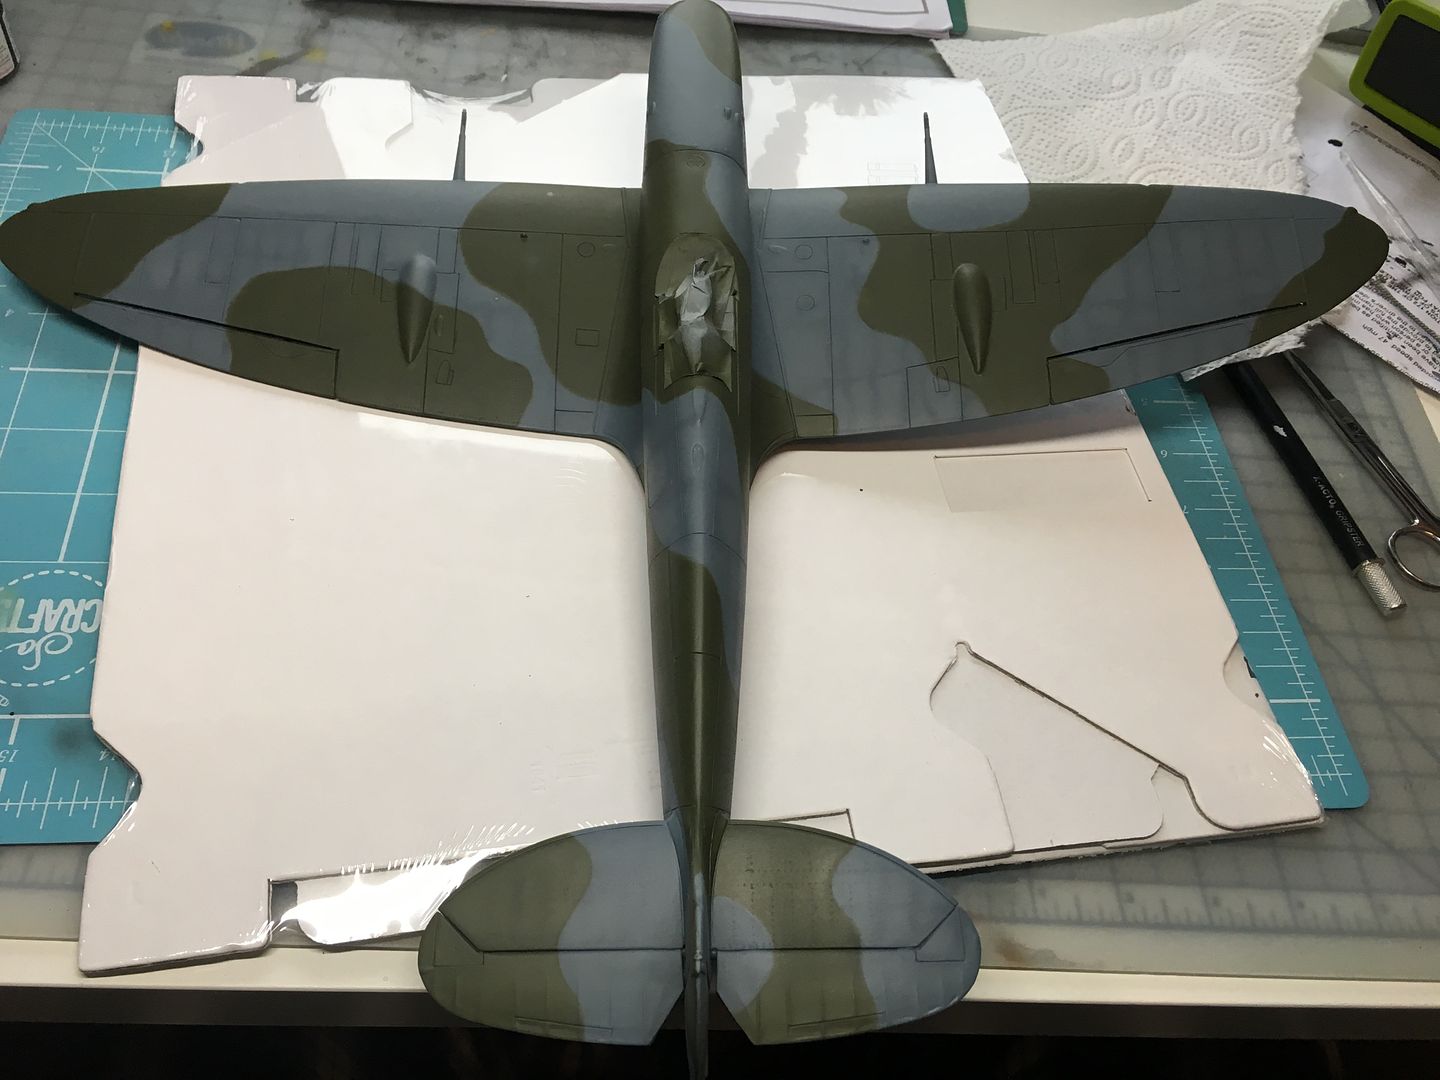
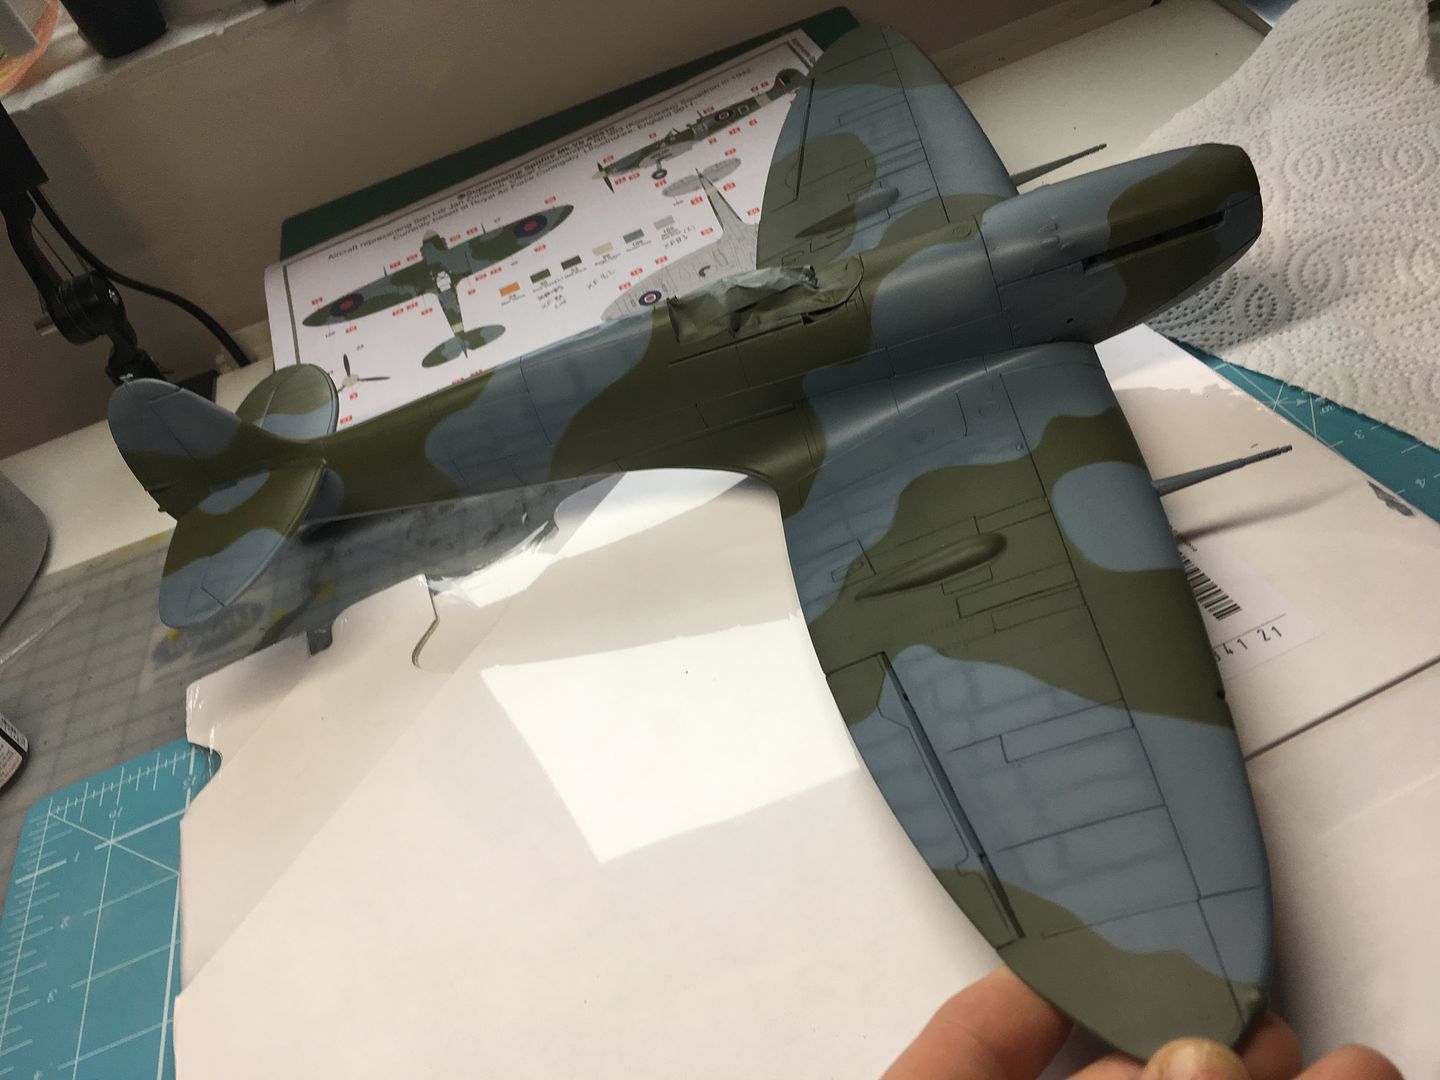
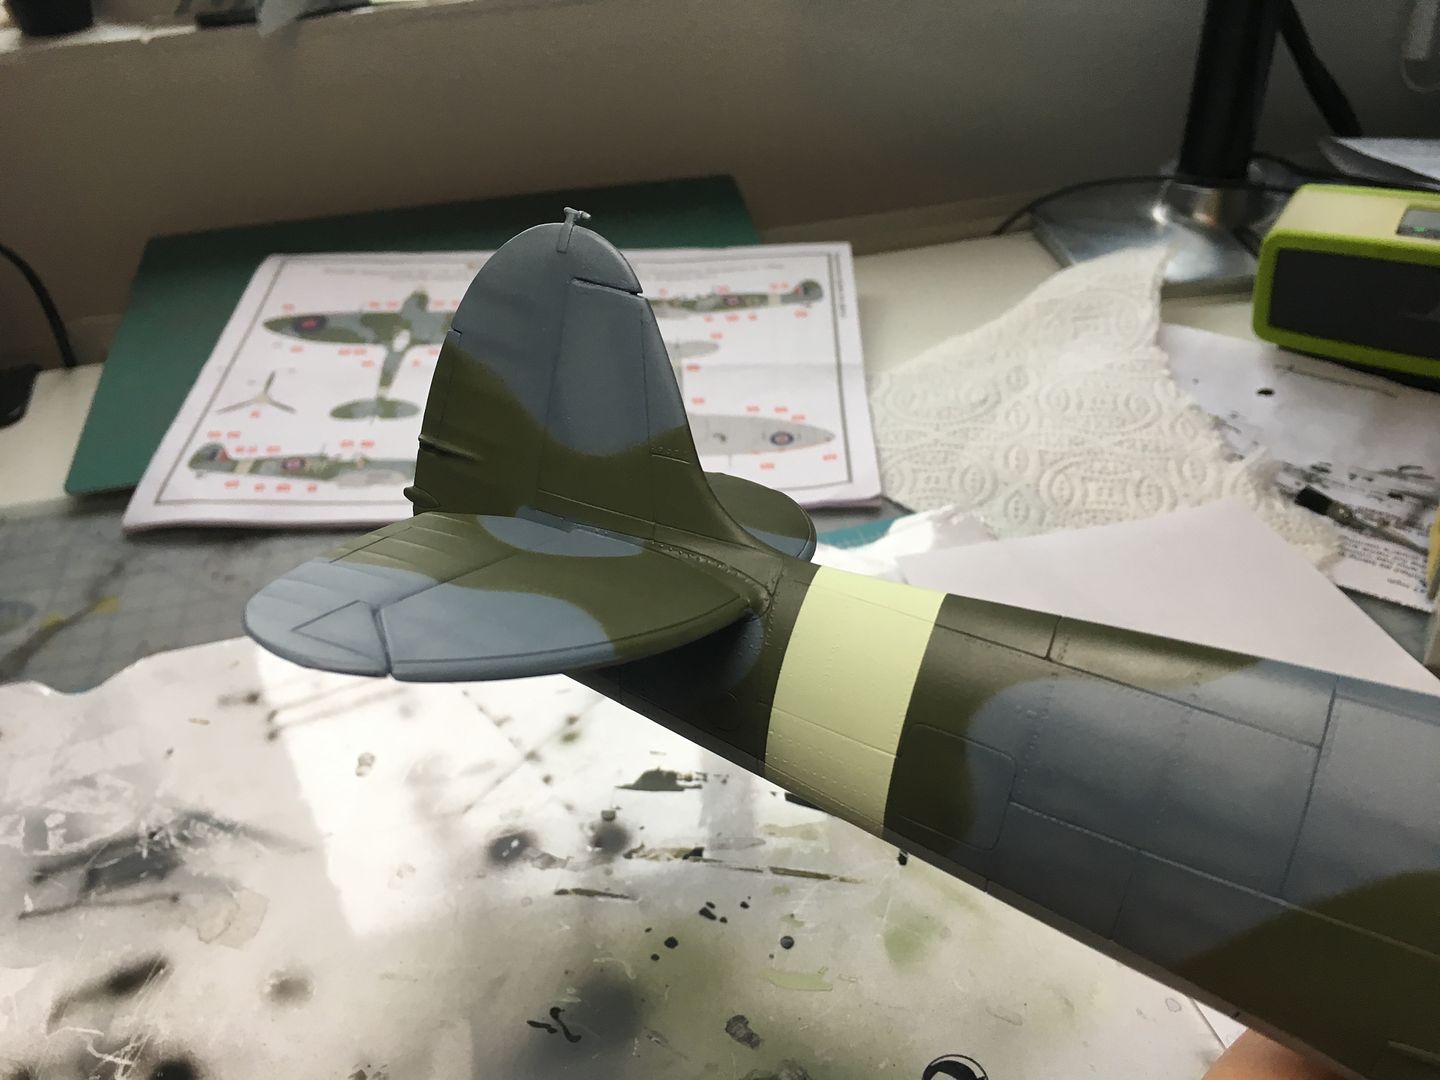
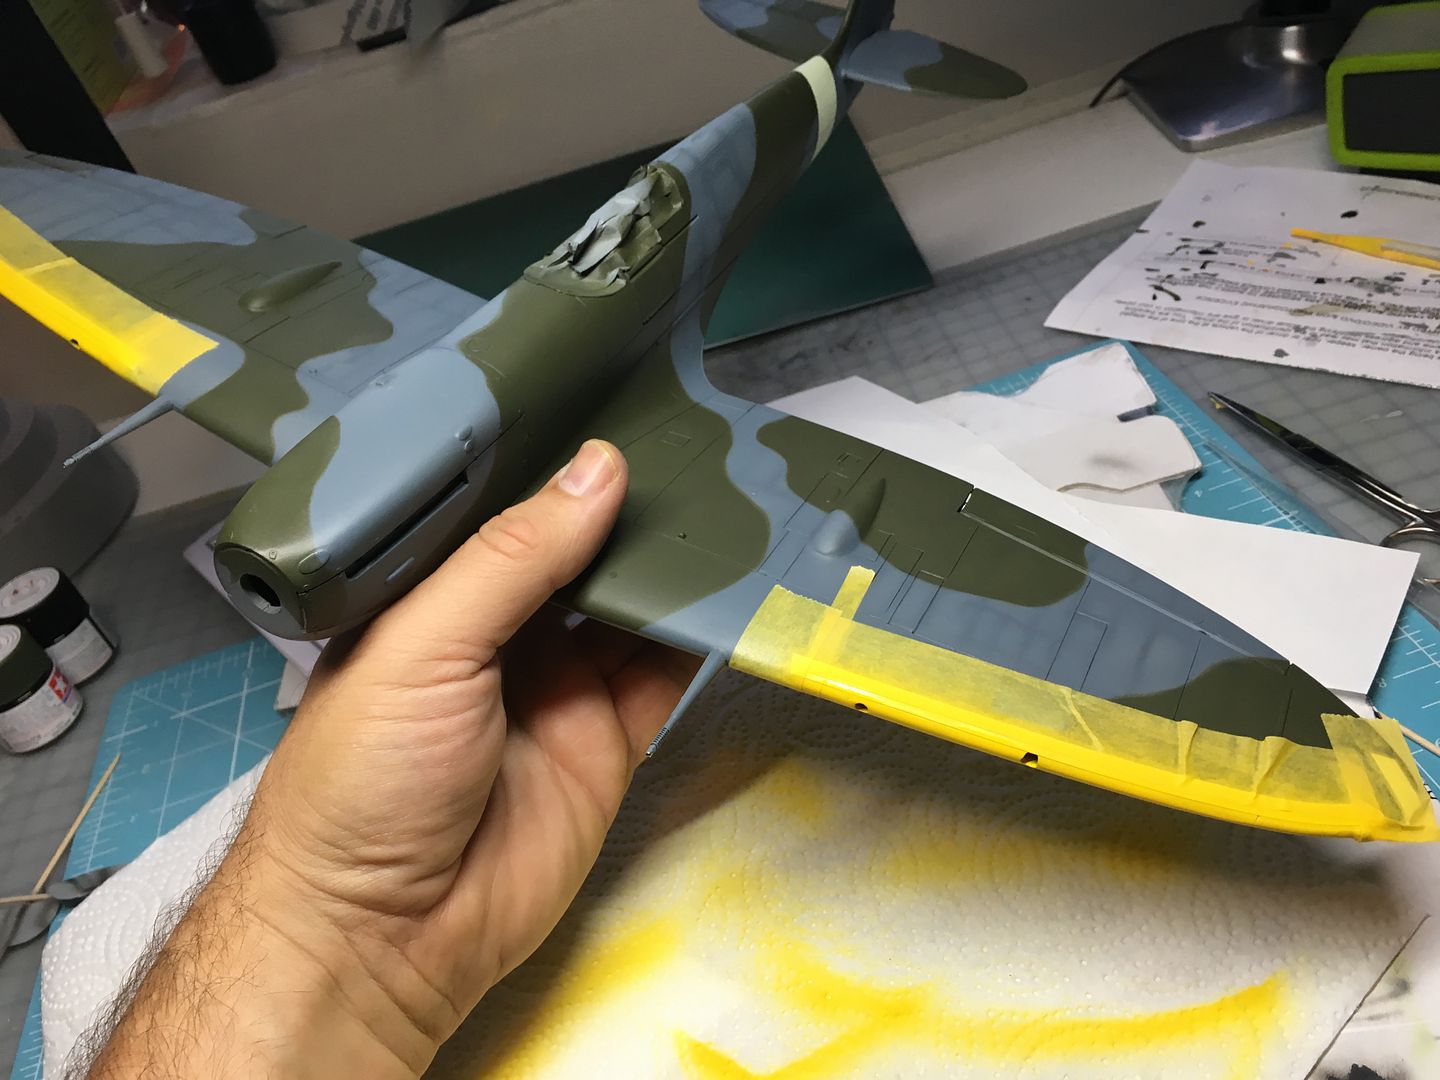
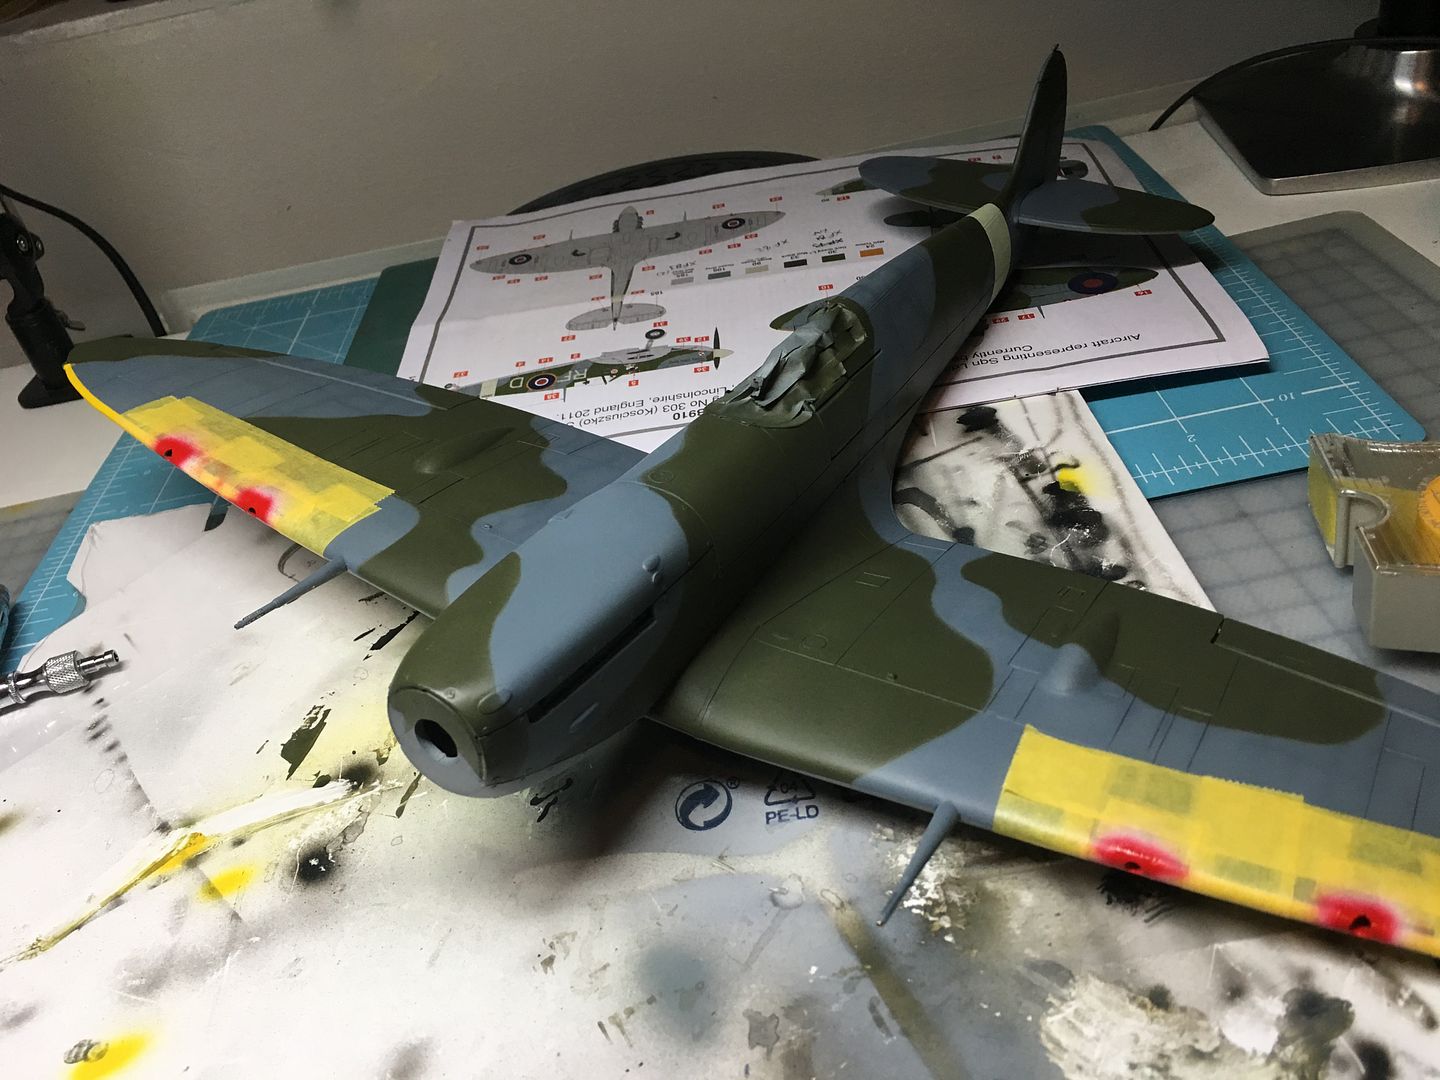
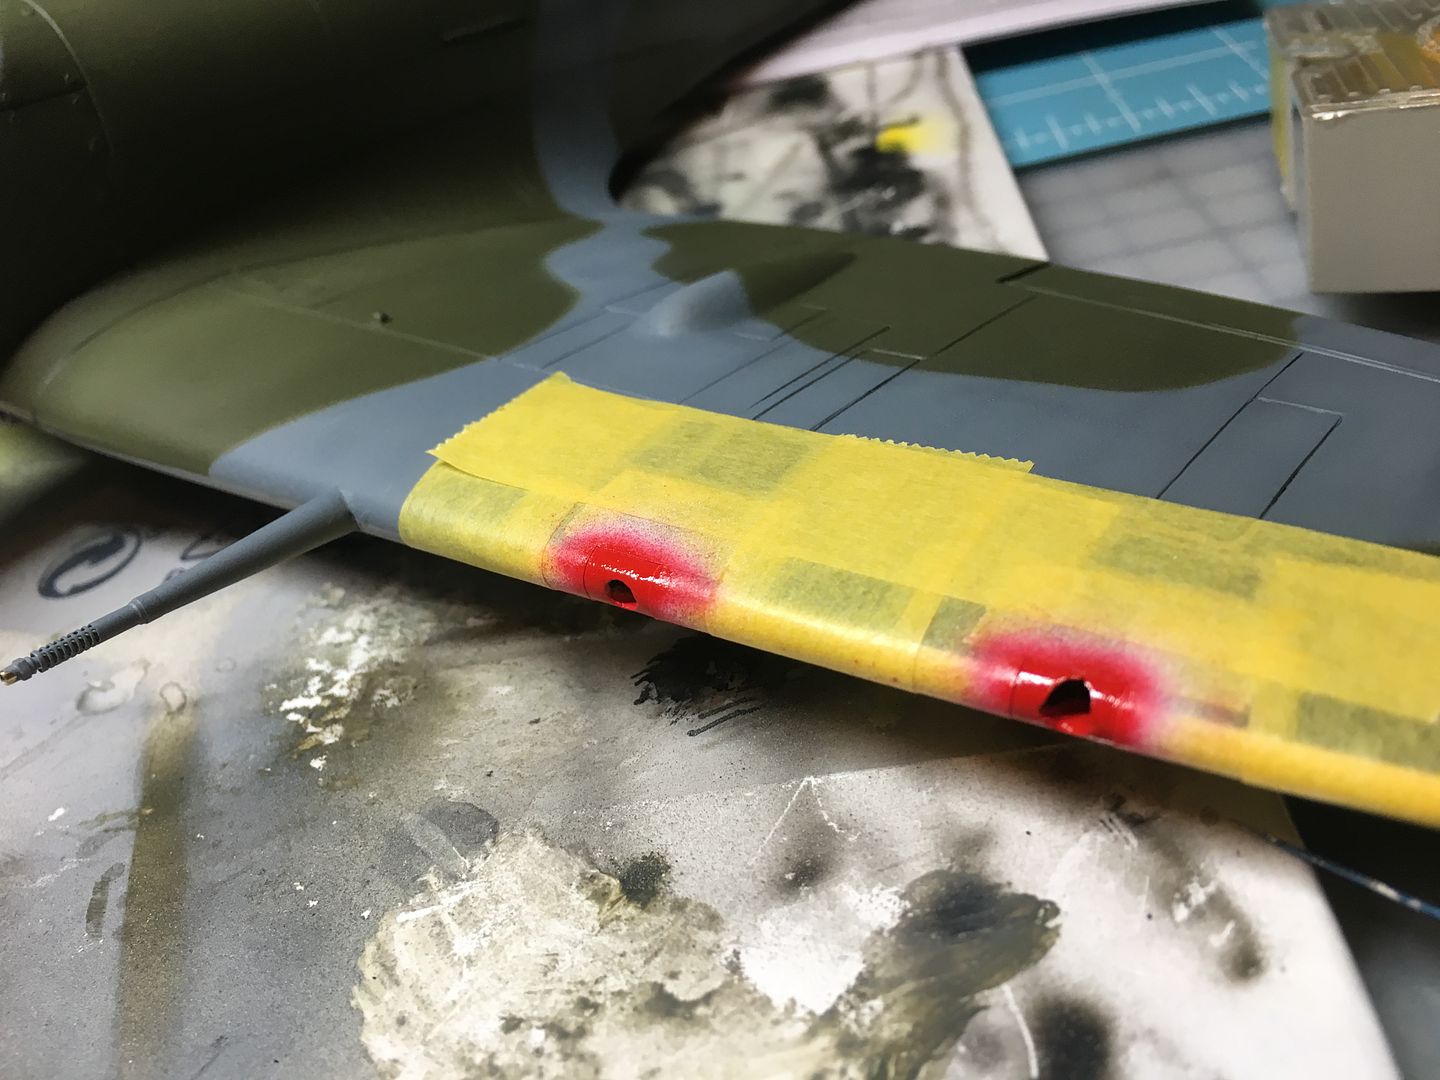
...and now some airbrushed details, such as stripe and yellow around the gun ports...

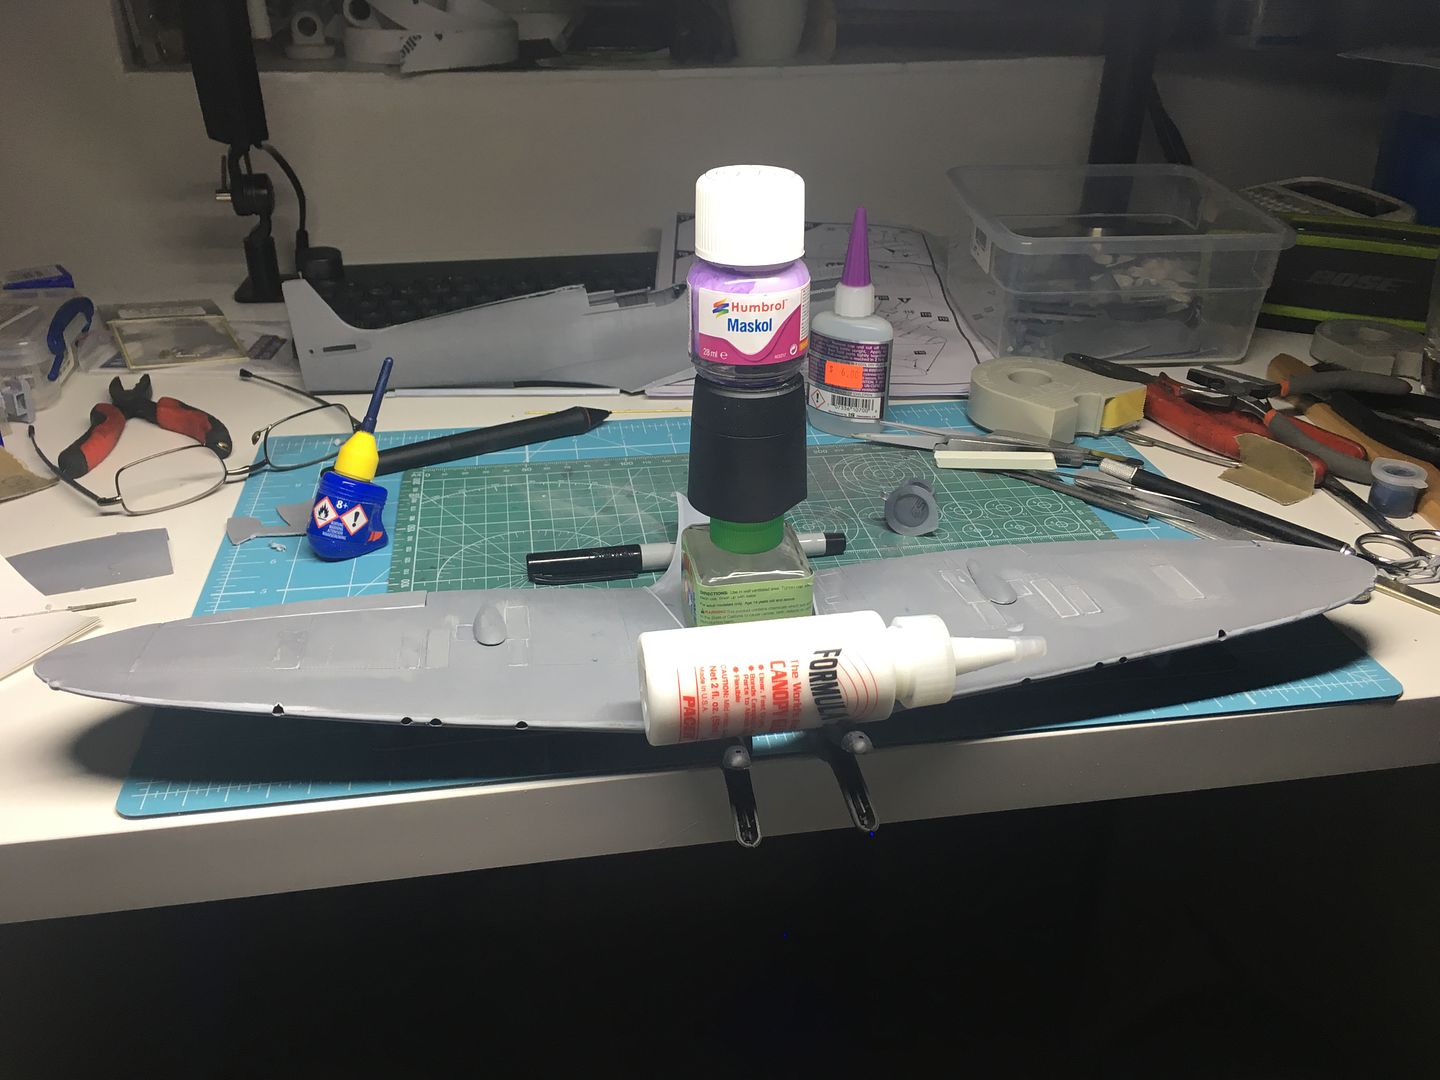
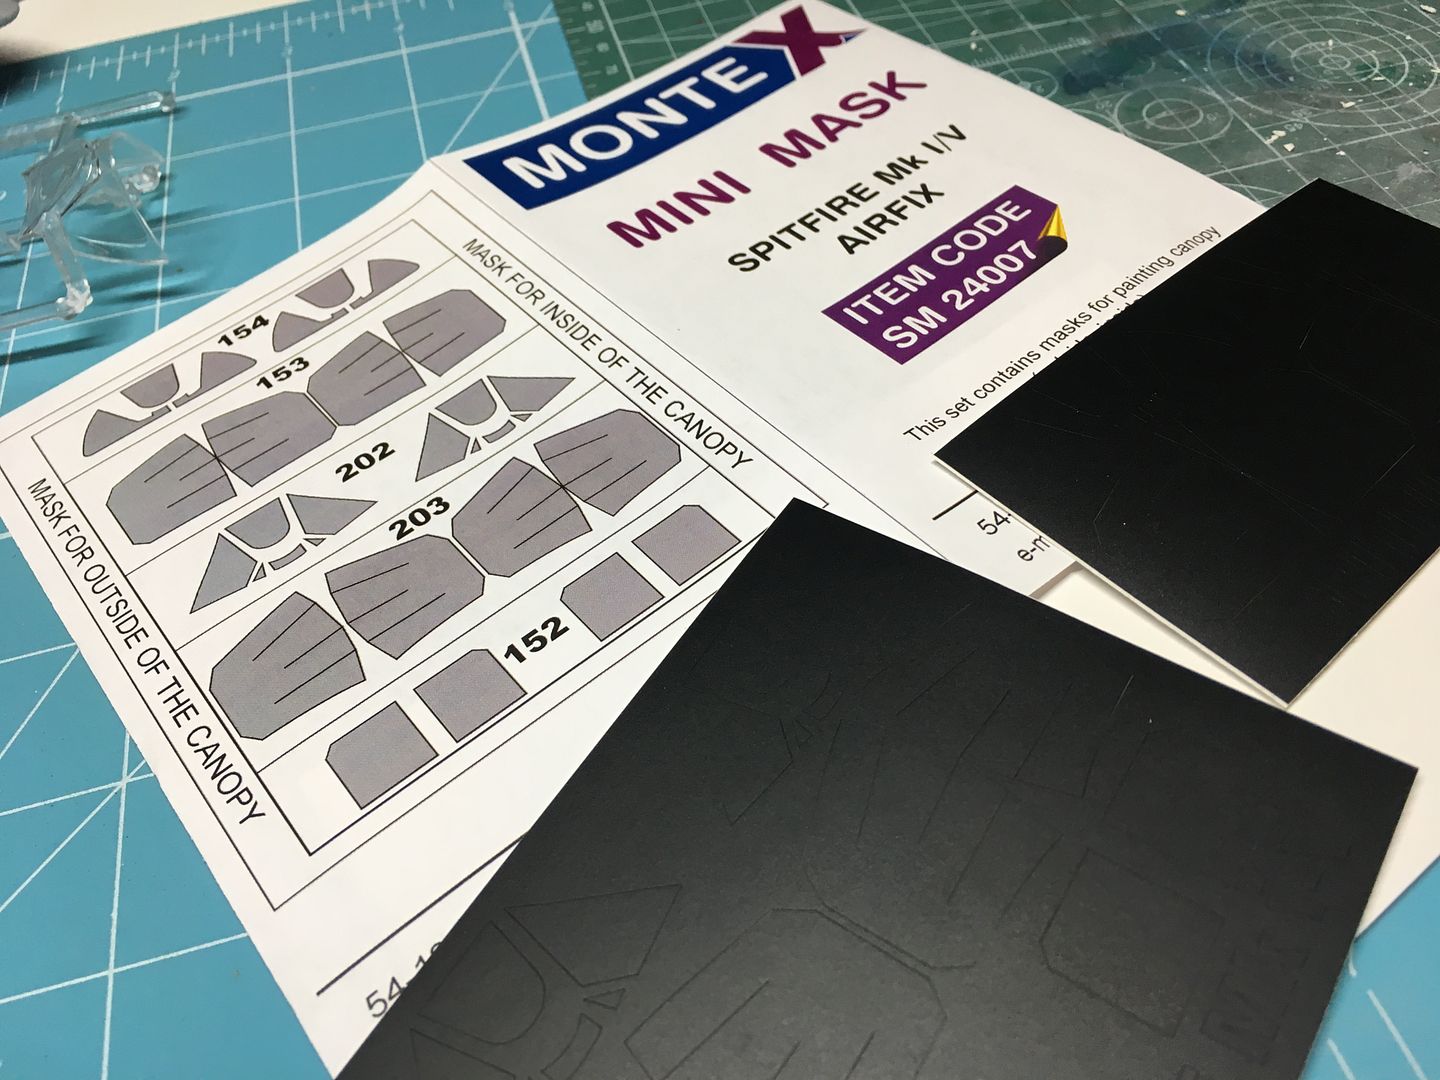
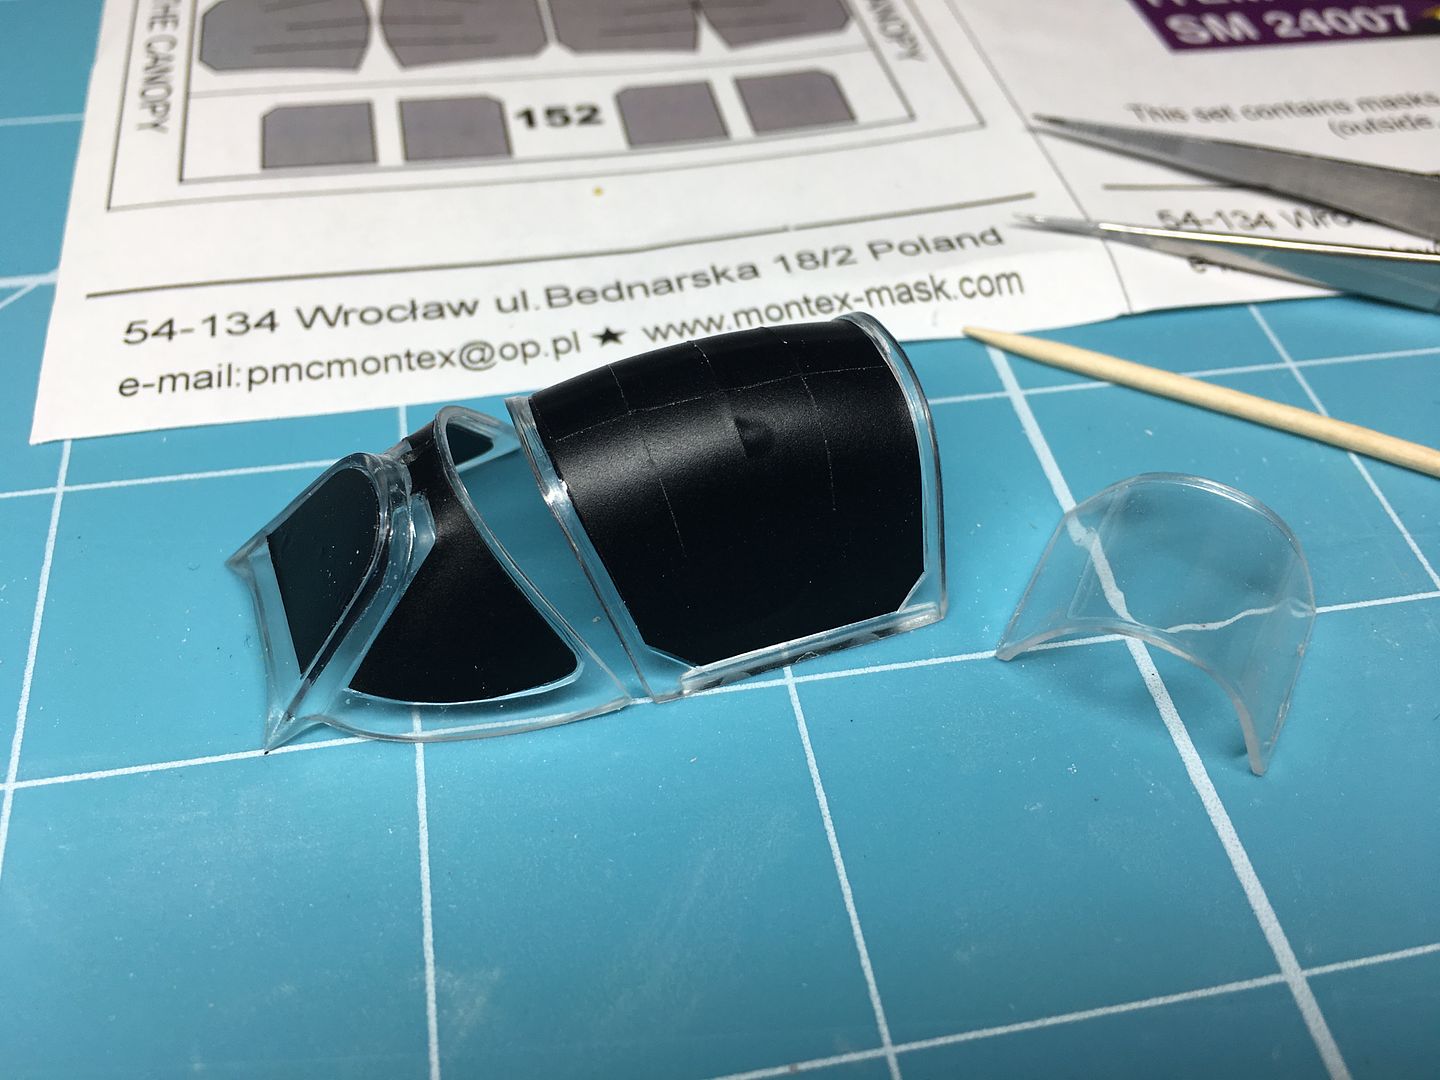
I had also completed the canopy sections - I had bought some after-market masks, which seemed to work ok. There were internal and external masks - I was going to spray the internal colour the same as the light green cockpit, but pictures suggest that the canopy framework itself was actually dark grey/black. As I had already sprayed the dark green, I left the internal like this...

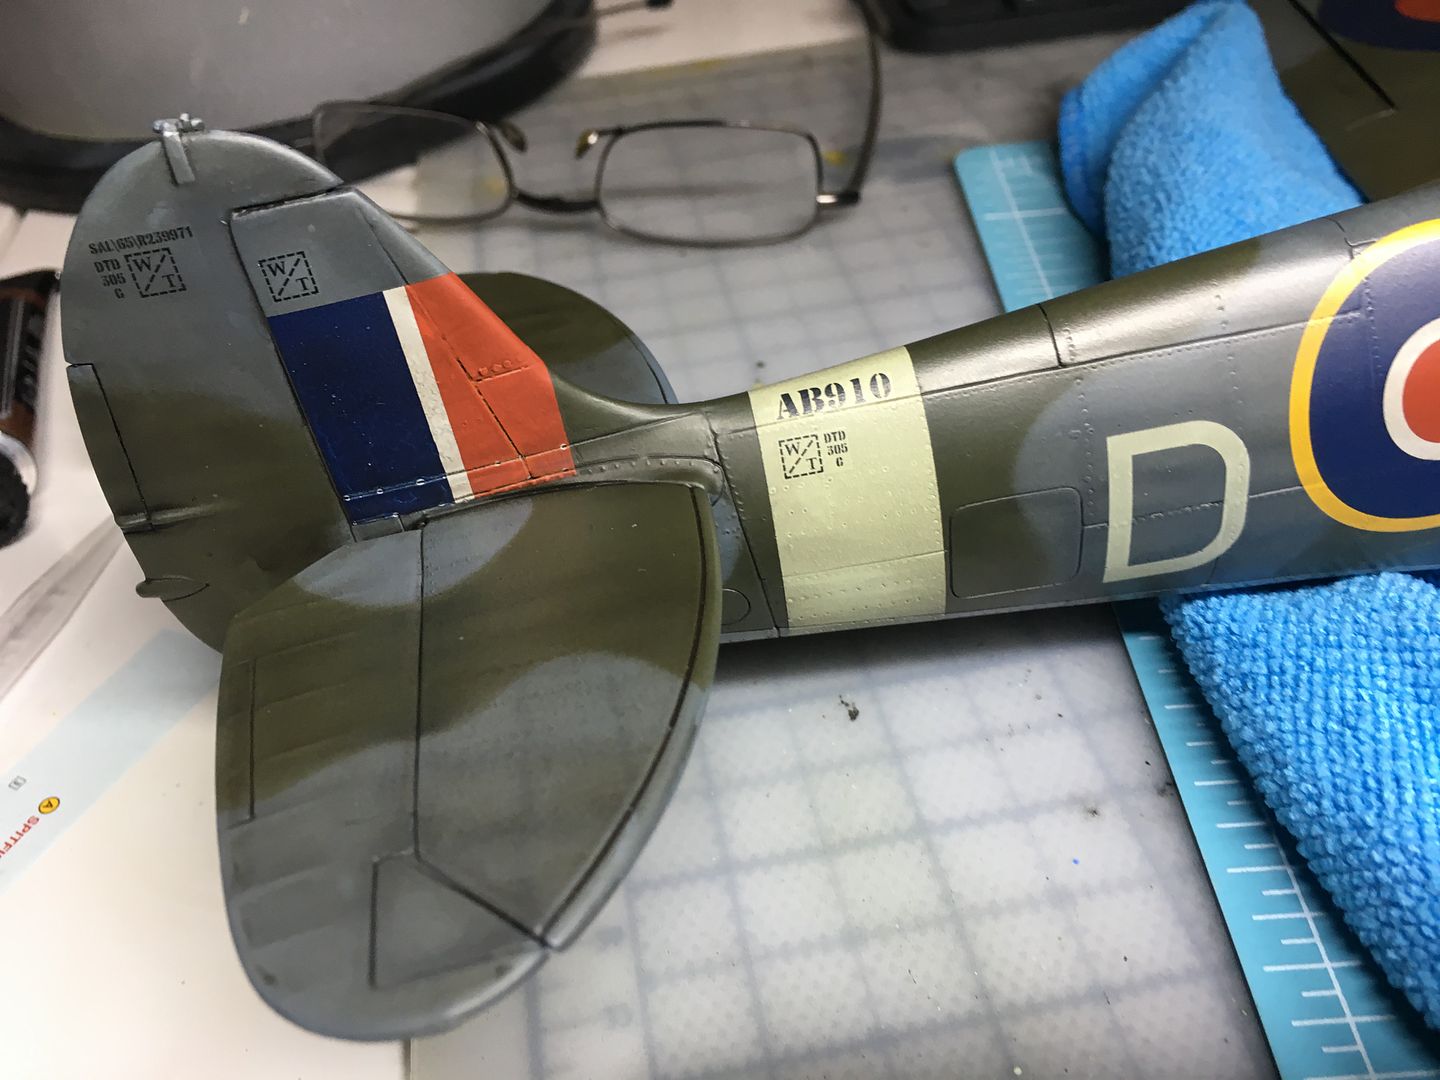
So now onto the decals!
I ended up adding some very thin strips of plastic to re-define this wing root area...
The engine panels had prominent fittings in the molding, some of which got sanded off during fitting. I decided to replace these - they are more flush on most models, but are a nice bit of detail on this one - I used PE 'washers' glued on to represent these - lower profile than the ones that had been moulded on - lots of them though!
I also used a generic PE 'pulley' to replace the crude detail of what I presume is an oil filler cap or similar, situated on top of the forward fuselage.
I added the very nice extra detail set of cannon...
Now onto the painting.
On the only other plane I have made, I used oils on the top surface to simulate panel profiles, panel gaps etc and shading - on this model I decided to try the method of airbrushing black shadows BEFORE the top coat. Took a while to get the airbrush set correctly (low) and to get the steady hand required to freehand the lines, but super-accuracy is not required here...
This had the desired effect...
HOWEVER - I was not happy with the colour. I had read that sometimes the proposed colour for this top surface of the Spitfire can be a little dark, so had tried a slightly lighter colour - but was still not happy - easy to respray another slightly darker colour on top - but I had to re-spray those pesky shadow lines again!
But happier with the colour...and with my first attempt at the shading.
I then had a similar issue with the underside - the colour that was suggested seemed too close to the top grey, so I ended up doing this twice as well - the smaller XF-83 was suggested, but I ended up using XF-19 - very subtlely lighter - but I also know that when I use my oils later, it will make things slightly darker anyway...
Finally it was the time for the Dark Green (RAF) - I used my Blutack method I used on the Mossie - I like the slightly soft edge it gives. Before spraying the green I had to re-apply those shade lines again, once masked.
Pretty pleased with the final result...
...and now some airbrushed details, such as stripe and yellow around the gun ports...
I had also completed the canopy sections - I had bought some after-market masks, which seemed to work ok. There were internal and external masks - I was going to spray the internal colour the same as the light green cockpit, but pictures suggest that the canopy framework itself was actually dark grey/black. As I had already sprayed the dark green, I left the internal like this...
So now onto the decals!
Yep - I know exactly what you mean - you can often see the frayed fabric in films etc - sounds like a nice bit of detail to add - particularly at this larger scale...
Had a minor potential disaster (and got away with it) where I had been using Tamiya airbrush cleaner (from Belgium!) and had a bit on a piece of kitchen roll, which I then rested the model on - luckily it was only on a one-colour section - so a quick gentle re-spray of the area worked - few!! I obviously had not learnt my lesson - when I was making the Brabham BT52 I managed to wipe the freshly dried blue Zero paint with a similar rag, and cause much more damage - perils of working on a small, temporary space -
arrrgh!!


Ginger had survived all the manhandling...

...and the canopy is going to fit!
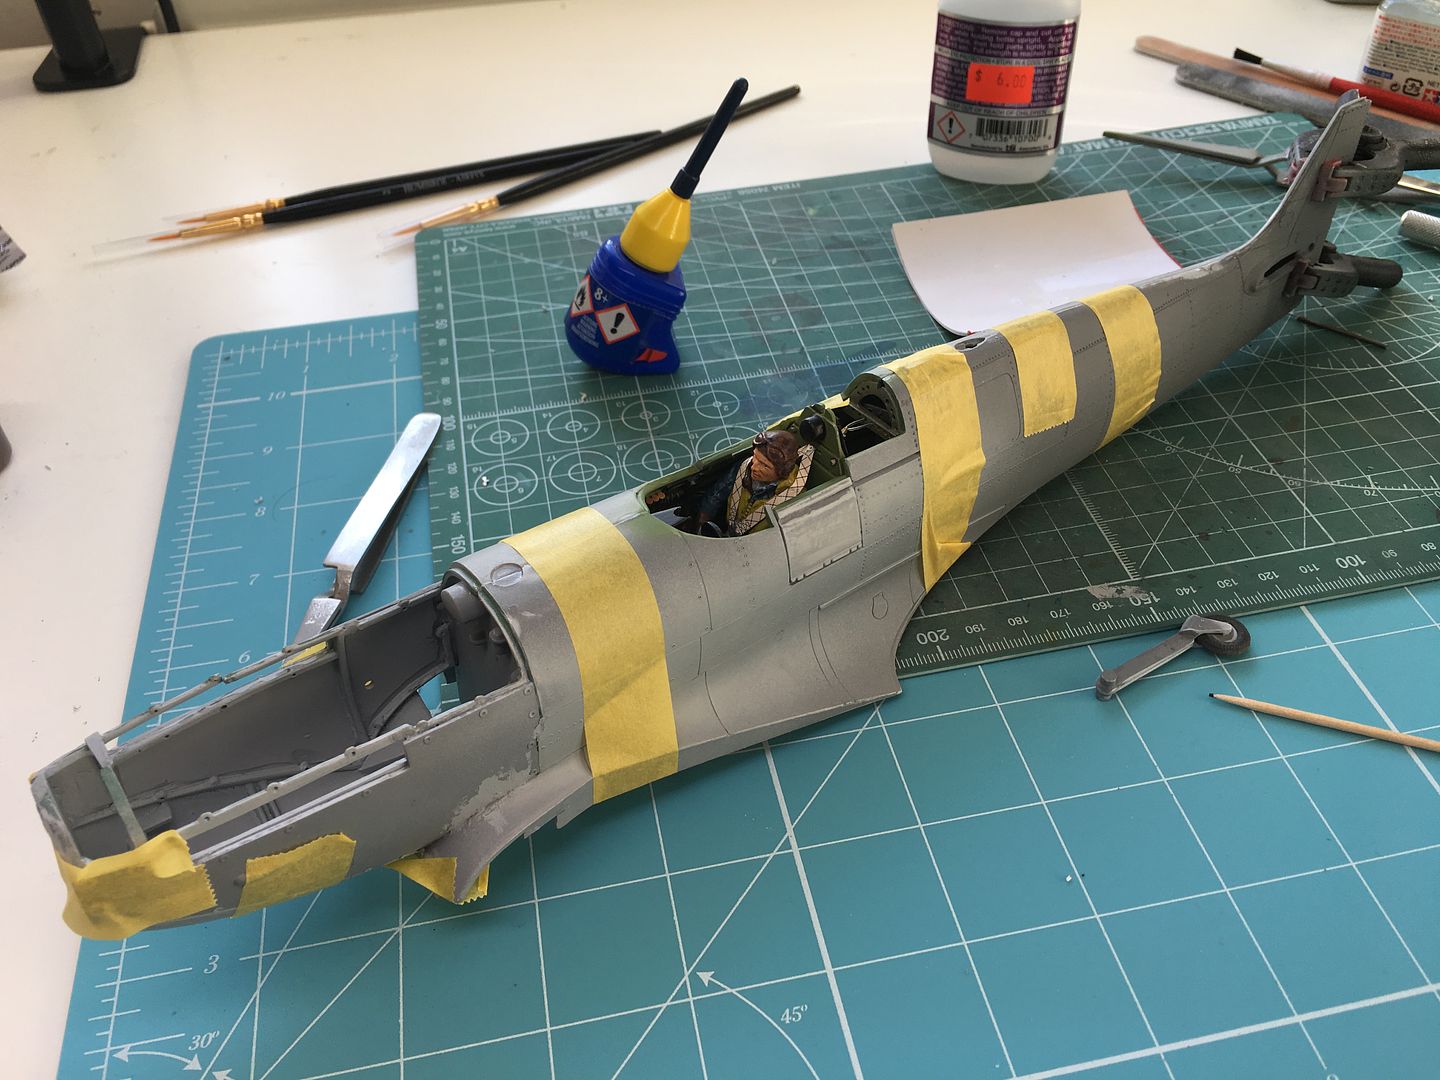
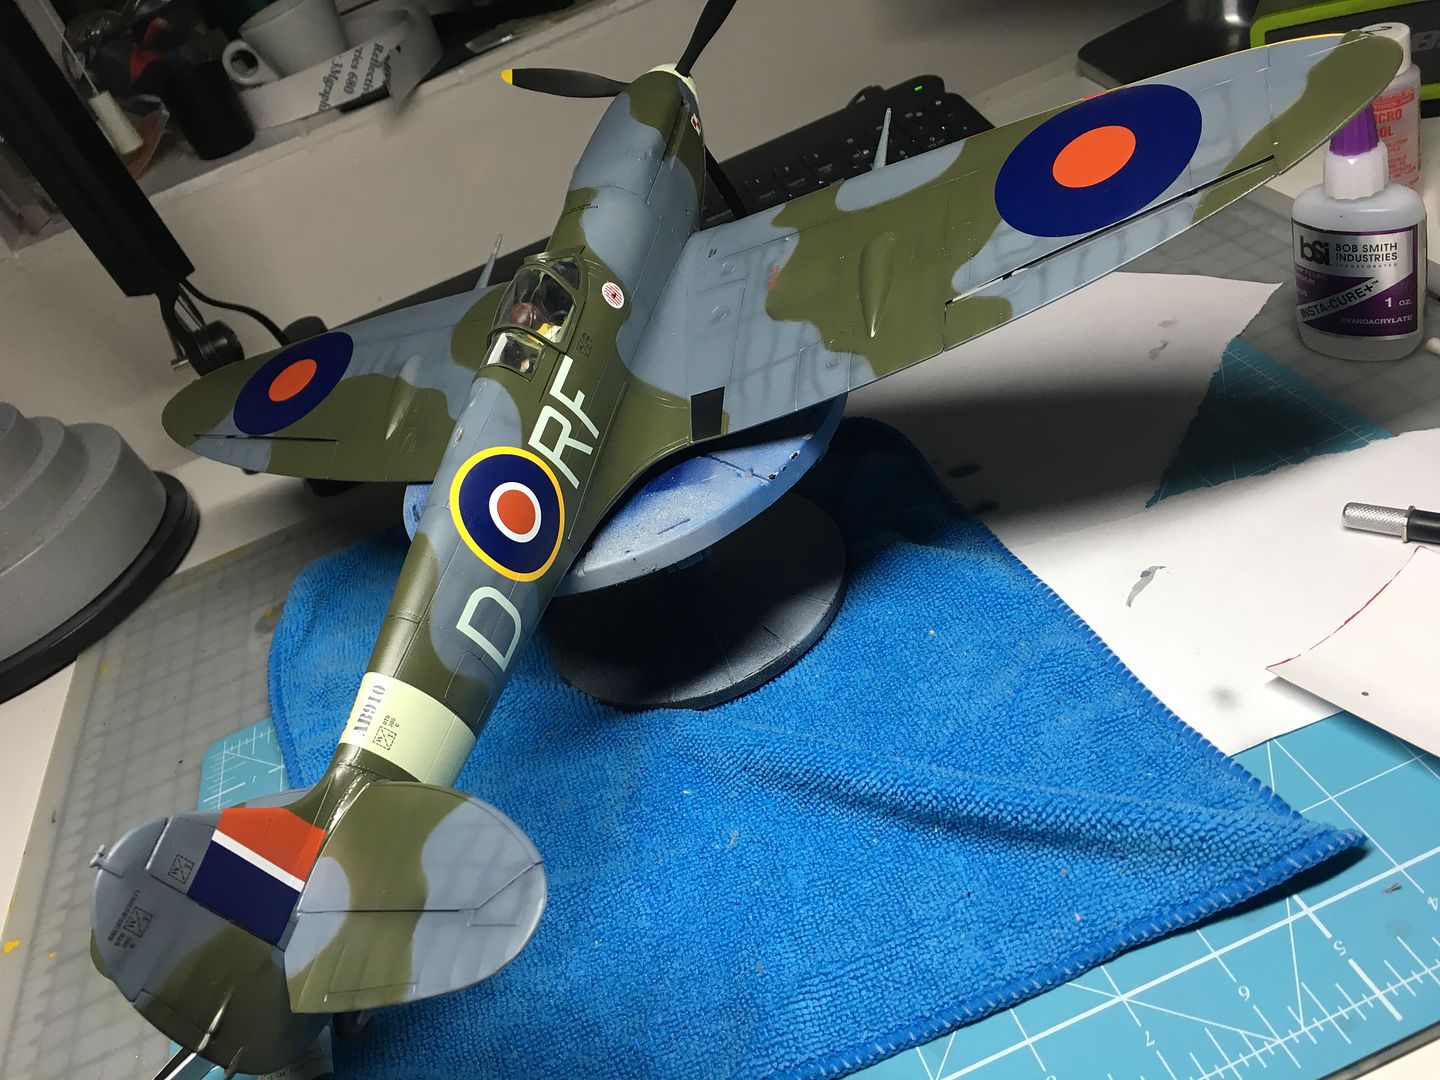
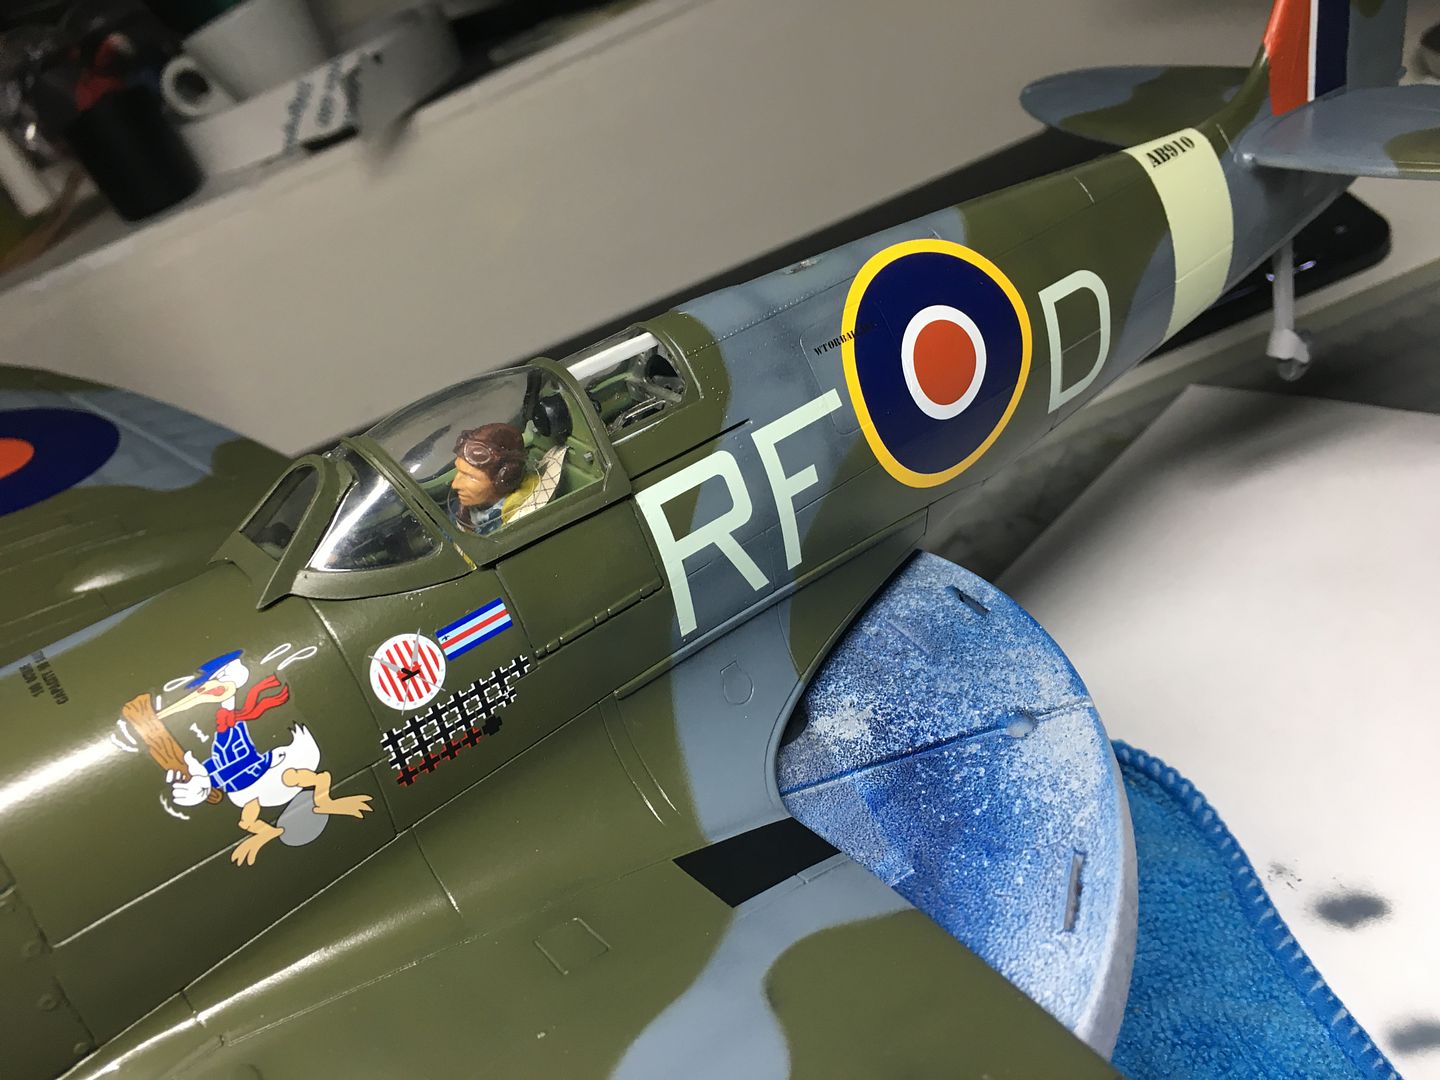
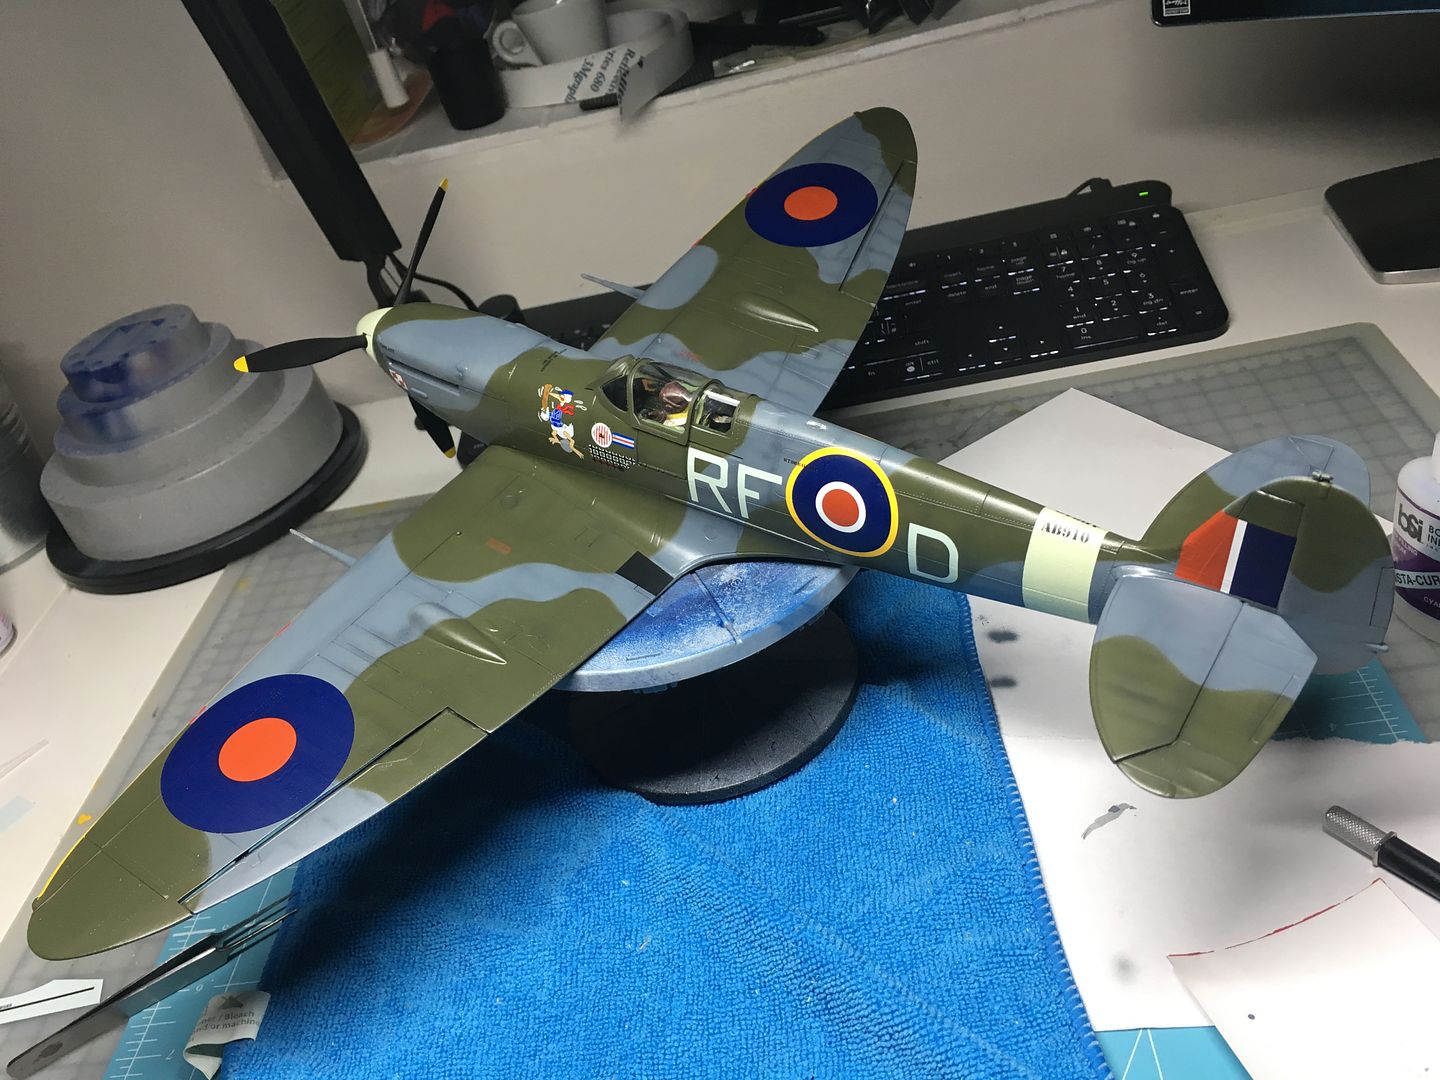
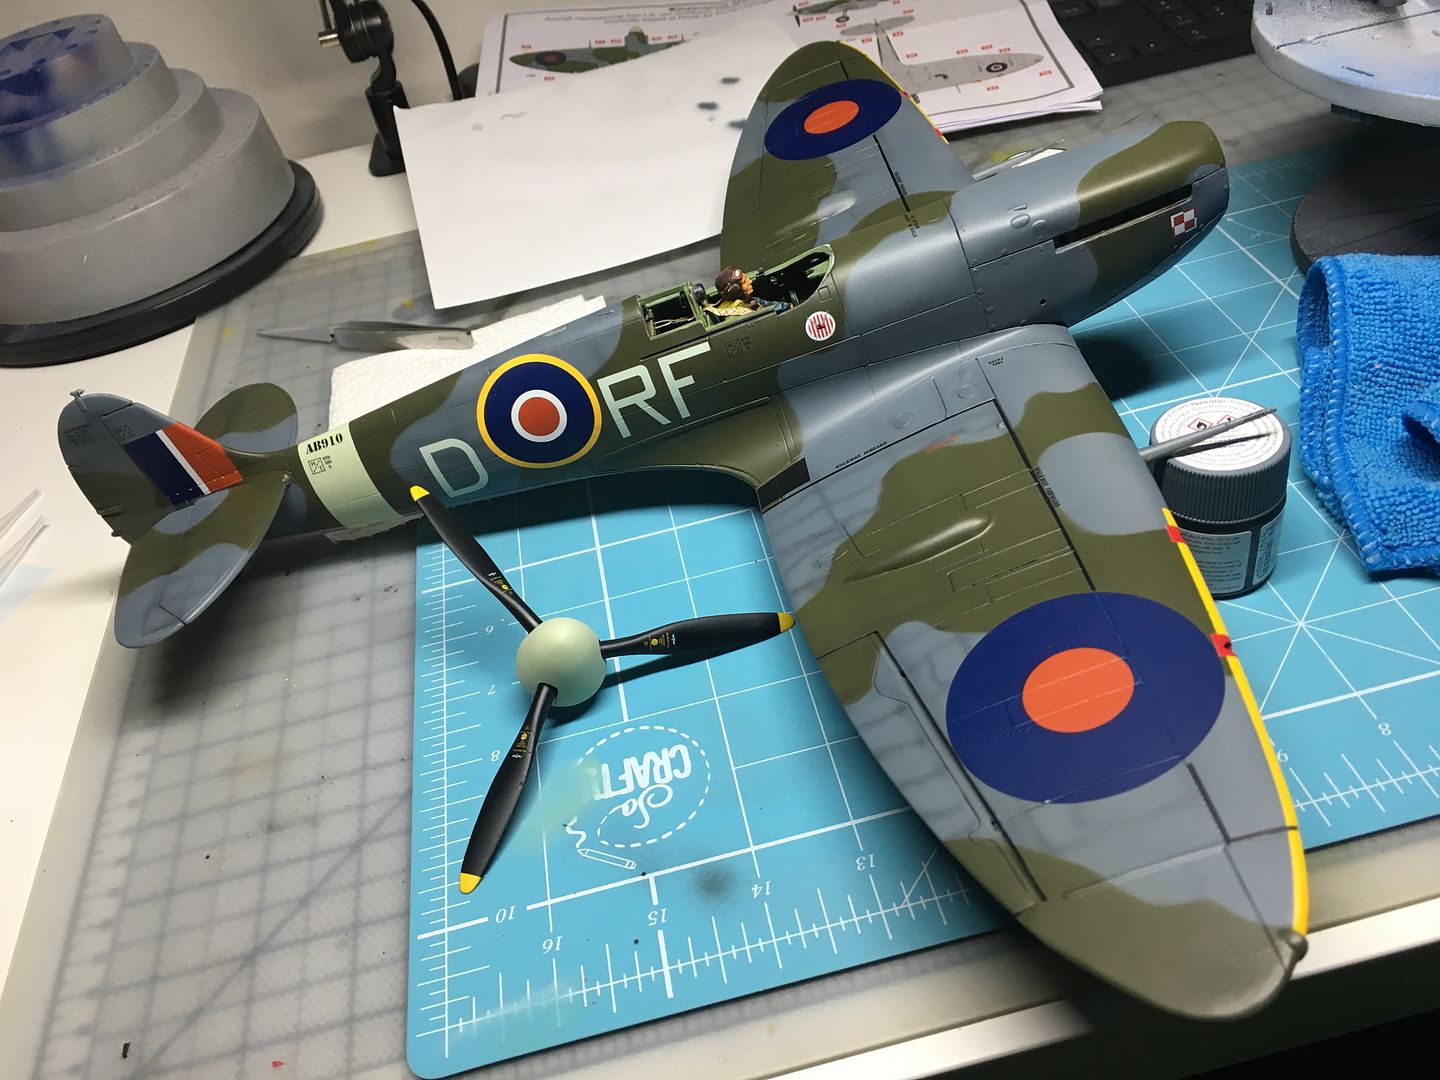
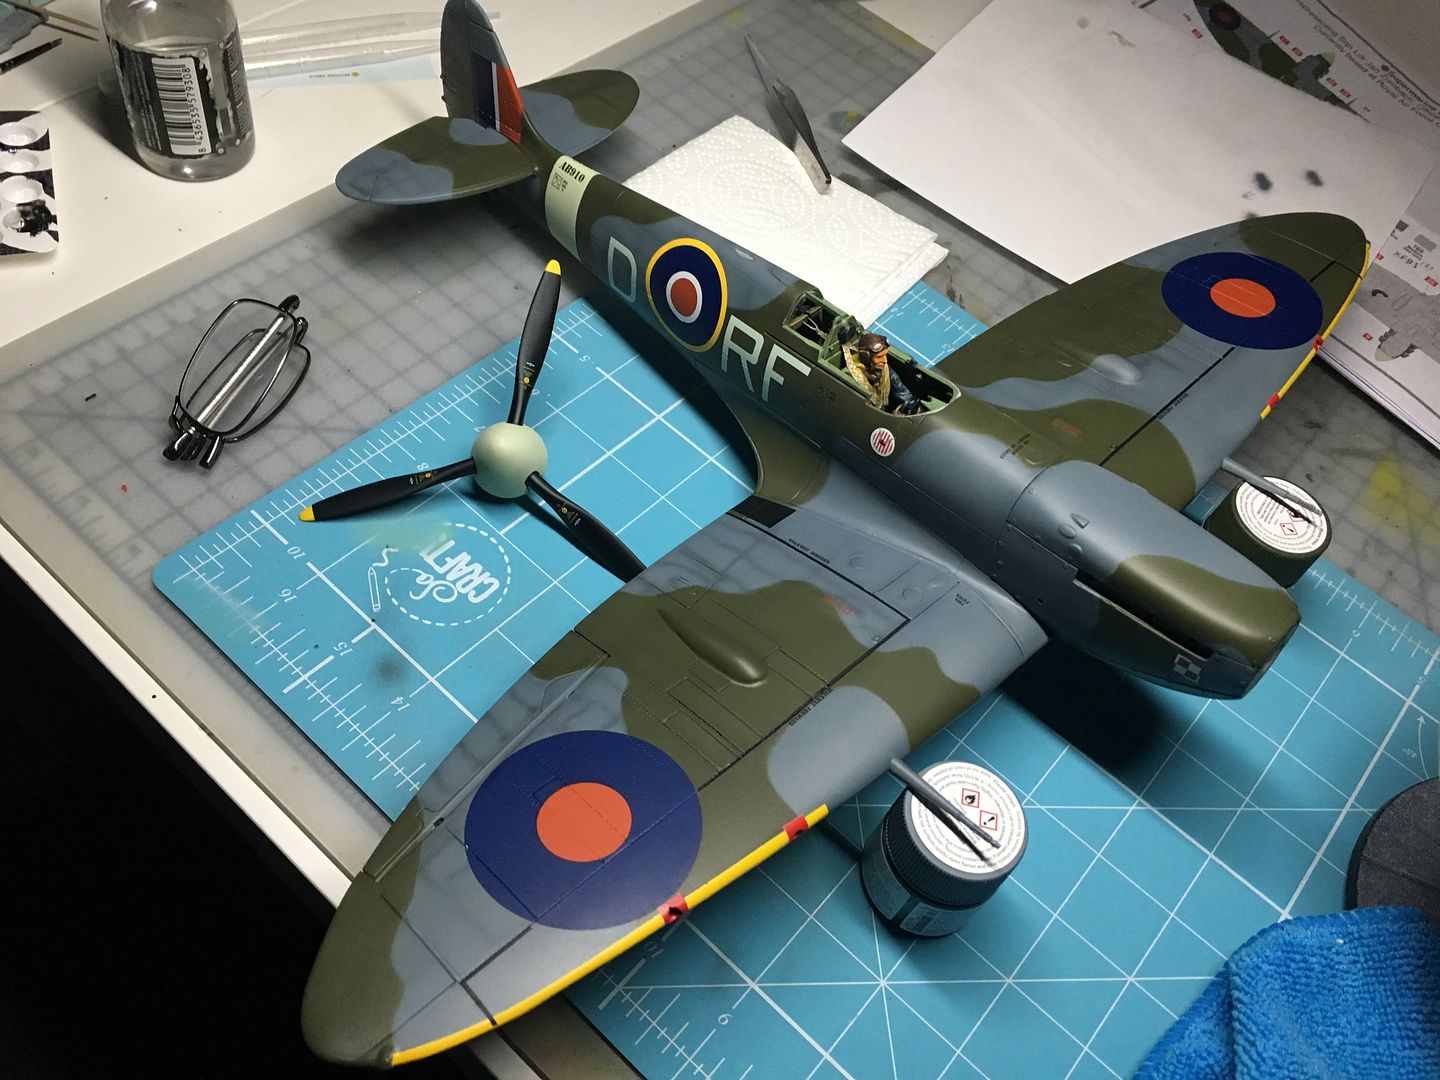
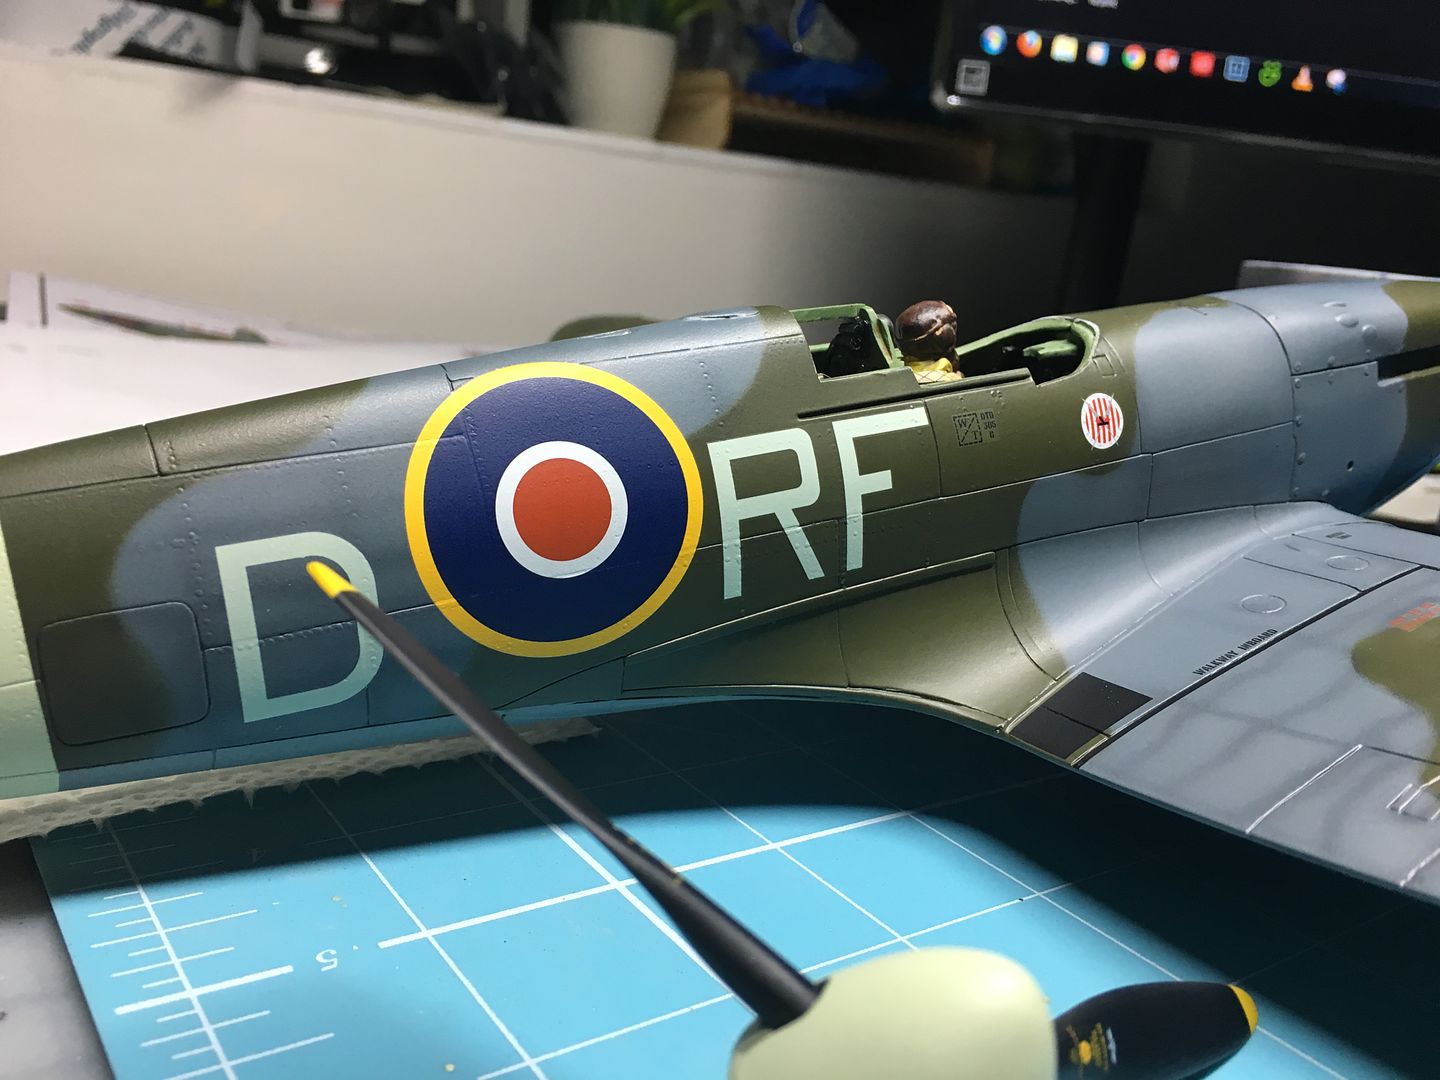
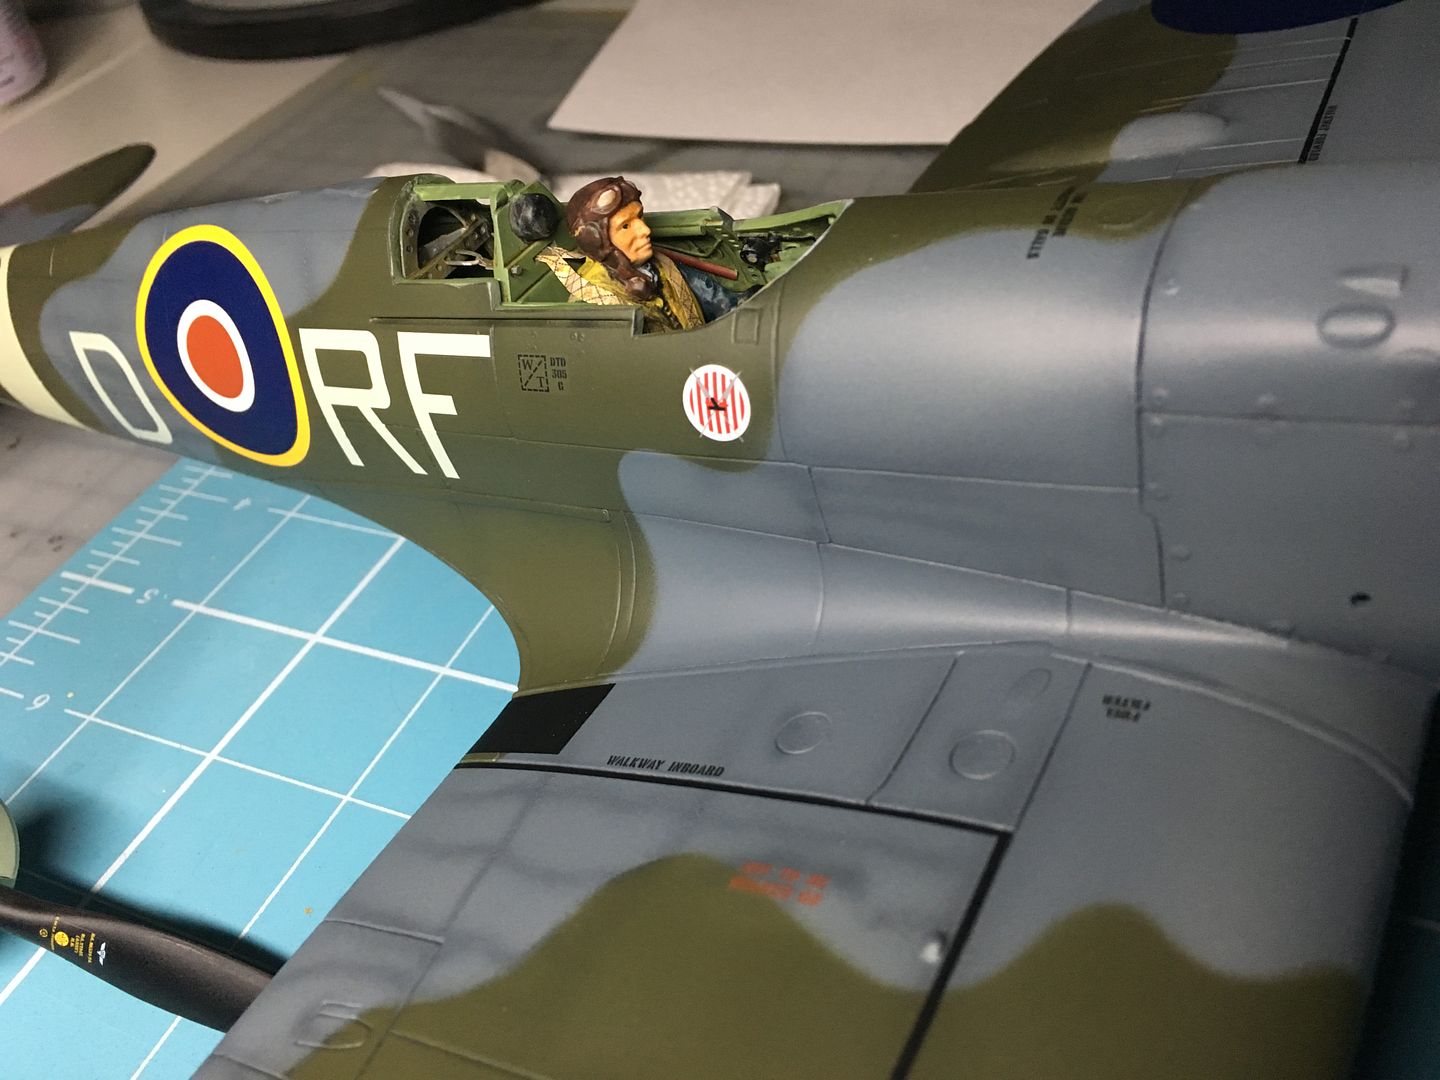
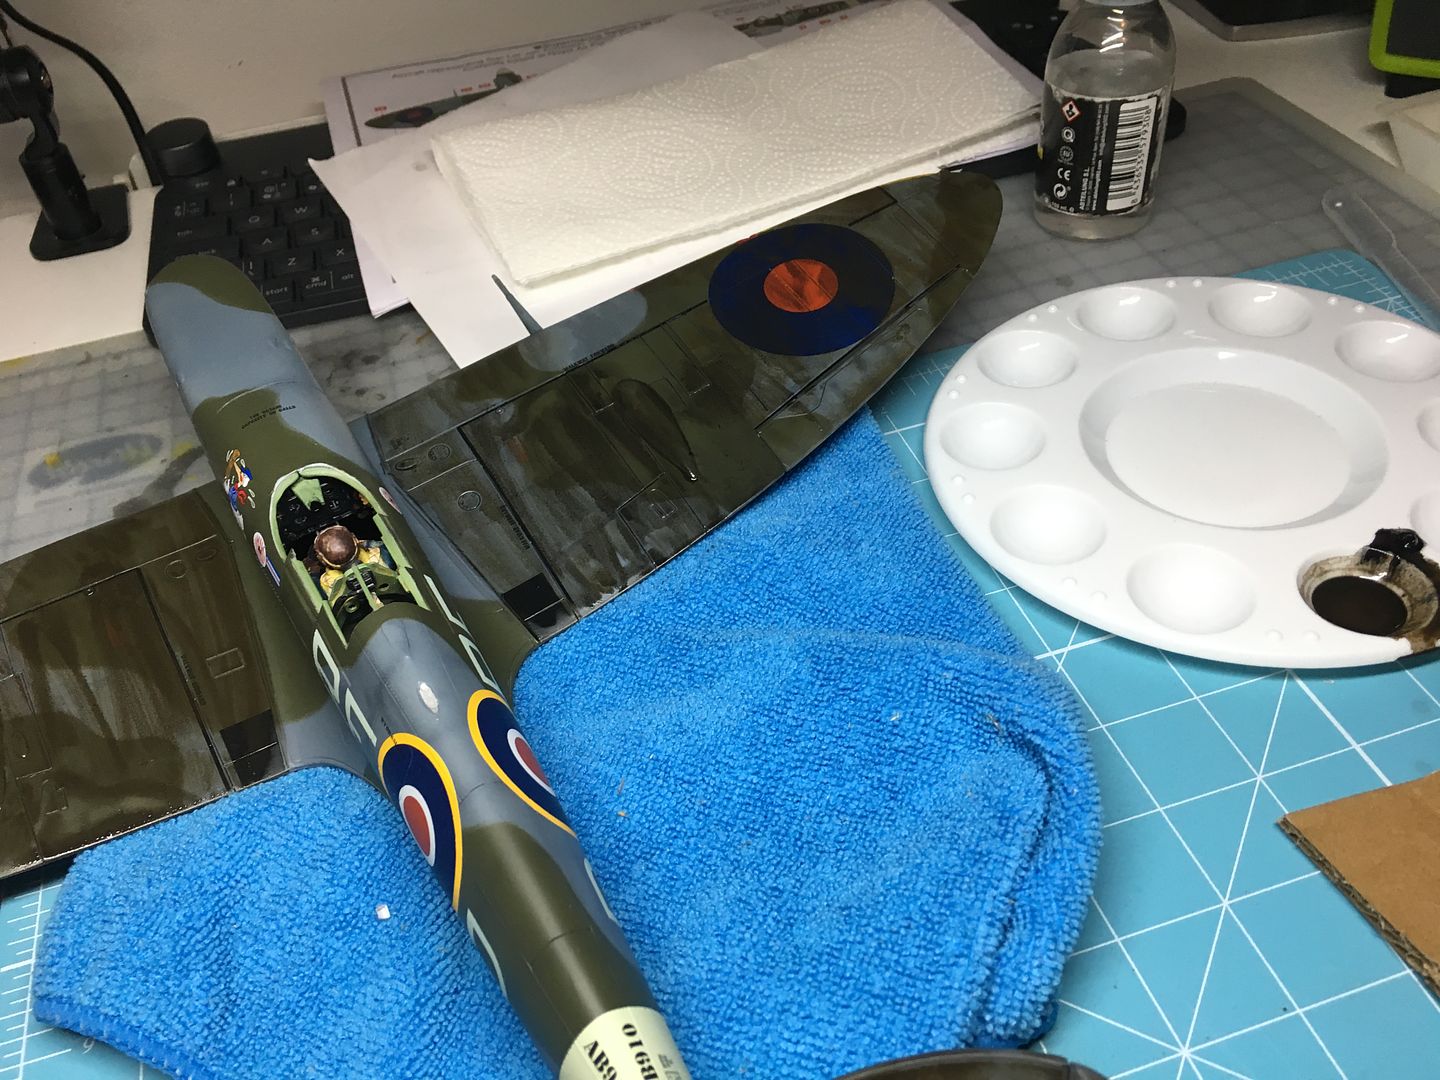
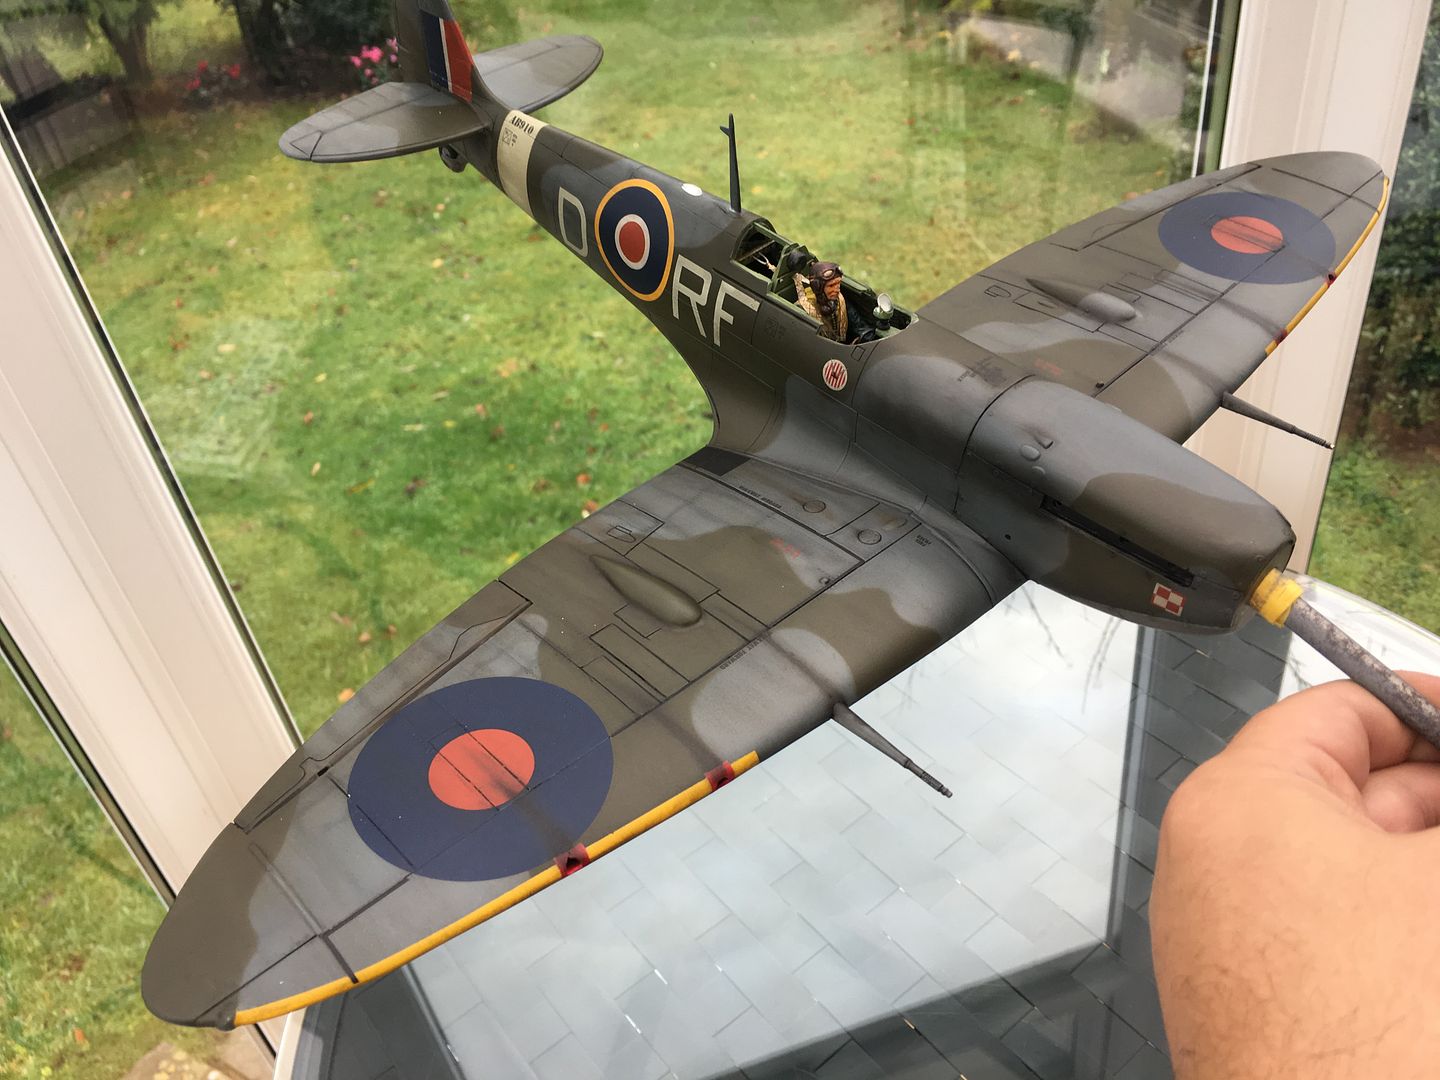
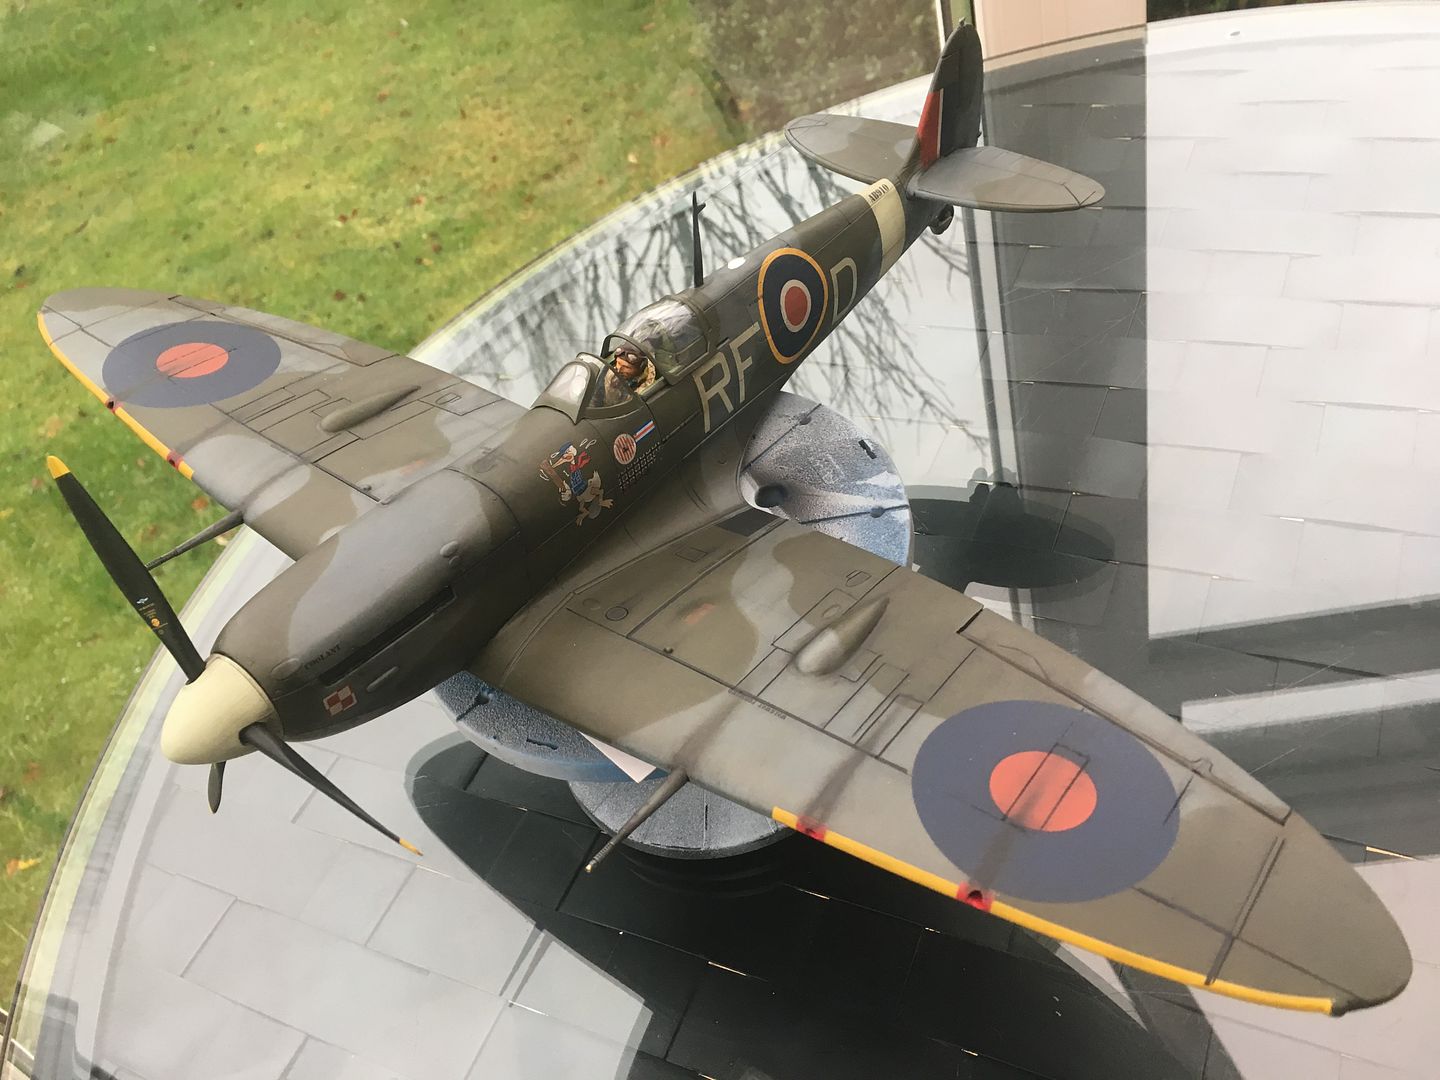
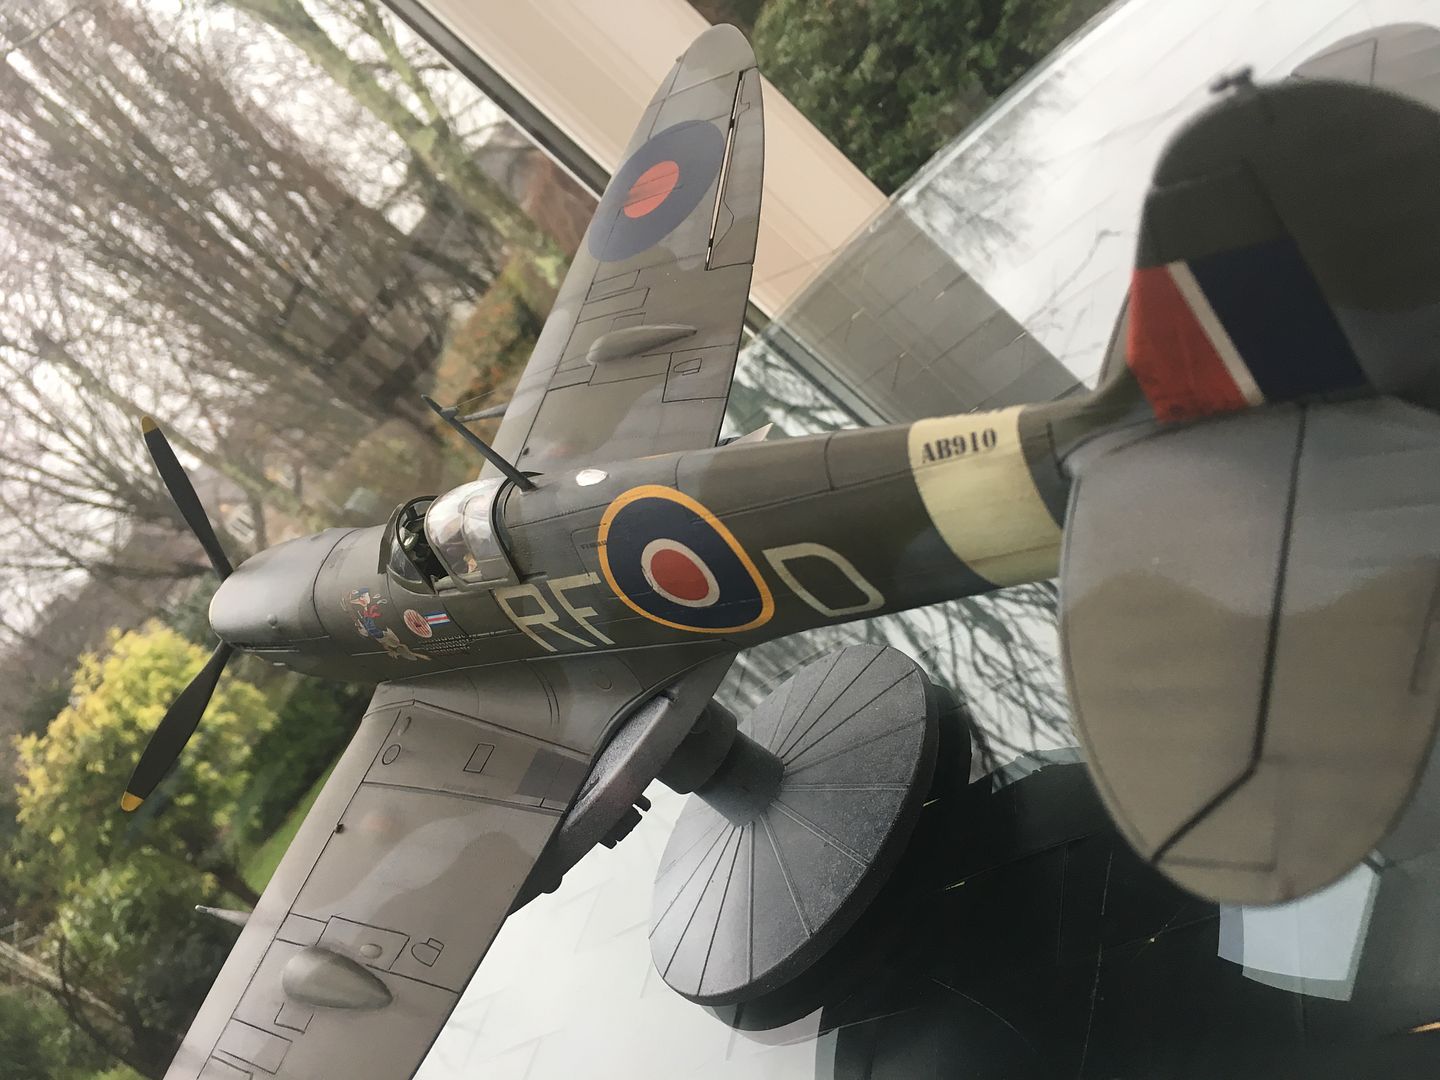
...so on to the decals. Really comes alive now - I had sprayed a semi-gloss clear to protect the paint and help the decals, so everything looks very shiny right now...


So, now onto the hard bit - adding a bit of weathering and detail!
Quick question for Spitfire nerds - rear wheel - up or down? You see both in pictures....

Had a minor potential disaster (and got away with it) where I had been using Tamiya airbrush cleaner (from Belgium!) and had a bit on a piece of kitchen roll, which I then rested the model on - luckily it was only on a one-colour section - so a quick gentle re-spray of the area worked - few!! I obviously had not learnt my lesson - when I was making the Brabham BT52 I managed to wipe the freshly dried blue Zero paint with a similar rag, and cause much more damage - perils of working on a small, temporary space -
arrrgh!!
Ginger had survived all the manhandling...
...and the canopy is going to fit!
...so on to the decals. Really comes alive now - I had sprayed a semi-gloss clear to protect the paint and help the decals, so everything looks very shiny right now...
So, now onto the hard bit - adding a bit of weathering and detail!
Quick question for Spitfire nerds - rear wheel - up or down? You see both in pictures....
Sadly not
Will fix the wheel in place then - thanks!
It will certainly be matt.
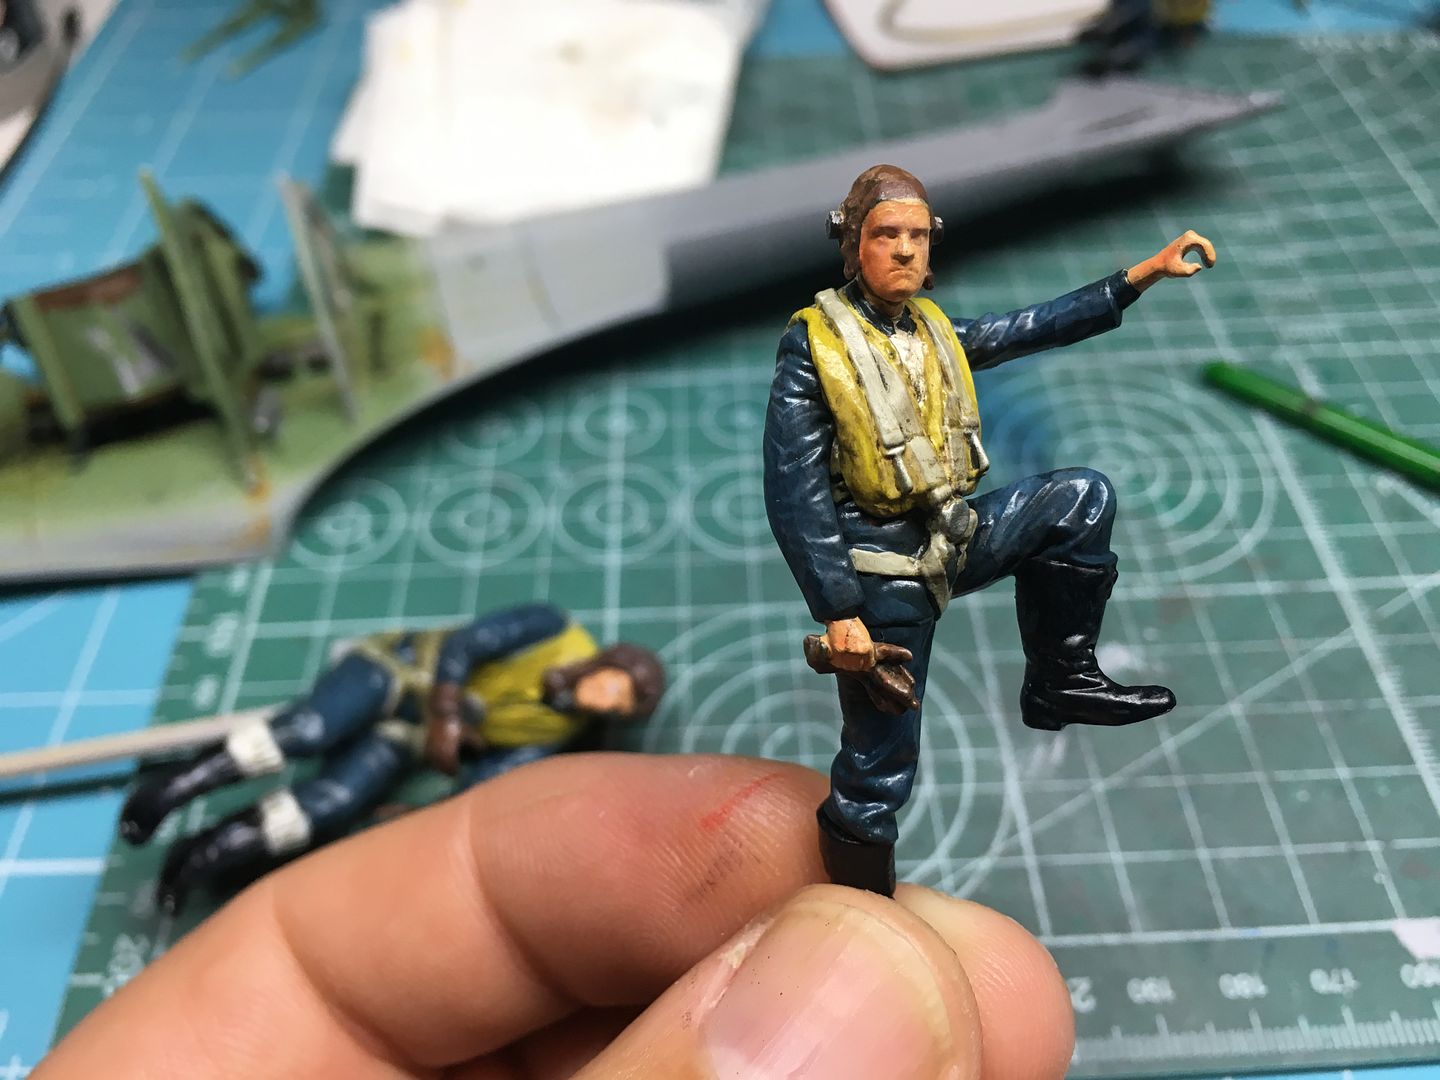
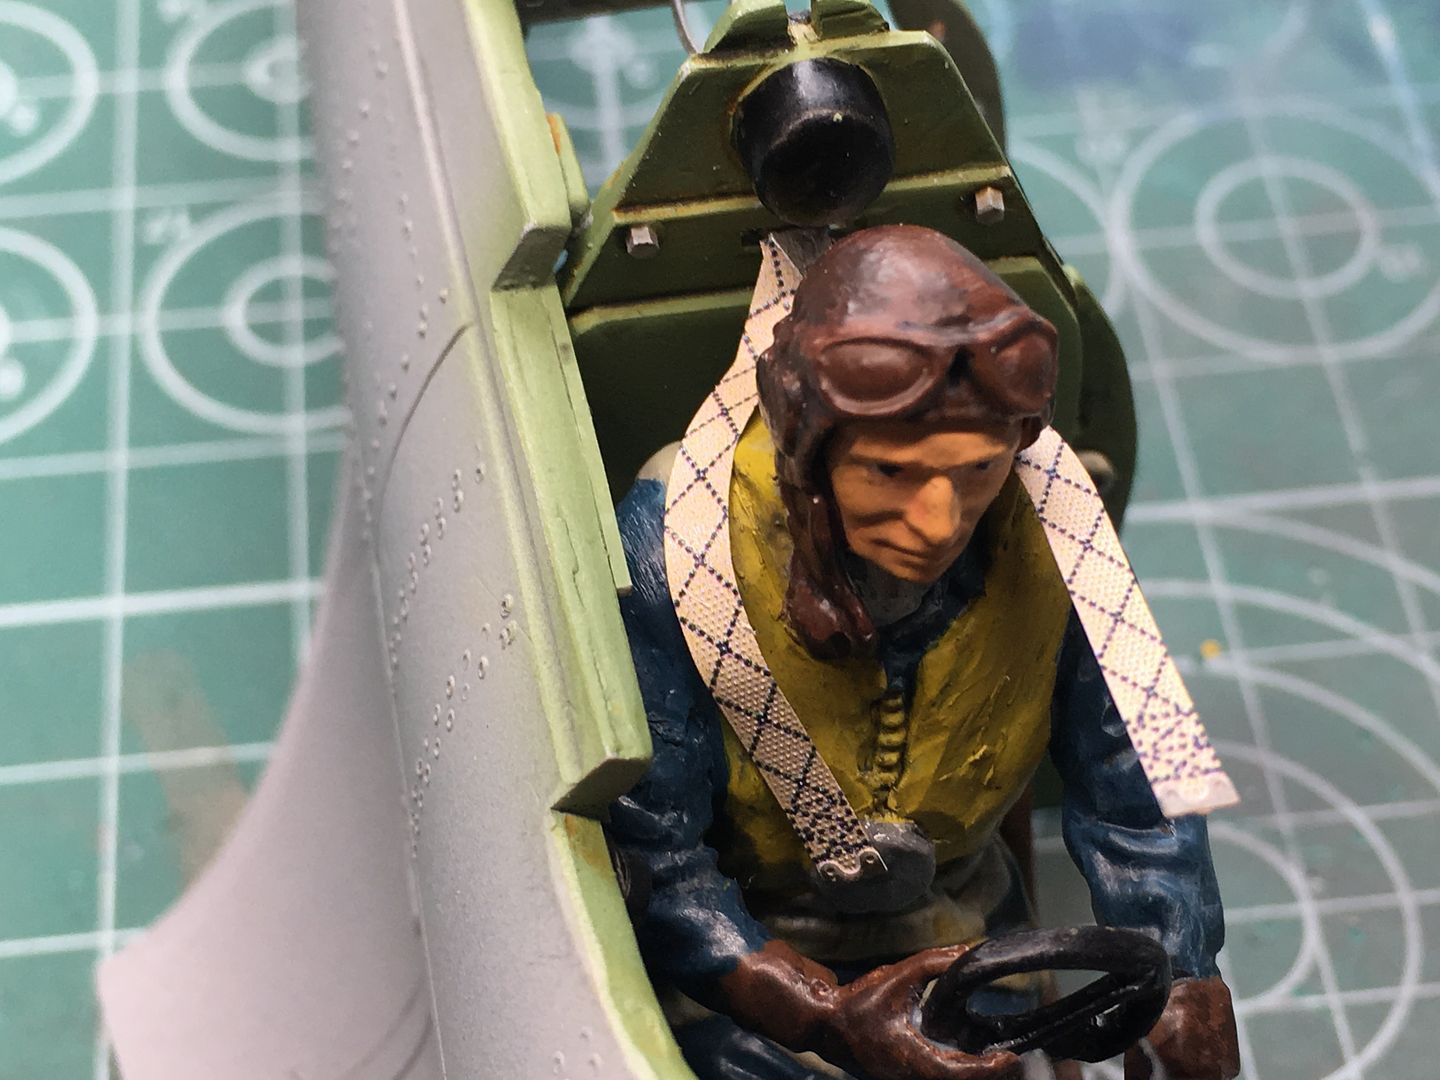
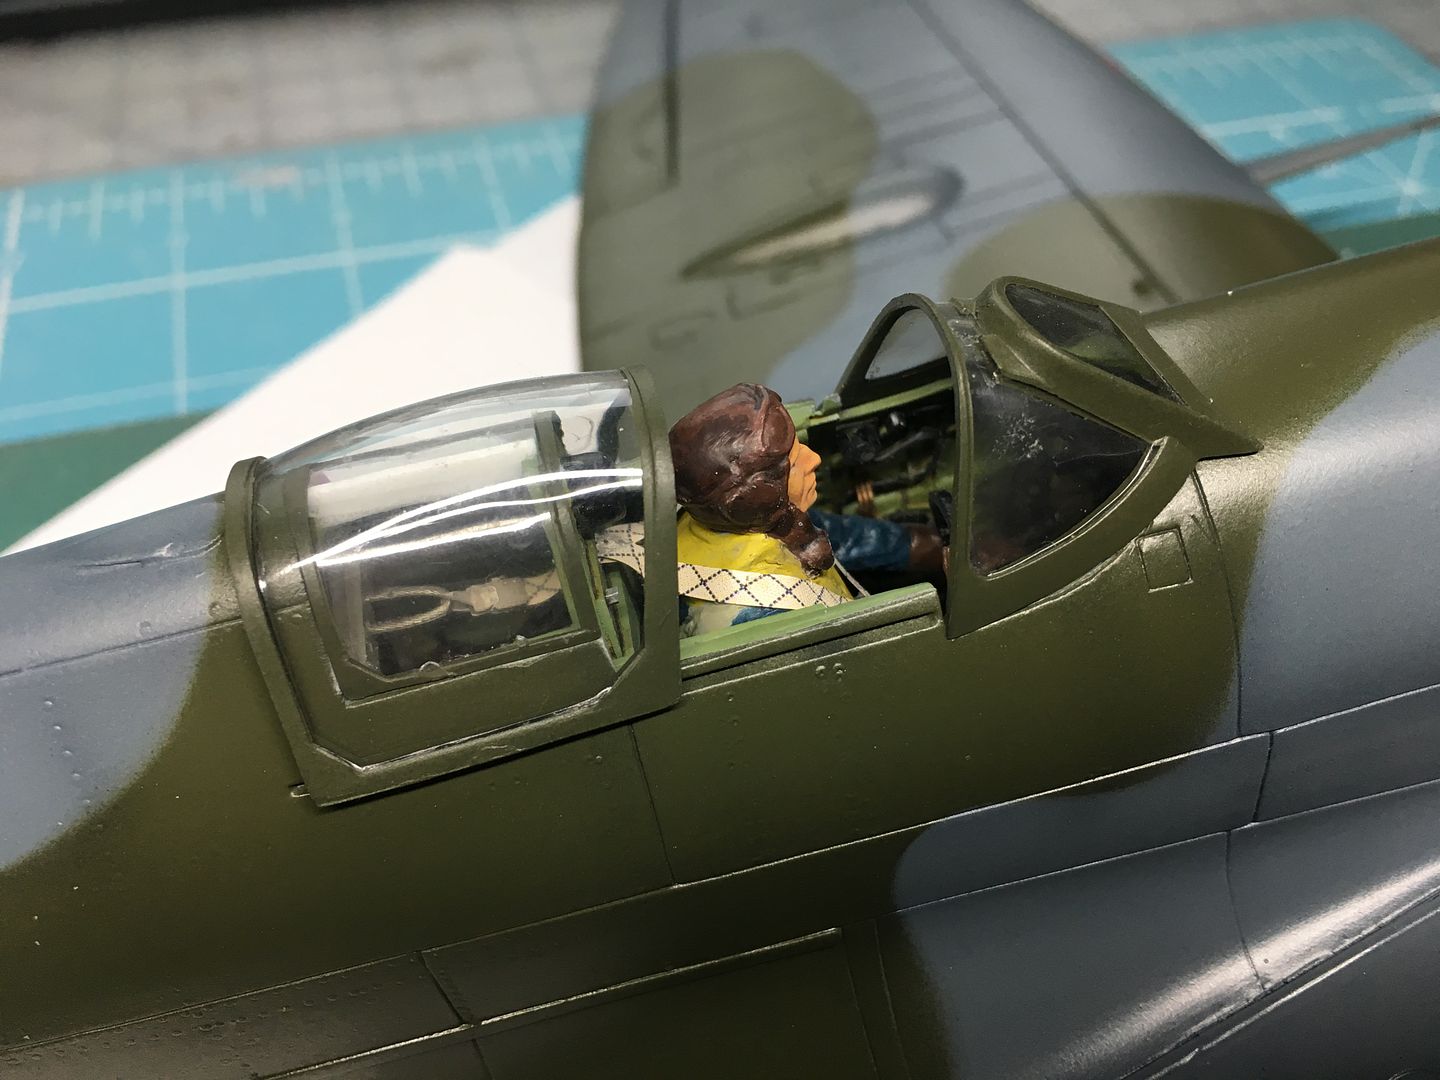
And yes - the pilot has to be 'weathered' as well - mould the harness into shape etc. add some shading....not a fan of that pre-printed PE though - on the Mossie I was able to temper the PE and bend far more easily...
Will fix the wheel in place then - thanks!
It will certainly be matt.
And yes - the pilot has to be 'weathered' as well - mould the harness into shape etc. add some shading....not a fan of that pre-printed PE though - on the Mossie I was able to temper the PE and bend far more easily...
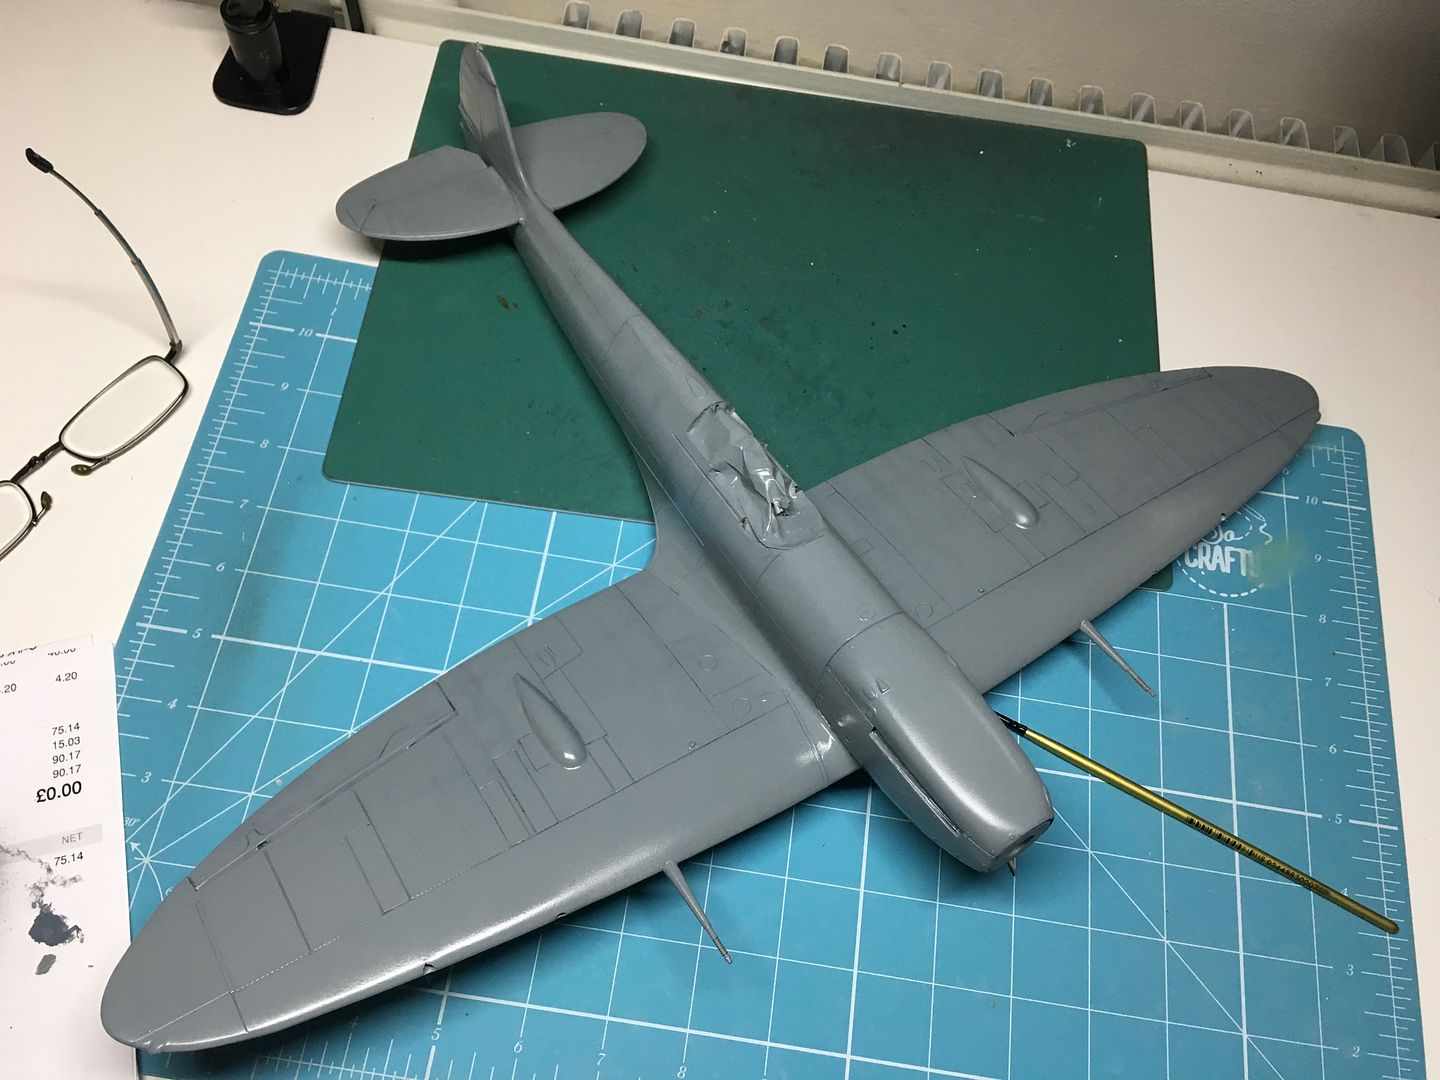
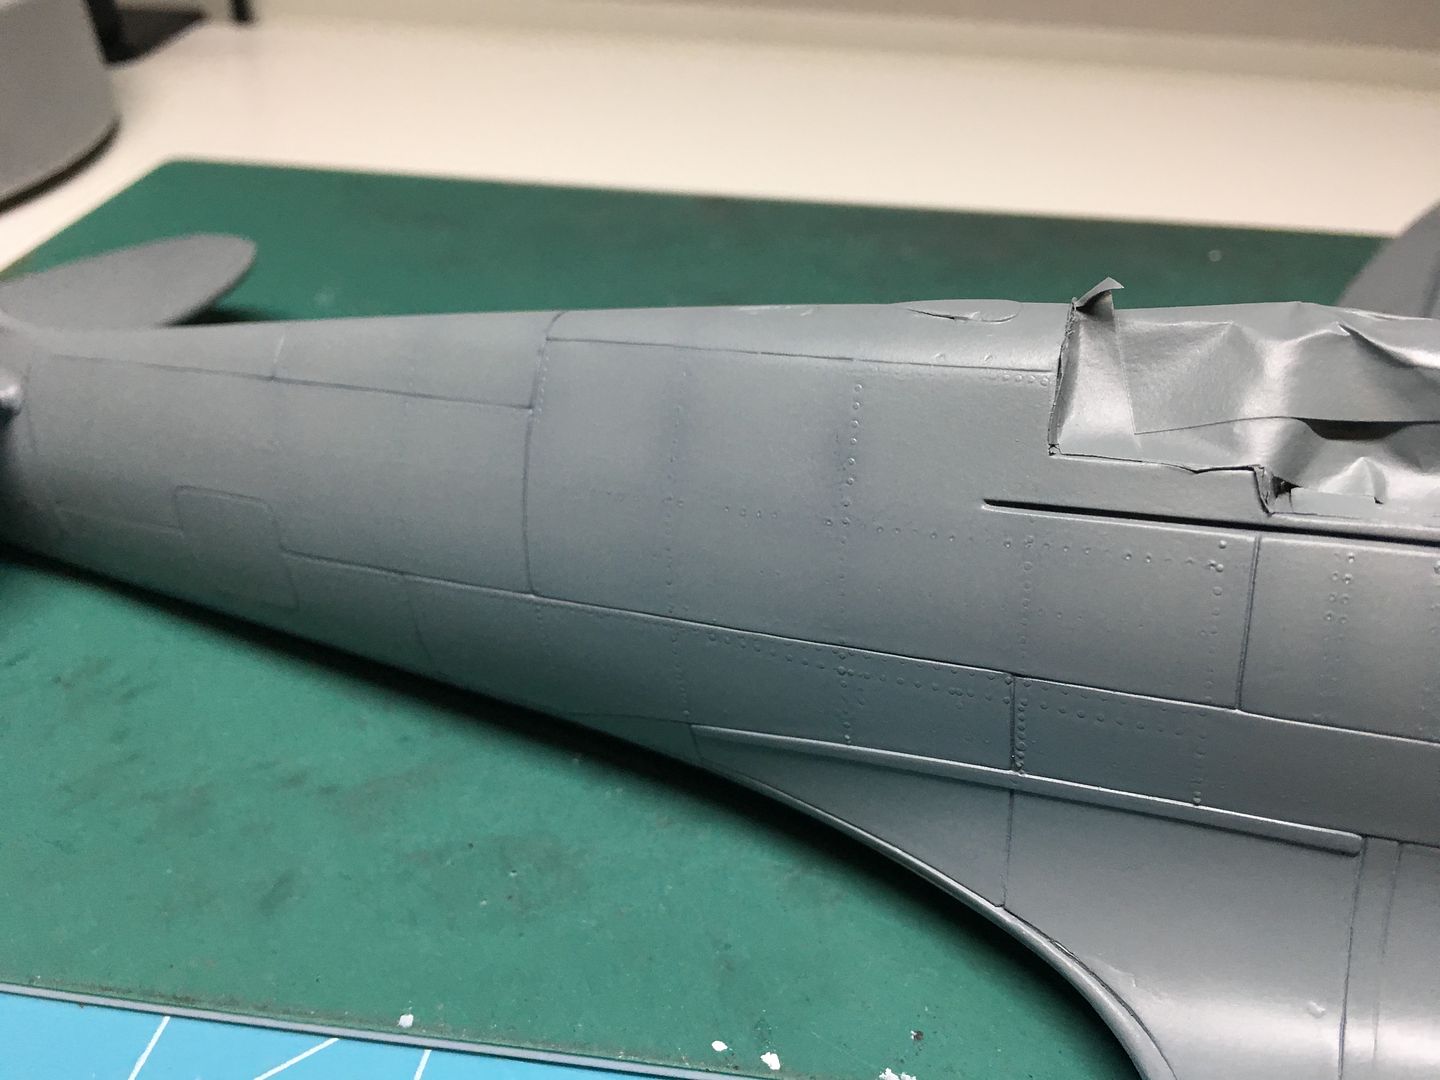
Yes - ITS NOT FINISHED lol - the kit part was...chunky - so I added that piece later...
Lots of little things to finish/add - nav. lights, tidy up the cockpit area and 'weather' - exhausts etc etc - and add 'glass' to Gingers goggles! Bomb sight needs fixing - and the rear view mirror!
Anyone know if/what type of aerial this model had - I have seen various types - single from the mast to the tail, seem some from the wings or tail plane to the fuselage, and some with no wire......(yet to be fitted - I'm too afraid I'm going to knock it off whilst painting - prop is only held on with blutack for the photos lol)
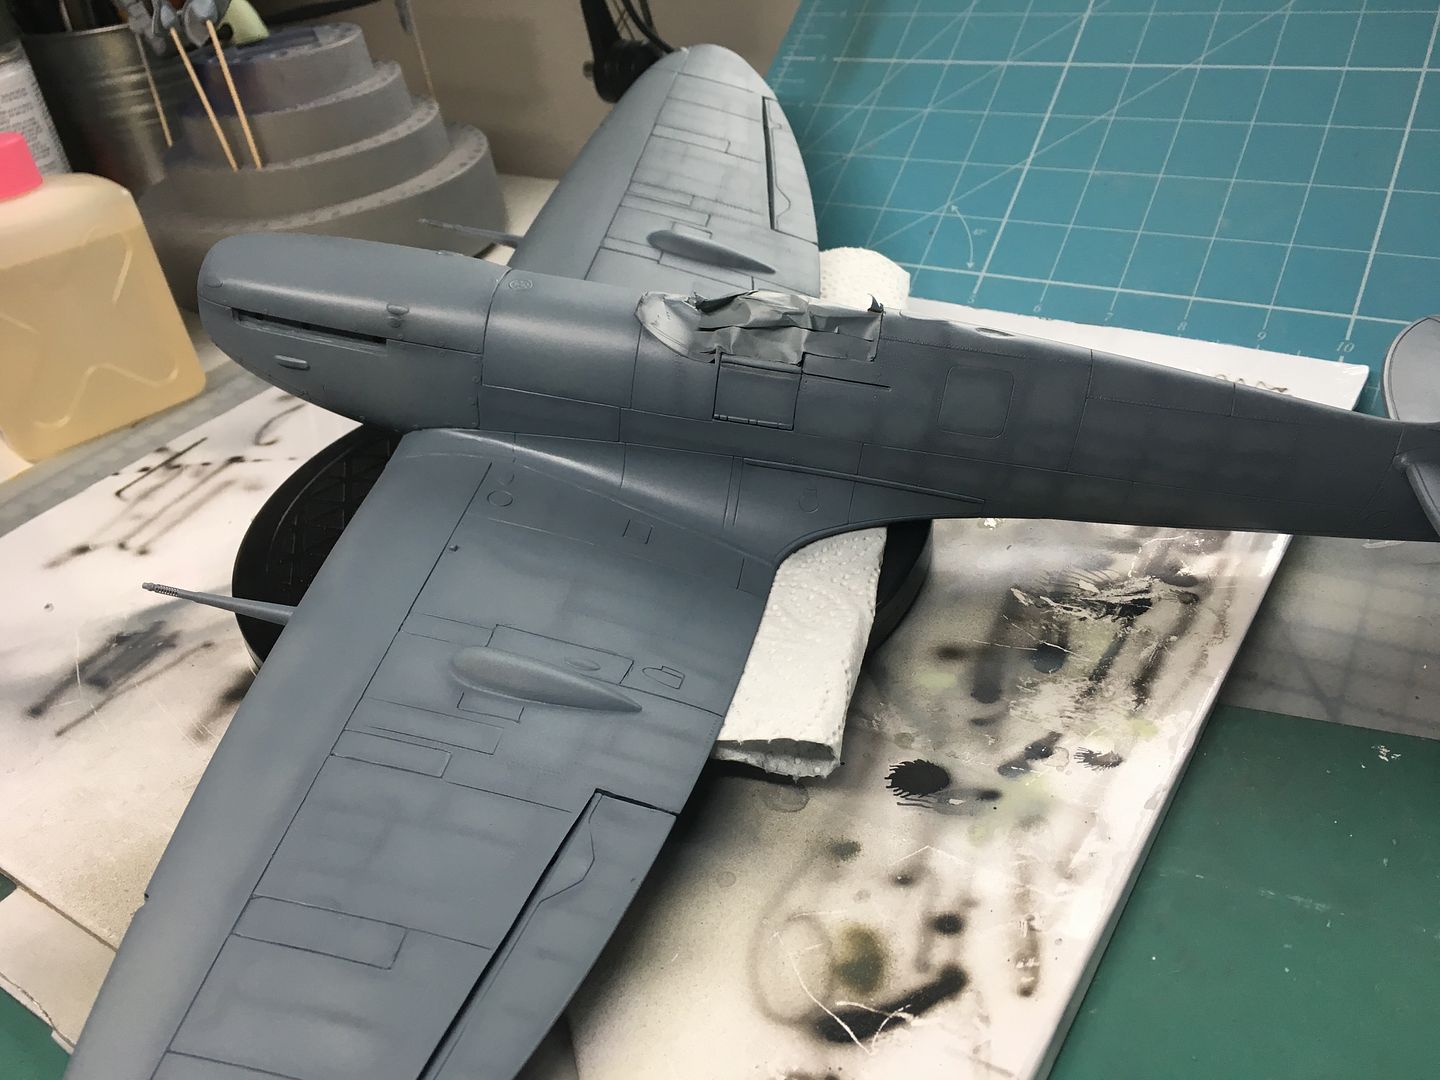
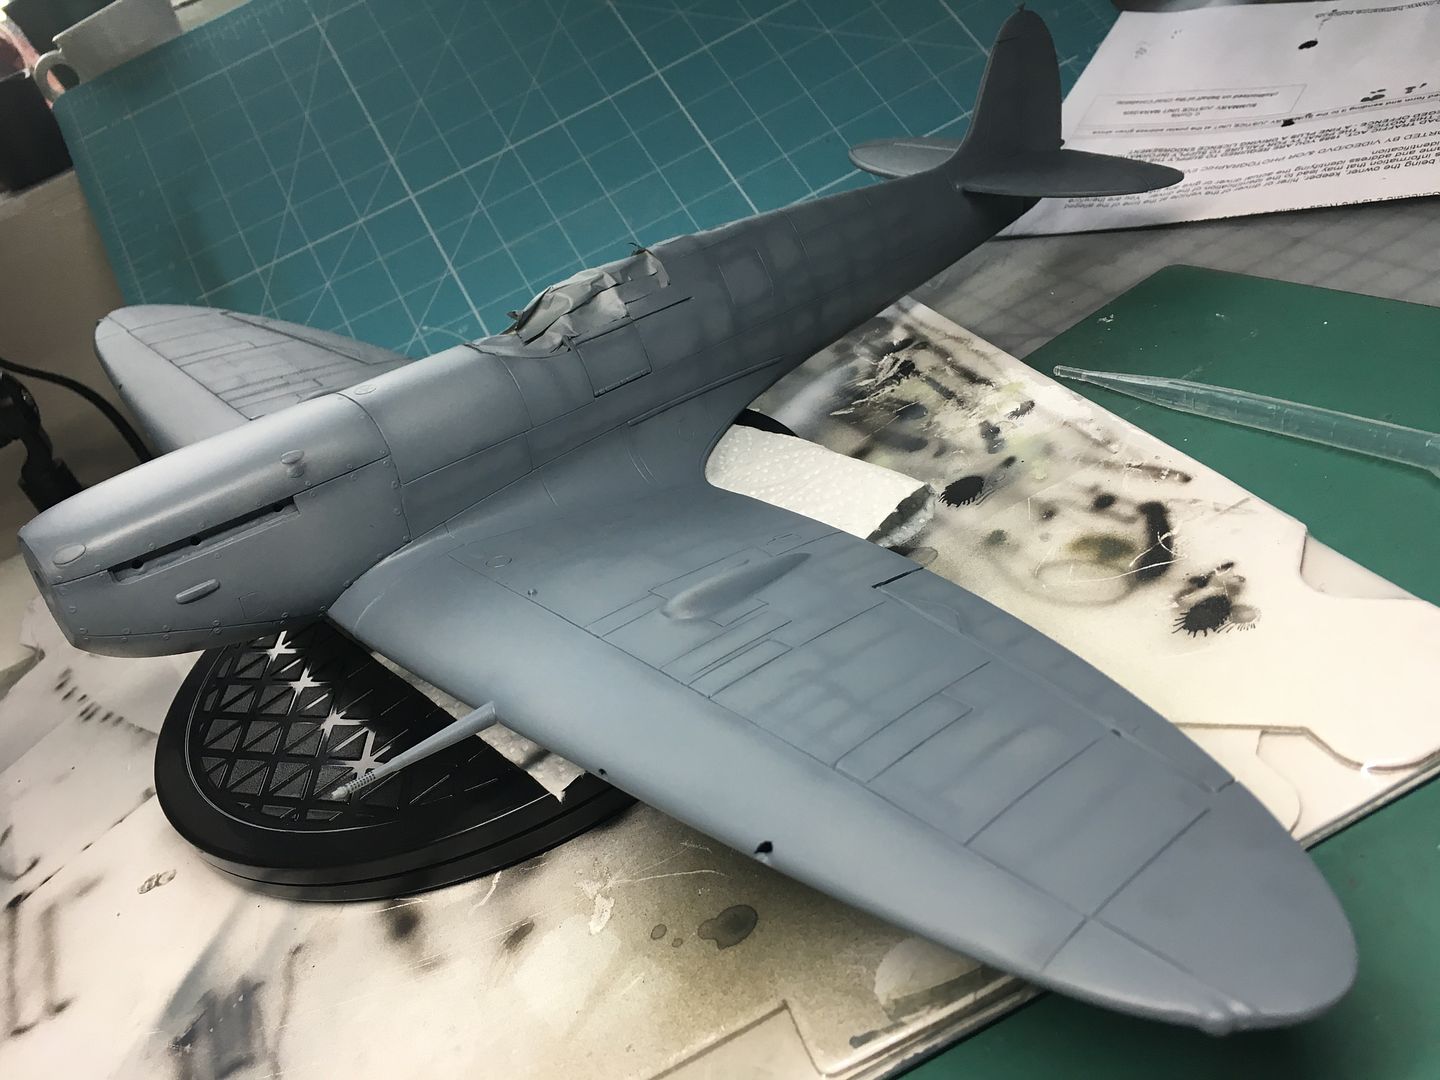
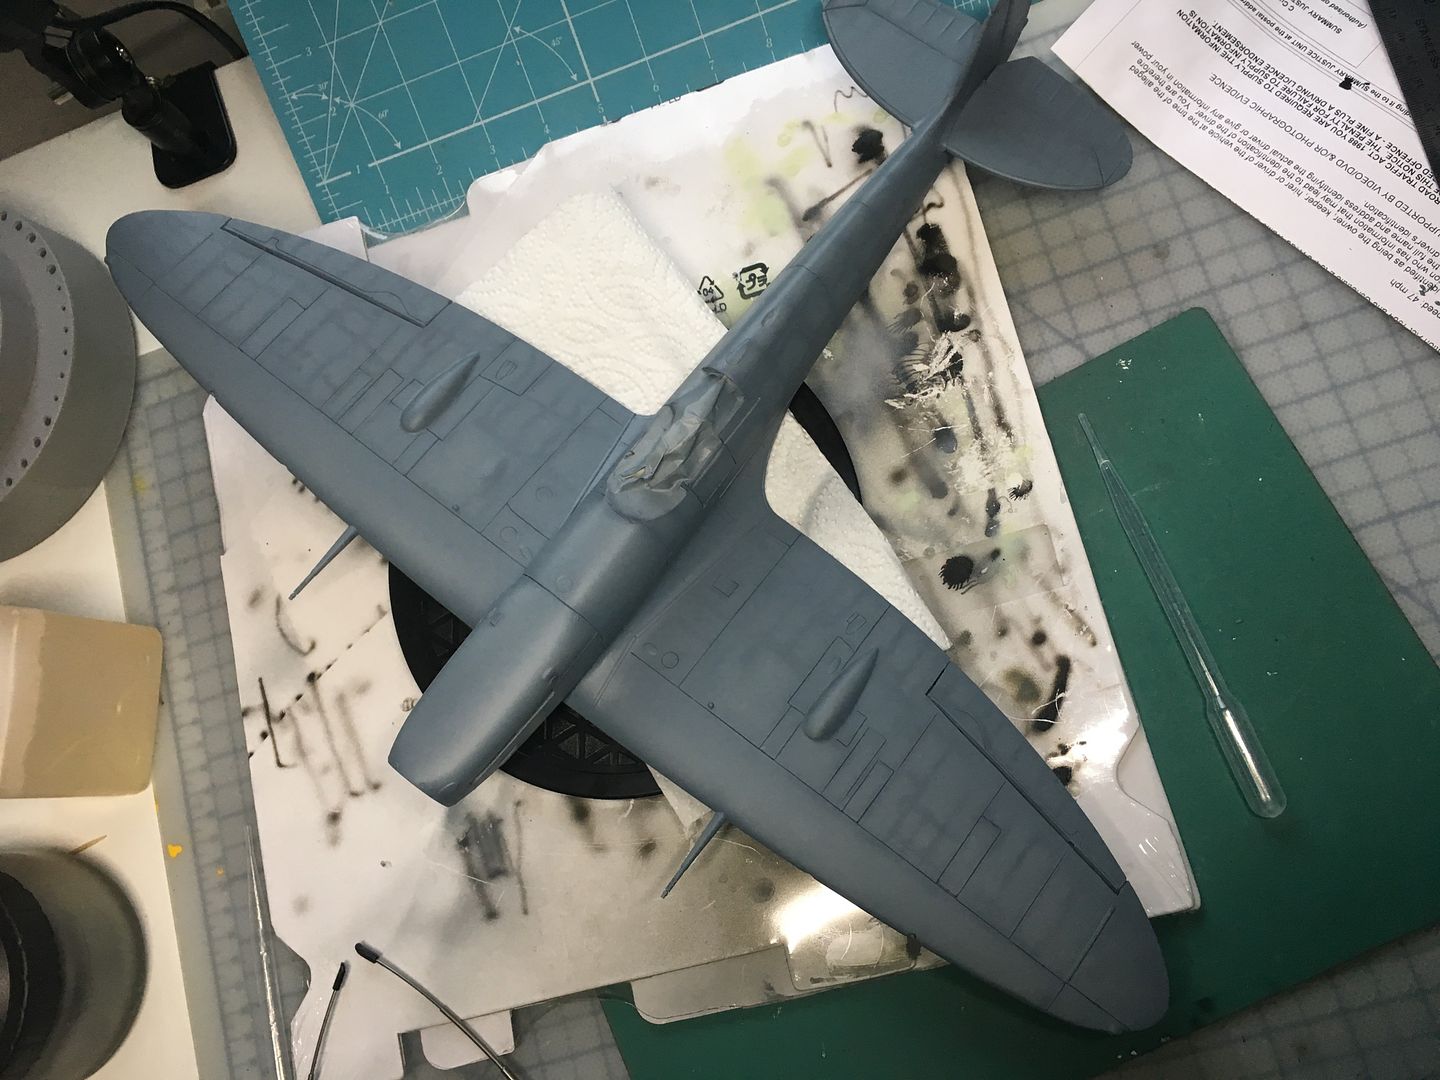
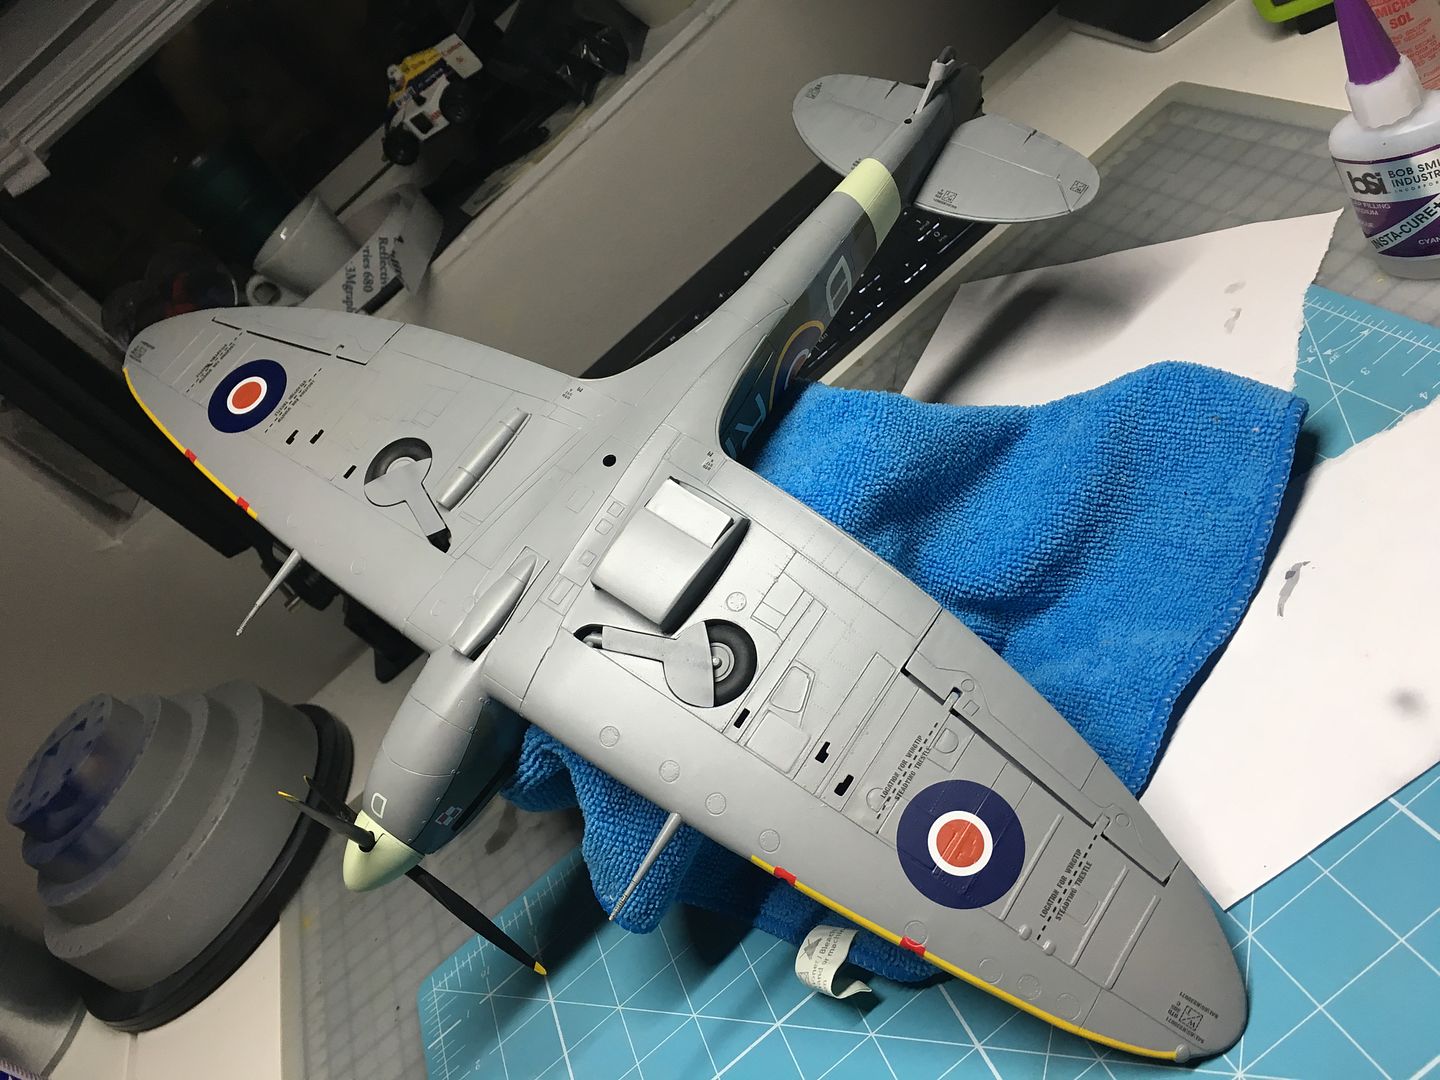
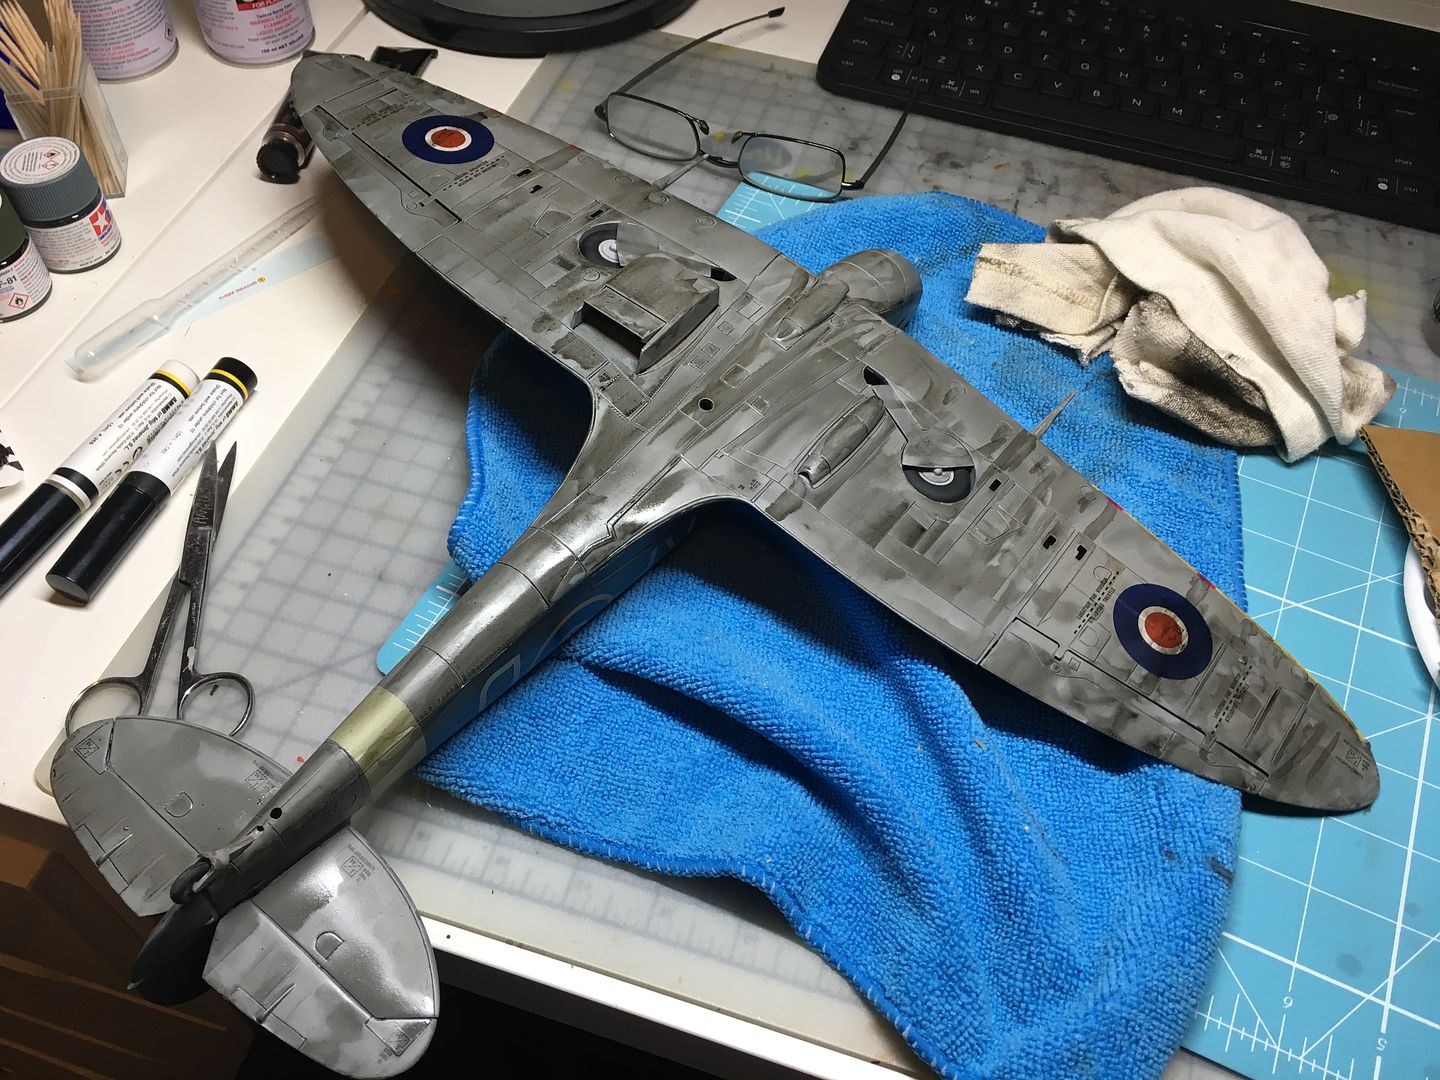
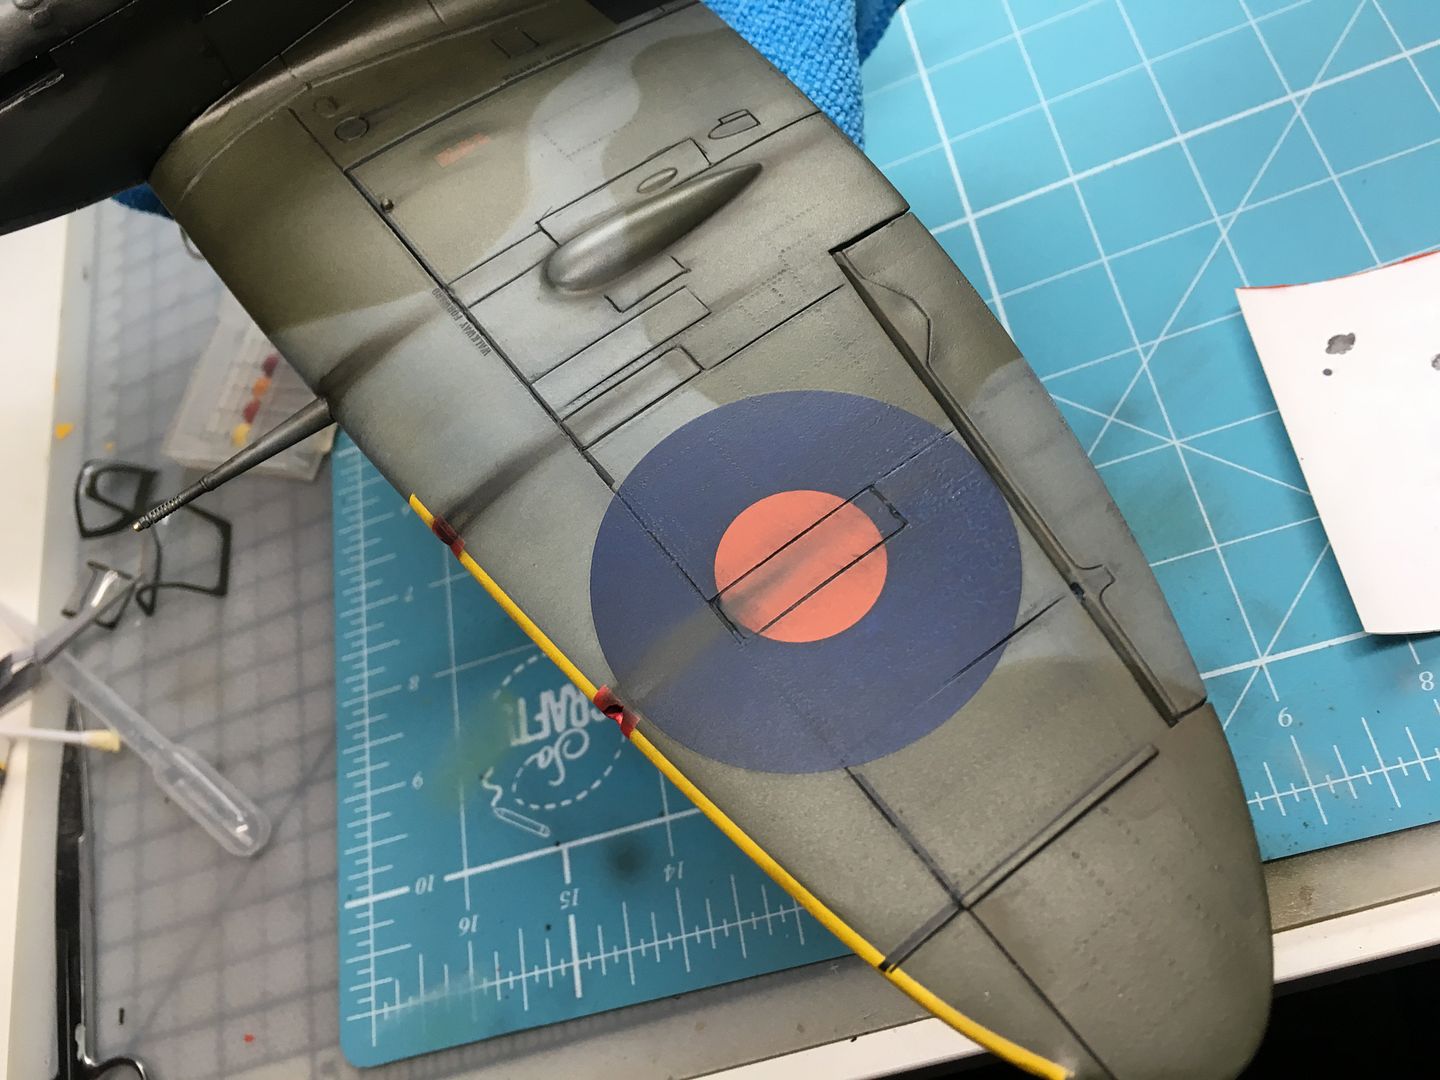
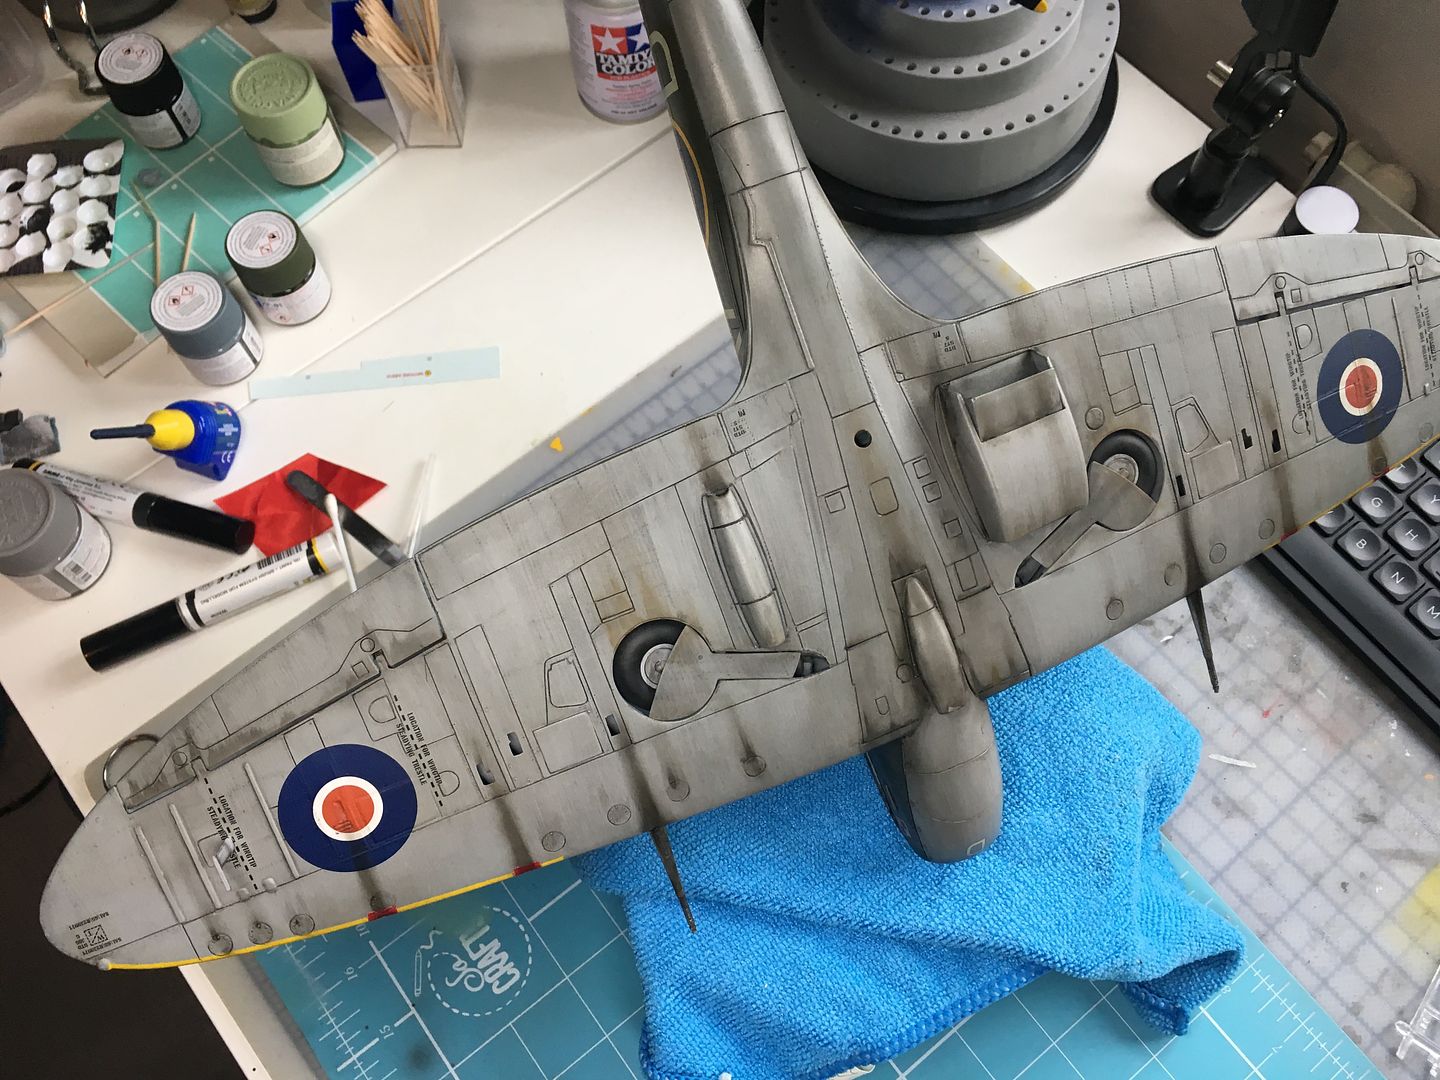
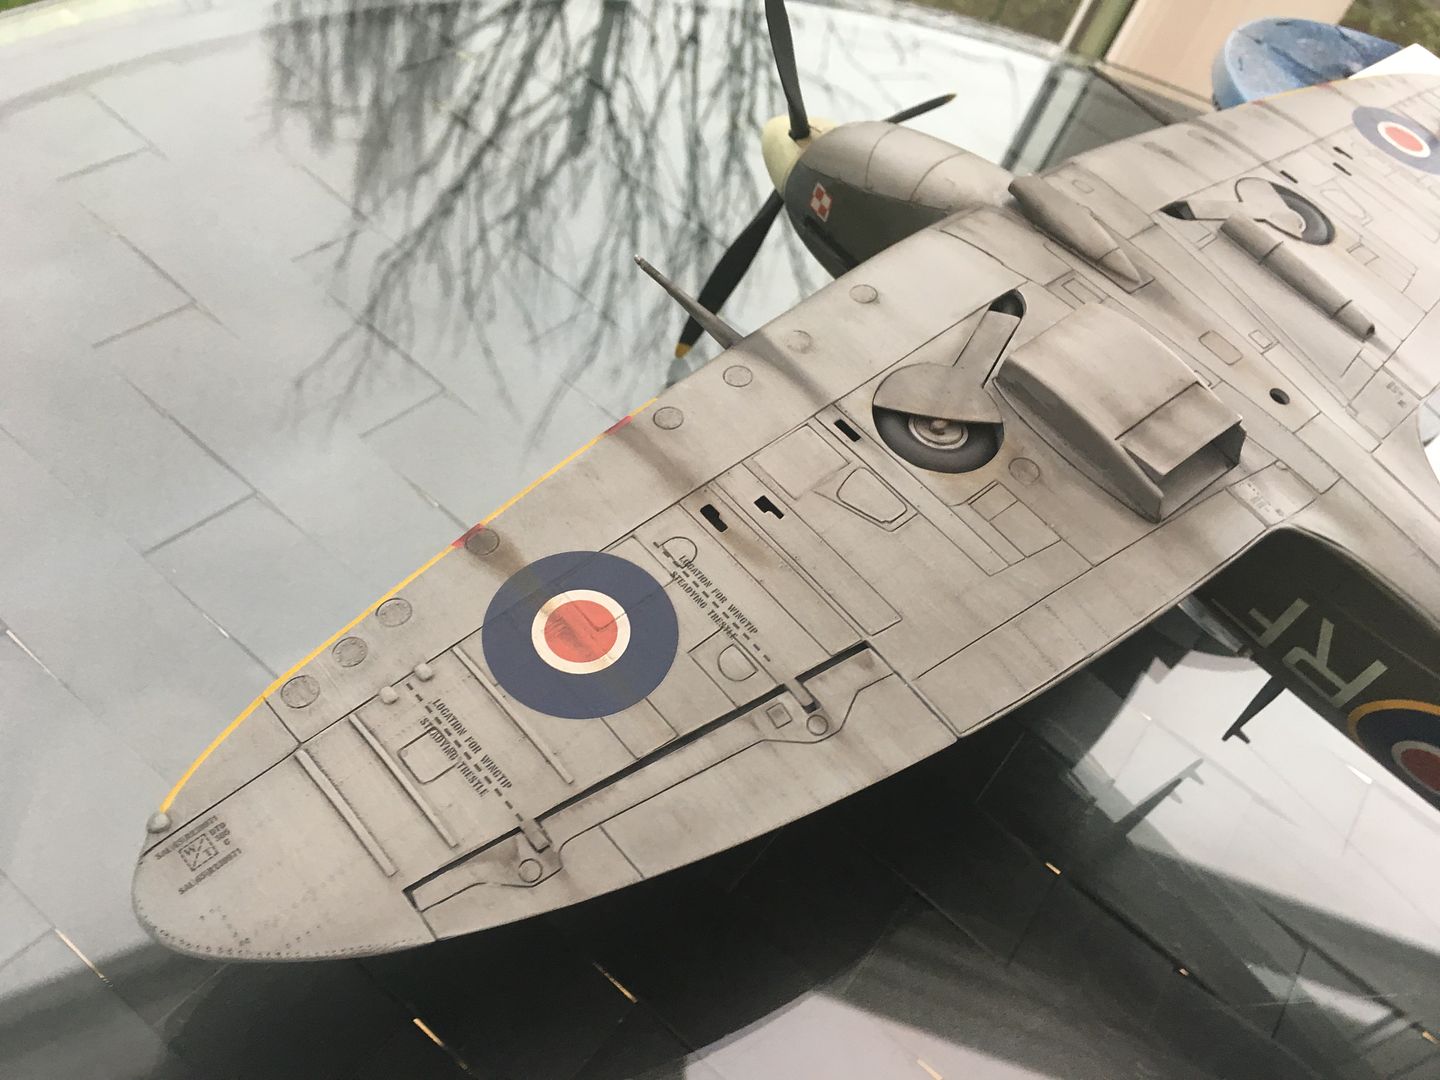
So looked much better in matt...

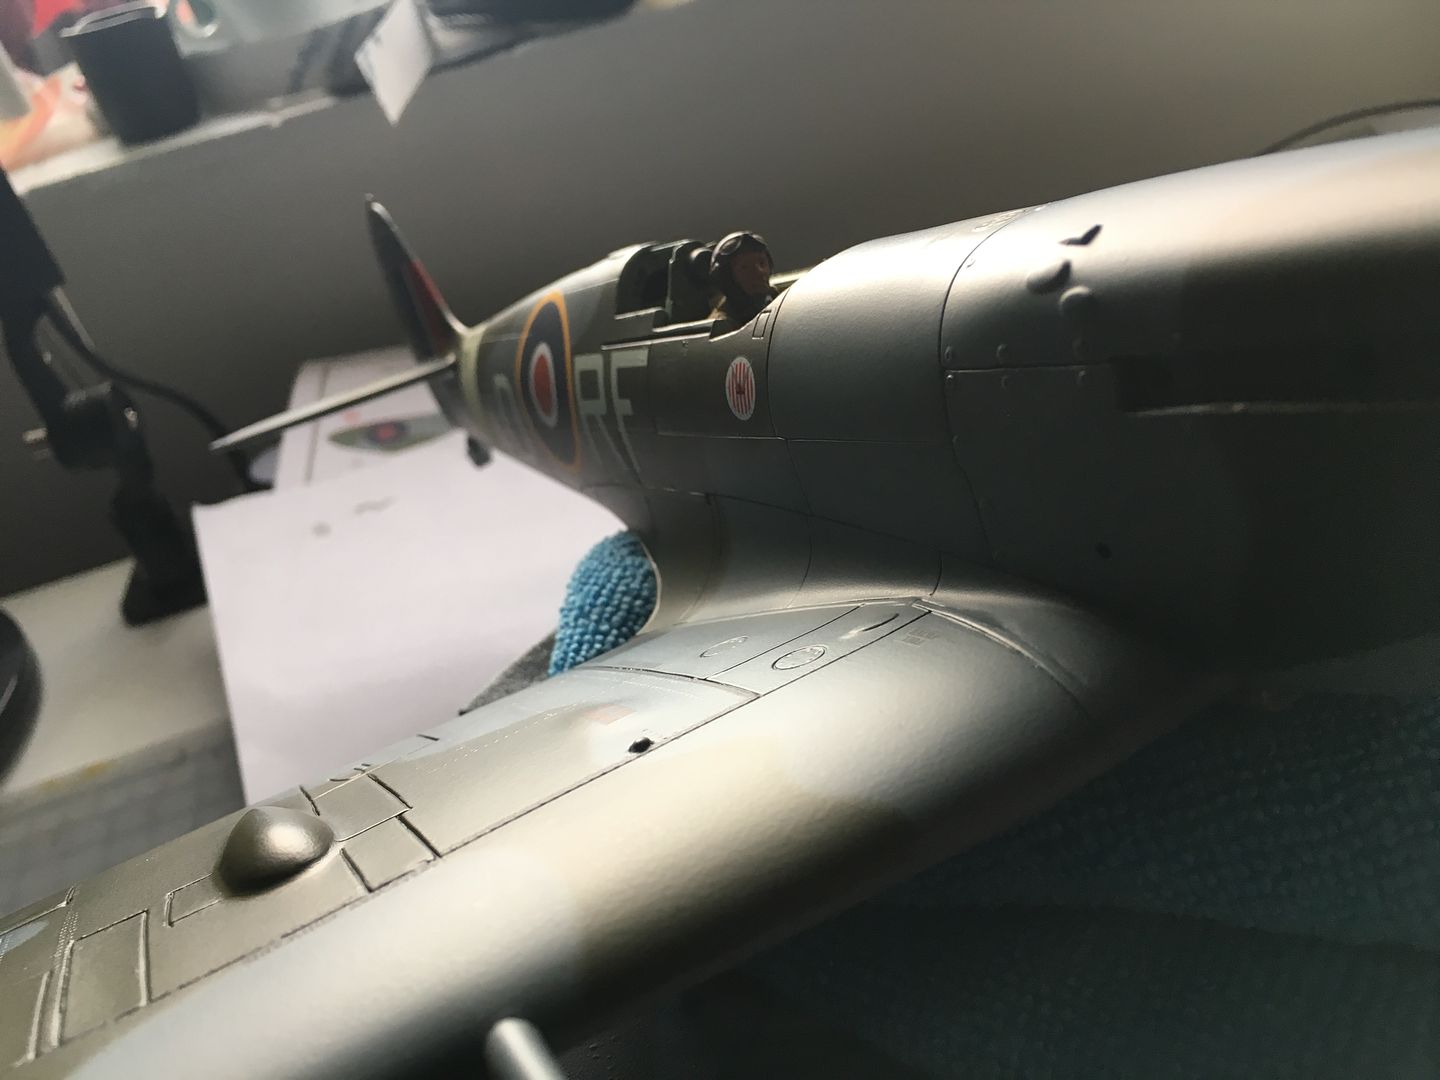
...so it was on to some weathering. I've only ever done one other, so I am sticking to what I know at this point - so th end result will be a 'used' Spitfire - as opposed to a polished-to-perfection version! I am very aware that half the skill during this next stage is knowing when to stop...
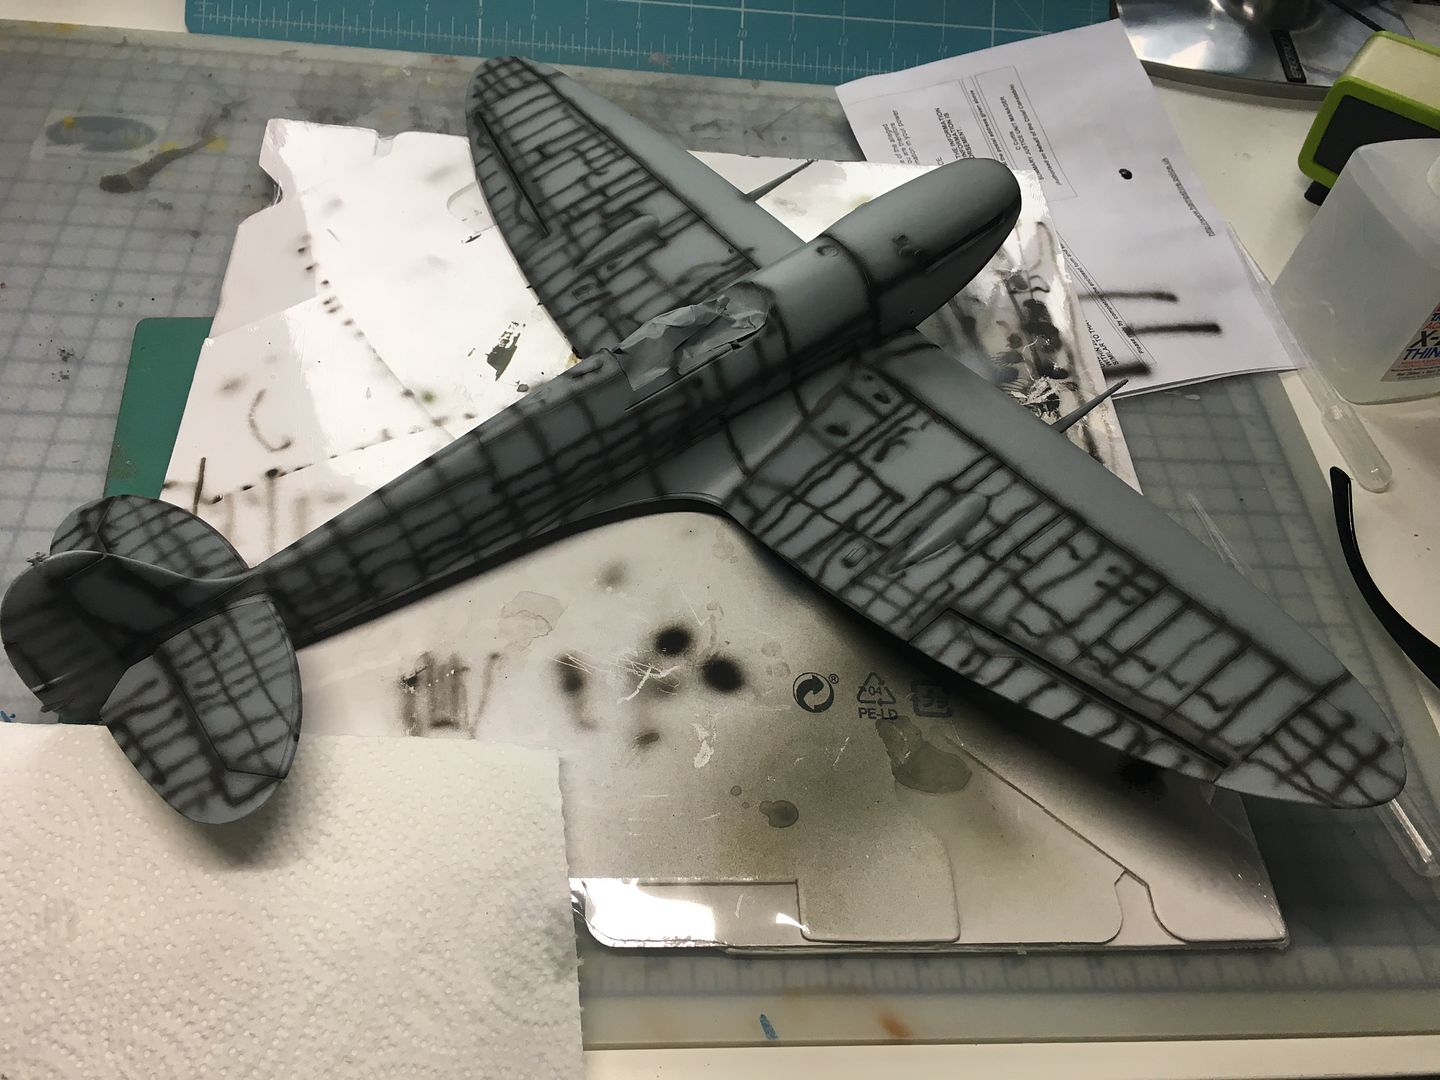
I'm missing my Tamiya Panel Gap wash (waaaay too dangerous for the UK apparently!) which worked very well, so it is straight to the oils....
...always a bit scary this bit...
...and then wipe off, hopefully leaving some detail behind! I wipe in the 'direction' of the airflow. The molded rivets did not hold much black - but I think it turned out ok.
I pretty quickly started on adding localised detail, in the form of stains, smoke trails, exhaust etc...again using oils. I dotted oil on and brushed with a 'dry' brush. Used a mix of black and some burnt umber.
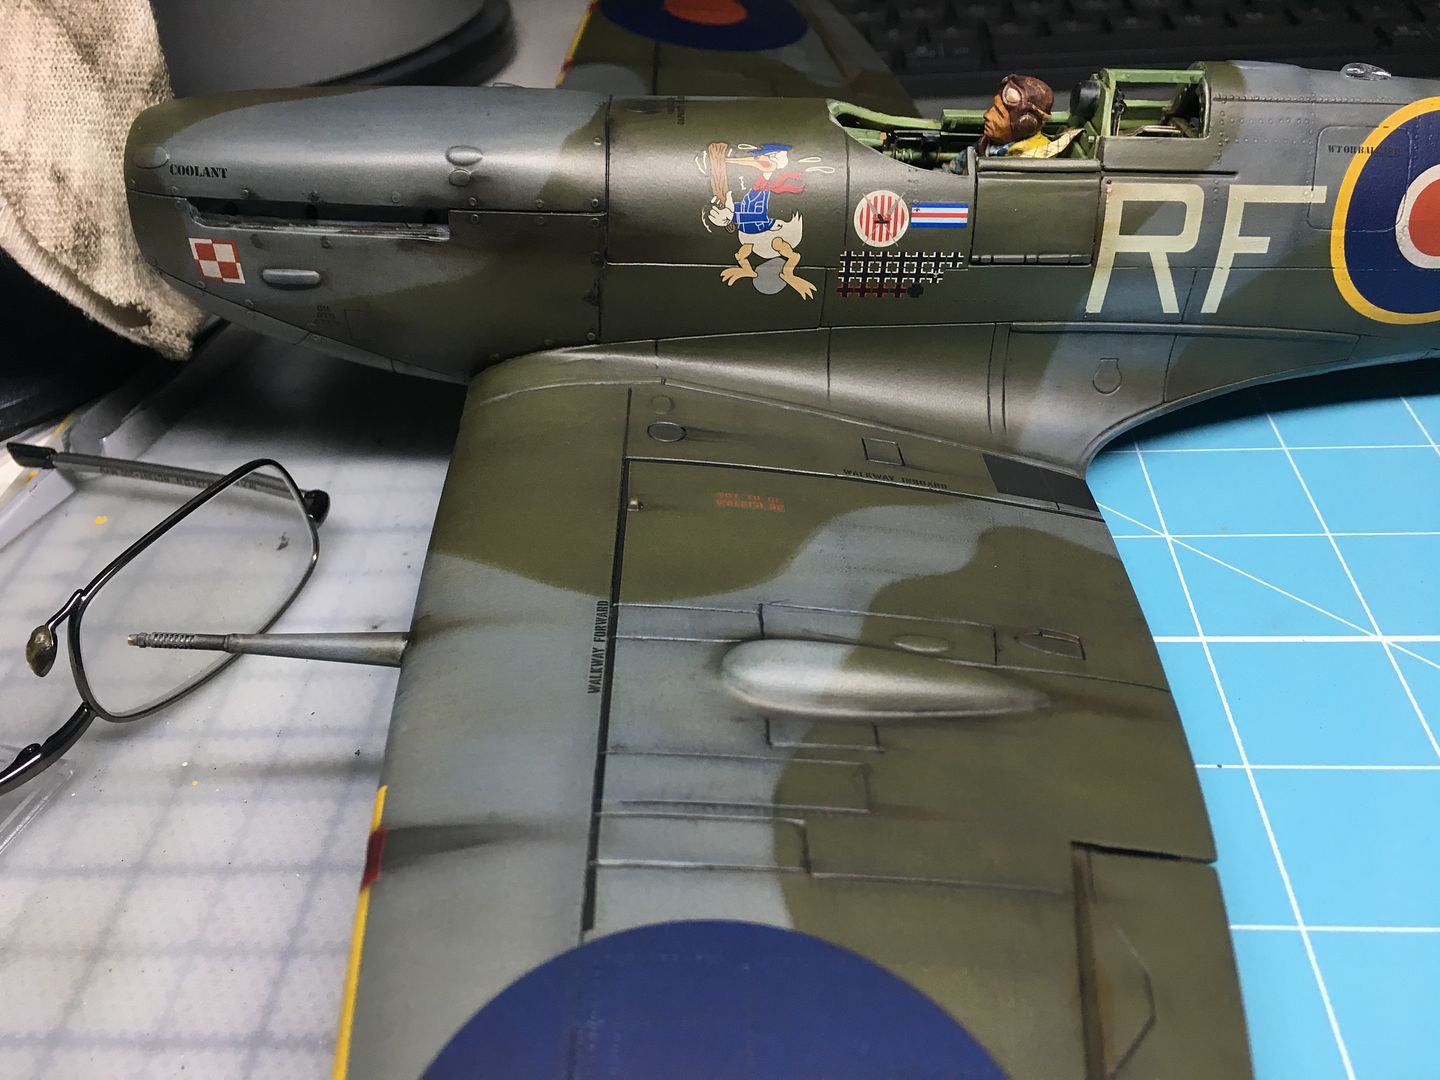

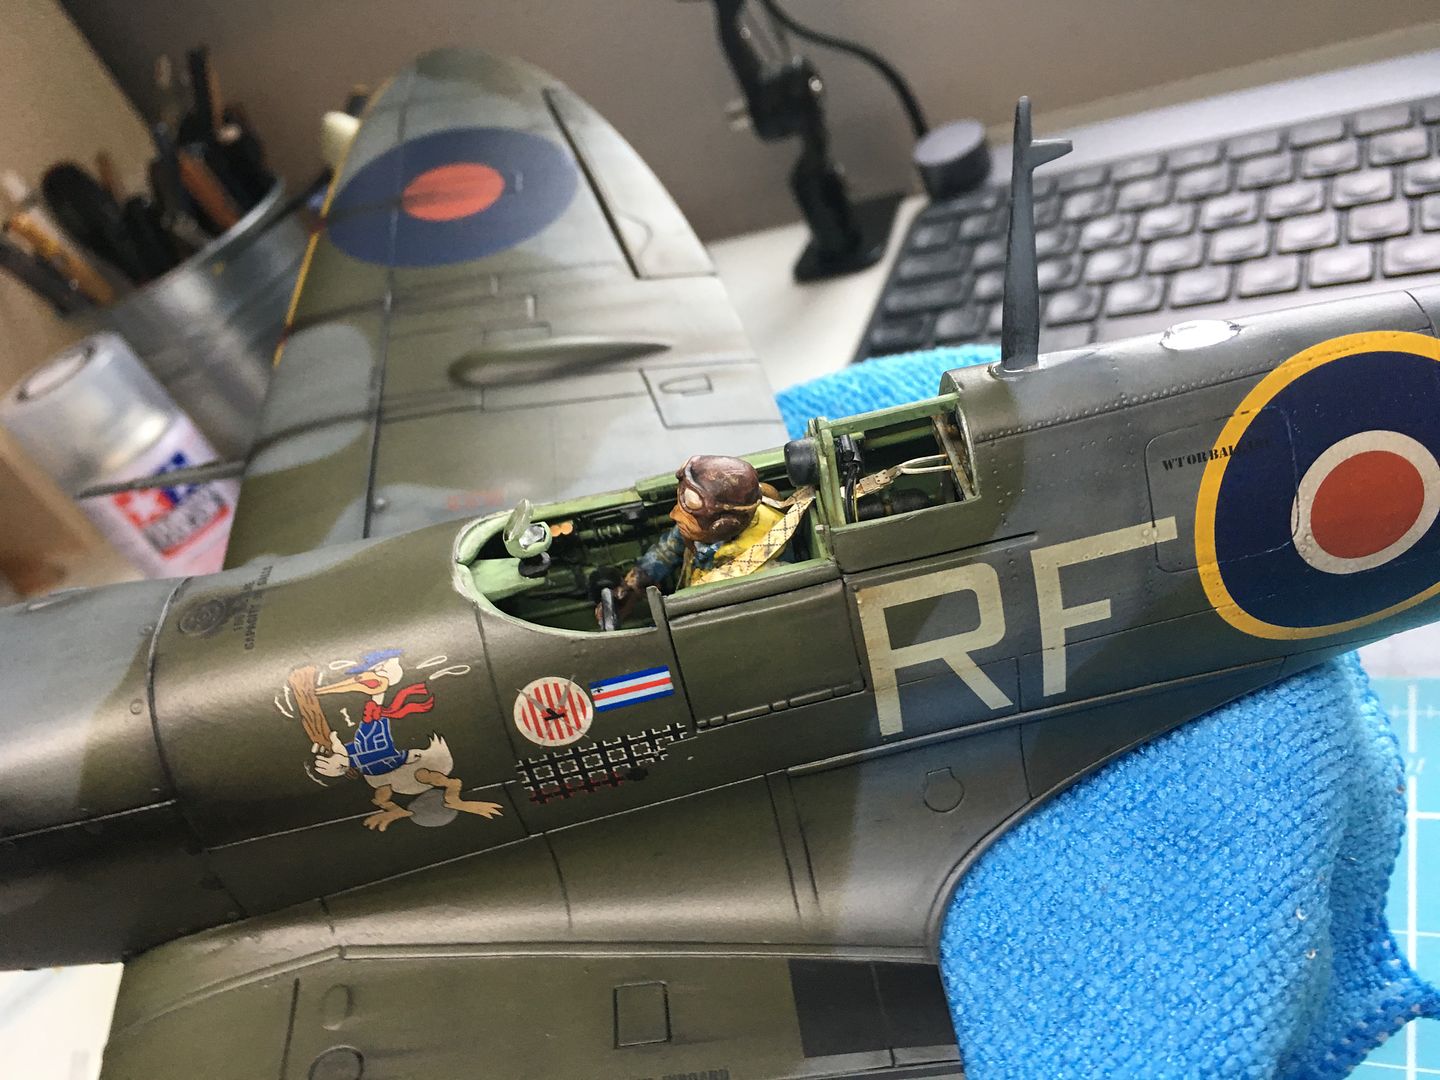


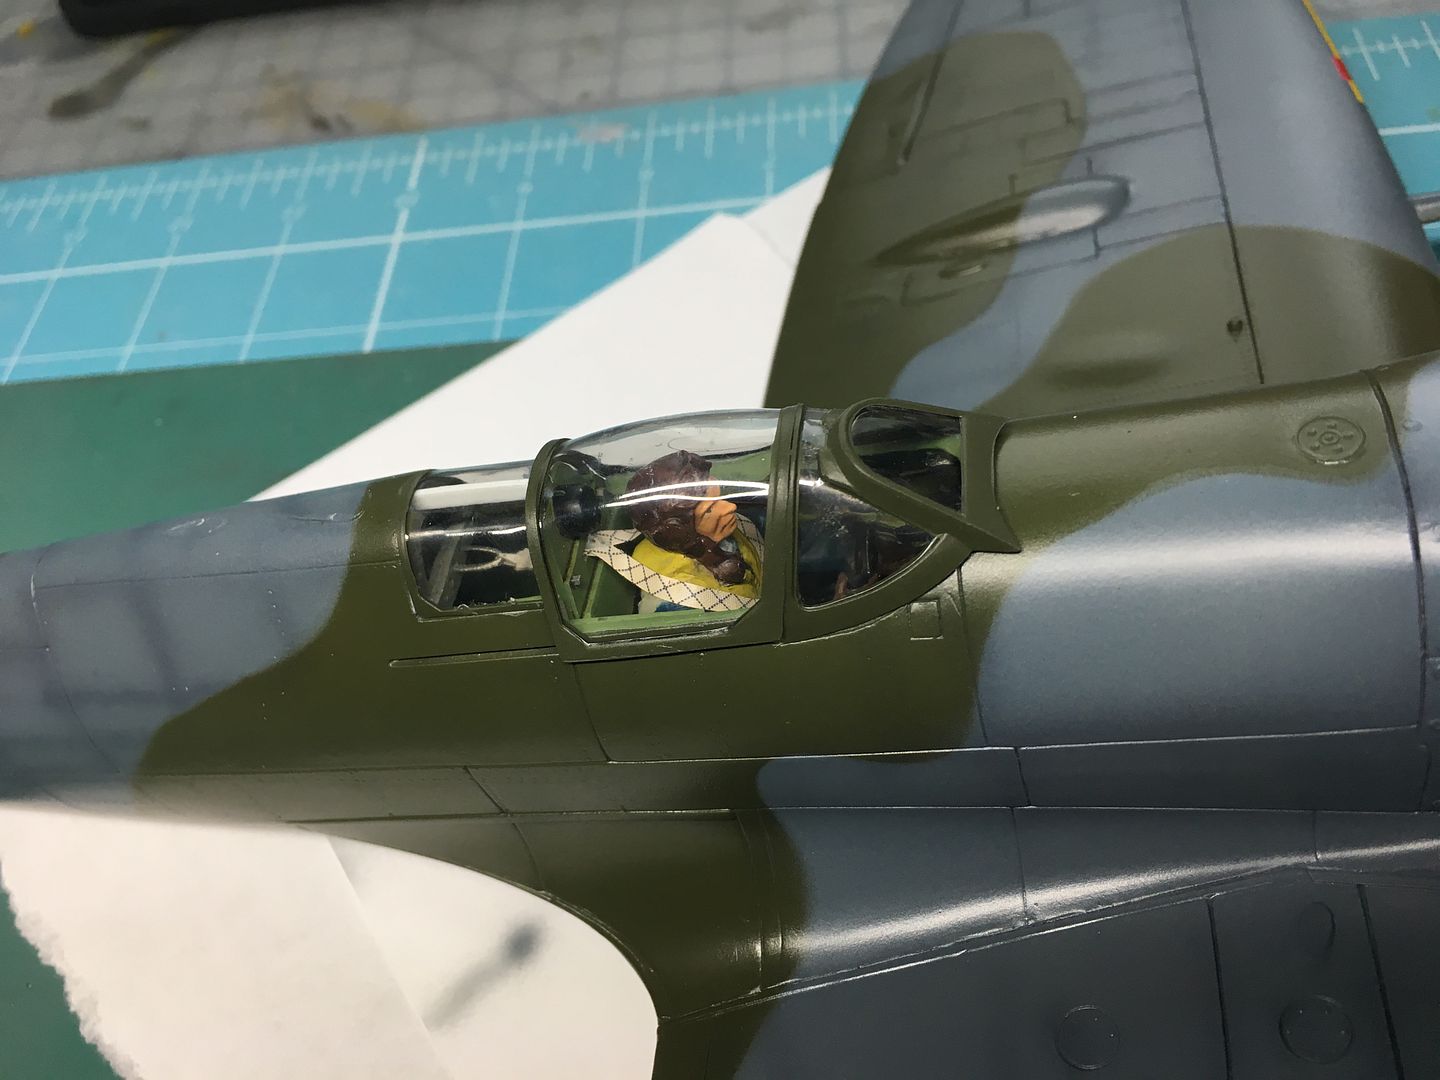
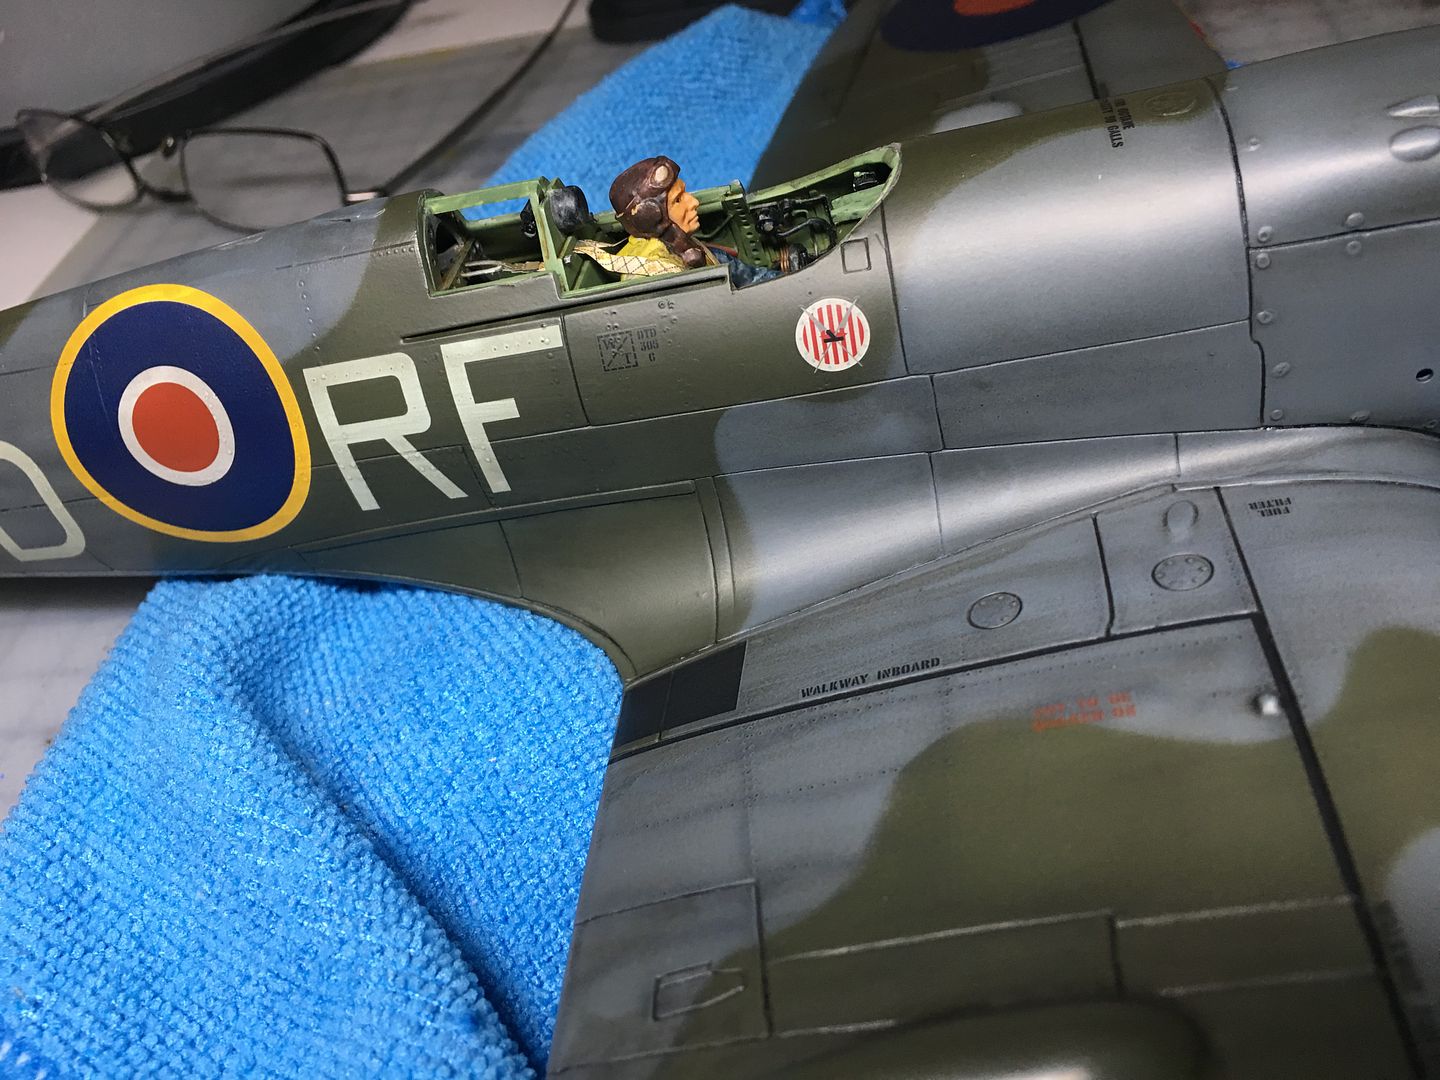
You can see I have added some more parts - the light behind the cockpit, and the aerial mast.
I added the cockpit canopy - fitted surprisingly well, and the sliding bit...slides!

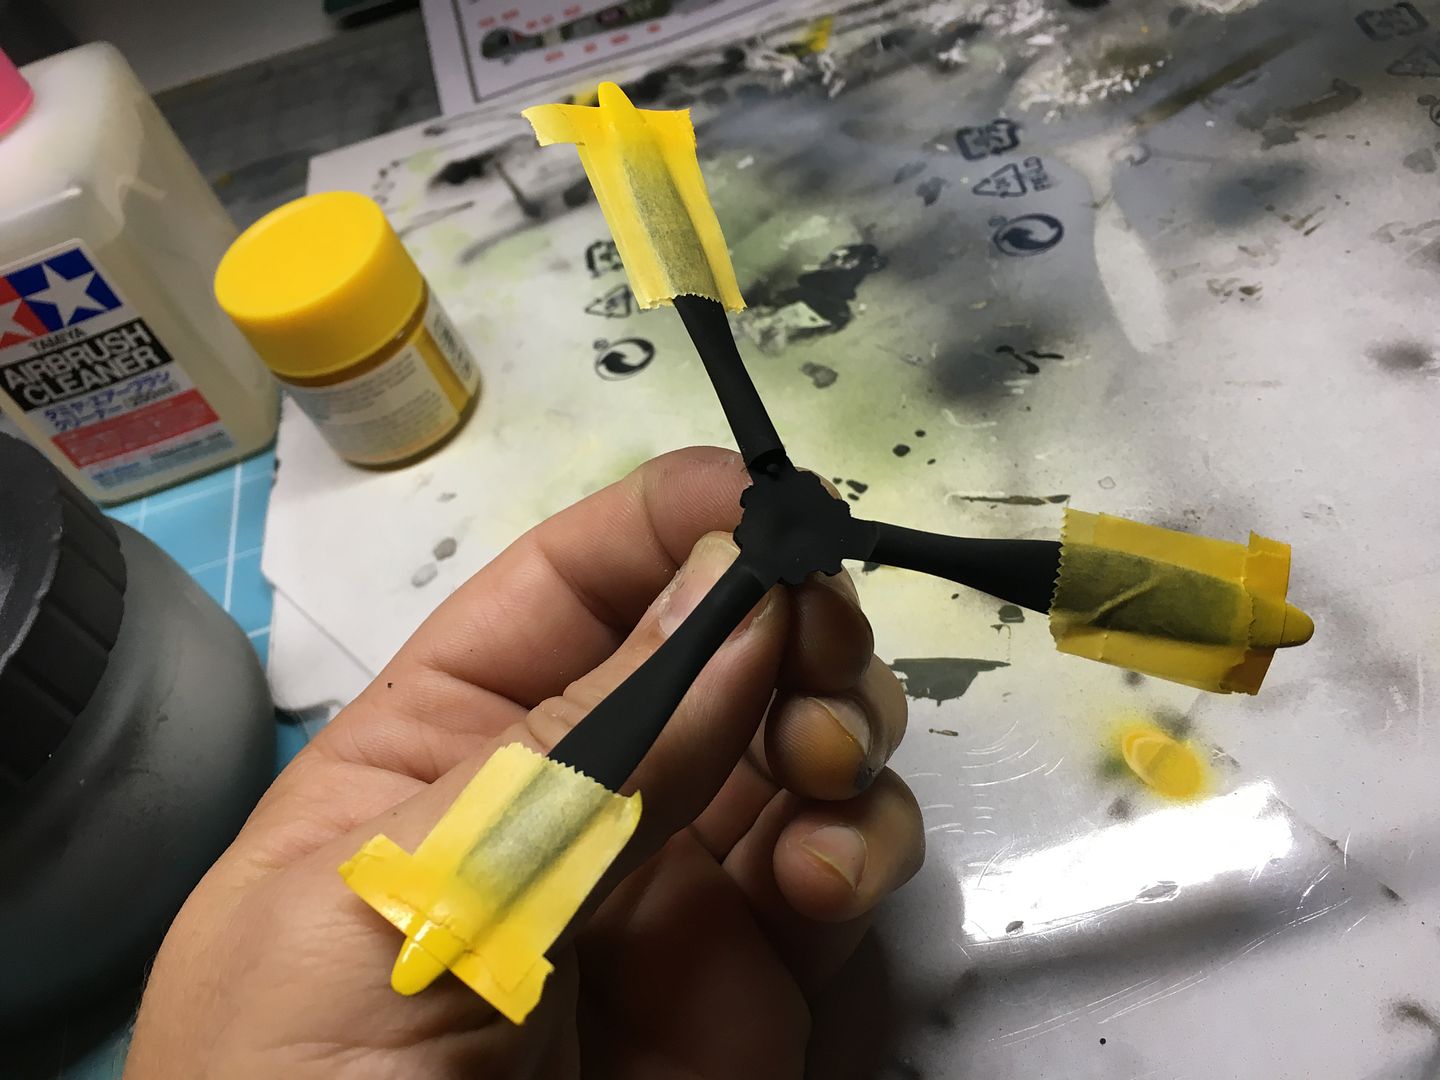
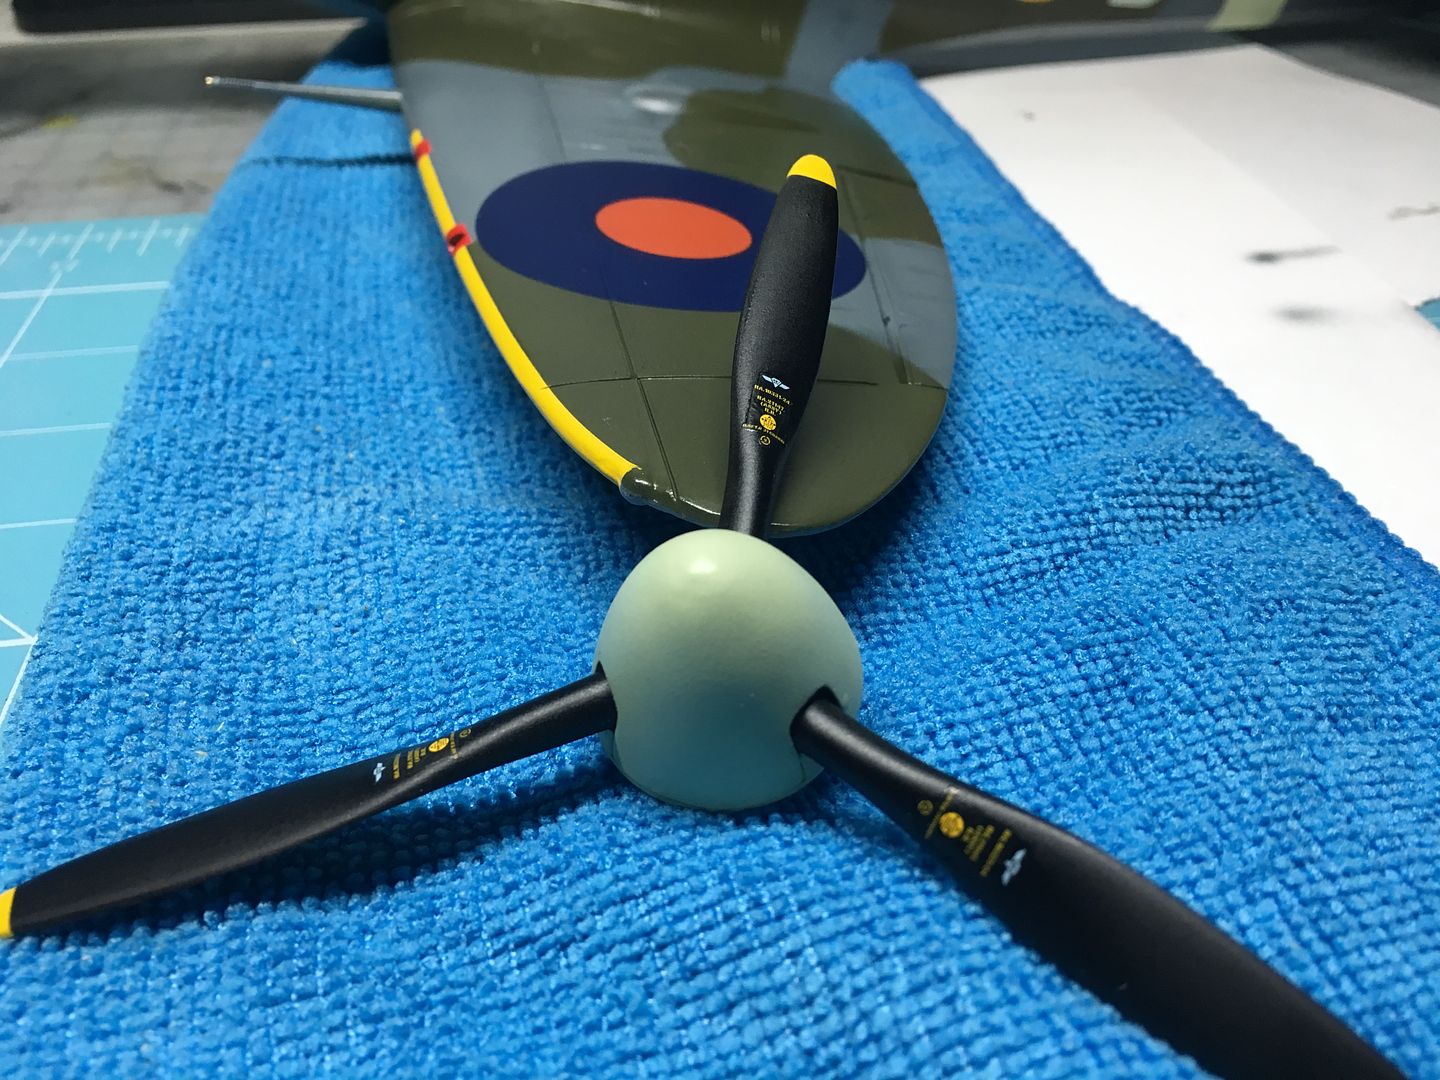
At this point I also glued the prop on, and the airspeed tube on th eunderside of the wing (if that is what it is) - I also added an aerial wire - I AM AWARE THIS MAY NOT BE PERIOD/CORRECT - but it is a nice detail - I was showing my 'customer/mate' a little later yesterday, so I wanted all the fine stuff on - I'll probably take the wire back off again though...
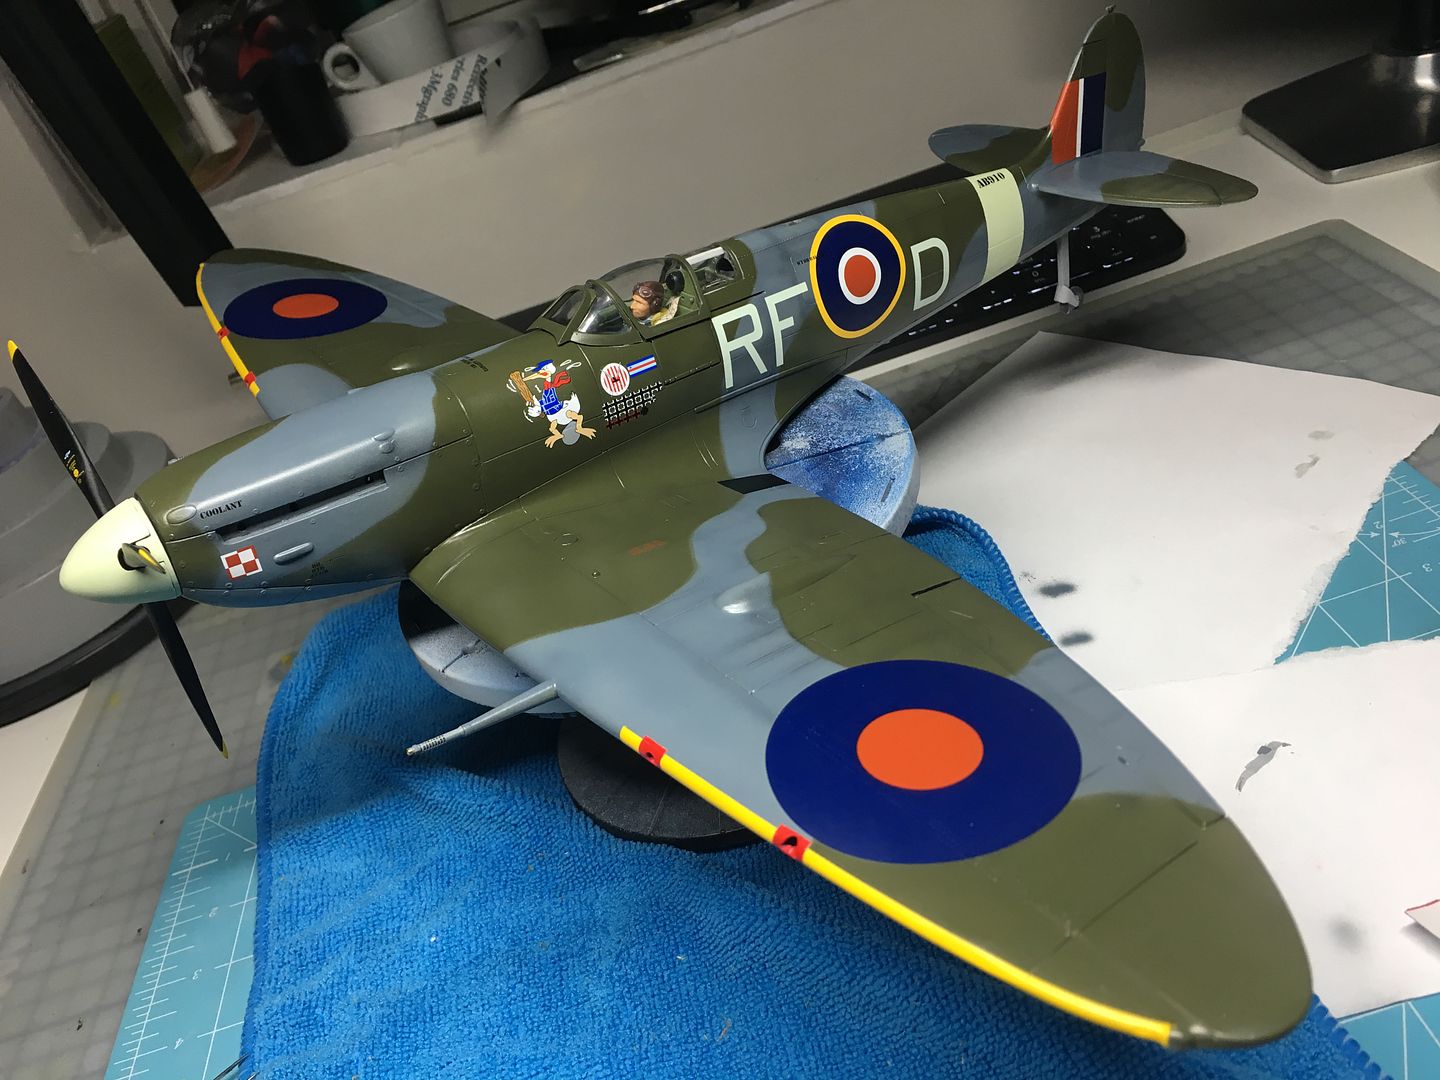
I used Tamiya flat clear sprayed from the can between various layers of oil etc - otherwise finger marks will show. The only main parts missing on these final photos are the exhausts - although I have added the exhaust staining. So very almost there! Just got to figure out how to mount it (in flight) but I do want to show it 'banking' as opposed to in level flight.


For such a much-maligned kit, I'm pretty chuffed with the end result...when it is 100% finished, I want to take some proper pictures of it - it is big though! I may even try some taken at the old WW2 airfield that is a few miles away - Harrowbeer, Yelverton.

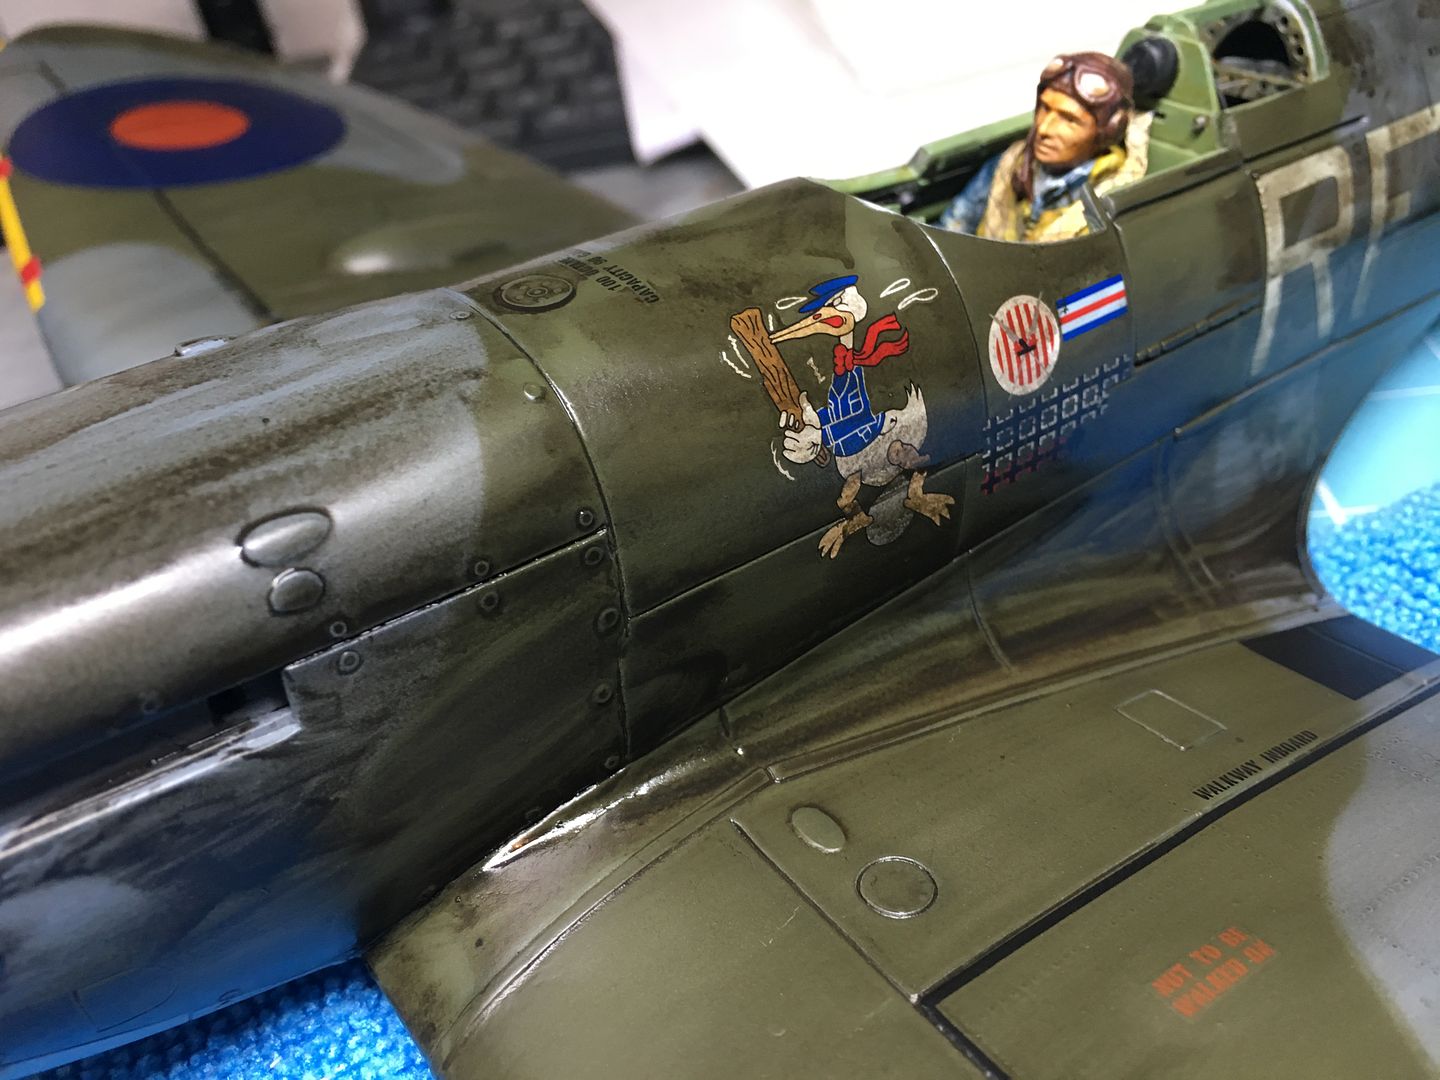
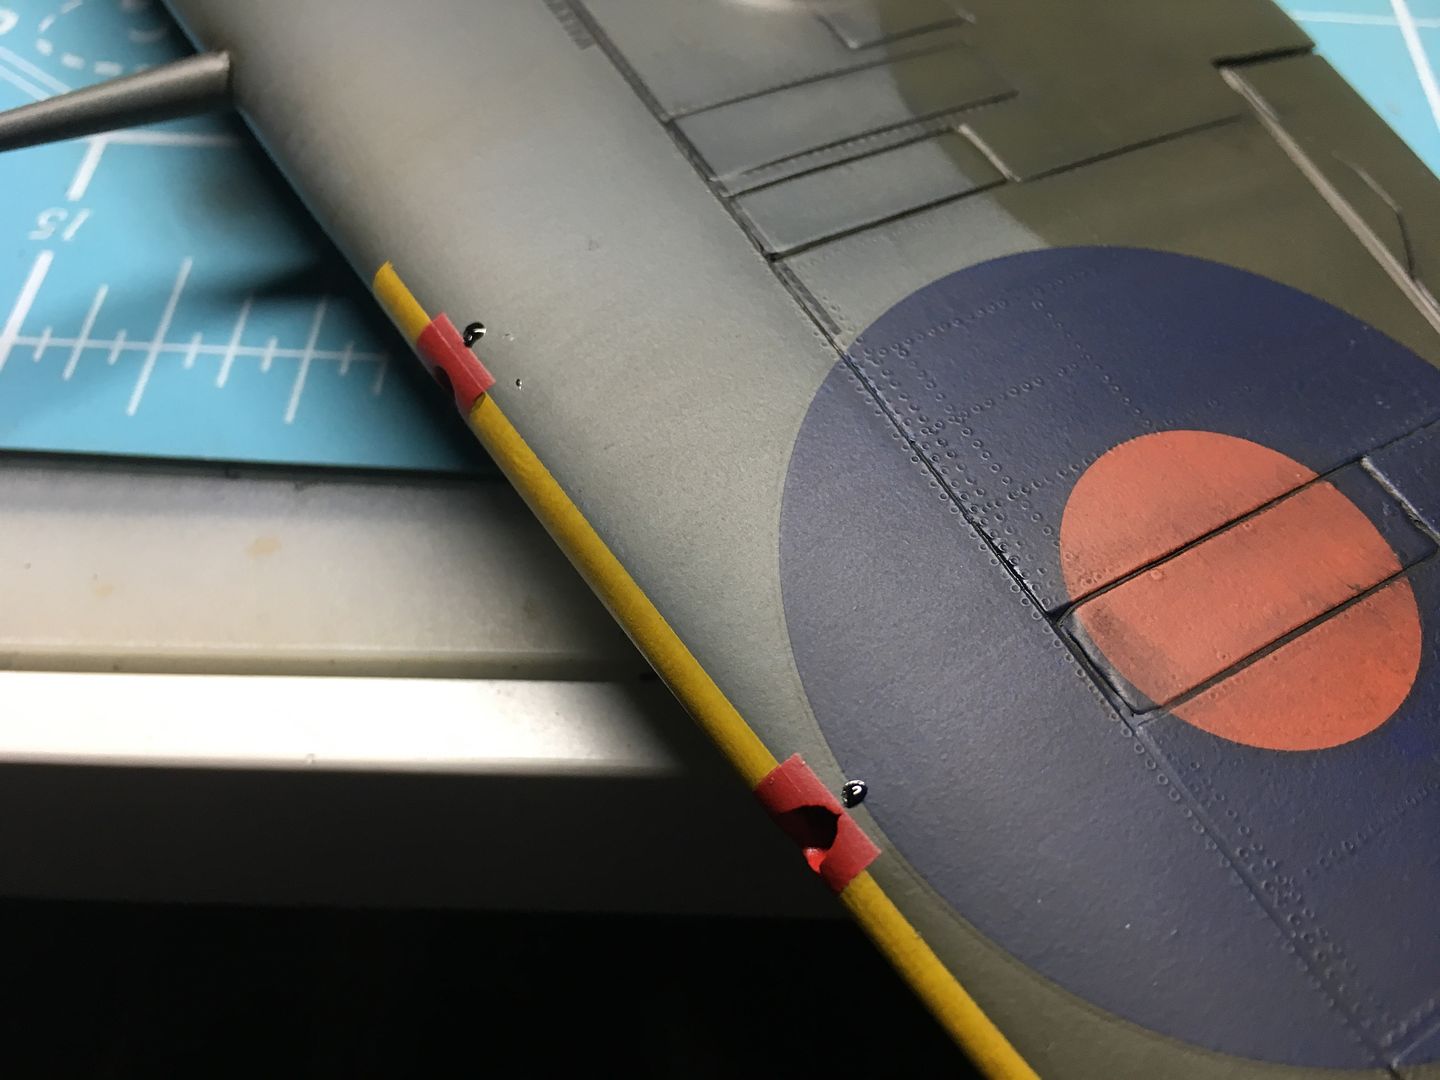
ooh yes - I am also going to add the red fabric squares over the gun ports!
...so it was on to some weathering. I've only ever done one other, so I am sticking to what I know at this point - so th end result will be a 'used' Spitfire - as opposed to a polished-to-perfection version! I am very aware that half the skill during this next stage is knowing when to stop...
I'm missing my Tamiya Panel Gap wash (waaaay too dangerous for the UK apparently!) which worked very well, so it is straight to the oils....
...always a bit scary this bit...
...and then wipe off, hopefully leaving some detail behind! I wipe in the 'direction' of the airflow. The molded rivets did not hold much black - but I think it turned out ok.
I pretty quickly started on adding localised detail, in the form of stains, smoke trails, exhaust etc...again using oils. I dotted oil on and brushed with a 'dry' brush. Used a mix of black and some burnt umber.
You can see I have added some more parts - the light behind the cockpit, and the aerial mast.
I added the cockpit canopy - fitted surprisingly well, and the sliding bit...slides!
At this point I also glued the prop on, and the airspeed tube on th eunderside of the wing (if that is what it is) - I also added an aerial wire - I AM AWARE THIS MAY NOT BE PERIOD/CORRECT
- but it is a nice detail - I was showing my 'customer/mate' a little later yesterday, so I wanted all the fine stuff on - I'll probably take the wire back off again though...I used Tamiya flat clear sprayed from the can between various layers of oil etc - otherwise finger marks will show. The only main parts missing on these final photos are the exhausts - although I have added the exhaust staining. So very almost there! Just got to figure out how to mount it (in flight) but I do want to show it 'banking' as opposed to in level flight.
For such a much-maligned kit, I'm pretty chuffed with the end result...when it is 100% finished, I want to take some proper pictures of it - it is big though! I may even try some taken at the old WW2 airfield that is a few miles away - Harrowbeer, Yelverton.
ooh yes - I am also going to add the red fabric squares over the gun ports!
Gassing Station | Scale Models | Top of Page | What's New | My Stuff