Help with Griffon 61 photos
Discussion


Hi Chaps,
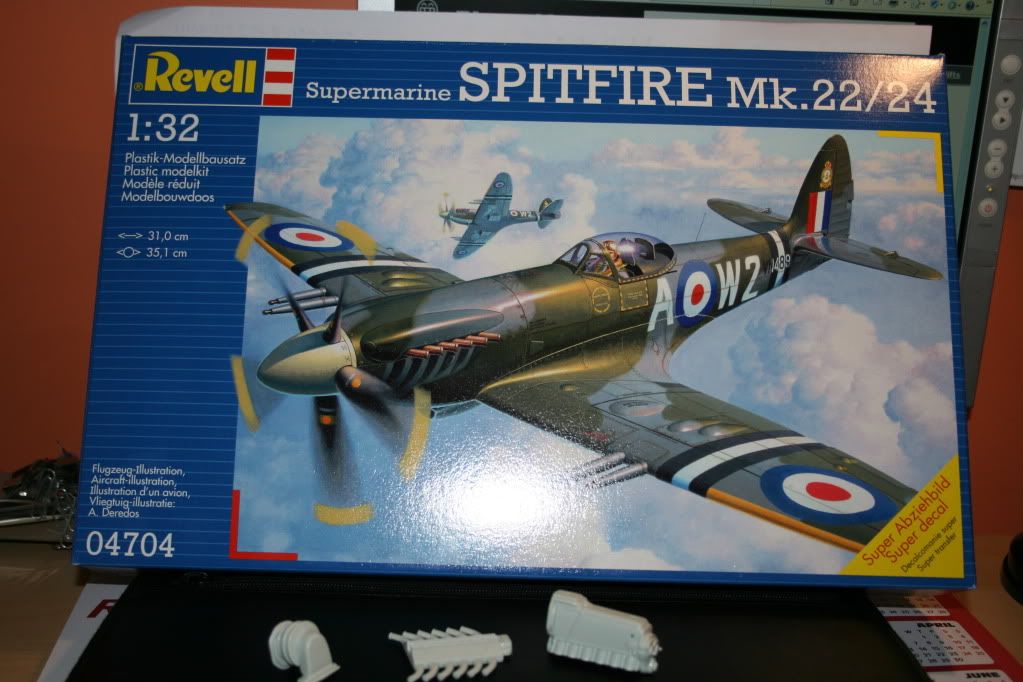
After my return to modelling with a disasterous choice of model kit (escort mk1 airfix)and having had a good look around and taking on board advice given here, I have bought a 1/32 spitfire kit and am trying to find some Photo based pictures of a Griffon 61 engine so I can detail some of the bare parts.
I have looked at most of the sites and can't find anything suitable, perhaps I am being daft, but any help would be appreciated.
thanks Dave.
Edited by xllifts on Sunday 21st November 00:39
dr_gn said:
xllifts said:
 You must be 'knowledgeable' on the subject to know that from an engine request!
It's a nice model, but it's old, and it ain't Tamiya. It will probably go together better than the Airfix Cortina, but as I said, take care with the wing joints.
Good night and good luck!
Thanks for the tips and inspiration chaps!
I have started the beasty already and spent 9 hours on section 1 already, this is going to be no where near what you guys can produce, have to say Dr your 109 is awesome!
If I get five minutes tomorrow I will post some pictures and await the feedback good or bad welcome.
Incidently minime has taken the airfix escort off me, and is doing it on the weekends he is here, its the quietest I've seen him in years!!!
Thanks again Dave.

Well thanks to you guys I spent some money today on new toys!
Thanks for the encouraging comments
I have taken onboard the advice on the exhaust porting, I was umming and ahhing about this, so here goes, hopefully pictures will follow later tonight.
(even Mrsxl is looking at the revell kits for me and suggested the 1/32 F18 and even commented 'thats nice')
Here's a picture of the new toys
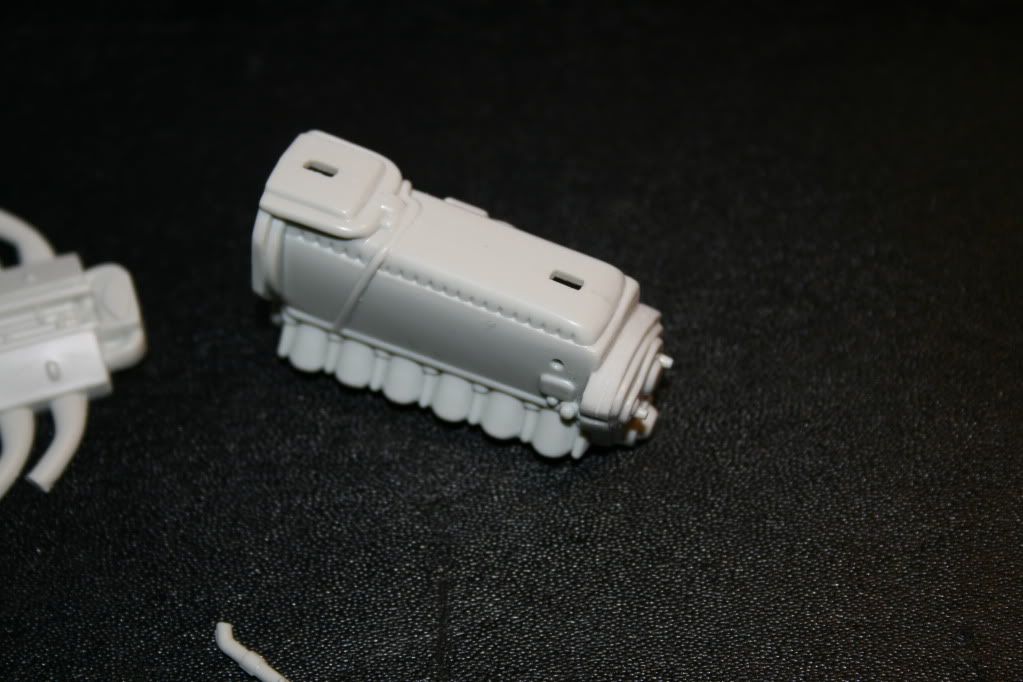
Tonights work, not a lot to show for the time spent, bit disappointed in myself with some of the exhaust work as I could not centralise the ports fully, and struggled at first to get used to the pin vise, but I persevered and the last hole was the best by far (childish snigger).
I decided that I really wasn't happy with the plastic pipe from the kit, so, never having built anything this small from scratch, I decided to have a go and scratch built a new one out of a paperclip and fuse wire.
I still have some fettling to do on this but am reasonably happy with the result.
Work permitting I will have another crack tomorrow.
Thanks for your comments I am a little bit scared of breaking this now!
I stopped at that diameter as the drill was getting to close at breaking out the sides, by countersinking i assume there is a small tool for this or is it best to buy some dremel type diamond cone bits ? Please excuse the daft questions at times would rather ask than plough on and bodge it.
That link is going to provide me with much fun and lots of bits arriving
Thanks Dave
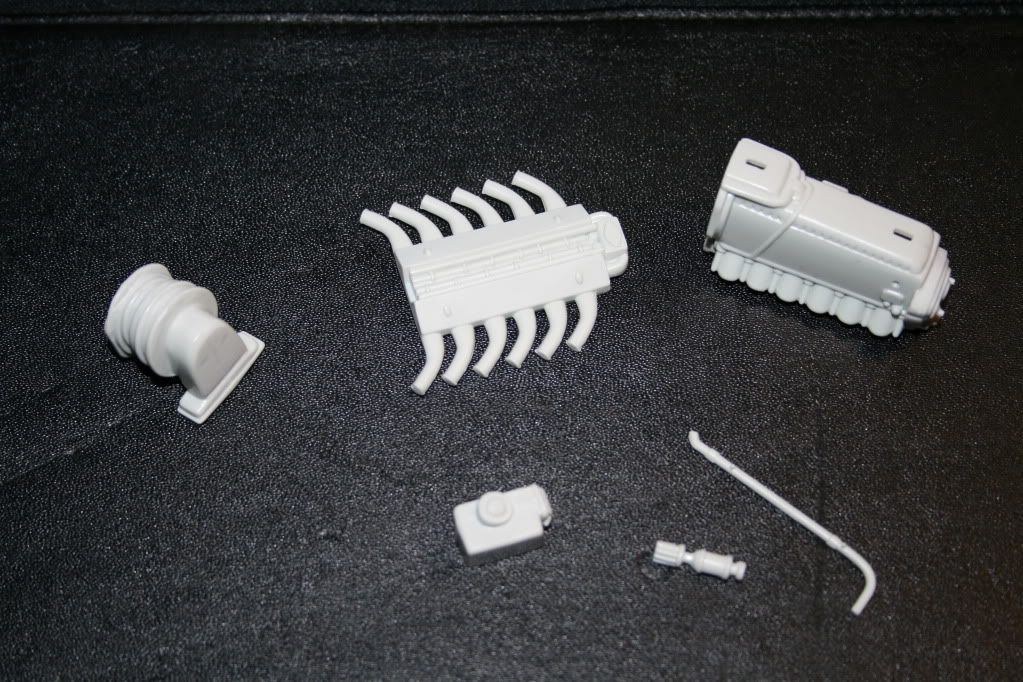
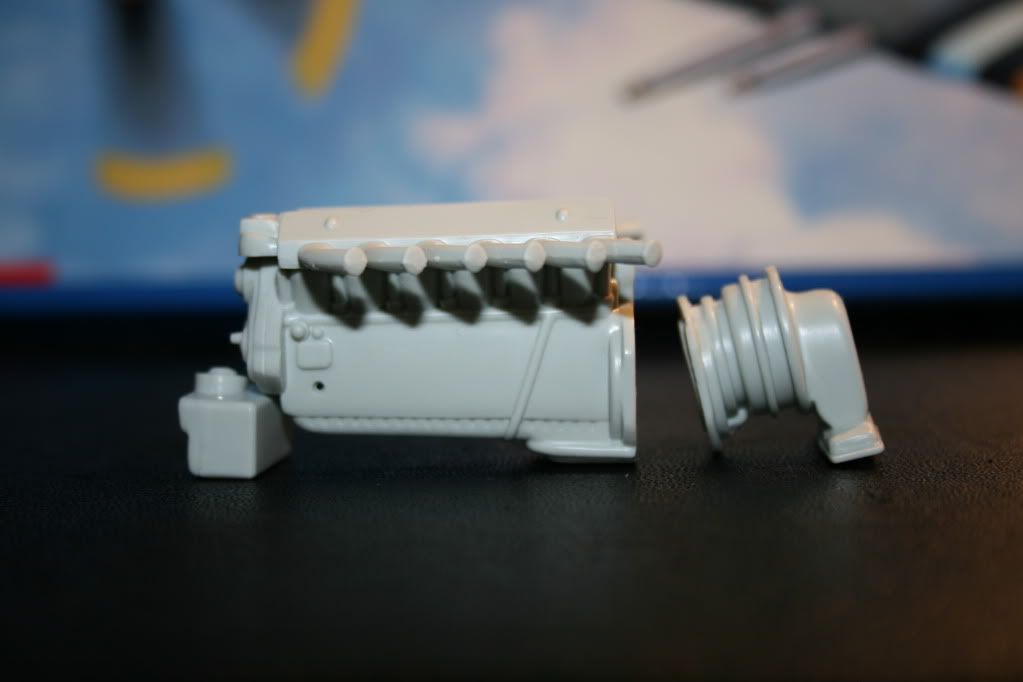
Managed to get time to buy a few more bits to enable me to continue with the engine yesterda, and spent some more time this evening scratch building some more parts and repairing a hole exhaust stub!


I have taken the plunge and trimmed off the moulded pipes that were on the side of the engine casing, made up some new ones to give the engine more life.
I am now unsure about this, and think I may have bitten a bit more than I can chew! perhaps with a bit of filling and patience I may feel better towards the end result.
dr_gn said:
xllifts said:
Managed to get time to buy a few more bits to enable me to continue with the engine yesterda, and spent some more time this evening scratch building some more parts and repairing a hole exhaust stub!
I have taken the plunge and trimmed off the moulded pipes that were on the side of the engine casing, made up some new ones to give the engine more life.
I am now unsure about this, and think I may have bitten a bit more than I can chew! perhaps with a bit of filling and patience I may feel better towards the end result.
Oh dear - sorry about the exhaust stub, exactly the same happened when I did it! It'll look fine once smoothed and painted though. Have you considered slicing the cylindrical stubs off and replacing with brass tube? Never tried it, but it might work on the next model.I have taken the plunge and trimmed off the moulded pipes that were on the side of the engine casing, made up some new ones to give the engine more life.
I am now unsure about this, and think I may have bitten a bit more than I can chew! perhaps with a bit of filling and patience I may feel better towards the end result.
You're doing well with the pipework. Don't fall into the trap that I did which is to keep painting bits 'just too see what it looks like'. This just builds paint up and dulls the details. Paint will make things look *much* better.
What I did with the '109 engine was to paint the block first, then add pre-painted detail bits afterwards (pipes/wires/ancilliaries. This makes painting easier and gives some contrast to the different engine parts. The lead wires and pipe clps I didn't paint, they are just left natural colour.
Just keep building the engine detail up, layer after layer, don't rush it, and eventually you will end up with a great effect. Keep up the good work.
ETA, use some Milliput to fill any damage caused by removing the moulded detail, and smooth it with a damp cloth or whatever. Again, once painted it's invisible.
ETATA Most important of all:
***DON'T FORGET TO KEEP CHECKING THAT THE MODDED ENGINE WILL STILL FIT INTO THE ENGINE BAY/ENGINE BEARERS/REMOVABLE COVERS!!***
Edited by dr_gn on Saturday 27th November 11:15
Think I'll leave cutting the stubs and fixing brass tubes on till the next project, which there are many now in mind, 'How addictive is this' !
Milliput, ah my cure all, it has blended away the scrape marks wonderfully, and I need to know .......... how did you know I had painted some bits to see what it would look like
Have trial fitted engine in the bay and so far so good....
I have bitten the bullet tonight and done my first ever airbrush work! and have found it incredibly difficult, I am guessing thats because I have skimped on the brand of airbrush, having read some of the other posts on here.
Is there a particular brand that I should be putting on my xmas list?
These will need another coat, I but am quite pleased with result as this was my first attempt.


Gokartmozart said:
Nice work on the exhausts and the engine pipework, keep the pics coming.
Thanks will try to keep pics updated as I go.Edited by xllifts on Sunday 28th November 22:28
Gassing Station | Scale Models | Top of Page | What's New | My Stuff