My '96 E36 M3 Evo Saloon
Discussion


Humongous update incoming :P.
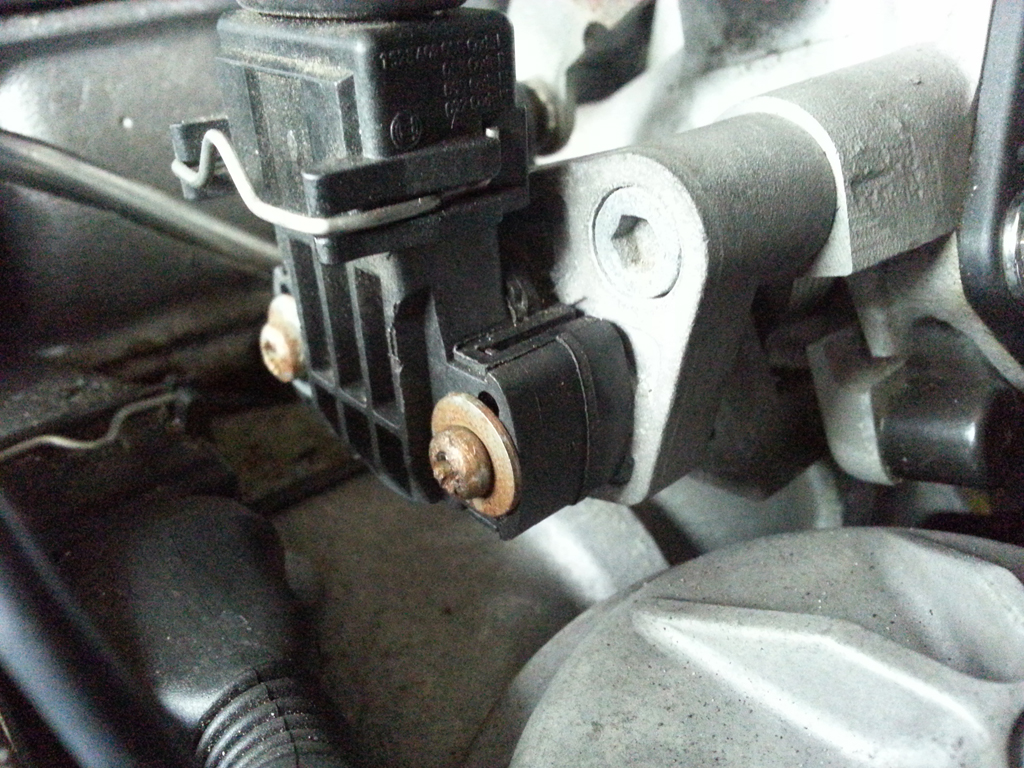
I'd clocked the TPS screws were fairly rusty and the heads had seen some wear and tear. The two screws and washers were replaced with stainless steel upgrades. Yes I am that sort of guy but the “nut and bolt” restoration will commence once the bigger jobs are complete. Suspension, and POR15 on the arches, brakes and wheels...


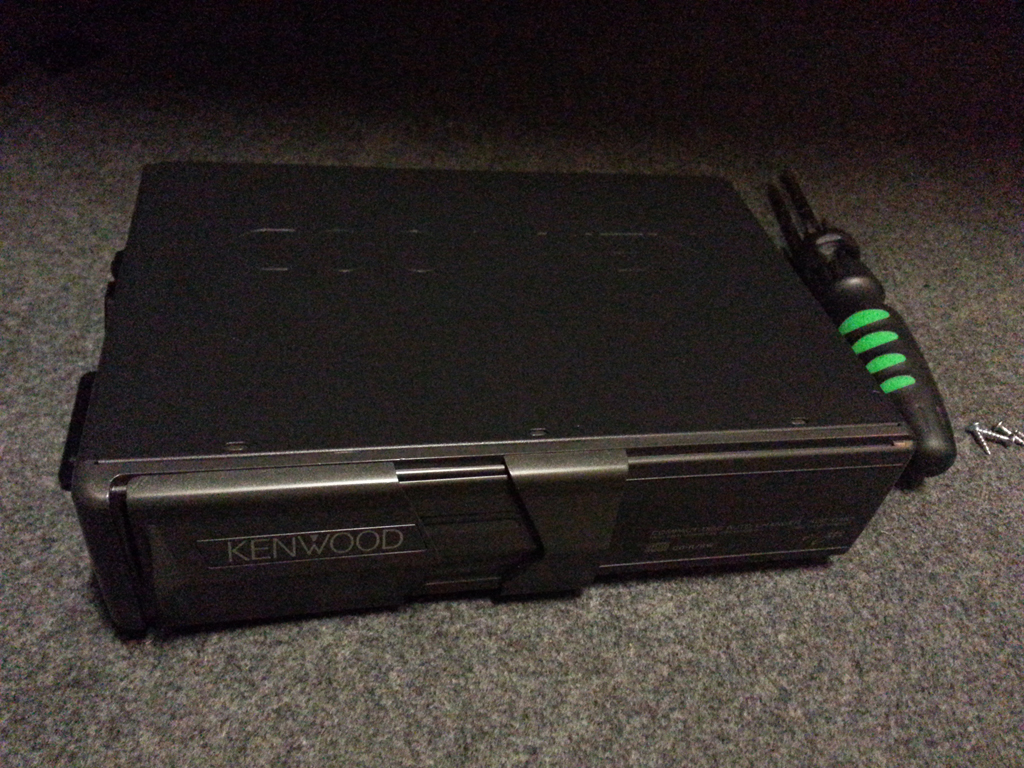
The aftermarket cd changer was removed. That removed a few kilos from high up in the boot . I'll remove the cable entirely when the summer comes. I have it neatly coiled up at the other end behind the glove box.
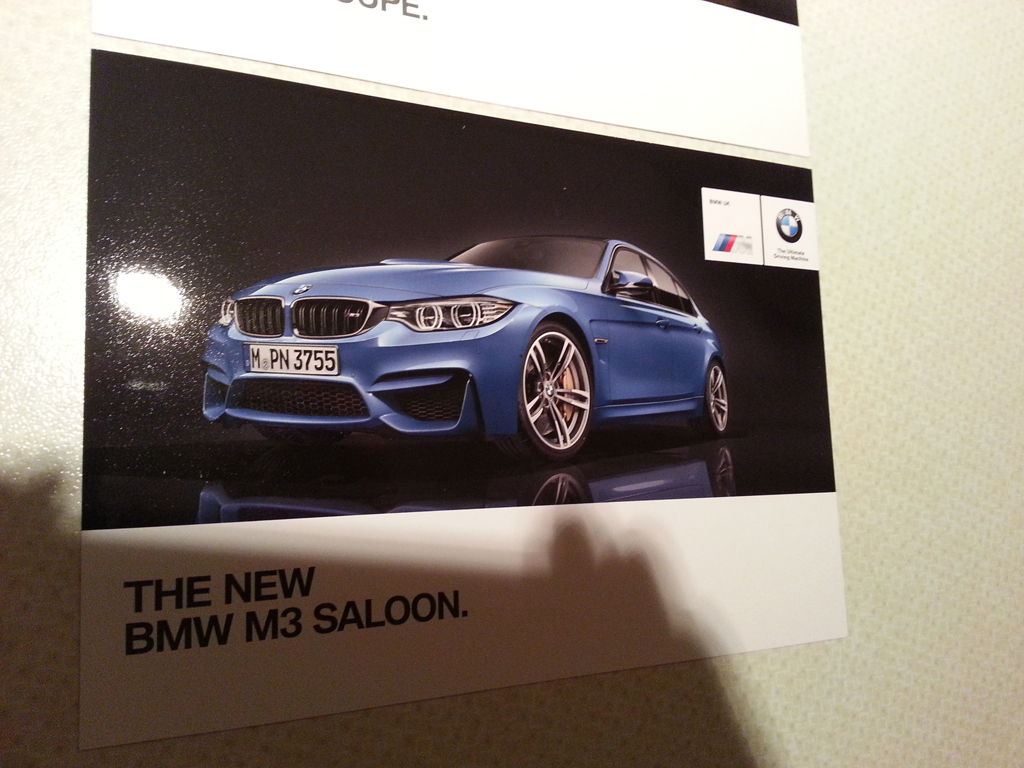
This also arrived through the post at the start of the week. Without bias the blue M3 looks the shizz. I have been disappointed by some “real life” photos of the M4...
I'd clocked the TPS screws were fairly rusty and the heads had seen some wear and tear. The two screws and washers were replaced with stainless steel upgrades. Yes I am that sort of guy but the “nut and bolt” restoration will commence once the bigger jobs are complete. Suspension, and POR15 on the arches, brakes and wheels...
The aftermarket cd changer was removed. That removed a few kilos from high up in the boot
. I'll remove the cable entirely when the summer comes. I have it neatly coiled up at the other end behind the glove box.This also arrived through the post at the start of the week. Without bias the blue M3 looks the shizz. I have been disappointed by some “real life” photos of the M4...
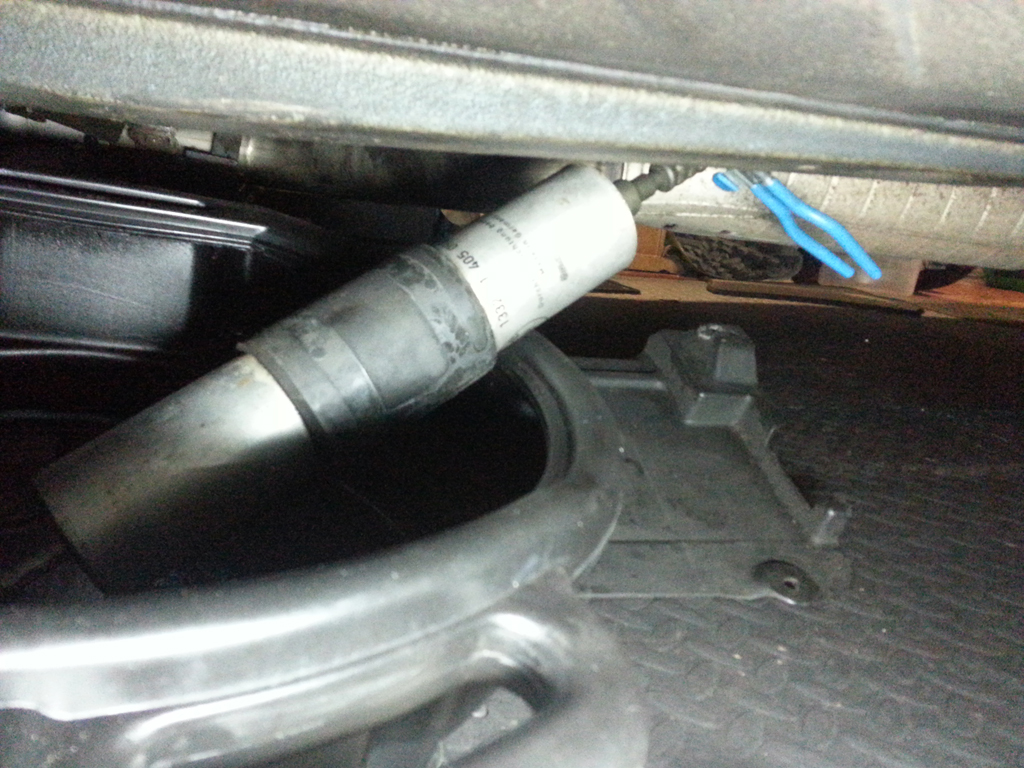
I fitted a new filter on Saturday along with the fuel filter cover.
A fairly straight forward job, de-pressurise the fuel system, clamp the fuel line, disconnect the "out" end of the fuel filter, let the filter drain, disconnect the "in" end, install the new fuel filter and job done!
I struggled with removing the fuel filter due to the fittings. Just twist the fuel filter as you pull back the release and out it pops. The new fuel filter connects with a satisfying click. Easy when you know how.
It was a job I was quite nervous about doing, more due to the safety aspect.
I didn't notice any difference in how the car drove.
But I did get out for a good run on Sunday (a nice cool, dry evening).
Lately I have been mostly building a new car lol!
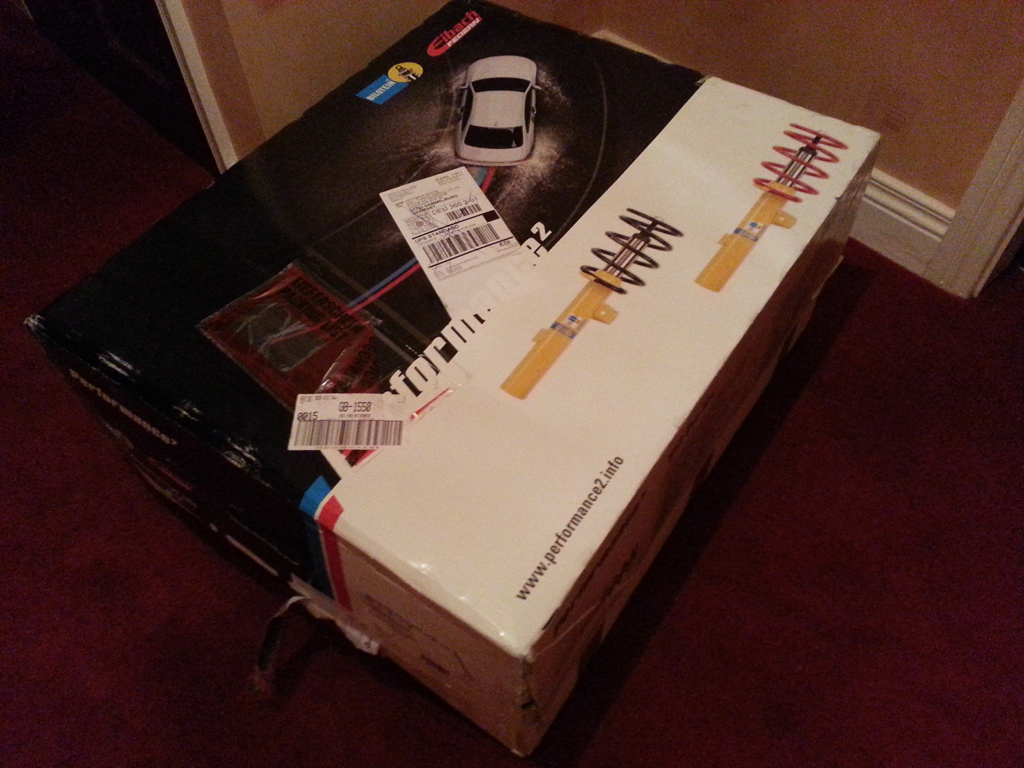
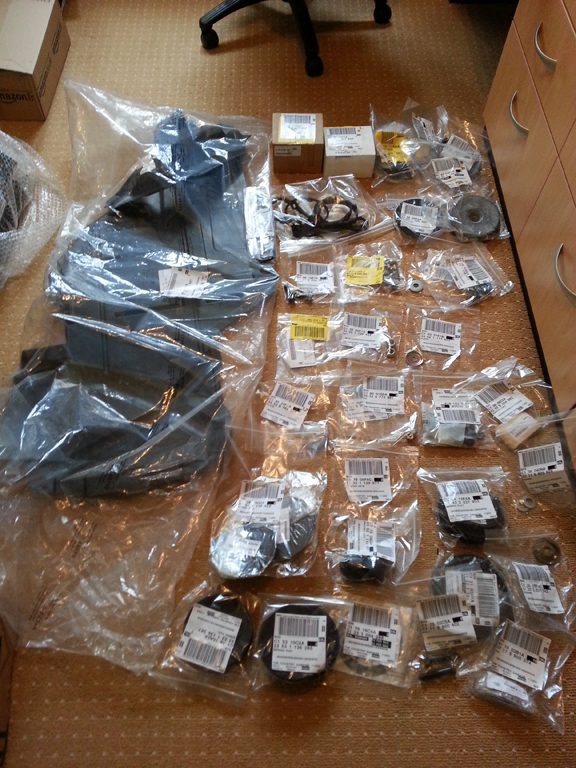
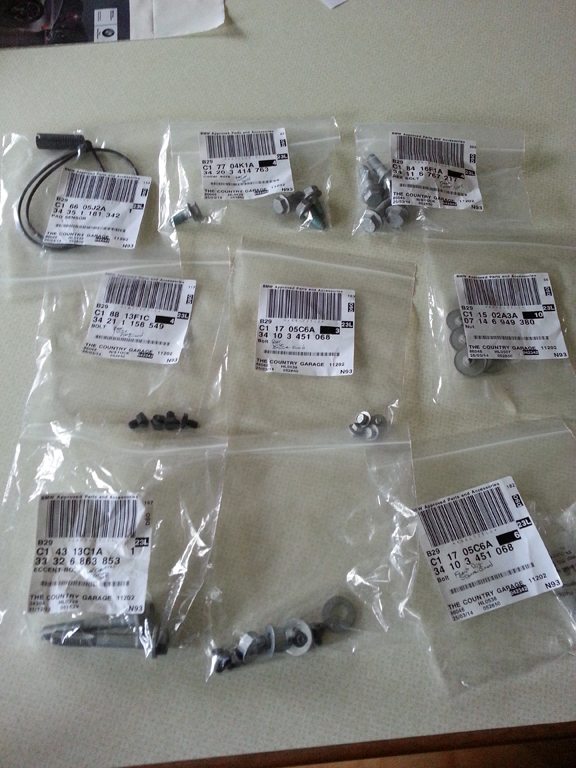
A few toys arrived (see below). In summary a new under-tray and sump plug cover, suspension (bolts, washers, spring pads, mounts – more pics to come), a new alarm fob, a spare key, a service key, cam cover gaskets, spark plug gaskets, cam cover bolt gaskets and a cam cover coil pack sticker.
No money for food this month.
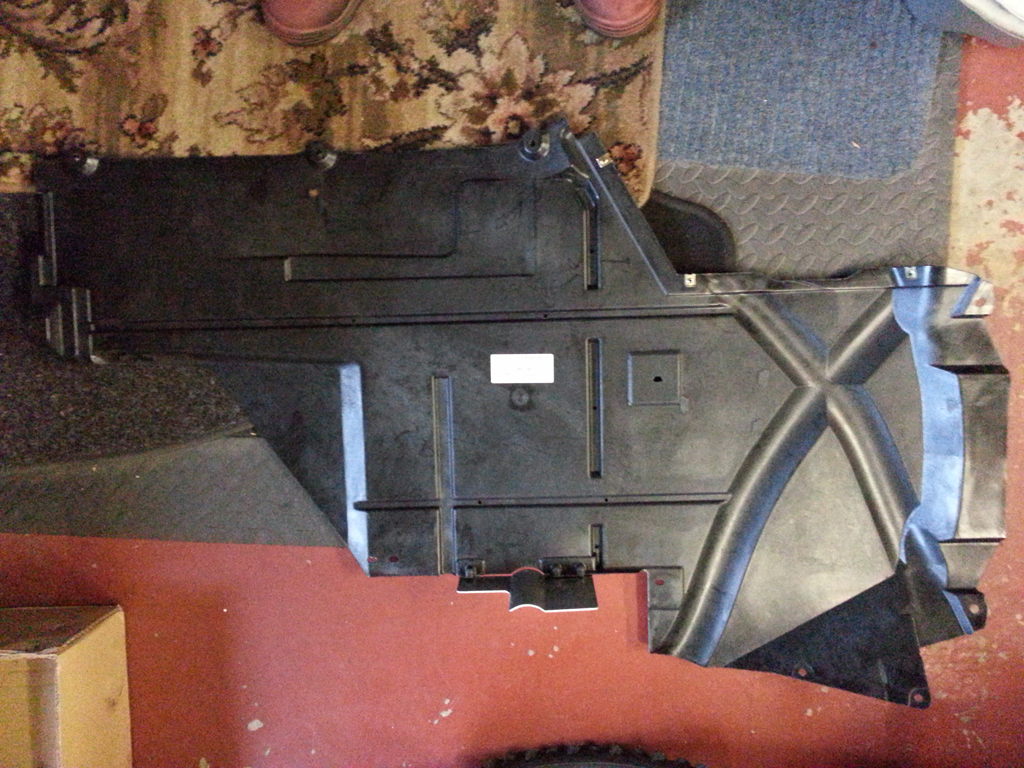
The new under-tray.
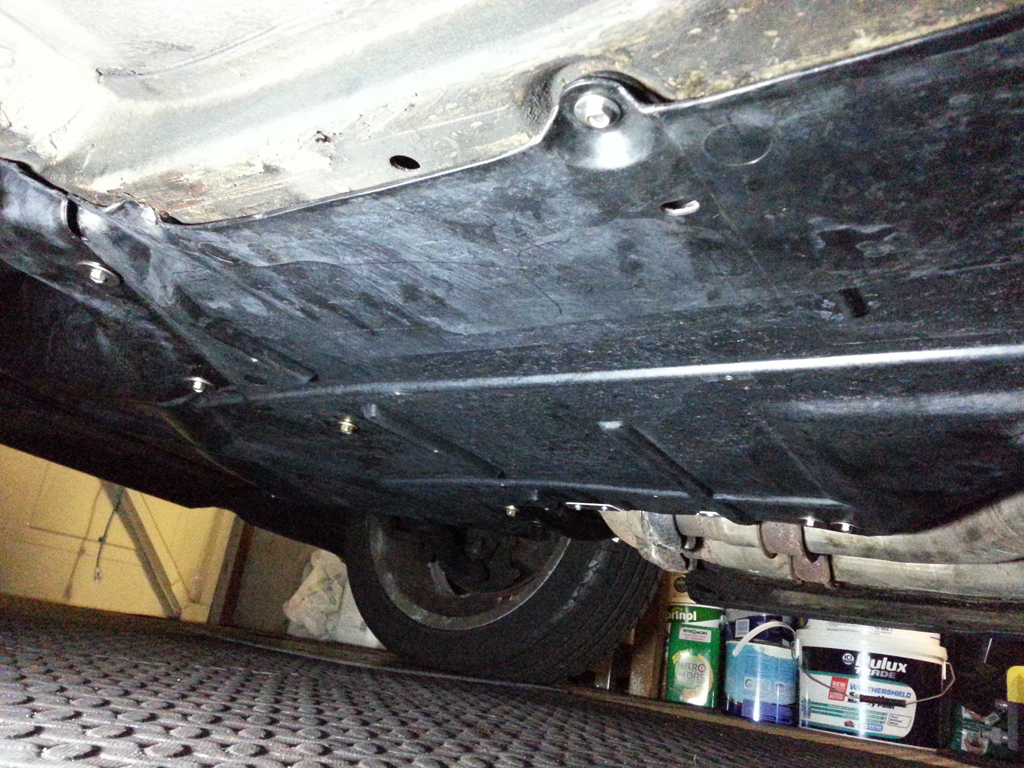
The new under-tray fitted. It's an awful pic, but you get the idea. Wanting to improve things led me to fit all new screws and washers to fit the under-tray. Most are now stainless steel, the few larger screws are new bright zinc plated.
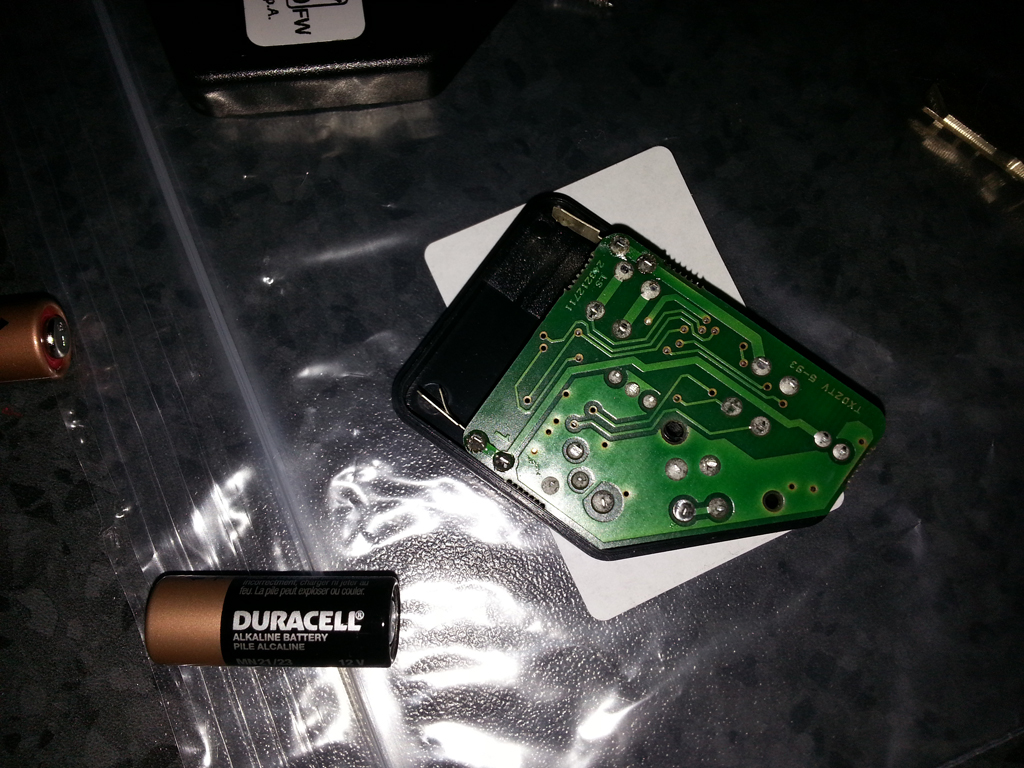
The old alarm fob, taken apart to get the battery info...

The new alarm fob, spare key and service key.

The new fob taken apart to install the battery. I replaced the old fobs battery for good measure.
Both fobs are now coded to the car... A surprisingly easy job.
The new style coil pack sticker. Bought in preparation for the cam cover refurb.

A few toys arrived (see below). In summary a new under-tray and sump plug cover, suspension (bolts, washers, spring pads, mounts – more pics to come), a new alarm fob, a spare key, a service key, cam cover gaskets, spark plug gaskets, cam cover bolt gaskets and a cam cover coil pack sticker.
No money for food this month.
The new under-tray.
The new under-tray fitted. It's an awful pic, but you get the idea. Wanting to improve things led me to fit all new screws and washers to fit the under-tray. Most are now stainless steel, the few larger screws are new bright zinc plated.
The old alarm fob, taken apart to get the battery info...
The new alarm fob, spare key and service key.
The new fob taken apart to install the battery. I replaced the old fobs battery for good measure.
Both fobs are now coded to the car... A surprisingly easy job.
The new style coil pack sticker. Bought in preparation for the cam cover refurb.
melvster said:
Nice update, love the picture of all the new little parts; serious OCD here 
LOL I know I'm in good company don't worry .I've yet to itemise them :|... OCD aside, there is that many parts, and numbers, they really need organised into whats for the front and back suspension etc etc...

While I was lucky to get the torch with my car, as is the common issue, mine didn't work.
I opened it up to find this... battery leakage and corrosion.


Some cleaning, new batteries and time with the soldering iron got it up and running again.

I the valve failed on the passenger side rear tyre. Down to my old place of work to get it sorted.
.jpg)
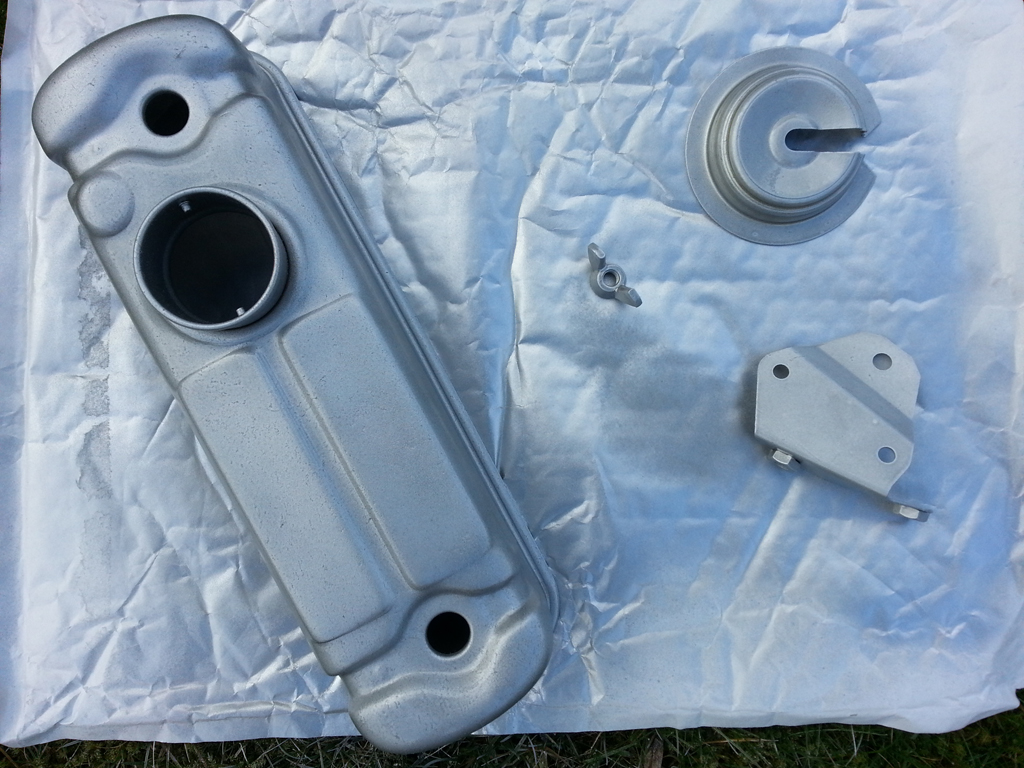
Painting the spare wheel bracket and wing nut. Doing a few other jobs at the same time, a series cam cover and bracket for a fiat coupe cam cover.
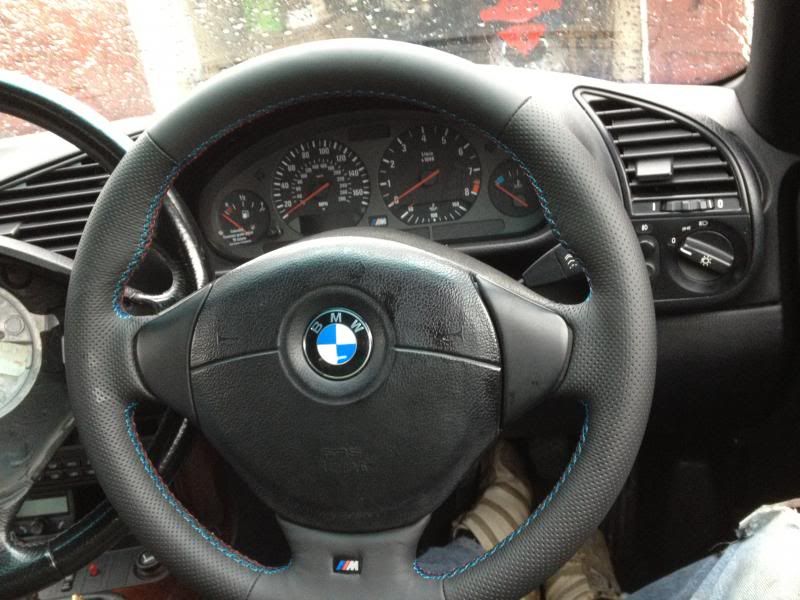
Finally a few decent photos of the refreshed interior. I'm quite chuffed with it.


The car was washed again and put back under its cover.While I was lucky to get the torch with my car, as is the common issue, mine didn't work.
I opened it up to find this... battery leakage and corrosion.
Some cleaning, new batteries and time with the soldering iron got it up and running again.
I the valve failed on the passenger side rear tyre. Down to my old place of work to get it sorted.
Painting the spare wheel bracket and wing nut. Doing a few other jobs at the same time, a series cam cover and bracket for a fiat coupe cam cover.
Finally a few decent photos of the refreshed interior. I'm quite chuffed with it.
The car was washed again and put back under its cover.
I opened it up to find this... battery leakage and corrosion.
Some cleaning, new batteries and time with the soldering iron got it up and running again.
I the valve failed on the passenger side rear tyre. Down to my old place of work to get it sorted.
Painting the spare wheel bracket and wing nut. Doing a few other jobs at the same time, a series cam cover and bracket for a fiat coupe cam cover.
Finally a few decent photos of the refreshed interior. I'm quite chuffed with it.
The car was washed again and put back under its cover.While I was lucky to get the torch with my car, as is the common issue, mine didn't work.
I opened it up to find this... battery leakage and corrosion.
Some cleaning, new batteries and time with the soldering iron got it up and running again.
I the valve failed on the passenger side rear tyre. Down to my old place of work to get it sorted.
Painting the spare wheel bracket and wing nut. Doing a few other jobs at the same time, a series cam cover and bracket for a fiat coupe cam cover.
Finally a few decent photos of the refreshed interior. I'm quite chuffed with it.
The car was washed again and put back under its cover.
Big update time...
Some deep wheel nut sockets, I'm getting a little precious because...

… the wheels were sent off for refurbishment.
The car flying in the air / on axle stands.

My kahoonas were feeling large while the wheels were off. So time for some preventative maintenance on the rear arches, as we all know one of the big weak spots on the E36.
I'm glad to say my arches only had a tiny bit of rust on the leading edge. However it wasn't due to the usual dirt trap design of the arches, it was a chip in the paint, presumably from a stone, it had chipped the paint leaving the metal to the elements.
Any way, time to fix the arches for good and hopefully never to see rust again....
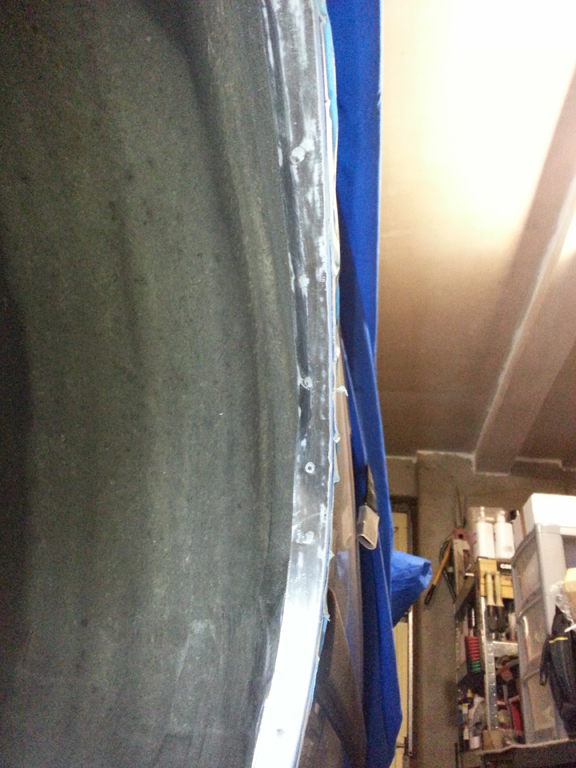
I stripped the arch lips back to bare metal inside and out and treated them with the POR-15 three stage kit. A degreaser, primer / zinc phosphate coating and then the POR-15 coating. (yes I know I need to clean the arches)
The POR-15 drying.

POR Tie Coat Primer (allows you to paint over POR-15. You need to as POR-15 reacts to UV light.

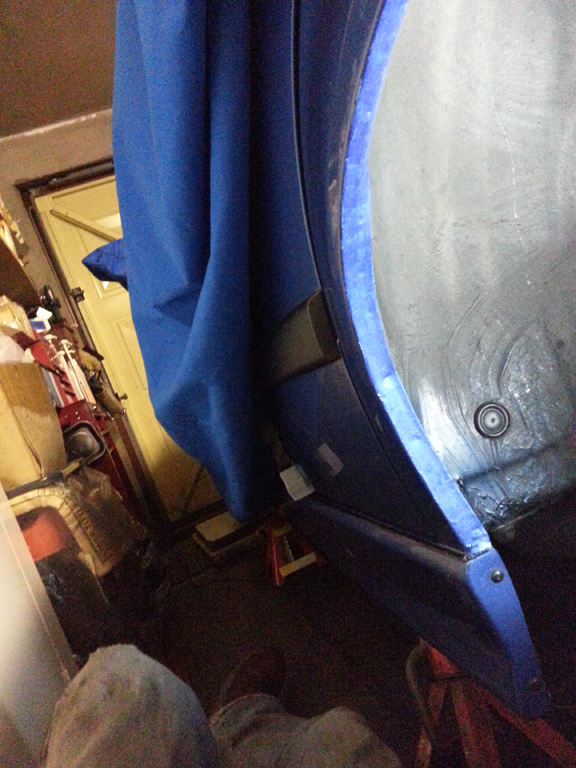
A very honest picture of the rear arches, the direct light does highlight the less than smooth metal underneath
Away from direct light, looks very very good.

Like wise with here... Very happy with these and I was very very worried how they will turn out.
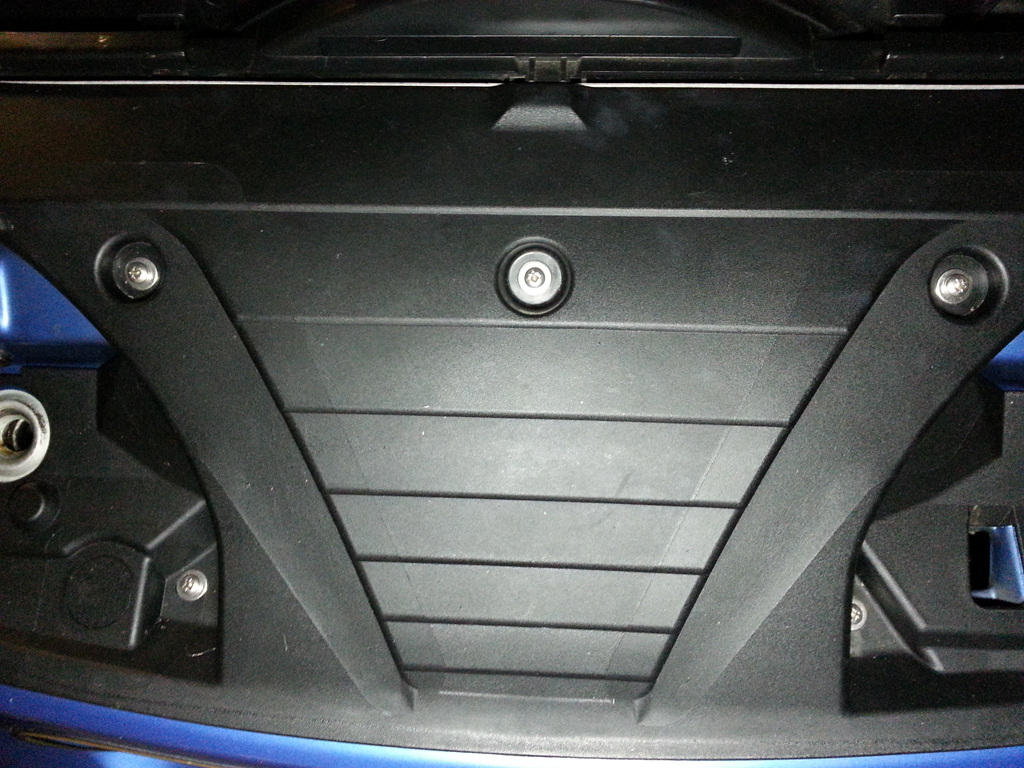
The radiator cover, shroud fastings were replaced with stainless steel items... Just because...
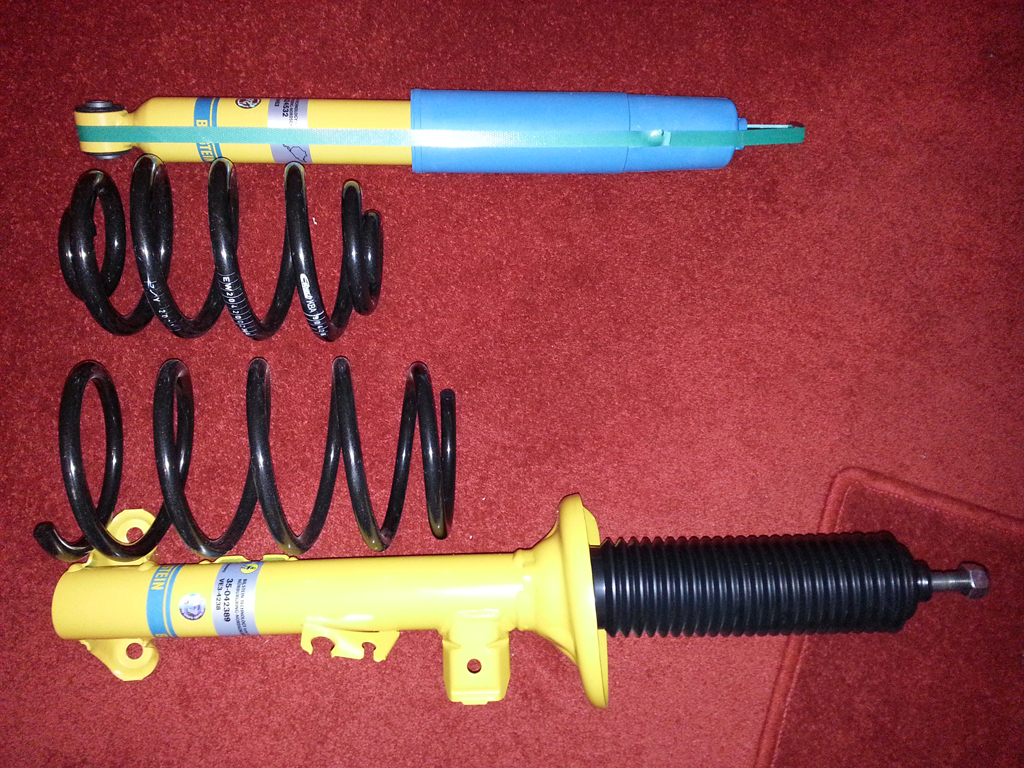
The rear shocks from the B12 kit were unboxed and the Rogue Engineering Top Mounts installed.

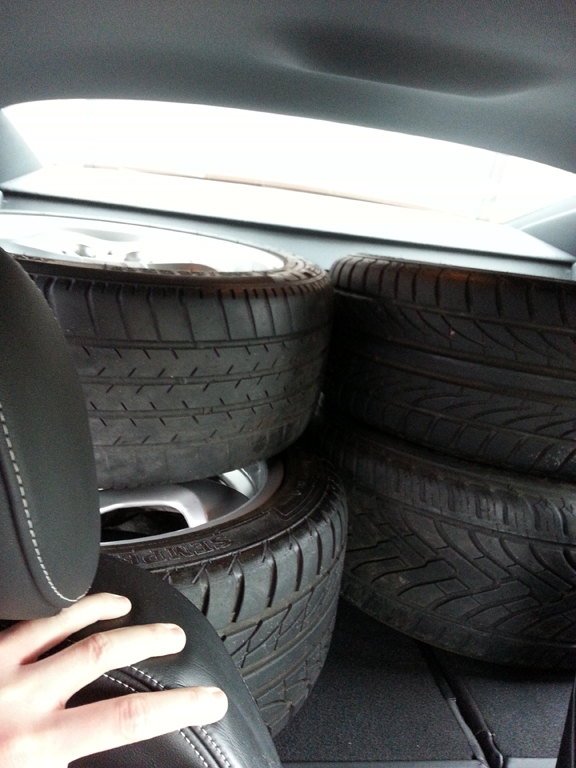
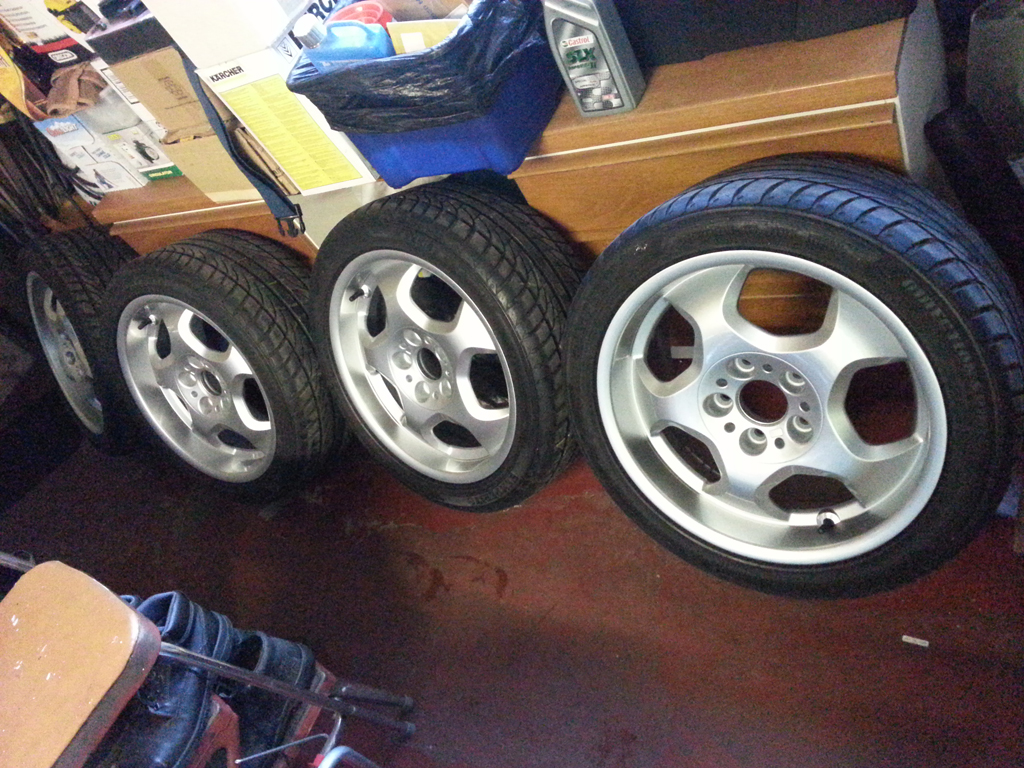
A boot full of shiny rims, I collected the other two the next suitable day.

One of the finished wheels...

All wheels parked up... I'm letting the paint breathe for a while, then I will cover them in several coats of wax.
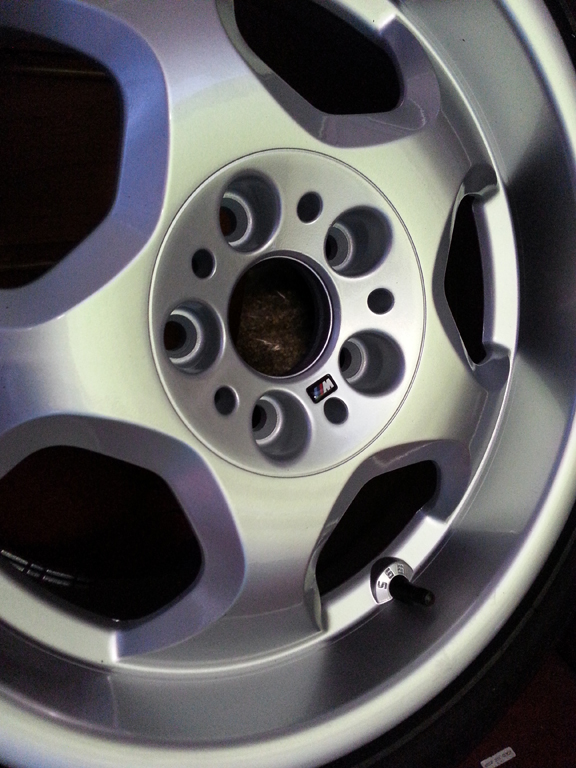
Another wheel shot taken last night. M badge installed.
In summary I'm delighted with how the arches have turned out. While not silky smooth like the exterior body of the car, they didn't come smooth out of the factory, so in reality they are an improvement. With the POR-15 kit, I followed the instructions to the T, that should mean I don't have any rust problems in the rear arches (touches wood).
The wheels (I will take some better photos with my camera soon) came out very well. They were refurbished by Lester Engineering in Lisburn and I am delighted with the result. I had a good chat with Billy there, who filled me with confidence and answered my very anal questions. Highly recommended.
Next jobs... Well three big ones...
Tyres, I need tyres all round (ouch). The rears are pretty much done, but one of the fronts now has a bulge in the side wall. I'll go for Michelin Pilot Sport 3, I'll let the funds recuperate before I do that...
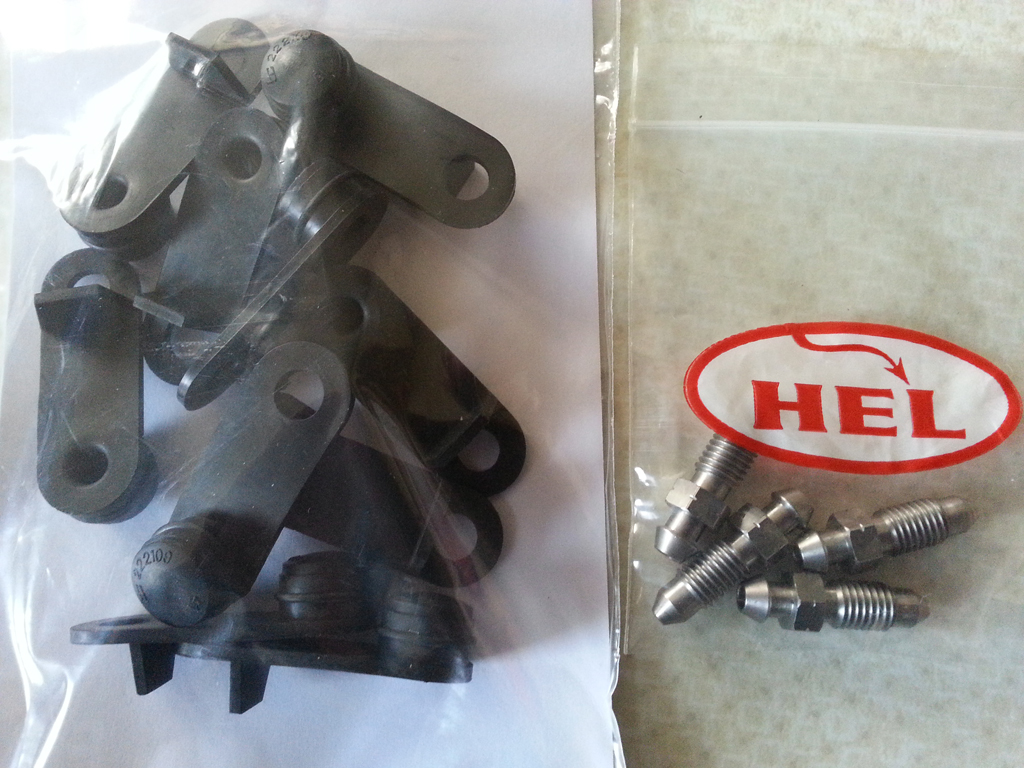
The car is still up on axle stands, so I have ordered new brake fluid along with braided brake lines. Along with some new fittings, I will do a full flush of the brake system, clean and paint the brakes and fit the new lines. I have doused the joints in WD40 tonight in the hope it saves me any grief when I start breaking the joints.
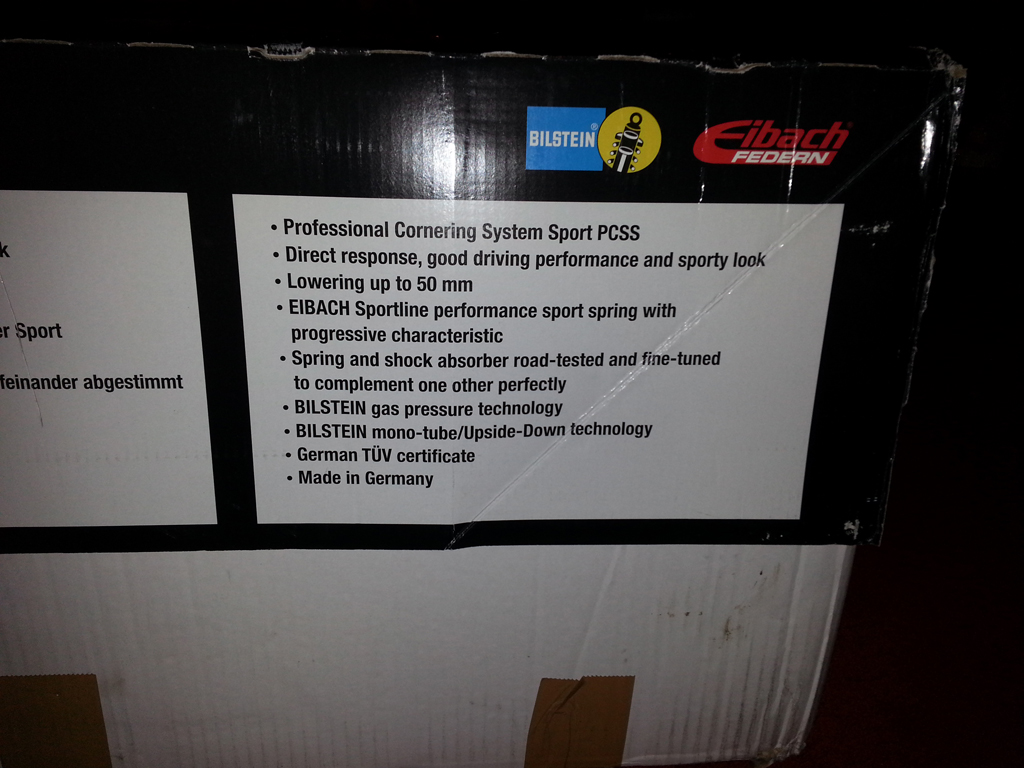
Suspension, I still need to fit the B12 kit. There is a very competent Porsche Specialist down the road from me, he works on many brands of cars and has come highly recommended for suspension work. I spoke to him several years ago and found him very helpful, so surprised I forgot all about him.
The car is slowly but surely getting there.
With those three jobs / expenditures out of the way, its MOT time.
Some deep wheel nut sockets, I'm getting a little precious because...
… the wheels were sent off for refurbishment.
The car flying in the air / on axle stands.
My kahoonas were feeling large while the wheels were off. So time for some preventative maintenance on the rear arches, as we all know one of the big weak spots on the E36.
I'm glad to say my arches only had a tiny bit of rust on the leading edge. However it wasn't due to the usual dirt trap design of the arches, it was a chip in the paint, presumably from a stone, it had chipped the paint leaving the metal to the elements.
Any way, time to fix the arches for good and hopefully never to see rust again....
I stripped the arch lips back to bare metal inside and out and treated them with the POR-15 three stage kit. A degreaser, primer / zinc phosphate coating and then the POR-15 coating. (yes I know I need to clean the arches)
The POR-15 drying.
POR Tie Coat Primer (allows you to paint over POR-15. You need to as POR-15 reacts to UV light.
A very honest picture of the rear arches, the direct light does highlight the less than smooth metal underneath
Away from direct light, looks very very good.
Like wise with here... Very happy with these and I was very very worried how they will turn out.
The radiator cover, shroud fastings were replaced with stainless steel items... Just because...
The rear shocks from the B12 kit were unboxed and the Rogue Engineering Top Mounts installed.
A boot full of shiny rims, I collected the other two the next suitable day.
One of the finished wheels...
All wheels parked up... I'm letting the paint breathe for a while, then I will cover them in several coats of wax.
Another wheel shot taken last night. M badge installed.
In summary I'm delighted with how the arches have turned out. While not silky smooth like the exterior body of the car, they didn't come smooth out of the factory, so in reality they are an improvement. With the POR-15 kit, I followed the instructions to the T, that should mean I don't have any rust problems in the rear arches (touches wood).
The wheels (I will take some better photos with my camera soon) came out very well. They were refurbished by Lester Engineering in Lisburn and I am delighted with the result. I had a good chat with Billy there, who filled me with confidence and answered my very anal questions. Highly recommended.
Next jobs... Well three big ones...
Tyres, I need tyres all round (ouch). The rears are pretty much done, but one of the fronts now has a bulge in the side wall. I'll go for Michelin Pilot Sport 3, I'll let the funds recuperate before I do that...
The car is still up on axle stands, so I have ordered new brake fluid along with braided brake lines. Along with some new fittings, I will do a full flush of the brake system, clean and paint the brakes and fit the new lines. I have doused the joints in WD40 tonight in the hope it saves me any grief when I start breaking the joints.
Suspension, I still need to fit the B12 kit. There is a very competent Porsche Specialist down the road from me, he works on many brands of cars and has come highly recommended for suspension work. I spoke to him several years ago and found him very helpful, so surprised I forgot all about him.
The car is slowly but surely getting there.
With those three jobs / expenditures out of the way, its MOT time.
melvster said:
This car is so clean I would feel guilty using it.
As much as I love a clean car, I love driving too... But I'm quite anti-garage queen so she will be driven as much as possible. My problem is that I like to make a meal of each job, rendering the car in bits for some time  .
.She will only get better. Busting to get the paints painted up

BullyB said:
just checking that out, thanks.
I used Krust last time and black Hammerite but it has come through again in a couple of places
I've used both before, but think the POR-15 is much more suited to the job of the arch lips.I used Krust last time and black Hammerite but it has come through again in a couple of places
The Hammerite can be a little brittle, so not quite suited (IMO) to an arch lip.
I’m getting stuck into the brakes over the next few evenings, starting with the rears.
My aim is to:
• perform a full brake fluid flush
• get the callipers, their carriers, discs and stone guards looking much smarter
• install stainless steel braided brake lines, with stainless fittings
• replace bolts that mount the calliper to the hub
• replace bleed nipples with stainless steel versions
• replace the rear brake pad sensor
A full calliper rebuild will come next winter at the latest.
Last night I managed to get an hour or two in to do some prep work. I cracked off the calliper carrier bolts, bleed nipples and most of the brake line fittings. One is trying to round off, but I have cleaned it all up and doused it in WD40 (fingers crossed).
The recently refurbished spare wheel in the boot. Note the painted bracket and new black boot floor support.

Rear subframe / diff carrier. John B style.
.jpg)
New bolts of the brakes, carriers, wear sensor etc.
Bleed nipple covers and stainless steel nipples, a little upgrade.
Brake pipe spanners, essential to prevent rounding the fittings.

Rear callipers, carriers and discs removed. Stone guards painted black.

DIY painting rig. That's an old clothes line hung over a small garden wall.

A sized bleed nipple was removed with these vice grips, note the straight jaws and small opening...

The offending little ****. I believe the oxidisation is a sign of brake fluid not being changed regularly.

One of the front callipers painted, quite chuffed with it.

Front discs painted. The two front discs were a complete **** to remove. The usual sized disc retaining bolt. I had to drill it out and re-tap the threads. Not a pleasant job!

Goodridge braided brake hoses finally arrive. A rather large delay on these, hence the lack of updates... I'd originally ordered them with a clear coating... But I quite like the black coating (more subtle), so I will keep them.


Stainless bleed screw fitted and a new cover.

Building the brakes and fittings back up...

I'm aiming to start connecting the brakes back up over the next few evenings...
The big hold ups were the sized disc screws and the brake hoses taking an age to arrive.
Rear subframe / diff carrier. John B style
.New bolts of the brakes, carriers, wear sensor etc.
Bleed nipple covers and stainless steel nipples, a little upgrade.
Brake pipe spanners, essential to prevent rounding the fittings.
Rear callipers, carriers and discs removed. Stone guards painted black.
DIY painting rig. That's an old clothes line hung over a small garden wall.
A sized bleed nipple was removed with these vice grips, note the straight jaws and small opening...
The offending little ****. I believe the oxidisation is a sign of brake fluid not being changed regularly.
One of the front callipers painted, quite chuffed with it.
Front discs painted. The two front discs were a complete **** to remove. The usual sized disc retaining bolt. I had to drill it out and re-tap the threads. Not a pleasant job!
Goodridge braided brake hoses finally arrive. A rather large delay on these, hence the lack of updates... I'd originally ordered them with a clear coating... But I quite like the black coating (more subtle), so I will keep them.
Stainless bleed screw fitted and a new cover.
Building the brakes and fittings back up...
I'm aiming to start connecting the brakes back up over the next few evenings...
The big hold ups were the sized disc screws and the brake hoses taking an age to arrive.
muzza289 said:
+1
love reading this thread.
Interior of your car looks great Neil - just one thing - had you thought about getting the steering wheel re trimmed?
i had mine done (i cant find the name of who did it - but it was postal/exchange, but i will be able to dig it out if you want me to)
i had extra padding, perforated leather and m stitching. Yes, i know its not original and it looks a bit grey, not black - but it will darken with time and you don't really notice the difference in the car and its soooo much better than driving with the old one. the pic is just after i fitted it and before i cleaned it up. the old 'shiny' wheel is in the background.
had a new rear window put in too....see here:
http://www.pistonheads.com/gassing/topic.asp?h=0&a...
PS - good to see my old wooden gear knob in your car being put to good use......
Ta very much most appreciated.love reading this thread.
Interior of your car looks great Neil - just one thing - had you thought about getting the steering wheel re trimmed?
i had mine done (i cant find the name of who did it - but it was postal/exchange, but i will be able to dig it out if you want me to)
i had extra padding, perforated leather and m stitching. Yes, i know its not original and it looks a bit grey, not black - but it will darken with time and you don't really notice the difference in the car and its soooo much better than driving with the old one. the pic is just after i fitted it and before i cleaned it up. the old 'shiny' wheel is in the background.

had a new rear window put in too....see here:
http://www.pistonheads.com/gassing/topic.asp?h=0&a...
PS - good to see my old wooden gear knob in your car being put to good use......
Yes and thanks for the Gear Knob it made the interior.
The steering wheel does need a retrim, its not really worn surprisingly, there are a few marks on it.
I've been looking at Royal Steering wheels if that's the company?
I too will probably go for the tri-m-stitching. A subtle touch. I'll probably not add any padding.
I'll check out the links when I get home
. A few sites are blocked in work.muzza289 said:
yep - i think it was royal.
i spoke to him in advance about what i wanted and he advised he doesn't use with the 'black' leather but the dark grey shown in my pic - i knew that before proceeding and was happy with it.
just one word of advice - i went with an 'exchange' wheel to keep mine off the road the minimum time, but the wheel i got was a little sun faded on the top - not much - and probably i'm the only one who would notice, but i can live with it and i didn't bother bringing it up with Jack at Royal.
on reflection i would go with sending your own one to him and getting your own one back....that way you know you won't get a slightly worse one in exchange.
Good tip, I'll bare that in mind.i spoke to him in advance about what i wanted and he advised he doesn't use with the 'black' leather but the dark grey shown in my pic - i knew that before proceeding and was happy with it.
just one word of advice - i went with an 'exchange' wheel to keep mine off the road the minimum time, but the wheel i got was a little sun faded on the top - not much - and probably i'm the only one who would notice, but i can live with it and i didn't bother bringing it up with Jack at Royal.
on reflection i would go with sending your own one to him and getting your own one back....that way you know you won't get a slightly worse one in exchange.
Though the steering wheel isn't top of the list.
Especially after ordered 4x tyres today :'(
 .
.Gassing Station | M Power | Top of Page | What's New | My Stuff