Pics of my E93 M3 post KDS wet sand and paint refurbishment
Discussion


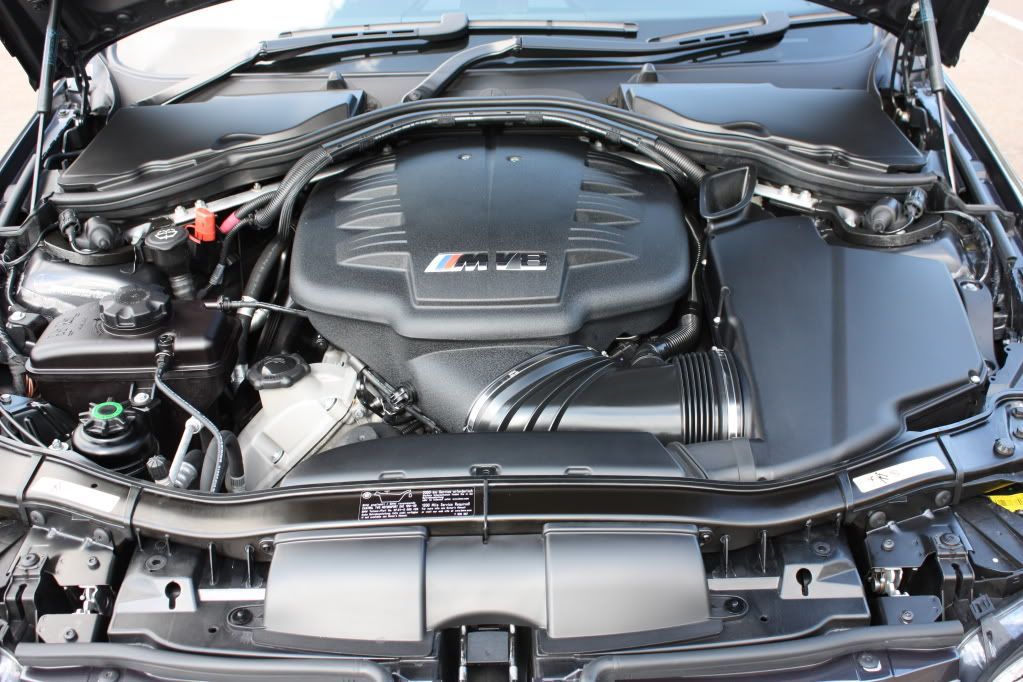
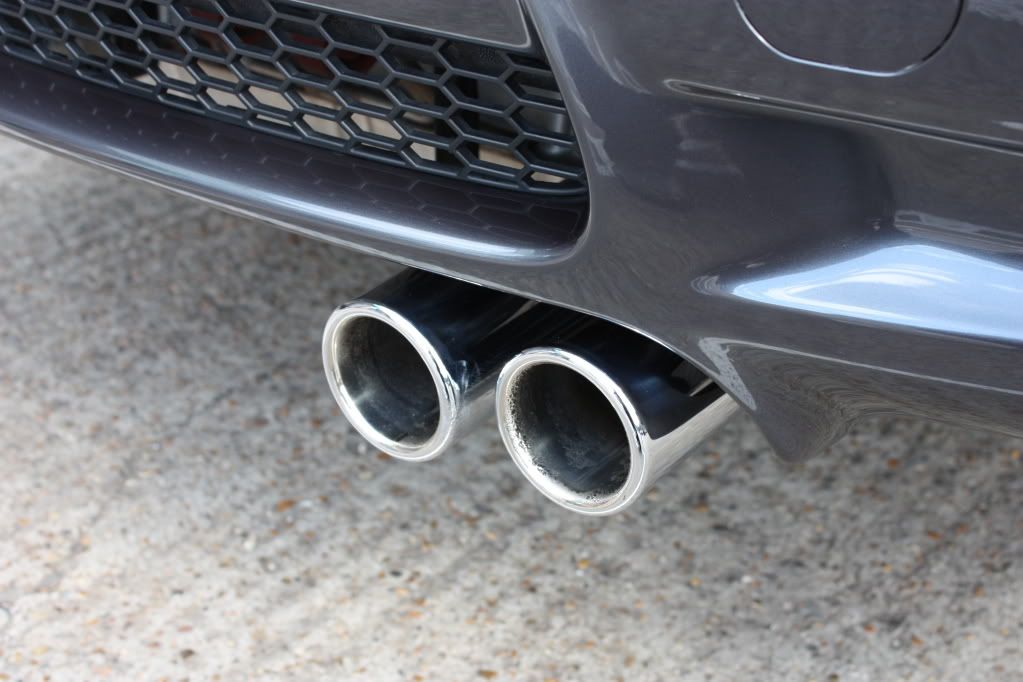
Here are some pictures of my car following a thorough going over by Kelly of KDS. Needless to say I'm over the moon with the car, it looks absolutely stunning! Kelly is without a shadow of a doubt the only person you'd want to do a job like this on your P&J. This is just a small sample of pictures, there are some more and the before and during work (some of which are quite scary) but the end result is I'm sure you'll agree awesome. The attention to detail that Kelly has applied to my car is second to none, I've got paint depth readings from all over my car, tons of pics and a couple of videos all of which are awesome. If any of you are thinking about having some paint correction done to your car, look no further. Kelly's your man, worth every penny!
Edited by J-P on Wednesday 29th April 23:01


Hi guys , first thing i will say is this is not your standard everyday detail ! 
As far as i am aware one of the only detail company's in the country who are wet sanding on a regular basis !
This finish only comes from wet sanding by hand and machine to remove the dreaded orange peel finish that late BMW's have .
I have around 100 photos uploaded to show and explain the whole process, for the time being here are some before and after clearly showing the orange peel problem .
Reflection shot of the workshop (or lack of reflection)
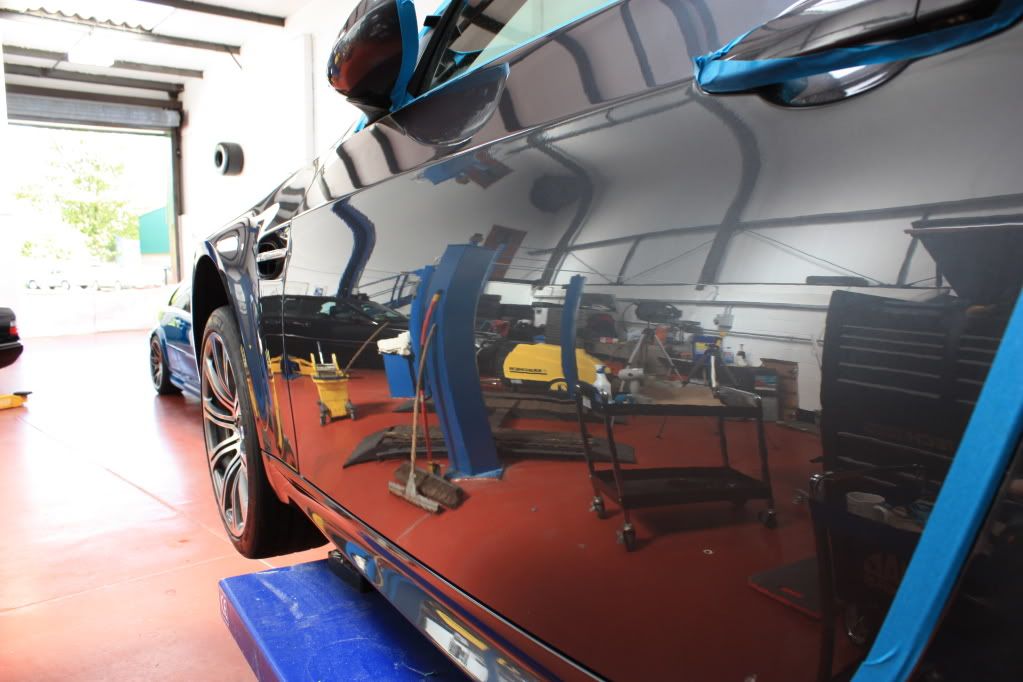
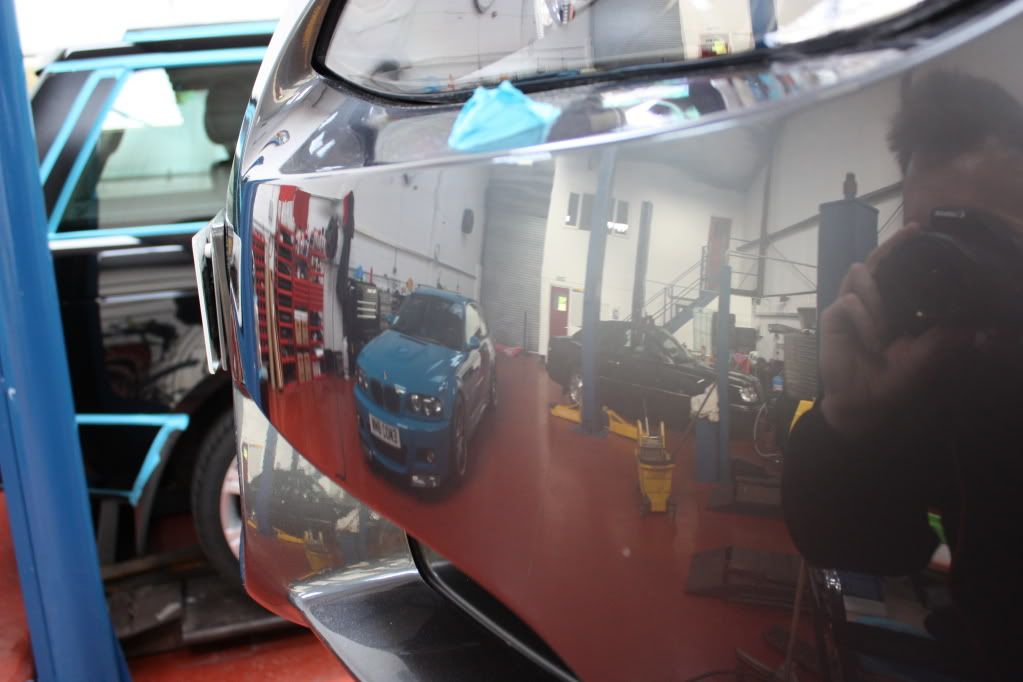
After reflection shot of workshop
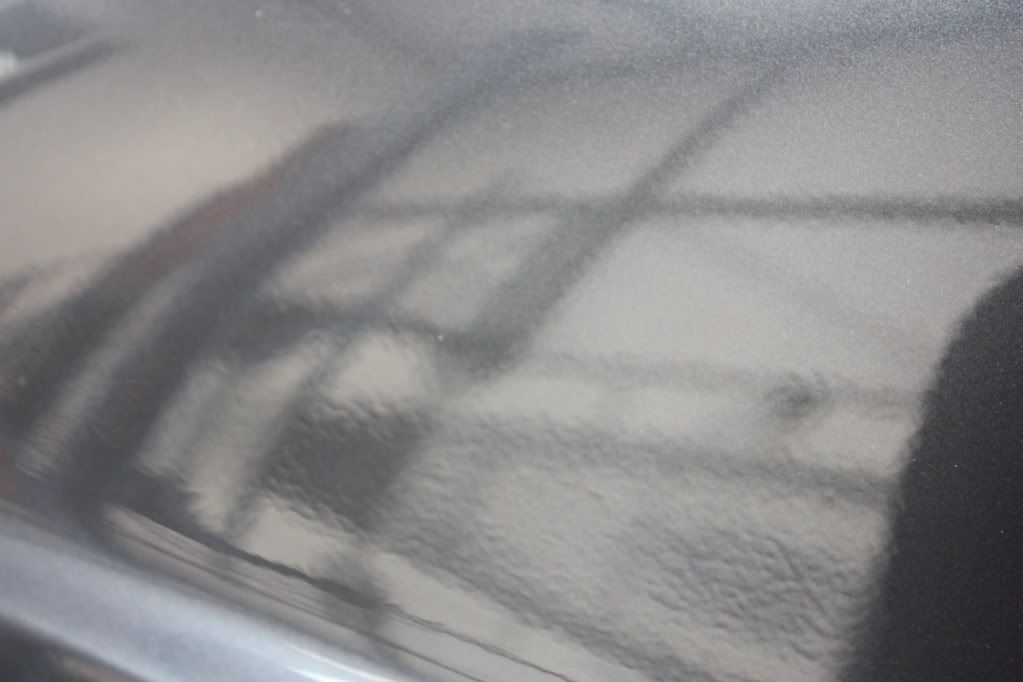
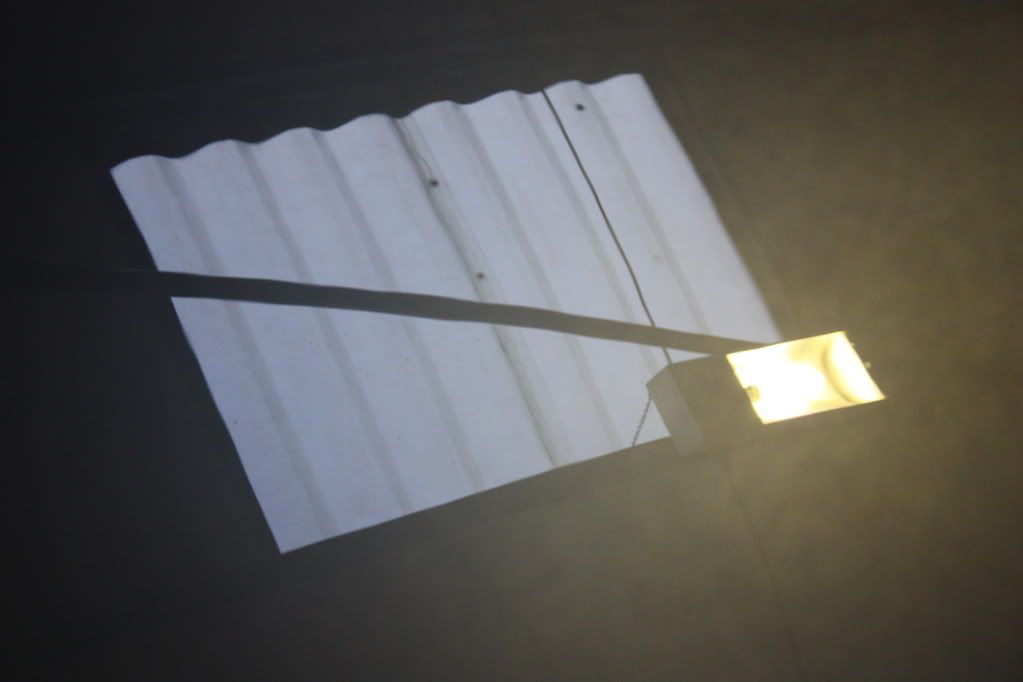
Before reflection shot of bonnet showing skylight
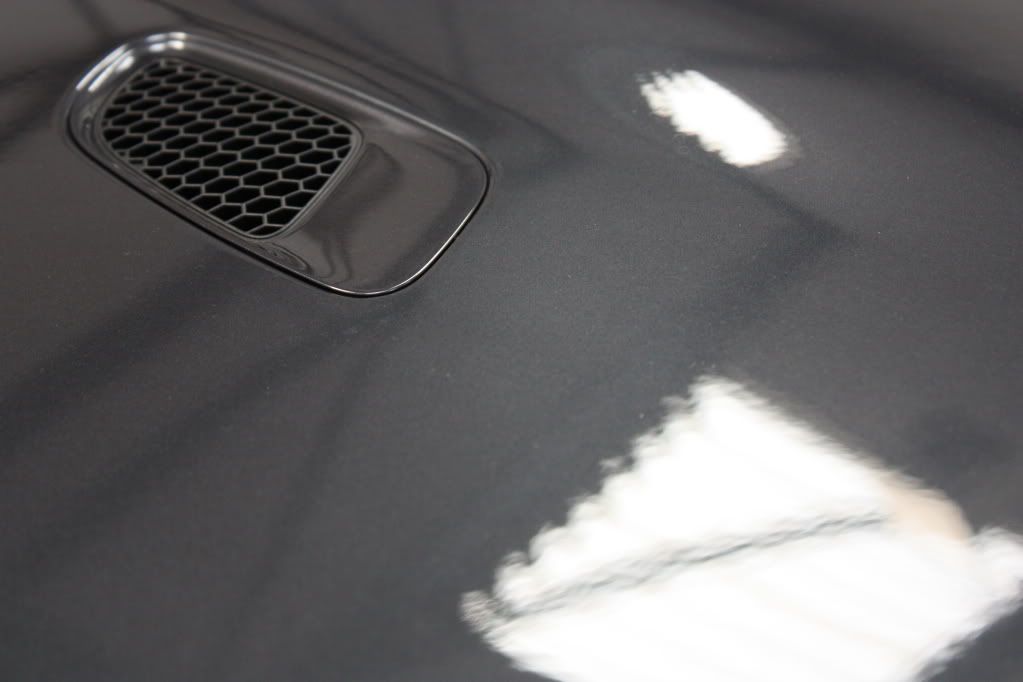
after shot of bonnet
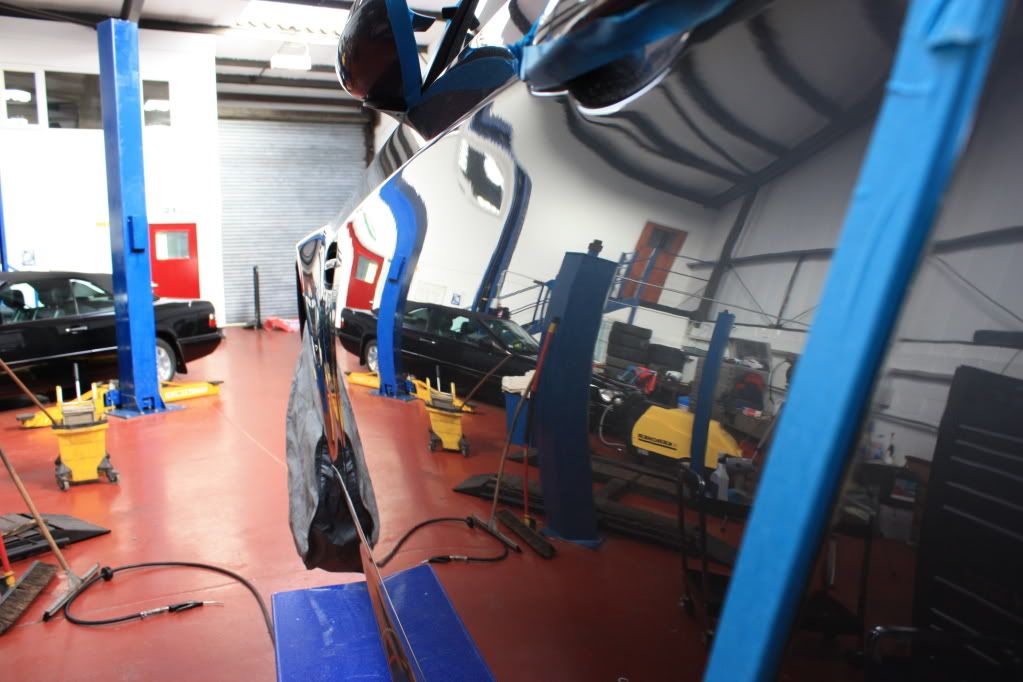
Here are some more random shots after
This is what paint can look like after 80 hours work
As i said will post lots more later
As far as i am aware one of the only detail company's in the country who are wet sanding on a regular basis !
This finish only comes from wet sanding by hand and machine to remove the dreaded orange peel finish that late BMW's have .
I have around 100 photos uploaded to show and explain the whole process, for the time being here are some before and after clearly showing the orange peel problem .
Reflection shot of the workshop (or lack of reflection)
After reflection shot of workshop
Before reflection shot of bonnet showing skylight
after shot of bonnet
Here are some more random shots after
This is what paint can look like after 80 hours work
As i said will post lots more later
Edited by kds keltec on Friday 6th November 19:21
croyde said:
BMW should be paying for that work as I could not believe the state of the paint on the new ones I looked at. I would not expect a paint finish that bad on an Aygo let alone a £50K plus car.
Yours looks fantastic BTW.
You are totally correct , the fact that i seem to be solely wet sanding and detailing new bmw models and detailing only some because of bad wash and valet before customer picks up their car from the dealership . Yours looks fantastic BTW.
Had a few local car dealers all say about how bad the new paint finish is and compared the finish too a cheap jap car and the finish was still better than the Bmw's .
I will say that bmw dealerships are starting to get a hard time from customers about the poor finish , had many a chat to many customers over this problem with some changing to another brand just because of the poor paint finish .
I do know that bmw are stuck if you complain on collection of your new car about the finish , as all they can do is offer you another car with just the same finish !

All i could suggest is check the paint finish if you are buying a new bmw and log it with the dealership before you drive the car away , as i do know there can be a solution , if you know what i am getting at

Kelly, does it never rain where you are? 
As usual, some excellent work, and I'm very tempted to get my car "done" at some point .... I know that with my luck/current arrangements with the man upstairs, I'd pick up my wonderfully detailed car, and be forced to drive home in thunderstorms, behind manure lorries, across freshly tarred/painted roads, and through all manner of s t .... I can just imagine the look on the GF's face when I'd arrive home and she exclaims "You spent £x hundred on that? It looks just as filthy as when it went away FFS!!!!!"
As usual, some excellent work, and I'm very tempted to get my car "done" at some point .... I know that with my luck/current arrangements with the man upstairs, I'd pick up my wonderfully detailed car, and be forced to drive home in thunderstorms, behind manure lorries, across freshly tarred/painted roads, and through all manner of s
t .... I can just imagine the look on the GF's face when I'd arrive home and she exclaims "You spent £x hundred on that? It looks just as filthy as when it went away FFS!!!!!" Edited by mat205125 on Thursday 30th April 16:15
mat205125 said:
Kelly, does it never rain where you are?
As usual, some excellent work, and I'm very tempted to get my car "done" at some point .... I know that with my luck/current arrangements with the man upstairs, I'd pick up my wonderfully detailed car, and be forced to drive home in thunderstorms, behind manure lorries, across freshly tarred/painted roads, and through all manner of st .... I can just imagine the look on the GF's face when I'd arrive home and she exclaims "You spent £x hundred on that? It looks just as filthy as when it went away FFS!!!!!"
Edit to say its always sunny down here in kent As usual, some excellent work, and I'm very tempted to get my car "done" at some point .... I know that with my luck/current arrangements with the man upstairs, I'd pick up my wonderfully detailed car, and be forced to drive home in thunderstorms, behind manure lorries, across freshly tarred/painted roads, and through all manner of s
t .... I can just imagine the look on the GF's face when I'd arrive home and she exclaims "You spent £x hundred on that? It looks just as filthy as when it went away FFS!!!!!" Edited by mat205125 on Thursday 30th April 16:15

The whole point of a properly detailed car is not to look good just after a its done , which is what happens with a standard clean or valet .
A correctly detailed car (days of work , not 6 hours - 1 day) is too make it easy to maintain afterwards .
I am sure J-P and deniz who have posted on here before about my work will agree with me in that the washing and upkeep is very easy afterwards .
Once all the hard work is done it only takes a small amount of time to keep it looking good !
The orange peel removal process is a permanent process and would not matter how , when , and what you do with the car it will always have no orange peel .
I have had many emails over the years from customers saying how easy their car is now to clean !
Or put it another way their are still plenty people all over the country paying around £350 and upto £500 for a dealer to apply some dealer protection wax/sealent that is for life time , which is all utter rubbish that takes around a hour to do with £10 of sealent .
Why is it i see so many new cars coming in for detail with the customer pointing out that its been "diamond/supa , miracle glaze " or something like it and that the salesman told them "its sets like stone and will protect for life" on collection the normal the most common quote is "it did not look like that when it was new " .
Had a customer (BMW) that picked up a nearly new car and noticed some sort of fallout on the paint that has left small rust spots all over the car !
I took a look at it and said take it back and get the dealer to sort the problem for you as the new owner should not be sorting it out !
The car returned the next day to be booked in with me and the customer will pay himself !
The reason for this is bmw said it is under the laquer and requires a repaint !
The total job took around 5 hours for full wash , clay , wax , windows , plastics and wheels , looking like new again (so no repaint then)
Edited by kds keltec on Thursday 30th April 16:44
Right here goes guy's
From the start
As dropped of by J-P
Dye transfer from blue Jeans on the leather seat's
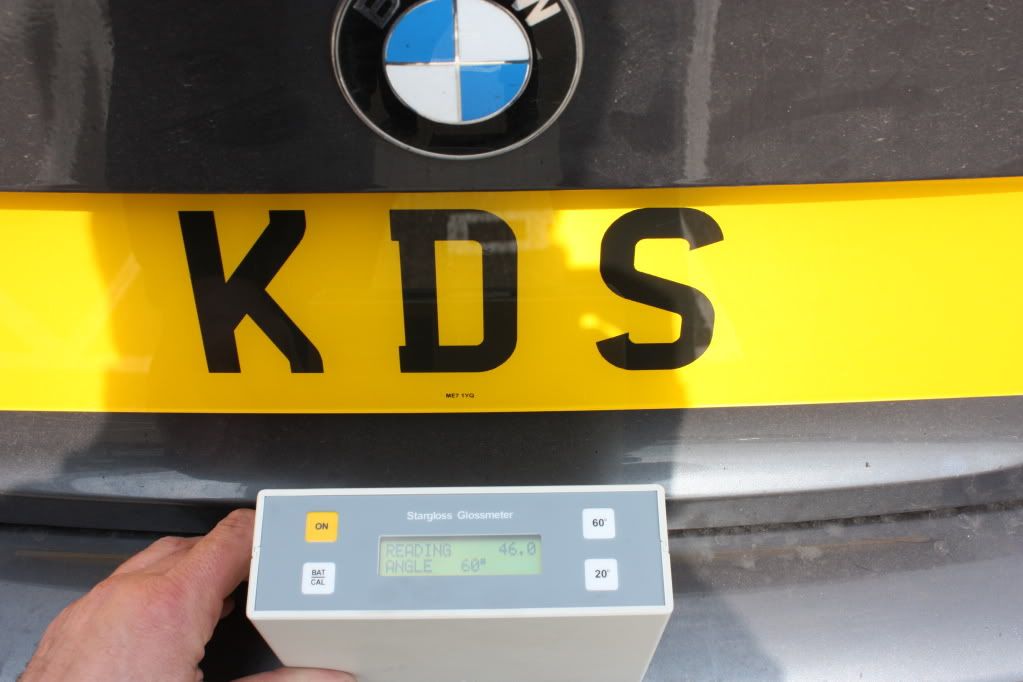
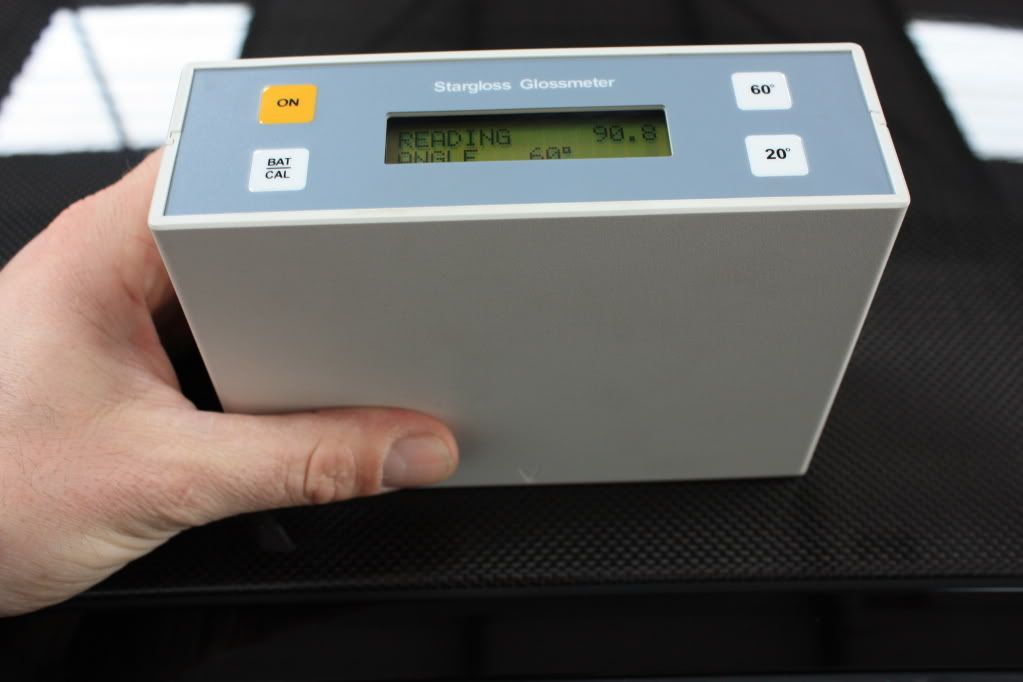
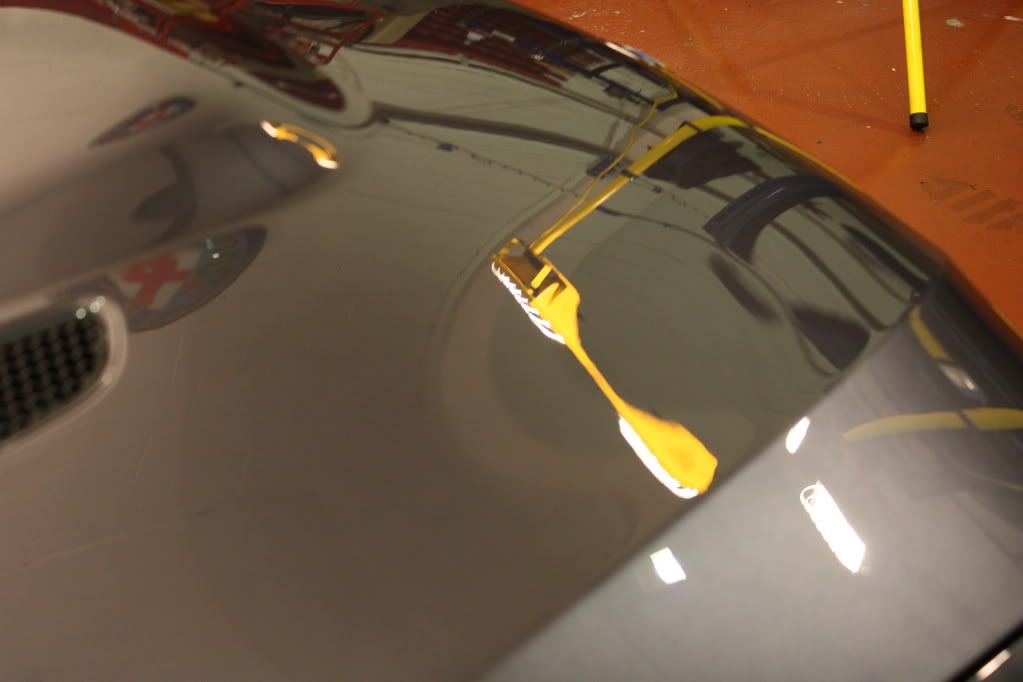
Gloss readings before any wash process
roof
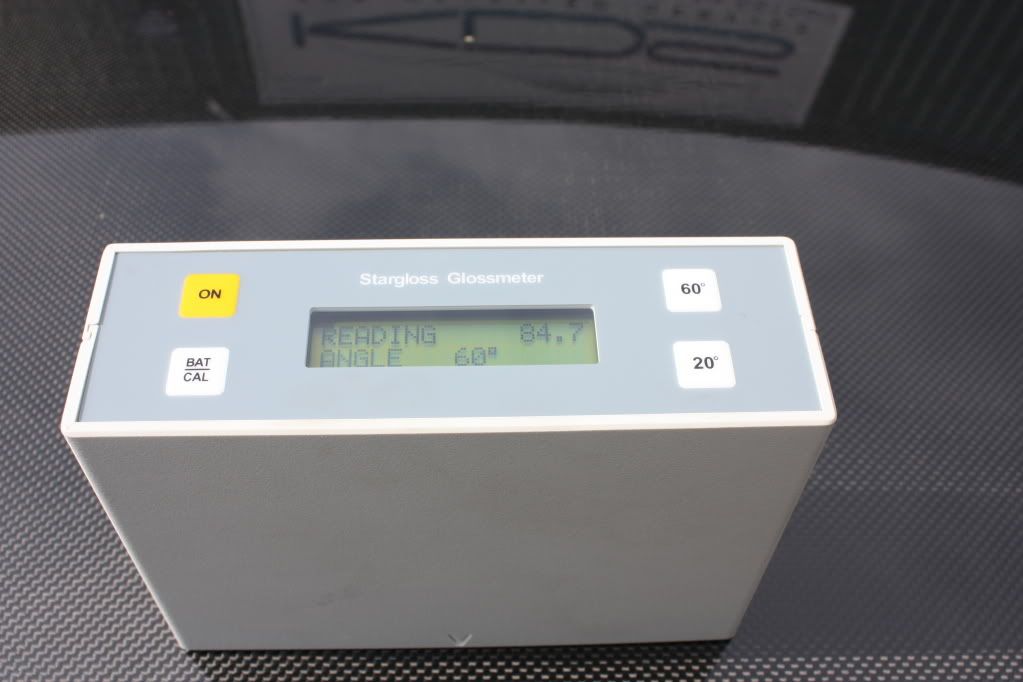
rear bumper
boot lid
bonnet

orange peel before wet sanding
I will load in small sections just in case computer crashes halfway through !
From the start
As dropped of by J-P
Dye transfer from blue Jeans on the leather seat's
Gloss readings before any wash process
roof
rear bumper
boot lid
bonnet
orange peel before wet sanding
I will load in small sections just in case computer crashes halfway through !
Edited by kds keltec on Friday 1st May 10:32
Edited by kds keltec on Friday 6th November 18:51
next
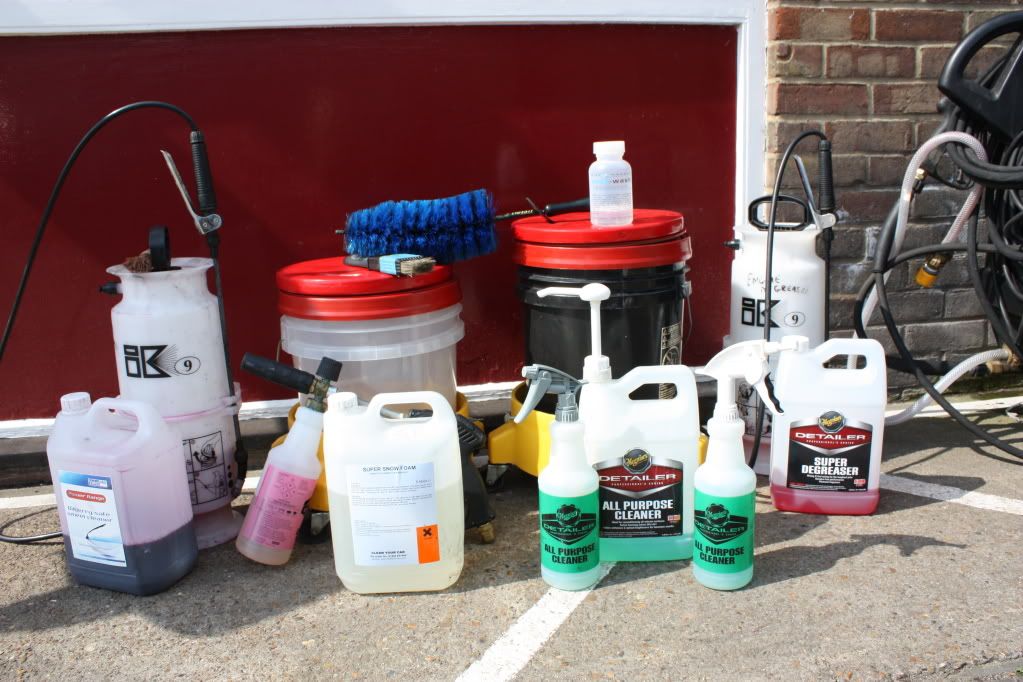
some products used to wash car ready for detailing process
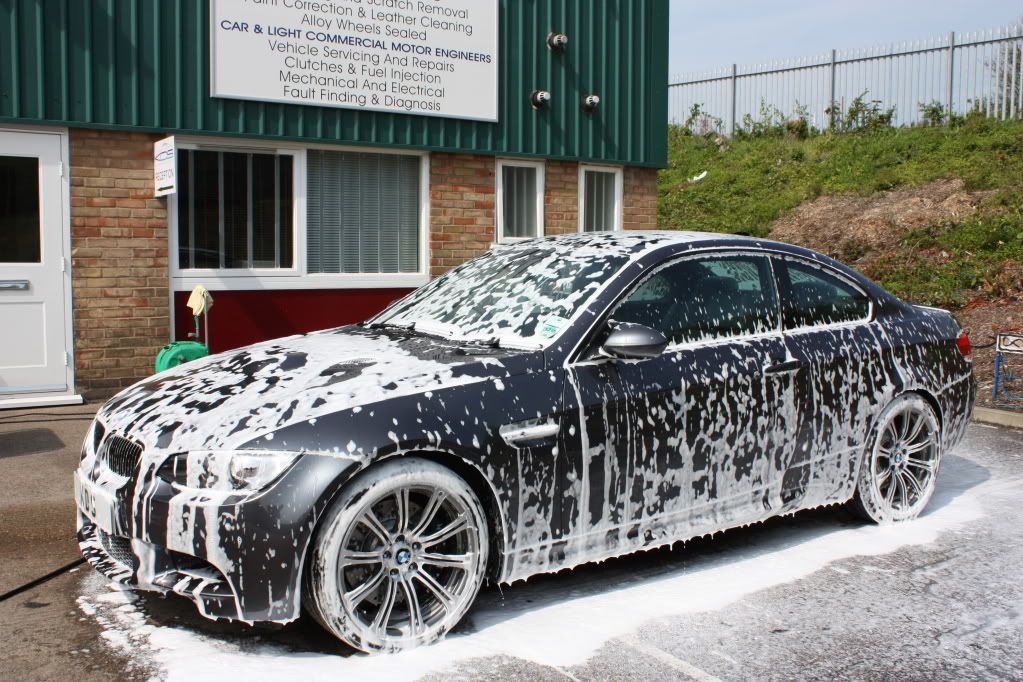
First wash down with snow foam
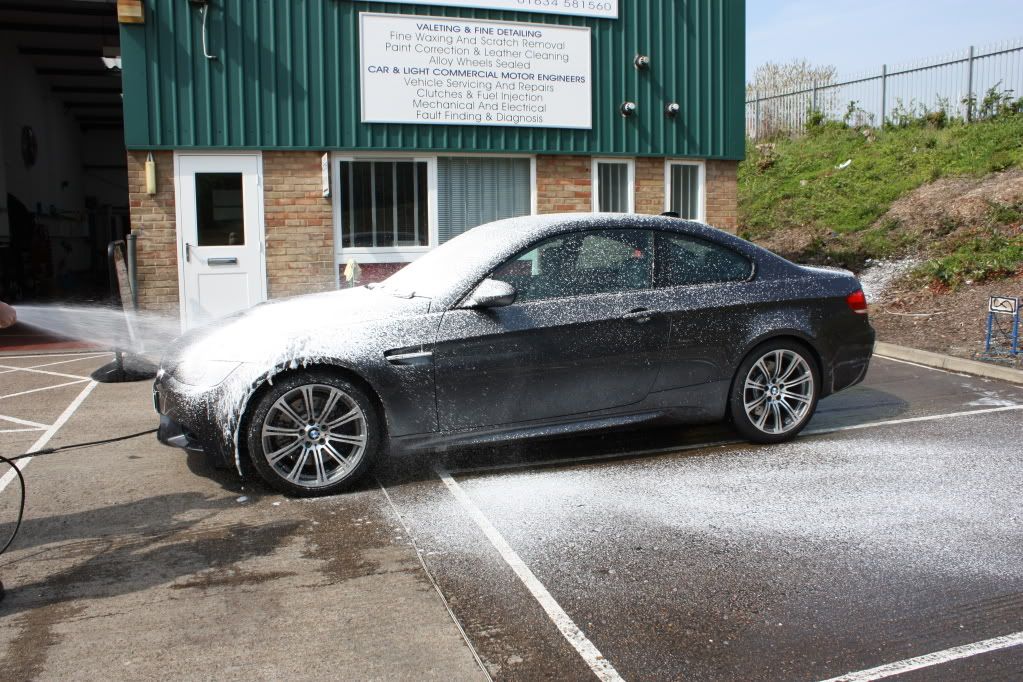
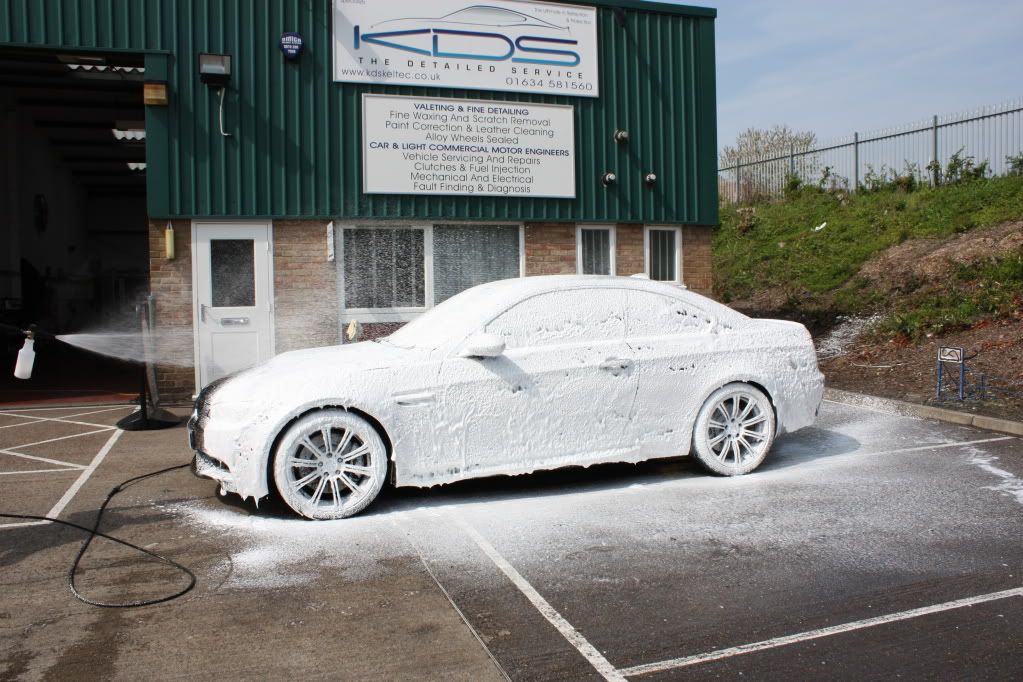
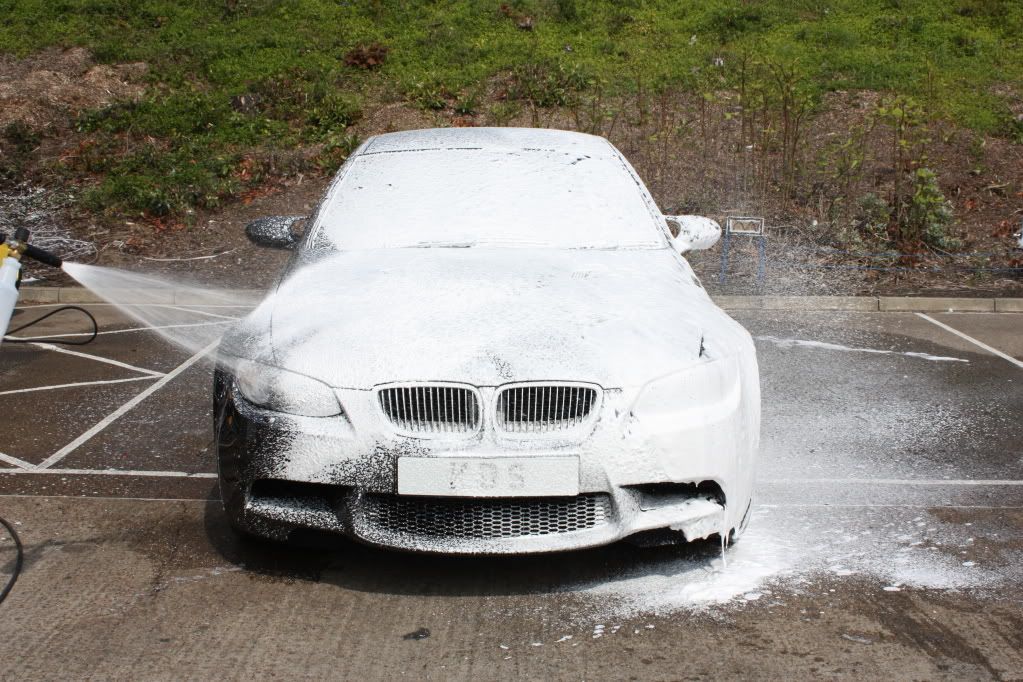
This is after leaving the snowfoam to dwell for 5 minutes
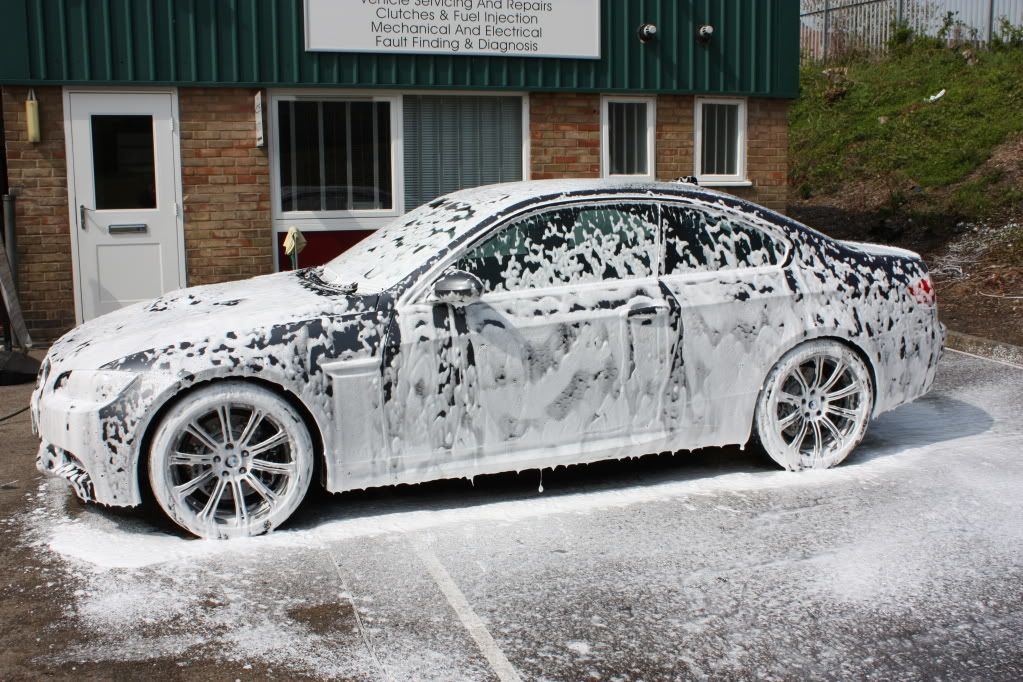
after 7 minutes
complete car was rinsed, then all edges washed with all purpose cleaner and degreaser around grills and badges etc .
Then clean wheels with acid free alloy wheel cleaner .
Then another wash with snowfoam
one final rinse of complete car , then move car indoors and blow dry car with compressed air and drying towels .
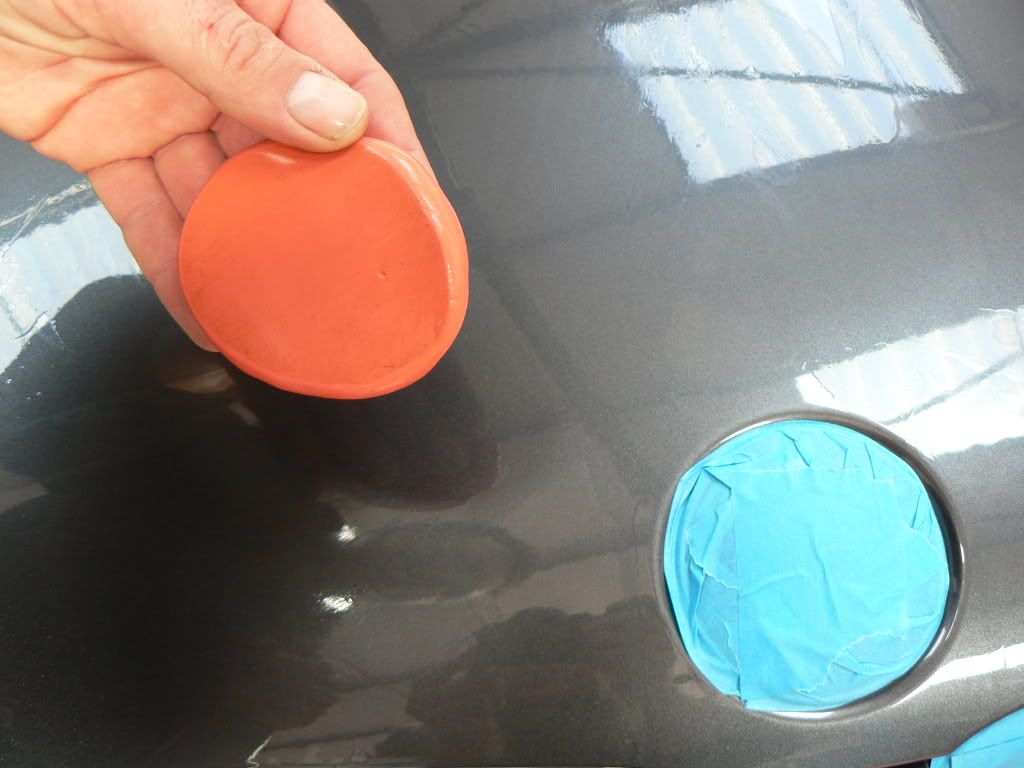
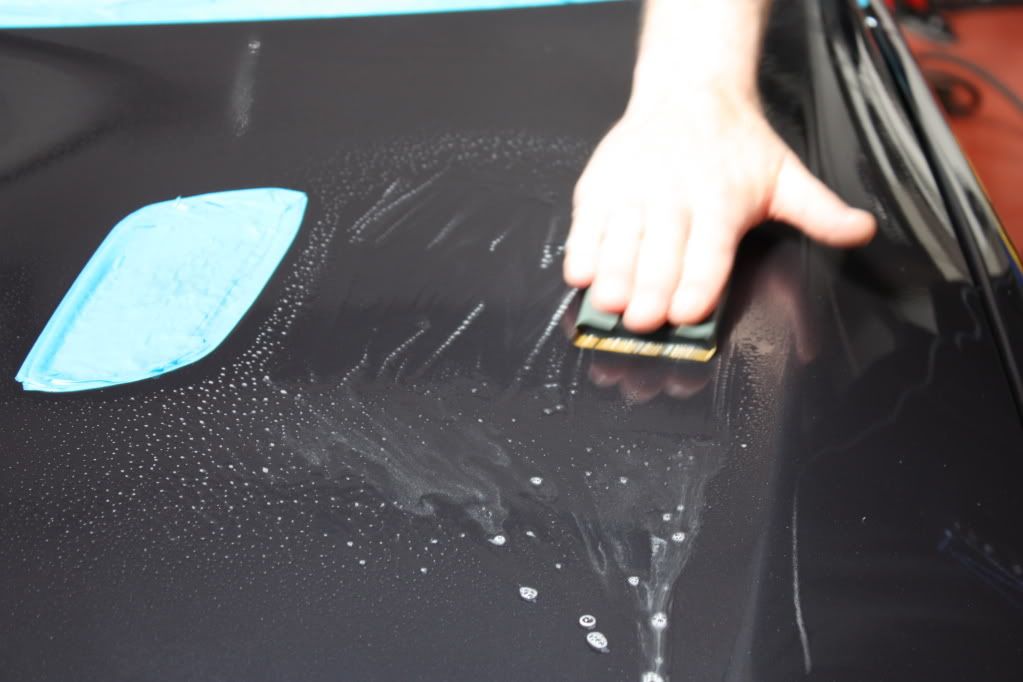
The clay section next
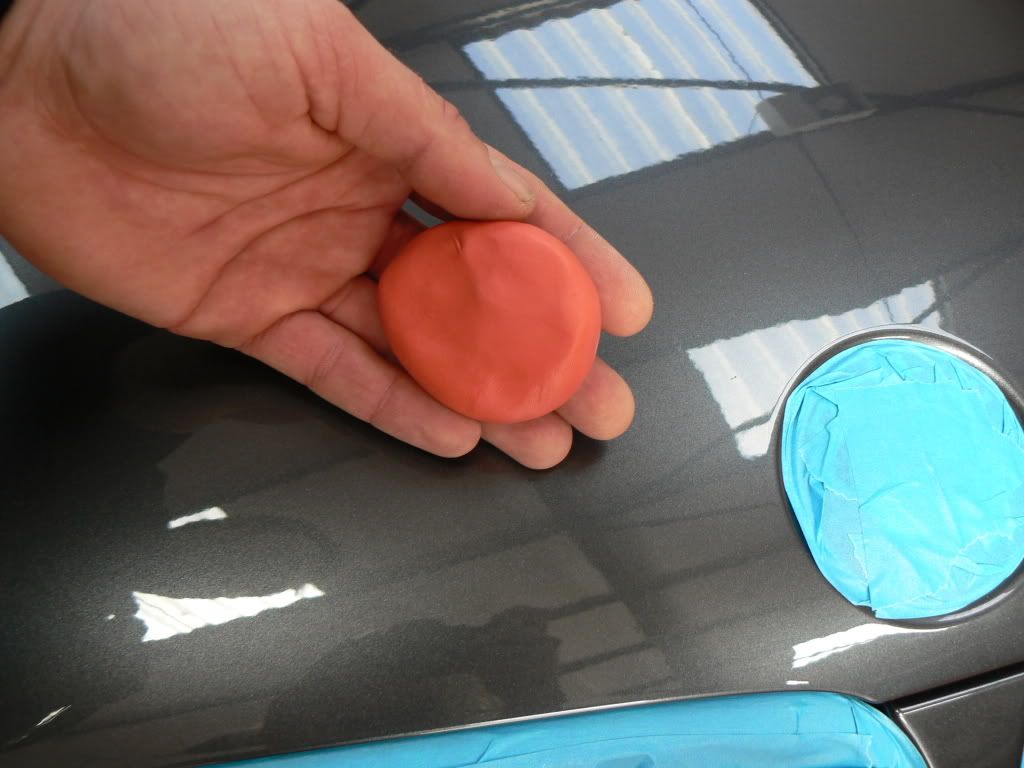
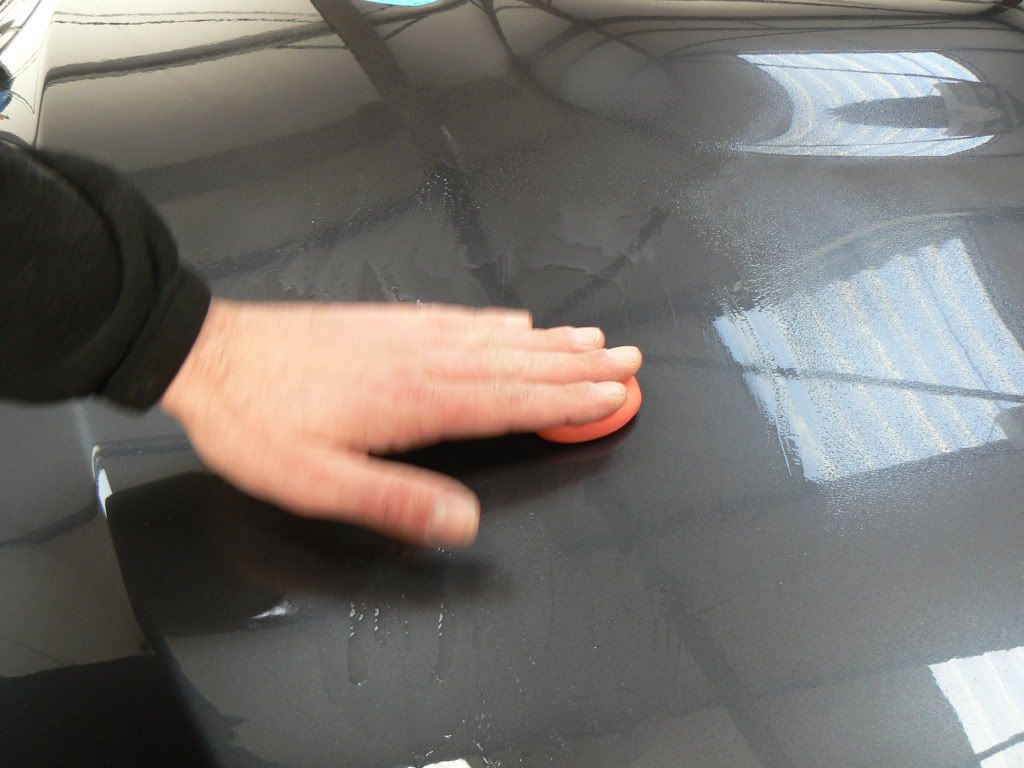
Was surprised too find not much debris compared to must cars i detail
Car was drove back outside to have a very close look at the interior mainly the leather , the leather dye transfer cleaned off ok using standard leather cleaning products .
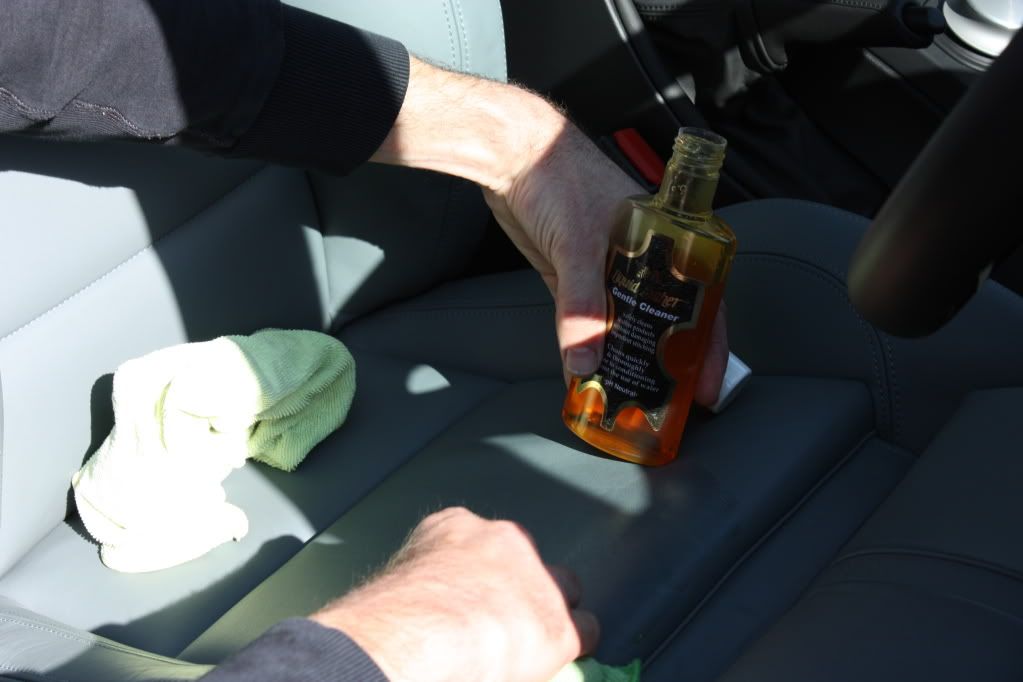
Here you can see the blue dye on the cleaning cloth

some products used to wash car ready for detailing process
First wash down with snow foam
This is after leaving the snowfoam to dwell for 5 minutes
after 7 minutes
complete car was rinsed, then all edges washed with all purpose cleaner and degreaser around grills and badges etc .
Then clean wheels with acid free alloy wheel cleaner .
Then another wash with snowfoam
one final rinse of complete car , then move car indoors and blow dry car with compressed air and drying towels .
The clay section next
Was surprised too find not much debris compared to must cars i detail
Car was drove back outside to have a very close look at the interior mainly the leather , the leather dye transfer cleaned off ok using standard leather cleaning products .
Here you can see the blue dye on the cleaning cloth
Edited by kds keltec on Friday 6th November 19:08
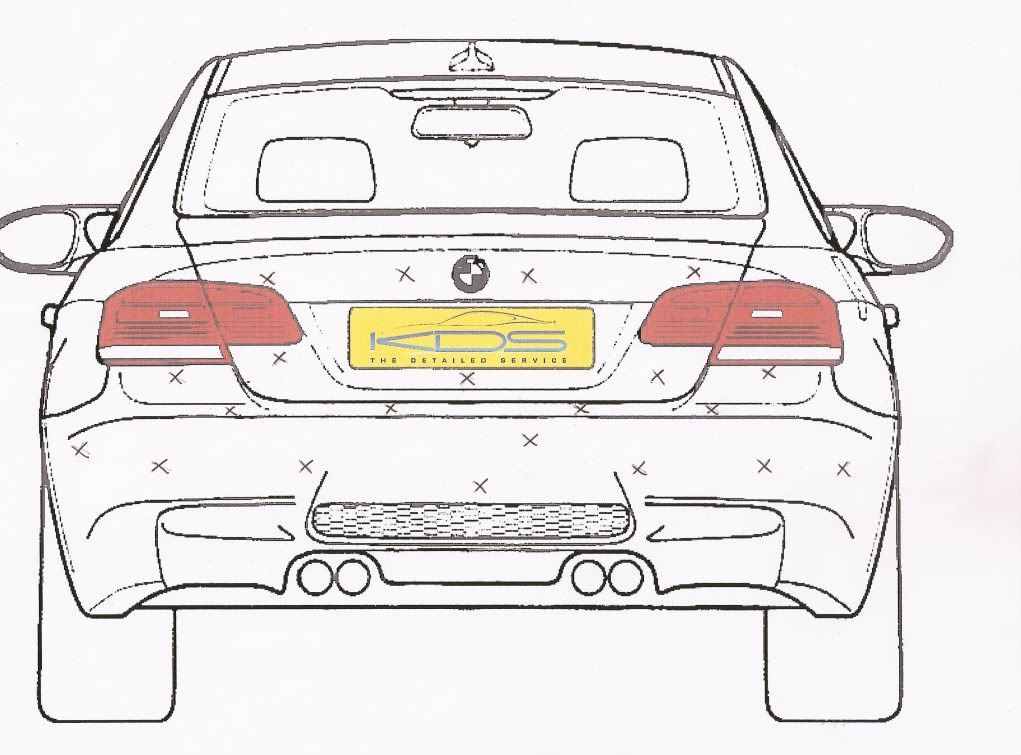
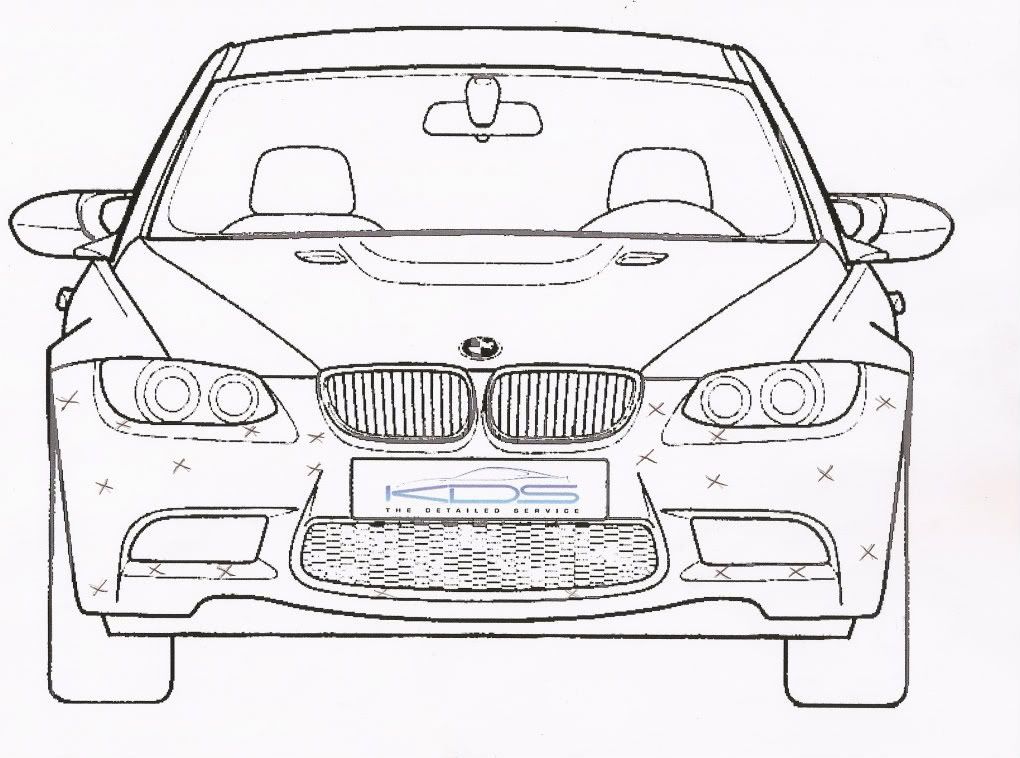
Now getting into the reason you pay to have a professional detail , as well as the equipment needed .
First thing is too inspect the paint for flaws and but more important is to measure the paint depth to build up a map of the car's varing paint depth giving the detailer the information needed to be confident the car can have the wet sand and machine polish process.
The measurments where taken all over the cars panels to gain an average figure .
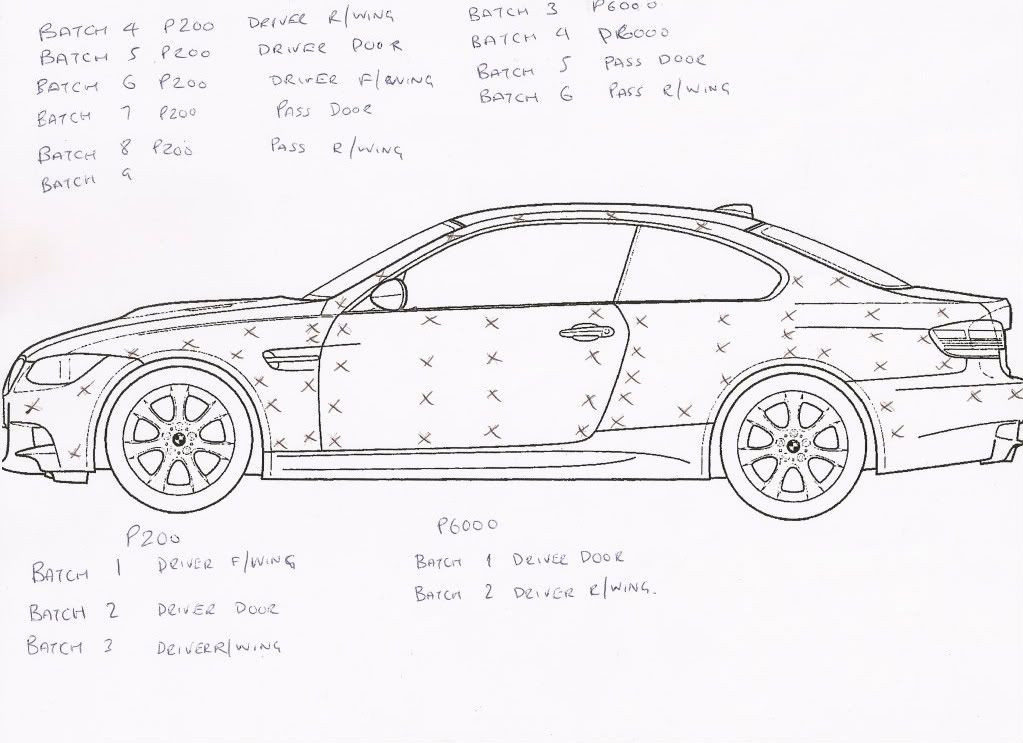
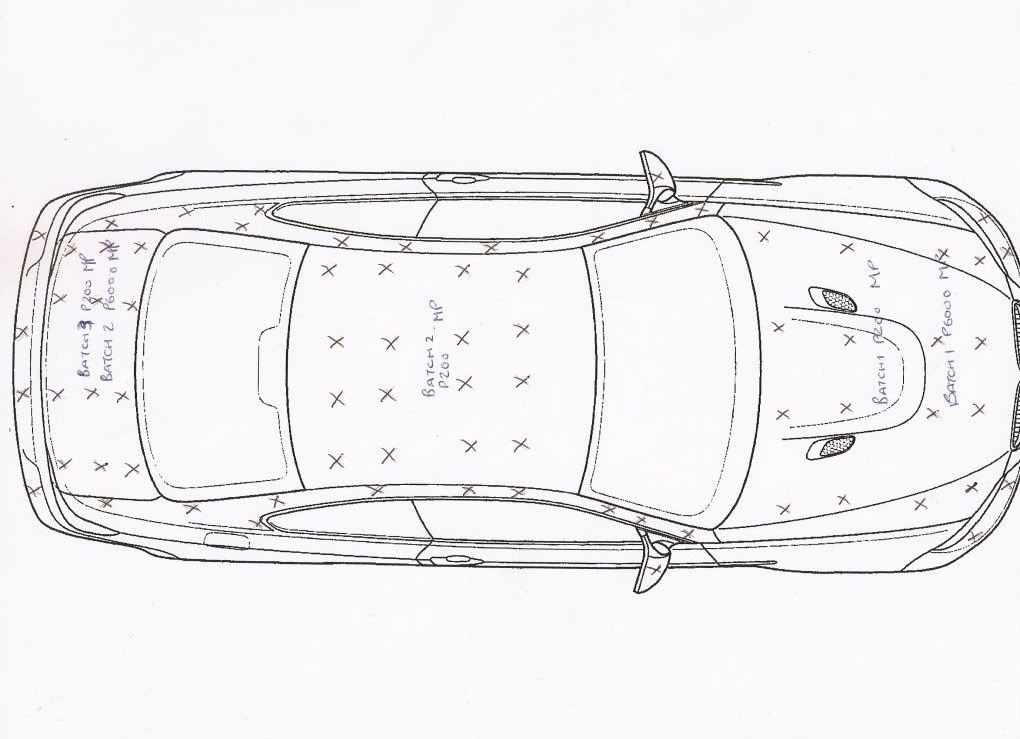
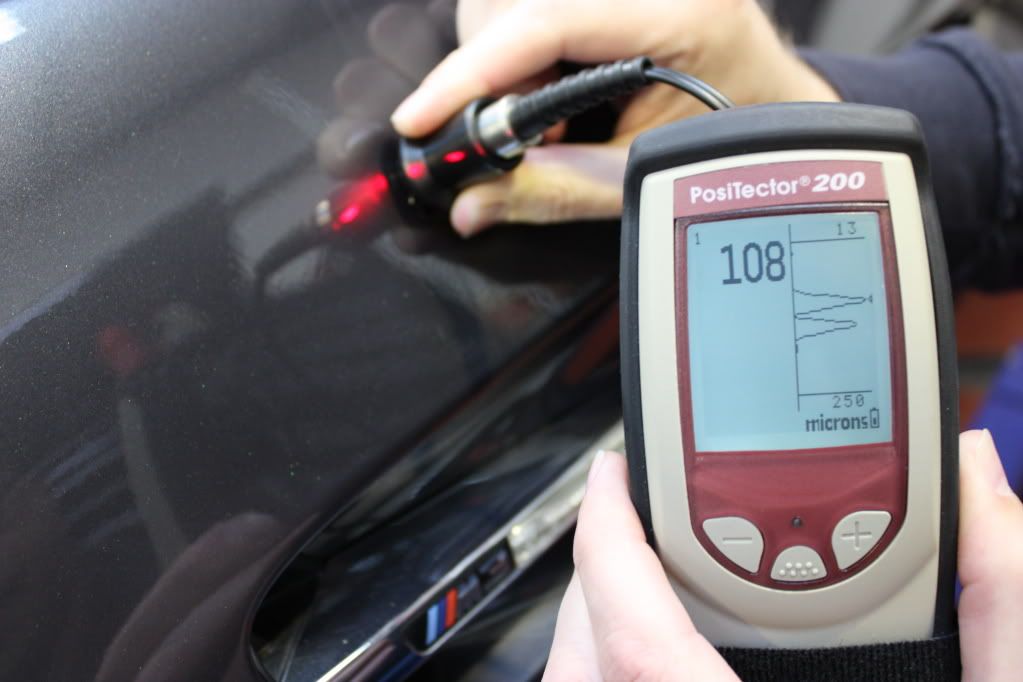
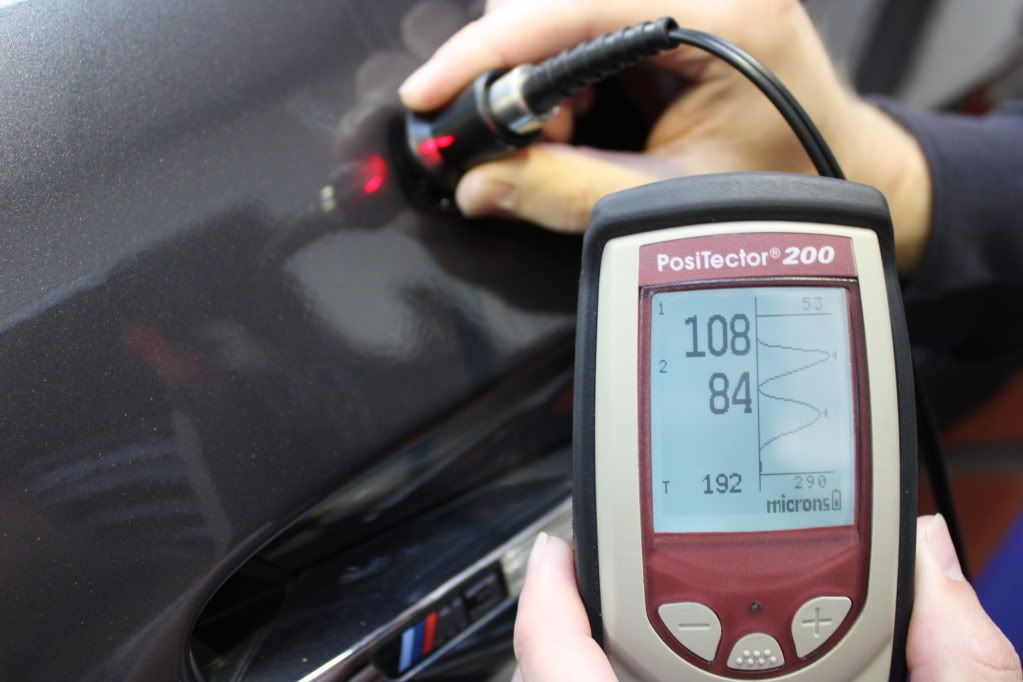
The readings are taken by using 2 different methods of paint depth gauges , one measures on Ferrous and non Ferrous metals only and the total paint depth only
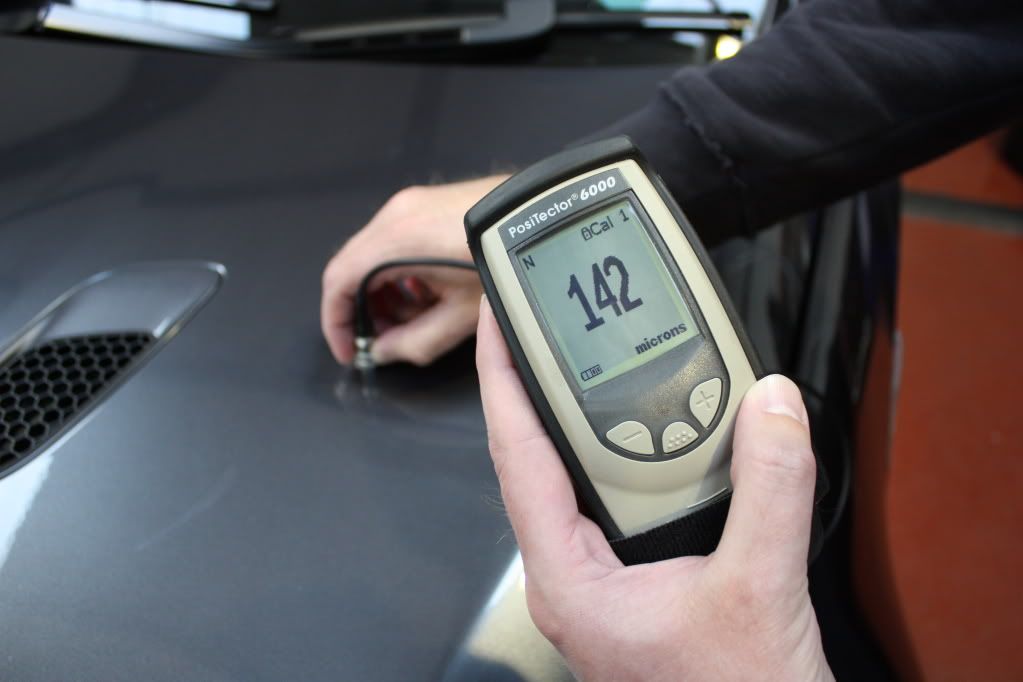
If you only have this gauge then the best way to work out the amount of top coat (laquer) there is , is to measure an area under the bonnet with no top coat take a reading then subtract that from the reading on the outside of the car this would give you a rough guide to the amount of top coat , or you can measure in the door shuts too where there would be one coat of laquer again to gain an idea of how much top coat is on the car !
This gauge measures using ultrasound which can be used on all surfaces as well as measuring in layers too ,

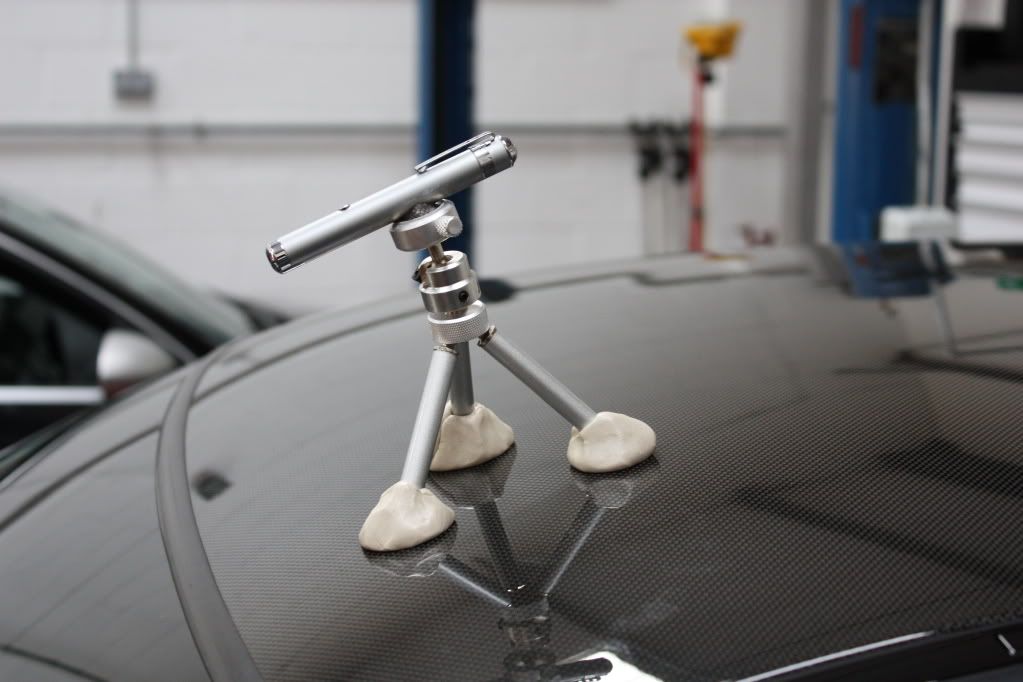
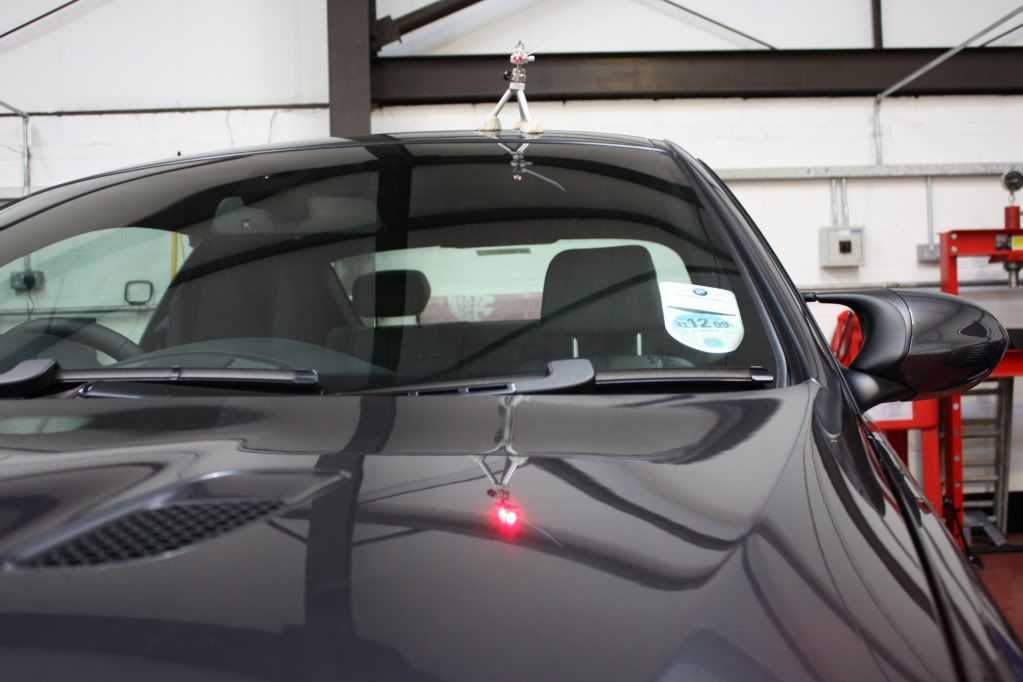
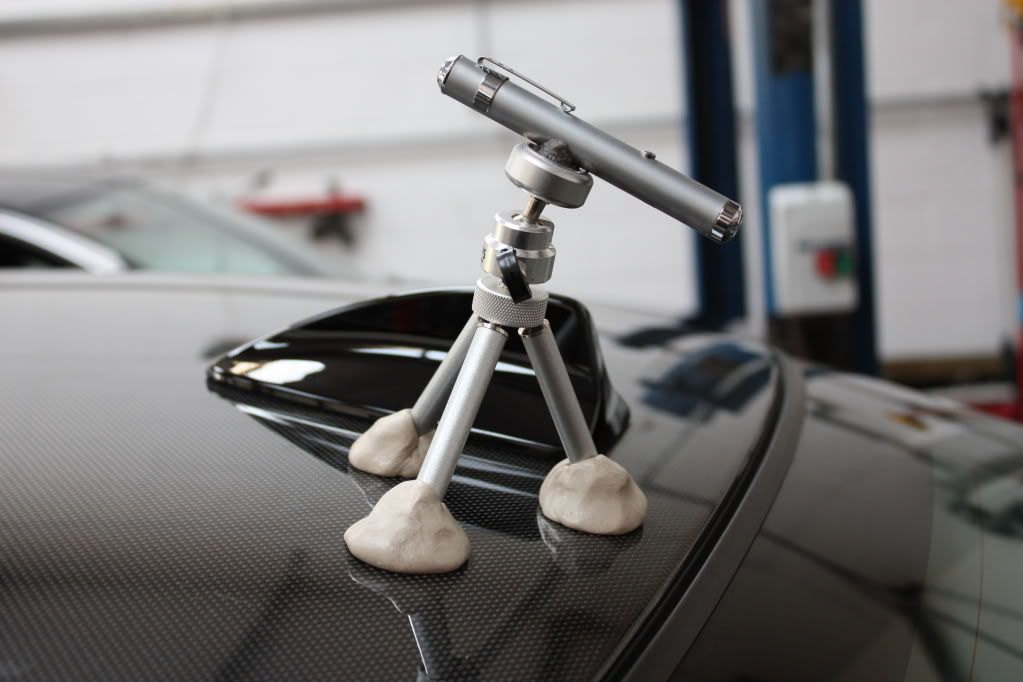
Because the paint depth will vary over a very small area measured the best method of repeated readings is to use this method of marking the panels ,
A mim tripod holding a laser pointer to mark the bonnet
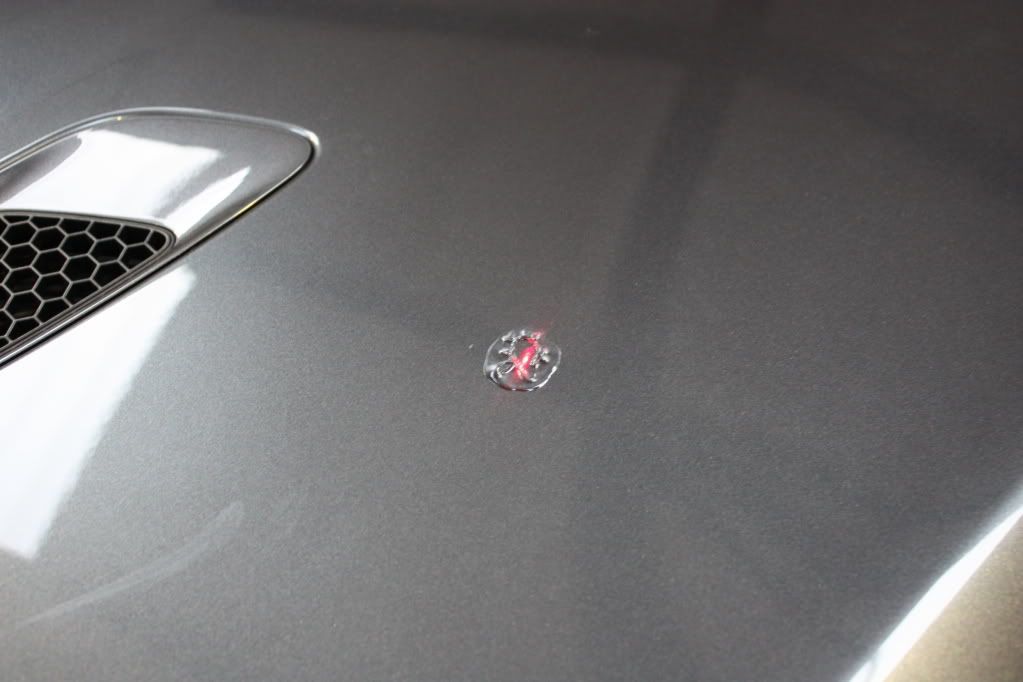
mark where the ultrasound gel has been used to take a reading
and the same for the boot

The wing was measured with a large tripod using this method
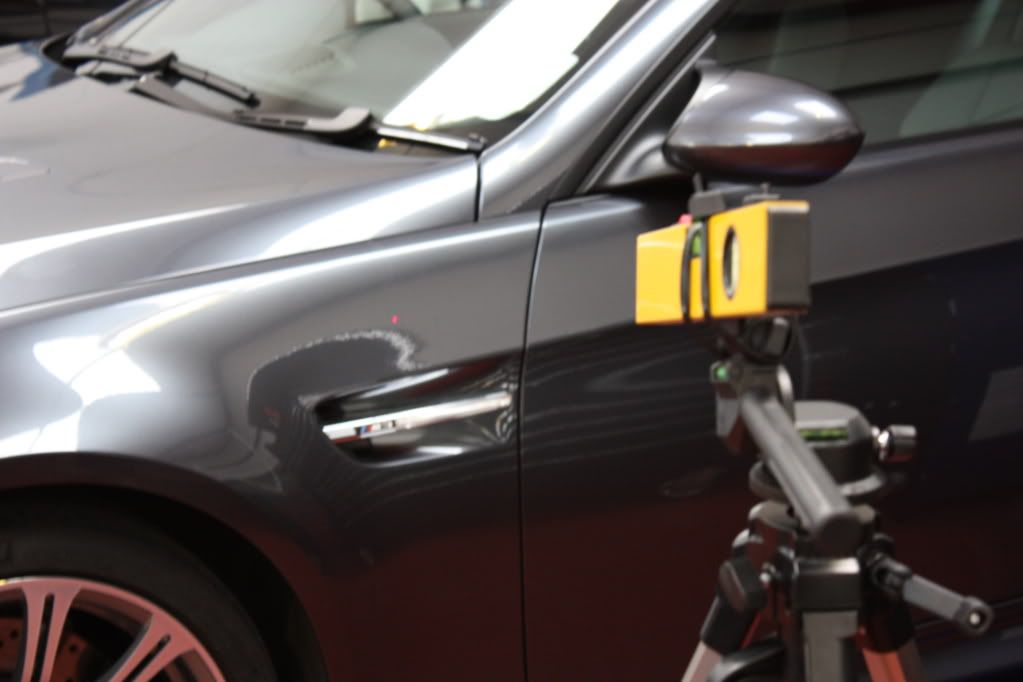
Here is the wing reading just the top coat
108 microns of laquer (which is very thick )
here is measuring 2 layers base colour coat and top coat
First thing is too inspect the paint for flaws and but more important is to measure the paint depth to build up a map of the car's varing paint depth giving the detailer the information needed to be confident the car can have the wet sand and machine polish process.
The measurments where taken all over the cars panels to gain an average figure .
The readings are taken by using 2 different methods of paint depth gauges , one measures on Ferrous and non Ferrous metals only and the total paint depth only
If you only have this gauge then the best way to work out the amount of top coat (laquer) there is , is to measure an area under the bonnet with no top coat take a reading then subtract that from the reading on the outside of the car this would give you a rough guide to the amount of top coat , or you can measure in the door shuts too where there would be one coat of laquer again to gain an idea of how much top coat is on the car !
This gauge measures using ultrasound which can be used on all surfaces as well as measuring in layers too ,
Because the paint depth will vary over a very small area measured the best method of repeated readings is to use this method of marking the panels ,
A mim tripod holding a laser pointer to mark the bonnet
mark where the ultrasound gel has been used to take a reading
and the same for the boot
The wing was measured with a large tripod using this method
Here is the wing reading just the top coat
108 microns of laquer (which is very thick )
here is measuring 2 layers base colour coat and top coat
Edited by kds keltec on Friday 6th November 19:11
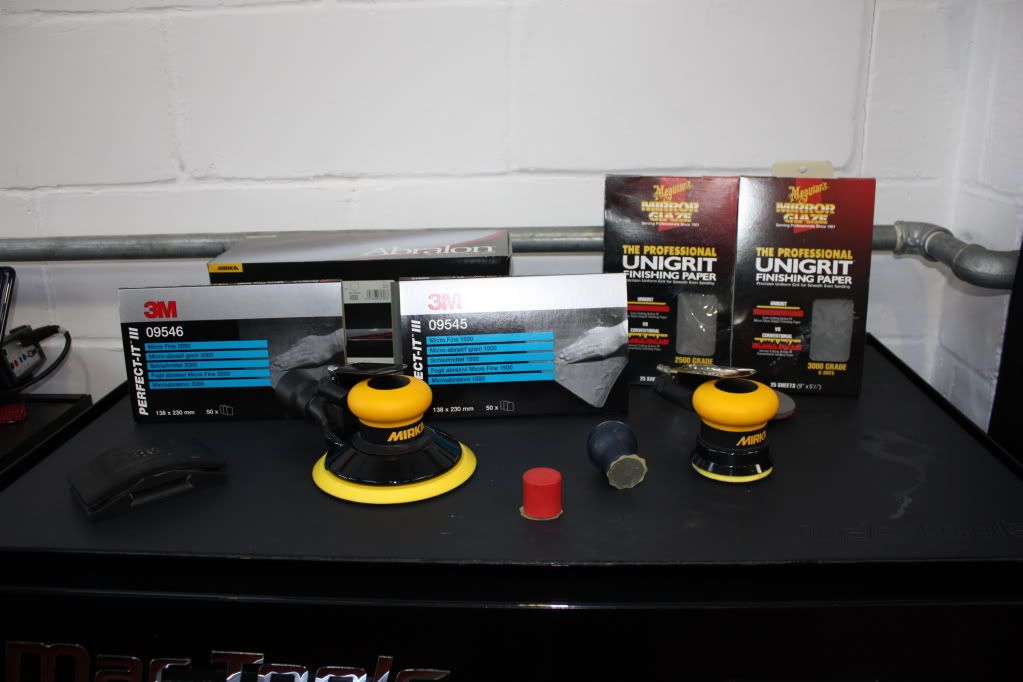
Now to the wet sanding stage
some of the equipment and materials used for wet sanding
I found the paint too be very hard , i would normally wet sand by hand starting with 1500 grit wet and dry moving through finer grades , but this was so hard that started with 1200 grit , here is a video showing how hard the paint is after using 1200 grit by hand
http://www.youtube.com/watch?v=puLhq93lzpg
here is using a machine for wet sanding
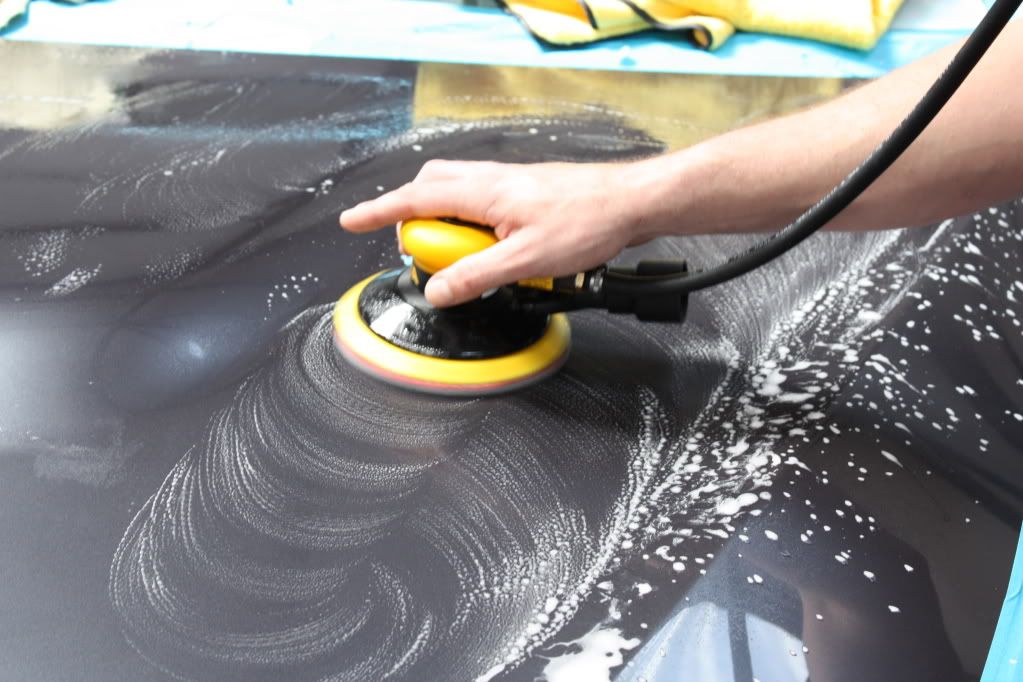
again with 1200 grit and did not touch the paint really
http://www.youtube.com/watch?v=z20jCP4ANxk
After days of work in the first rough sand the car ends up looking like this , and this is when the customer has kittens if they see their car ,

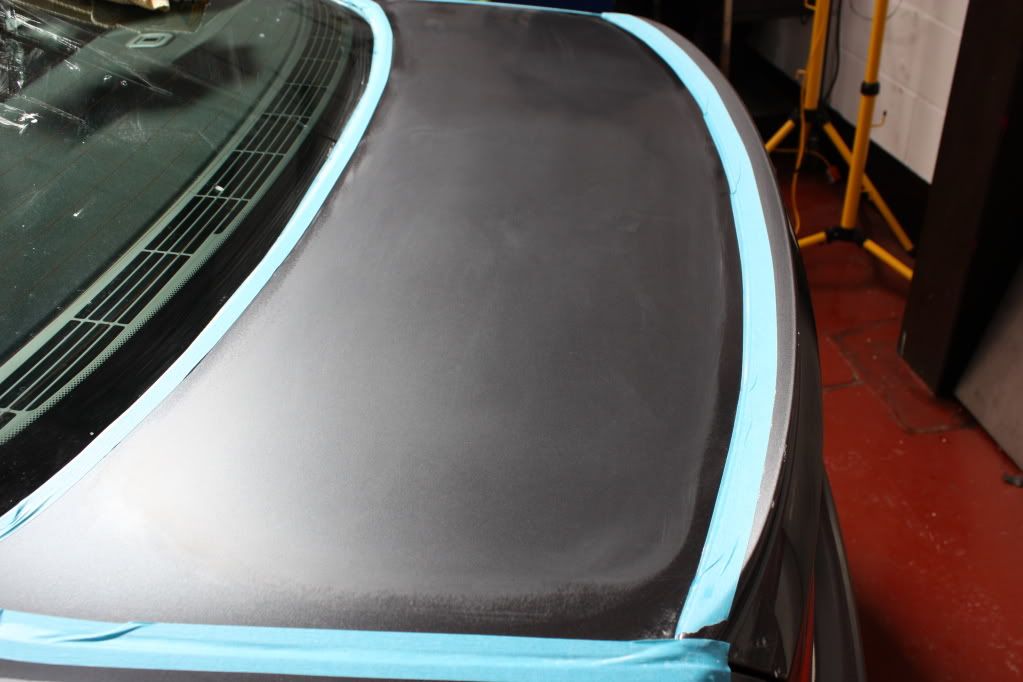
The car was sanded in 1200, 1500 , 2000 , 4000 grit .
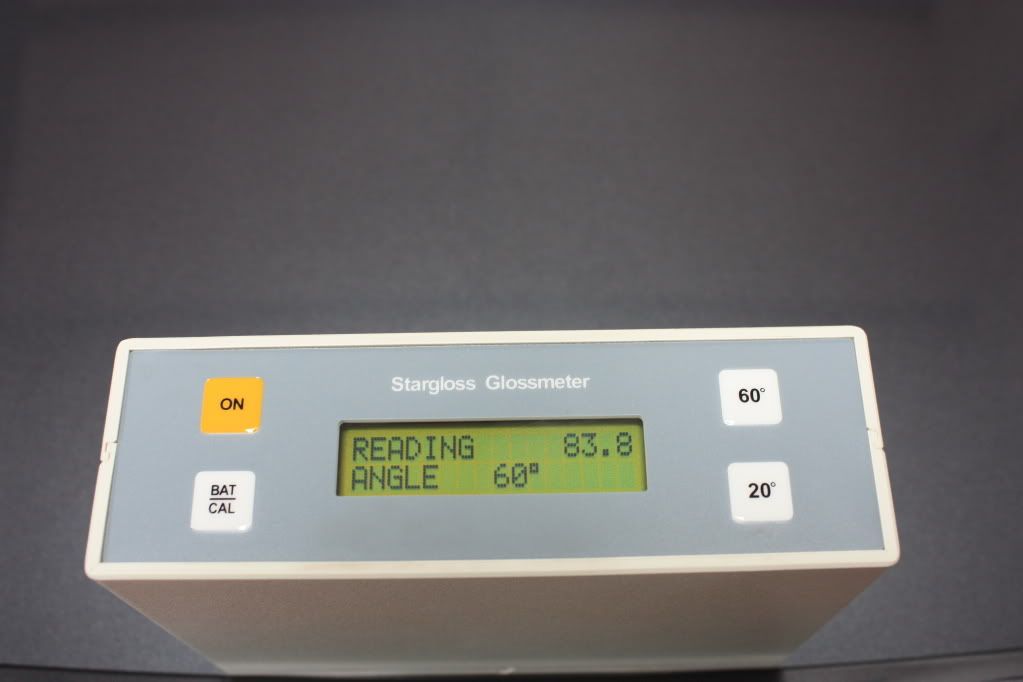
before the machine polishing stage started i took more reading round the entire car to show how much material has been remove to lose the orange peel ,
bonnet before reading again
bonnet after wet sanding readings
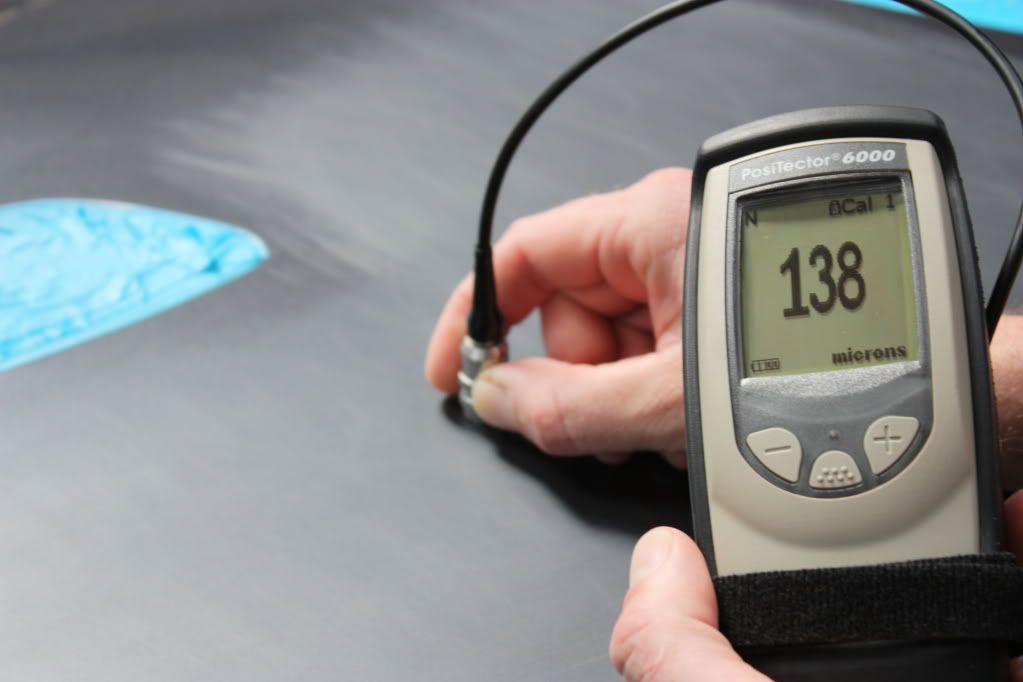
bonnet after machine polish final stage
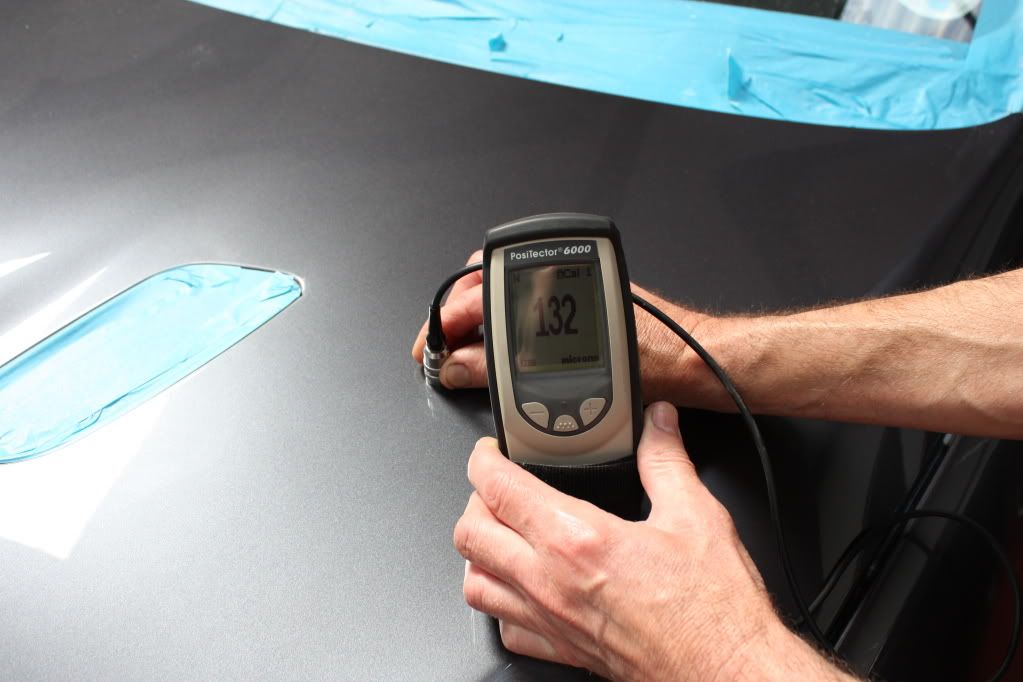
100 microns in depth is the same as an expensive sheet of A4 paper , so a removal of 10 microns of top coat was needed on that measurment to get perfect flat paint , which really shows the small amount of materail that was removed .
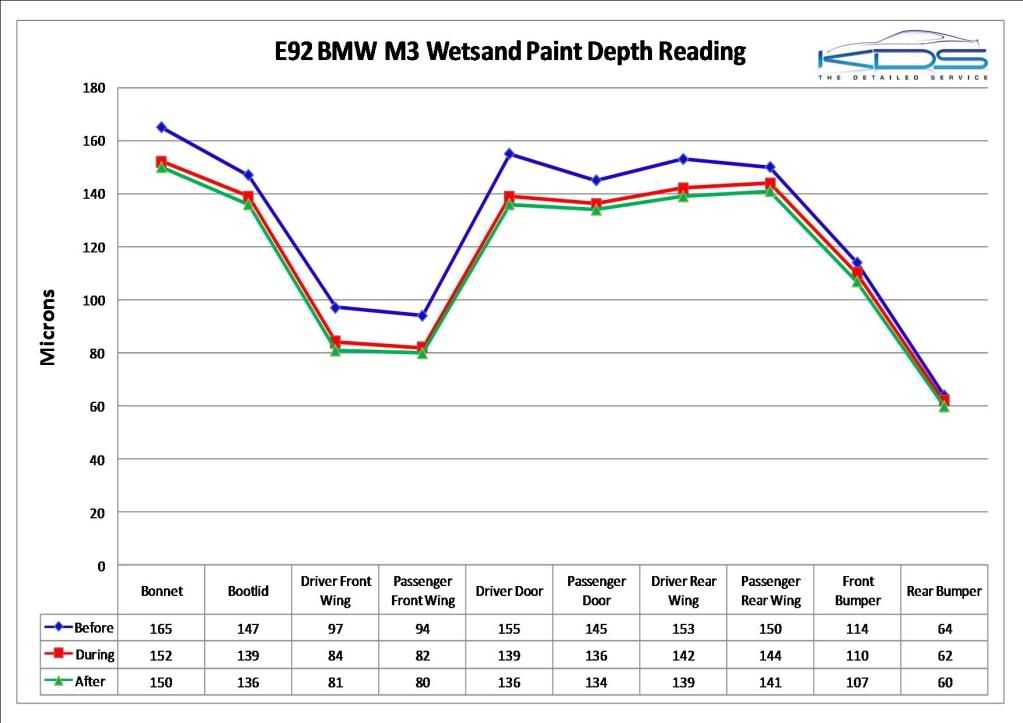
here shows the average amount of material taken from each panel to get no orange peel , you will notice that the rear bumper had a much lower reading than the rest of the car so was machined polished only not wet sanded , you will also notice that say wing to wing , door to door the after paint depths are closer than before the wet sanding .
some of the equipment and materials used for wet sanding
I found the paint too be very hard , i would normally wet sand by hand starting with 1500 grit wet and dry moving through finer grades , but this was so hard that started with 1200 grit , here is a video showing how hard the paint is after using 1200 grit by hand
http://www.youtube.com/watch?v=puLhq93lzpg
here is using a machine for wet sanding
again with 1200 grit and did not touch the paint really
http://www.youtube.com/watch?v=z20jCP4ANxk
After days of work in the first rough sand the car ends up looking like this , and this is when the customer has kittens if they see their car ,
The car was sanded in 1200, 1500 , 2000 , 4000 grit .
before the machine polishing stage started i took more reading round the entire car to show how much material has been remove to lose the orange peel ,
bonnet before reading again
bonnet after wet sanding readings
bonnet after machine polish final stage
100 microns in depth is the same as an expensive sheet of A4 paper , so a removal of 10 microns of top coat was needed on that measurment to get perfect flat paint , which really shows the small amount of materail that was removed .
here shows the average amount of material taken from each panel to get no orange peel , you will notice that the rear bumper had a much lower reading than the rest of the car so was machined polished only not wet sanded , you will also notice that say wing to wing , door to door the after paint depths are closer than before the wet sanding .
Edited by kds keltec on Friday 6th November 19:13
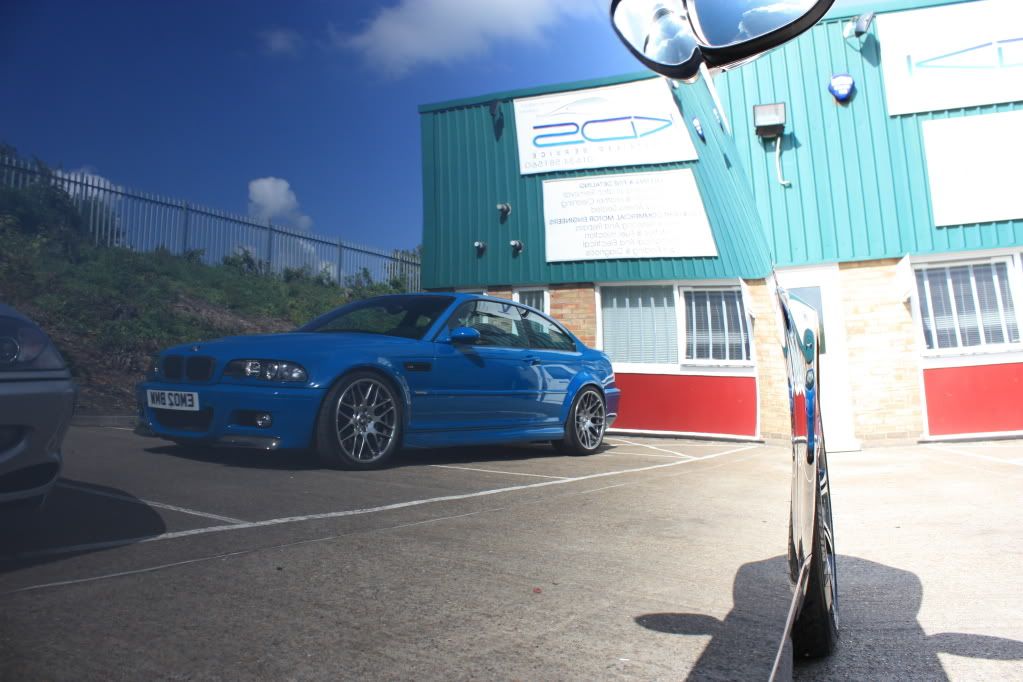
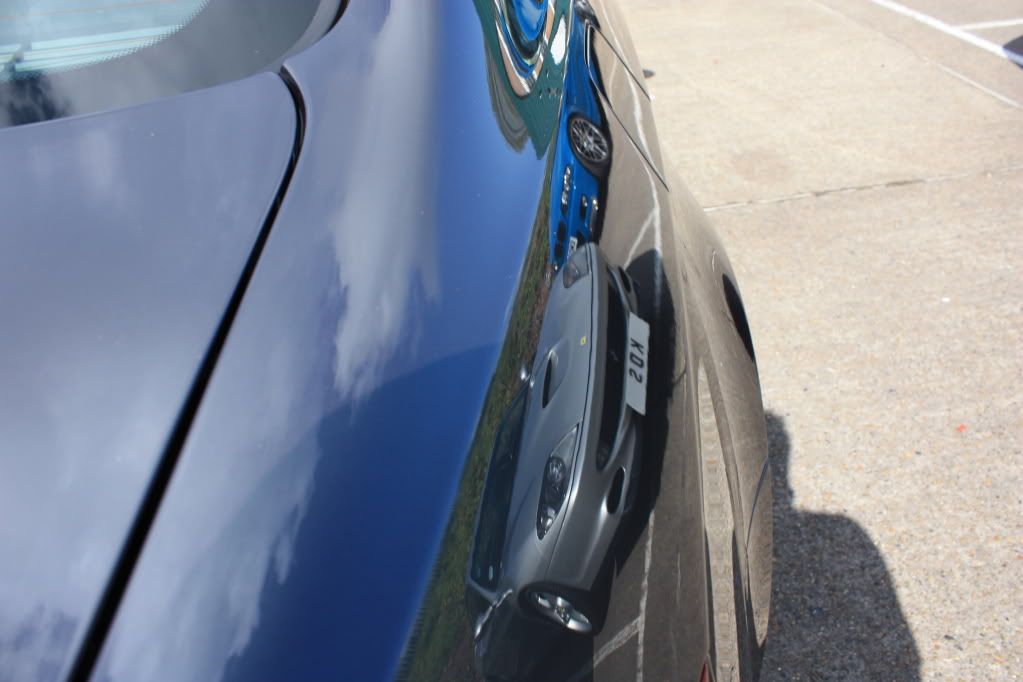
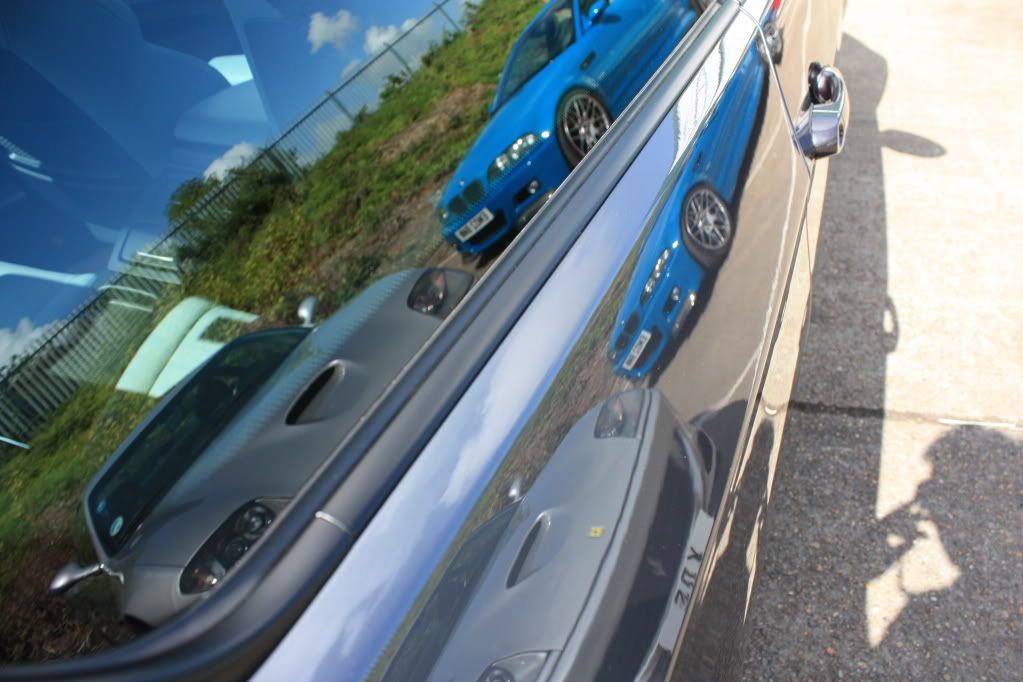
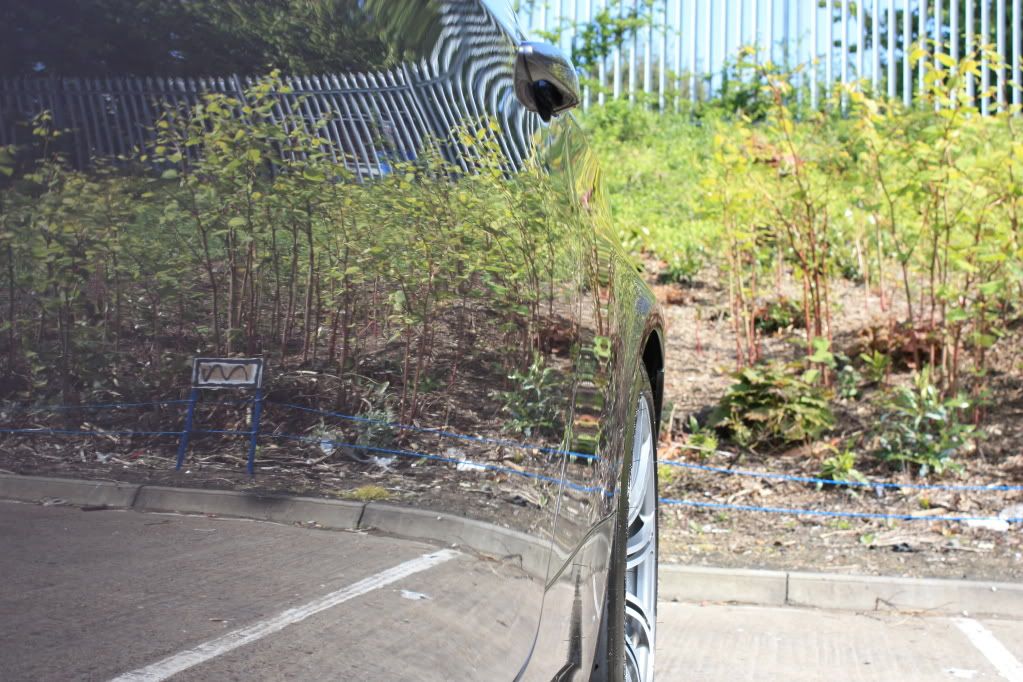
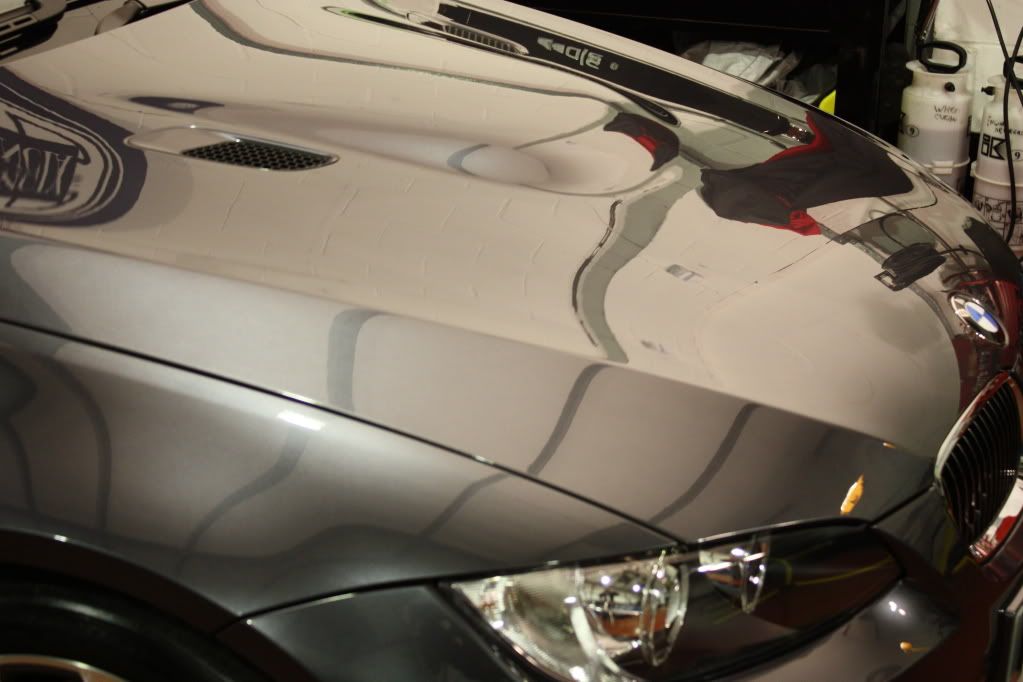
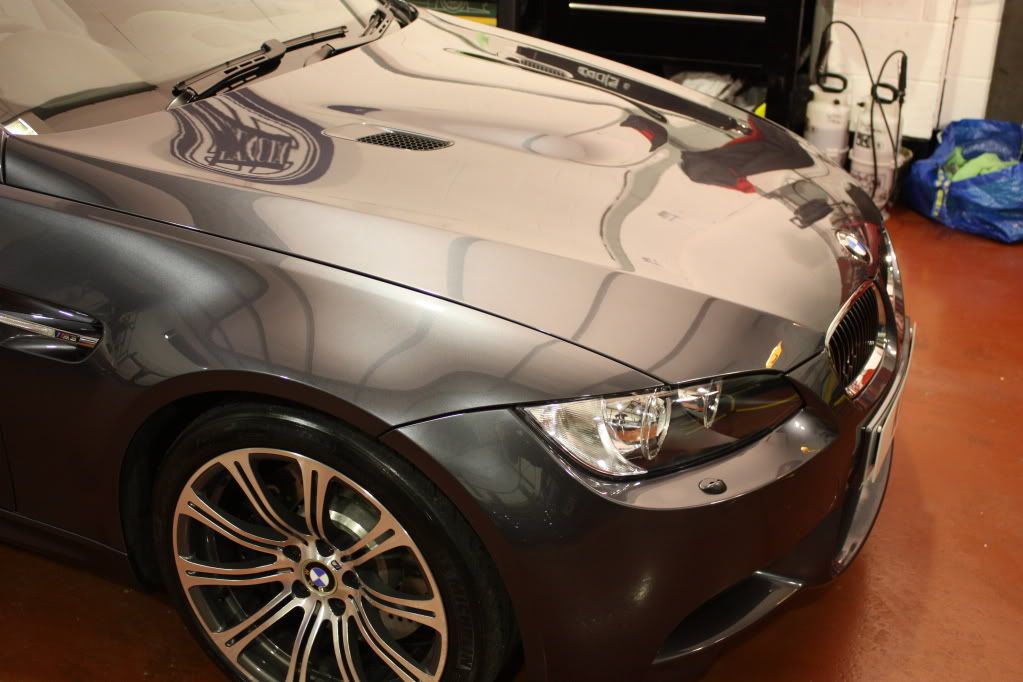
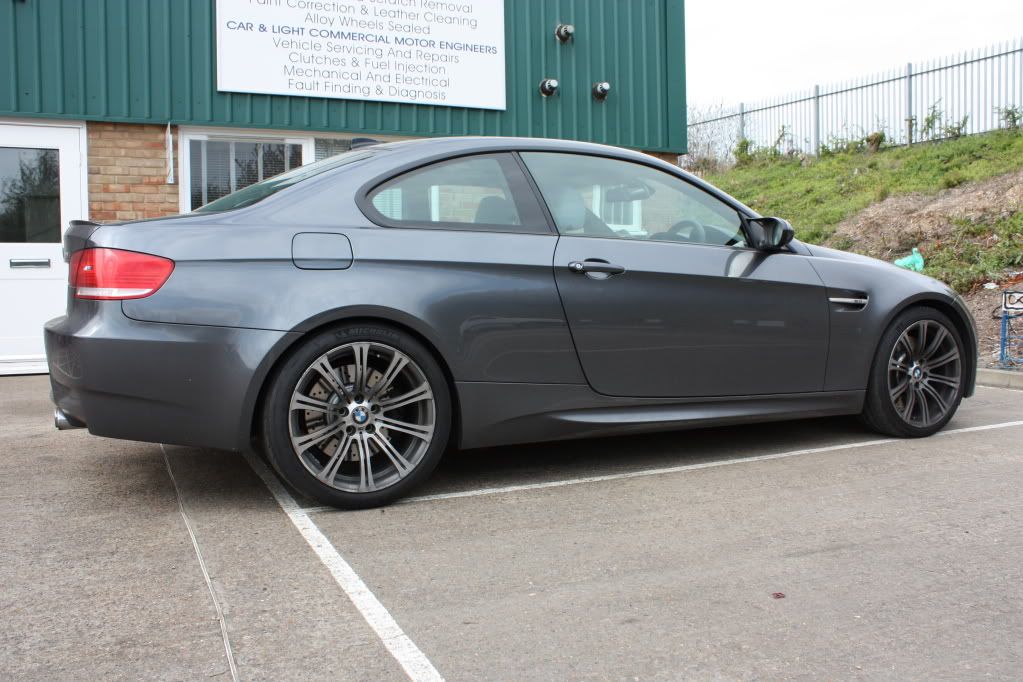
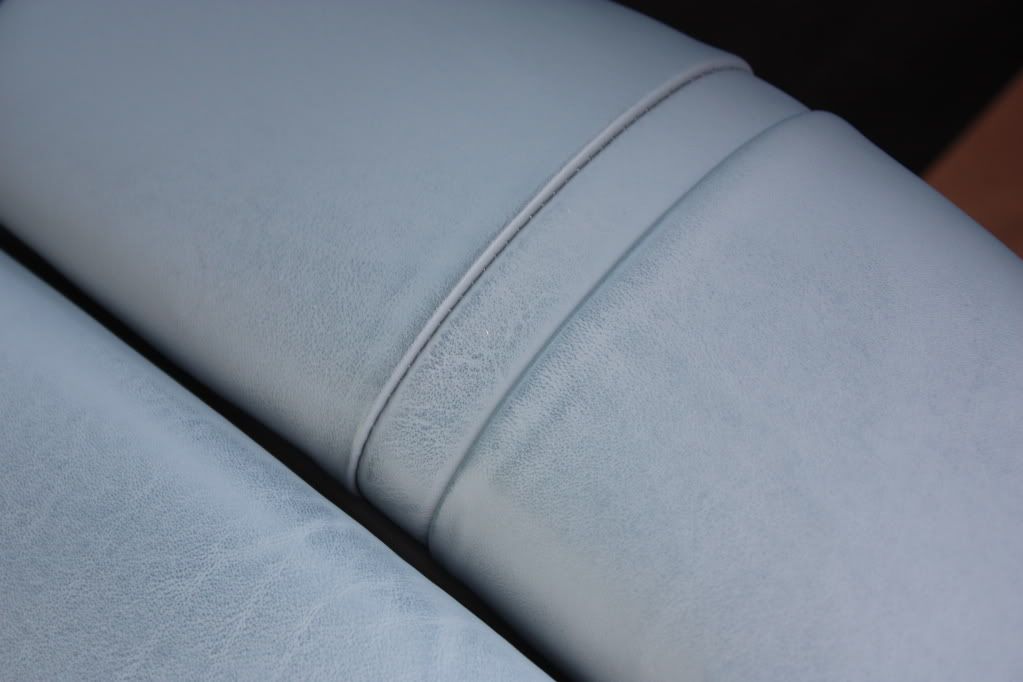
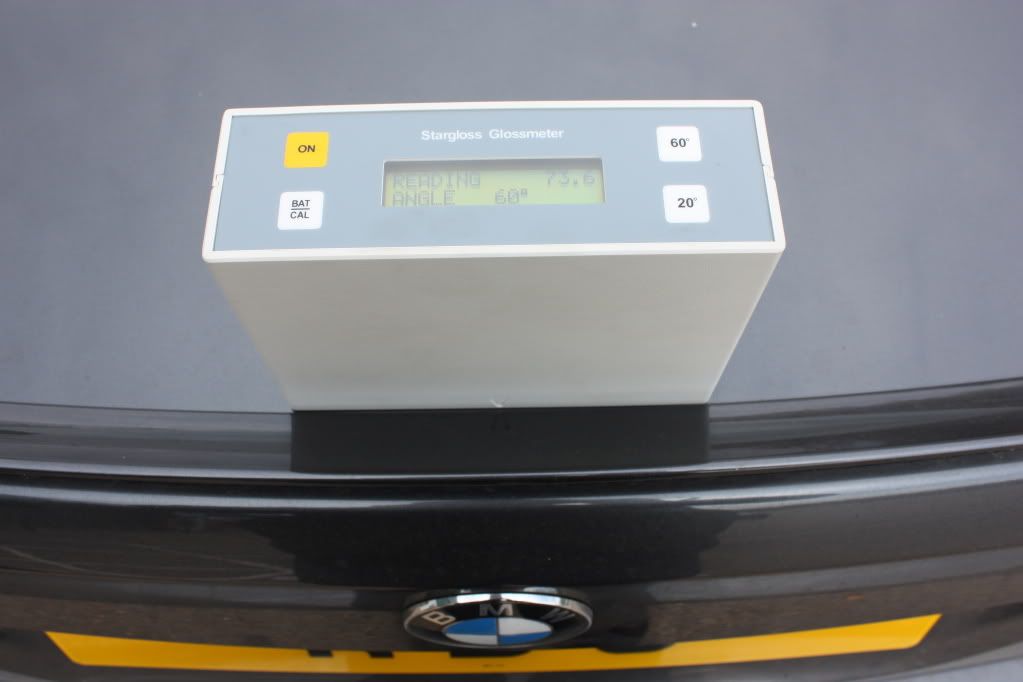
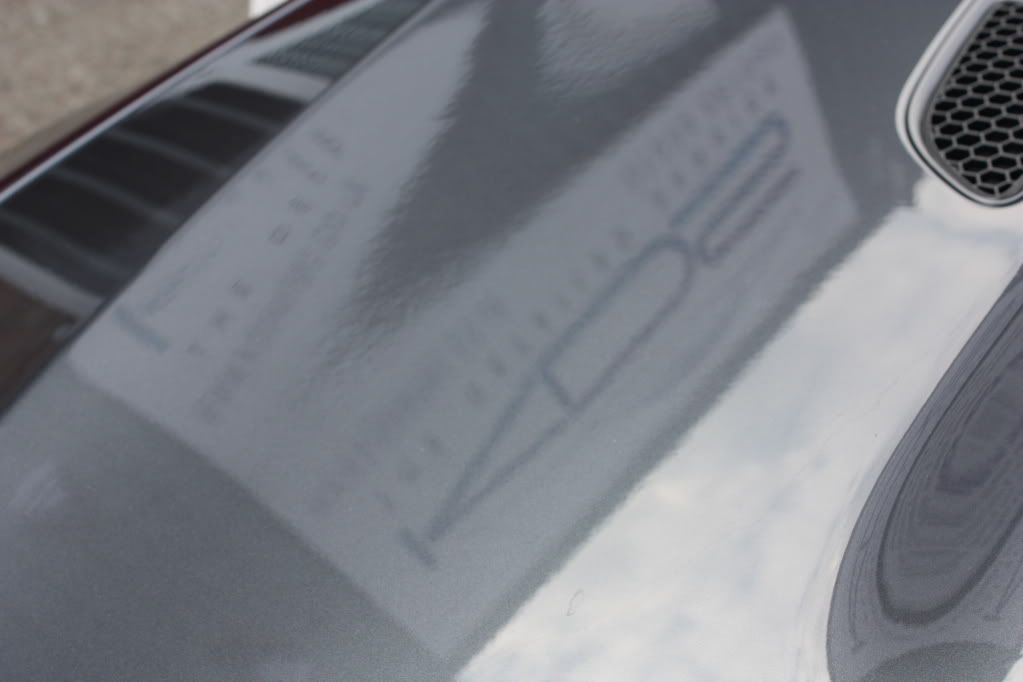
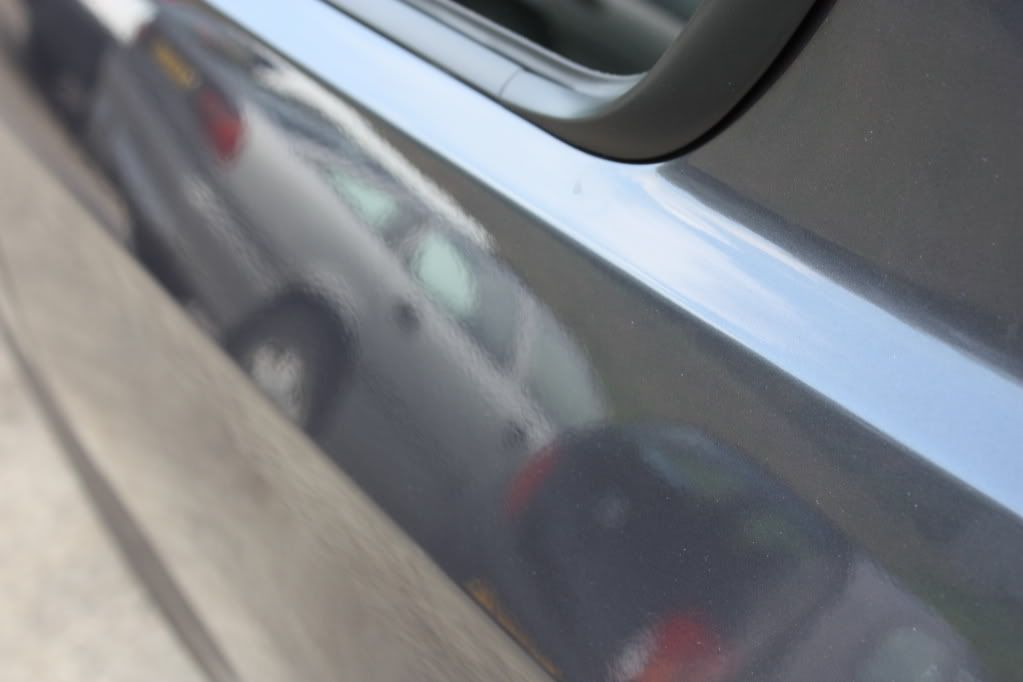
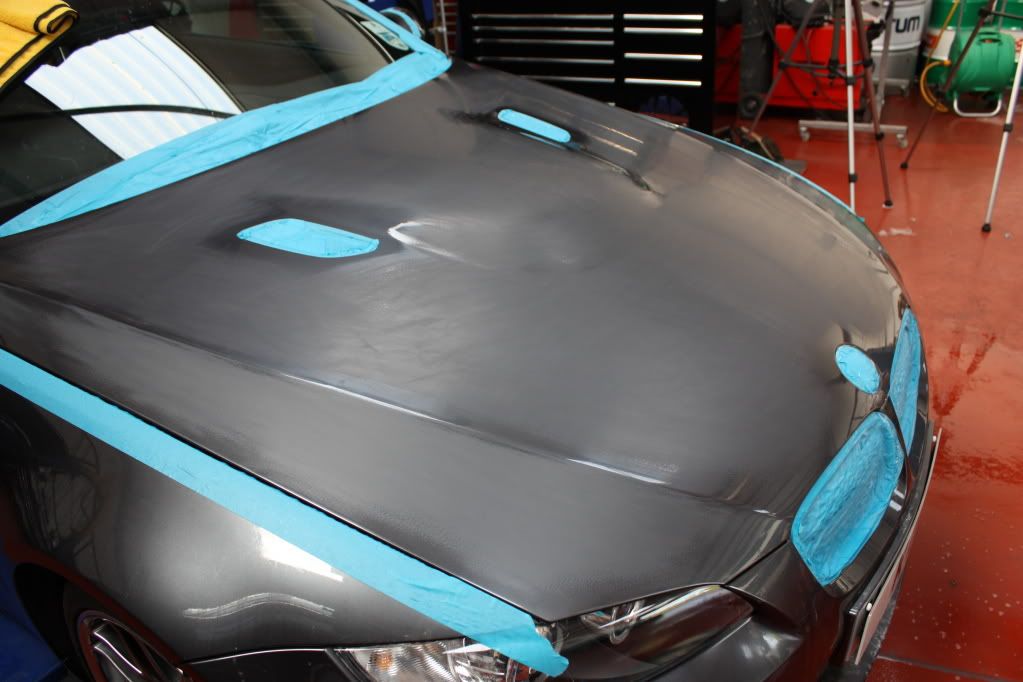
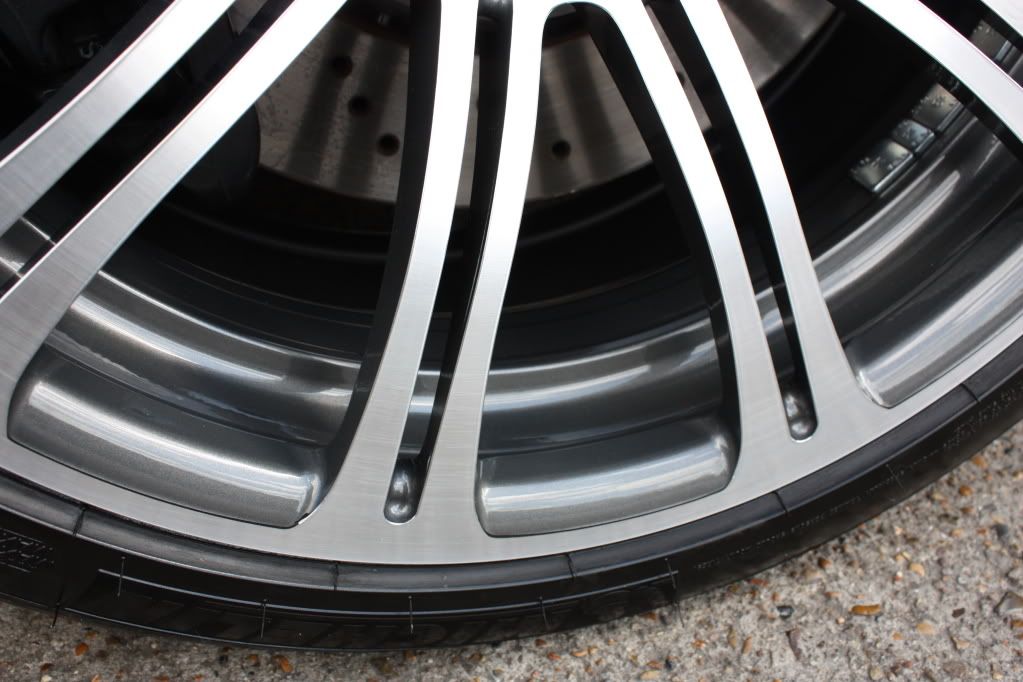
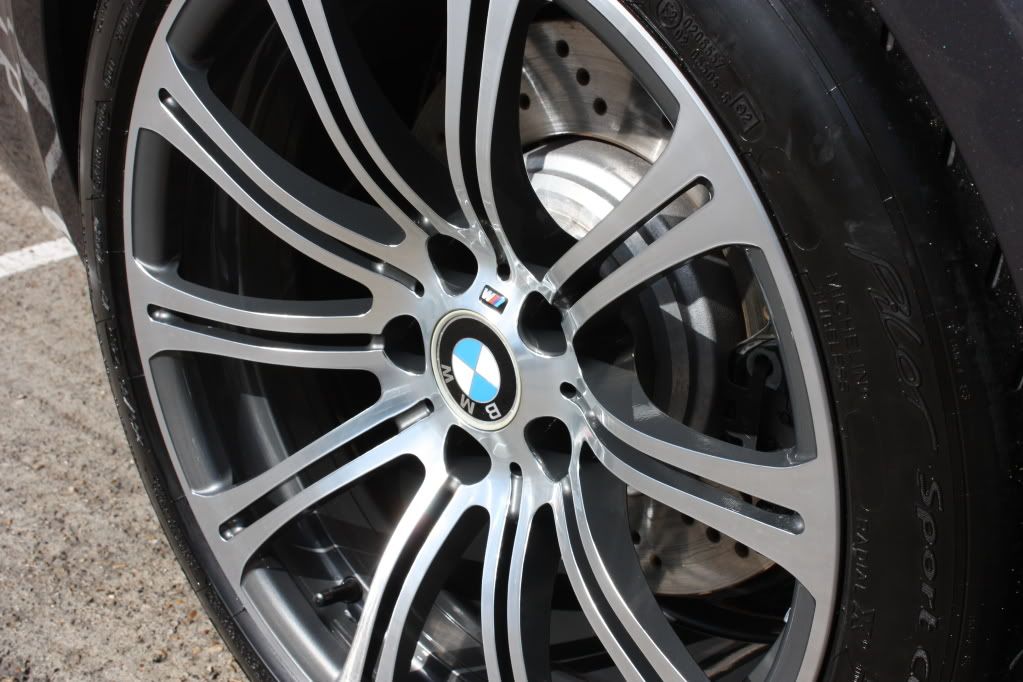
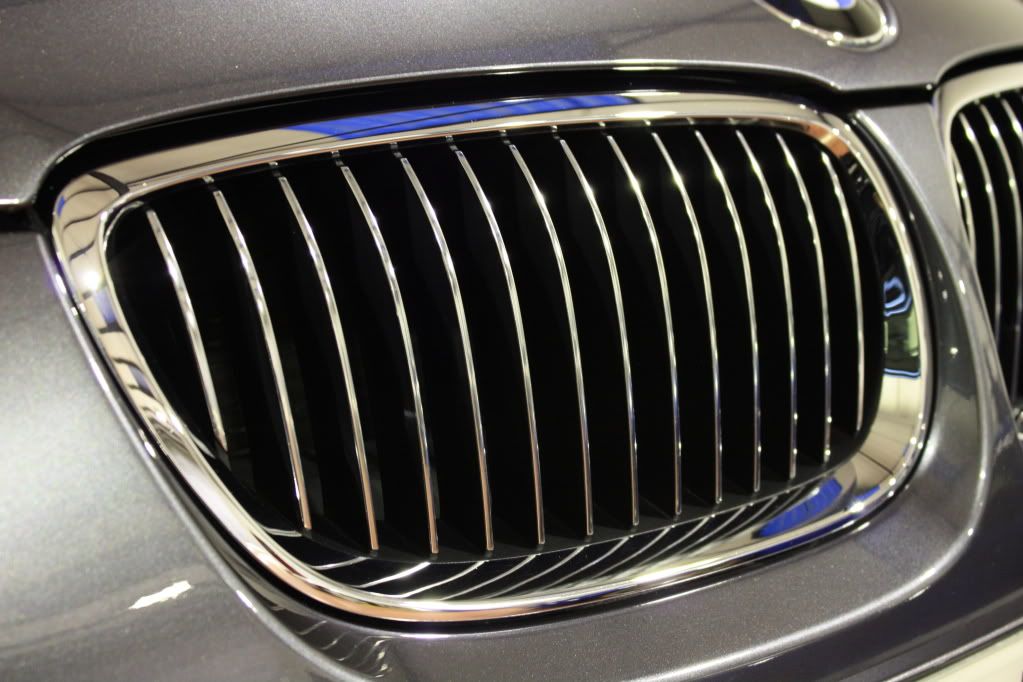
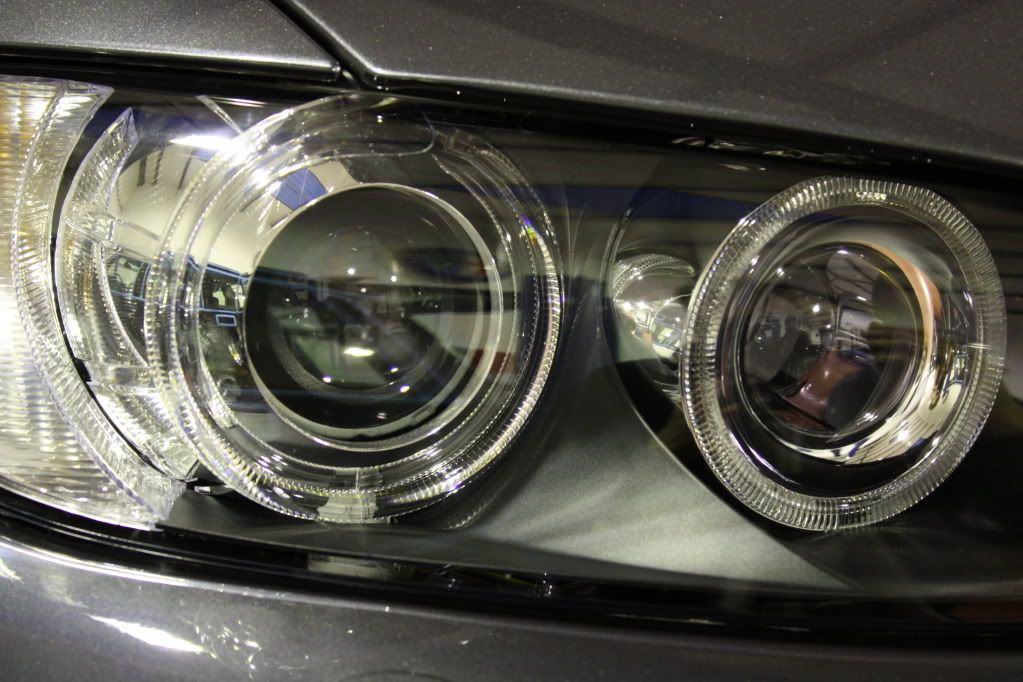
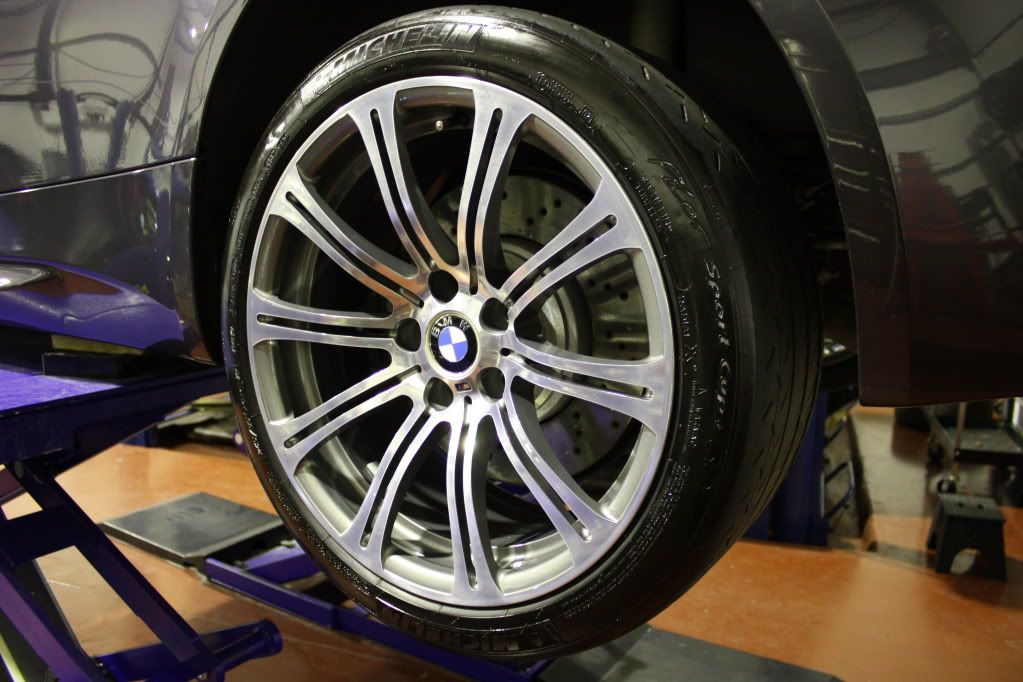
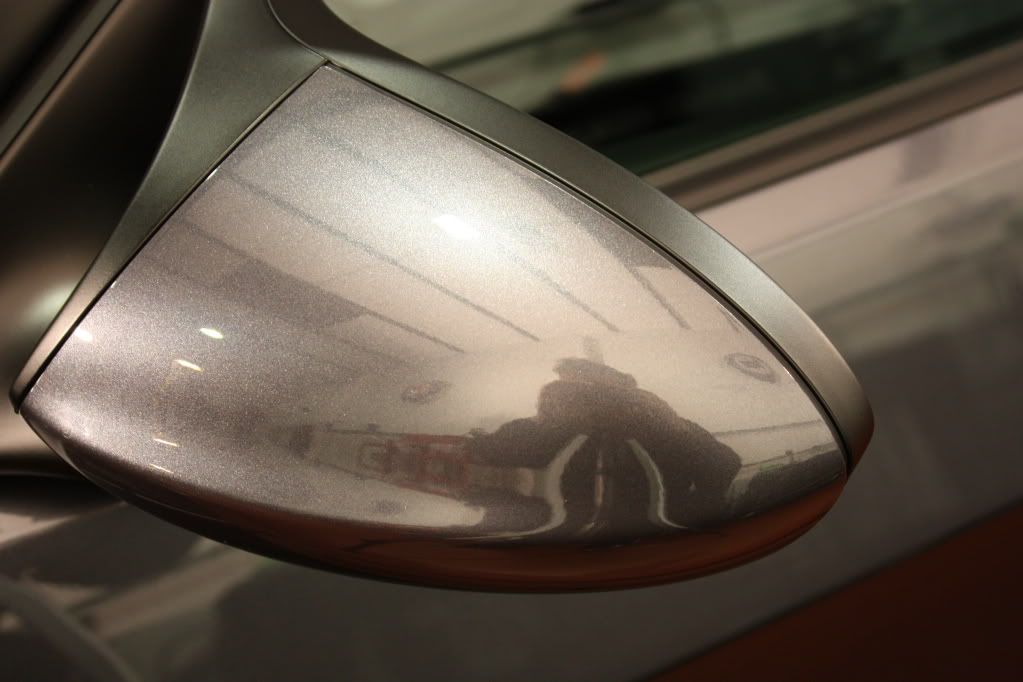
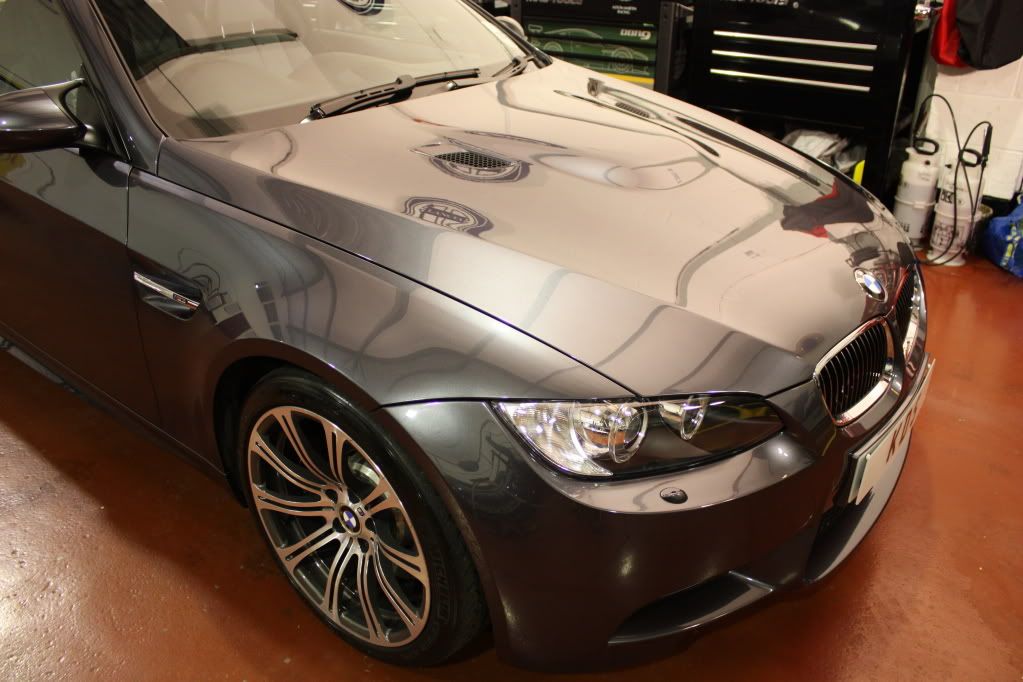
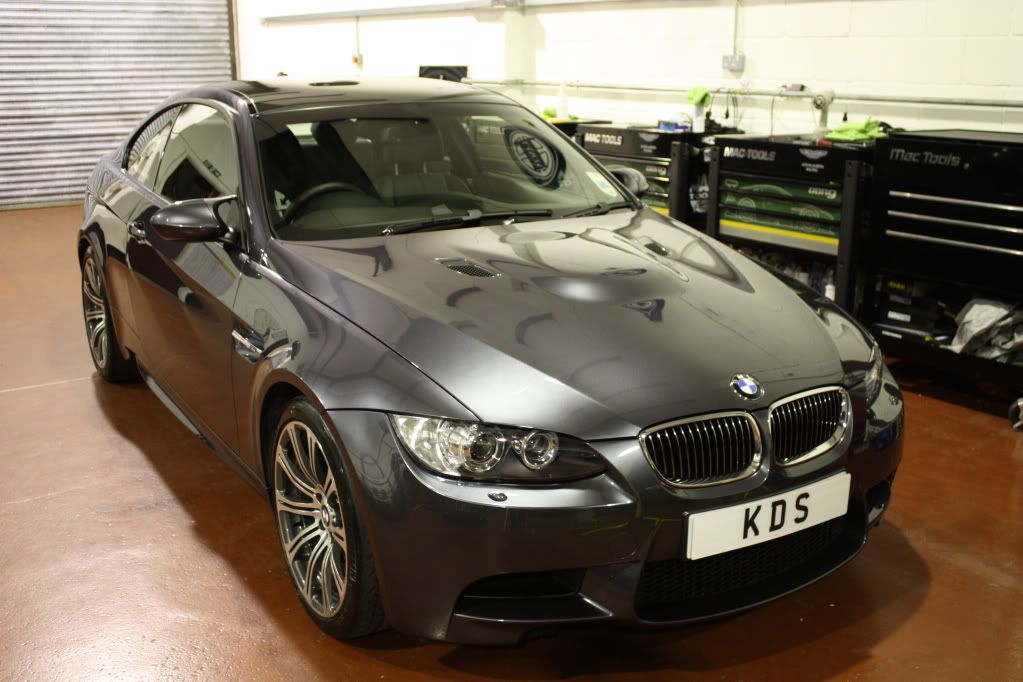
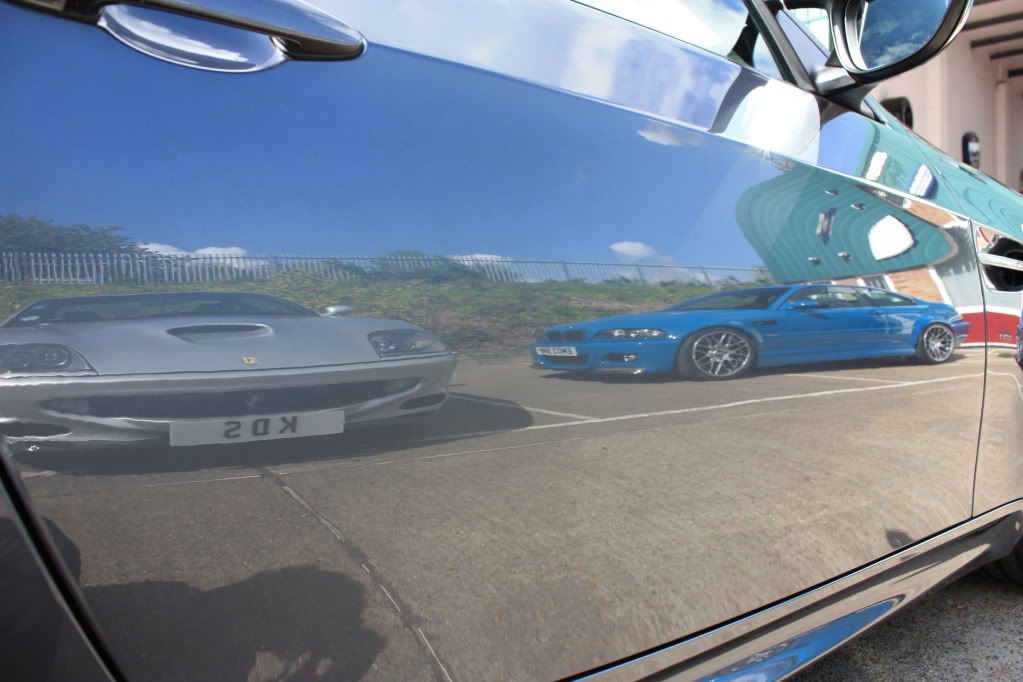
now to the best pictures the results
gloss readings after
roof
rear bumper
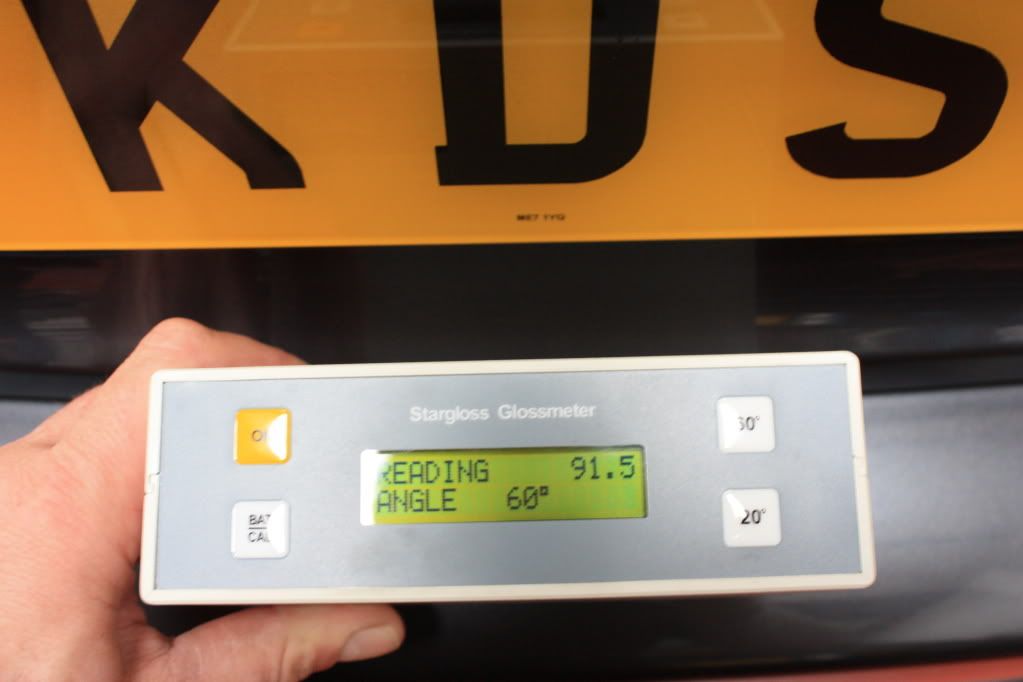
boot lid
bonnet
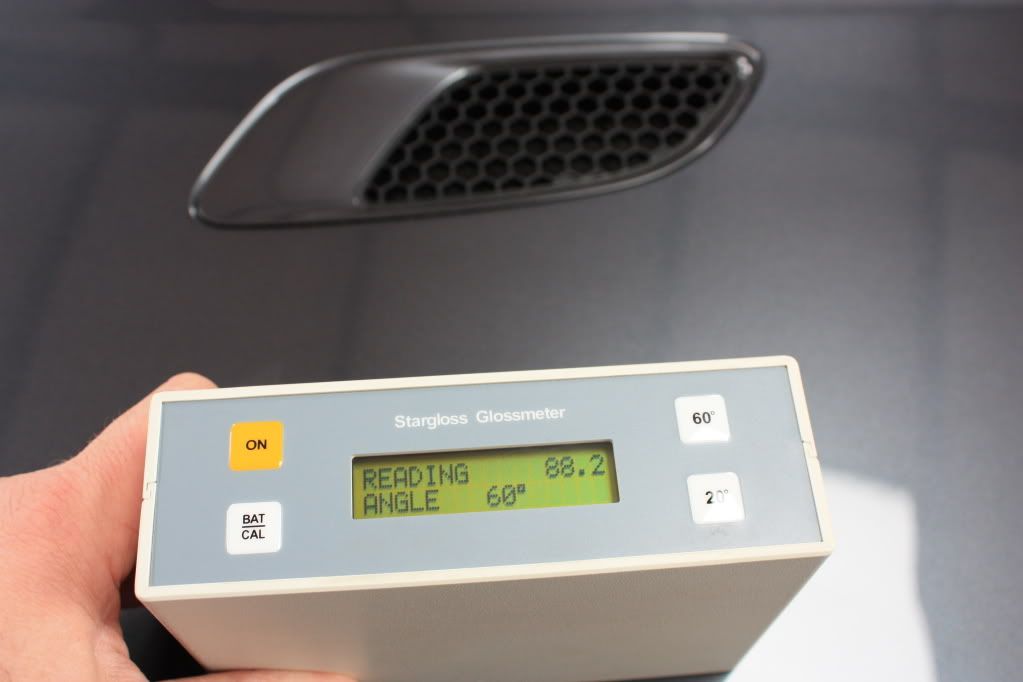
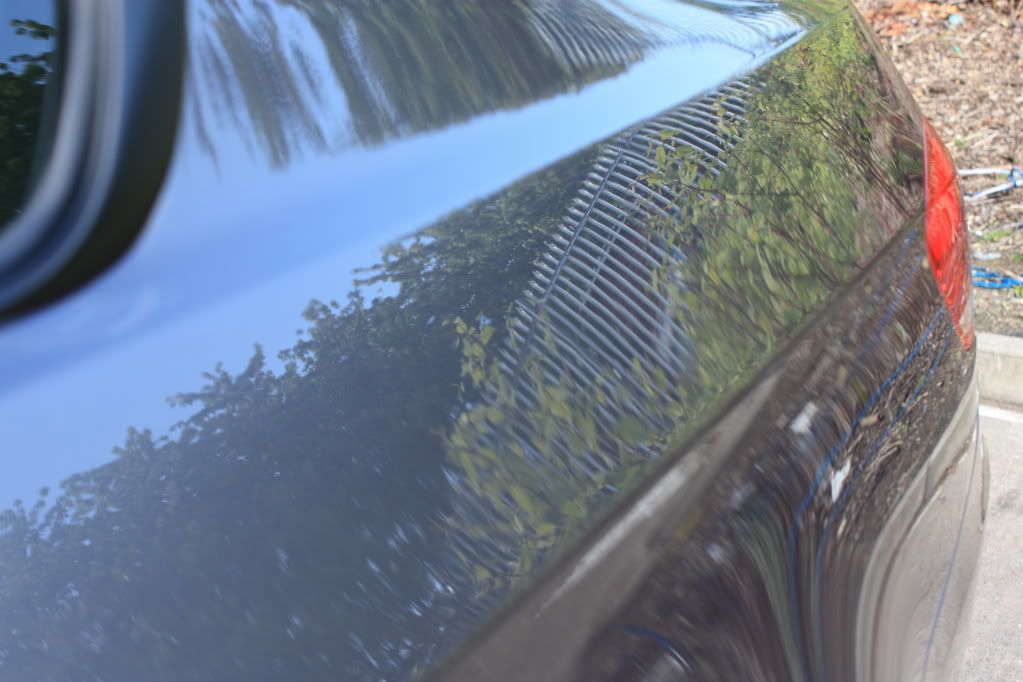
after shots
I will be waiting for the usual comment from a well known pistonhead member that says detailing is done in a couple of hours using some turtle wax that has lasted him some 30 years !
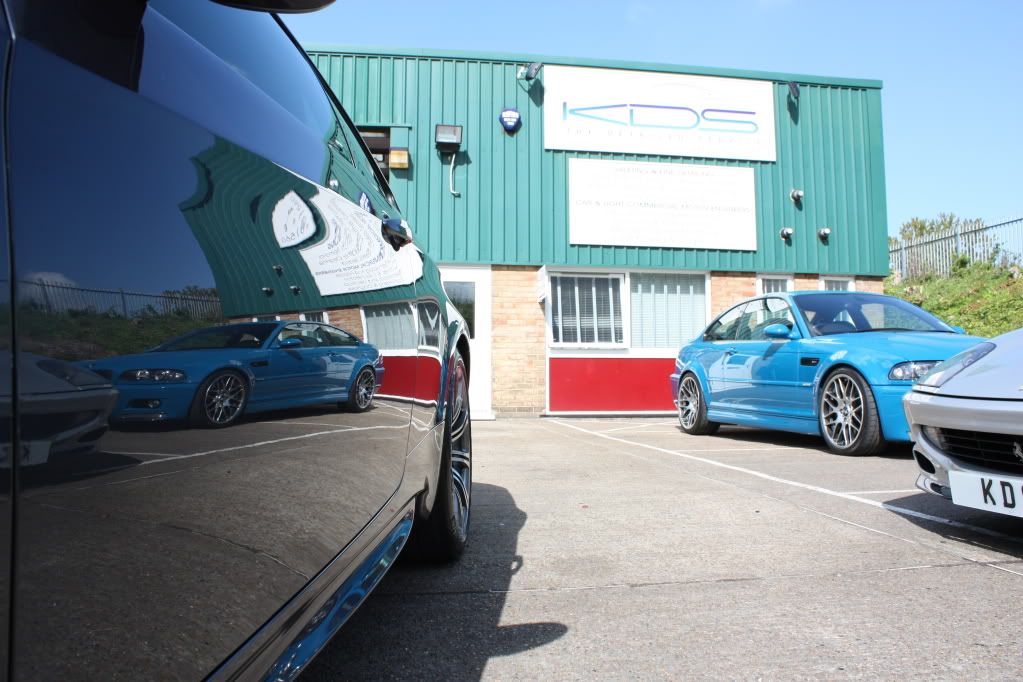
and my favorite shots
Here are 2 videos too
http://www.youtube.com/watch?v=z-Fr6AnCmzc
http://www.youtube.com/watch?v=C-_810dEtew
forgot to add them
gloss readings after
roof
rear bumper
boot lid
bonnet
after shots
I will be waiting for the usual comment from a well known pistonhead member that says detailing is done in a couple of hours using some turtle wax that has lasted him some 30 years !
and my favorite shots
Here are 2 videos too
http://www.youtube.com/watch?v=z-Fr6AnCmzc
http://www.youtube.com/watch?v=C-_810dEtew
forgot to add them
Edited by kds keltec on Thursday 30th April 20:57
Edited by kds keltec on Thursday 30th April 21:25
Edited by kds keltec on Friday 6th November 19:18
Gassing Station | M Power | Top of Page | What's New | My Stuff